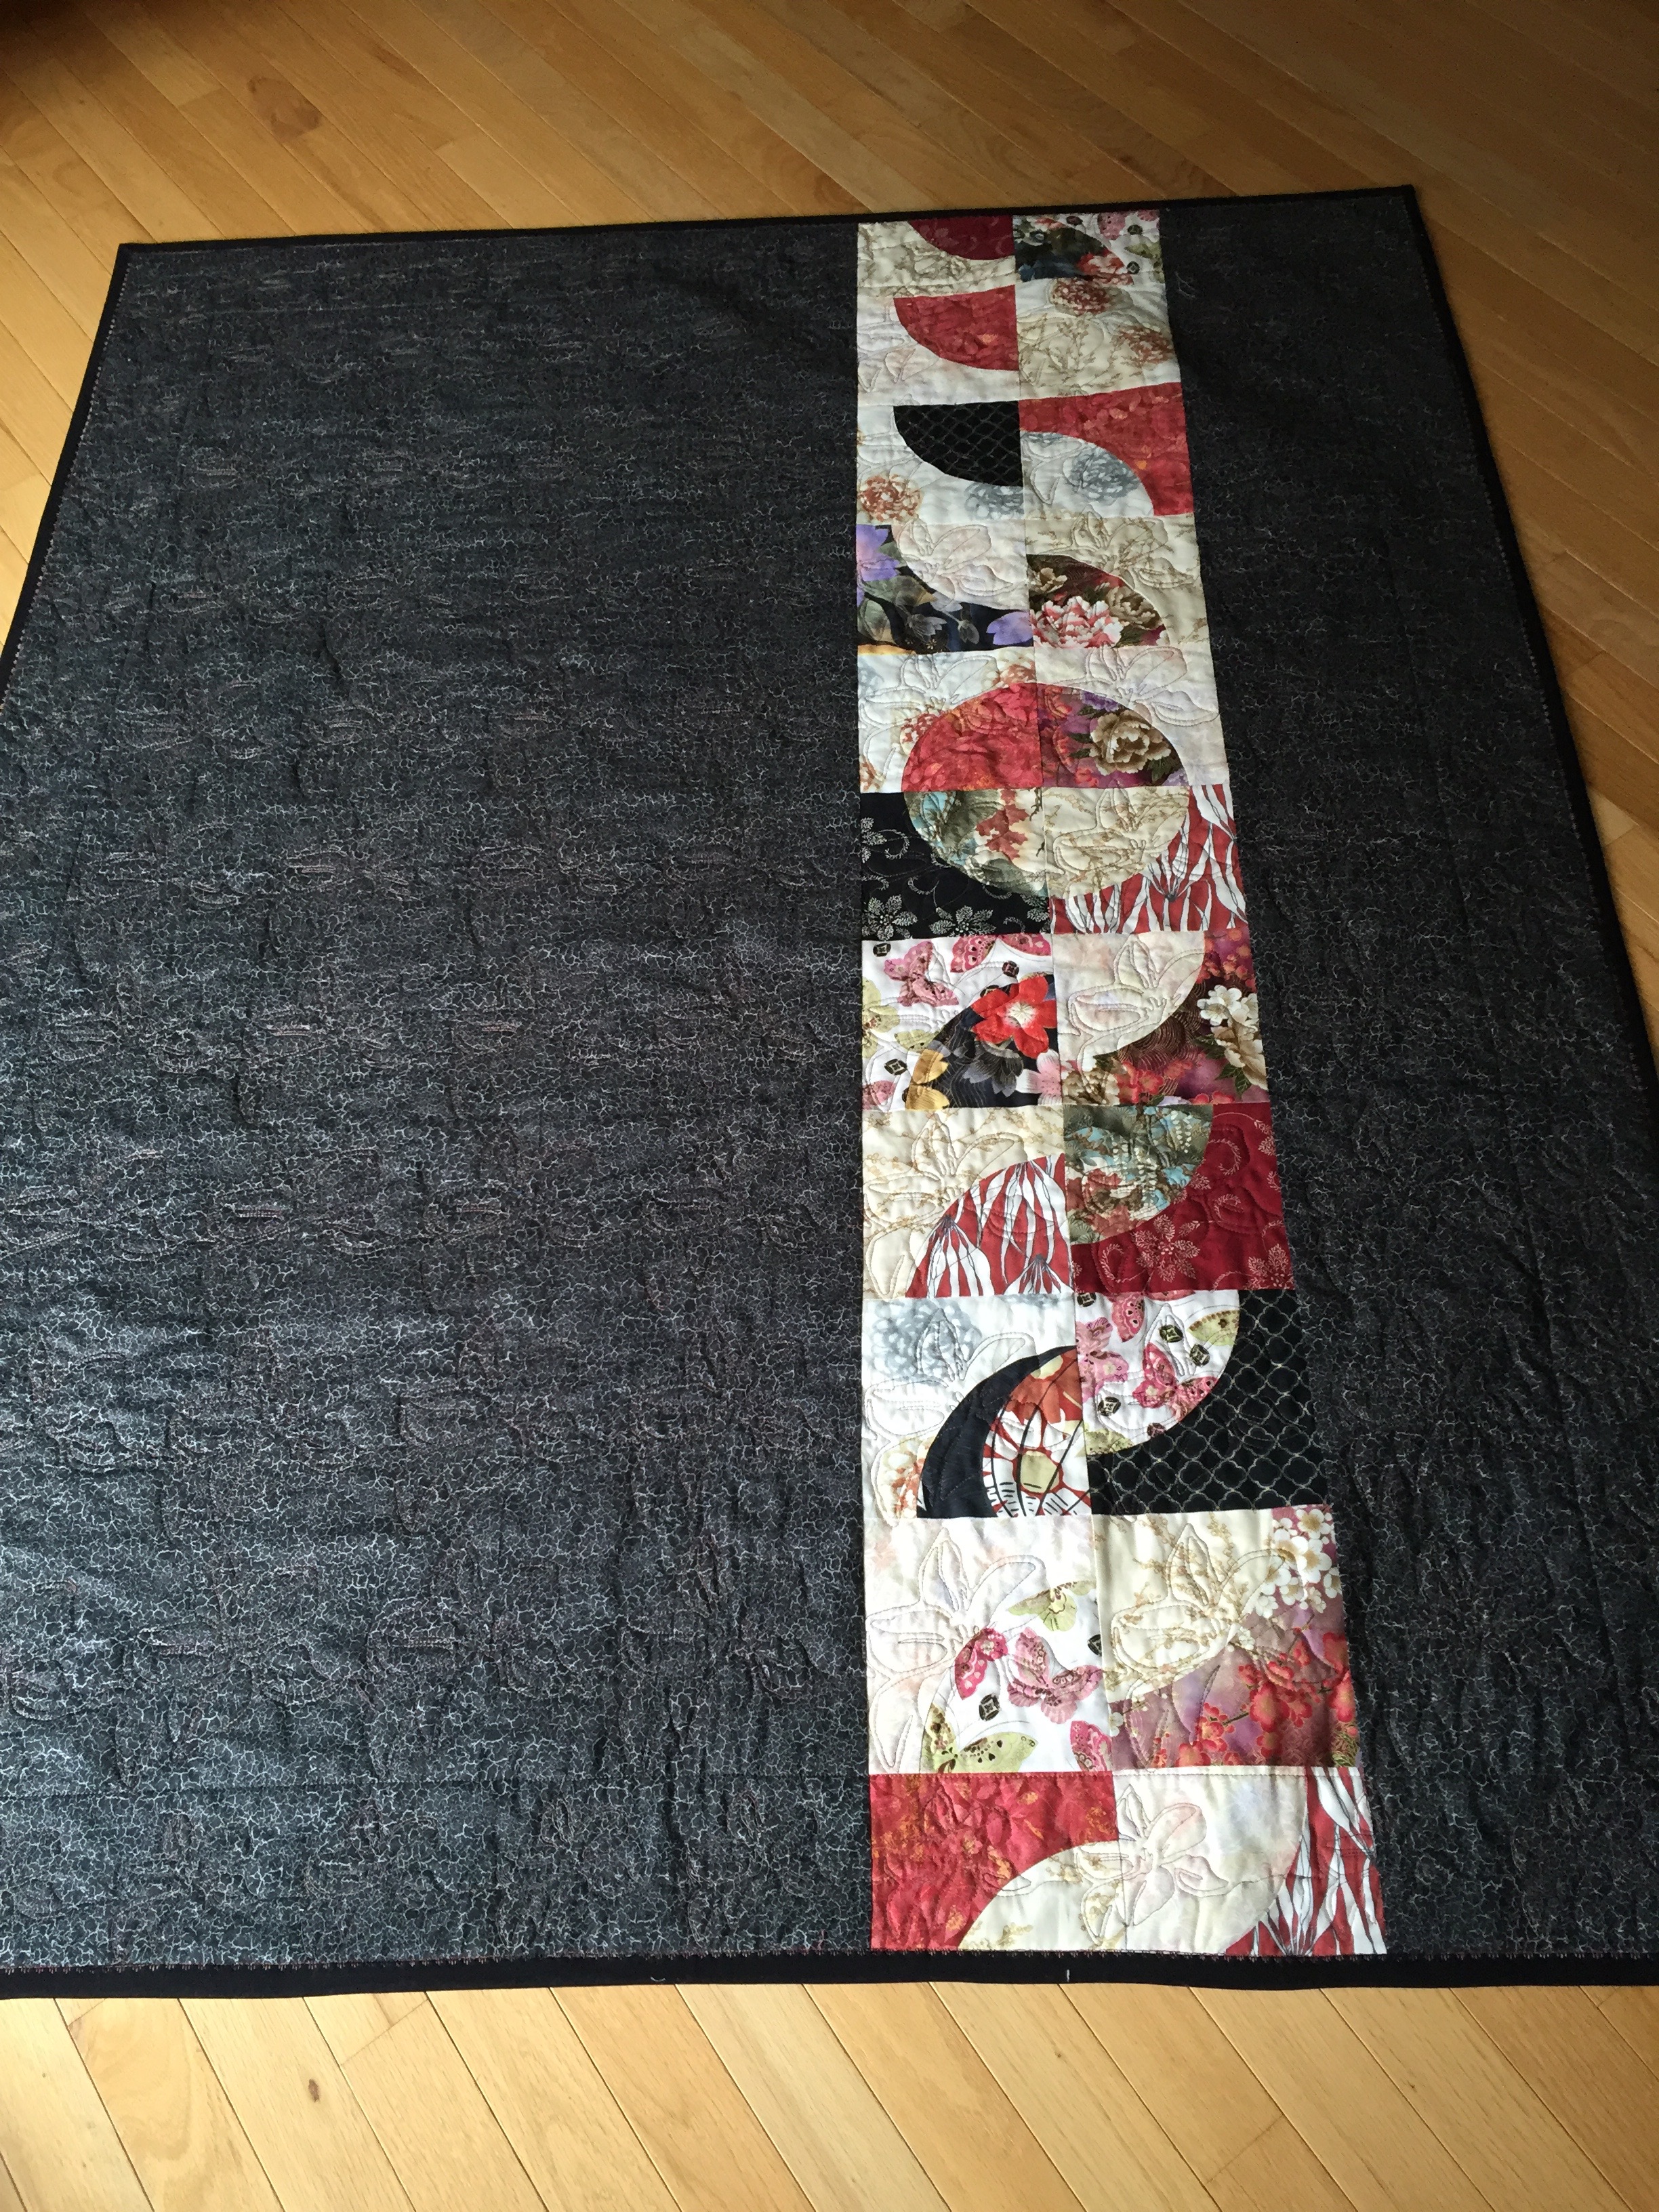
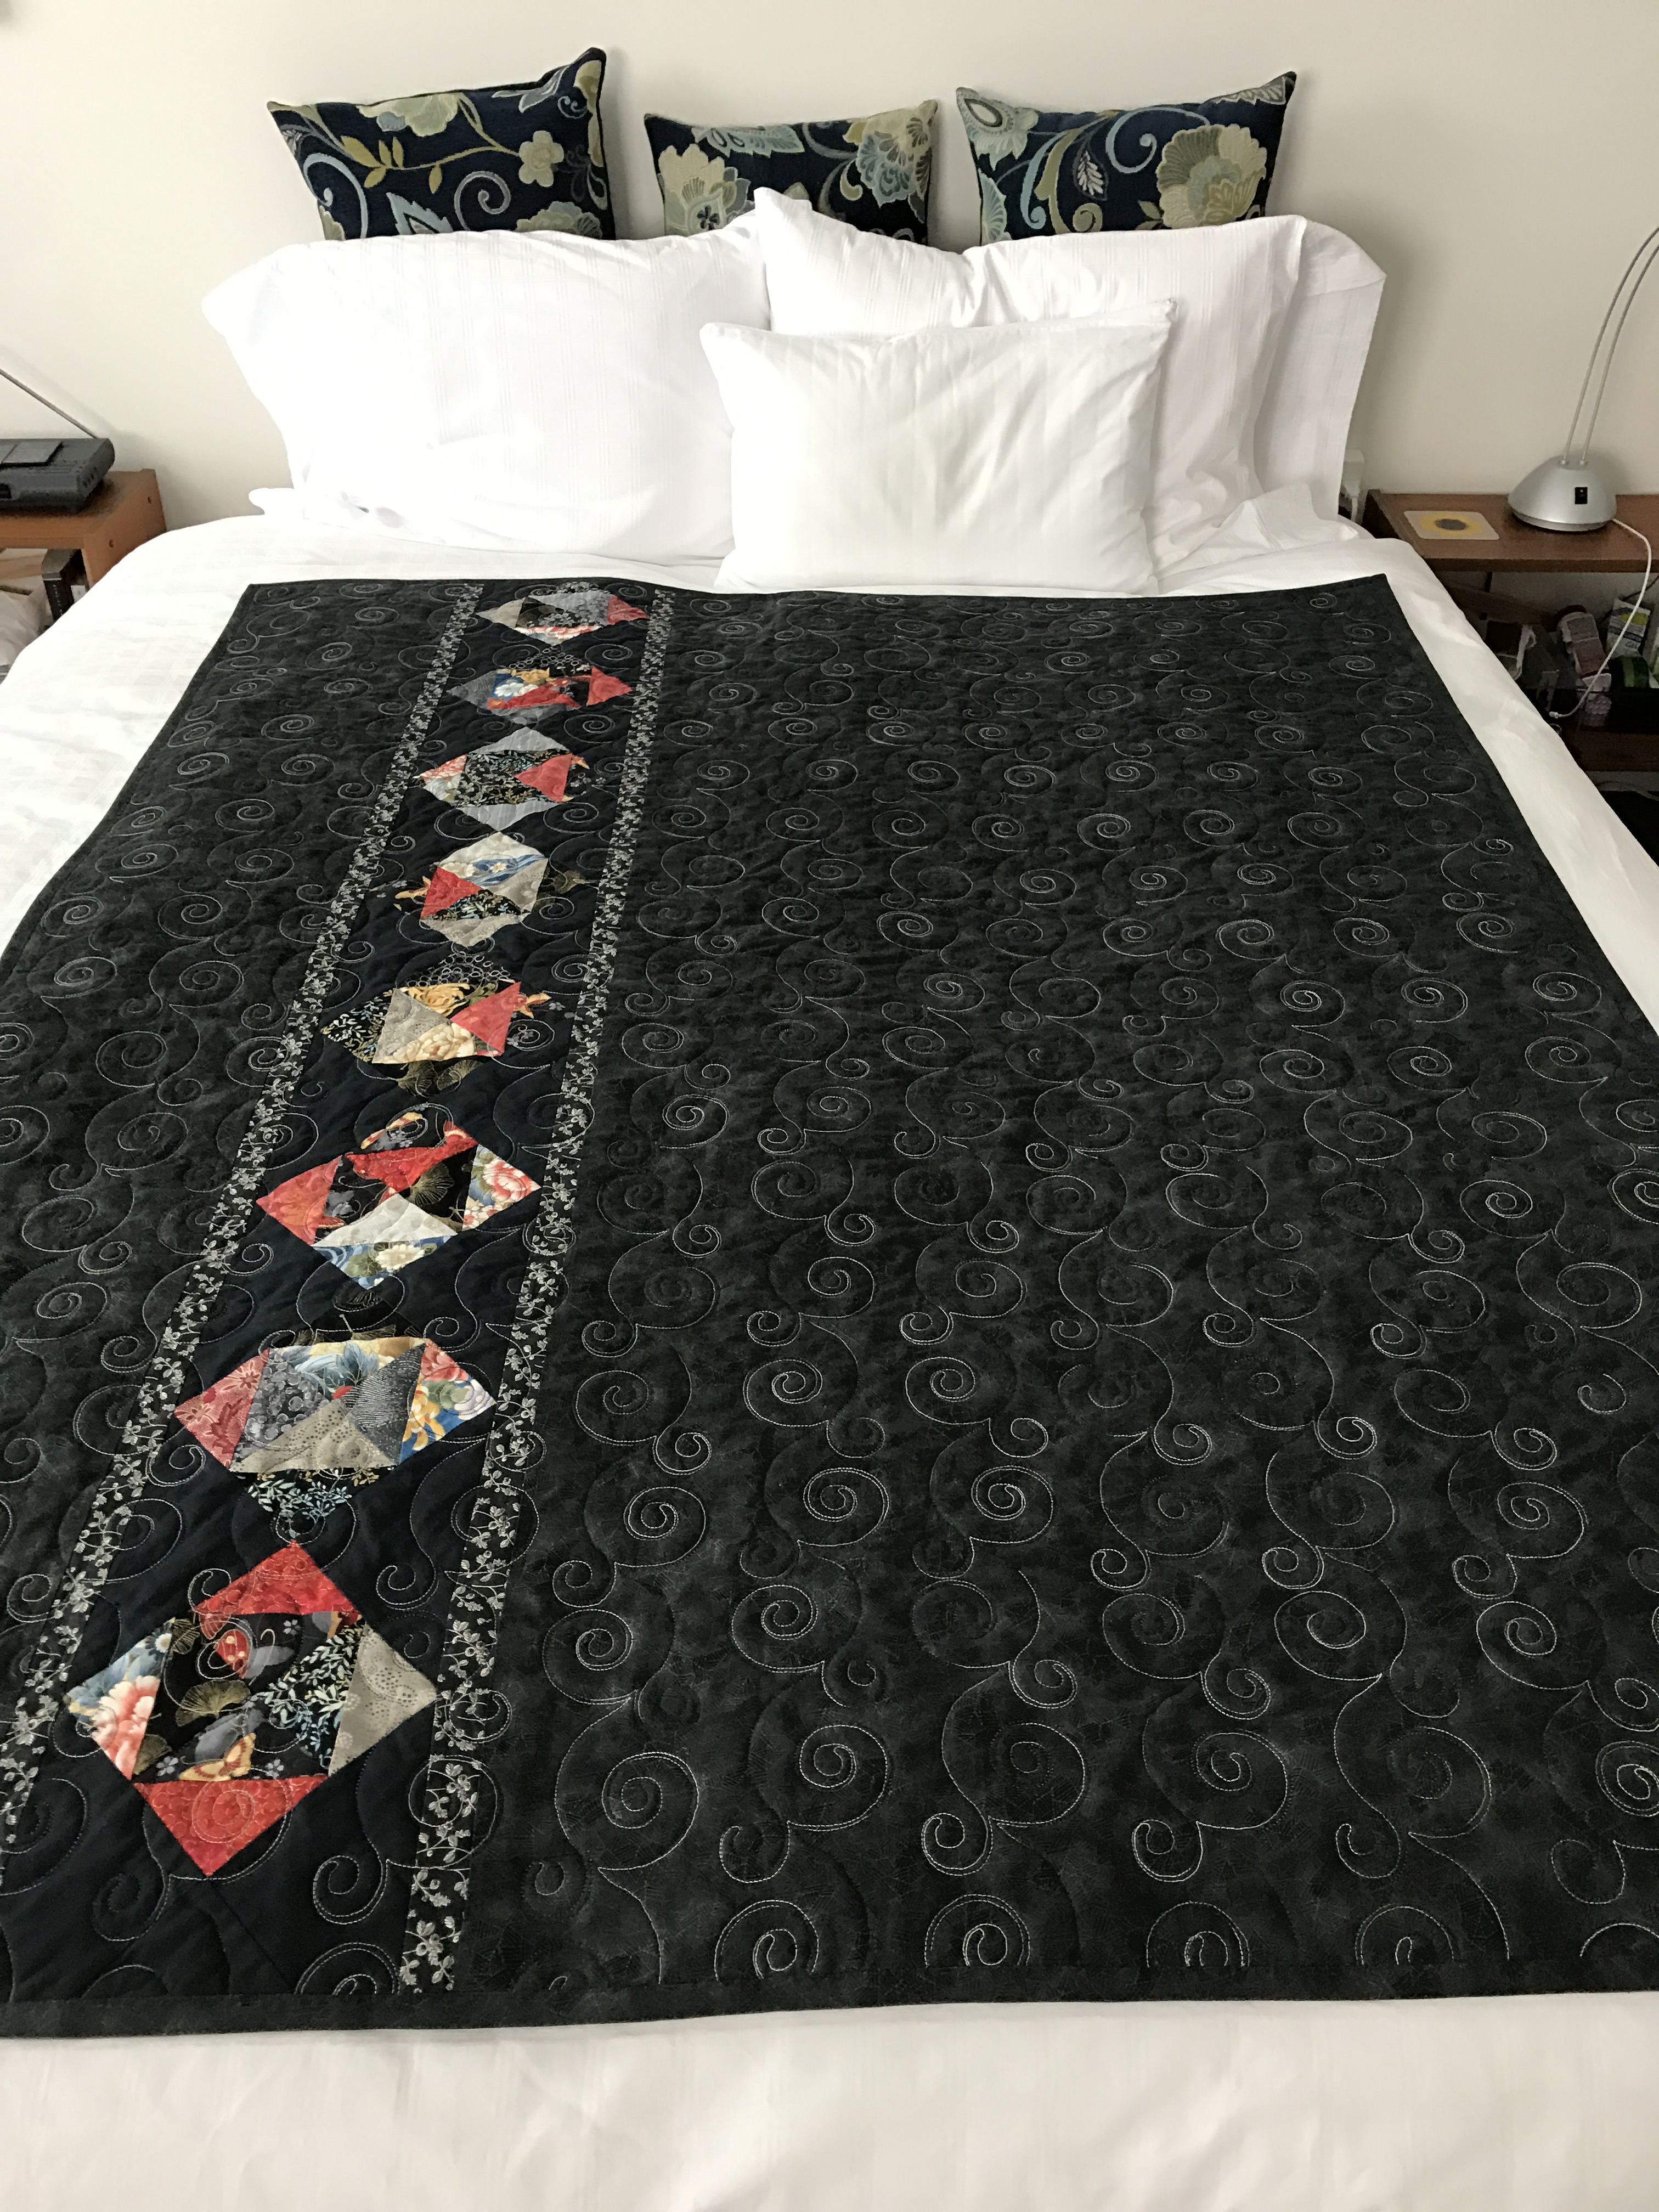
Layer Cake Quilt – Finished

Finished this morning! I quilted both the narrow inner border and wider outer border over the weekend. That left the binding for today.

After my water aerobic class I pieced the binding fabric – six 2 1/2″ strips, joined end to end. Attached the binding to the back, then folded it over the front and stitched it in place using a decorative stitch.

Quilt Top

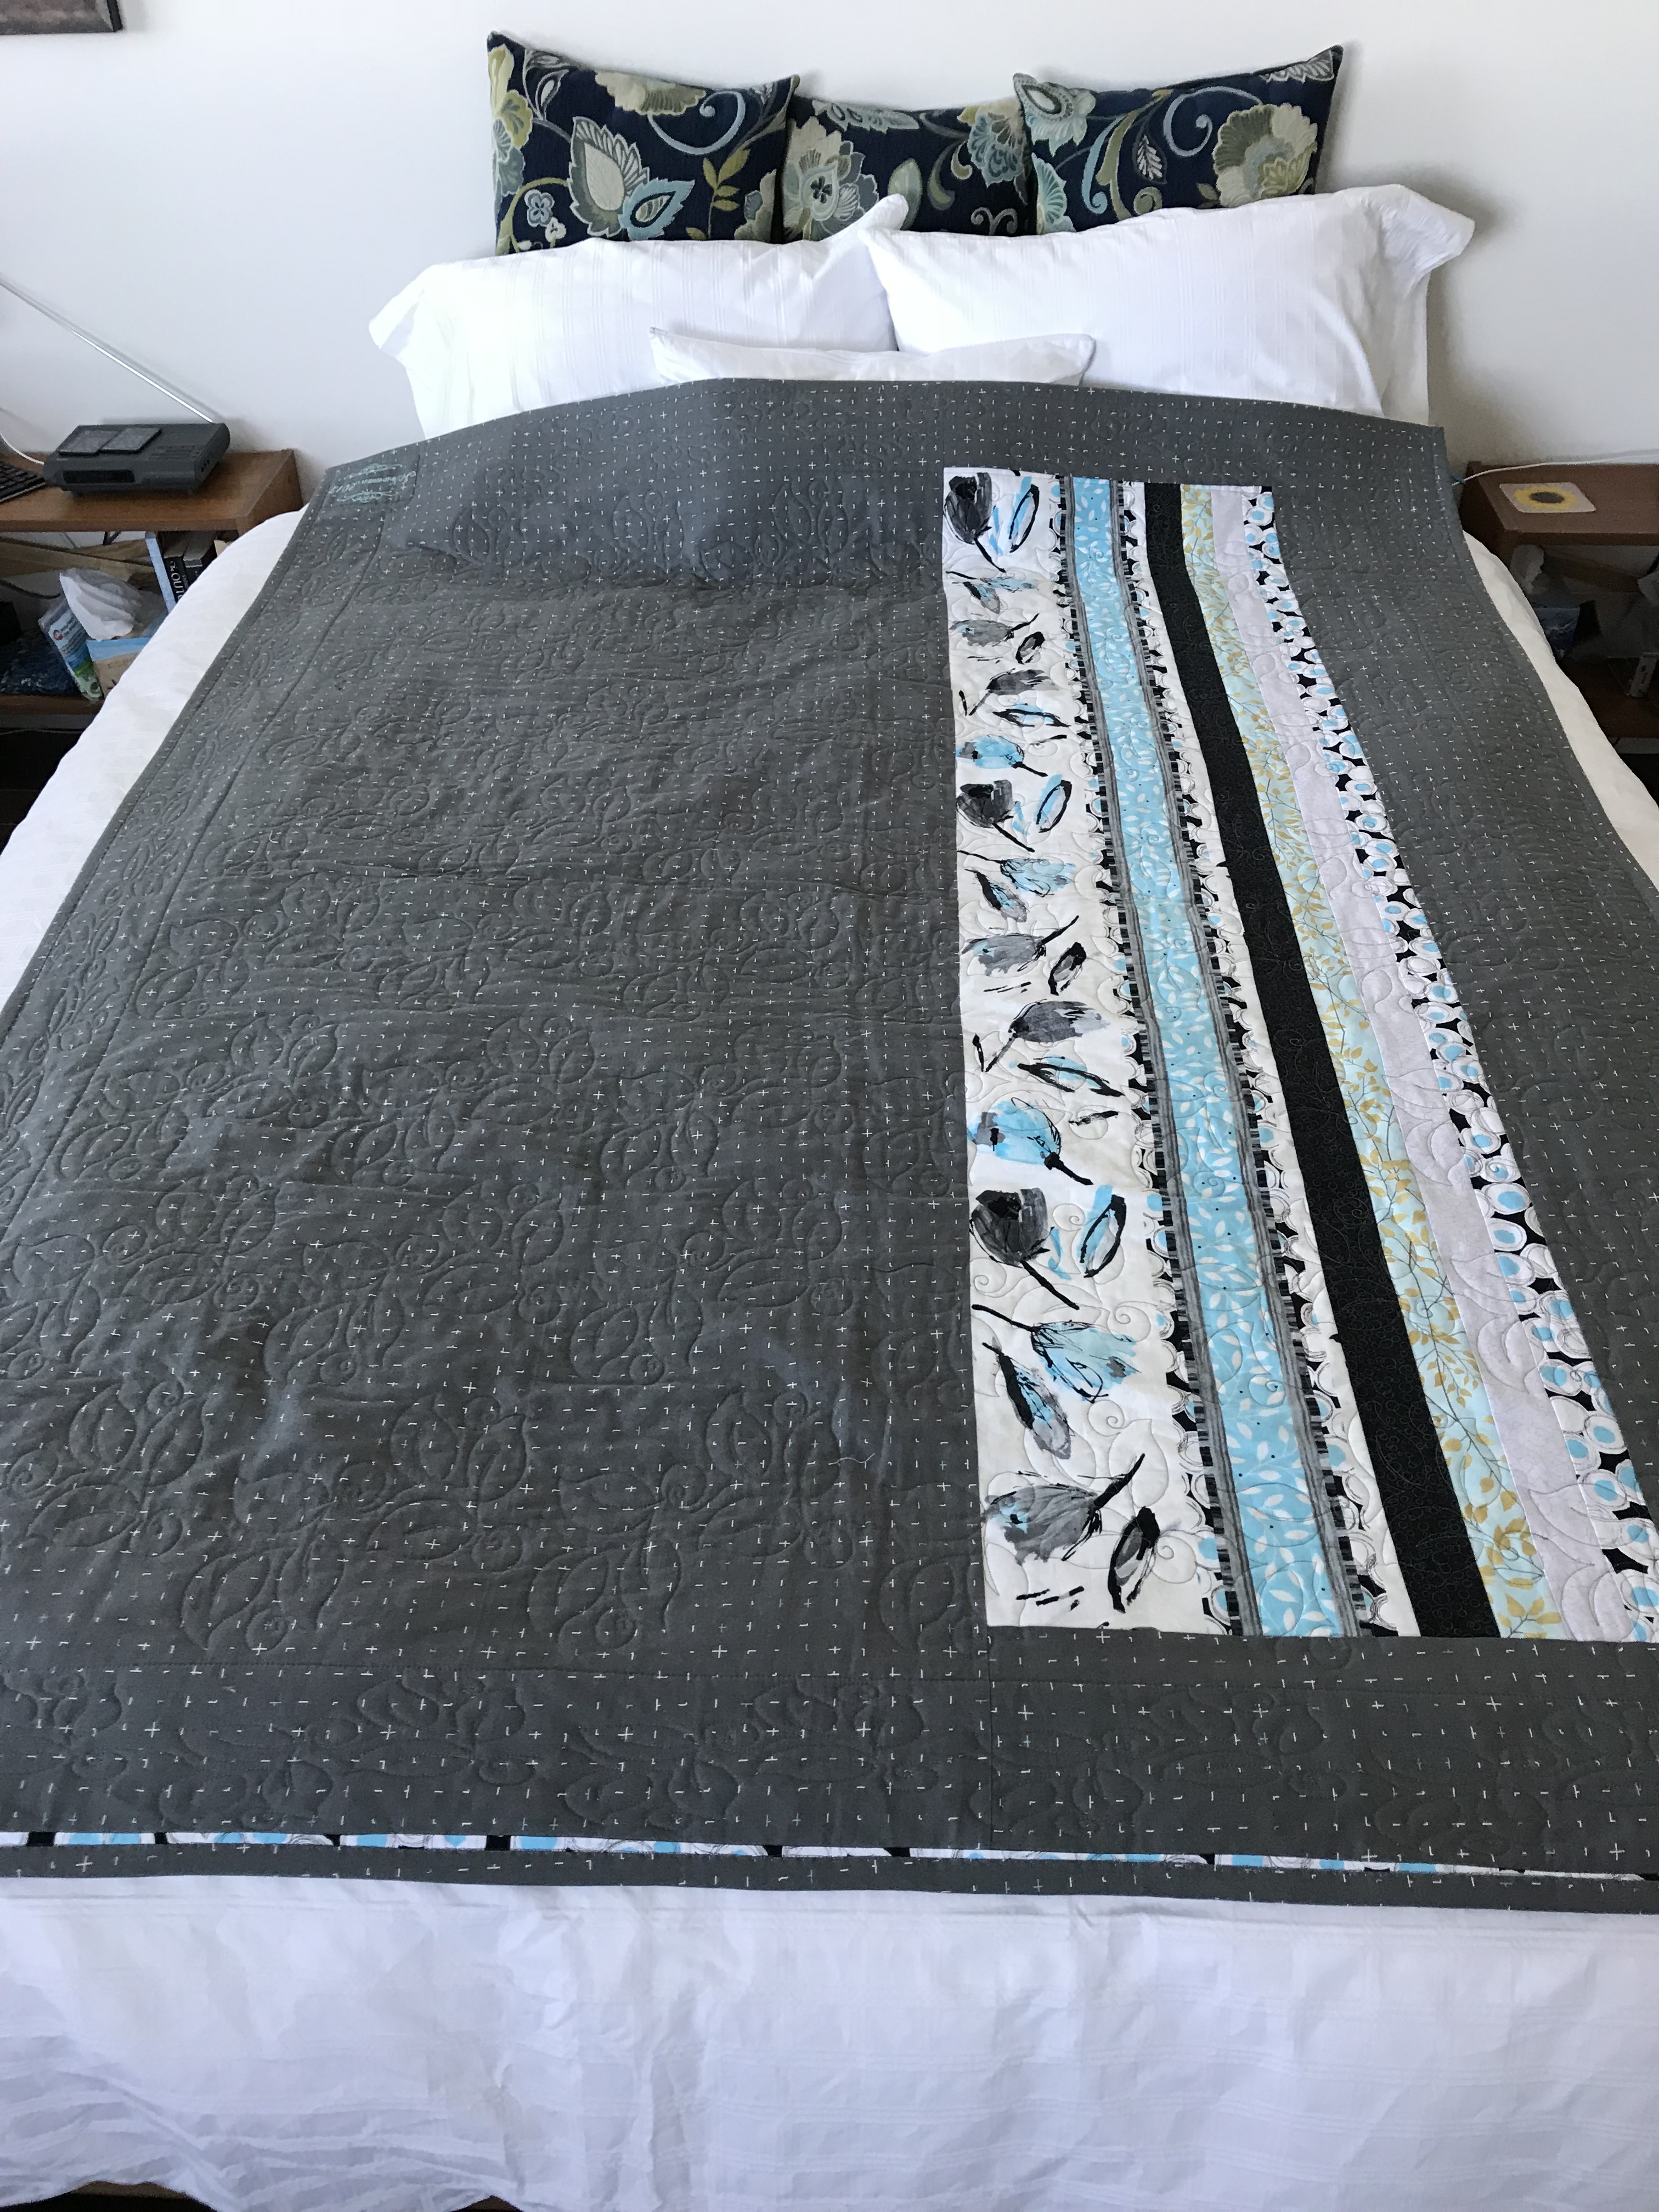
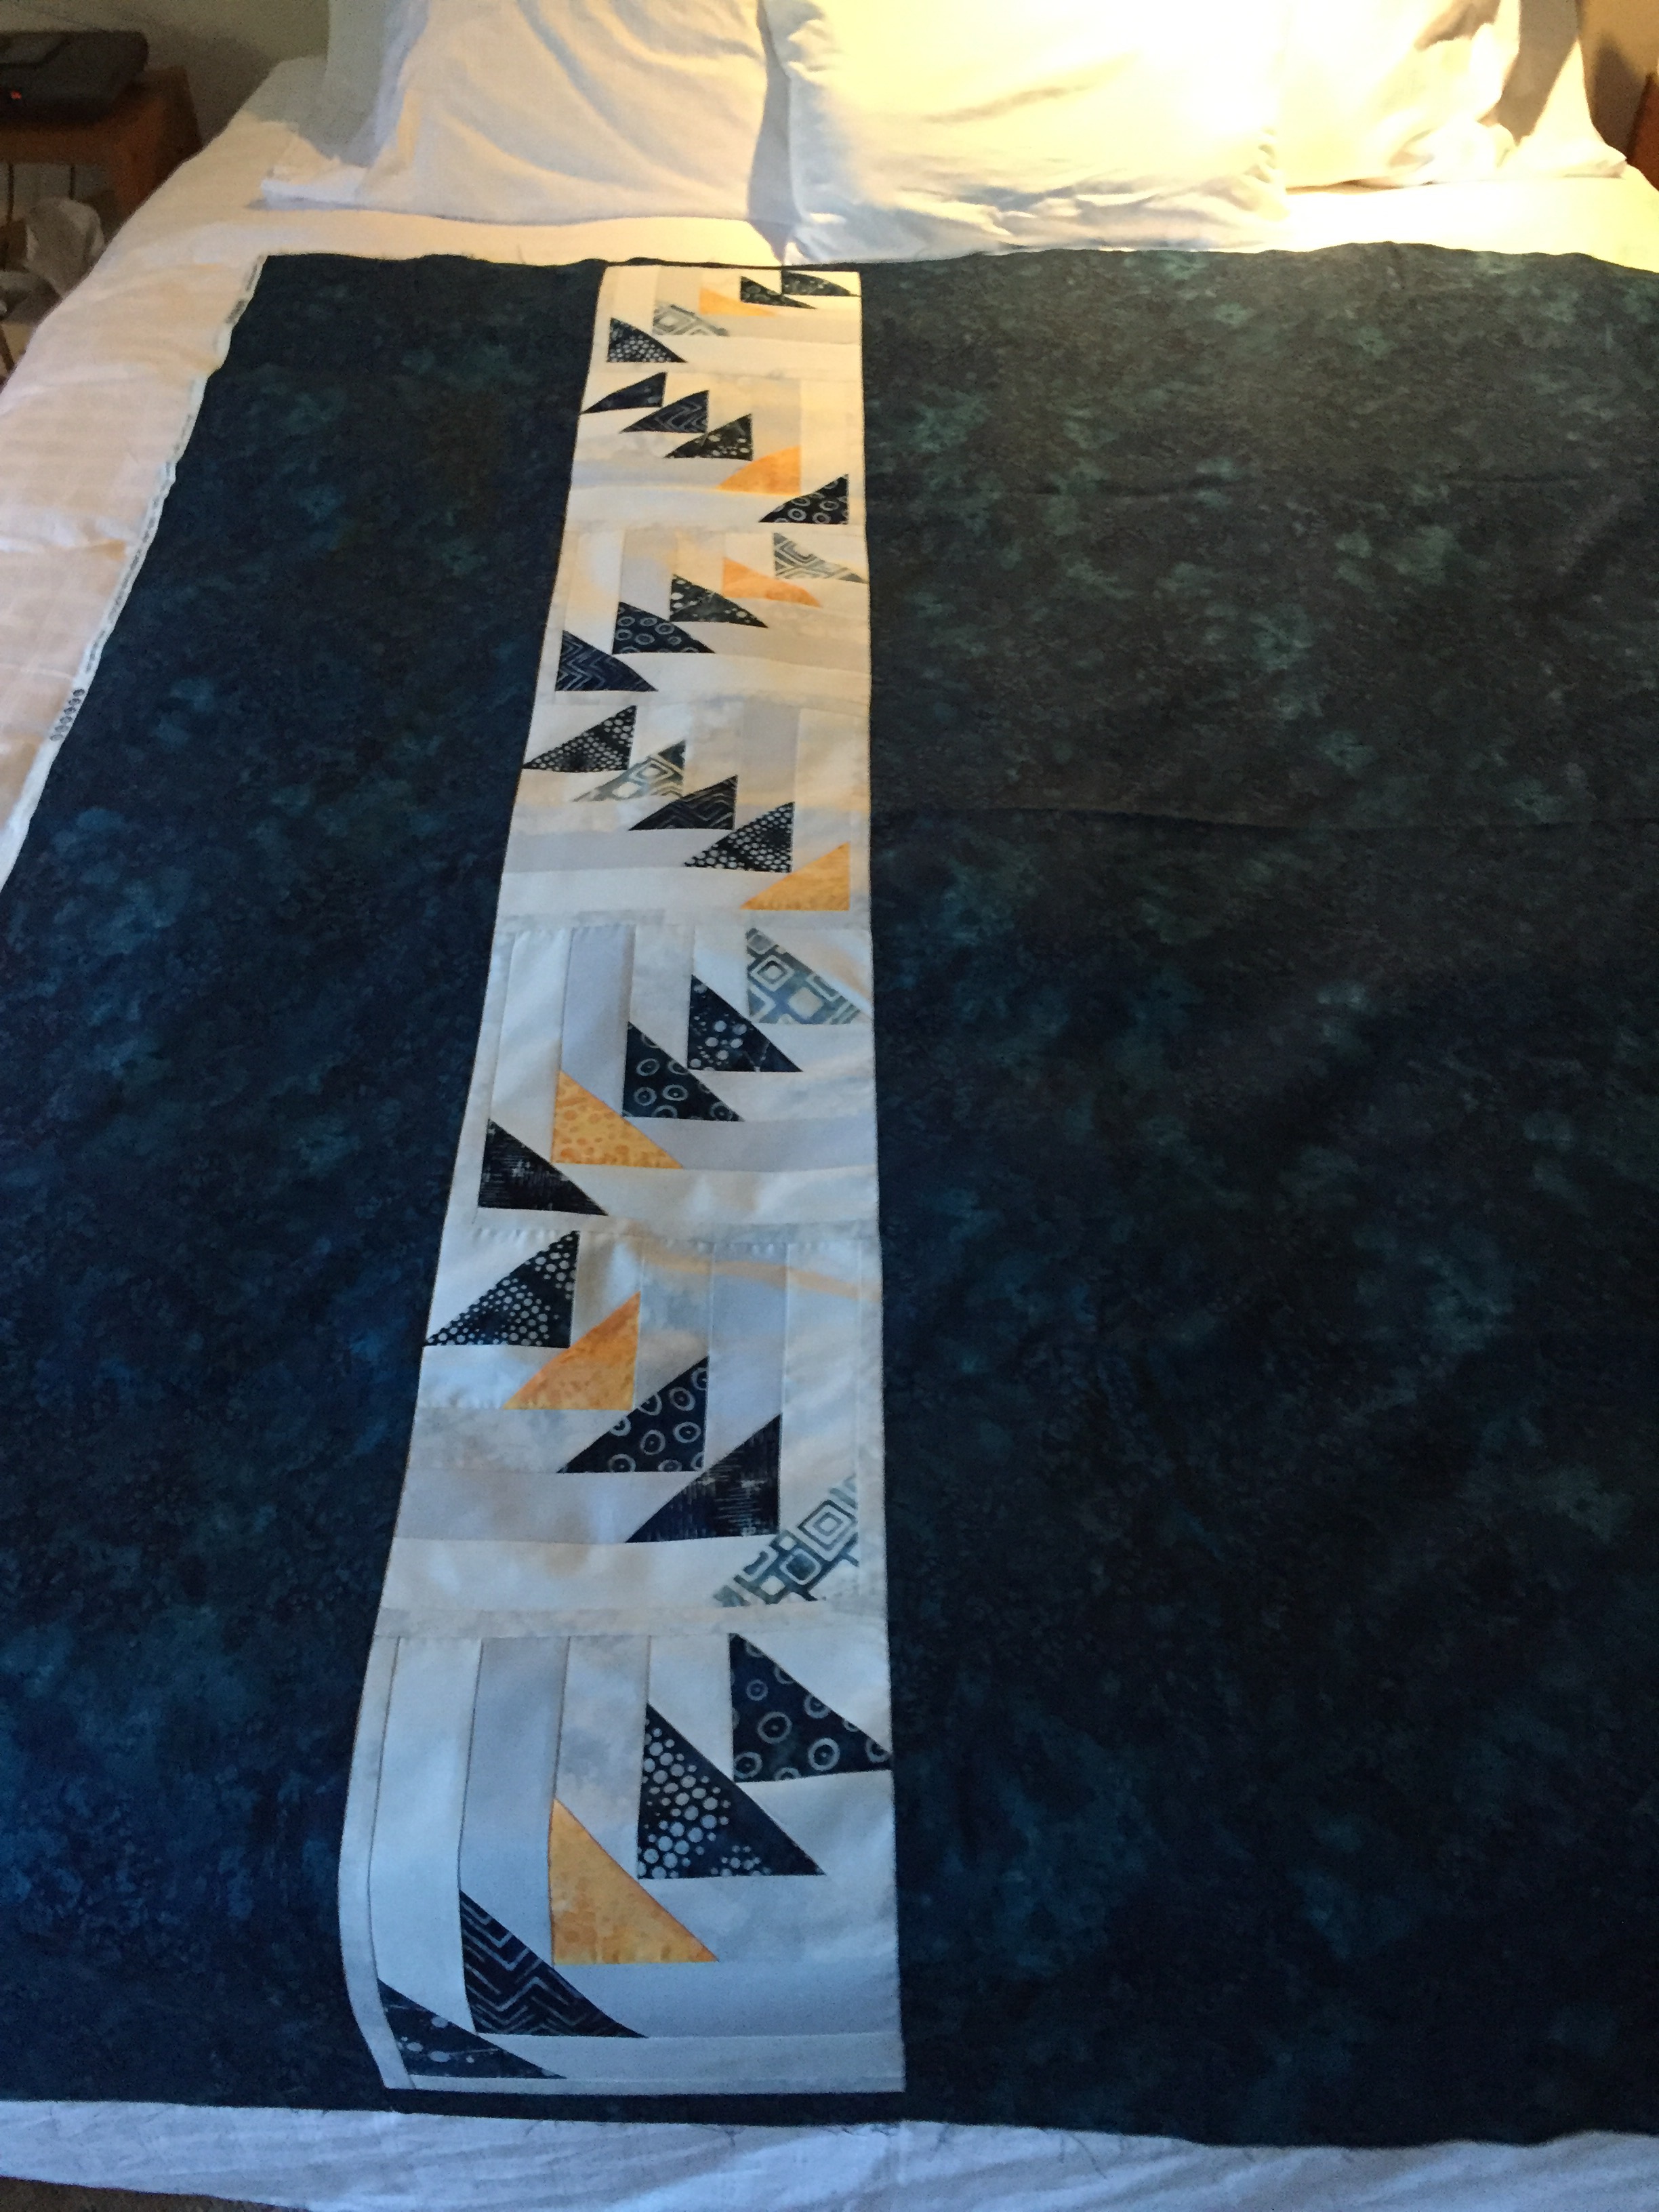
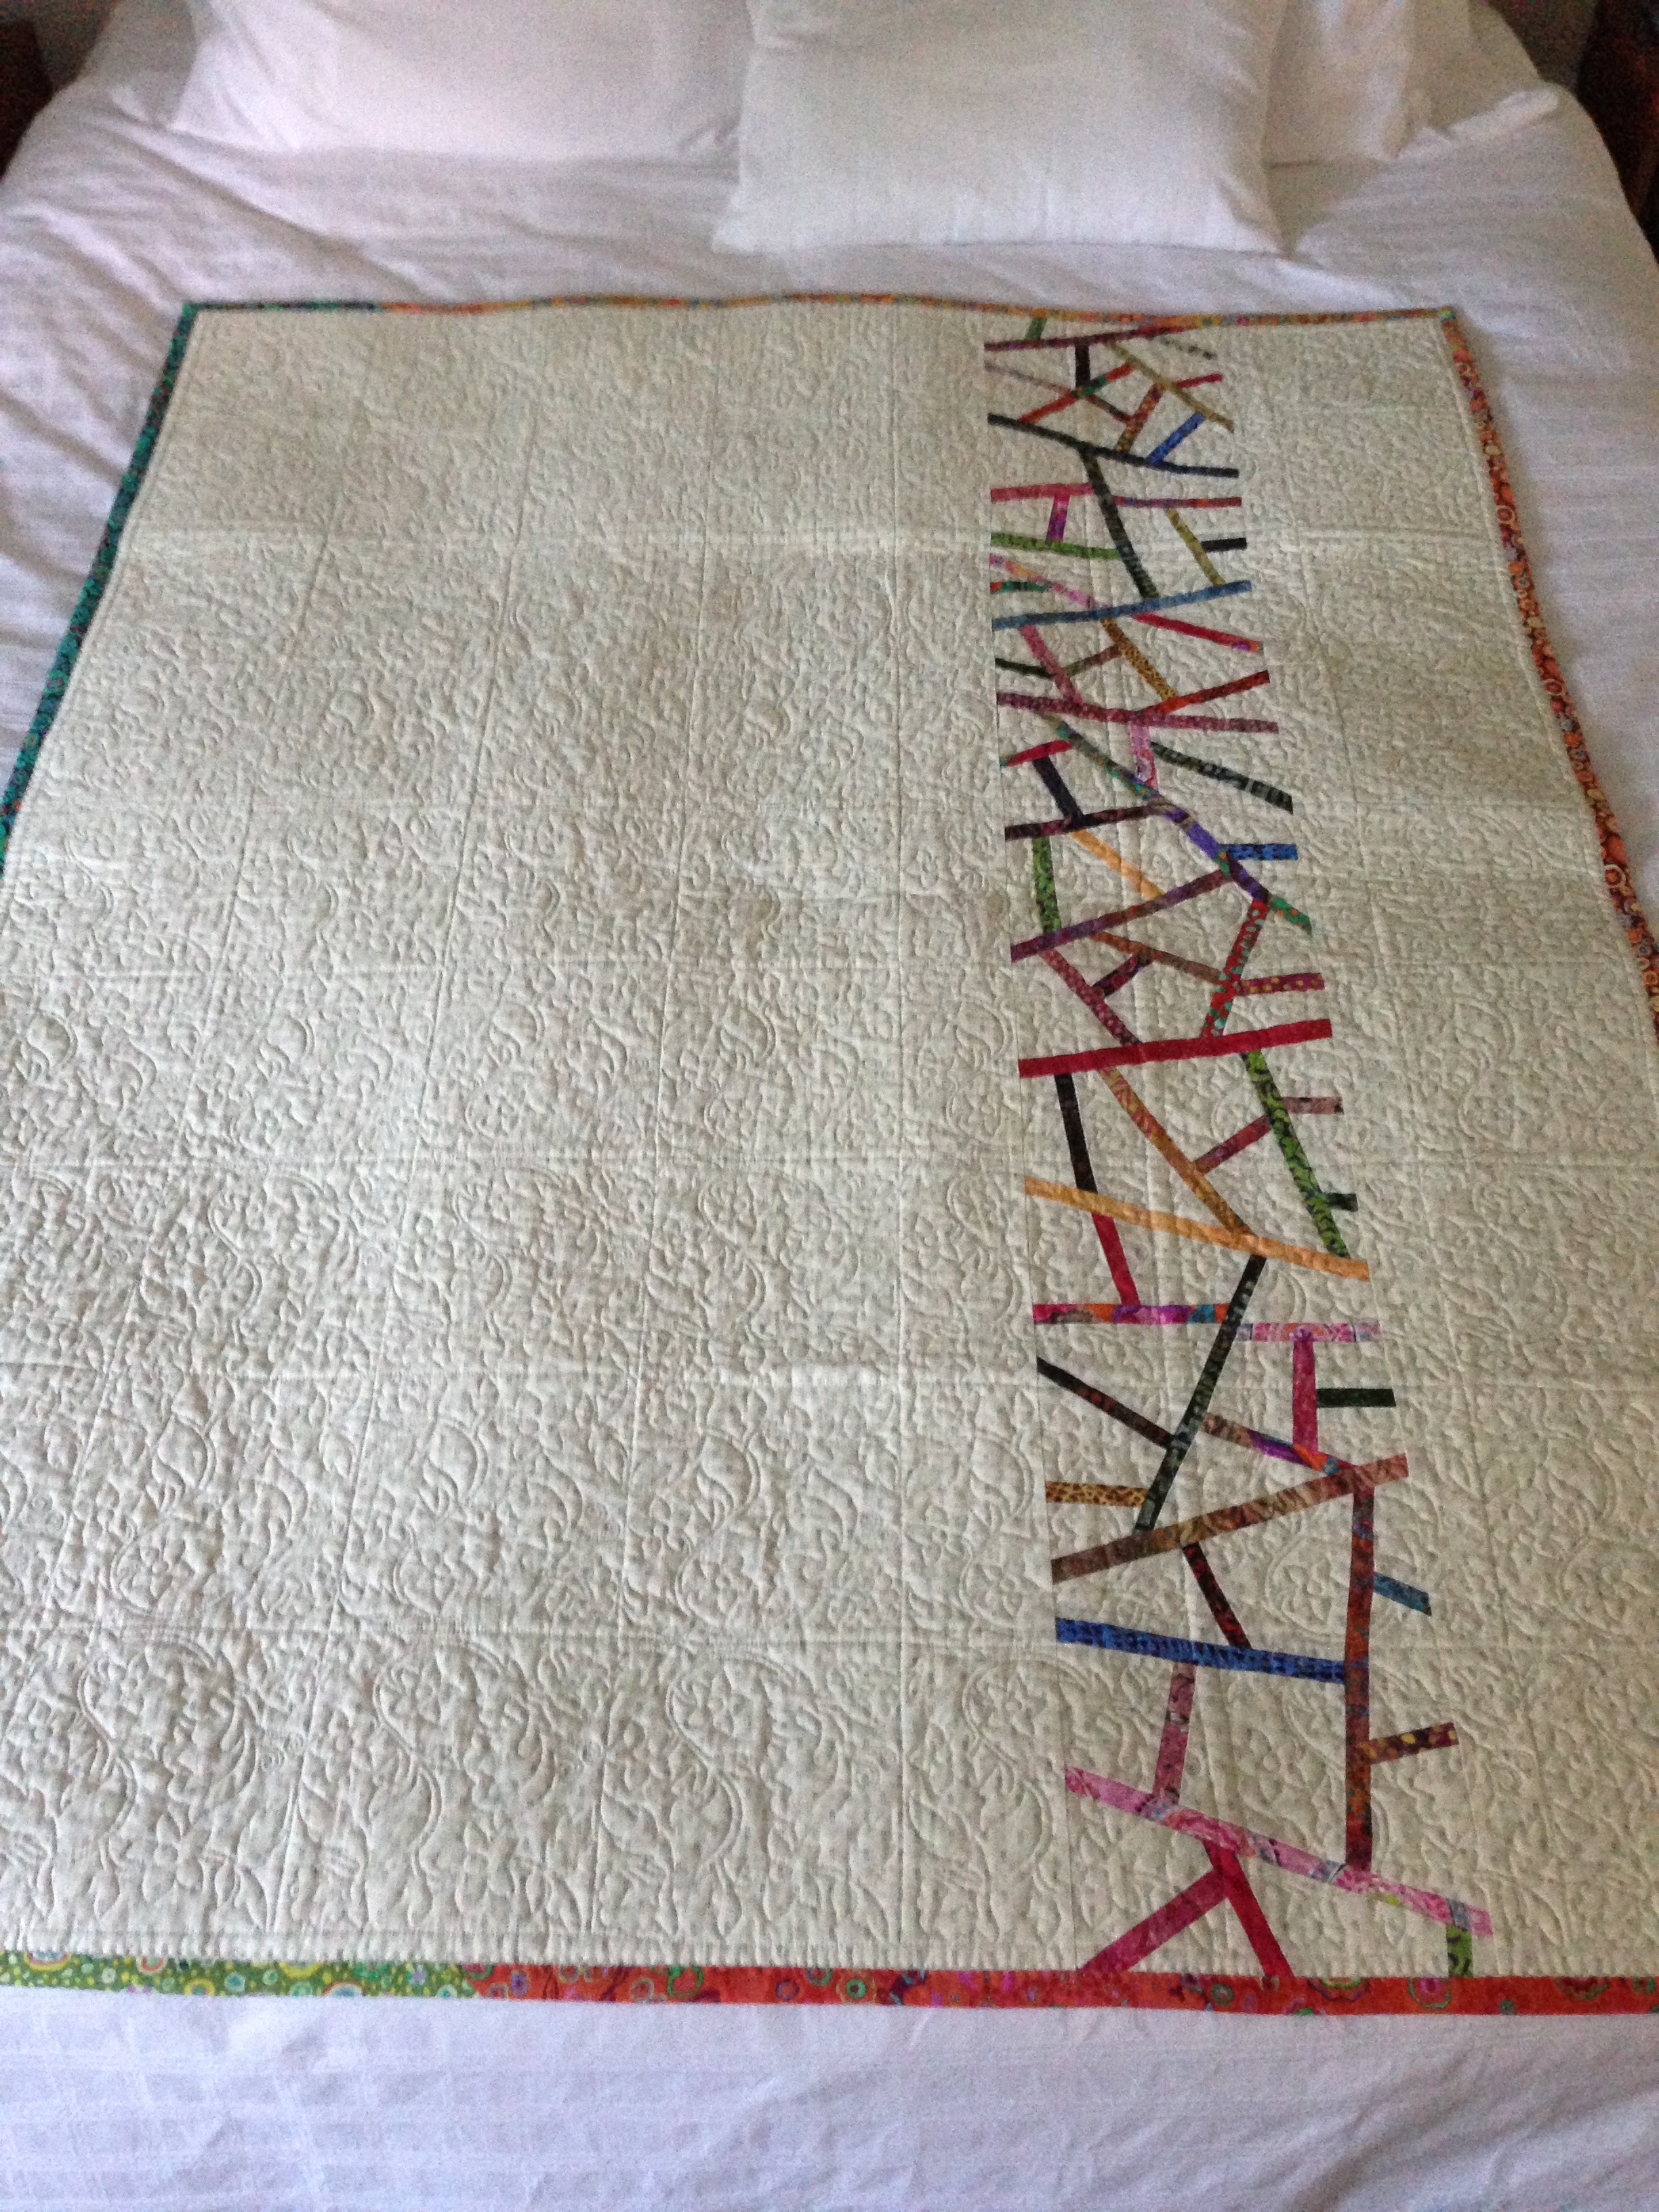
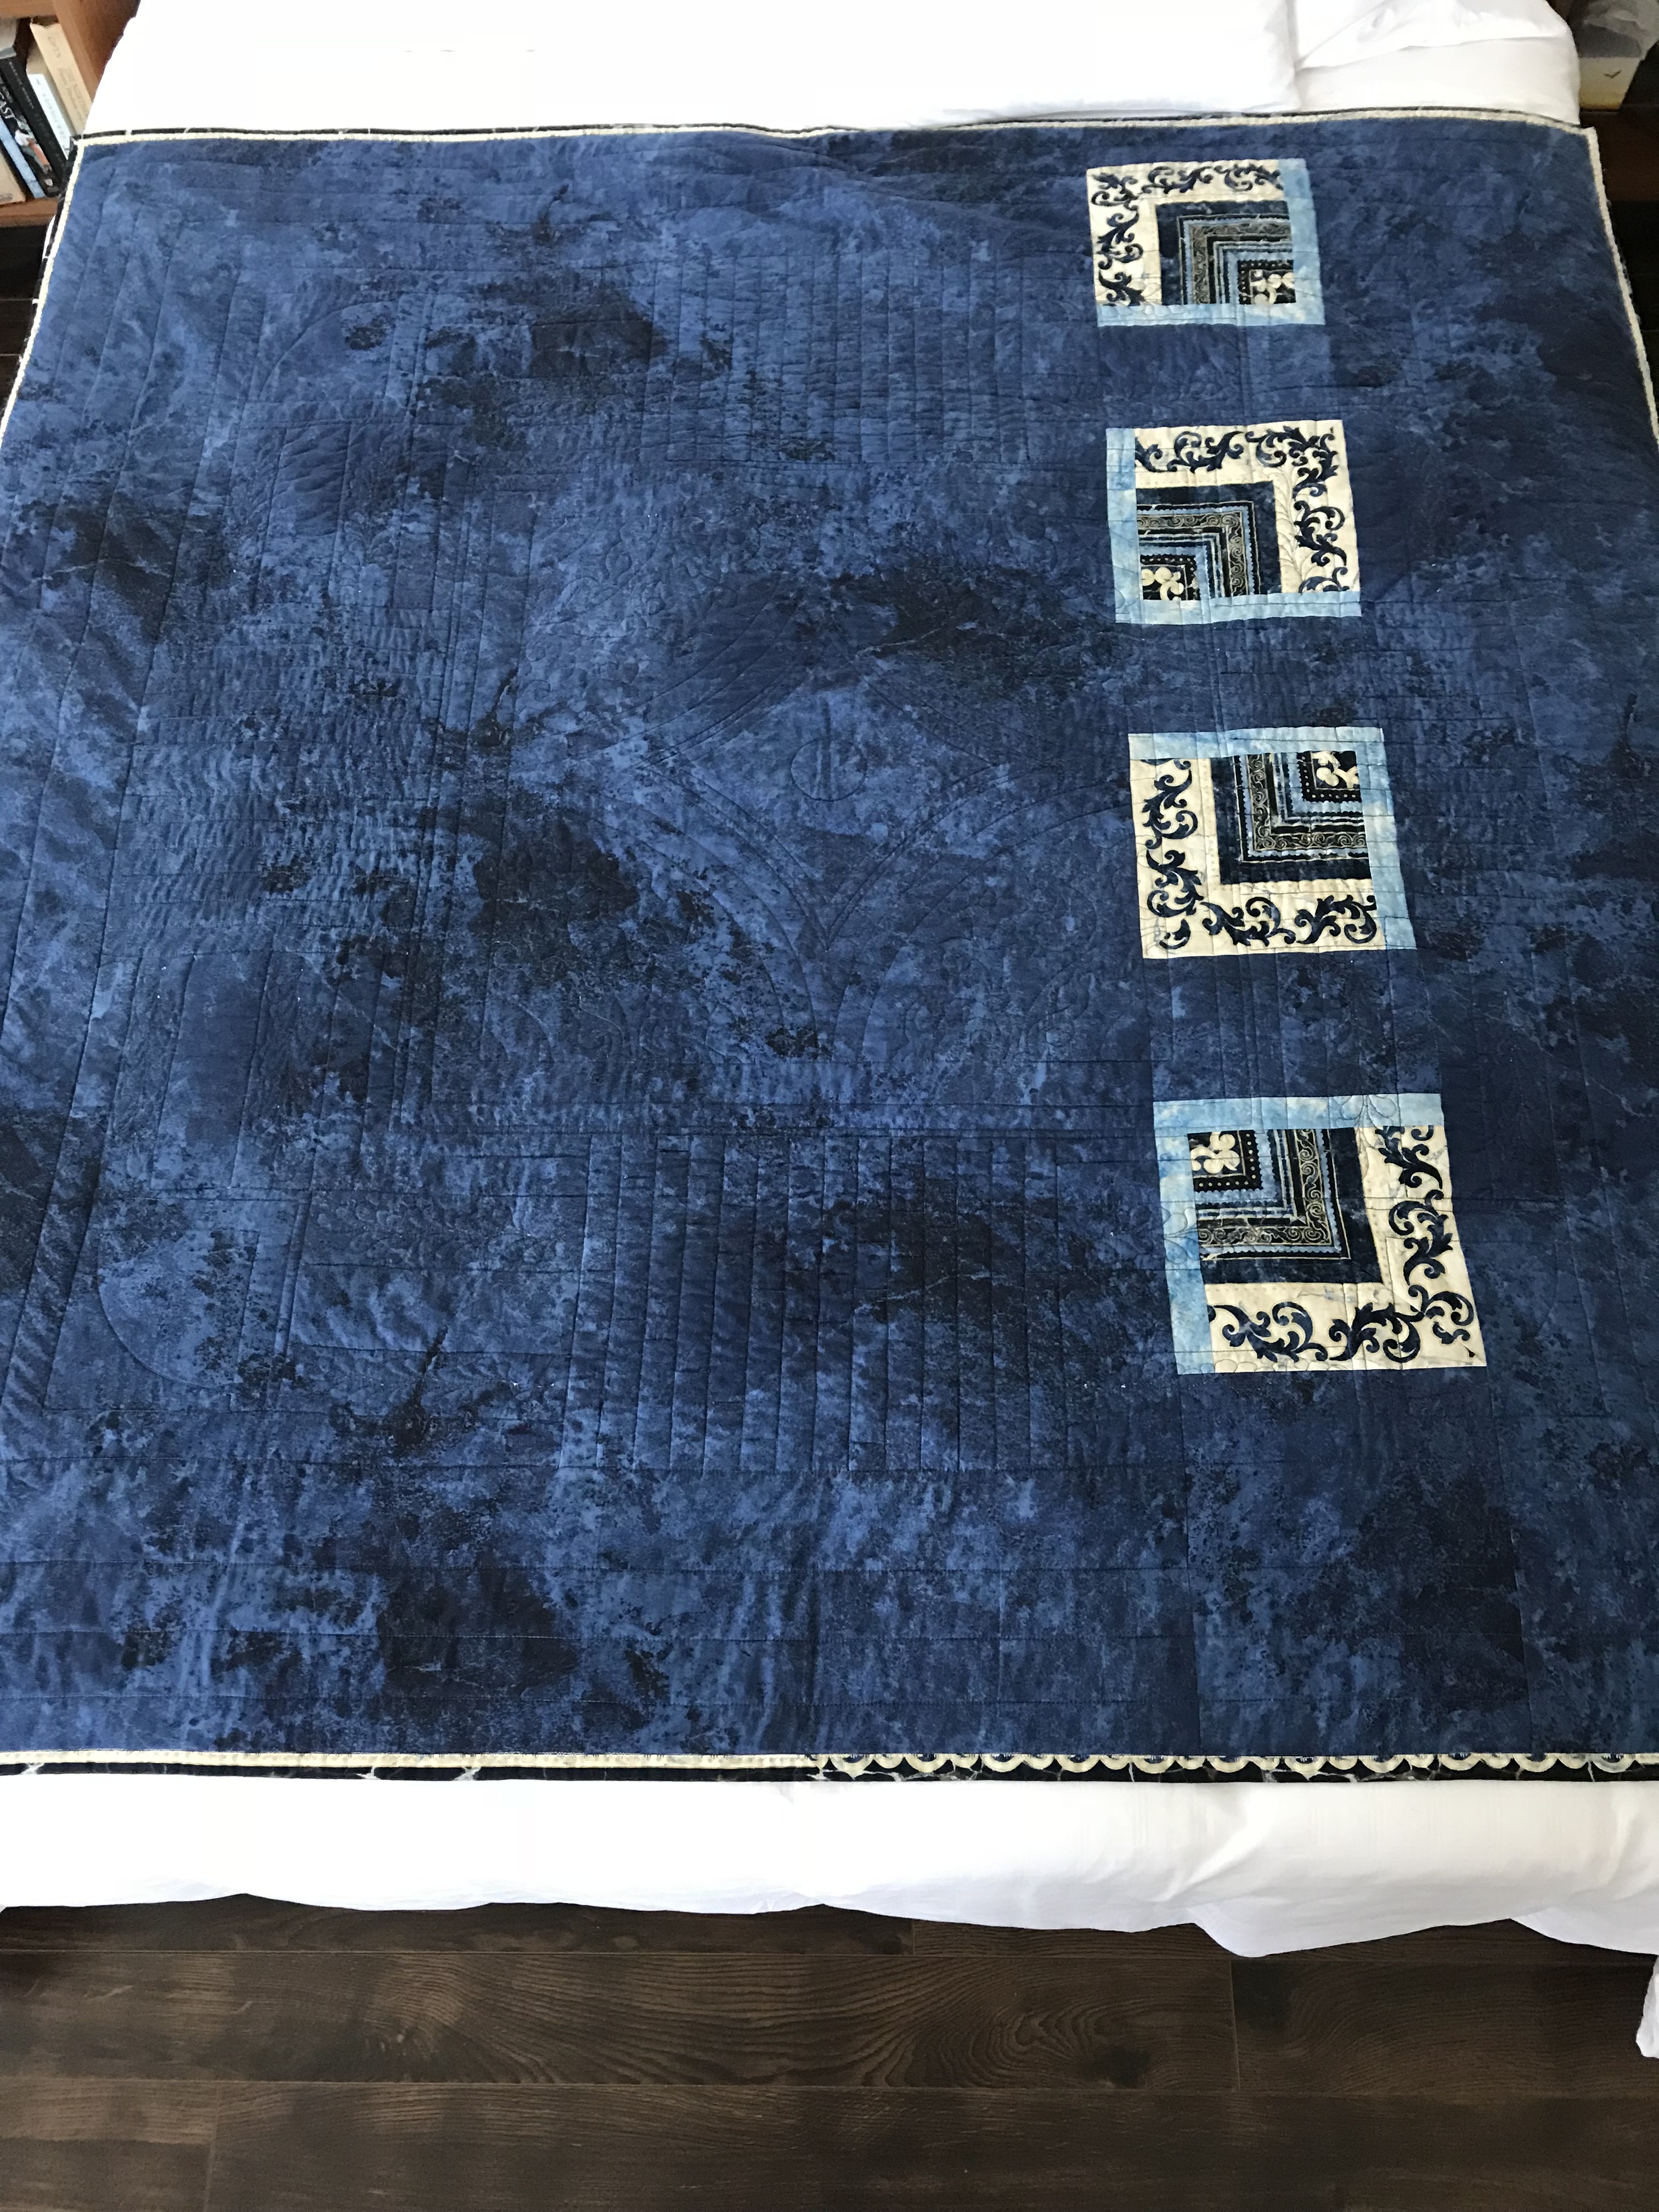
I used the same fabric I used on the back for the binding – it blended with the many grey and beige fabrics in the pieced quilt top quite nicely. The back was completed by splicing a single width of fabric and inserting a strip constructed from leftover squares from the top, and some strips of the background fabric and from the inner border. Simple, but turned out fine.
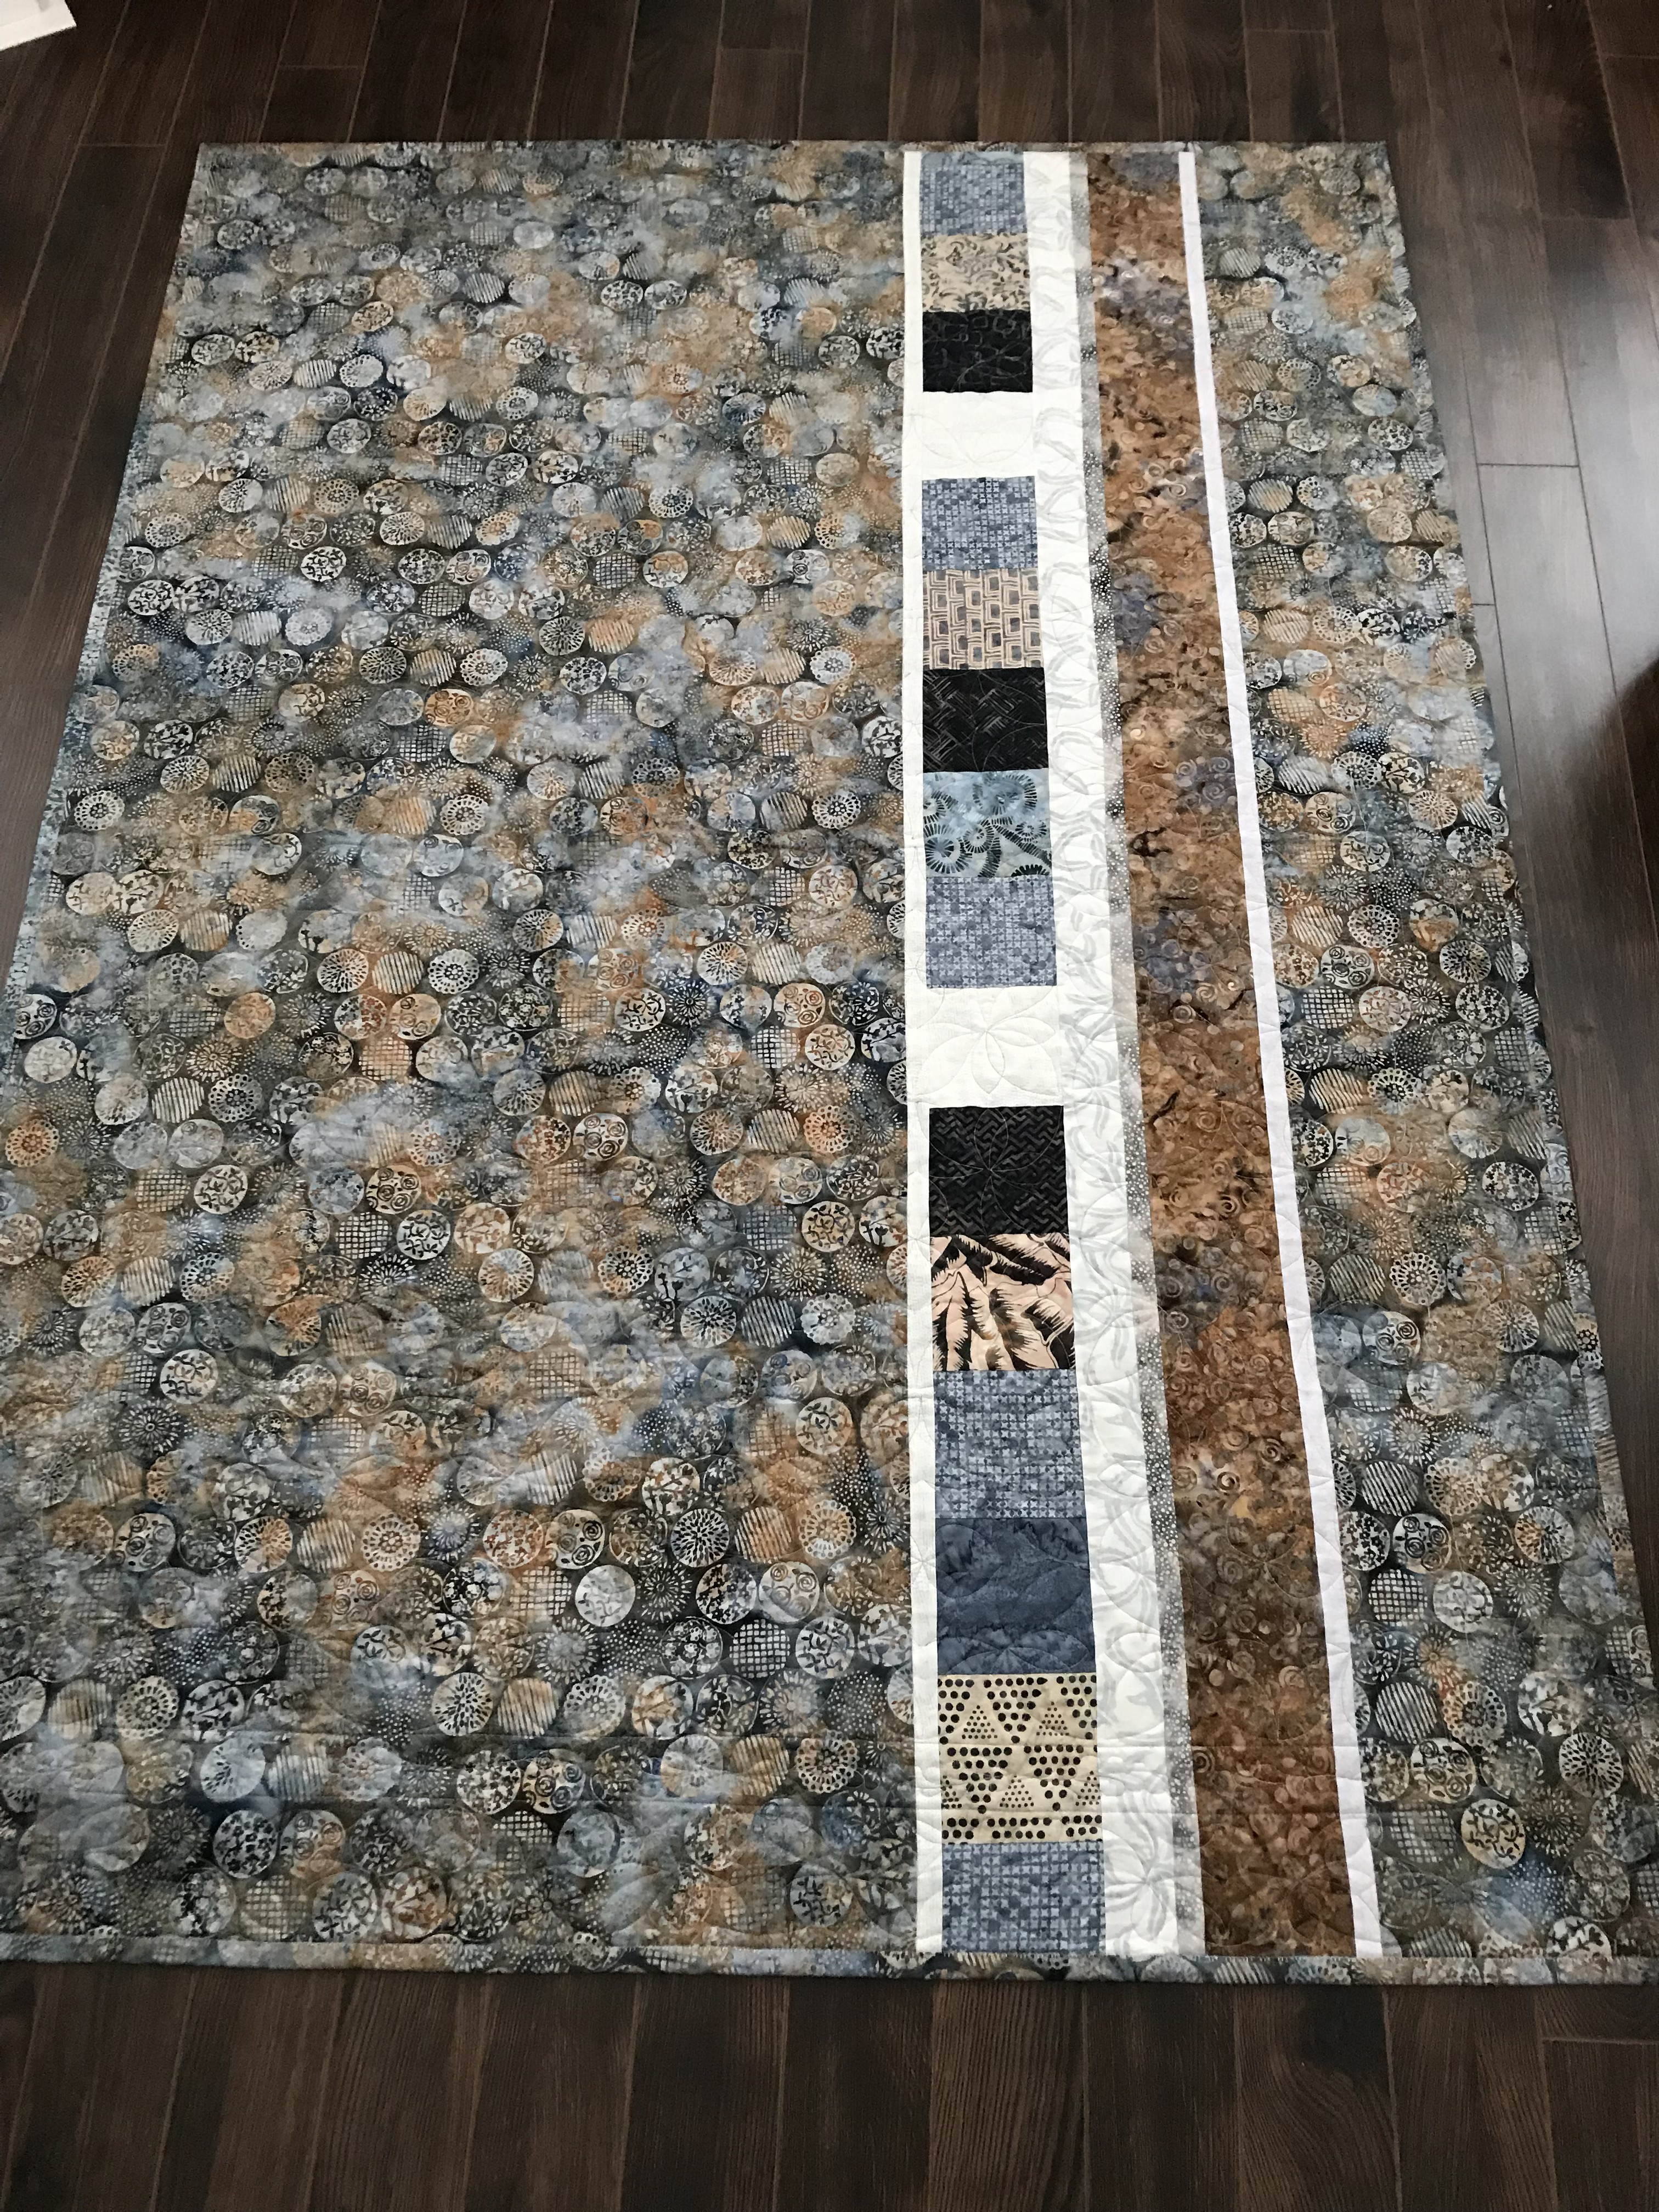
Quilt Back

Now onto a project I’ve been meaning to take on for a while. I have a Pfaff sewing tools carry case that came with one of my previous embroidery machines – I’ve had it for years. It’s reached the point where the outer case is falling apart – the binding has worn through on all the edges. So while the inner “pages” with zippered see-through vinyl compartments are still fine, it’s time make a new outer case.

I came across a pattern for a sewing tools organizer like the one I have.

Pattern for Sewing Tools Organizer

I bought some bright batik for the outside and a muted blue for the lining. I’ve spent the evening doing the prep work – I’m not exactly following instructions – I’ve added a welted zippered pocket to the front of the case, as well as a pocket on the inside of the front, and another zippered pocket on the inside of the back. The instructions recommend quilting the outside and lining fabrics but in order to put the zippered pockets into the outside and inside of the case that wouldn’t work. So instead, I’ve used a rather stiff fusible interfacing on the back of the outside fabric and a layer of quilt batting with the lining. When it comes to sewing the elements together I will have eight layers of fabric to stitch but it looks as if my new Pfaff Creative Icon will be up to the task – I will just sew more slowly than I normally would.
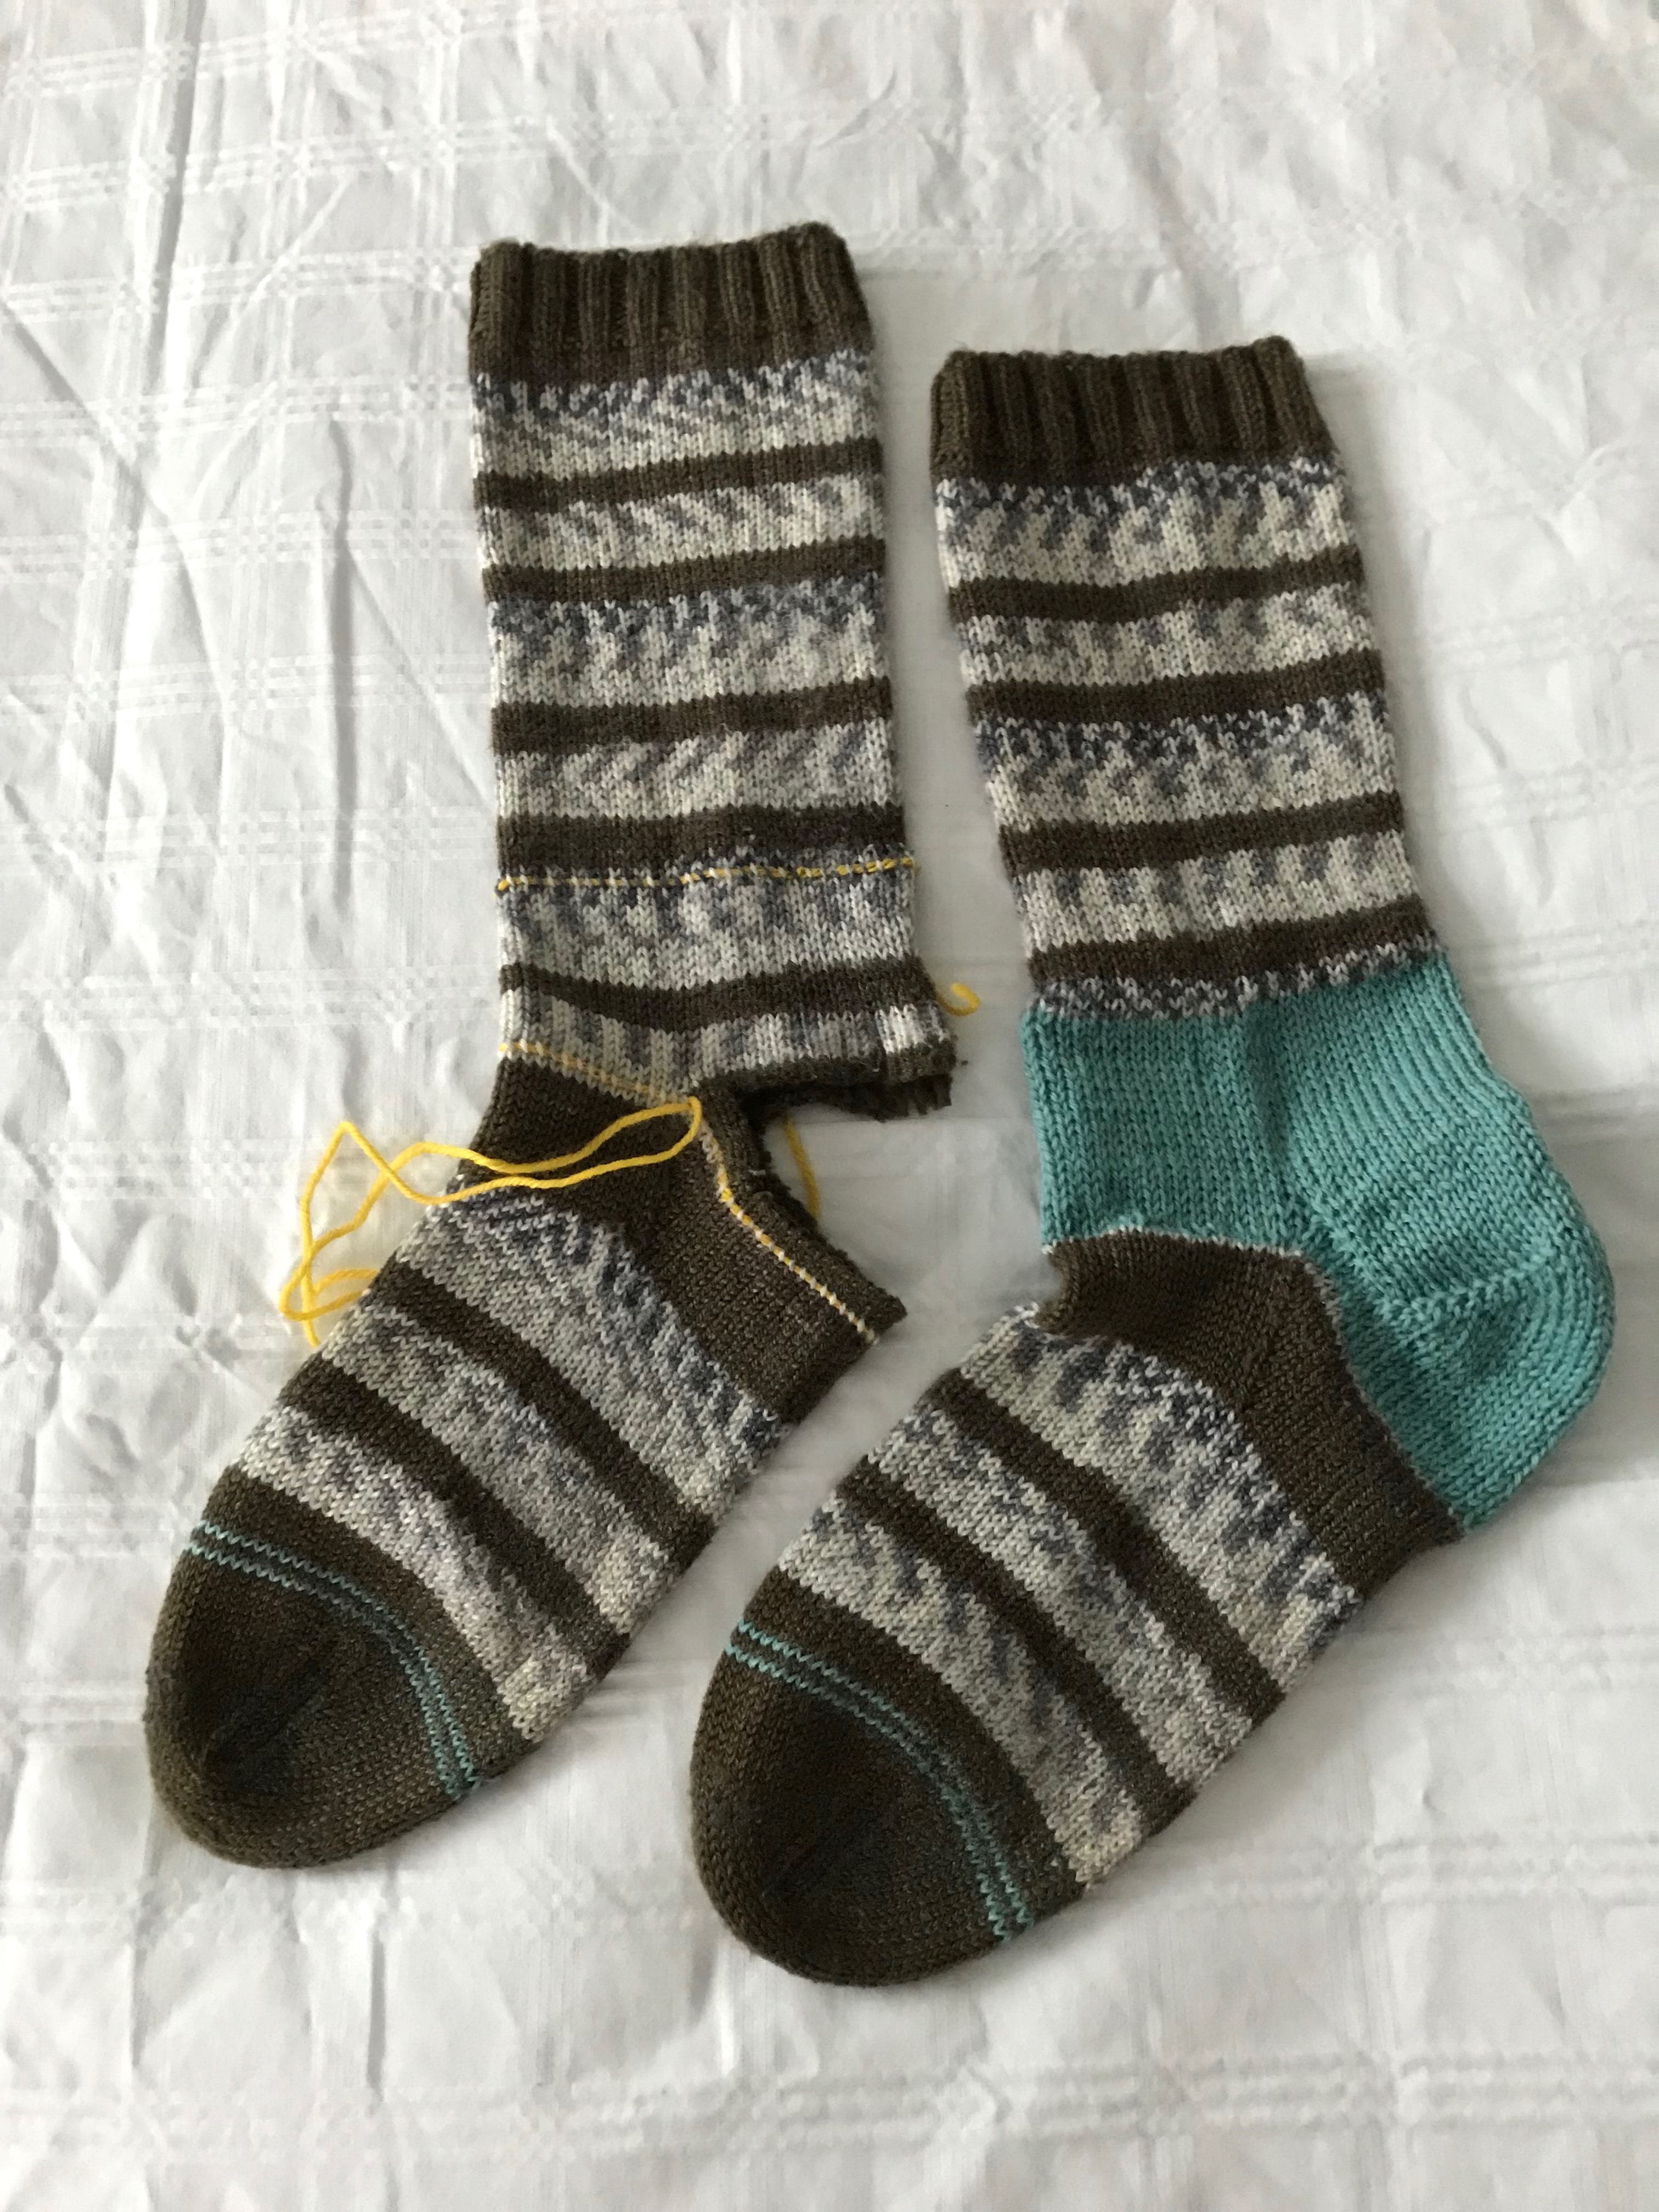
 

Before / After

I have a basket of socks beside my chair all in need of repair – the heels are worn (some worn through, hopefully the holes are still small enough that a heel replacement will do). The pair below, however, is a left over from the previous batch of repairs – put aside because they needed more than a heel replaced – the back of the leg was also worn through to the point that I knew I’d have to cut it off and reknit part of the leg – a rebuild, not a repair.

I decided to work on them after I’d calculated the time it would take to rebuild the socks – about 7-8 hours compared to  25 hours to knit a new pair.

Before / After

This is the before and after – the before sock has already been set up with stitches picked up on the leg and across the instep. Next steps are to cut close to the carrying thread, pick away the extra rows to get to the stitches on the thread, pick up stitches on the leg, extend the leg, create a heel, and then the difficult/tedious part – grafting back the foot. It’s worth saving the foot beyond the instep because it still has lots of body.

It took me about 4 hours yesterday to do the prep work and rebuild the sock on the right. It’s now a wearable sock for a couple of more seasons.

Drawstring Bags – Done!

Just finished the last of the drawstring bags for Christmas gifts – eighteen here, twenty-one in all. Just in time for tomorrow’s Friday afternoon knitters get together.

Drawstring Bags – Eighteen Completed

For the most part I was able to fabricate these bags using fabric for the outside and lining, for the drawstring channels, buttons, wooden beads, from the supplies I had on hand. I did have to buy 6mm grosgrain ribbon and a few wooden beads to finish the last few but for the most part I used what I had. That doesn’t mean there was no cost associated with the bags but it feels differently (like free) when I don’t have to go out and buy specific supplies for a project.

Now back to quilting the Layer Cake Quilt. Hoping to finish it this weekend.

Seven Done – Fourteen To Go

Just finished the seventh shoe bag – fourteen to go.

Shoe Bags

Here is this year’s Christmas gift (last year I gave small zippered bags) – a drawstring bag for carrying shoes during the winter. They’re not large enough for sneakers/running shoes, but if it’s a snowy day and you’re wearing boots, then this bag is perfect for bringing along a pair of “lady’s” shoes. It’s also a great size for carrying knitting or a hand sewing project, a book, art supplies, even makeup.

I was originally given a drawstring bag by a Japanese friend and it was immediately obvious the design was better than any I’d ever made – it was lined, made with separate channels for the drawstrings, and a buttoned pocket on one side.

I was limited by the width of fabric strips I was using – I’d pulled from the 9″ scrap bags (Keepsake Quilting puts together sets of coordinating fabrics using twelve 9″ width of fabric cuts of both printed and batik fabrics) fabrics I didn’t think I’d want to use in a quilt. So the final size of each bag was limited to 8 1/2″ x 16″ (don’t forget 1/4″ seam allowances). The drawstring channels are constructed from two 2 1/2″ x 17″ strips of fabric, sewn to form a circle, turned right side out and folded – long, raw edges together – and pressed. Each channel is inserted (raw edges to the opening) between the outer bag and the lining (which is placed right side together over the stitched outer bag). The top edge is sewn with a 1/4″ seam. The lining is pulled over the bag, the bottom end serged and the lining pushed inside the bag. I used narrow grosgrain ribbon for the drawstrings, used some smallish wooden beads (with large holes) to secure the ends. The drawstrings are strung through both channels, one from each side.

The first three bags have already been gifted – they were samples to establish size and production details. They lacked front pockets – didn’t think of adding the pocket until I started cutting the scrap bag fabrics – after cutting the two 17″ pieces for the length of bag I had just the right amount left for a lined pocket!

So now back to the sewing machine to assemble another batch – it’ll probably take me one more day to finish up the twenty-one bags I need.

Layer Cake Quilt II

Just finished the central panel of the Layer Cake Quilt. I had two challenges with this quilt – the number of small pieces (408) and making the fabric I had on hand go as far as made sense in the context of this quilt design. Total number of fabric pieces in this 4 x 6 quilt – 600! Given the fiddlely work with the 1 1/2″ white squares I’m surprised that my points work as well as they do! Not 100% perfect, but close enough that when the final quilt is quilted the slight imperfections are not going to be noticeable.

Center Panel

Now I need borders. I want to introduce a contrasting colour. I have some 4 1/2″ batik strips that bring out the rusty/beige colours in the central panel,  but I think a wide border in that fabric will be too strong – I’m thinking a 1/2″ – 3/4″ border will be enough (the question is whether to piece the strip in or to create a narrow flange). The outside wide border will be the white Zen Chic fabric used in the panel itself. My problem is that I have, at the moment, just four 4 1/2″ strips of that fabric! My local shop has none left! I’ve ordered some from the Fat Quarter Shop online (they had what I needed, my other usual sources didn’t) but the fabric hasn’t yet arrived. So I’m on hold for the moment.

I guess I can fill in the waiting time by going through my fabric stash and pulling out something for my next quilt….

Grey/Yellow Socks

Finished last evening. I probably worked on them for 10 days or so (same 25 hours it takes me – I just knit more each evening). I was given the yarn by one of the women in the Friday knitting group – she picked it out of a donations bin at her church, didn’t want to use it herself, but thought I might like working with it.

The yarn (an older Regia pattern) looked pretty dull, someone had knit and unravelled a portion of it, but I thought the yellow offered some possibilities, so I added in the yellow stripe at the top, alternated rows for the next 10 rows, then knit the remainder of the sock as the yarn worked out. Cuffs, heels, and toes all used a bluish grey which blended well with the greys in the yarn.

Grey/Yellow Socks

Not a bad looking sock. Turned out to have more life than I’d anticipated.


Layer Cake Quilt

I’ve been working on this new quilt for the past ten days. I started with sixteen grey batik 10″ squares and eighteen assorted beige/blue/grey 10″ squares – in effect a “layer cake.” I’d had the fabric in my stash for over a year not sure what to make with it. I didn’t have enough of the grey squares to do a whole quilt top so I added some Zen Chic (Fragile, Chalk Stamped) yardage which I also had in my collection. I decided to do an outer “border” with the white, doing the centre of the quilt using the grey batik.

I cut each 10″ square in four and constructed a total of 96 half square triangles, making sure I had enough blocks using the white to build the perimeter of the quilt top. Next I carefully laid out my HST and began sewing them together. Each block has four HSTs separated with a sashing constructed from 4 1/2″ rectangle “snowball” blocks – turns out I had a jelly roll using many of the same fabrics as the mixed batik 10″ squares I began with. I pulled out 12 strips to use for the sashing. To complete the snowballs I needed 384 one and a half inch white squares to add to the four corners of each rectangle.

Assembling The Elements

So far, I’ve assembled half of the inner panel of the quilt top – you can now see the white perimeter taking form and the grey batik interior squares are emerging.

Quilt Top – half pieced

I have two more columns of blocks to construct to add to this half panel. Then I will border the panel with more of the white patterned fabric. I have enough backing fabric that I should be able to add a narrow border of that fabric as well.

In the meantime it’s back to the snowballs – I have 48 more to construct. Once the snowballs are done the remainder of the top construction will go quickly.

Sailboats In The Fog – II

I finally finished Sailboats In The Morning Fog – in time for the Tuesday class this past week. That involved the thread painting on the boats and their reflections in the water,and a bit of movement in the water on the right side of the harbour. Next I added a matte done in white muslin, followed with a dark grey piping, and finally a wide border/frame. I tried several different fabrics, some quite muted but in the end went with this one which brought out the greys of the reflections as well as the wooden insides of the boats. I used the two remaining strips of border fabric to create a hidden binding.

Sailboats

At class the gals all got their work close to finished (except for the hand sewing which they were going to do at home).

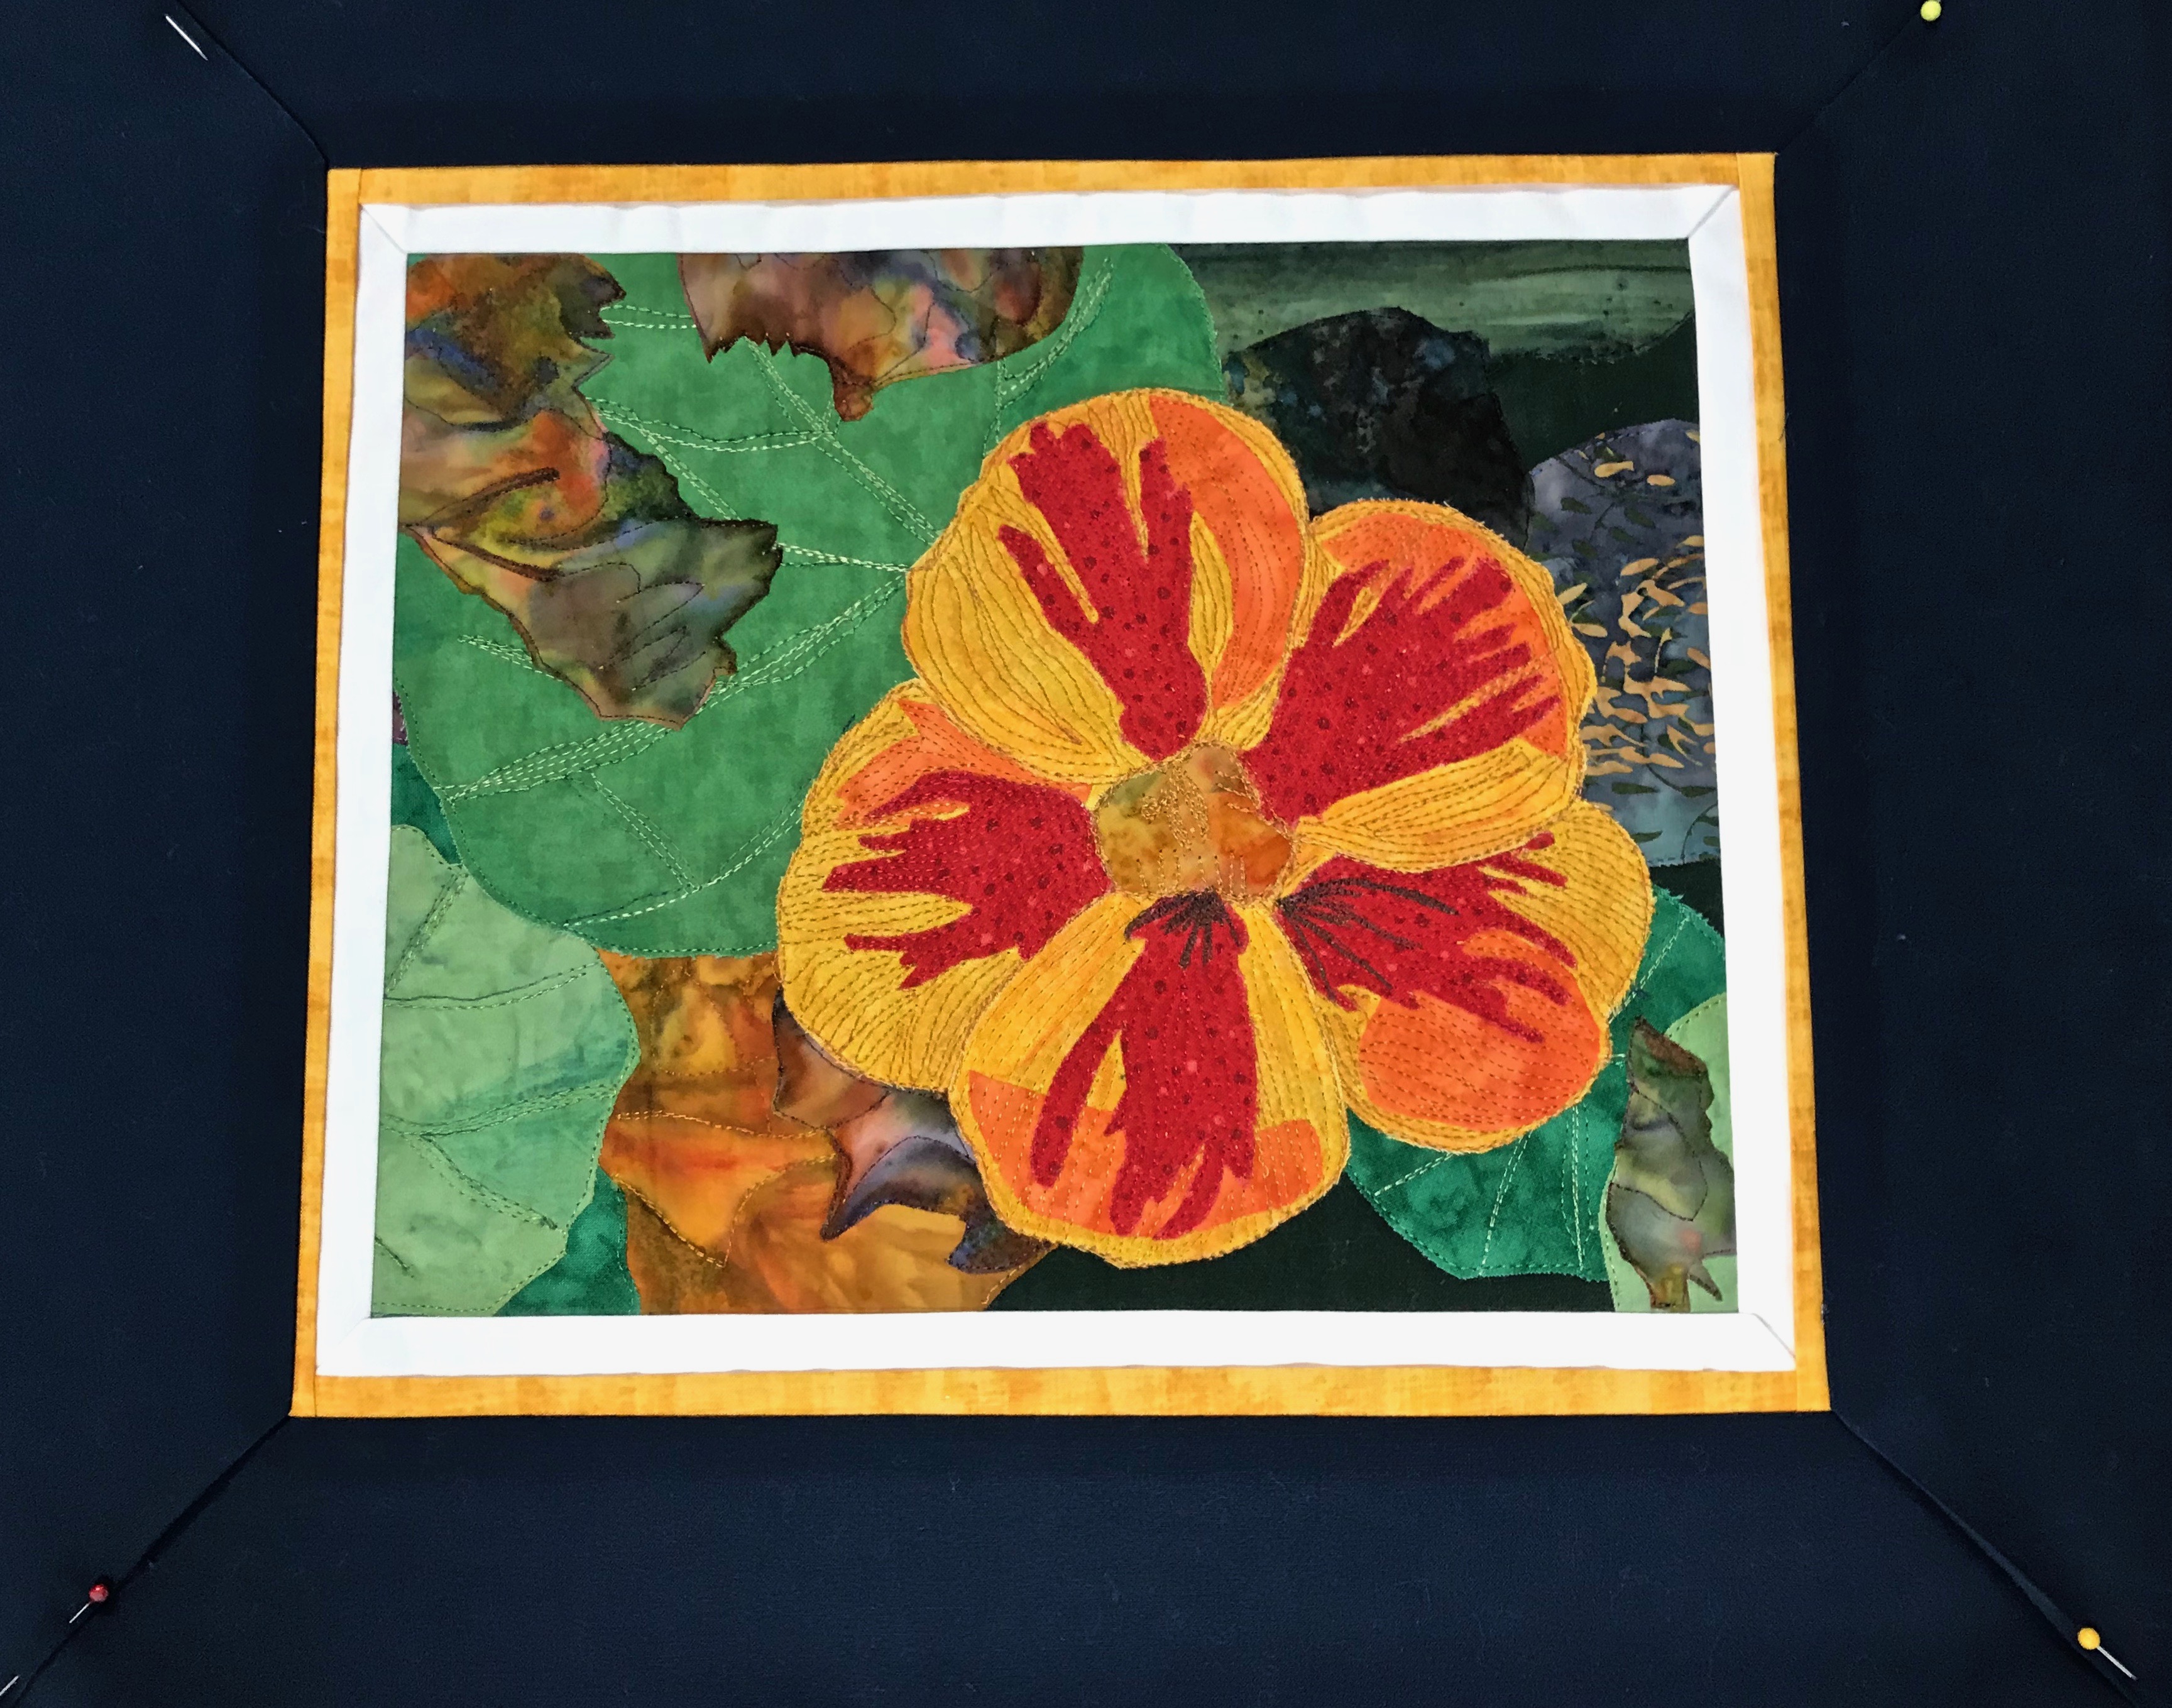
Linda had done the thread painting on her Nasturtium before she came. On Tuesday she added the white inner border, the yellow flange, and then the outer navy border. She added a hidden binding in the navy fabric she used for the outer border.

Nasturtium

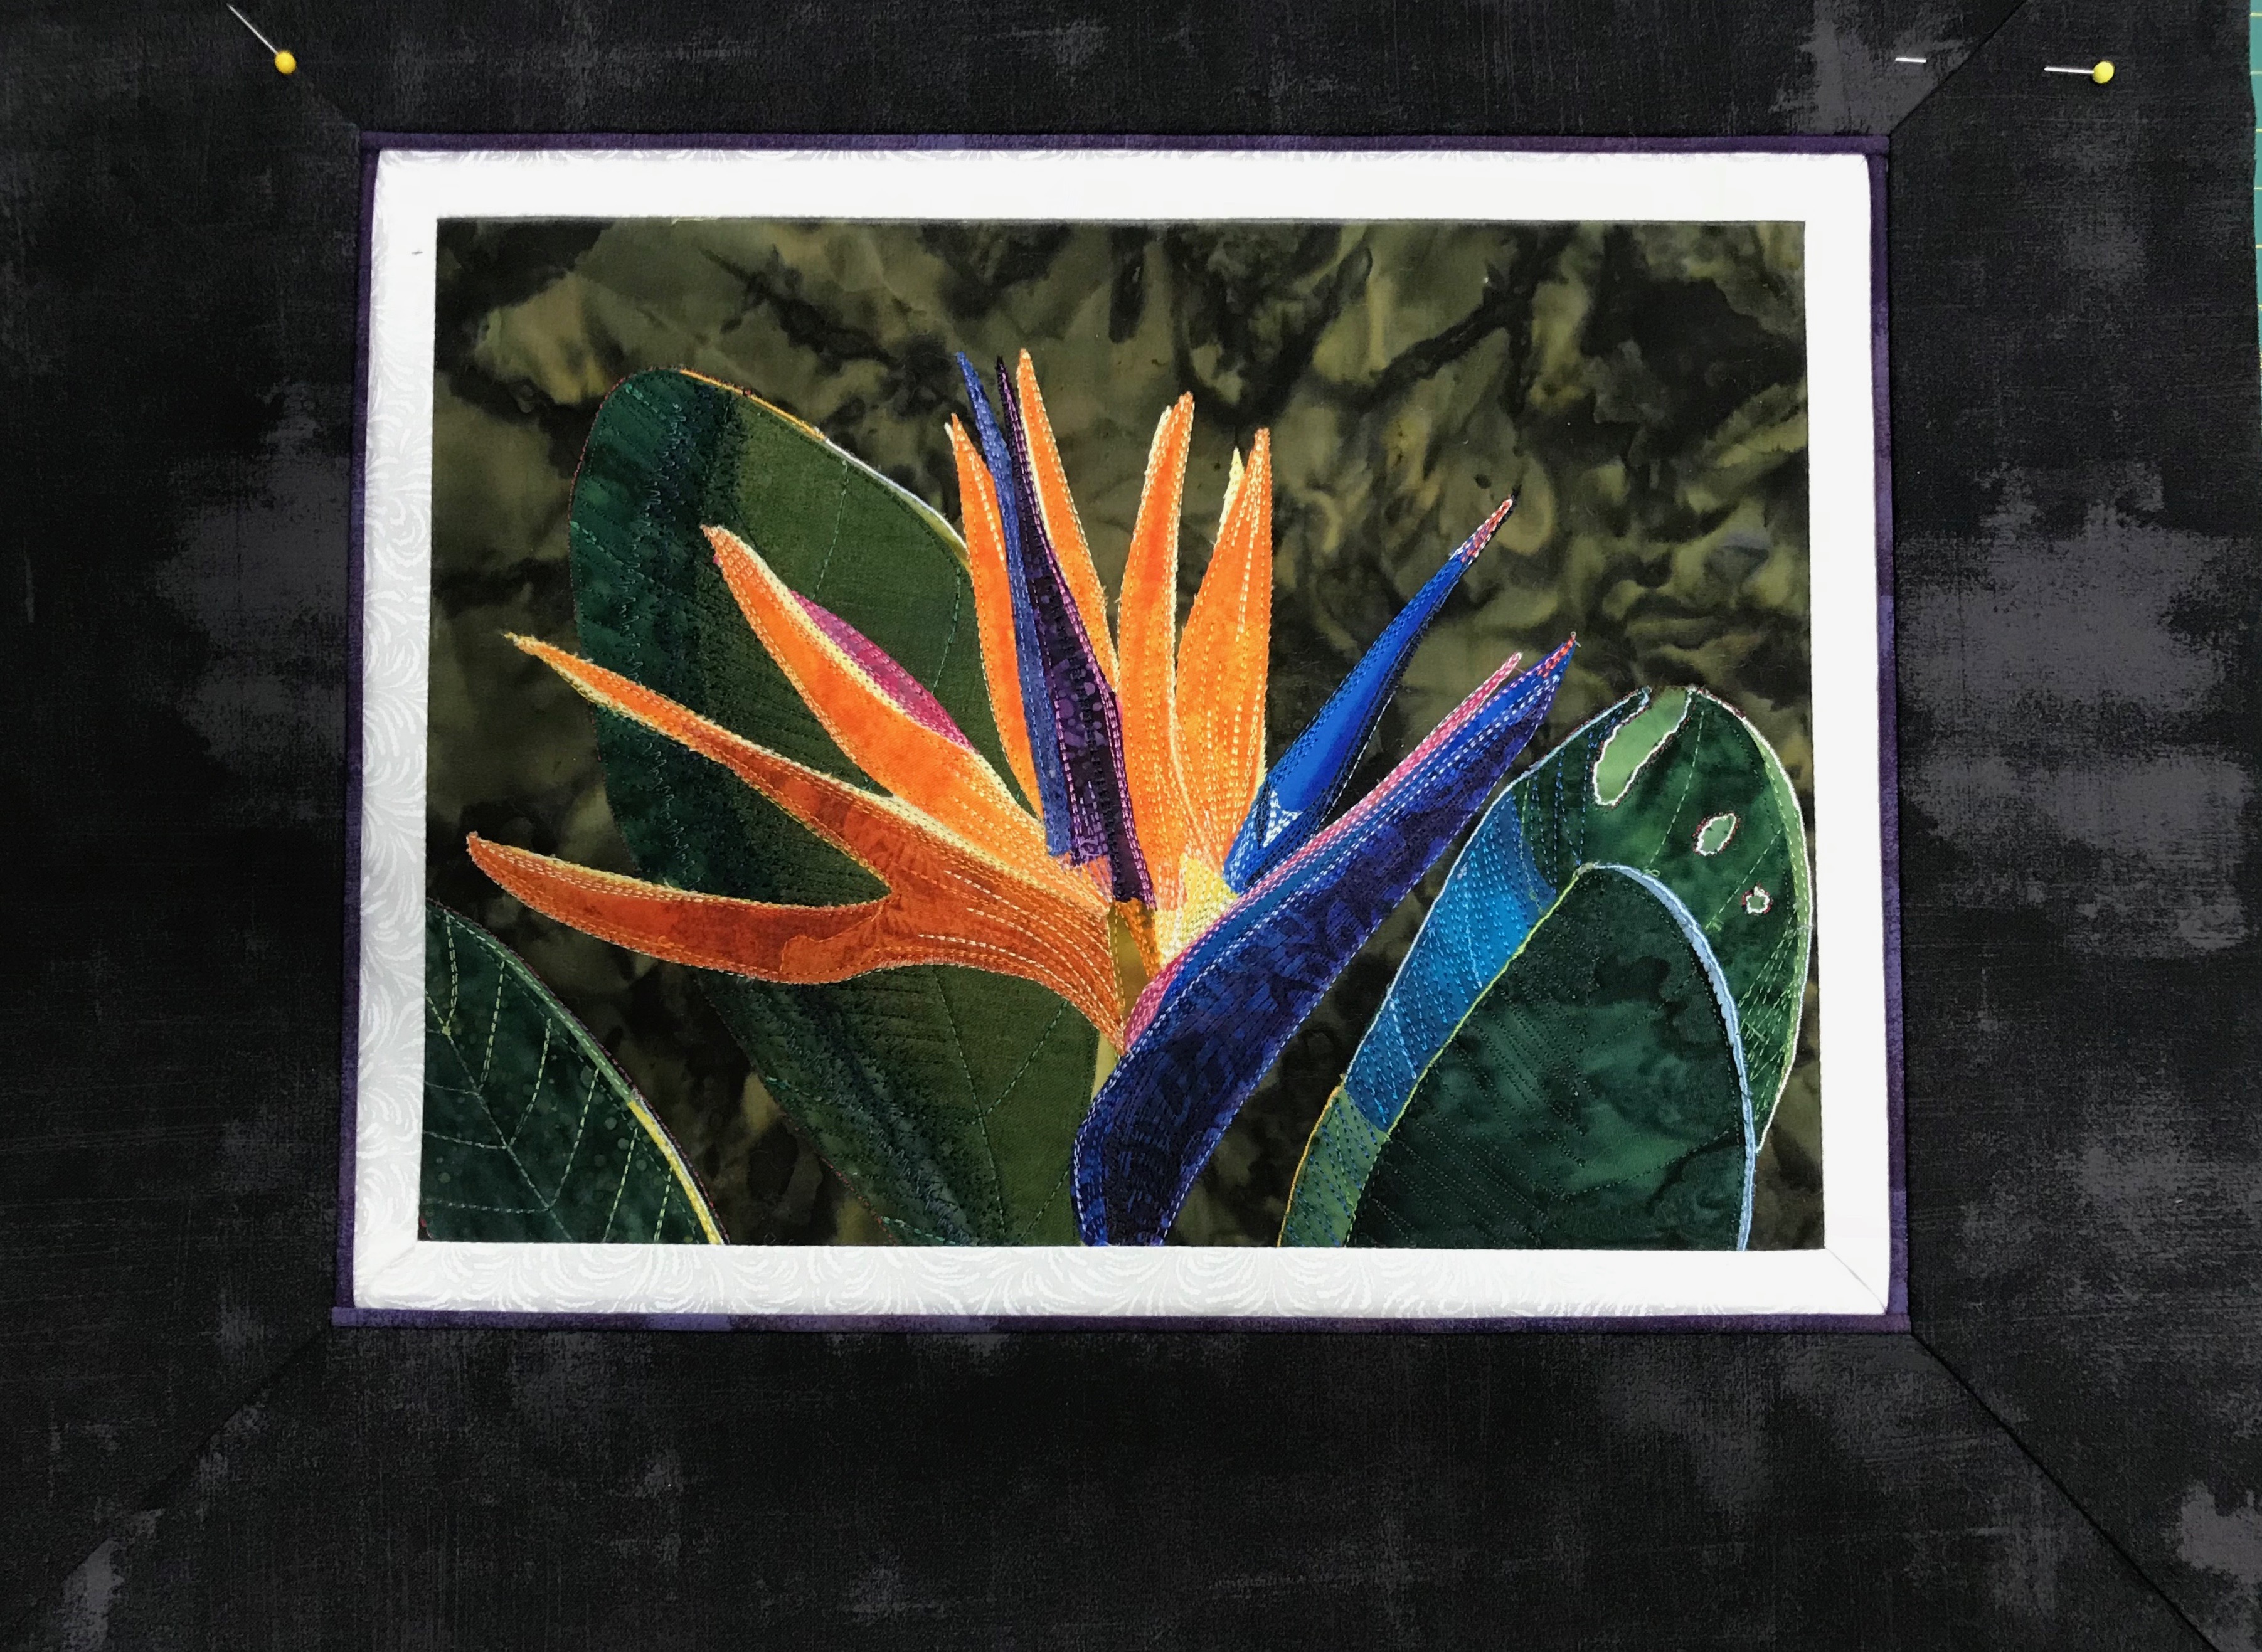
Deb’s Bird of Paradise also turned out beautifully. Although nearly invisible, the purple piping does pick up the purples within the flower and hinted at in the foliage.

Bird Of Paradise

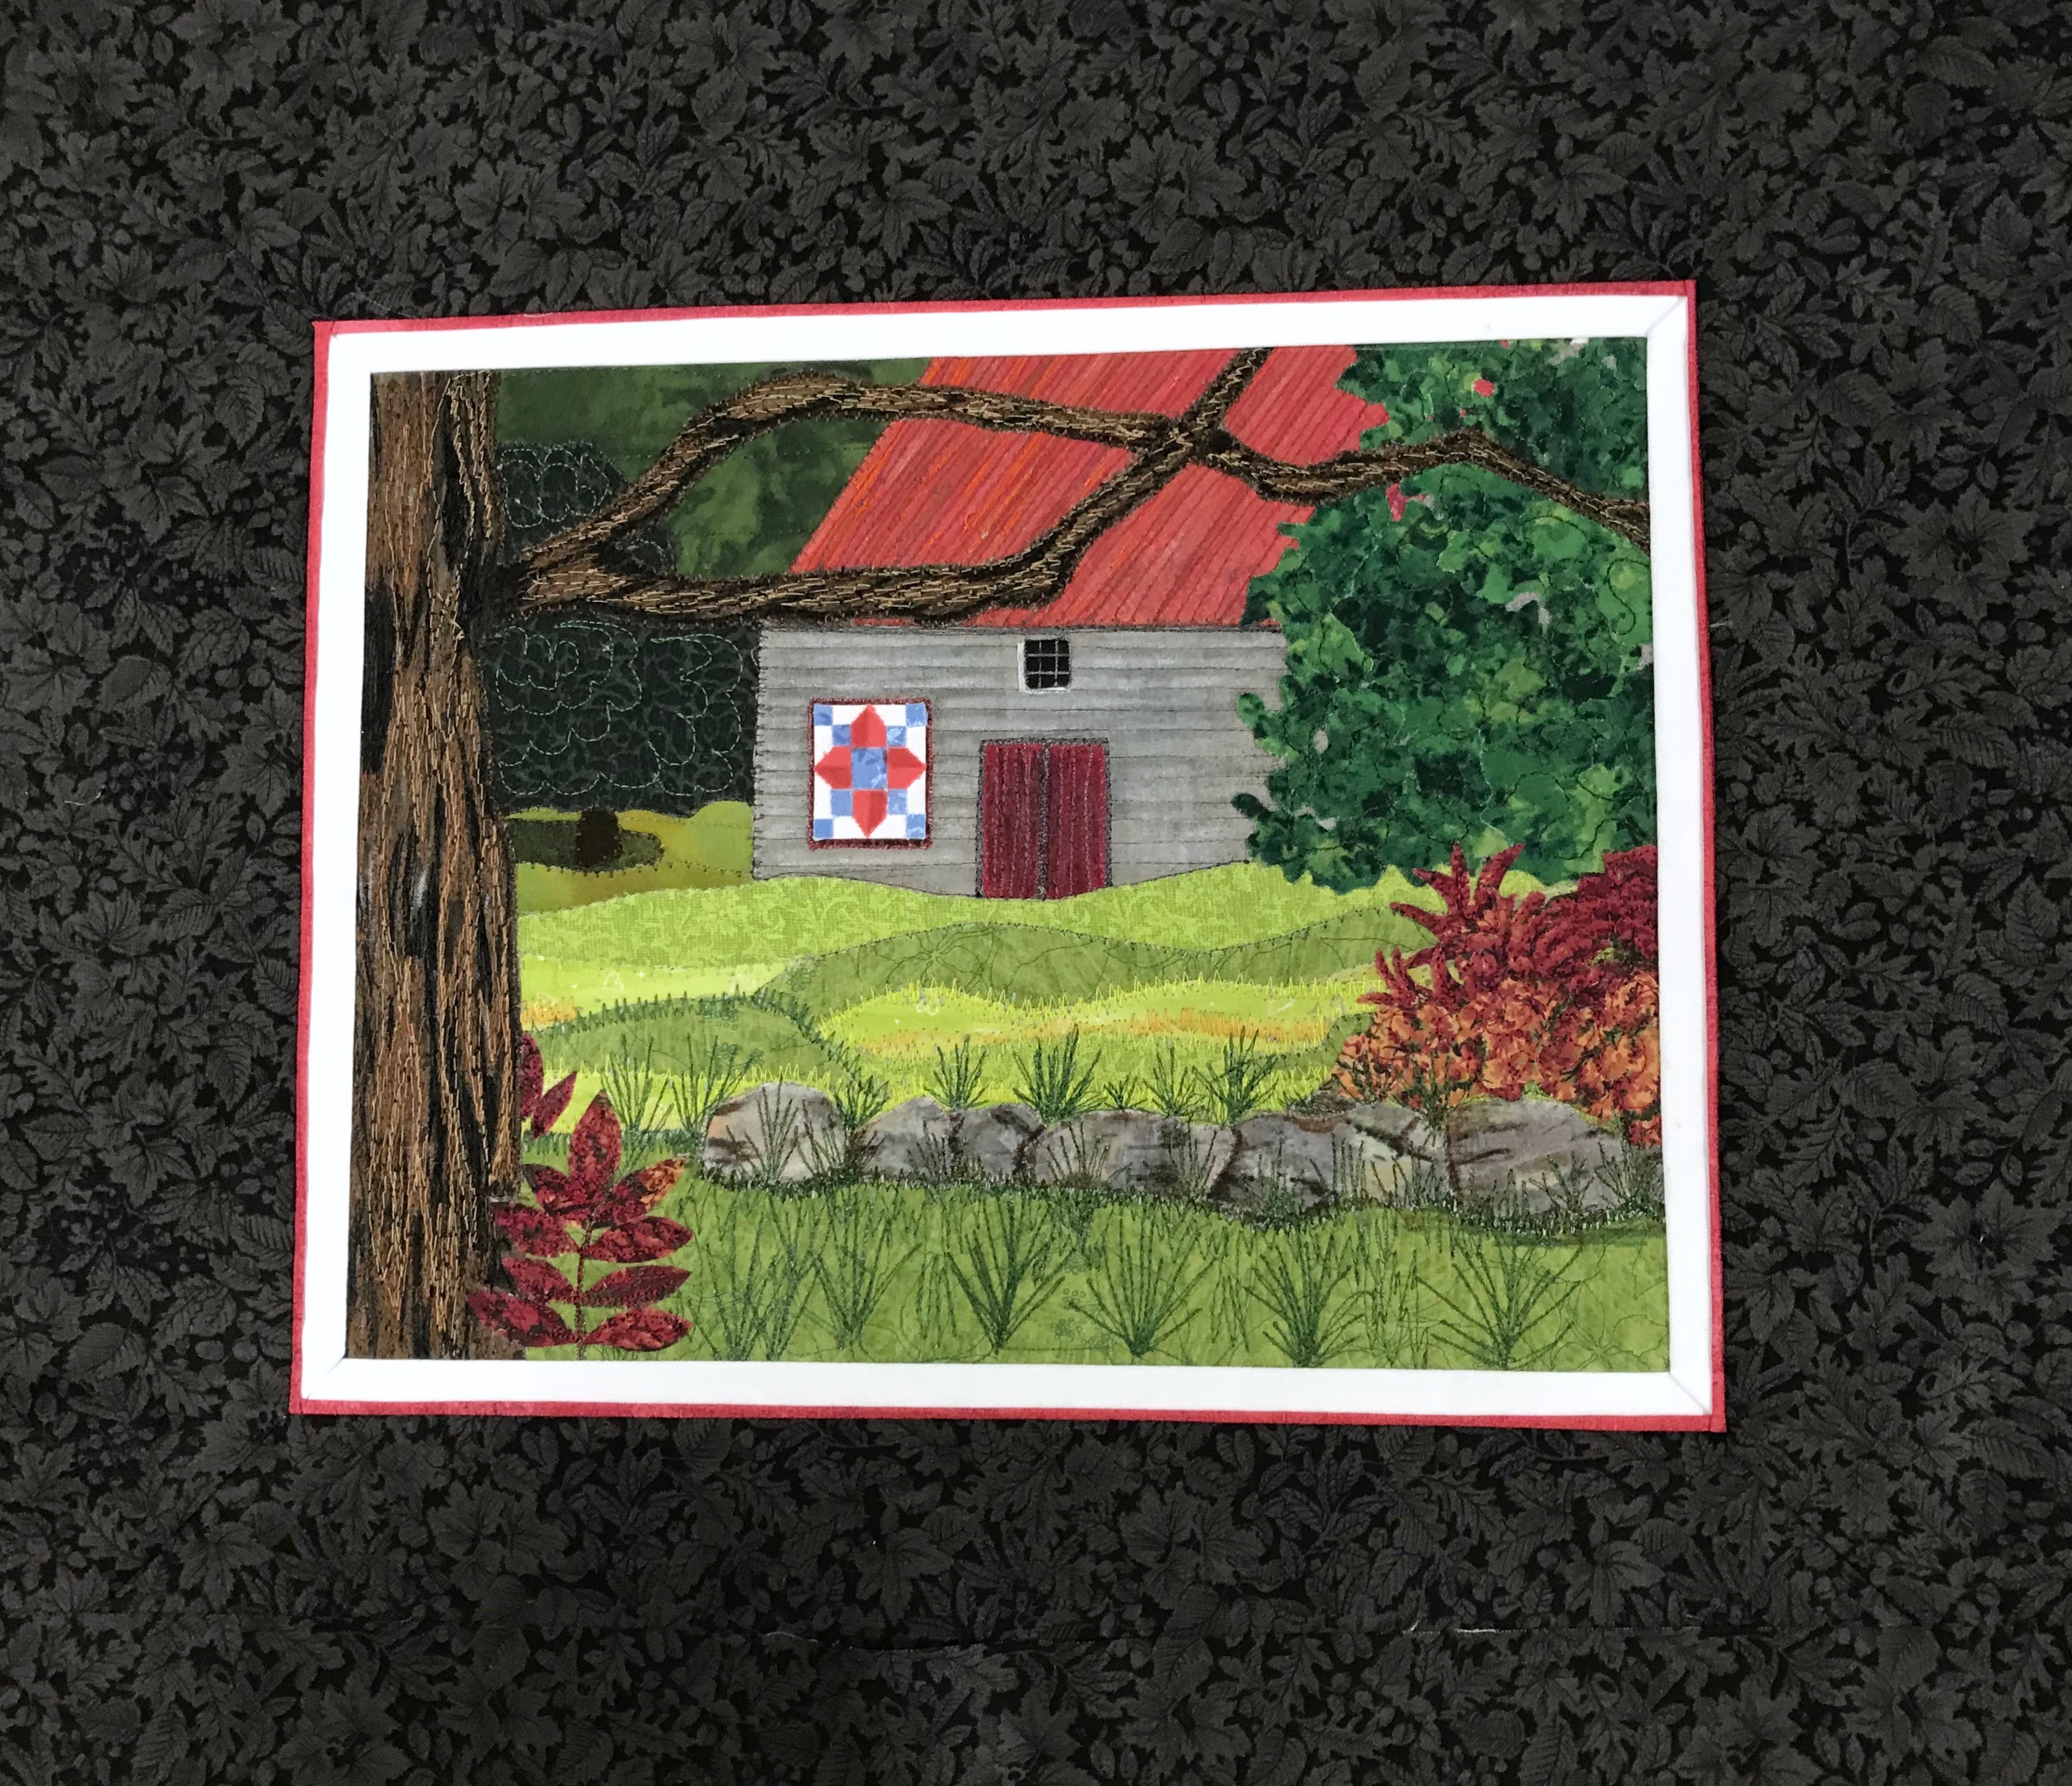
Pam did a lovely job on her wall piece Barn With Quilt – the thread painting, appliqué work on the tree on the left, created a very tactile bark.

Barn With Quilt

Faye’s Fall Walk captures the feel of a cool Nova Scotia fall day. The background was pieced and thread painted, the two figures were printed on fabric and applied to the scene. The red piping draws attention to the woman’s red jacket.

Fall Walk

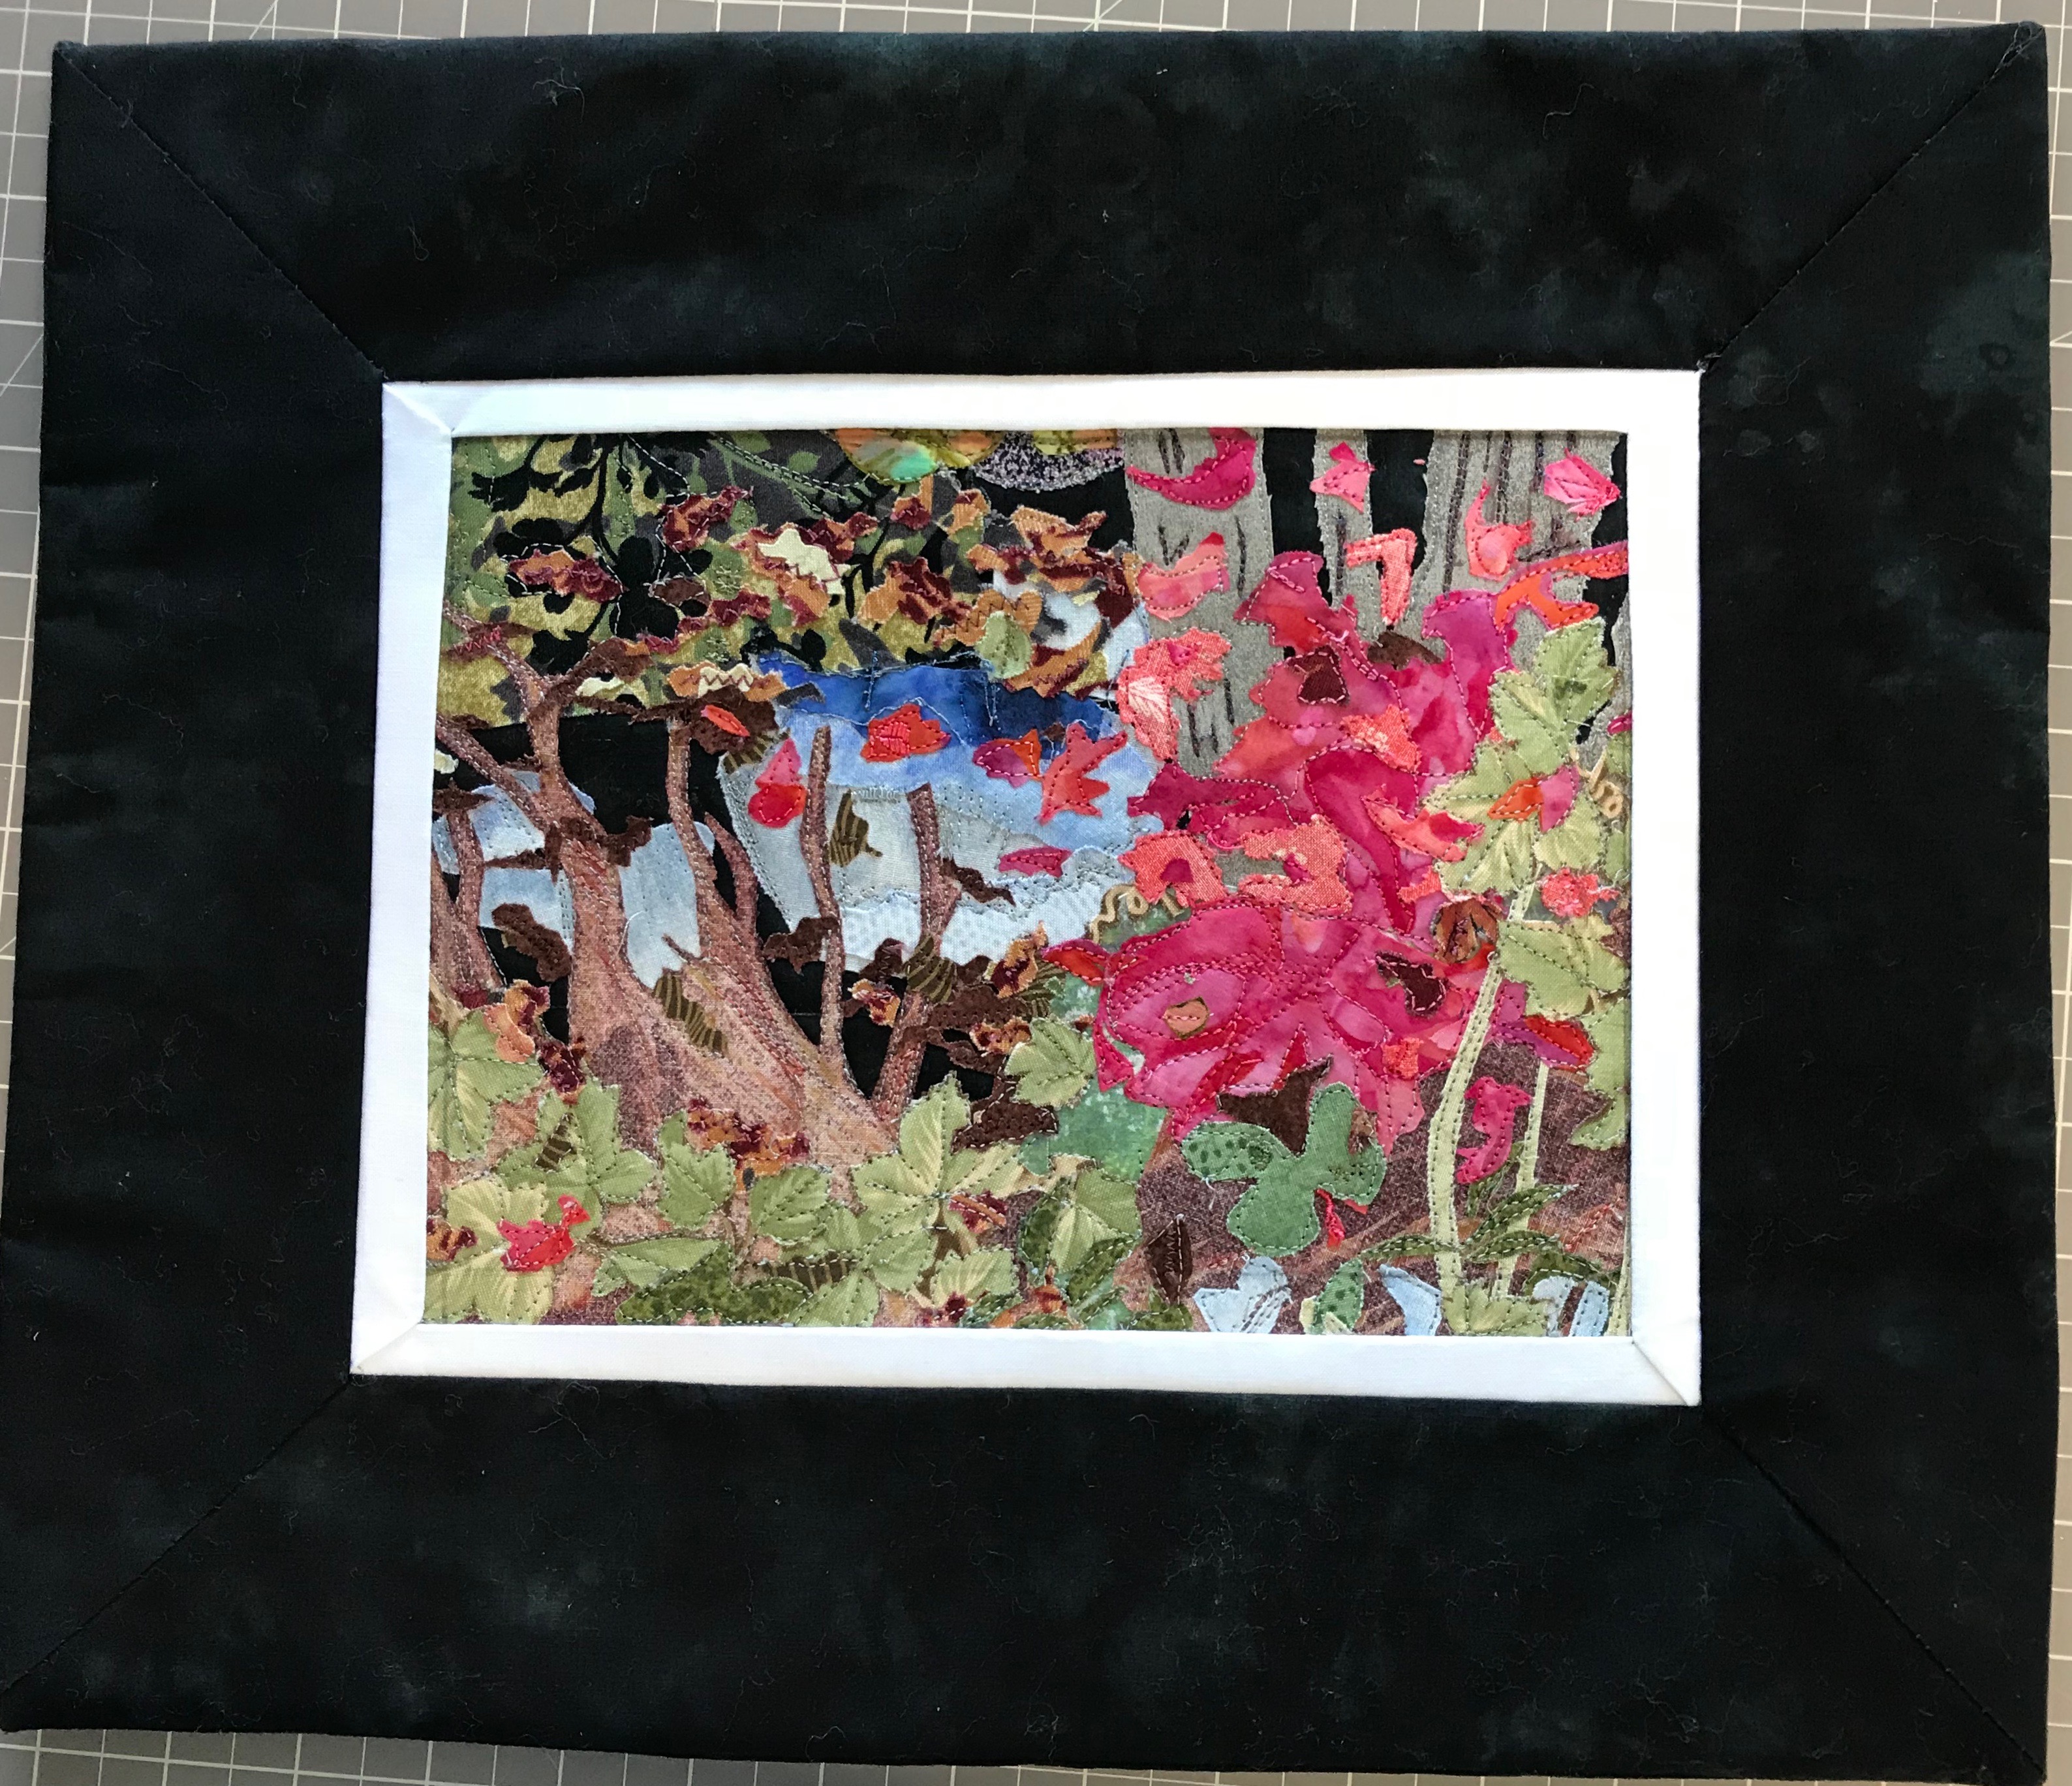
Linda’s A Fall Day In The Woods brings the vivid fall foliage to life. Her framing of the scene strengthens the texture of the fall colours.

A Fall Day In The Woods

The gals were (as was I) delighted with their work. I wanted them to get the finishing touches on their art pieces in class. We didn’t quite make it, but the remaining hand work was going to be no barrier to them completing their projects.

Quilt Backs

Yesterday, Melanie McNeil (Catbird Quilt Studio) posted a piece on pieced quilt backs.

That got me thinking about the piecing I do for quilt backs. She says she prefers a solid back (her quilts are bed size) – I prefer the adventure of piecing (I generally make lap quilts). The challenge for me is to get away with a single length of quilt backing fabric and filling in the width with leftovers from the top, retaining something from the character of the top but at the same time creating a new piecing. Most of my back piecing involves a wide strip, although occasionally I’ll do a block of some sort surrounded by backing fabric – it depends on just how much backing fabric I actually have to work with!

Here are some quilt backs:

#1 – This is the latest quilt (Improv Quilt) – a strip/block because my strip wasn’t long enough and I fortunately had just enough backing fabric to border the strip converting it to a block.

Improv Quilt – Back

#2 –  An opportunity to try some flying geese. The original blocks were all in shades of indigo but I decided to insert one gold triangle in each and it made a huge difference to the strip.

#3 – From the red/black/white strips quilt. The quilt top looks like three Venetian blinds with a red background. The grey backing reflects the fabrics used in the piecing from the top, with the red accents.

#4 – This back was for the Starburst Quilt: I had no fabric leftover from the quilt top so I decided to use  other indigo fabrics highlighted with the turquoise and green elements.

#5 – The inspiration for this quilt back came from a quilt by Weeks Ringle – it backs the Pick-Up-Sticks Quilt:

#6 – This is the back of the Medallion Quilt: I had just enough of the border fabric leftover to create these four mitred blocks. I decided to rotate them rather than keep them all facing the same direction. Spaced them out, offset top to bottom, with backing fabric because I had a lot of it.

Quilt Back

#7 – This back is from the Grey-Yellow Quilt: I had a lot of half-square triangles left over from the front. I decided to array them as a spiral. The panel is offset top/bottom, and left/right. My quilts are all modern quilts – they need asymmetry to look “right”.

#8 – This back is from Improvisation #6 – Asian fabrics, drunkard’s path quilt. I had several slightly smaller blocks left over. I decided to do a more conventional drunkard’s path layout with single complete circle near the top of the strip.

#9 – The back of the Asian Strips Quilt: I did the piecing of the on-point squares, added the filler and realized I still needed border/sashing to offset the insert strip from the backing fabric.


Obviously I have many more quilt backs I could showcase here, but these are enough to illustrate how I see a quilt back. All of my quilts are “double” quilts – they can be used either side – for me, that’s part of the challenge/adventure of improvisational quilt making.

Regia Pairfect #2

Schachenmayr, the company that makes Regia sock yarn, has had for the past few years a line called “Pairfect” – designed to created a patterned sock without any decision-making. I tried it when it first appeared and found it boring to work with – very dull patterns. This season the variegations looked like they’d be more interesting with clearly different cuffs, heels and toes.

Finished this pair of socks (#2) last evening:

Regia Pairfect in Blue

Still just as boring to knit – no decision-making required – the yarn for the two socks is marked with a length of yellow yarn (intended to be discarded – or saved for another project). When making the first pair using the yarn a couple of weeks ago I changed up the design but then had to do quite a bit of reconnecting to be able to complete the socks.

This time I decided to follow the yarn. It knits up nicely but the part of the sock-making that I enjoy is deciding what colours contrast with my variegated yarn and where to insert contrasting strips, whether to change the heel colour, maybe even a third colour for the toes! So even though the variegated design changes and the repeat is a long one, there’s no creativity in knitting these socks.

If you’re not an adventurous sock knitter then you’ll love this yarn because it does knit up a respectable patterned sock. I’m not going to use it again.