On Deck 2

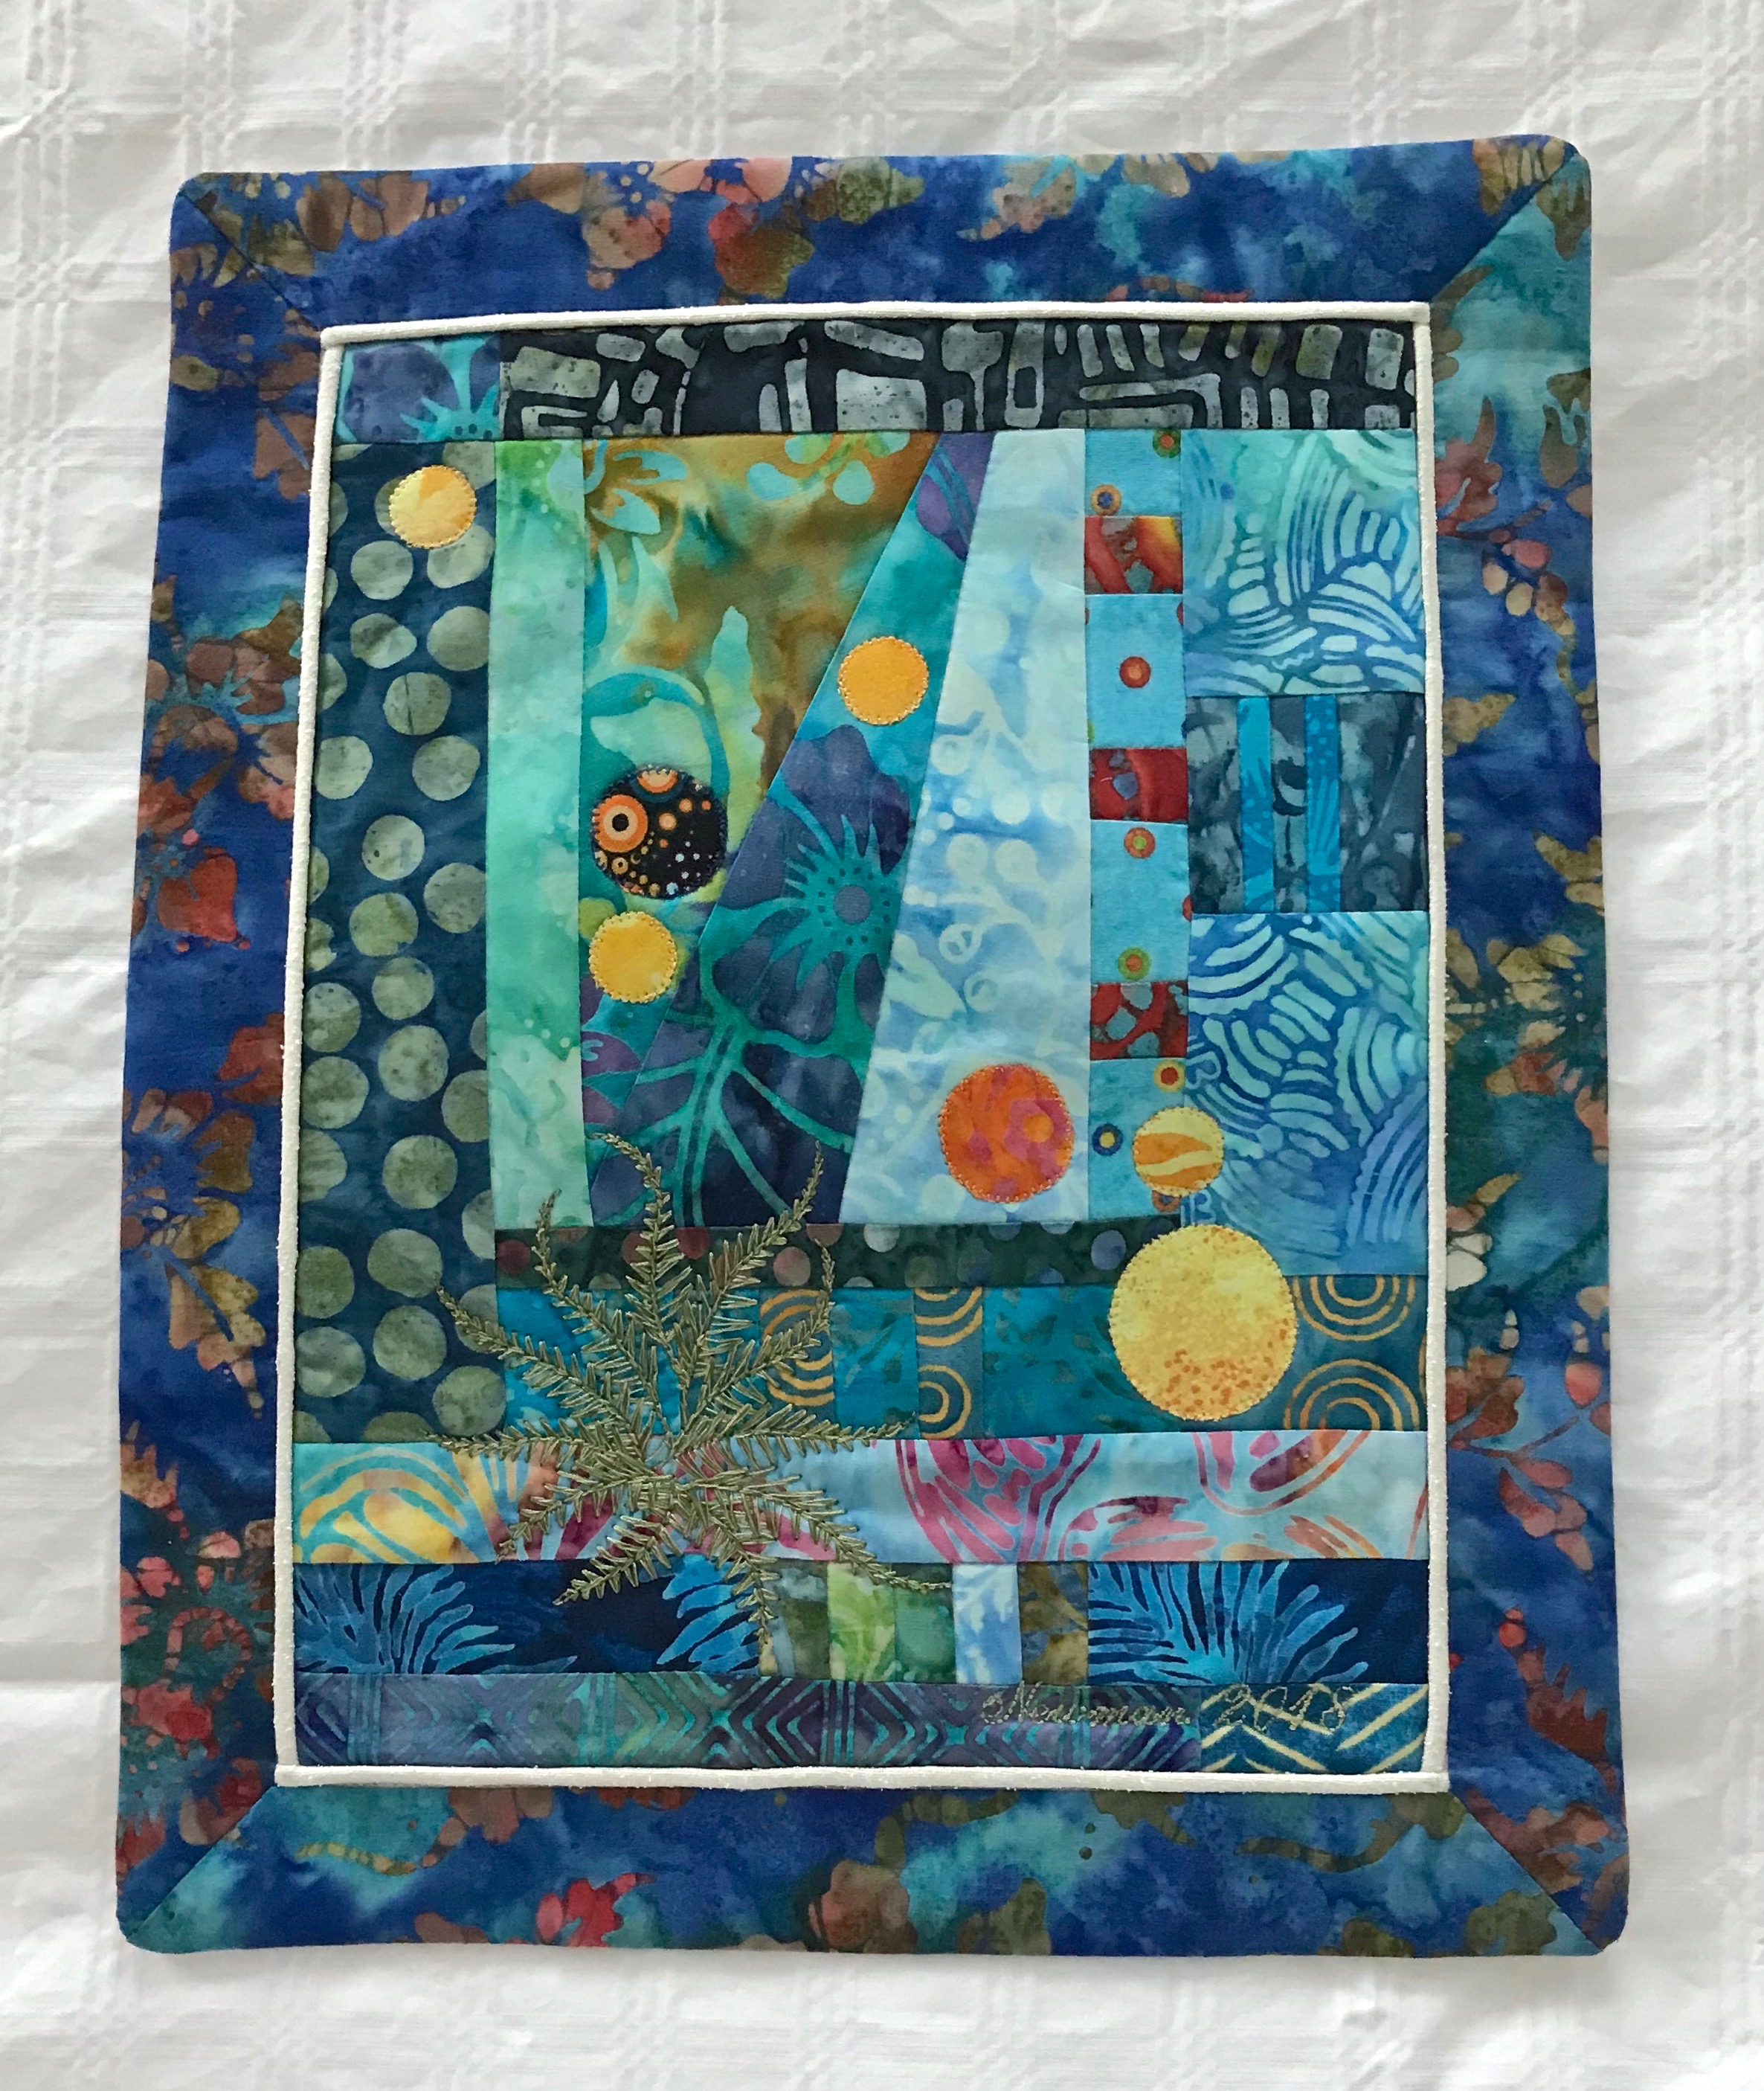
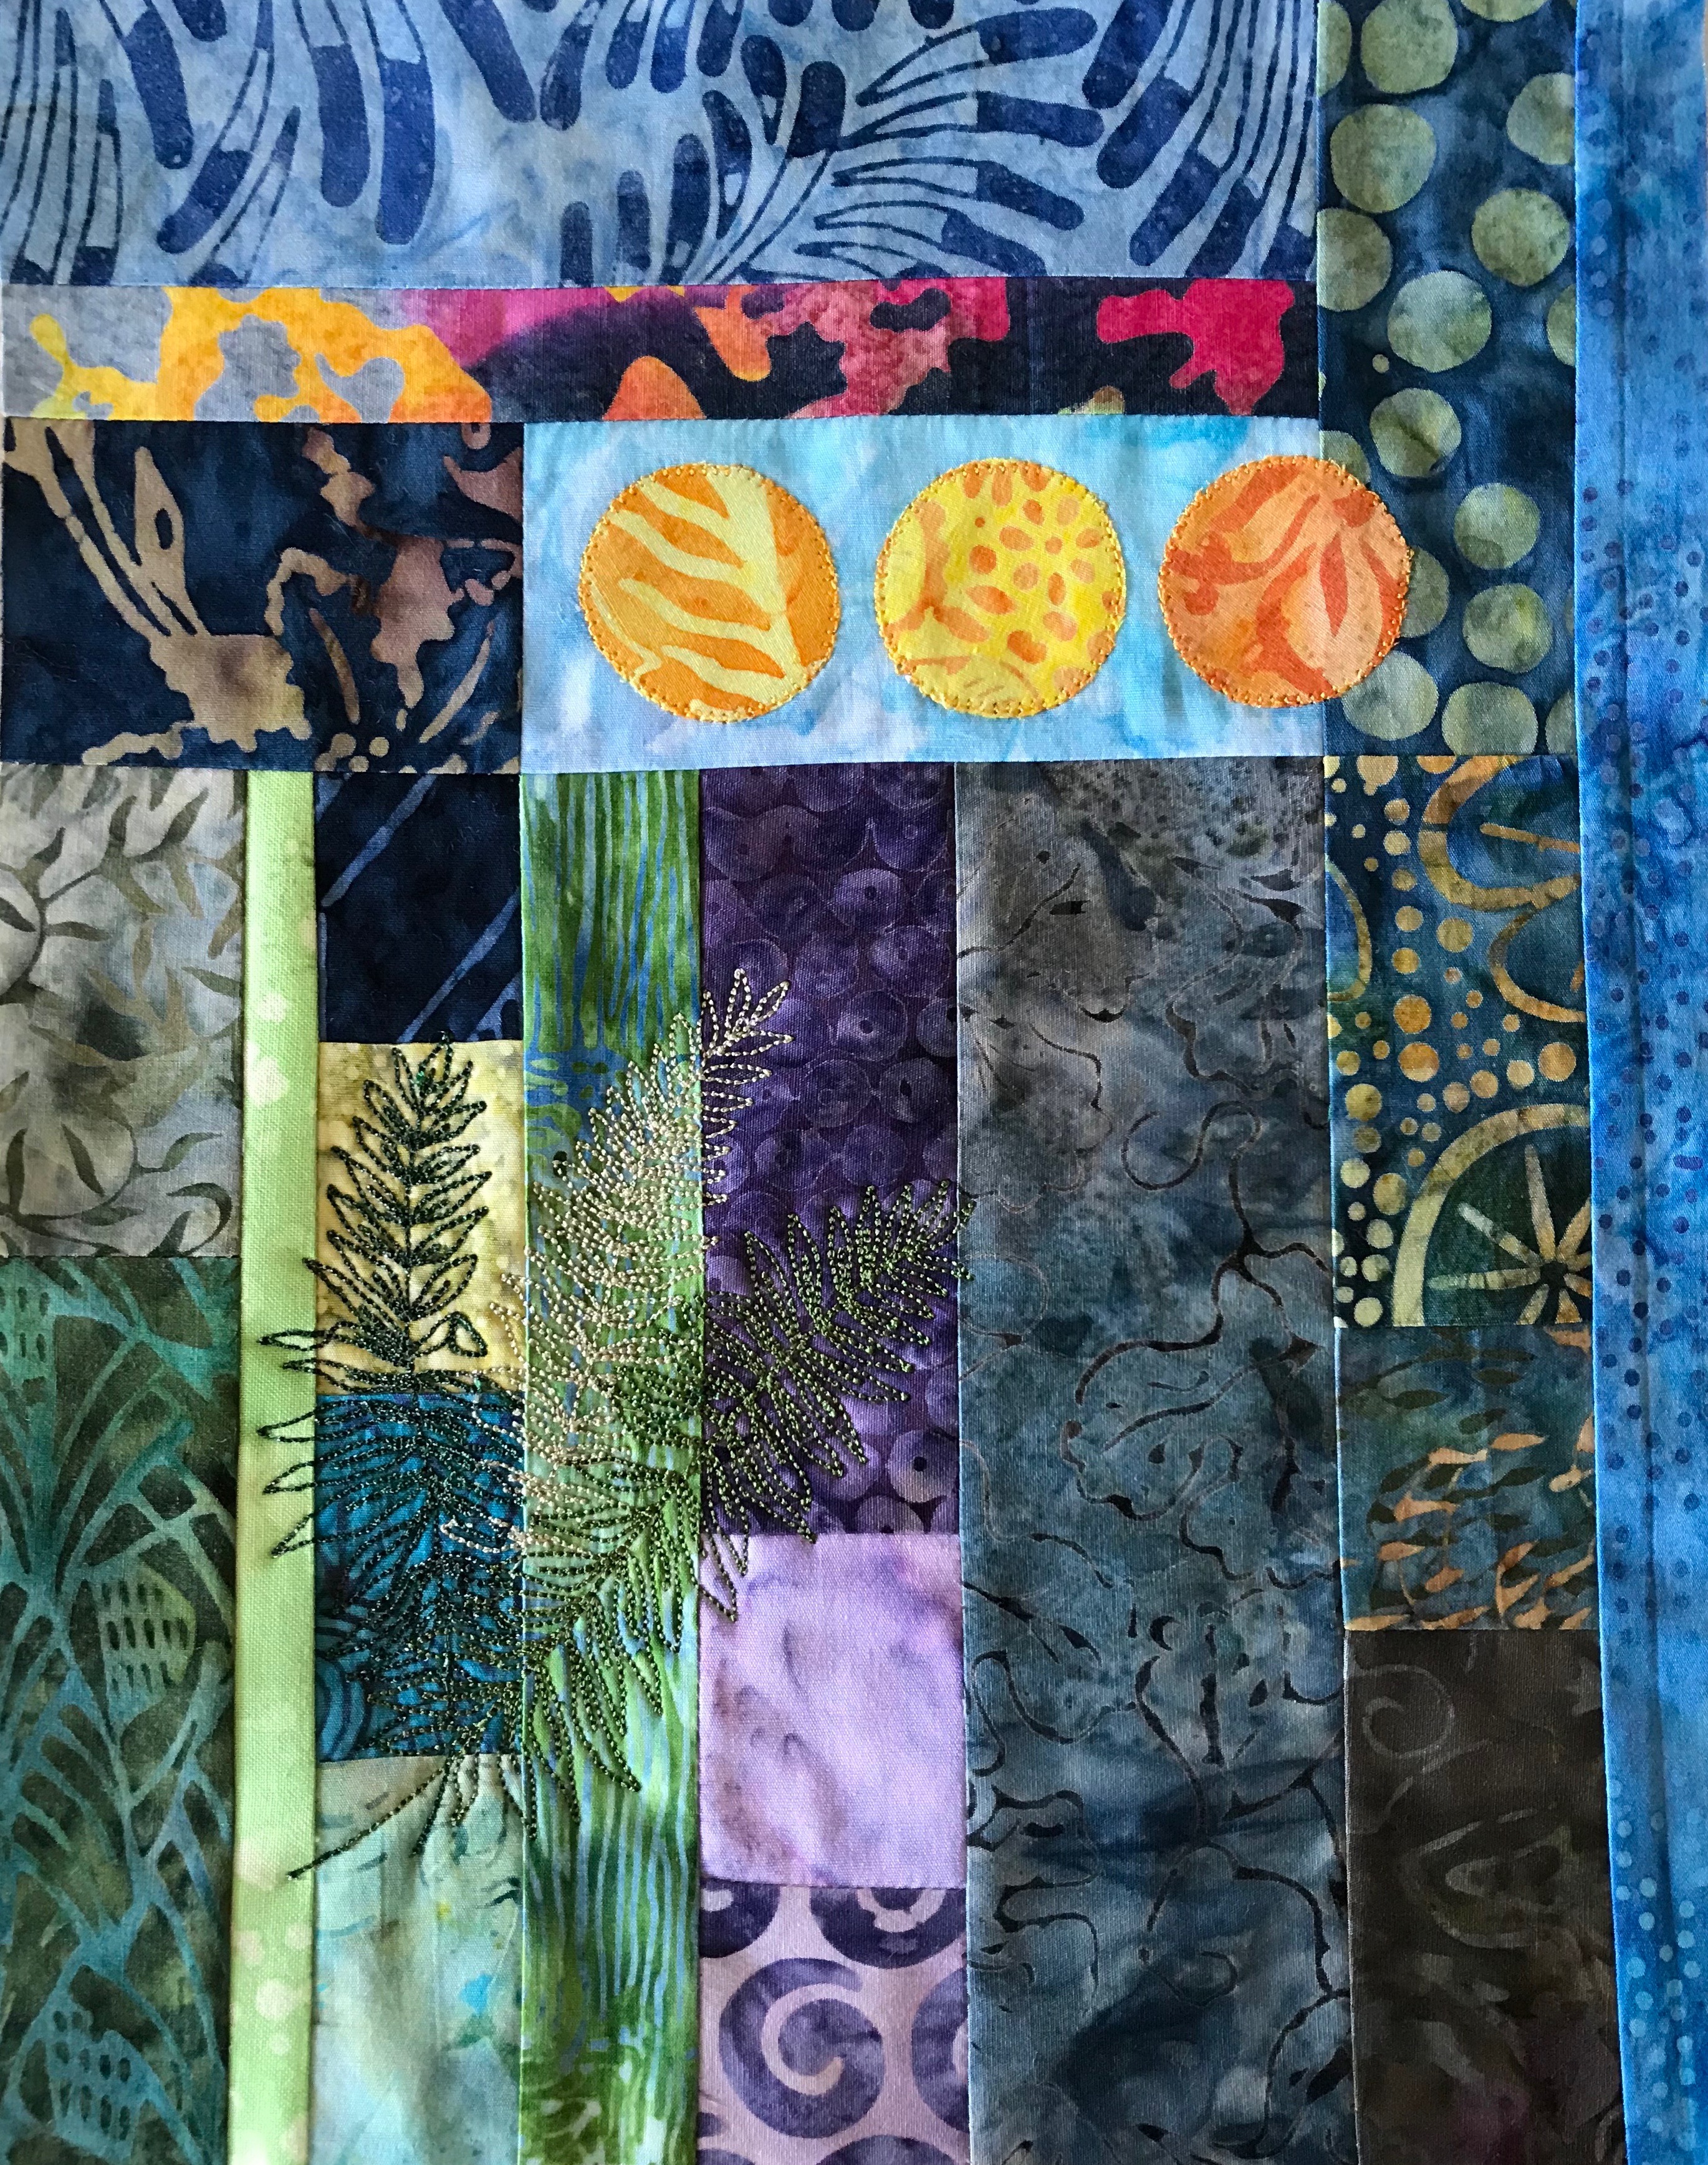
Today: I added a medium weight woven fusible interfacing (which doesn’t seem to have “fused” – oh well – I’ve stitched it at the edge and around the “finished” image lines), I finished stitching the water, added some darker thread strategically to the headland to give it more depth, did a bit of sewing in the sky, just enough to bring out some clouds.

On Deck 2

Now I need to plan out the windows (the decking is there – I’ll make it more plank-like with permanent markers and stitching with dark thread). The windows I have to think about, so that’s for tomorrow – I need to let that next step percolate and see what ideas emerge in the morning.

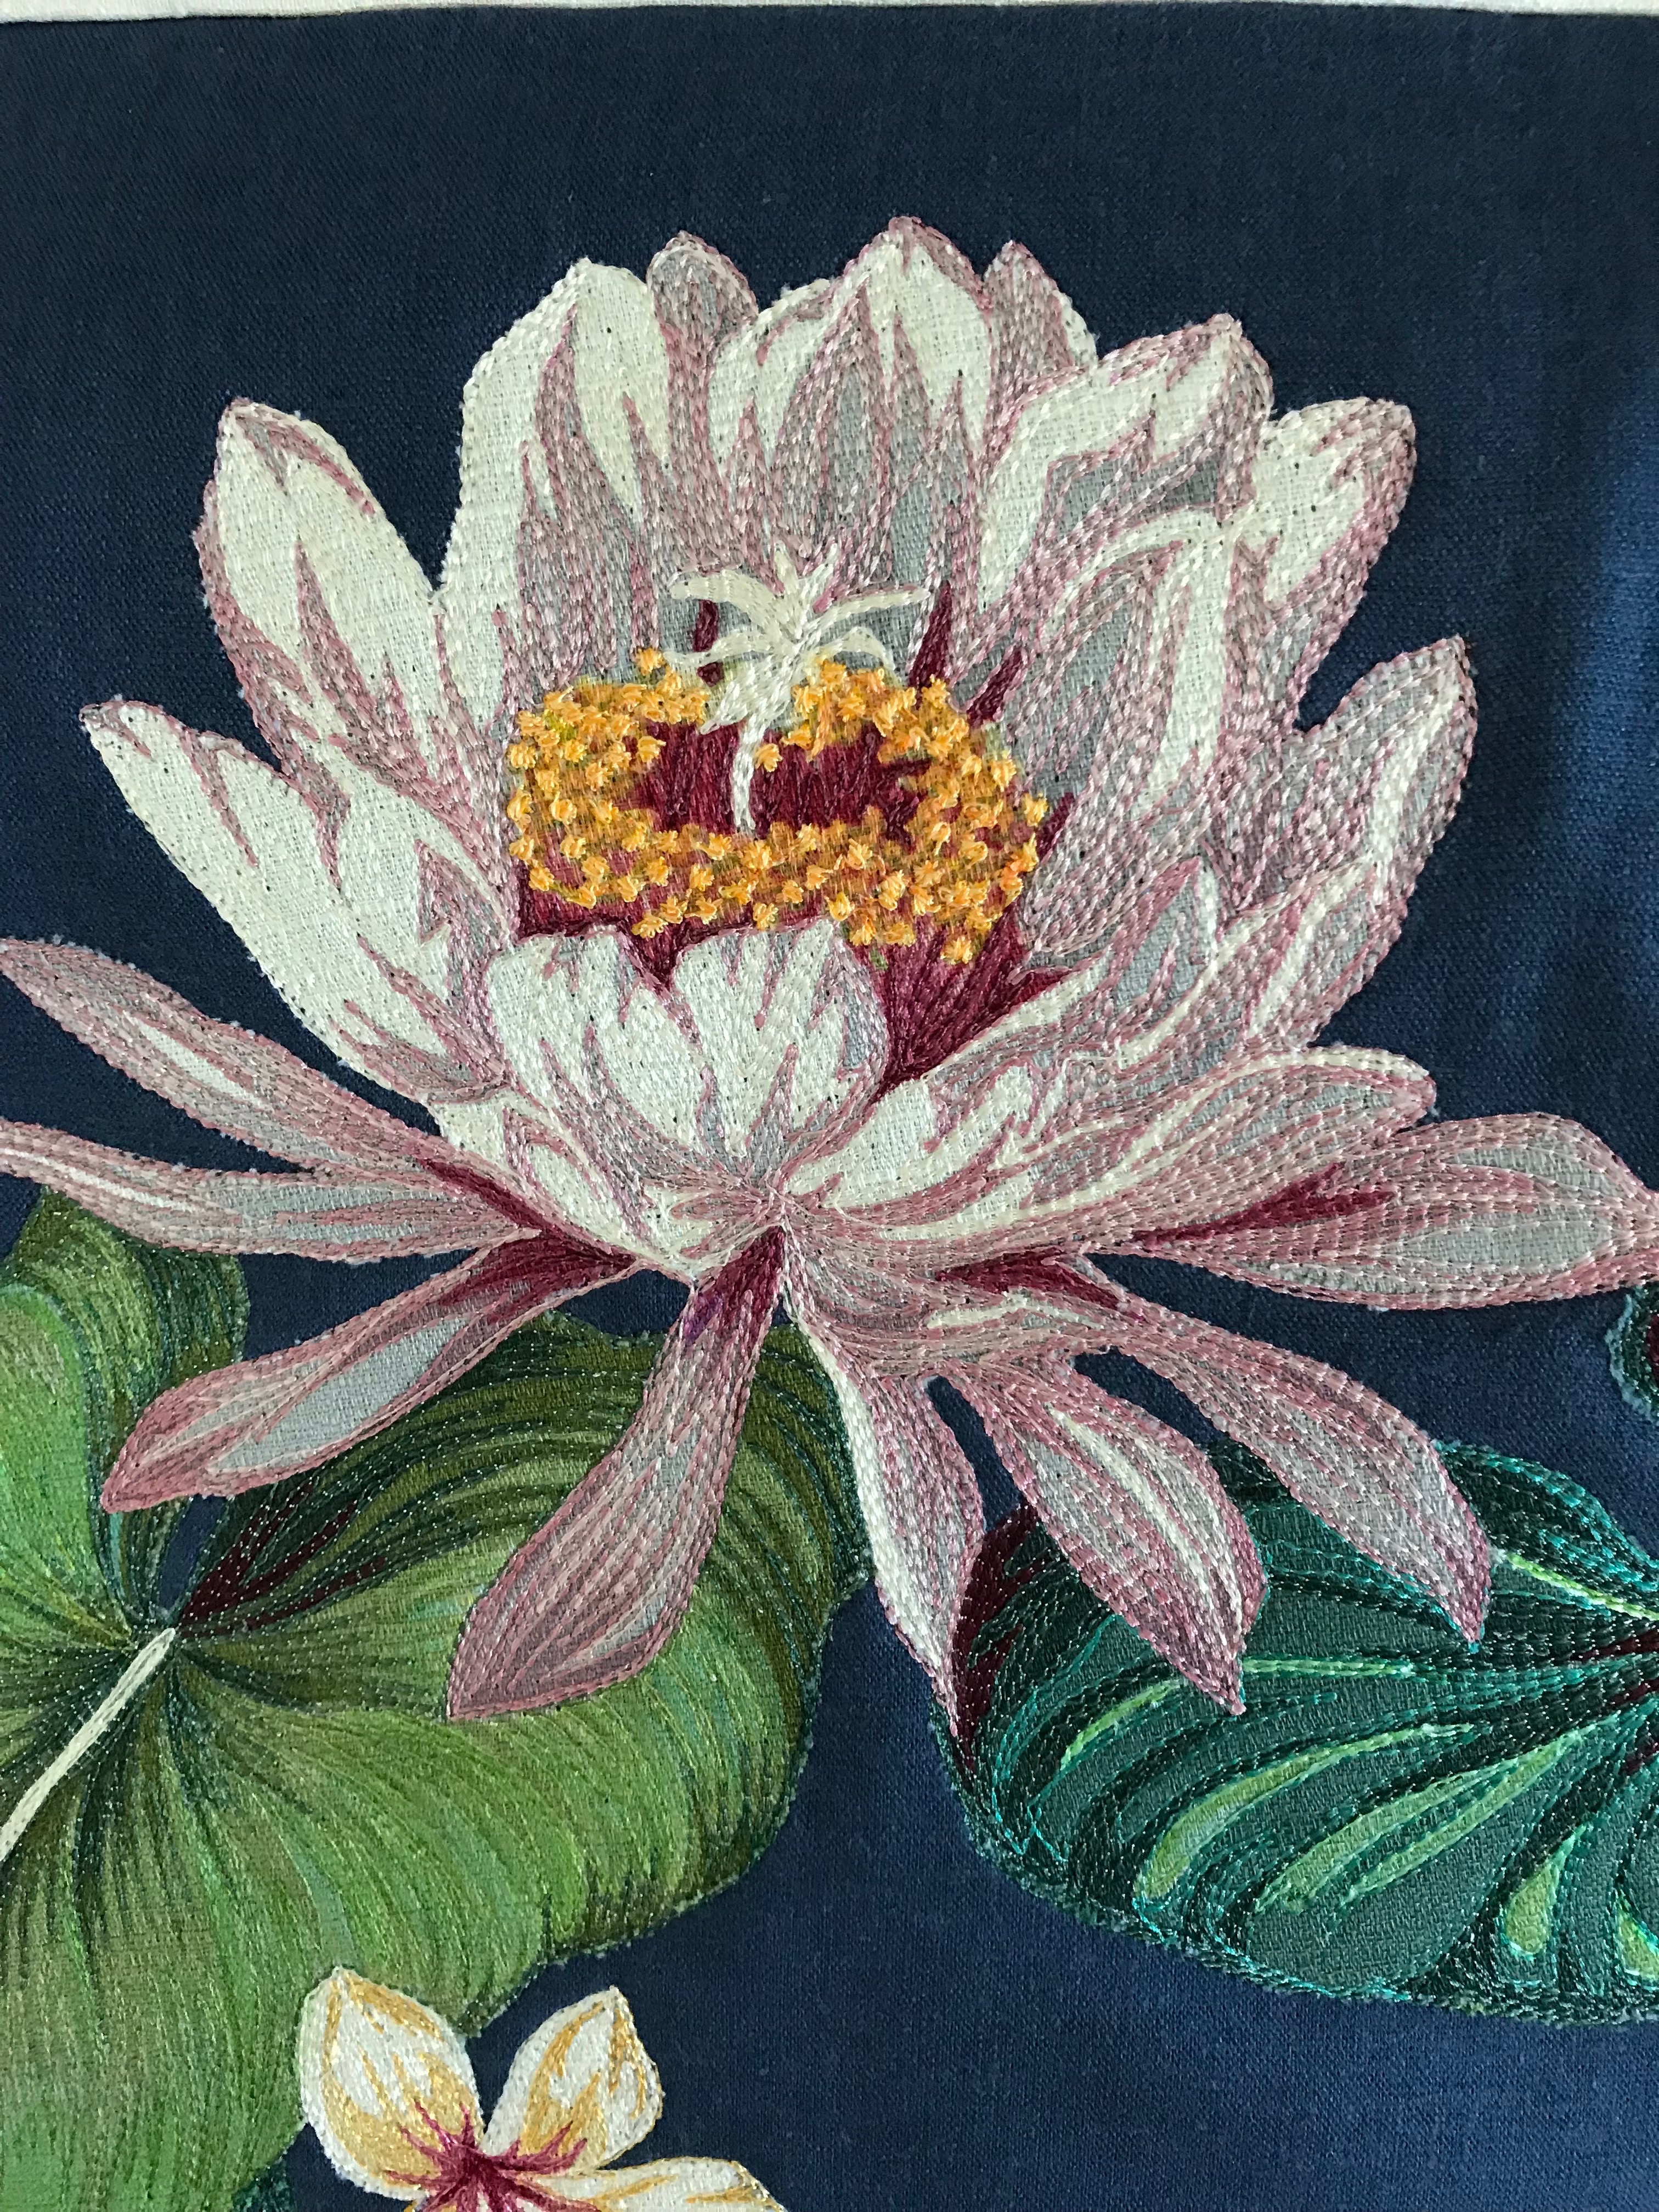
Yesterday I visited my friend Marlene – her  Oriental Poppies were in glorious bloom (it hasn’t rained here for a few days although it’s raining today so I imagine I caught the flowers at just the right moment).

Oriental Poppies

The petals just glowed! Simply wonderful. There are lots of buds still to open so she should have more flowers after today’s rain has knocked the petals off the present ones.

I tried, unsuccessfully, to grow oriental poppies both in the garden beds and in my container garden at the townhouse, not enough direct sunshine. I never got much of anything. Marlene’s have been growing in that same location at the front of her house forever – close to 50 years, I’d guess.

I’ve given up gardening altogether (except for a few phalaenopsis and an occasional amaryllis indoors) – my balcony faces north-east – right now I’m getting the sunrise coming in my living room windows and on my deck but the sun’s completely moved on by 10:00am – not enough direct sun for anything other than geraniums. I wanted to grow hibiscus – I brought two potted hibiscus with me when I moved into the apartment, but once on the balcony I stopped getting flowers – just not enough sunlight.

On Deck 1

Melanie MacNeil, a blogger I follow, had this to say the other day:

…it’s hard to know where to start. I have lists of things done and lists of things doing and lists of things to do! I have a mess in my studio, the product of having several projects going at the same time. What should I do first? What should I write about first?….

It’s like that with the textile art pieces — where to start…in this case with an analysis of the photo and deciding what to include and what to leave out, how close a representation / how abstracted…then sketching the image outlines and proportions on the muslin, choosing fabrics (buying more when you don’t have exactly the right print for the job like I did yesterday), cutting pieces to fill the spaces, adding fusible web to the back and pressing them to the muslin using the underlying sketch as a guide…start stitching at the horizon to make sure those first lines of thread painting are horizontal, next moving more freely to give the stitching some flow.

On Deck

That’s as far as I got today. I didn’t add a fusible interfacing to the back of the muslin – that was intentional, but I can see already the little stitching I’ve done is tightening the fabric so the first thing when I resume will be to add a medium weight woven interfacing to the back of the muslin to provide some stability to the panel.

The women is not fused to the panel – adding her is the final step, but I wanted to see how my proportions were beginning to shape up and I think I’m in the ballpark. She’s a bit darker than I’d like but I will lighten her with the thread I use when I add detail to her. Also where she’s standing behind the windows of the deck is shaded and that will help with her colour tones.

So I’ve started….I have a running list in my head of how to proceed – I’ll carry on thread painting the water, then the sky (wouldn’t you know I gave away my spool of white/aqua variegated rayon embroidery thread — I’ll have to use some of both colours). Still haven’t worked out how I will construct the window frames — they were painted white but appear a rather dark grey/almost black with whitish highlights where the light hits the edges, they’re graduated top to bottom so I will need to use a lighter grey and create the ombre with crayon or markers or both. I’m going to have to play a bit with making the railing appear rounded at the top – single rows of thread in increasingly darker colour, perhaps?

On Deck – 2008

The piece is underway. It will start to move along now.

Abstracts From Scraps – IV

The last one is just finished (except for the sleeve on the back for a rod/dowel to hang the  panel).

Fern 2

I’m happy with the results (in spite of the imperfections that pop-out at me). One thing for sure, in future I will use a fused stabilizer to keep the panels from rippling and then use fusible web to adhere batting to panel. It’s quite a bit more work, but I think the final panel will be the better for it.

Fern 1

Fern 2

Fern 3

Fern 4

Fern 5

Now I’m ready to move on.

Fern 3 – Done

OK, here’s the 4th panel completed with piping and binding/frame. I’m getting better at squaring the corners with the mitre meeting the point (some of the appearance of “skew” is my picture-taking skill with the iPhone – quite difficult actually to balance the position of the phone)

Fern 3

So that leaves just one fern panel left to complete. I’ve stitched the piping on, next comes the frame/border, then the muslin backing. I’ve got to run a couple of errands now, then I’ll sit down and finish that last one.

Next on to the “On Deck”:

On Deck – 2008

My plan is to lighten the overall colour, remove the boats, and position the woman on the right. I captured the photo on a Caribbean cruise I took in 2008 – gracious, that’s ten years ago, now. The ship anchored for the day so people could enjoy the Cayo Levantado Beach off the coast of the Dominican Republic. I stayed on board and happened to see this scene  which reminded me of an Alex Colville image.

Fern 5 – Finished

Completed this panel yesterday – with piping and border/frame.

Fern 5

A friend looking at it commented that it reminded her of an underwater scene. I guess it does. Not intentionally done – I was just juxtaposing scraps of fabric and adding small bits of appliqué and embroidery to make a pleasing whole.

Two more to finish – my goal for today.

I finished this panel two days ago – with the addition of a couple of sequins and beads to complete it.

Fern 1

Hawaiian Flowers

I finished thread painting the Hawaiian Flowers (Plumaria, Anturium, Epiphyllium) yesterday. Today I framed the piece using an off-white piping made from raw silk and a batik fabric border.

Hawaiian Flowers

I’m happy with the thread painting. What I now can see is I should have backed the blue raw silk with some kind of stabilizer like “sewer’s dream” to keep it from stretching. The thread painting has kept the appliqué flat, but the blue background is problematic and at this point there is nothing I can do about it. [I will have to take apart the piece set up on the natural coloured raw silk separating the silk from the batting, fusing sewer’s dream to the back of the silk, then reattach the batting so that the silk will remain more stable when the thread painting is done.]

Hawaiian Flowers – Detail of Epiphyllium

The modified embroidery stitch I chose for the stamen anthers worked out nicely and the colour brightens the whole panel.

I learned quite a bit from doing this piece. Now to apply it to the second one (which I’m putting aside for the moment until I finish framing the Fern pieces.

First of the Abstract Wall Art Pieces Completed

Fern 4

I finished this piece yesterday, including the hand sewing – the border corners, the opening at the bottom where I turned the piece inside-out, the sleeve for hanging on the back.

At first I wasn’t sure I liked how it turned out, but the more I looked at it (and the unfinished panels on the cutting table) the more it grew on me. The raw silk piping brings closure to the pieced panel and the border fabric definitely declares that the piece is pink.

I’ve done the prep work on the other four panels – I’ve created and trimmed the piping, cut batting strips to fuse to the border edges so I can enlarge the panel (that’s because I trimmed the panel thinking I would only apply the backing with a hidden binding), cut backing muslin, and chosen border fabric for each. Hope to get to them later this afternoon.


Abstracts From Scraps – III

A fifth (and for now final) Abstract From Scraps piece — this one assembled from turquoise-ish scraps. I really have kept quite a few small scraps of fabric, boxes of them (all coloured coded: red/yellow/orange scraps, blue/green/purple scraps…). This is definitely a good way to use up a few of them.

Fern 5

I’m enjoying the process of selecting bits of fabric, piecing them (trying to use each fabric just once – although there are a few repeats where I decided to splice two fabrics in more than one spot), building a 10″ x 12.75″ block, then added a few appliqués, finally setting up and stitching out an embroidery.

For some reason, the “fern” seems to have worked quite well as a focal point for these pieces. I could see flowers, or other leaf shapes working quite well, too.

Anyway, this is it for now – although a grey/neutrals panel is kind of whispering to me. However, for hanging purposes 5 is probably a better number than 6, but maybe after I’ve finished the bark cloth appliqués I may come back to this idea and pursue it a bit further. Maybe….

Fern 1

Fern 2

Fern 3

Fern 4

Abstracts From Scraps – II

Just finished – the pink background wall art panel with appliqué and machine embroidery.

Fern 4

I added in a bit more pale fabric to lighten the whole, reconstructed the embroidery so it would be different from the previous two. All of the panels still need a signature which I’ll get to tomorrow. For now, that’s it. I did look at the turquoise fabrics but I haven’t pulled any from the boxes yet. I will probably do a fifth to fill out the set.

Abstracts From Scraps

Last week I started work on an idea I had for creating abstract wall art from fabric scraps. I pulled small pieces from the red/yellow scrap box, pieced them, added in a few soft blues/greens to complete the block (~10″ x 12″), added a few bits of appliqué, fused, then stitched them into place, added an offset machine embroidery of a fern.

Fern 1

The second piece uses predominantly blues with a bit of purple/green, three appliqué circles and, again, a machine embroidered fern.

Fern 2

The third piece uses green batik scraps with a few appliqué circles and a fern machine embroidery in the bottom left.

Fern 3

Those three are completed – now I need to decide whether to finish them with a quilt binding, or an invisible binding, and a backing fabric (probably natural muslin, of which I have quite a bit in a drawer).

I’m about to assemble a fourth piece in shades of pink with a few other accent colours. I can see from the photo I need to interject a few more light elements, particularly in the lower right, to make this background work. Again, there will be some small bits of appliqué and another “fern” embroidery to complete the work.

Fern 4 – in progress

I may still do a fifth using turquoise scraps….

[These wall art pieces are an extension of something I started with a single piece a year ago “Dots” – where I pieced scraps, then added a bit of appliqué. This time I seem to be focusing on colour as an organizing principle.]

I also want to do a few pieces which I refer to as “faces” –

A Very Sad Face

Baboon

The Scream

Definitely A Cat

For these pieces I plan to print the images on fabric, create a background, carefully cut out the essential “face” elements, appliqué them in place and thread paint the background a bit. I see these as relatively small pieces — ~9″ x 12″.

I’m still working, as well, on the bark cloth floral cut-outs. I hope to make progress today on the flowers. One thing I’ve learned (I guess I really knew it but didn’t act on it) is I need to have a similarly coloured bobbin thread to have the thread painting come out successfully! Otherwise, when I use a white embroidery bobbin thread, it shows and I’ve been forced to carefully darken the stitching with permanent markers. I finally made the switch when I did the “fern” pieces above. I took the time to set up quite a few bobbins filled with different coloured rayon thread so the embroidery and thread painting looks like I want it to without bits of white showing.