Blue Flowers

Blue Flowers

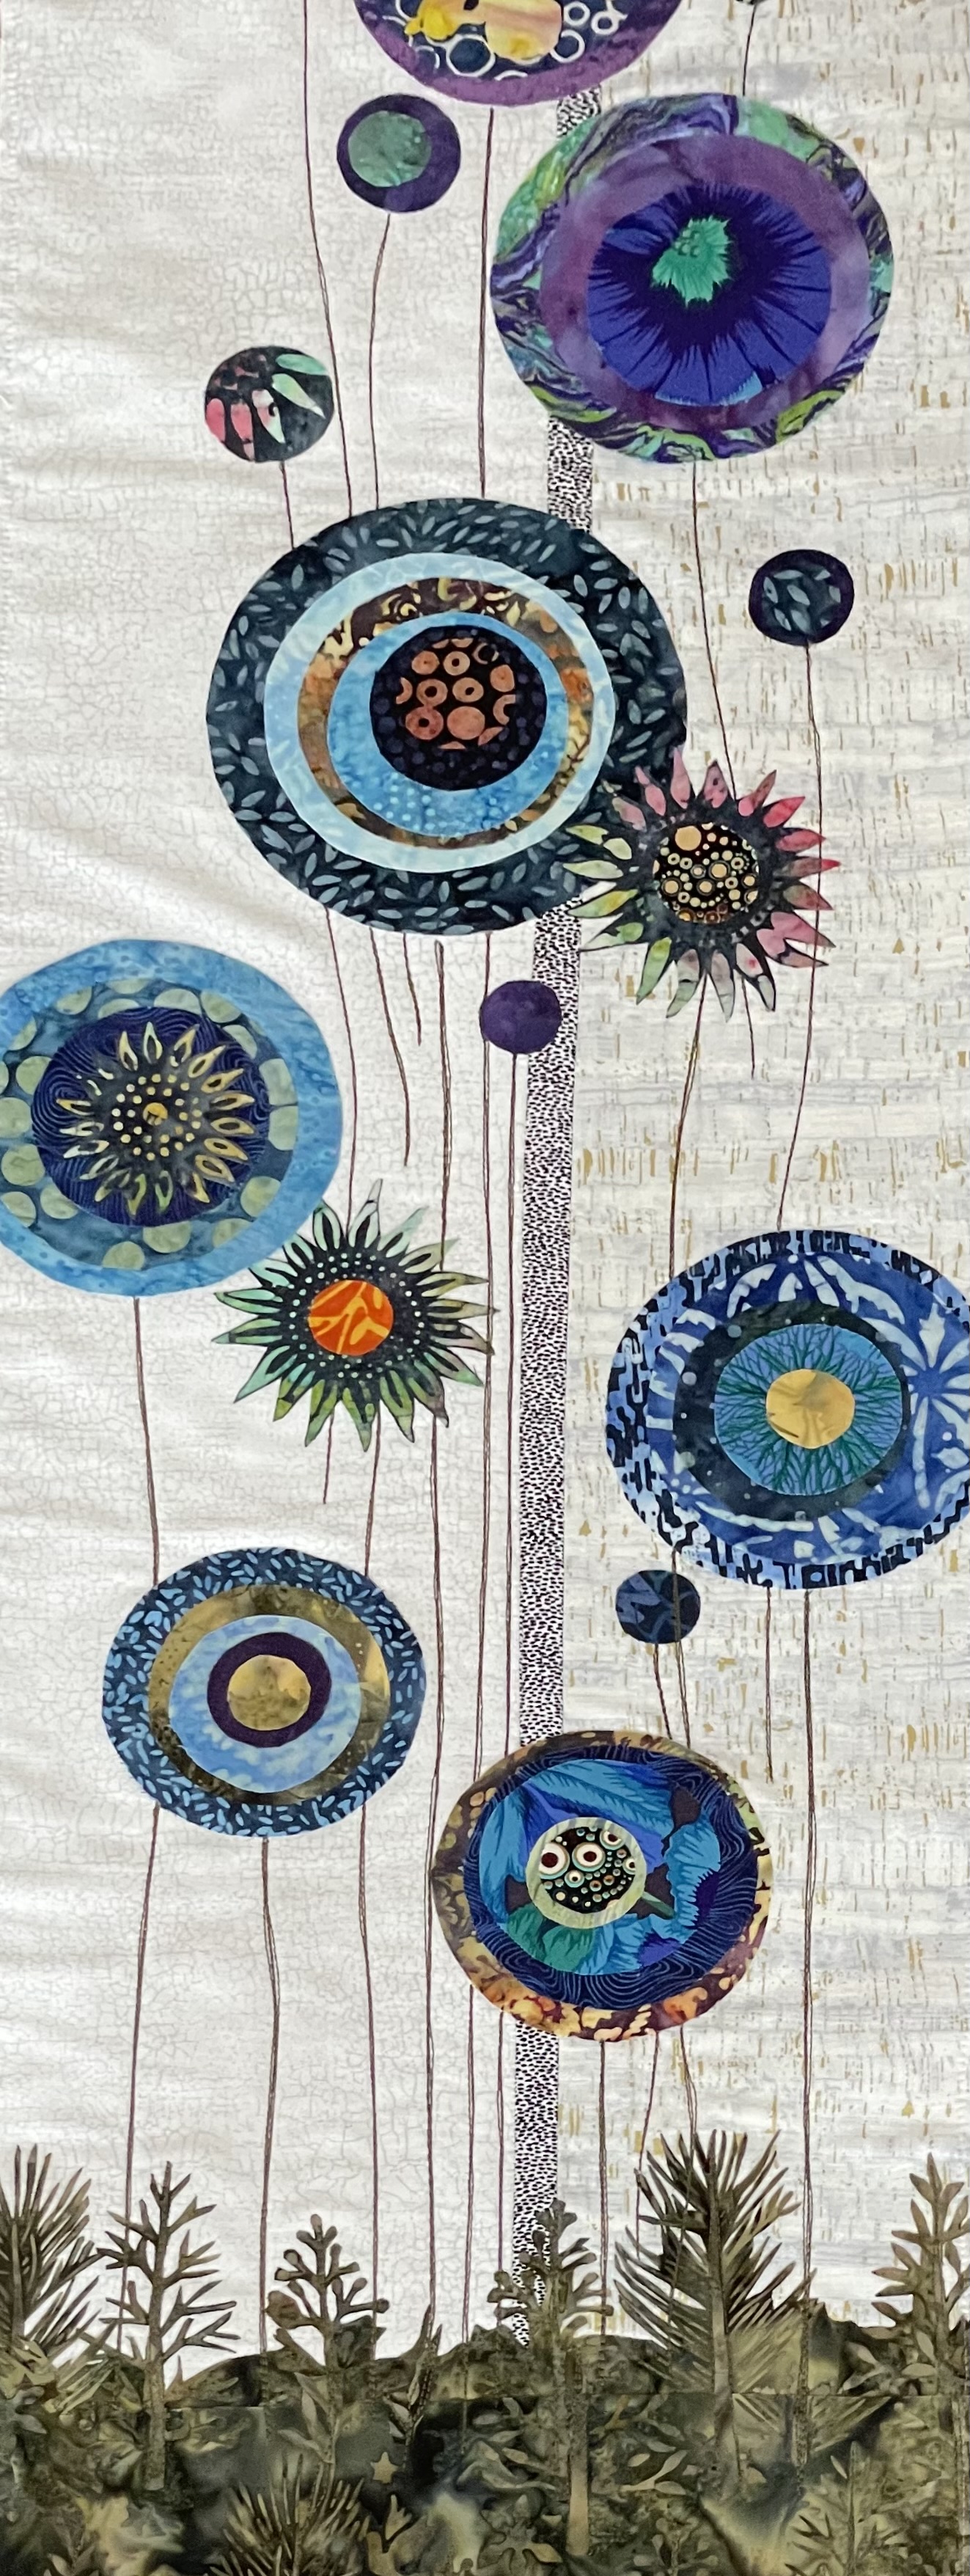
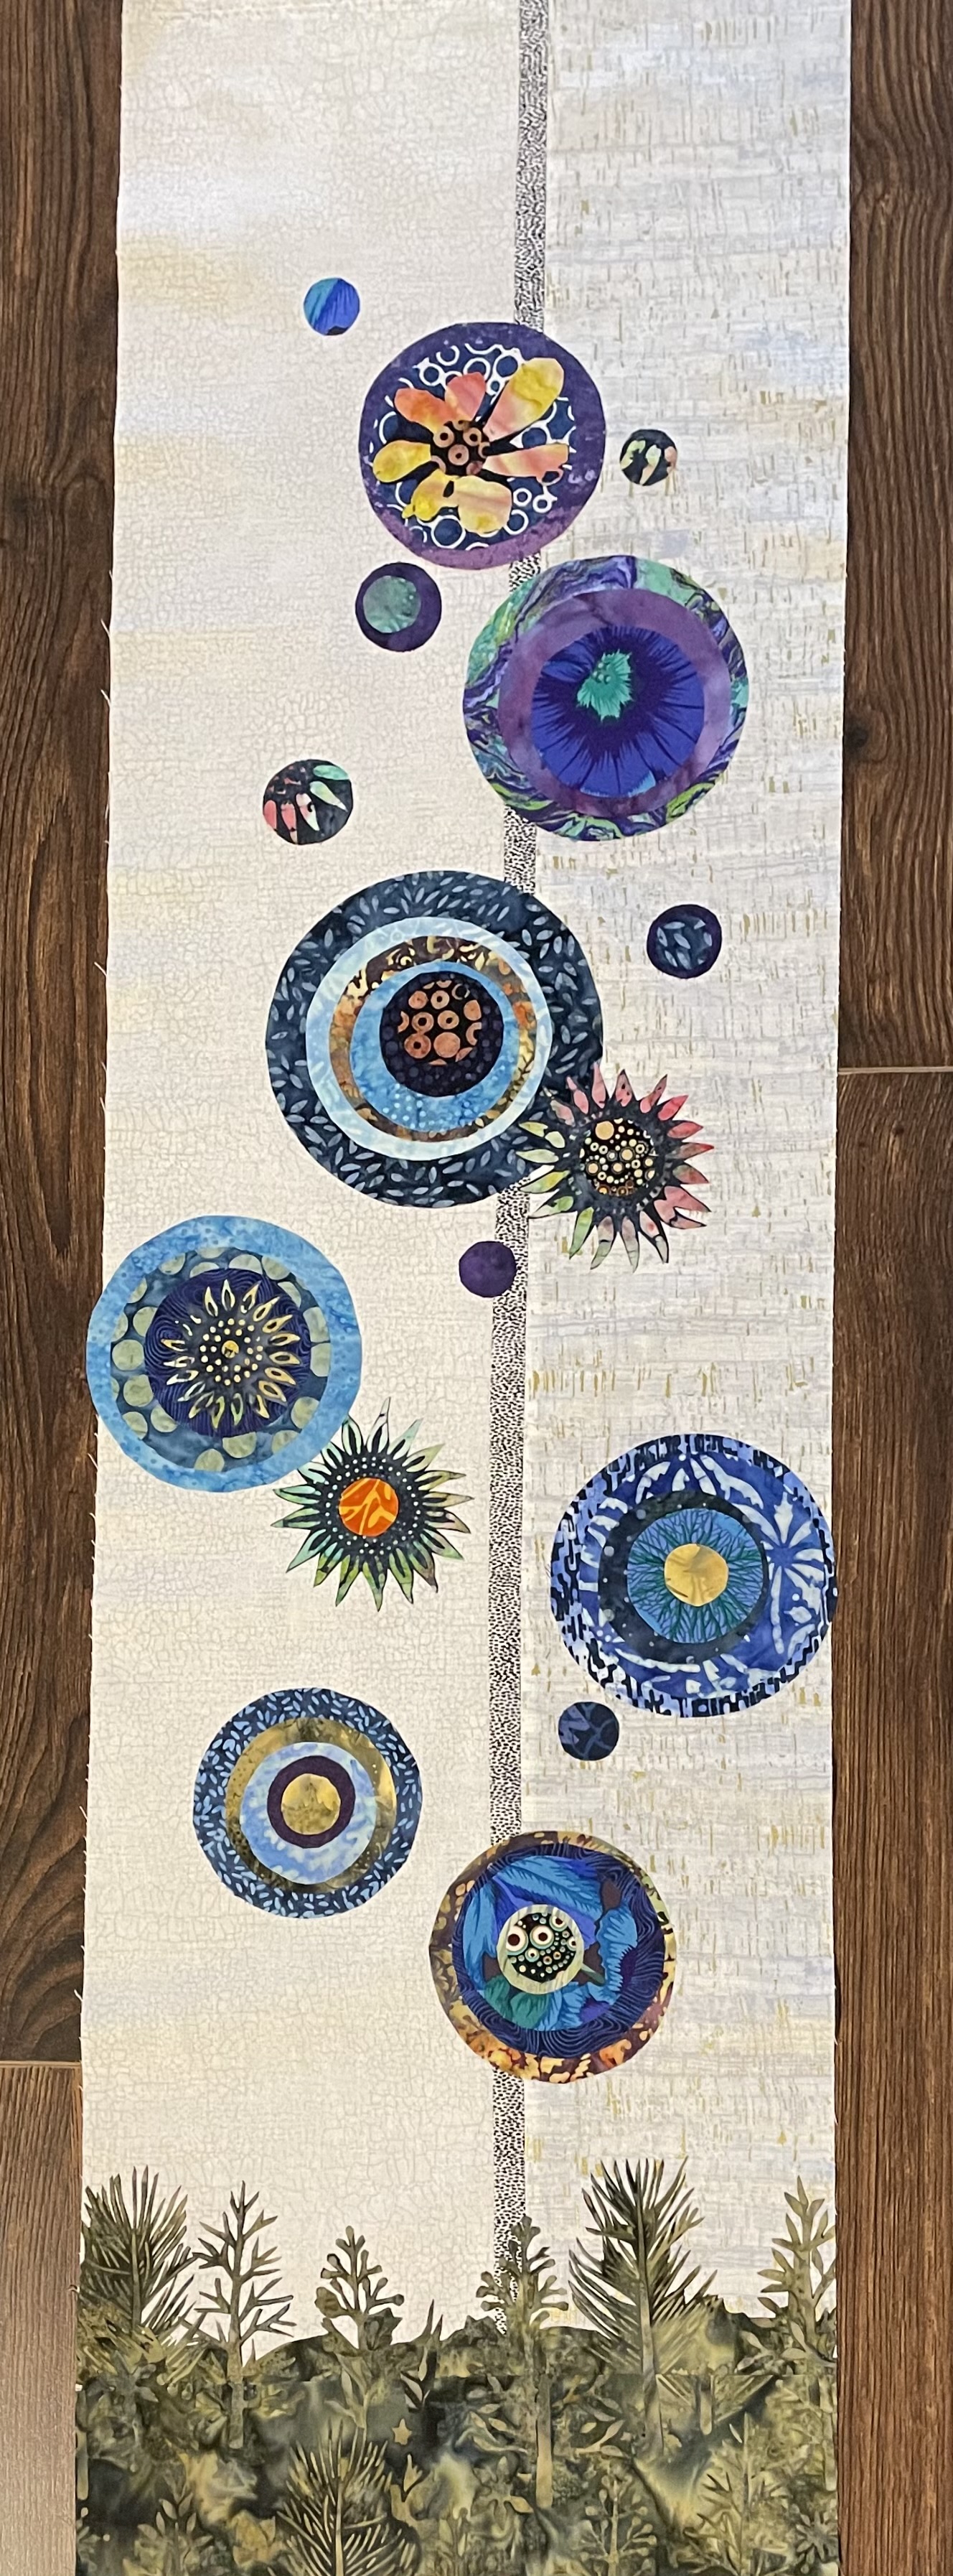
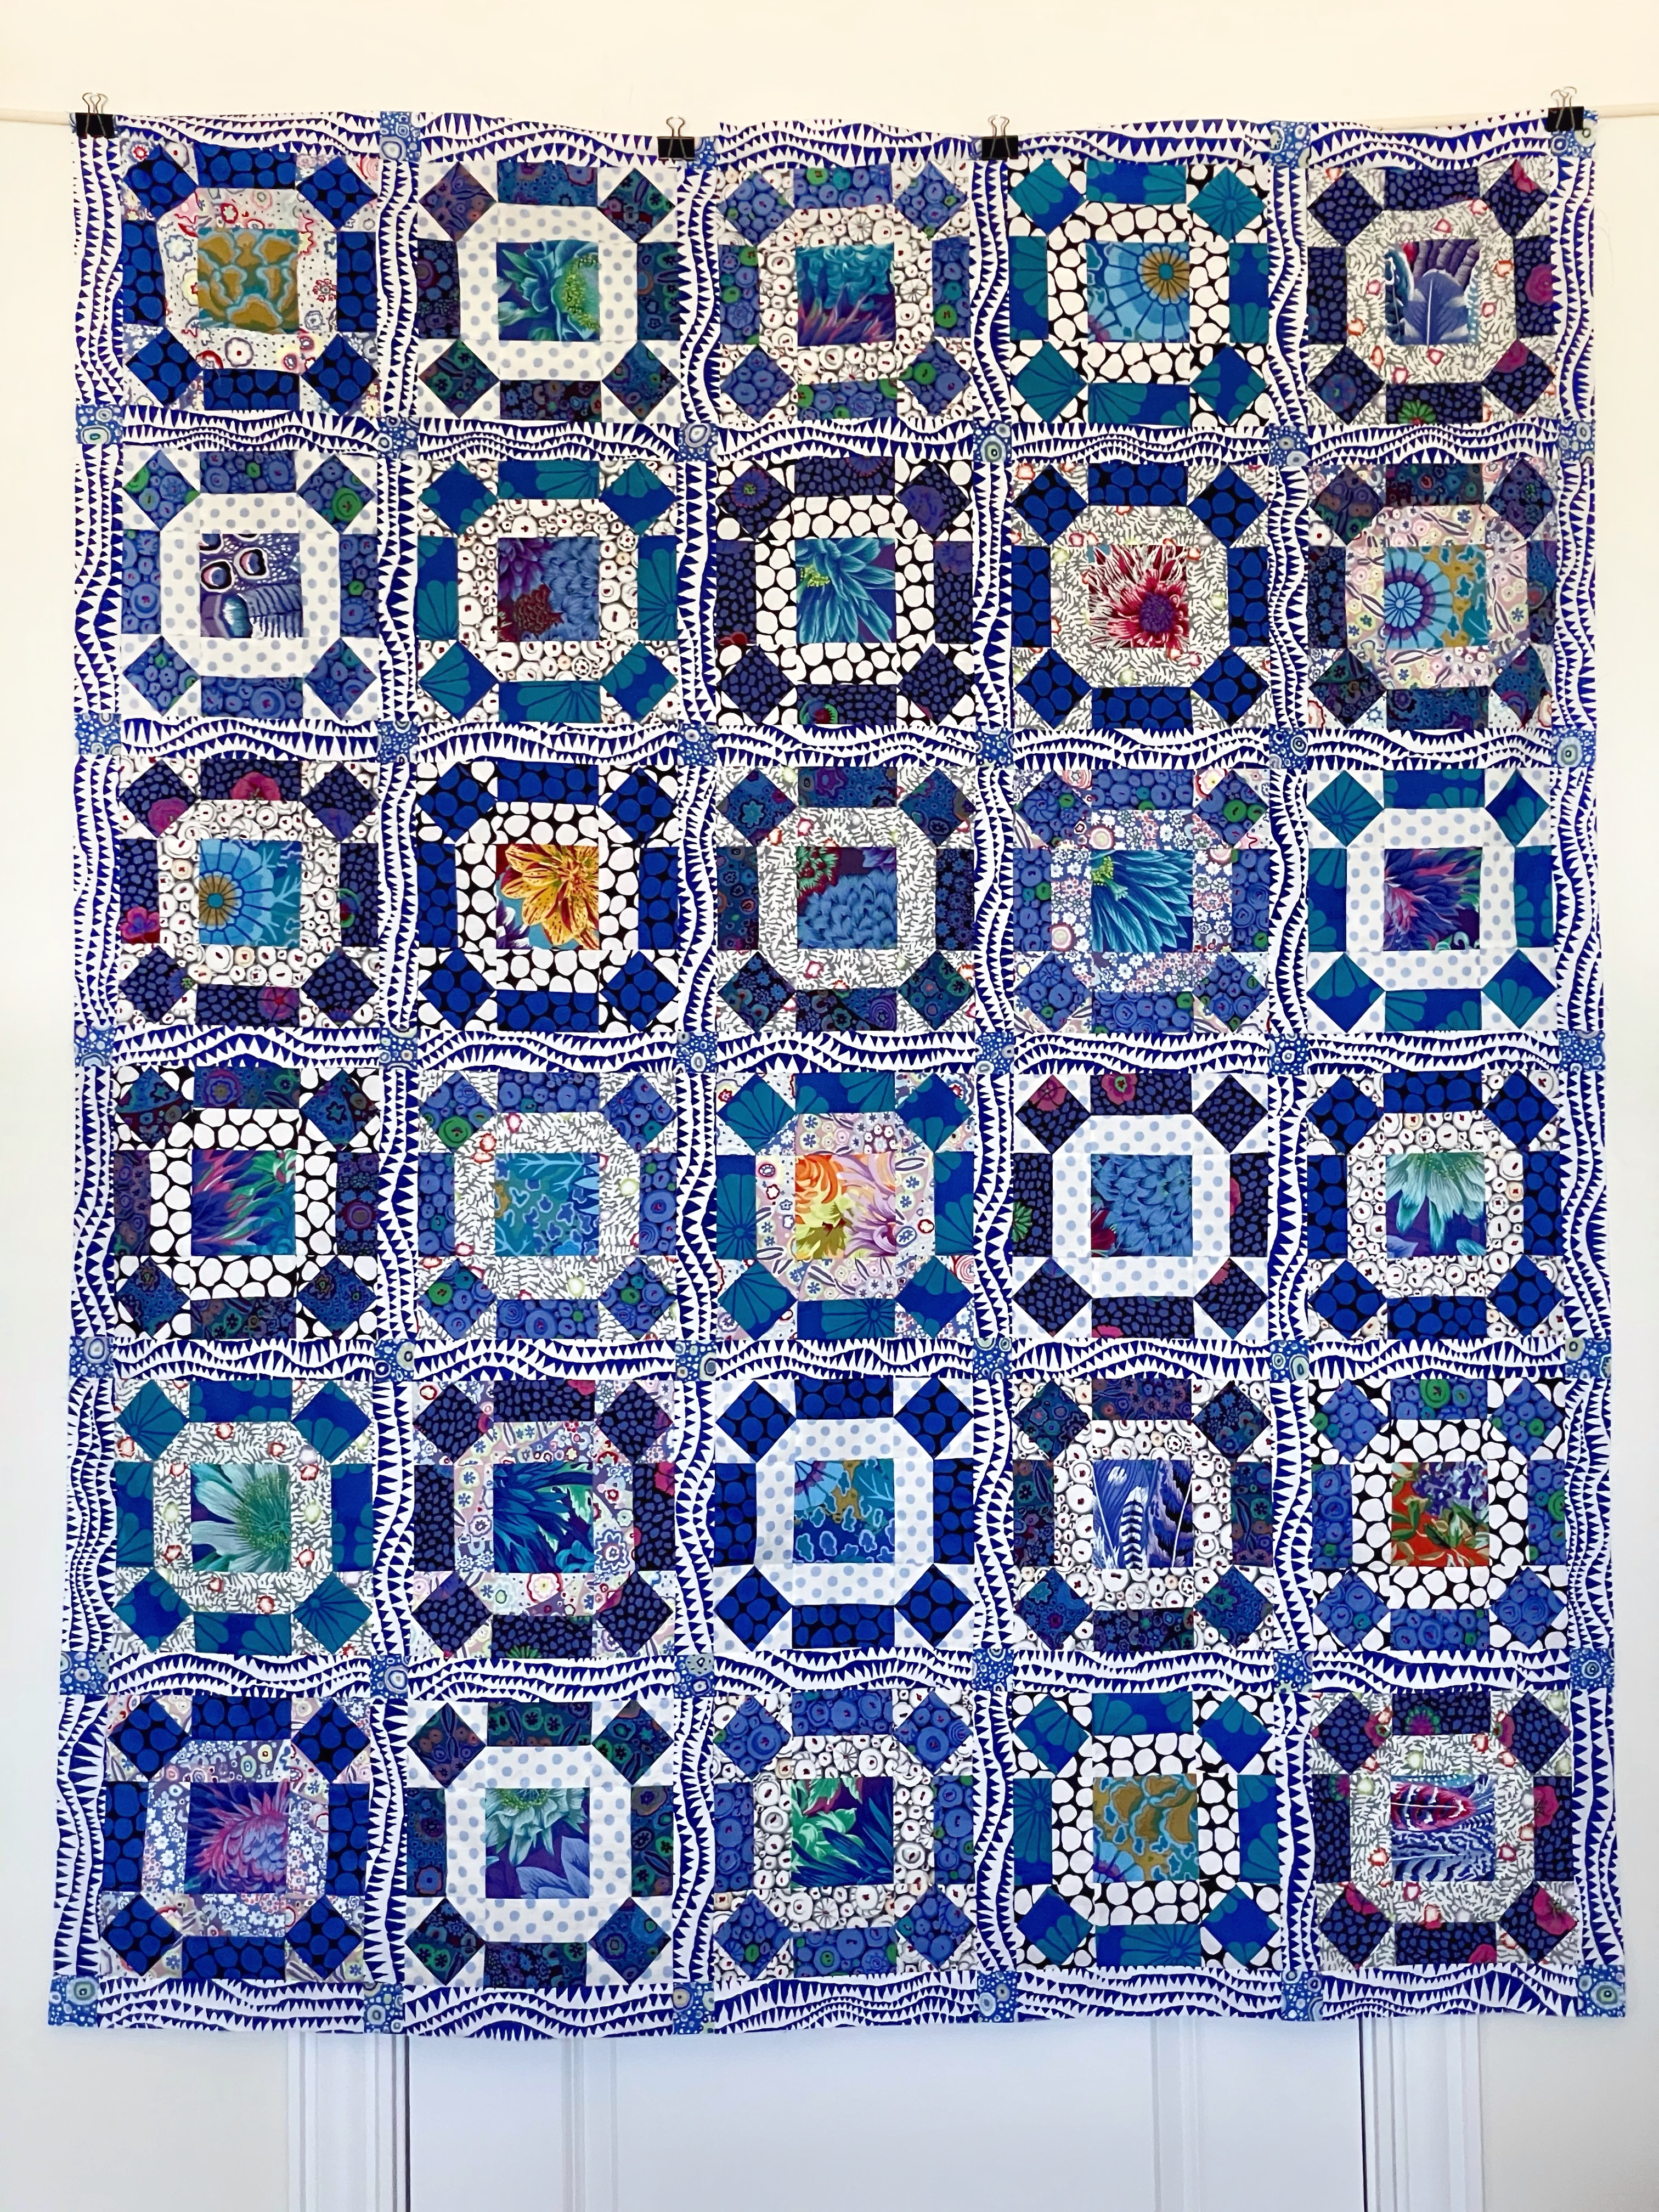
Just finished (well, I’ve still have to hand stitch the hidden binding in place). It took several days to do the thread painting – using decorative stitching around each fabric circle, embellishing the flower centres with embroideries, adding leaves, and stitching the detail in the foreground at the bottom of the piece.

Detail

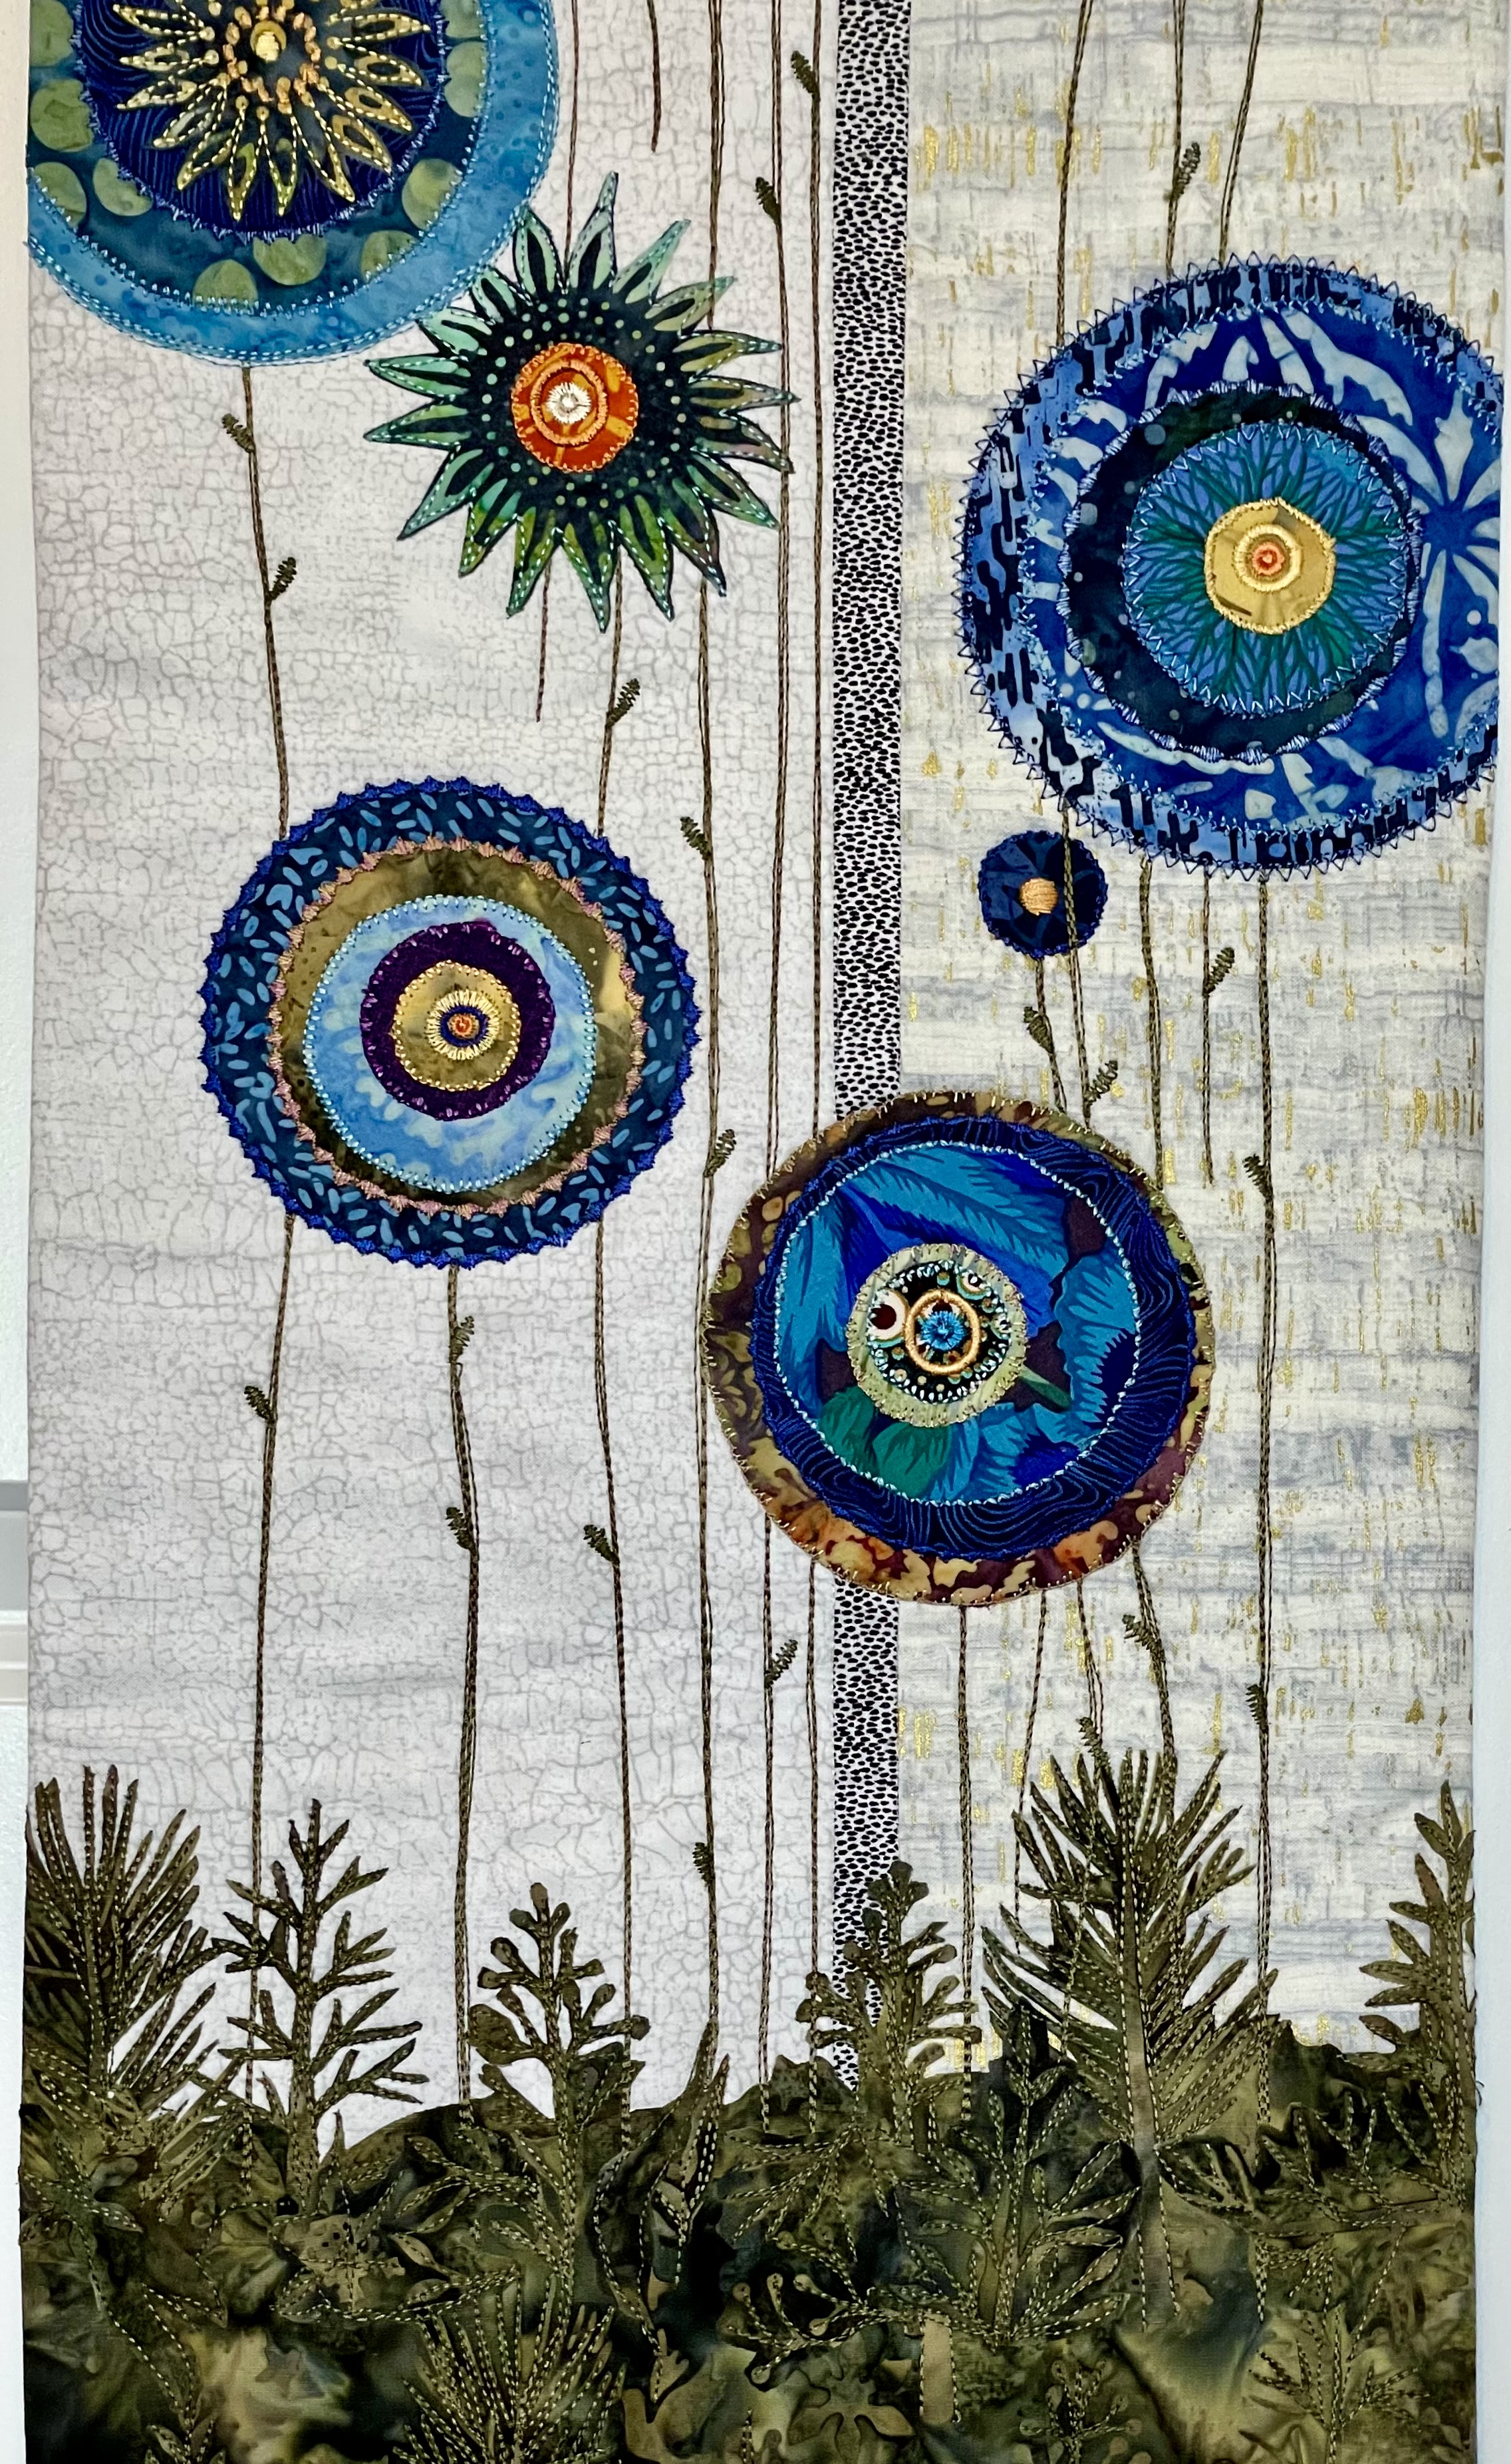
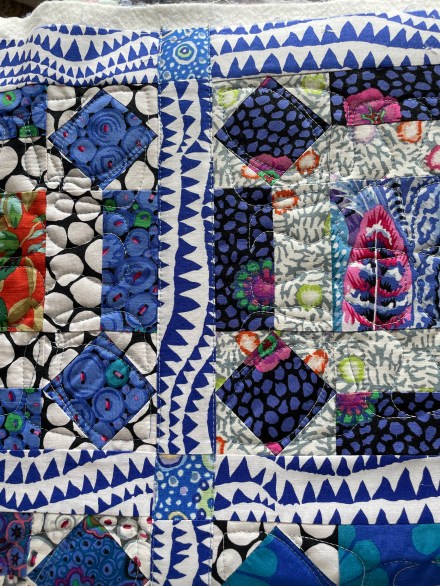
Here you can see more of the stitching detail – many decisions: what thread colour, which stitches, stitch dimensions. Most of the centre embroideries I’d already set up from a previous floral hanging but they had to be adapted to fit these smaller centres.

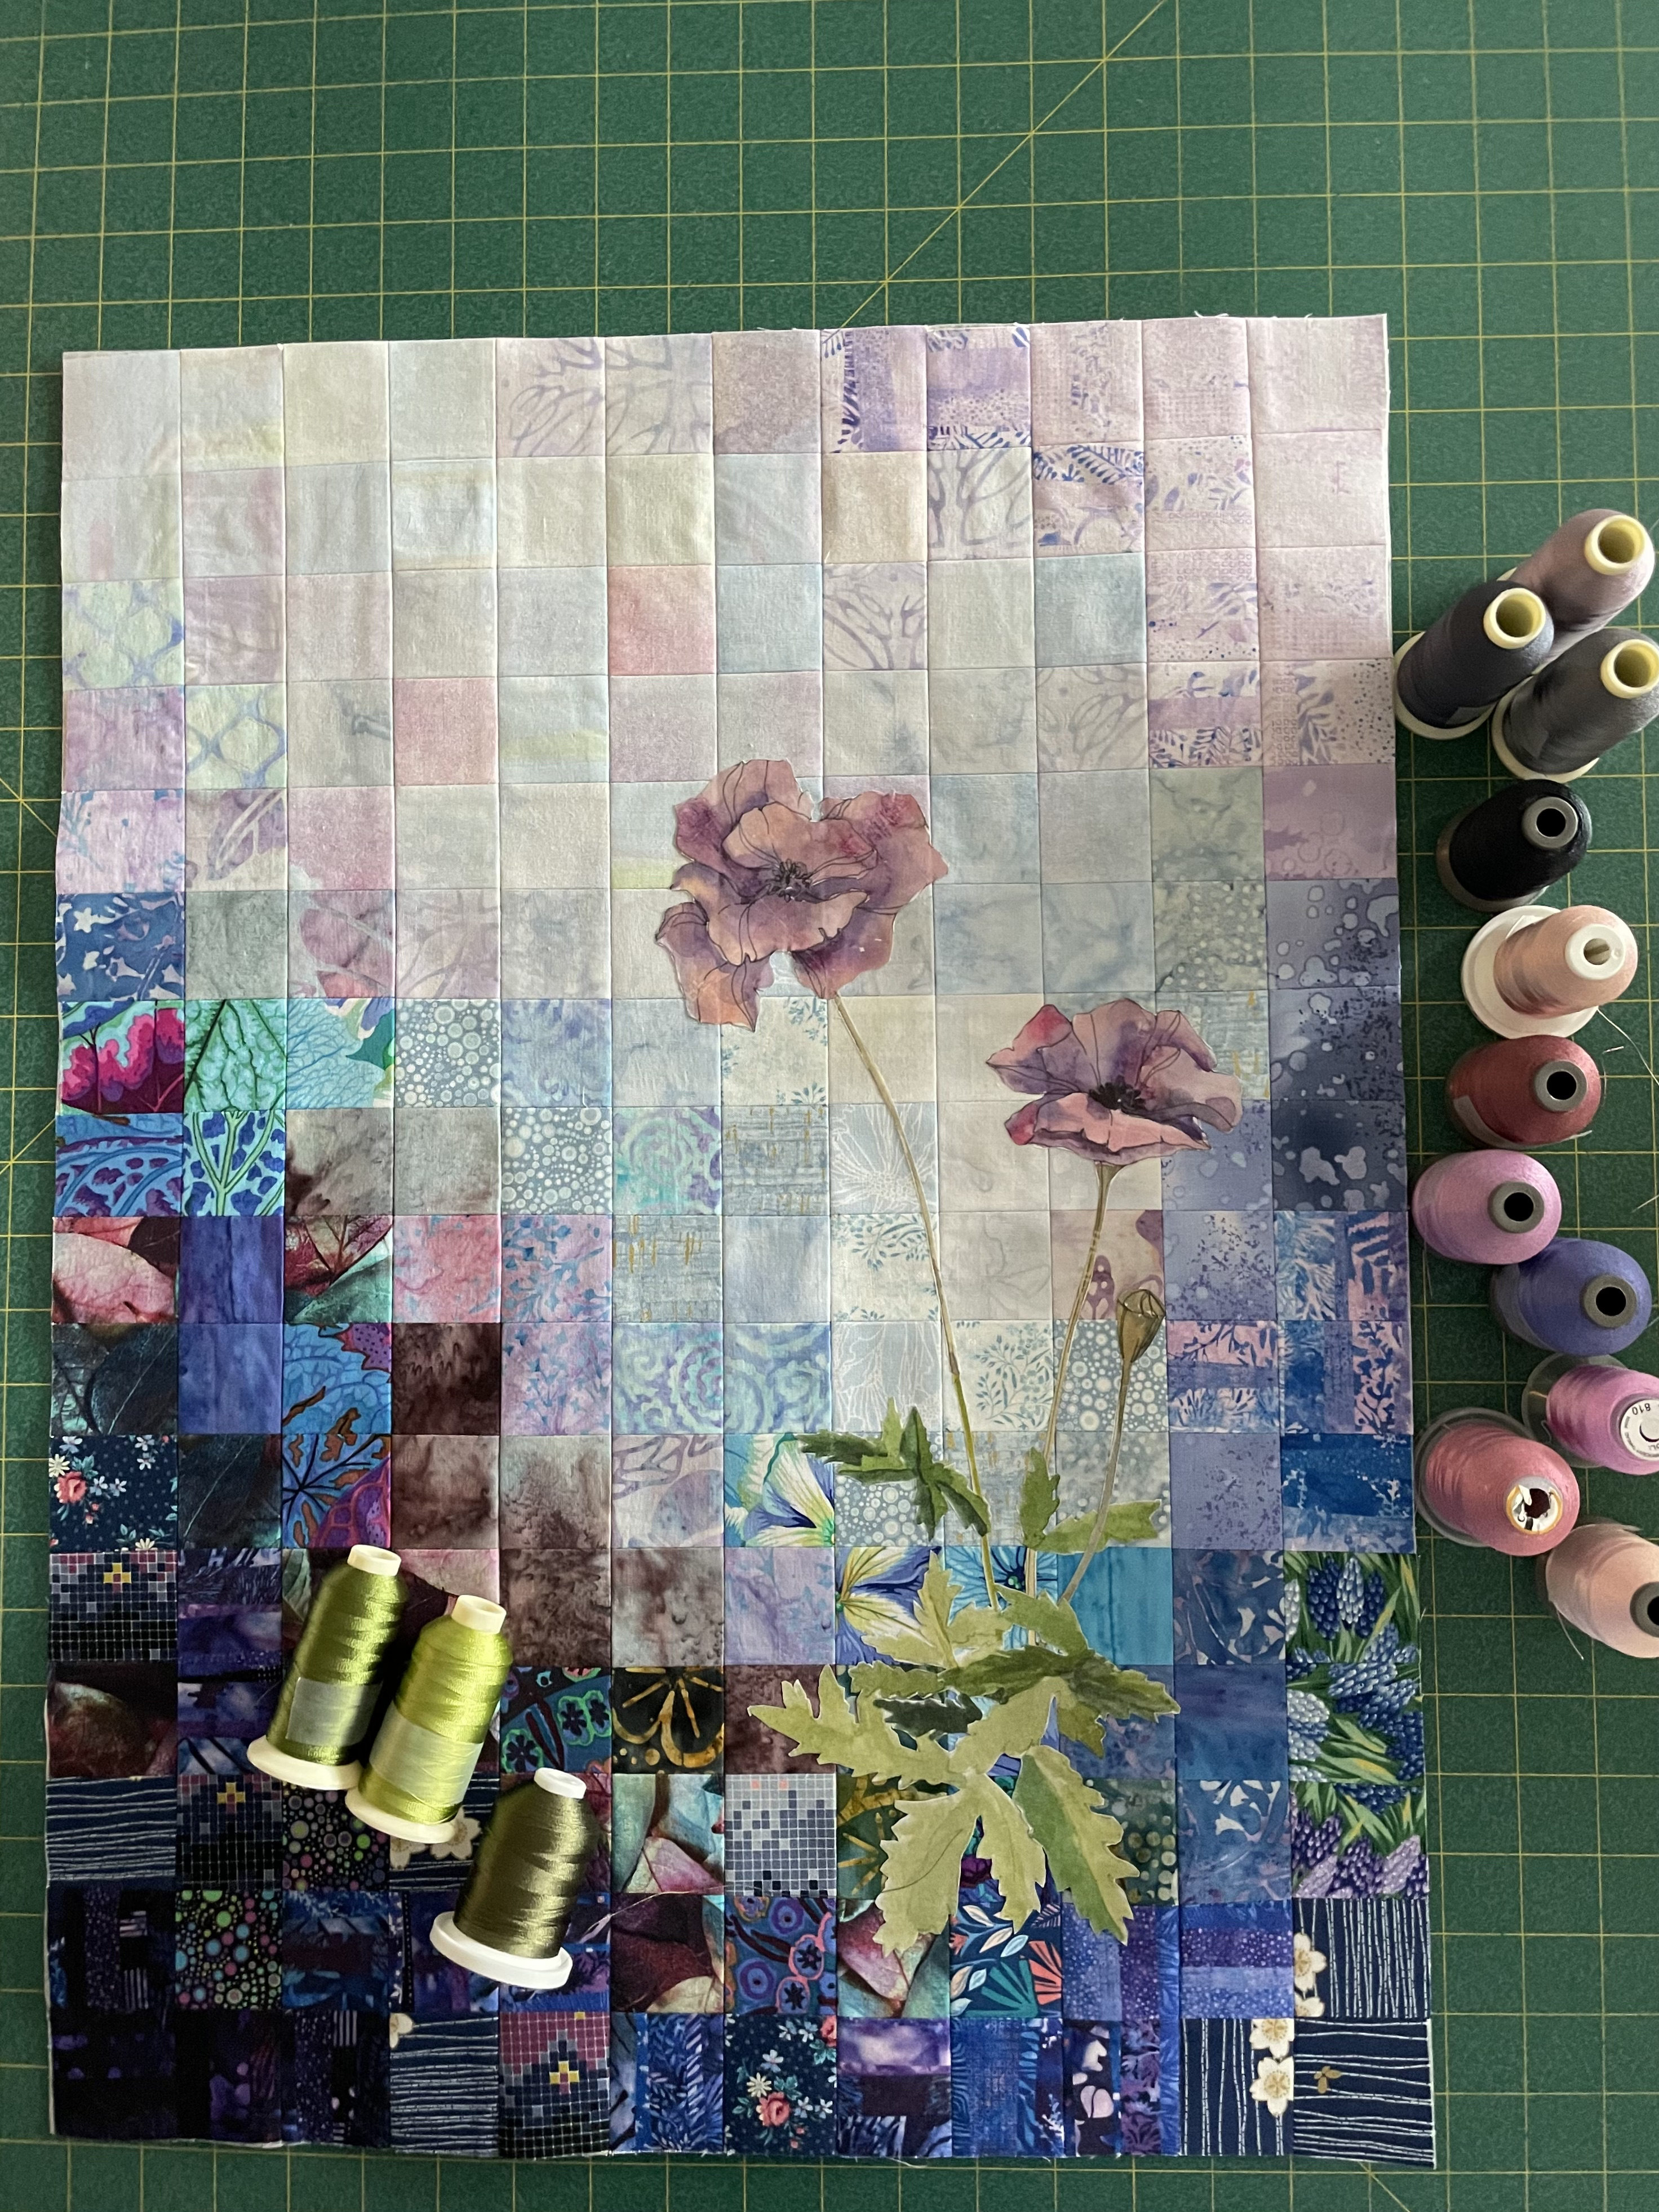
This was the image that inspired the piece:

By Marieka Diepenveen

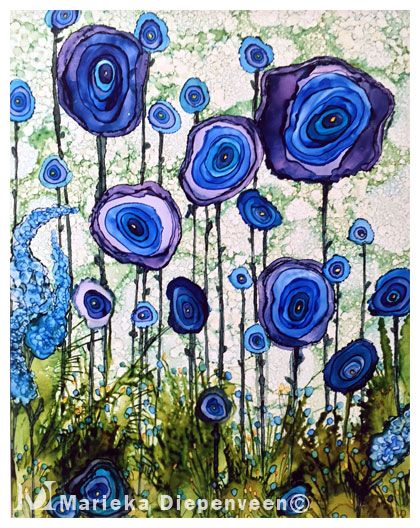
The piece by Marieka Diepenveen is a watercolour. I particularly liked the irregular concentric blue flower shapes and the tiny leaves growing out of the variable green vegetation. I added more colour and adjusted the dimensions and my circles are regular. My vegetation was dictated by the batik I chose to use which had greenery shapes. I might try another where the flower shapes are irregular….

Blue Flowers – Again

I started this textile wall art piece on Jan 23. I managed to get the basic appliqués in place and then I was stumped. Before I could embellish the raw edge shapes I had to figure out some way of stitching “stems” for the “flowers”. I thought about cutting narrow strips of various green fabrics, using yarn (yarn couching – using decorative stitches to tack the yarn in place), even stitching over very narrow ribbon. The issue was the colours I’d used in the vegetation at the bottom of the piece which limited my options. I spent time sporadically playing around with decorative stitches but nothing seemed to set up the effect I was after. I had no suitable green/brown yarn in my stash. And trying to force ribbon into gentle curves, even if I could come up with a suitable colour, wasn’t going to work, either.

After finishing a pair of black corduroy pants this morning (more about that in another post), I picked up my stitching sampler, played with a few more decorative stitches and then decided I’d just repeat rows of straight stitching! I practiced a bit. I matched thread colours with the fabric at the bottom of the hanging and started in.

Blue Flowers

This is as far as I’ve got at the moment. Those stems need small leaves of some sort – I intend to work those in last. Next will be embellishing the raw edges of each layer of the flowers to permanently attach them to the backing.

You get the idea here. The vegetation at the bottom also needs a lot more embellishing but that, too will come after I’ve worked on the flowers and flower centres.

I thought it was the COVID-19 Rapid Test Kit building that had interfered with my working on this piece. It wasn’t. It was my not knowing how to do the stems/leaves that had me stopped. I feel like I’m being creative again. Finally!

Blue Flowers

Blue Flowers

A couple of days ago I started pulling together subsets of blue fabric scraps and piling the pieces into groupings for the flowers. Next I pressed fusible web (glue) to the back of each fabric piece, then cut out “flower” elements.

Circles? Almost Circles? Irregular circular shapes? In the end I opted for more or less circular shapes in graduated sizes, laid them on top of one another, offset somewhat. I removed the paper backing and pressed the layers for each flower together then played with placement on the background. I finished by pressing the flowers in place.

Before I start thread painting the flowers, I need to use a heat erasable pen to mark where the stem/leaf elements should go. I plan to stitch long thin stems with just a hint of leaf shapes – that may change when I get underway and decide to include some fabric cutout leaves.

This is as far as I have got today.

A Beginning

For some reason I can’t seem to find inspiration for a quilt at the moment – so I’ve turned to smaller projects. Looking through my Pinterest saves I considered the “Skinny Quilt” ideas I’d stored there. Several looked interesting – I selected two, then went through my fabric stash to see what I had that might work for both.

Idea #1

Idea #1

I found a photo of a 4-panel square quilt constructed from blocks with interspersed light and dark. One strip is probably not enough so I think I will work on two, but of unequal width. I started with the light colours – based on a soft teal and juxtaposed some dark blue (with gold), some other blues with greens gold, and finally the tans including two pieces of silk dupione which have a strong grain which I think will work well. I don’t know yet whether I will interject a contrast between the two panel elements, or not. The technical challenge is that the insert strips are cut with a curve which means cutting the seam edge of both fabrics at the same time and sewing the opposing curves. We’ll see how that goes.

Idea #2

Idea #2

This panel is based on a photo of a painting done by Marieka Diepenveen (you can see it peeking out on the left side of the fabrics – the round blue flowers). Again her painting is a wide rectangle but my intention is to create a panel about 12″ x 50″. I’ve chosen the two pale grey fabrics using the white with tiny black dots to separate them, with a collage of greens at the bottom. I have lots of colourful blue scraps and even some small circles from another project that might work themselves into the banner.

Now I just need to get going on both!

Purple Poppies – Finally Completed

Purple Poppies

I started this piece on (or about) July 7 2021 – here’s how it unfolded:

I got to the thread painting part and stopped, partly because I wasn’t sure I liked the poppies – I felt they weren’t strong enough although they were the right size to fill the space.

The piece has sat around, face down, until a couple of days ago when I finally picked it up and got to work on it. I’d already picked possible threads for the job, had them all in a plastic bin (which sat on top of the face-down piece). I threaded my machine with the lightest of the green embroidery thread and got to work filling in leaves. That was relatively straightforward; the leaves wanted a bit of texture but nothing more. The poppies were another matter. I wanted to brighten them so I started with a dark purple thread to stitch the outline pencil marks which took some careful stitching. I stood back and looked at the piece – seemed to me right then was the moment to stop. I figured I’d just muddy the whole thing had I attempted to work in the various pinks and mauves. So I’ve left it alone.

I added a batting panel, and backing, and decided to complete the piece with a narrow dark binding. The piece is 18″ x 24″ – large enough without adding wide borders to it. In truth, I just wanted the piece finished and out of my way. It’s been hanging around for six months – the longest I’ve procrastinated on a project.

The piece is not bad; not my best. It’s now finished.

Delft #2 – Laid Out

Now I have to spend some time looking at the blocks and their position in the array! There are three variables in play – the fabrics of the inner square, the fabrics of the first triangle, the fabrics of the second triangle. I’m trying to keep them all different so there are no two centre fabrics in a row or column; then I’m trying to have not two same fabrics touching. I’ve almost got it – I see three spots where the inner and outer triangles are the same fabric and I may not be able to move anything more to alleviate that. There are also some adjacent diagonals (which I’ve decided to ignore). More important is whether I have the colour distributed broadly around the array – it’s not bad – I will have to look at the blocks tomorrow to see if I still feel that way.

The issue is at this point I have almost no degrees of freedom – the only way I can gain more is the make the seven blocks for the quilt back and see if that combination accommodates some swaps. It’s probably a good idea to do that before I attach the sashing because once the sashing is attached I’m not going to be able to do any moving around!

The quilt is going to be colourful, for sure.

PS: I’ve been asked about measurements for the block. If you’re interested in constructing a quilt top like this, click here for information/measurements for creating/setting up the blocks. If you decide to try it, be sure to make a couple of test blocks using scrap fabric.

Gathering No Moss – Sashing

I finished quilting the 30 blocks; next the sashing. I figured I had two options: edge stitching or stitching-in-the-ditch. I did a bit of both knowing I was going to have to take out whichever one I didn’t like.

On the left is the edge stitching (on the vertical sashing), on the right stitching-in-the ditch. The difference is subtle but I prefer the stitching-in-the-ditch. So I started taking out the edge stitching. Thank goodness I only did one horizontal row and a bit of the end sashing. That’s a job for working in front of the TV tonight.

I’m quitting for now but I will carry on quilting the sashing tomorrow.

Gathering No Moss – Quilting

I started quilting yesterday – did 6 blocks; another 19 blocks today – 25 blocks done – 5 remain.

A Quilted Block

I’d set up a single-run embroidery (single-run = the design is stitched once) to fit the block within the sashing, coming close to the edges but leaving a small amount of space so when I do something with the sashing (either stitching-in-the-ditch or edge stitching beside the seams) I don’t run into the embroidery.

Tomorrow’s decision will be what to do with the sashing. I’ve thought of other options besides the two I’ve mentioned above like under stitching all the rows of shark’s teeth but I think that would push me past my boredom threshold! And I can’t see a decorative stitch down the middle of the sashing strips – would just clash with the fabric detail. So it’s either stitching-in-the-ditch or edge stitching. I might just try a bit of edge stitching to see what it looks like, being prepared to take it out if I don’t like it! That’s for tomorrow.

Gathering No Moss – Quilt Back

Quilt Backing

I finished piecing the quilt backing this morning. It needed a good pressing with some Best Press (a clear spray starch.

Would you believe it – I see a mistake! I’ll have to take the pinning partly apart so I can get to the spot where I have to rotate one of the rectangle blocks 180°! I didn’t pick up on that – not until just now as I’m looking at the photo.

Damn!

The quilt sandwich is pinned. I’ve been setting up embroidery designs for quilting the blocks – testing them out on scrap fabric to make sure they stitch out correctly. Still haven’t decided which to use. Guess I need to sleep on it a bit. I hope to have made up my mind by tomorrow!

There! The block is fixed – the joins not quite so perfect but nobody, except me, is going to notice.

Gathering No Moss

Quilt Top Assembled

Here it is – the quilt top is finally assembled. All the shark’s teeth sashing is going in the same direction vertically and horizontally (that took a bit of correcting in the first couple of rows until I realized the top would look better with that fabric unidirectional rather than helterskelter. The four substituted square centres bring some life to the quilt and bring out the colour in the others.

Final quilt size is 52 1/2″ x 62 3/4″.

Next step is to create six more blocks for the back of the quilt. Past Friday I went to Mahone Bay to Woolworks and picked up one of the fabrics to use for backing the quilt. One length isn’t wide enough for a backing – I will splice it and insert a column of blocks with sashing.

It’s a lovely colourful quilt top – I like Kaffe Fassett’s sharks’ teeth fabric selection for the sashing – quite unlike the other fabrics, yet the right colour – it creates a very modern feel to what is a traditional block.

And I was right – the many imperfections in the blocks were amended when I added the sashing. I didn’t trim the blocks to a precise 9 1/2″ because I needed to keep the 1/4″ at each corner block point so I fudged the placement while adding sashing and the blocks have ended up as I wanted them.