I’ve spent the morning, fussy cutting the flowers, laying them out, fusing them to the raw silk background, redrawing the finished block size, positioning where I want the signature to go on each. The remaining nine are now ready to thread paint.
I’ve tidied up the top of my cutting table, putting fabric scraps back where they live. Stacked the rules in the ruler holder. Put my rotary cutters where they’re normally stashed. Now I have to start selecting thread for the stitching.
It’s a lovely sunny day out – no clouds at the moment. So once I’ve got myself organized it’s time to get out of the apartment! I’ll start sewing on these tomorrow morning.
This one is #3. I finished it yesterday. A surprising number of thread changes involved in this one. I’m pleased with how the flower centre turned out – I didn’t feel it needed a metallic thread; the dark brown/black set up enough contrast with the golden yellow to make the flower lively. The challenge is deciding how much stitching and where. The flowers look better when there is some unstitched space but there still needs to be enough thread painting to give the flower texture.
More To Come
This is what’s on my cutting table (anti-clockwise starting at the bottom left) – a purple poppy (needing to be fussy cut), a Blue Flag iris, Bradford Pear, a clematis, a peony, a day lily, and a hibiscus I cut from some Hawaiian bark cloth which I’m not going to use. Instead, I added a few more printed photos to the collection – a yellow/pink phalaenopsis, a more vibrant purple iris, and a golden/red hibiscus. That gives me the ten flowers I’m hoping to complete for this set.
I’m waiting now for my latest order of 6×6 mounted canvases to arrive so I can mount these pieces when I’ve finished thread painting. This project will take me another ten days or so to complete.
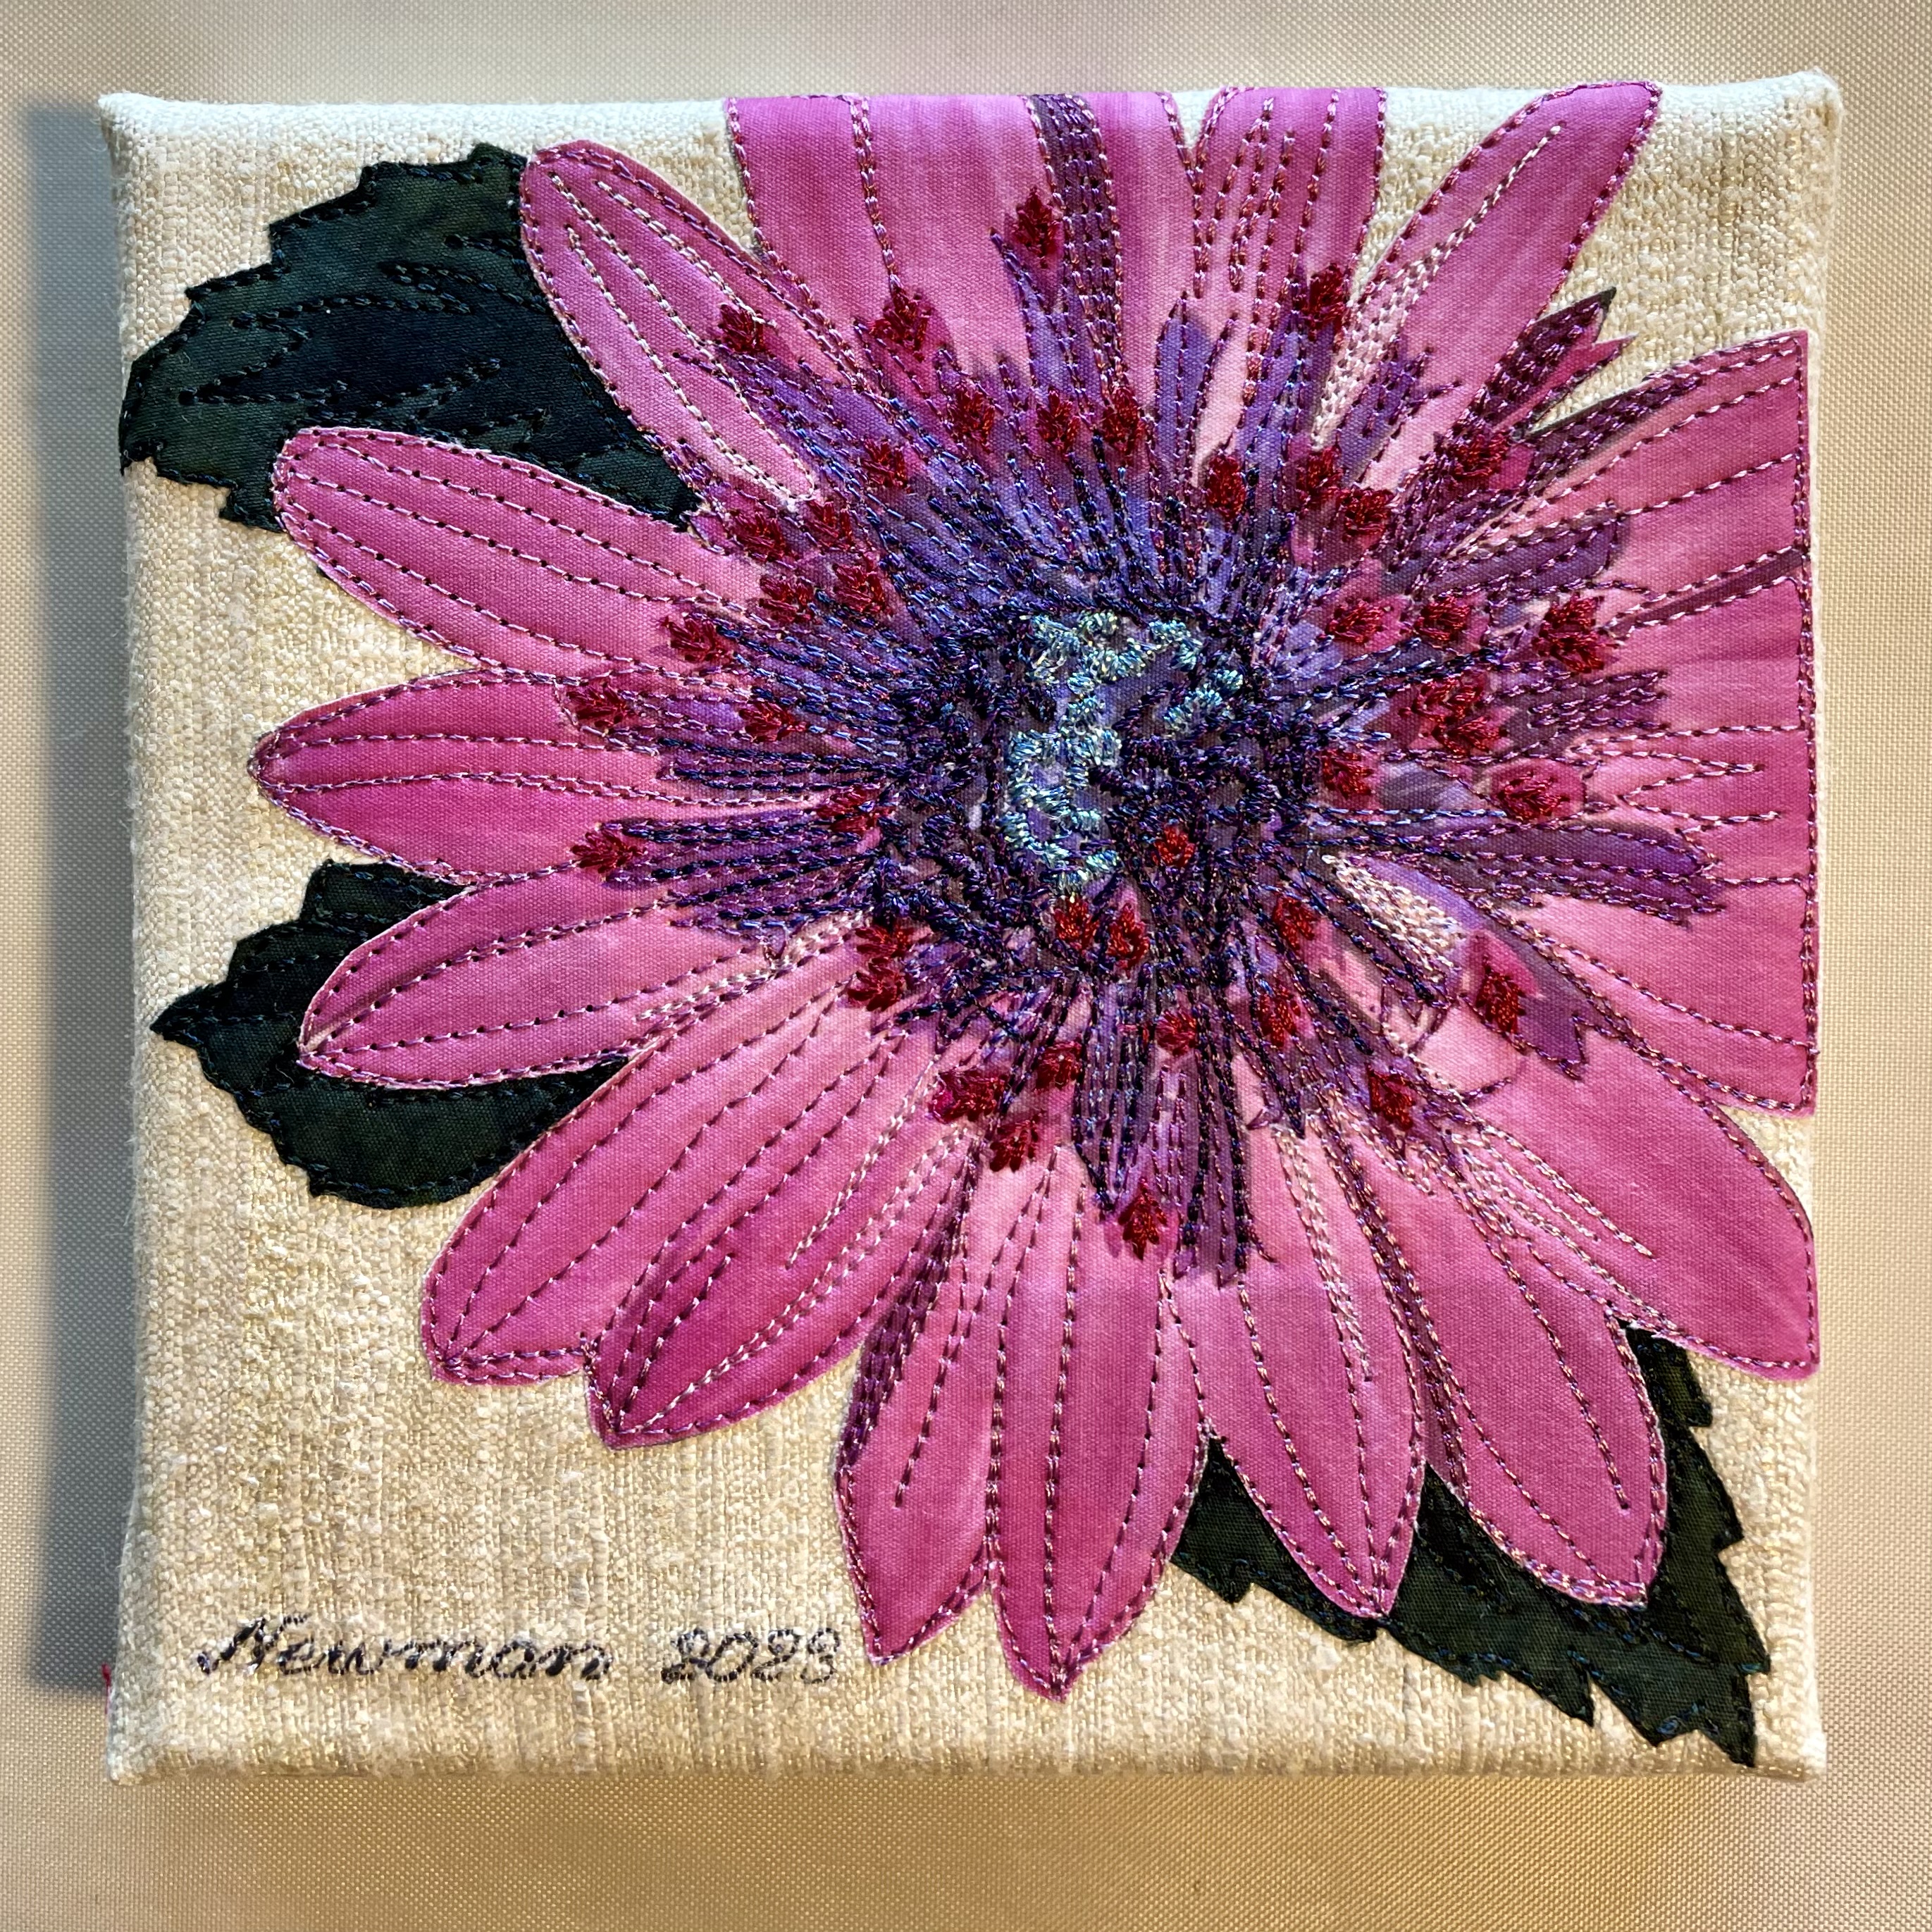
Osterspermum are African daisies. I first noticed them at garden centres maybe 20+ years ago. They come in a range of colours from off white to a lovely purple, red, orange. I started planting them in the container gardens on my back deck. Over the years I took lots of photos of them.
Osteospermum
I decided to include an Osteospermum in the set of ten pieces I’m working on.
Again, on a raw silk background, I fused the fussy cut flower printed on cotton. I selected a variety of rayon and polyester embroidery thread to use for the thread painting. Then I started stitching – first the flower edges with a dusty pink thread, then I spent about an hour designing a stitch to use for the small central florets – I stitched each one separately. Then I worked my way into the centre. wanted to catch the viewer’s eye at the centre – I used a metallic thread paired with a rayon to stitch the unopened florets at the very centre. Last came the leaves.
A second 6×6 piece finished.
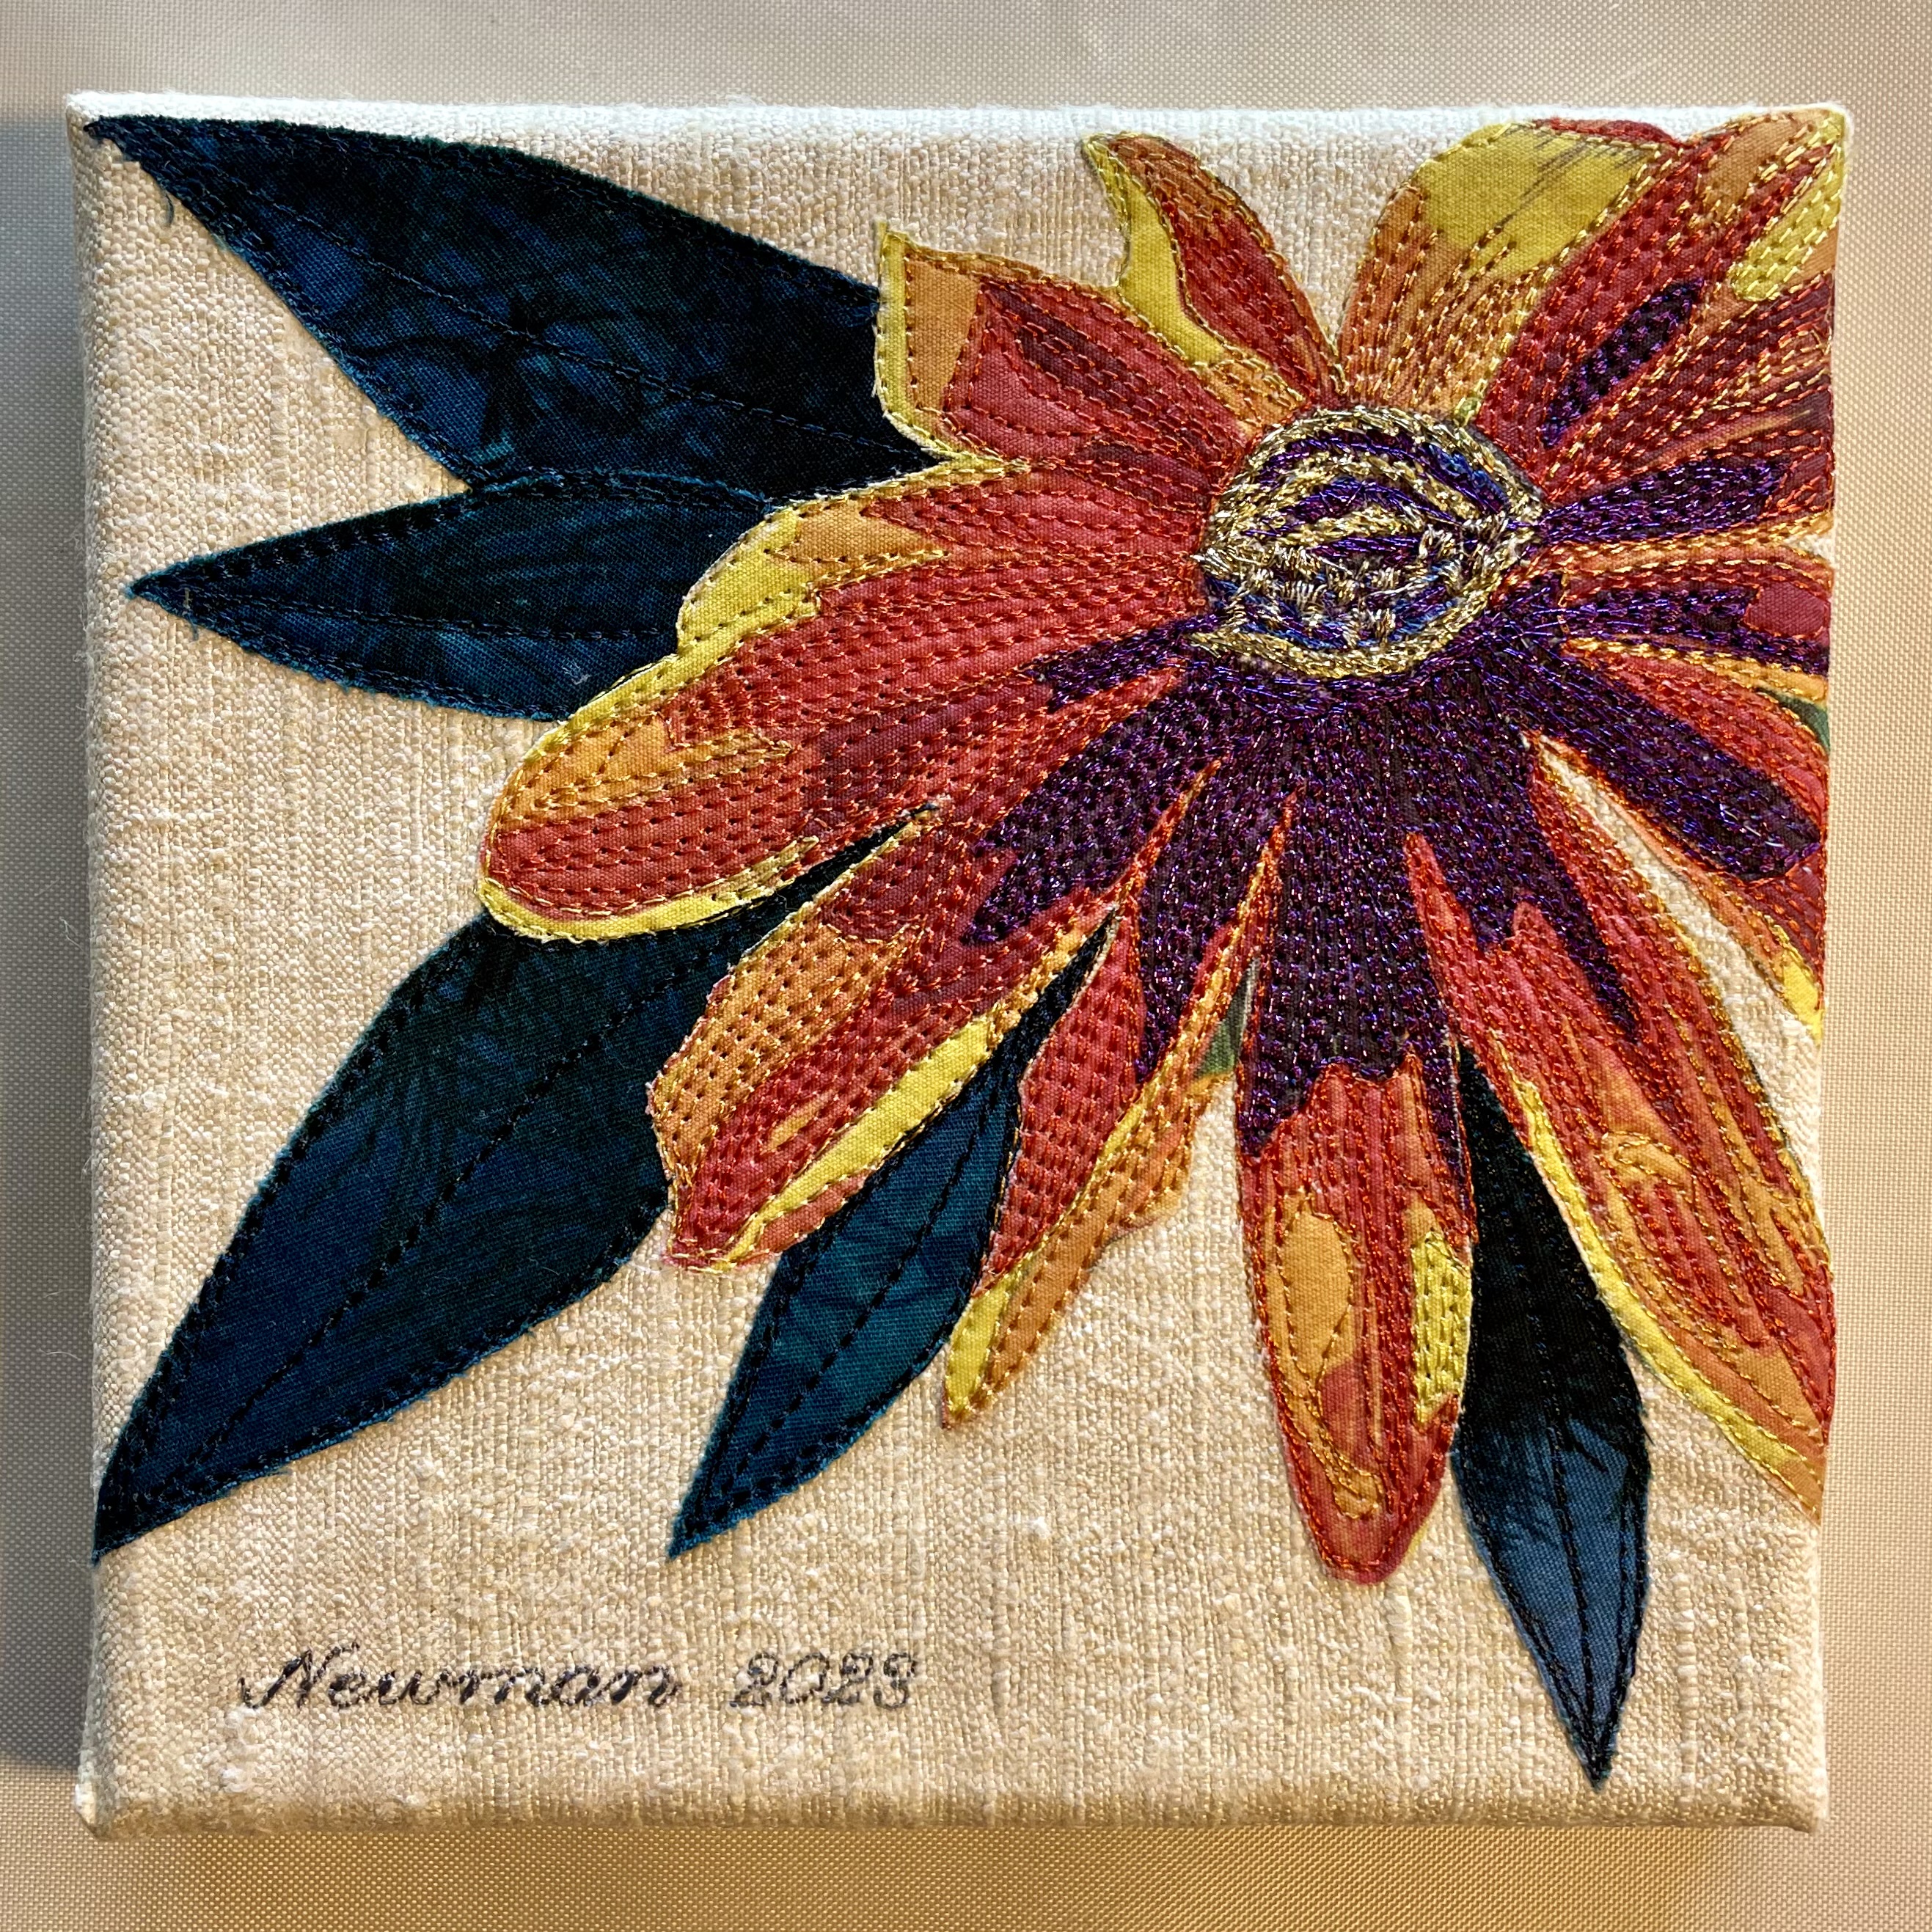
Then I went back to Rudbeckia II – I wasn’t happy with the flower centre. I removed the piece from the canvas backing, pressed it lightly and reworked the centre and dark purple areas thread painting with metallic thread.
Rudbeckia II – Reworked
You can just see the glint of the metallic thread at the centre and in the deep purple areas. The thread painting with metallic thread gives more depth and texture at the flower centre. The slight glint of purple metallic thread livens the whole flower.
I haven’t done much textile art for the past month or so – not since the 6×6 pieces. Nothing in particular has called out to me.
This morning I decided I had to start something. I keep a folder on my desktop “Wall Art” where I stick ideas. I looked at Charlie’s first swim photo – I’ve never been happy with my original piece created using raw-edge appliqué. I’ve wanted to print the photo on fabric and embellish it.
Charlie’s First Swim
The problem is his dad sent me a small version of the photo on his phone and when I attempt to enlarge it I get a very pixilated image. This morning, I printed an enlargement on paper – I’m going to try stitching that to see whether I can sharpen the image with some thread painting. If it works, I’ll print Charlie on fabric and carry on from there.
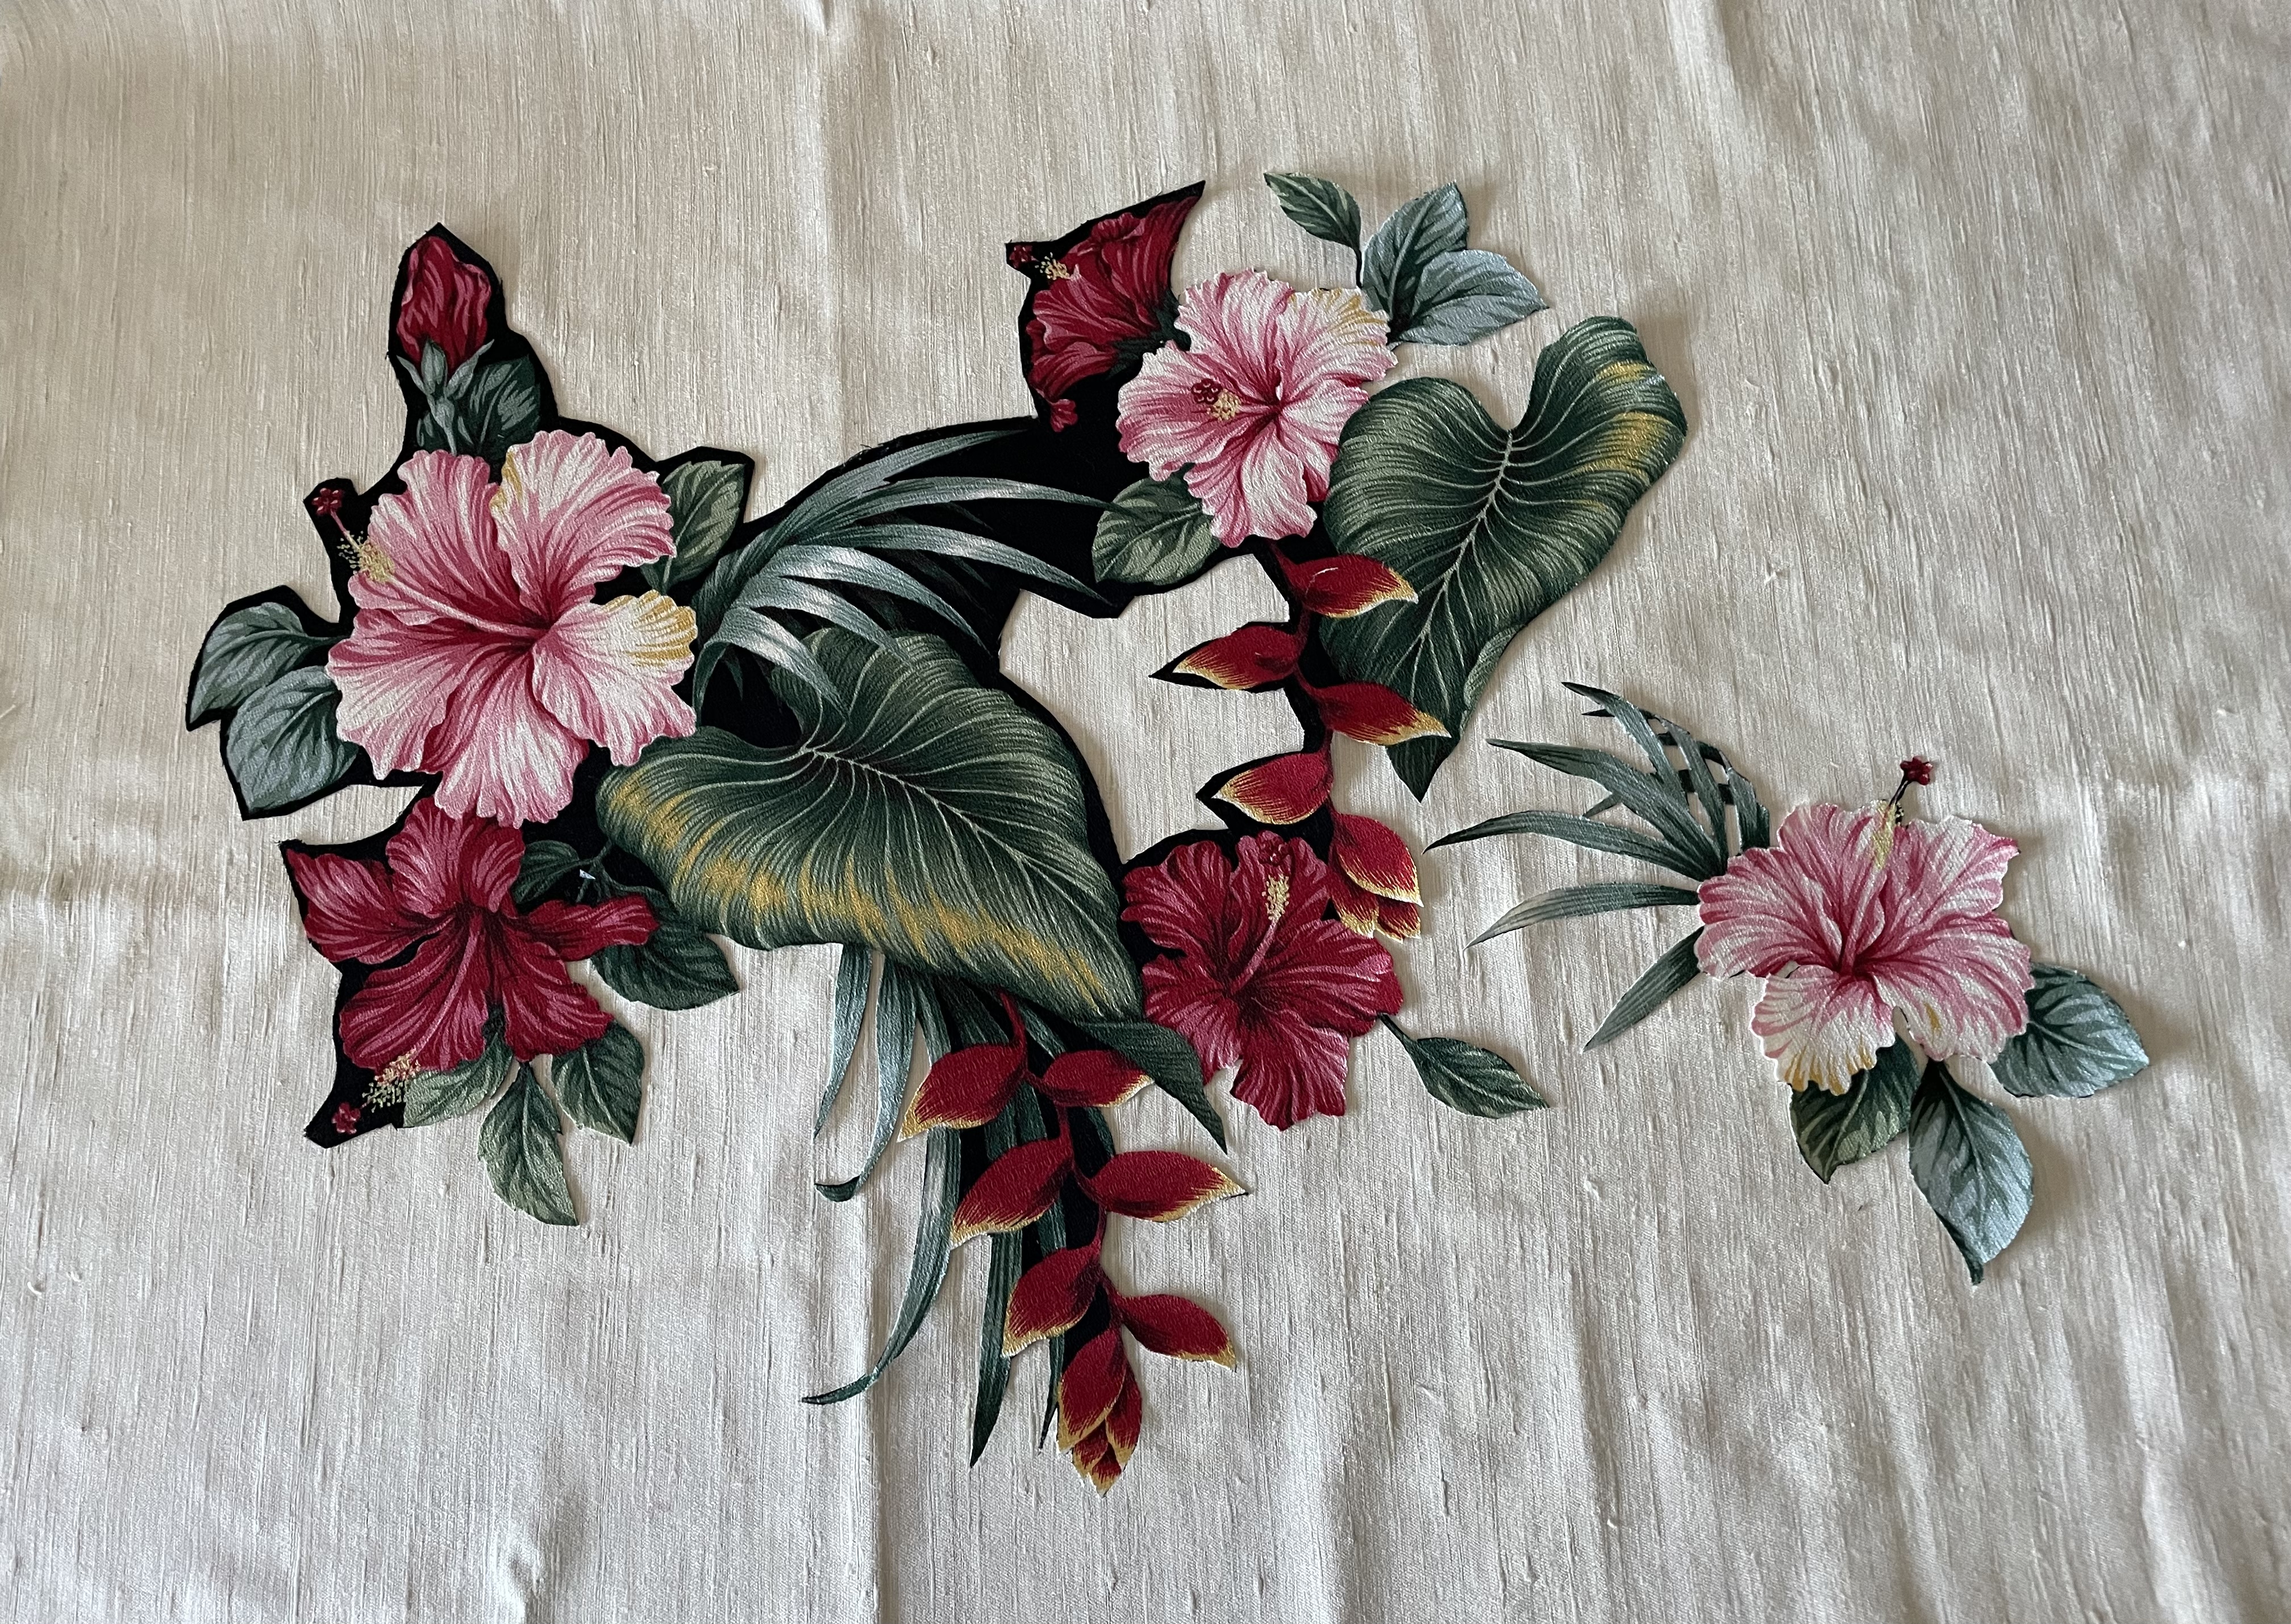
Another thought was to revisit the bark cloth in my stash. I selected an array of hibiscus and heliconia from the black fabric, pressed a sheet of Pellon 805 fusible web to the back, and started fussy-cutting the flowers.
Hawaiian Flowers
I’ll carry on trimming off the black. I plan to use a panel of natural raw silk as background. This may be a project I’ll work on while working on other things.
However, this doesn’t feel like a start – I definitely want to do some quilting – just not sure where to begin.
Finished this pair of socks on Friday and began a new pair that I think I might keep. The stash keeps growing – I will definitely have plenty of socks to share for Christmas. Last week I contacted the gal who wanted 4 pairs of socks from me two weeks before last Christmas – I told her this was the time to place her order. She said no socks this year. Do I really believe her? When she asked last year I just squeezed her order through – I had to take one pair, remove the toes, lengthen the foot by an inch, reknit the toes – she was lucky I had enough time to do that. I’ve already put aside a couple of pairs with someone’s name on them. I’ll just keep knitting as usual.
The Christmas Show Challenge
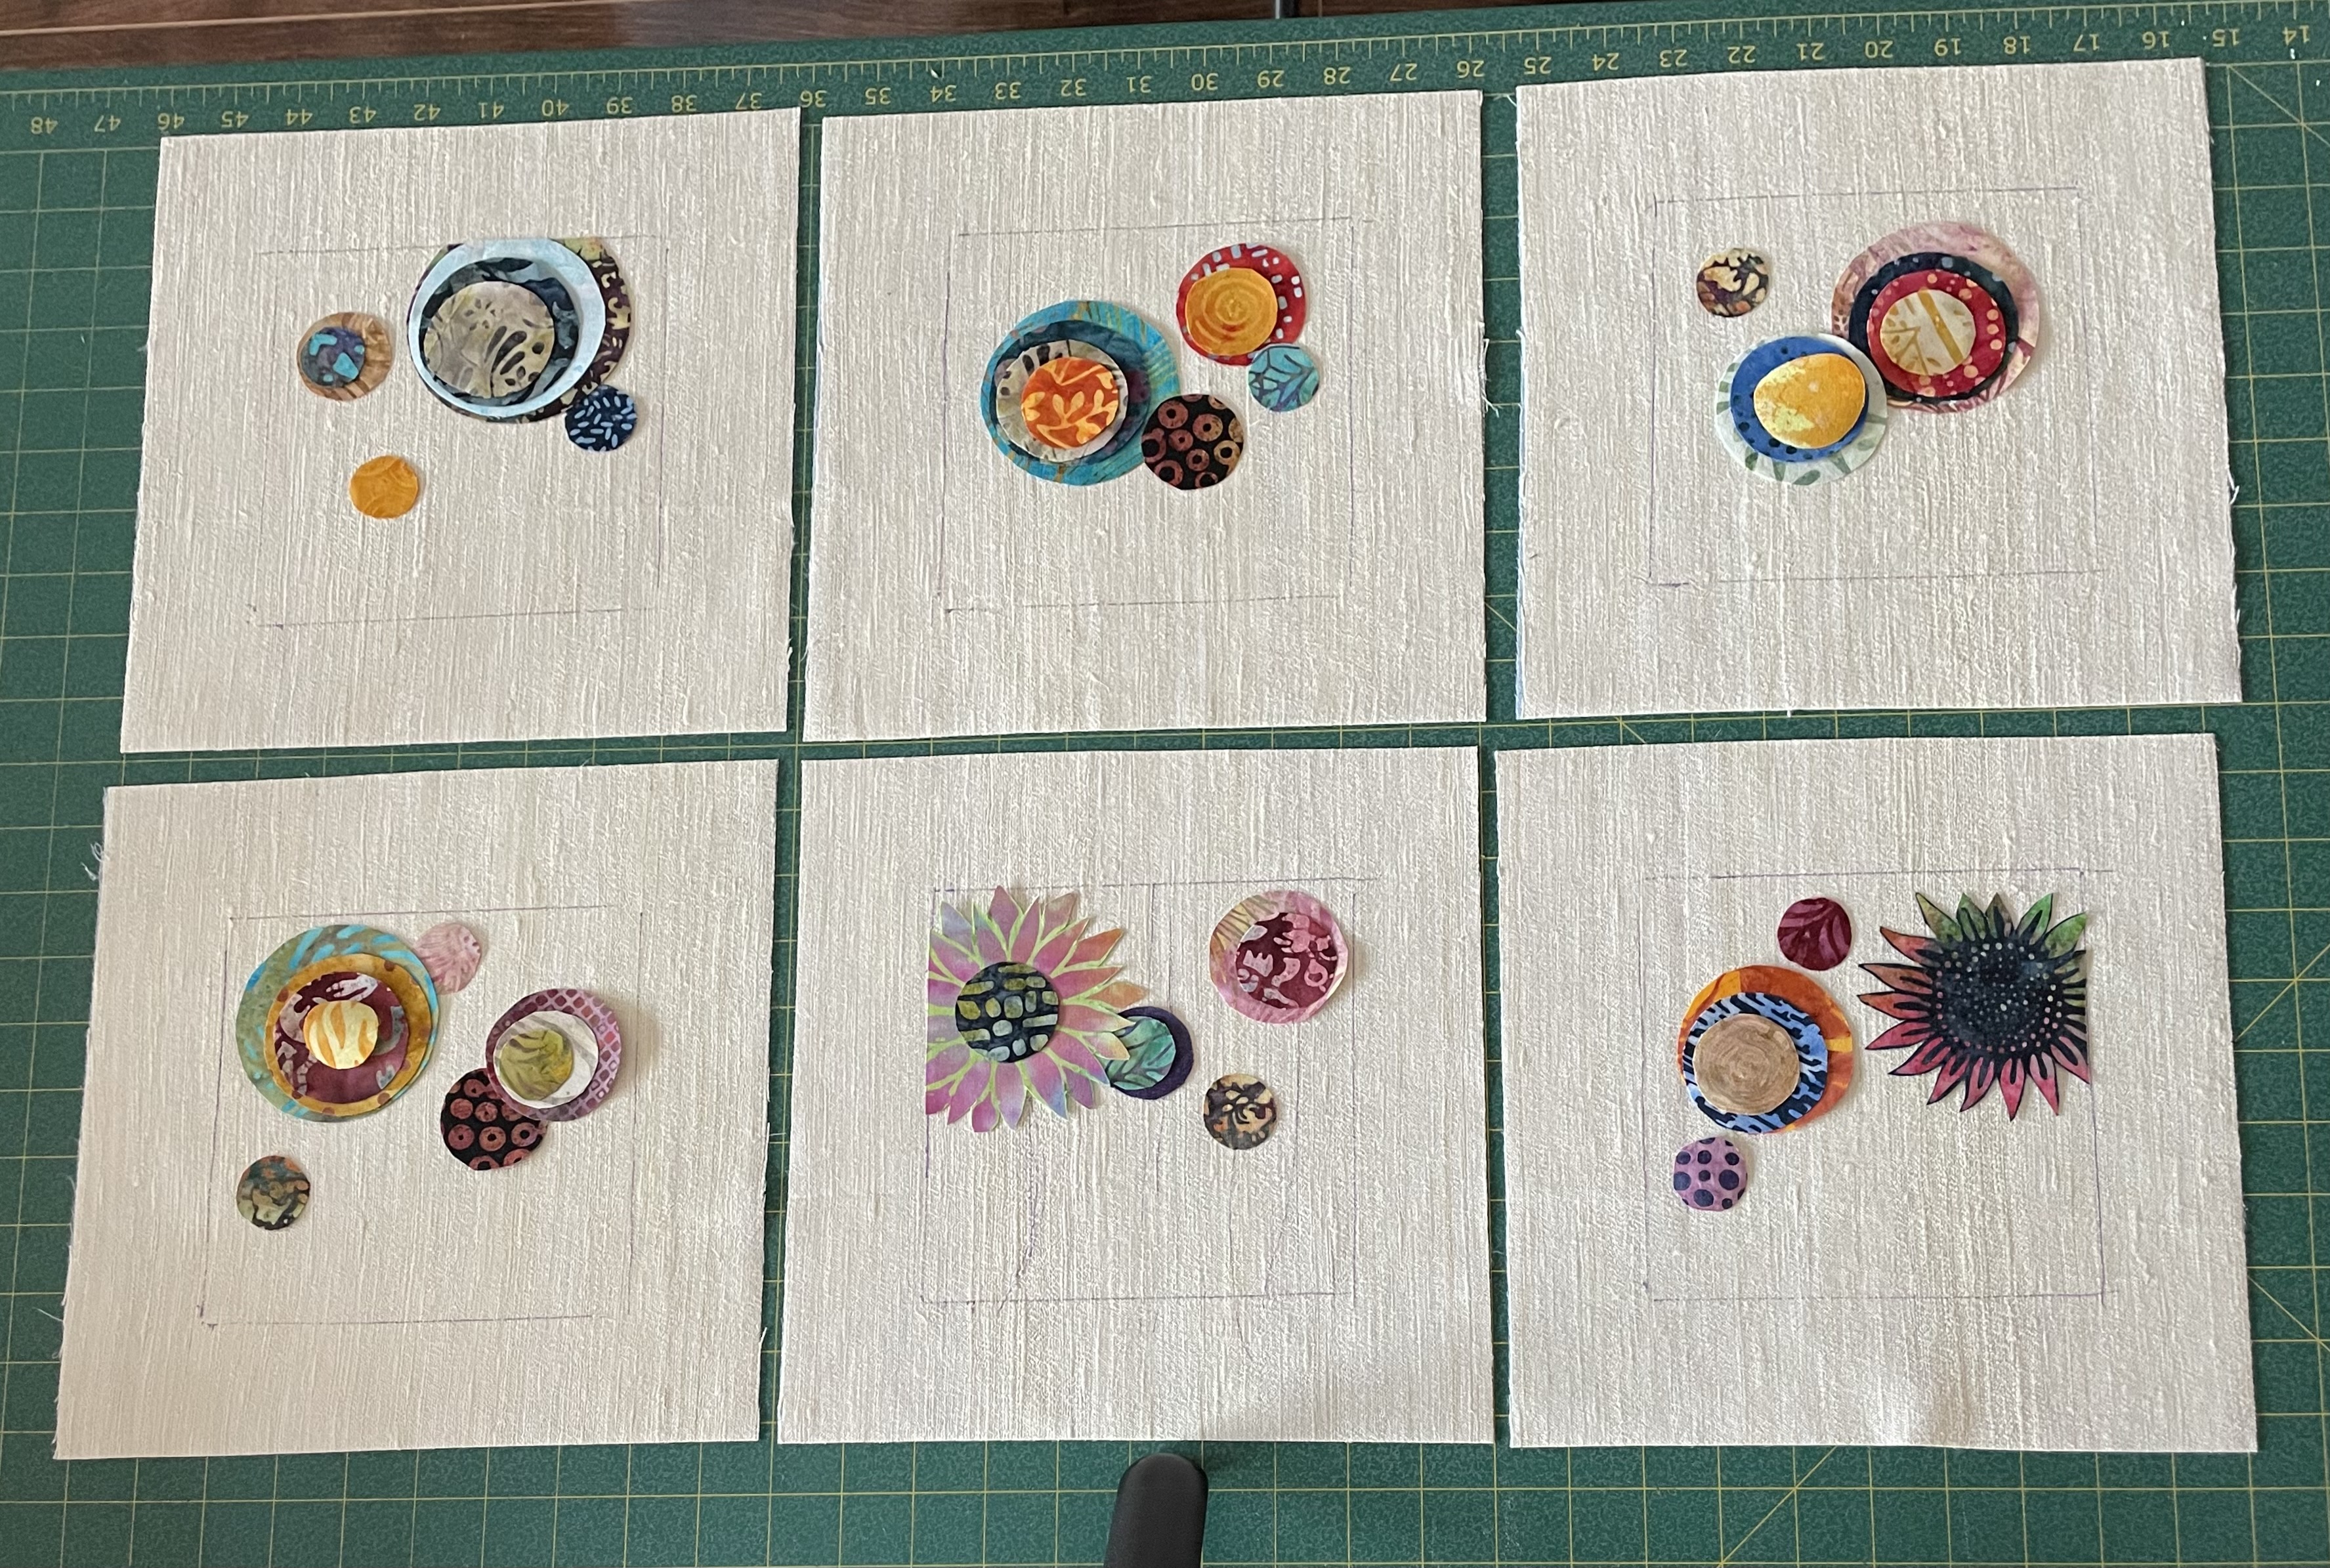
I finally made a decision regarding the 6″x6″ blocks – to use the textured raw silk for the background, to fuse batik circles of various sizes to the background to simulate “modern flowers”. I cut out ten 10″ blocks from the raw silk I have on hand, backed it with sewer’s dream to stabilize it, marked 6″ squares in the middle (using a heat erasable pen). Next, I added fusible web to a pile of batik scraps and cut out a lot of circles. I have started arranging and fusing circles to the raw silk.
Six Blocks Laid Out (but not yet fused)
Because all ten blocks will be shown next to one another, I’ve worked to vary placement, even cropping some of the flowers so the appearance of the blocks is different. I have to edge stitch the cropped edge so there are no raw edges at the edge of a piece.
I’ve completed one of the blocks
First finished 6″ Block
The slight wobble at the bottom of the block will be eased out when I mount the fabric over the stretched canvas.
Looks like each block will take me between 2 and 3 hours to embellish. It doesn’t look like a humungous amount of stitching but it takes more time than you think to edge stitch each bit of batik, then to add stems and leaves, and signature. The stems are free motion. The leaves are decorative stitches each requiring careful placement. The flower centres are embroideries which want precise positioning and often involve thread changes. It all takes time.
I’ve got another block sitting on my machine waiting to worked on tomorrow.
In my stash, I have several metres of raw silk – I bought it in Toronto in 2008 to do wall art. I cut a strip, backed it with sewer’s dream – light weight woven fusible interfacing – to stabilize the weave of the silk and to eliminate some fraying at the edges, then cut the strip into 7 1/2″ blocks. I also had some fabric with these roses which I thought might work as appliqués – I backed a piece of the fabric with Pellon 805 fusible web, fussy cut these two flowers, fused them to the silk, thread painted them, added a signature, trimmed the block to 6 1/4″, bordered it, finally I mounted it.
Again, those corners are driving me crazy! Adding the black silk border adds quite a bit of bulk at that critical location and makes it nearly impossible to get a tight, square fold at the corner so while the fold look OK when you look at it from the side you can see the “pointy” bit sticking out when you look at the block face on.
I’m not sure how I feel about the raw silk – I think it has a bit too much texture compared to the woven silk I used on the other flower piece:
Also, I think I prefer the whimsy of the “Modern Flowers”.
I can’t source anything close to this woven silk here in Halifax; I’ve ordered several different types of silk from two different suppliers. Until it arrives (10 days/2 weeks?) I’ll keep playing with the raw silk squares, making more Modern Flowers arrangements. I think that’s where I’ve landed. Because I’ve cut the raw silk at just 7 1/2″ (8 1/4″ is what I need for wrapping around the stretched canvas) I’m going to have to trim and border the blocks but I want to explore different leaf types and lots of different appliqué placement.
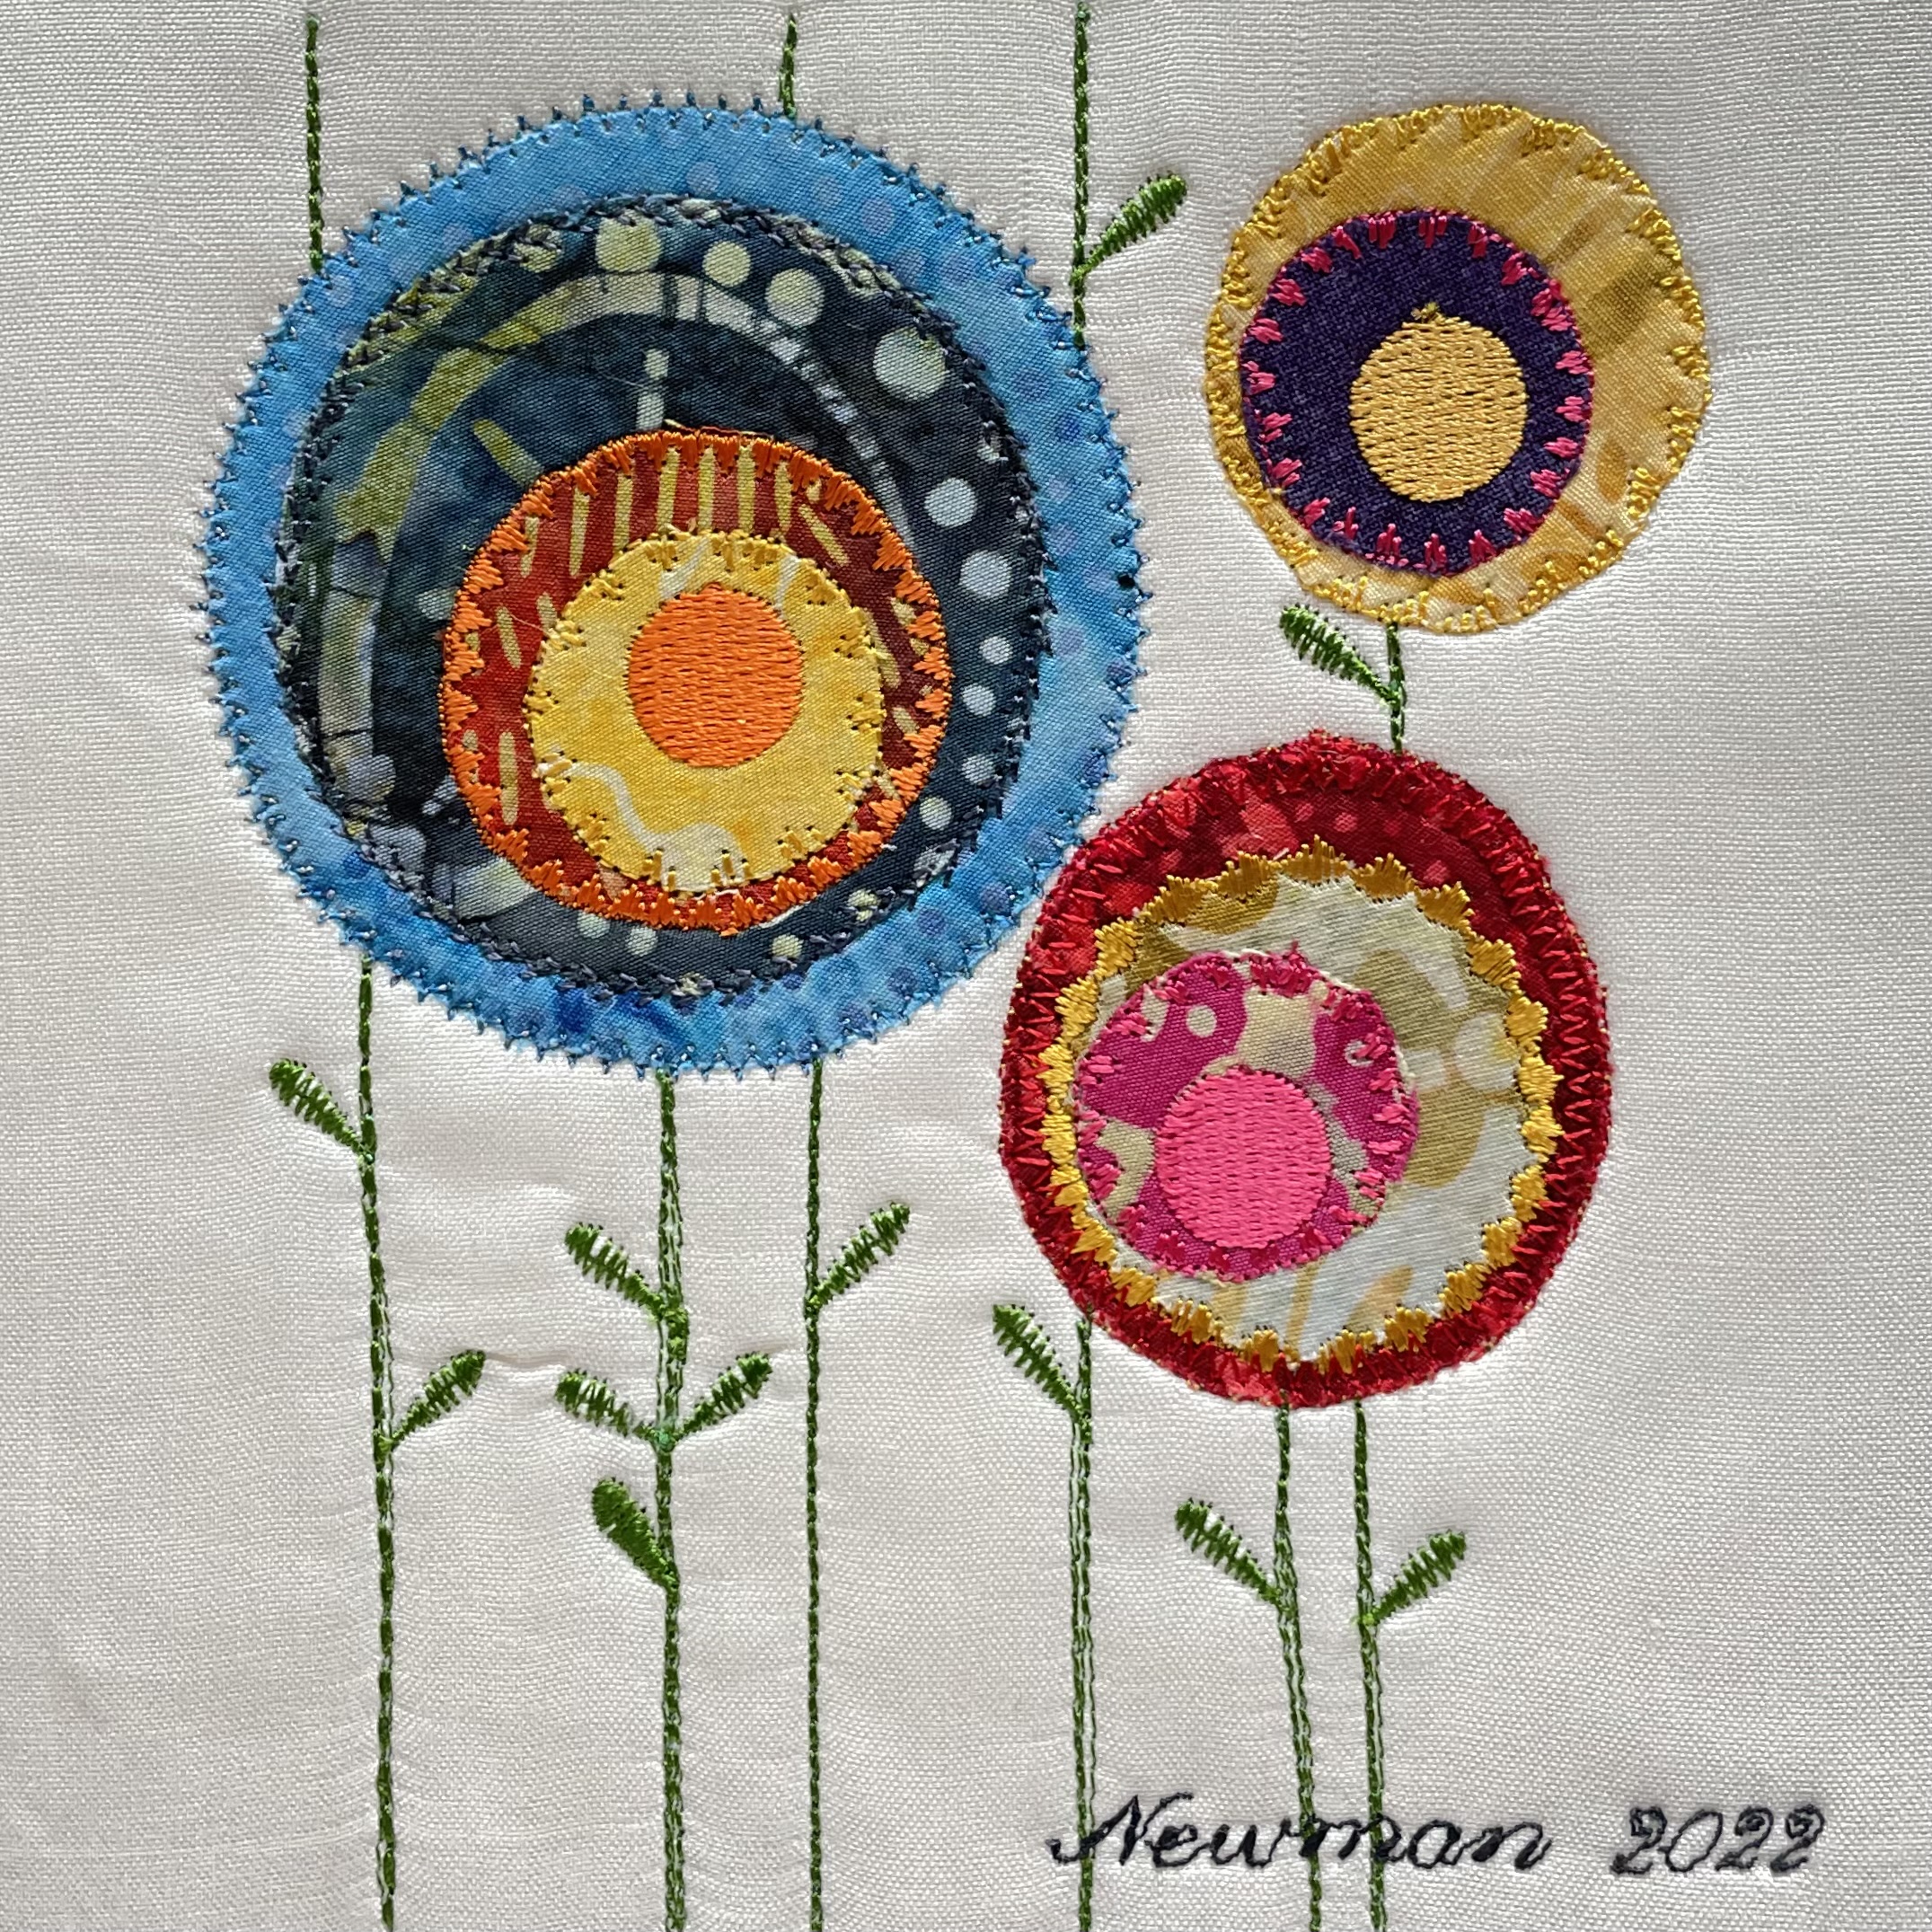
This is an adaptation of my Modern Flowers idea, an outgrowth of the Blue Flowers banner piece. Difficult, however, to decide what to do in a 6″ x 6″ space!
I started with a 10.5″ square of woven silk habotai fabric. Next I opened a baggie filled with circles left over from the Blue Flowers banner and began laying some out. Always the same decisions – centre the circles, offset them, relative size of adjacent flowers….
Once I had an acceptable layout, I fused the circles to the silk, added a 6.5″ x 6.5″ layer of batting beneath. What I didn’t do, and should have done, was add a backing of light tear-away stabilizer – that would have eliminate the bubbling in the silk as I embroidered the edges, stems and leaves. I will definitely add stabilizer to the next experiment.
The tricky element is positioning the embroideries for the centres and the decorative stitches for the leaves. I needed to rebuild the leaf stitch to start and finish at the stem end in order to be able to position each leaf on the stem in a realistic way. And then always the question – how many leaves do I want?
I’m happy with this experiment. I’ll do another couple of these – using the raw silk fabric I have rather than the silk habotai I used here.
There’s still time this morning to move on to another experiment – a crazy quilt block using batik. The question here is whether to cut and fuse it to a background at 6″ x 6″ or to take the quilting to the edges of the base 10.5″ square – that would allow the block to be wrapped around a mounting frame.
In the end I think I’m planning 10 pieces based on a single experiment, rather than 10 unrelated pieces.
This is the second “beans” experiment finished. I used a different stitch to edge stitch each swatch which worked better than the blanket stitch (the small fraying threads are contained). This time, the revised signature is a bit larger and actually readable! There are still one or two edits I want to make on the signature but it’s working better now.
On to another idea – a “flower” collage on raw silk – just to see what that turns out like in a 6″ x 6″ piece. I also want to create couple of crazy-quilt blocks to see what they turn out like.
This is the second piece I decided to work on. I photographed the bench on the beach at Huntington Point in 2007. I’ve always wanted to turn it into a textile piece but it needed people sitting on the bench.
A couple of summers ago I was doing the day trip thing with a friend. We stopped at the Tangled Garden near Wolfville and I people watched. There were a couple of young women sitting on chairs near a picnic table. I asked if I could rearrange their chairs and photograph them from behind. I’ve been playing around with the relative size of the gals and the bench to get the proportions in balance. I’m close. Although now that I’ve mocked up the sky, the bay, the faint line of shore in the distance (needs to be much narrower than the strip I’ve got place holding it), the rocky beach and the grass, I think the bench and the women need to be a bit larger for the image to work as I imagine it.
Next steps: add fusible web to the pieces of fabric, trim them to size; thread paint the setting, print the gals and the bench to size, fussy cut them and place them in the scene. To make the image work, I need to build the shadow cast by the women and the bench coming toward the foreground (the direction of the shadow dictated by the position of the sun on the young woman’s hat). I don’t know whether to do that with permanent markers or ink pencils – I’ll have to experiment before I decide.
Now I really need to get on with that wedding gown!
Finished, except for hand stitching the hidden binding to the back. It’s hard to tell from the image how much quilting I did. I decided to leave the narrow strip unquilted to act as a separation between the two pieced strips. That meant I had to free motion quilt the light elements stopping precisely at the separator and make sure I did a tie off at the back. The darker elements required a different technique – I created embroideries to fit the size of each of the dark elements and stitched them in the hoop as I would any embroidery. You can see the detail below:
Quilting Detail
I wanted a “wave” like flow to the “sea” elements so I set up a couple of different embroideries for each section. I used a “stippling” stitching in the embroidery on the hibiscus fabric. I created “grass” for the green/blue fabric, etc. I made sure each embroidery fit the dimensions of the bit of fabric I was quilting. In the end I was pleased with the outcome.
I added the gulls once I’d stitched the “sky” portion of the hanging – they are cut from black raw silk, fussy cut, fused, then edge stitched in place. My initial idea had been to print images of gulls on fabric but when I did that with the paper cutouts they didn’t show up well. In the end I thought silhouettes of the gulls worked better against the “Sky” background.
This evening I’ll do the hand stitching to finish off the piece.