
It’s hard finding t-shirt fabric here in Halifax. The color choices are very limited and what’s available is often the wrong weight. So, the other day when I took three large bags of clothing to Value Village (I’d gone through closets and drawers) I took a look at the men’s large t-shirts they had – I found three in solids (red, black, blue). I cut the shirts apart – there was enough fabric there for a t-shirt for me! This is one of them. Final cost – $4. I can’t buy fabric at that price!
New Socks

Finished this pair of socks last evening. I like the pattern created by the yarn but this time there was an interesting variation – the variegation was obviously planned for 68 stitches – that’s what I started out with and you can see the blocks of brown and light colour. When I decreased to 64 mid way down the leg, the blocks of brown turn into stripes. I’ve never had that happen before – the “patterns” have all been more general and so the decrease in stitches hasn’t made much difference to how the overall pattern turned out.
Amazing World Map
My sister sent me a link to this image yesterday with the note “Imagine quilts like this!”
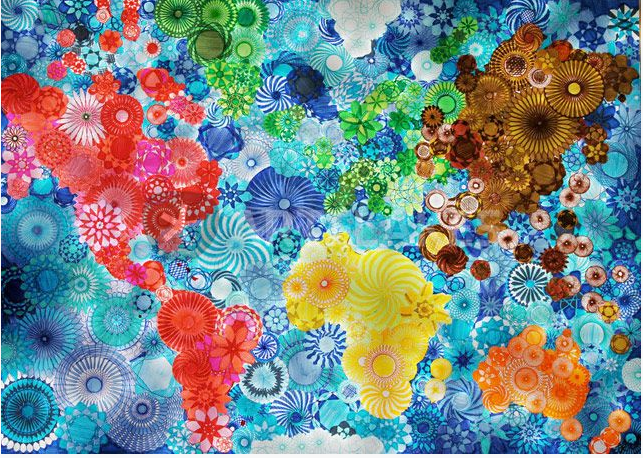
Rachel Evans makes colorful world maps out of Spirograph-produced patterns.
Can you just imagine a quilt map done with large pattern fabric?
I’ve pinned the image on my Pinterest board along with many other ideas. I’ll probably never do a quilt like this but it’s fun to think about trying one.
Intersections II
In case you think I haven’t been working at the sewing machine, I have been. I’ve got the top for the Intersections Quilt pieced and sewn. (Remember the original post about the quilt?)

I have the back pieced and the “quilt sandwich” (top, batting, back) is assembled and the layers are pin-basted. I’m hoping this week to begin quilting them together.
Swimsuits
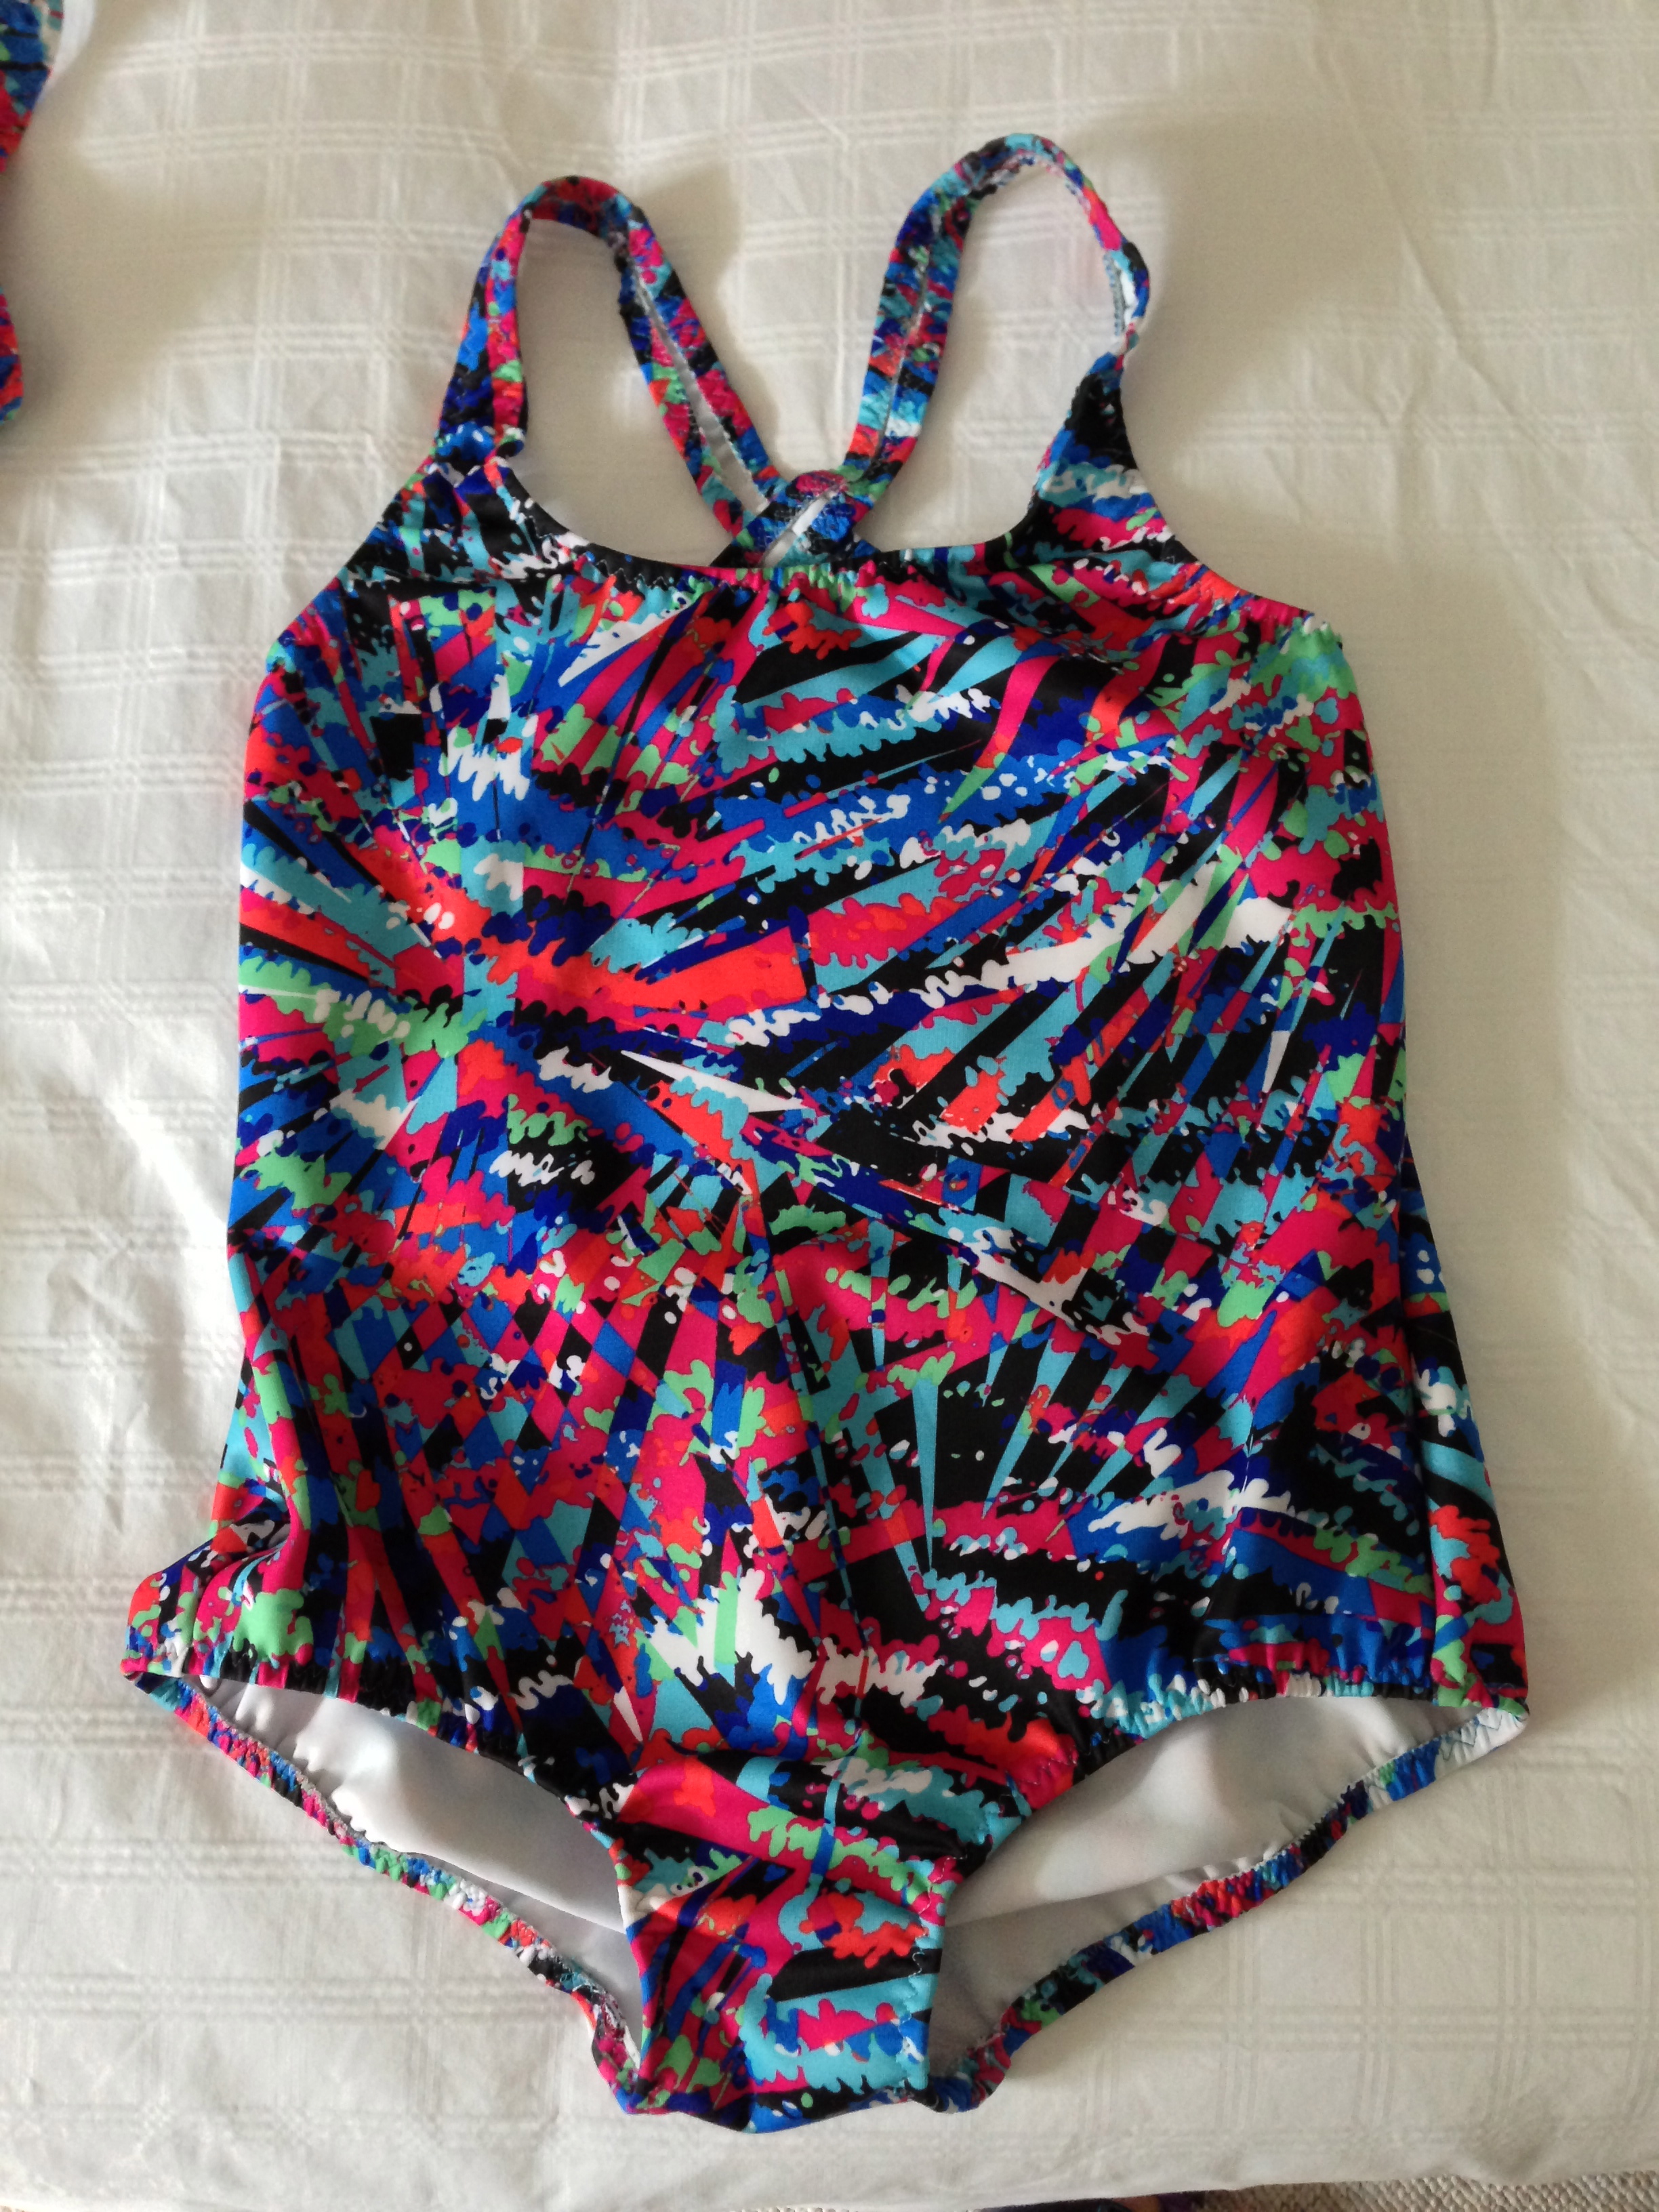
I have made my own swimsuits for a long time. I do it to get the fit I want, not because it costs me quite a bit less than buying them. I attend aquafit classes three mornings a week and the chlorine in the pool simply eats suits – doesn’t matter whether I’ve made them or bought them. So I continue making suits – the challenge is finding interesting swimsuit fabric. This fabric I bought at Mill Ends in Portland OR during my trip there in June. I have one other fabric from that trip as well as the two new pieces from Spandex House in NYC which I’ve posted about a couple of weeks ago.
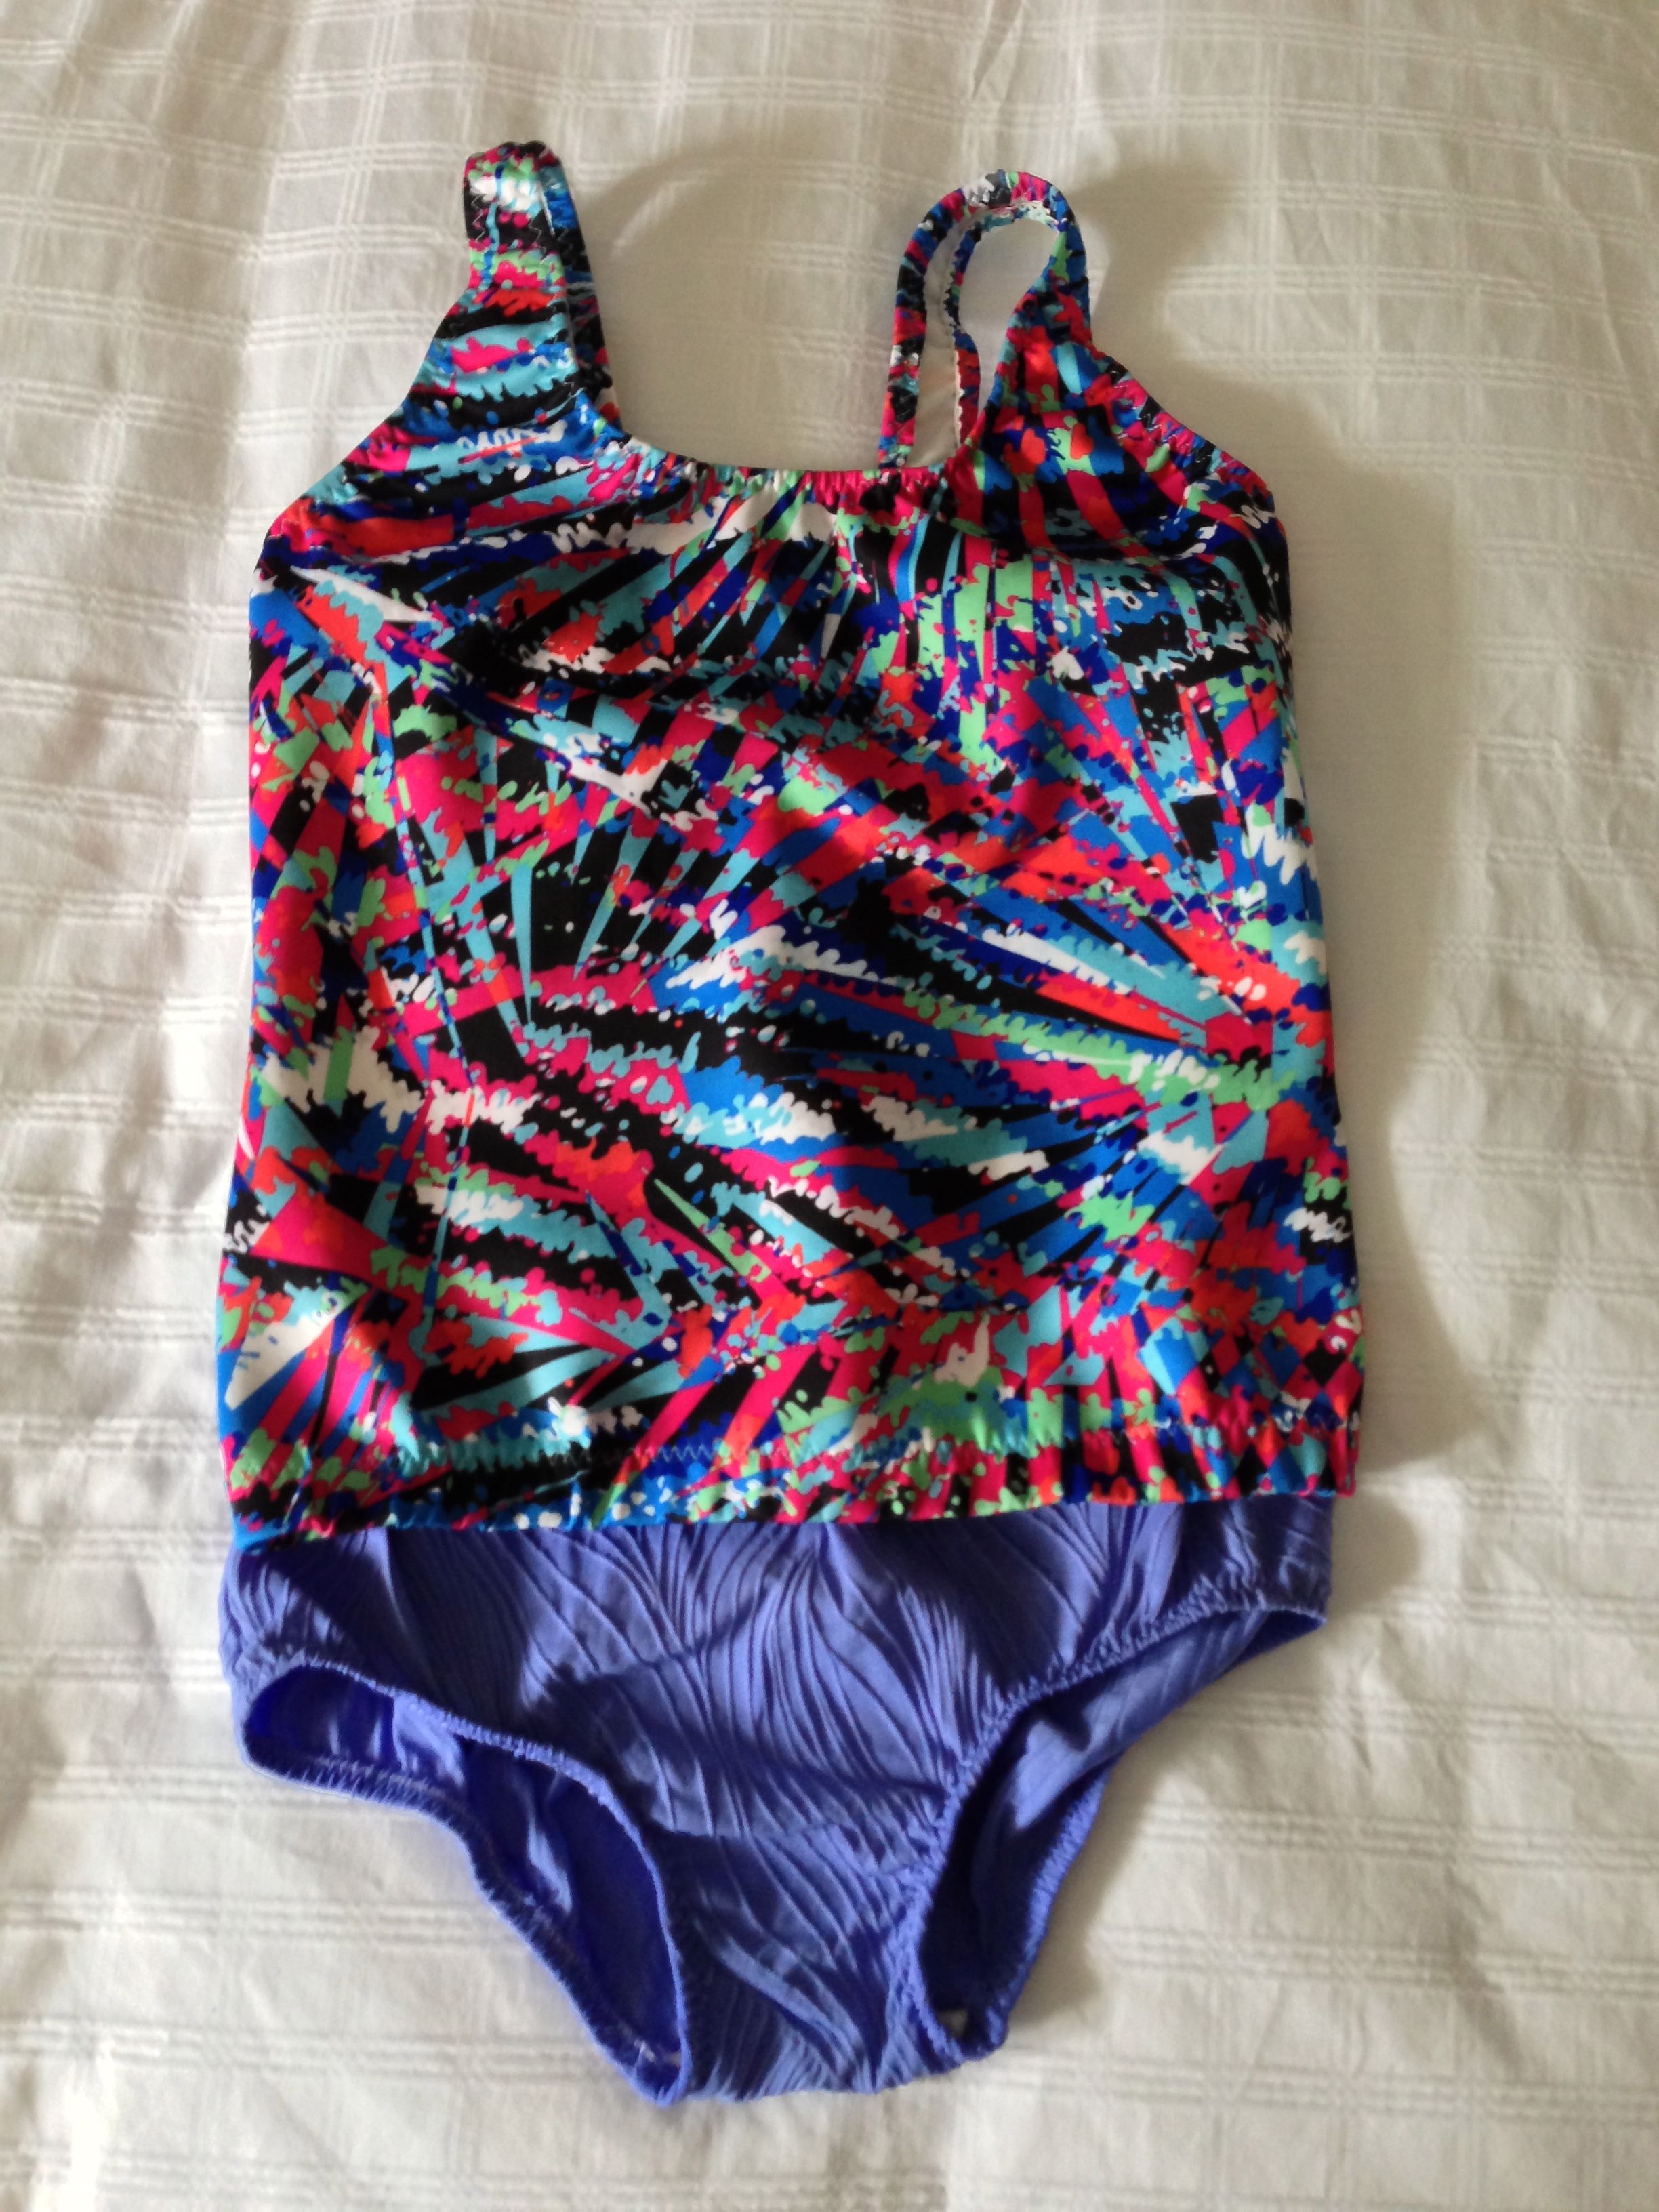
Making a swimsuit is easy – I have a pattern I’ve used for years (still fits), I cut out a couple of suits when I’m making them. It takes very little time to sew them together on the serger – the more time consuming part is putting in the elastic around the legs and the neckline. This time I tried something new – I took my pattern and created a bottom from it, then created a top – a tankini two piece suit – I found I had to put elastic around the bottom of the top portion, or the top had a tendency to ride up in the pool. The elastic around the bottom of the suit top solved that problem.
I have another two piece in the works. I’ll post a photo when I get it done this weekend.
Ichiroya Newsletter
The Kimono flea Market ICHIROYA News Letter just arrived in my inbox. It arrives weekly since I ordered the kimono silk from them. I enjoy reading it – it’s about some small aspect of life – this one about Senko hanabi (a kind of sparkling firework – I’d call then sparklers) which used to be made in Japan but haven’t been for about 15 years and of course the know-how for making the item has almost been lost. It’s been about the cost of producing the sparklers which can be manufactured in China much more cheaply. Ichiro (or whoever writes the blog) is lamenting the loss of craft knowledge:
Not only kimono but all the traditional art work are in the same difficult situation- they are seeking for survival, finding new concept and trying to appeal people. I knew this is happenng all over and by seeing the new products like this Senko hanabi, I almost scream,
`Don’t go, Kimono! Hold on! Hold on Senko hanabi, too!’
‘Don’t go, Kimono! Hold on! – that’s because the most beautiful kimono fabrics are becoming too expensive to make in Japan and cheaper, inferior ones are being imported from China. The fabrics Ichiro sells are often old ones – obtained from who knows where – and when they’ve been sold, they’re gone – no more of them being made.
How many of our craft skills are being lost because the cost of doing hand work has become too expensive? I know I don’t sell my quilts because I can’t get what they’re worth – I prefer giving them as gifts; that way I know they are treasured and might survive as family heirlooms (and I’m not angry that I was paid poorly for my efforts).
Amazing 3D Street Art

I’ve seen stuff like this before – however, it never ceases to amaze me to think that the artist has created a flat painting on the street that has such features of depth that I suspect it would be hard to walk on it! You can see more of it if you click here.
Ironing A Shirt
I just finished ironing a couple of shirts; I manage to do a reasonable job after having watched the video by TM Lewin (a shirt maker in England). Click here if you want to learn how to iron a shirt in just three minutes. You’ll find several useful tips in the video.

I originally got the link from Pam Erny – a professional shirt-maker who makes wonderful shirts.
I’ve got fabric for several shirts – purchased in New York and Portland – time to think about using some of it.
Intersections
Thinking about starting a new quilt so I went through my scrapbook of quilts I might like to make and decided Intersections by Cheryl Malkowski (Hoffman Timeless Treasures – free pattern) would work well with the green scrap bag I purchased from Keepsake Quilting some time ago. Here’s the picture of her finished quilt:

It’s constructed as an 8 x 10 block quilt – with a finished quilt size of 68″ X 85″ – too big for me to handle. I’d like a finished size of no more than 48″ x 64″. The basic block is this:

They get assembled in groups of 4 to form a pinwheel at the center

I have 12 fabrics to work with (9″ x 44″) – I need a quilt constructed from 6 x 8 blocks – to give me complete pinwheels – so how large does each block have to be to fit within my dimensions?
Turns out 7″ finished blocks will work – so I need to cut from each fabric:
- 4 blocks – 4″ x 7 1/2″
- 8 blocks – 2 1/4″ x 7 1/2″
I did a sample to see how it would work (these are scrap fabrics not fabrics from the set of greens):

This let me know my dimensions will work – BUT – I will have to more meticulous in my piecing because the finished block should be a 14 1/2″ square – and this one isn’t quite!
The assembled blocks will be 42″ x 56″ – which will allow me to add a 2 3/4″ border around the outside to make the final dimensions: 48″ x 62″. A good lap quilt size.
I also played around with some ideas for quilting the finished quilt – I think I may go with this one for each block:
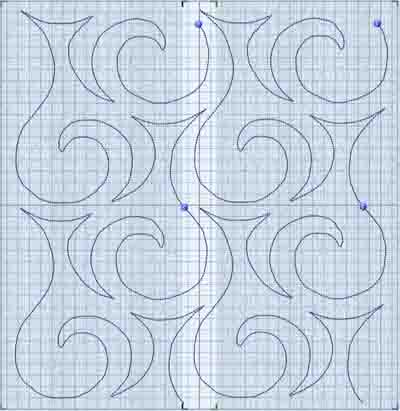
This will give me an overall design for each of the finished 14″ x 14″ blocks which I will be able to do in my grand dream hoop. I don’t have a longarm quilter, I quilt in the hoop of my embroidery machine.
Replacing Sock Heels
I have a friend who wears holes in the heels of her socks. Rather than throw them away I repair them. (We joke about her having a “lifetime guarantee”—she loves to wear the socks and I enjoy knitting them.)
It used to be I salvaged the legs and reknit feet. But that’s wasteful—the feet often have another season’s wear in them. So I changed to fixing just the heel—first I tried darning the hole but often the hole is too large for a successful darn. Next I tried knitting a patch over the hole, but the sides of the patch created a strain on the sides of the heel and she ended up with holes on the side. Sometimes I’ve reinforced the bottom of the heel with a double strand of sewing thread but where the thread ended on the sides left that area vulnerable.
I have finally figured out a way to reknit just the heel itself.

The link above is to the complete set of directions (with pictures) showing how I replace just the worn heel of a knit sock!
If the hole is under the ball of the foot – no option, you can only really salvage the legs – ya gotta reknit the foot and of course by then you don’t have any of the original yarn left so you end up with something that contrasts well with the colours in the leg.

