Possibilities #1

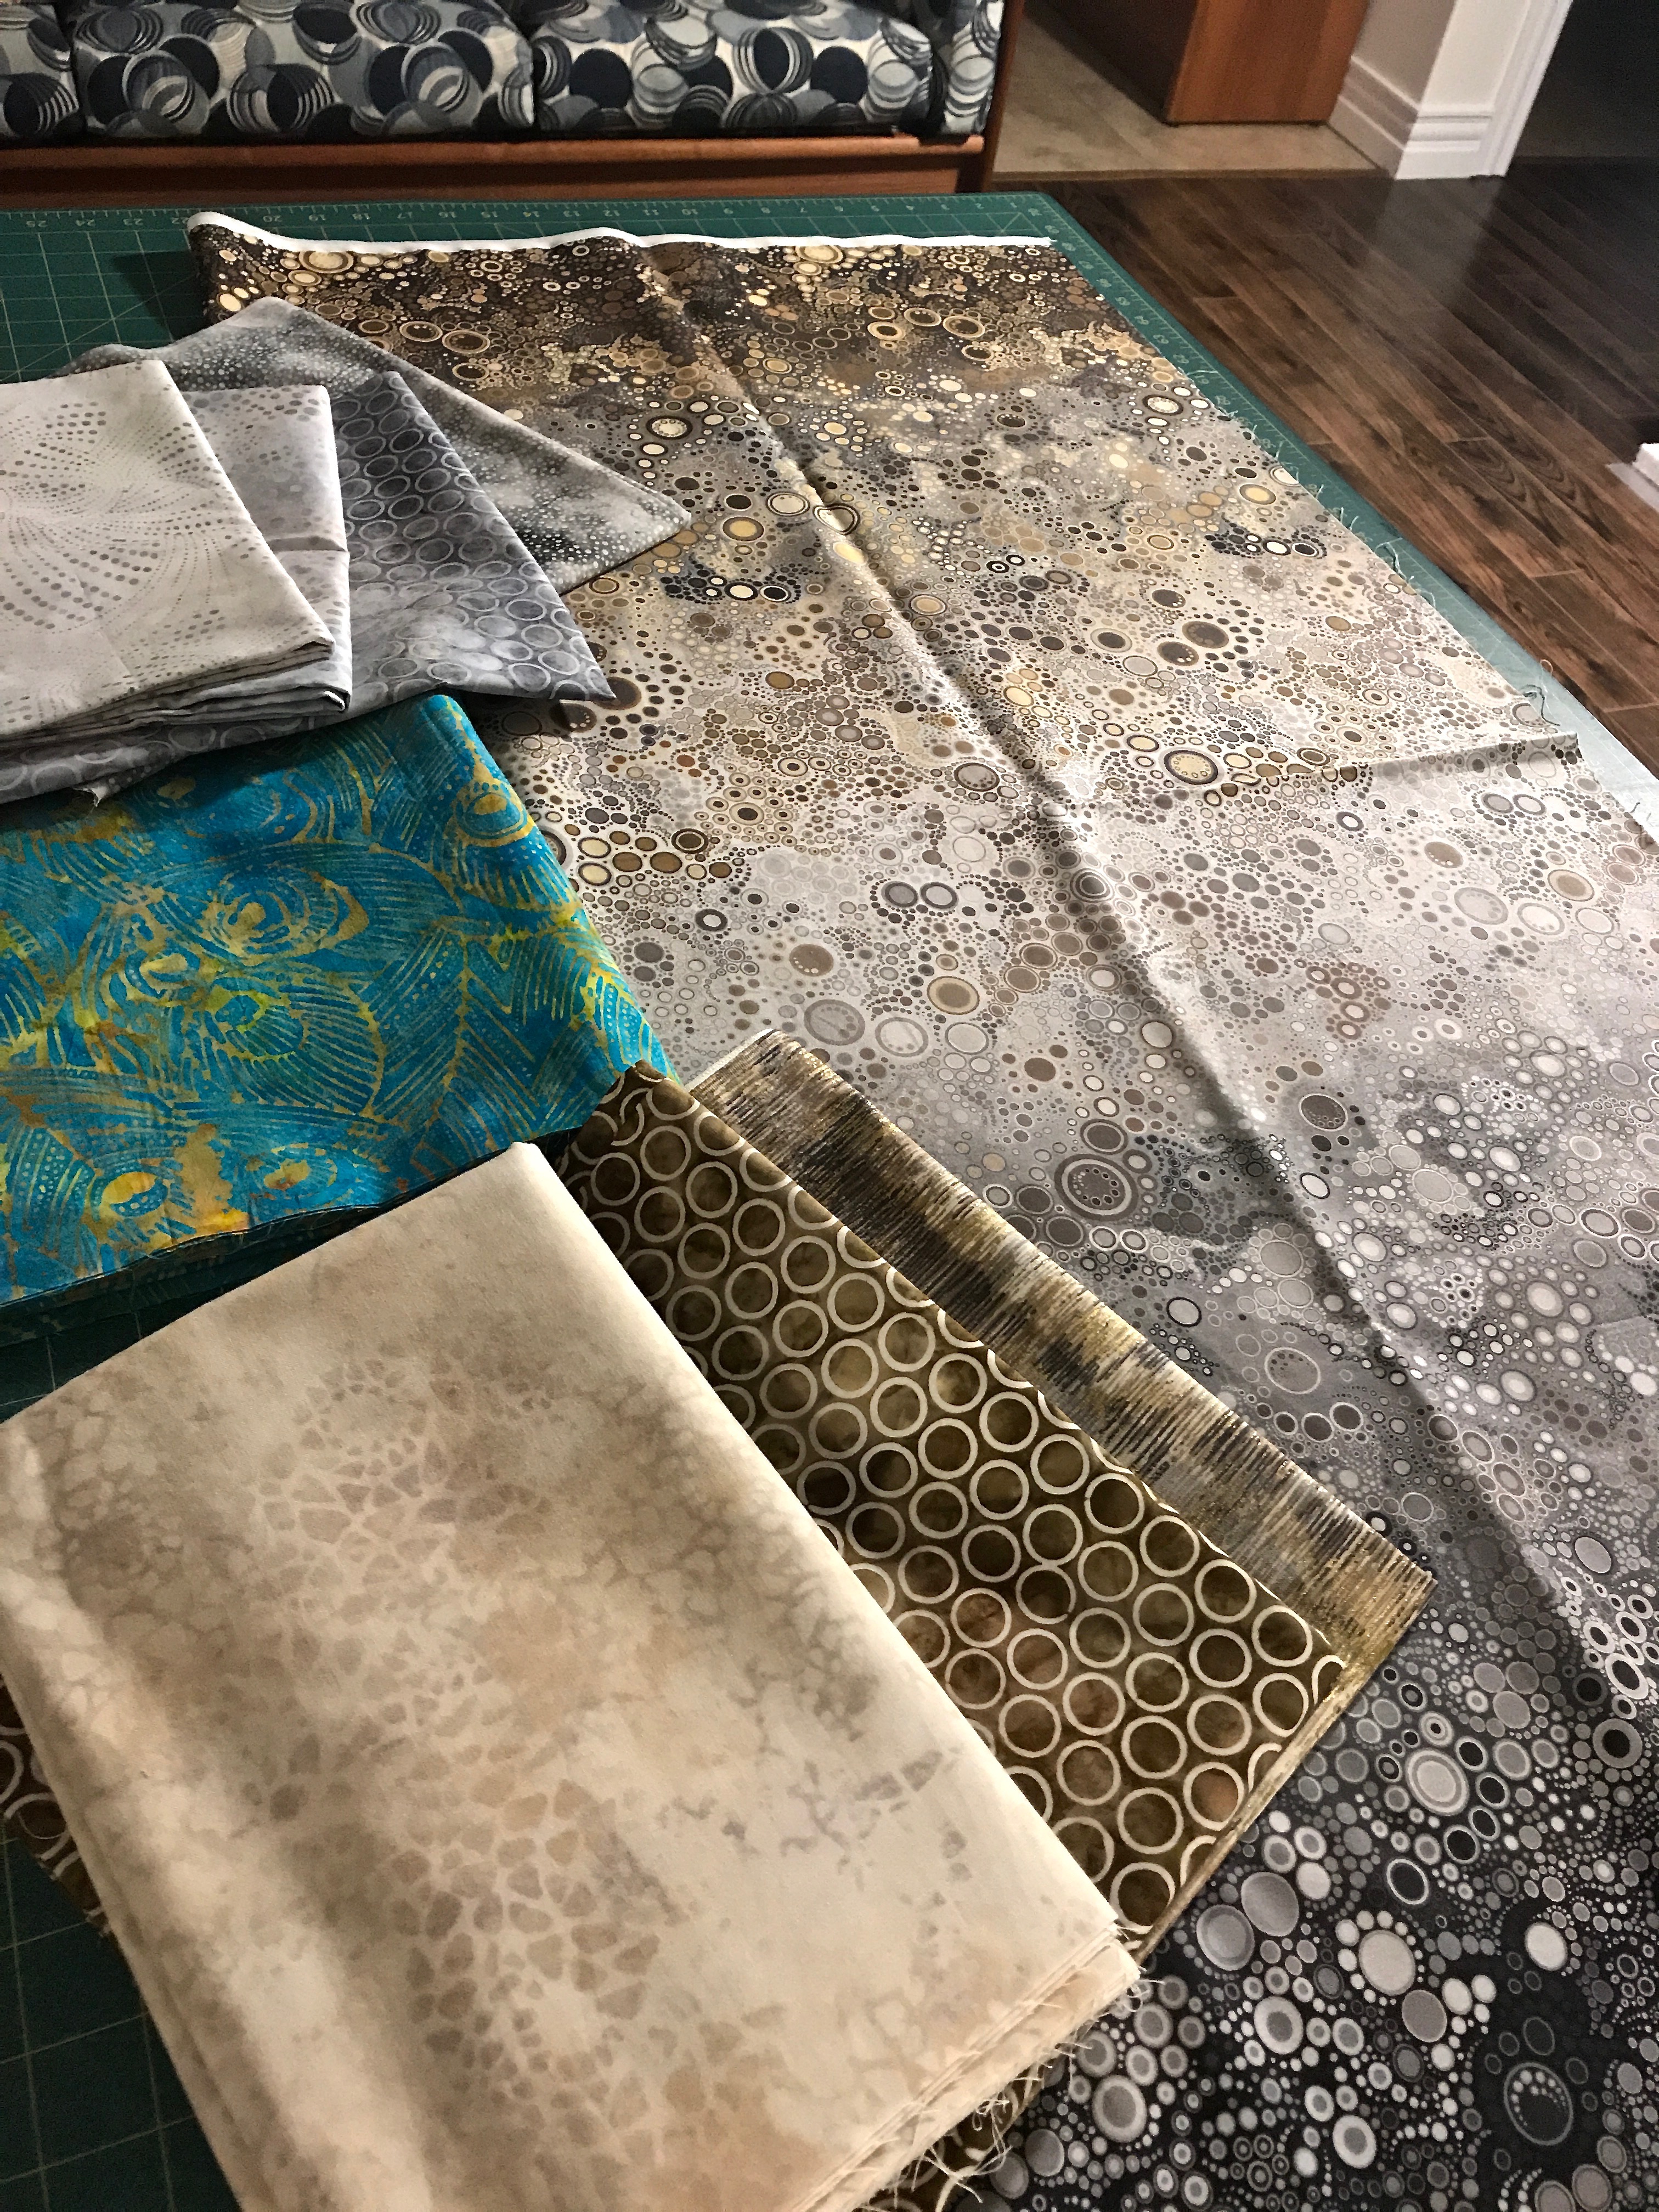
That pile of fabrics with the Ombre fabric as central has been calling out to me. So this morning I decided to have a go. My idea was to keep the ombre as intact as possible and to set up some kind of convergence idea using the other blending/contrasting fabrics.

Well that didn’t work! The strips of contrast fabrics kill the ombre – they’re way too strong; they overwhelm the ombre fabric. I’ve gathered them up and put them aside to use them in something else.

Ombre Idea #1

So then back to Ricky Tims basic convergence quilt idea – four squares of blending/contrasting fabric which are cut into graduated strips, sewn together in one direction, then sliced again in graduated strips and stitched once more. The question is what will go with the two blocks of the ombre.

I tried a light and dark turquoise – the darker fabric is lifeless against the ombre.

Possible Ombre Idea #2

The lovely lined fabric doesn’t have near enough contrast to work at all.

Ombre Idea #3

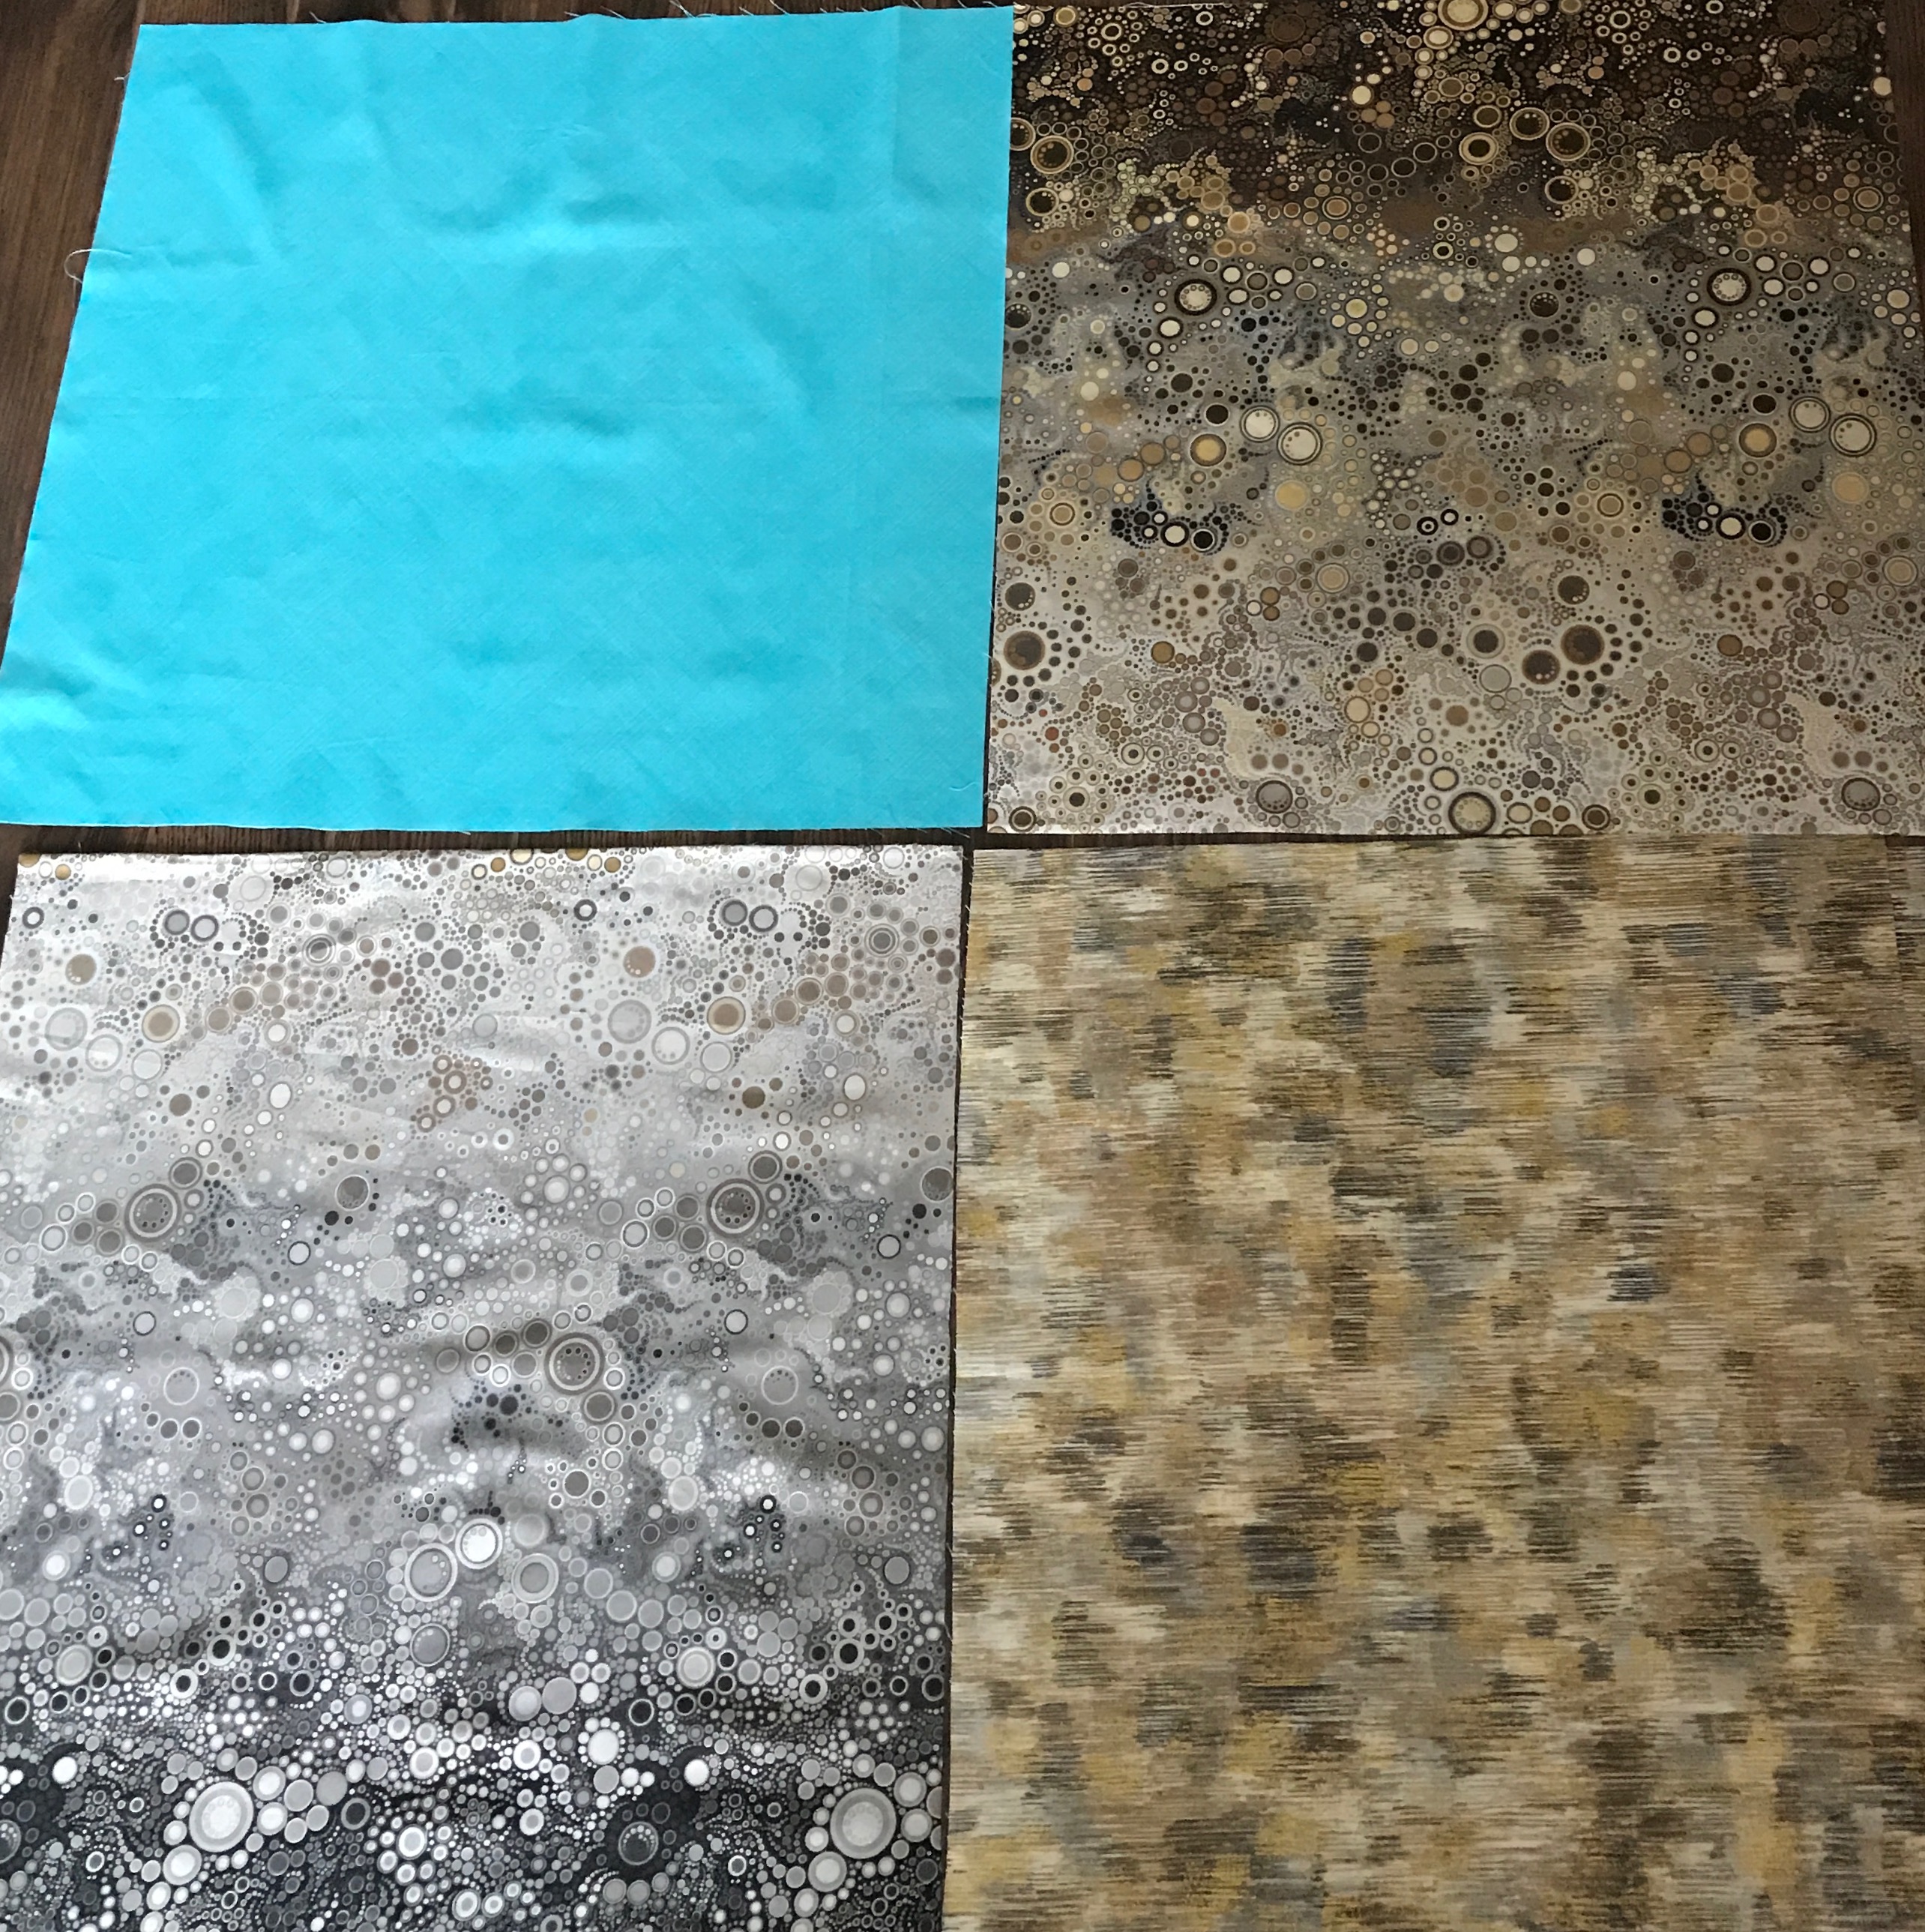
For the moment I’m contemplating this selection – the turquoise should make the overall assembly bright and the paler batik blends reasonably well with the two halves of the  ombre fabric…

Ombre Idea #4

I will walk around that for a day or so before cutting further – at the same time going through my stash again to see if I have any other fabrics that might work better.

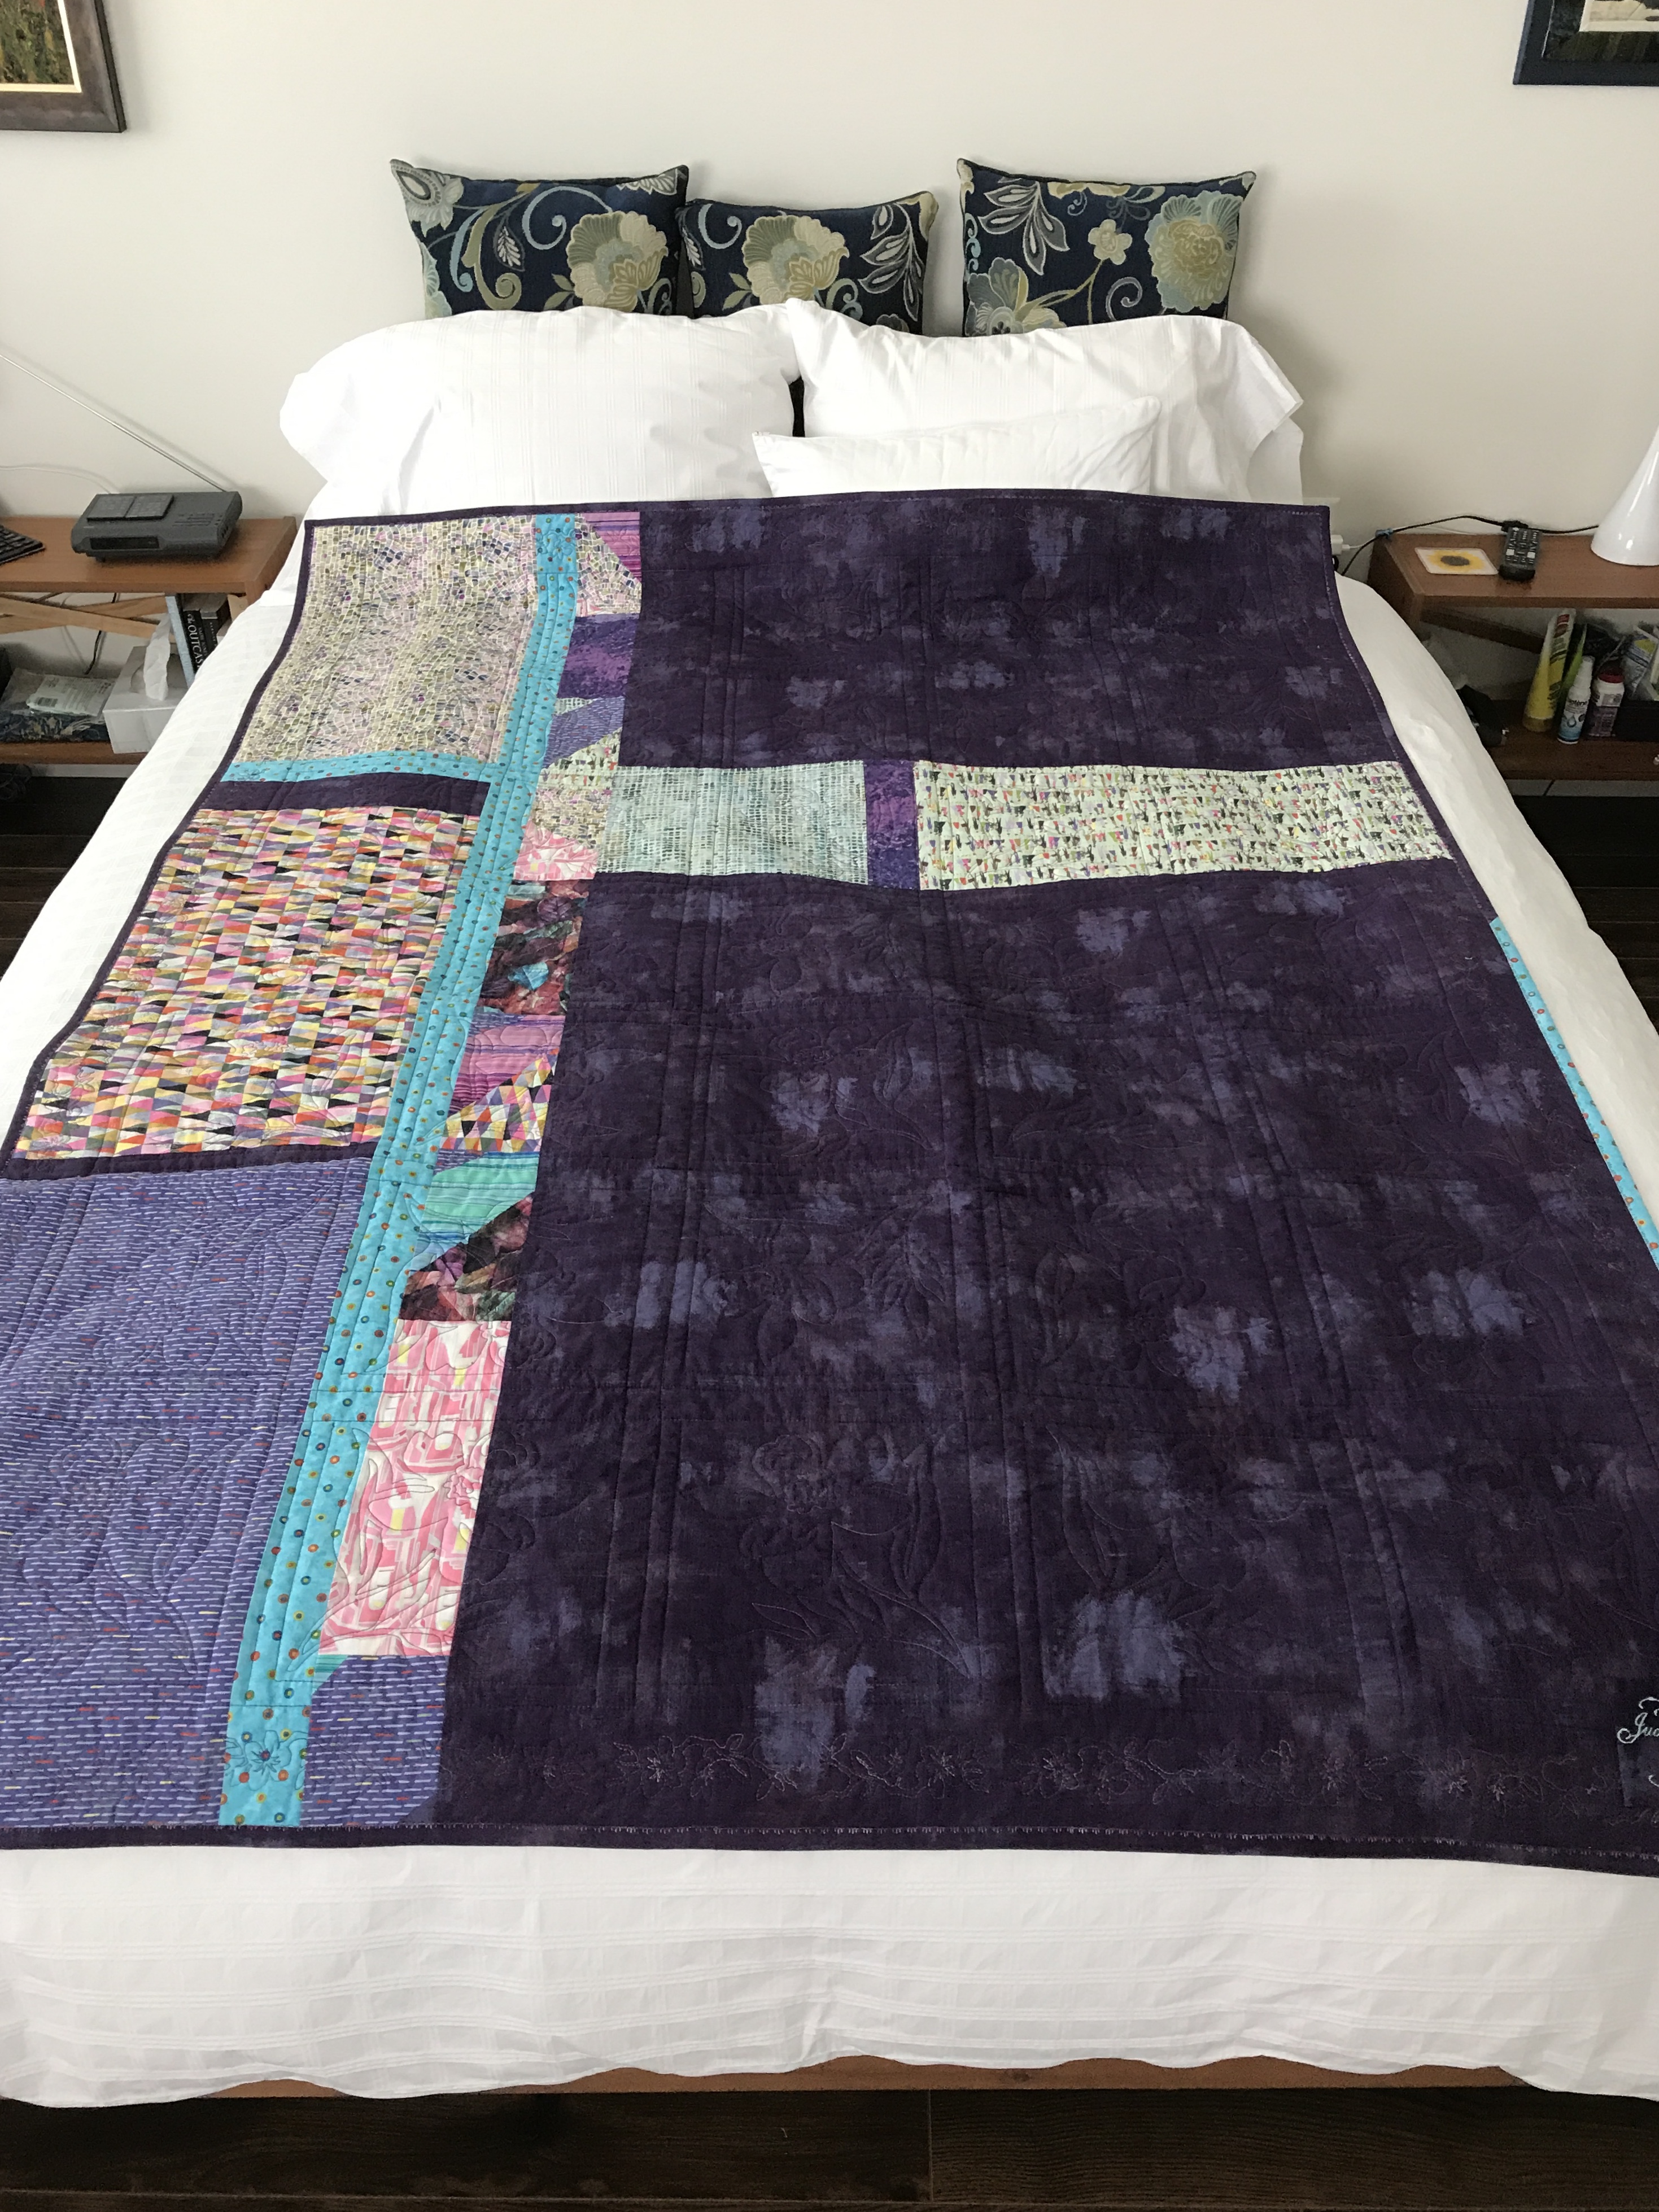
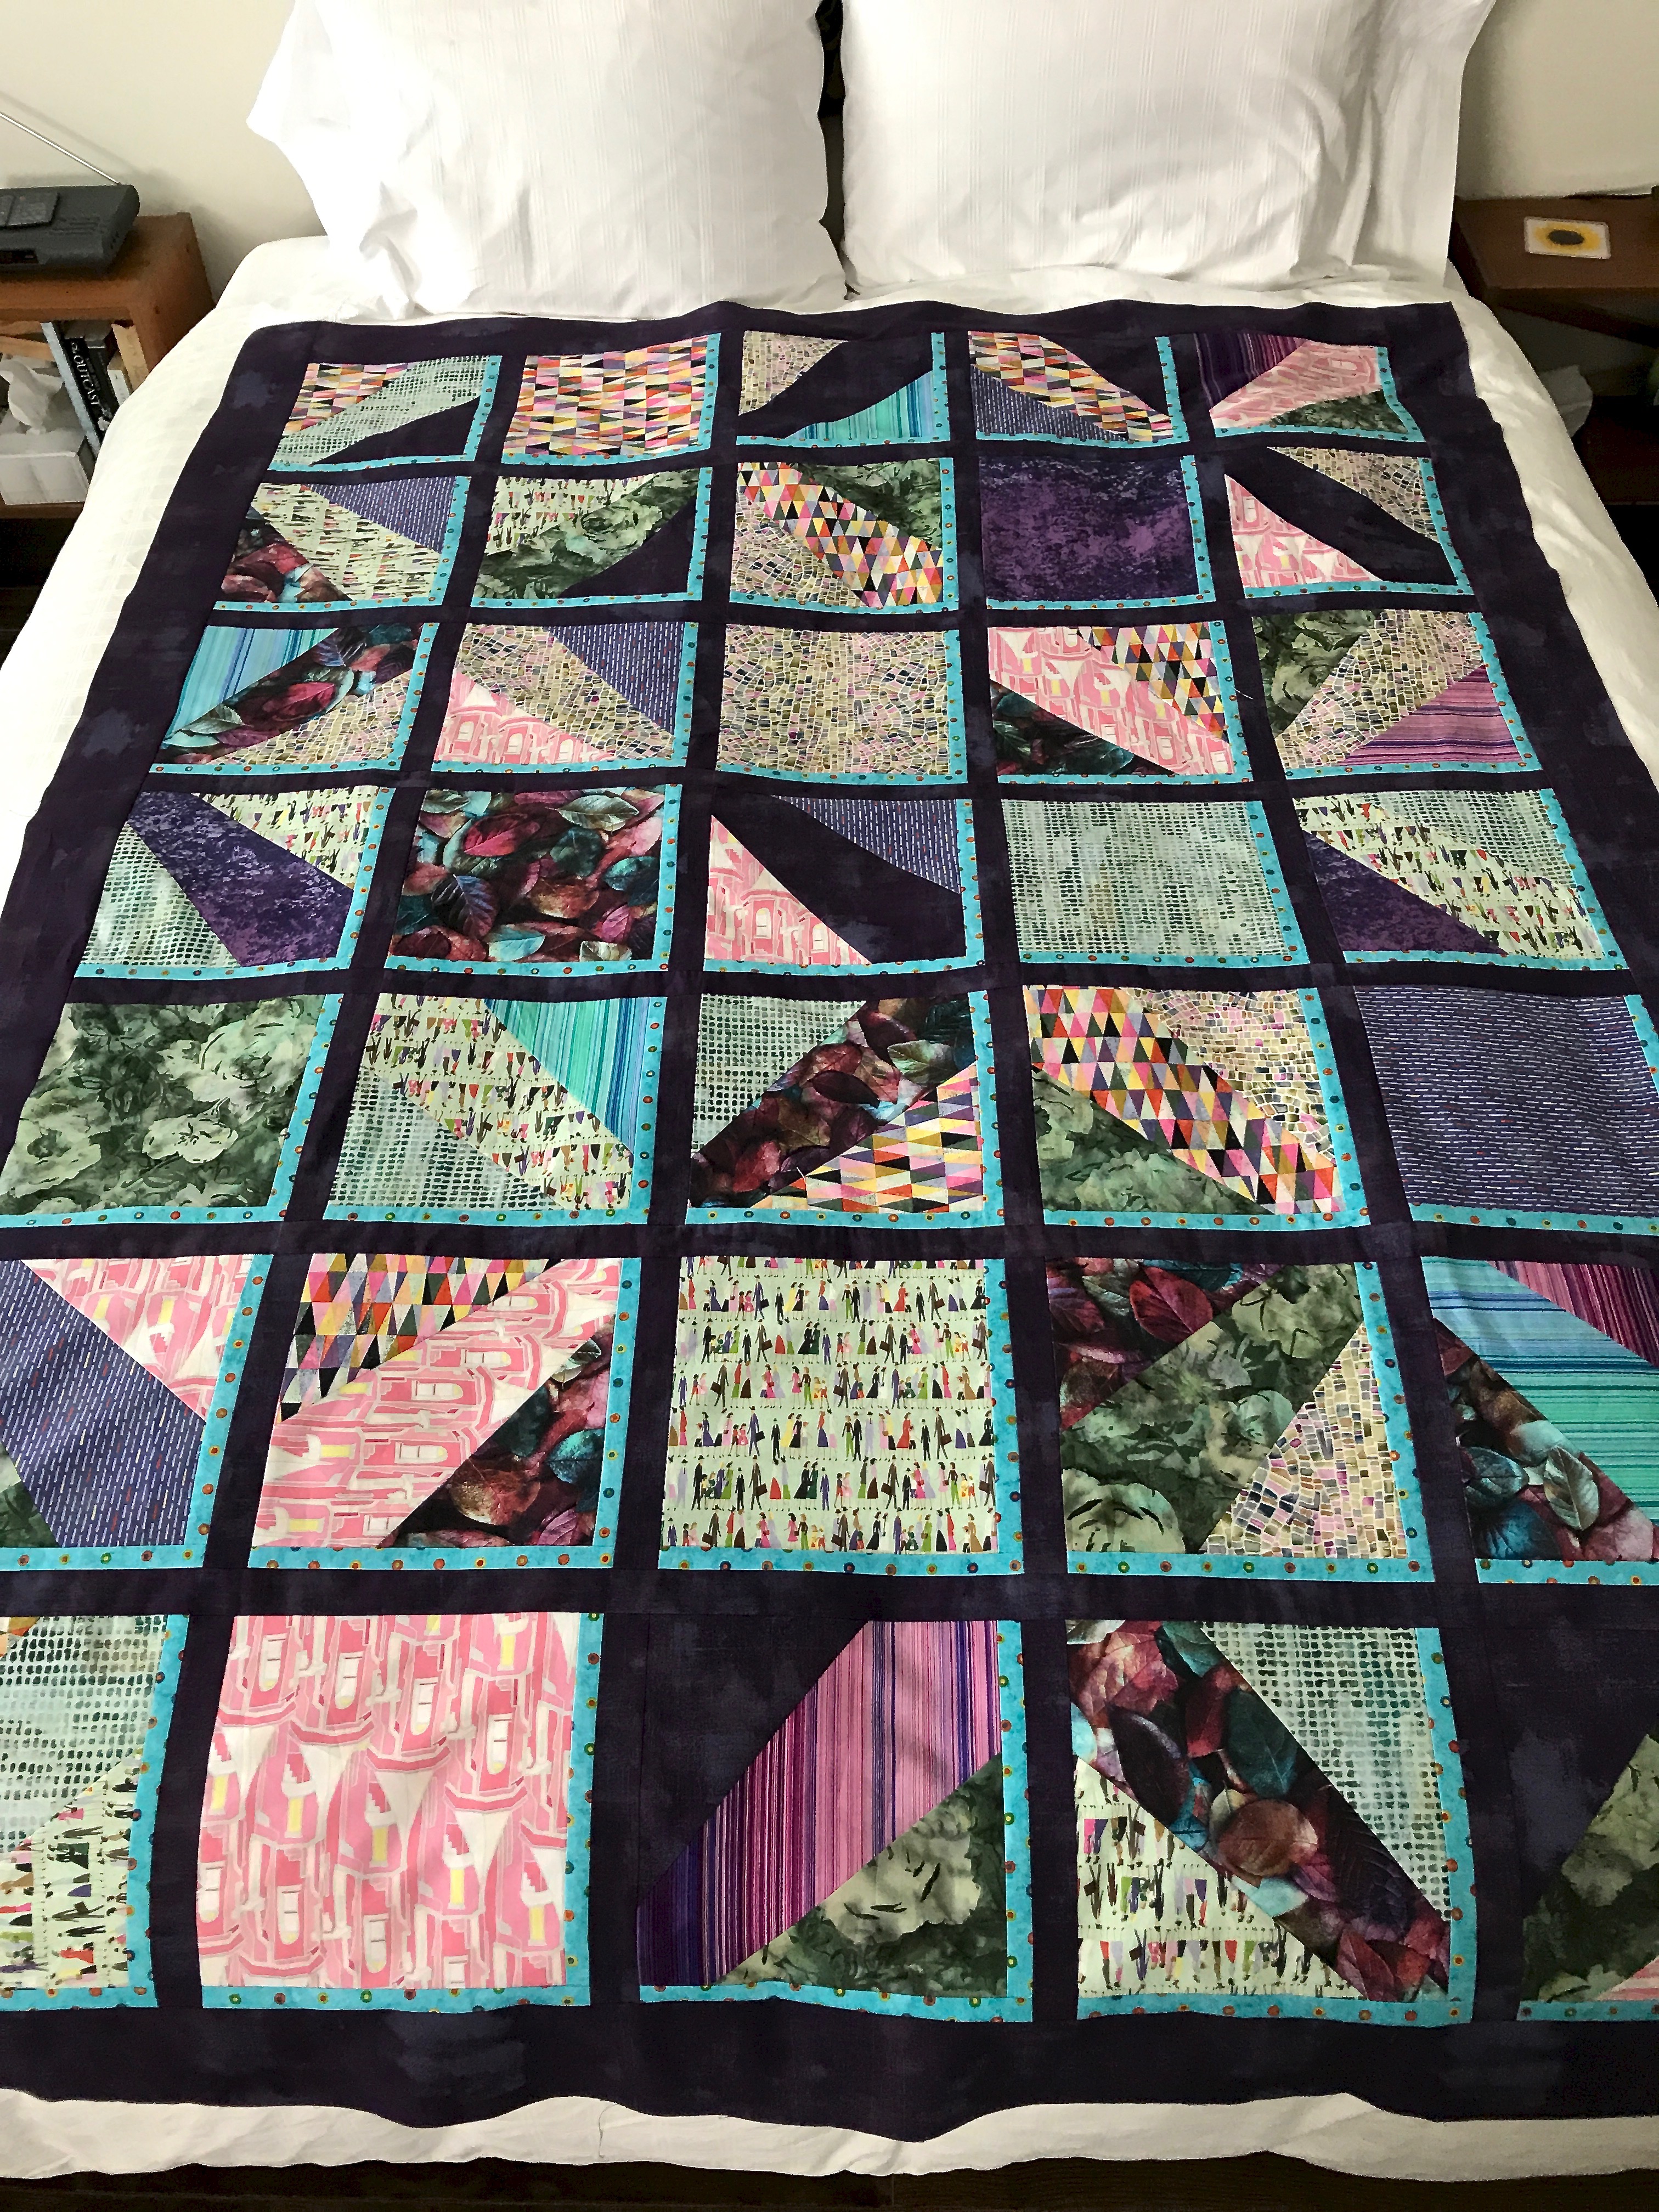
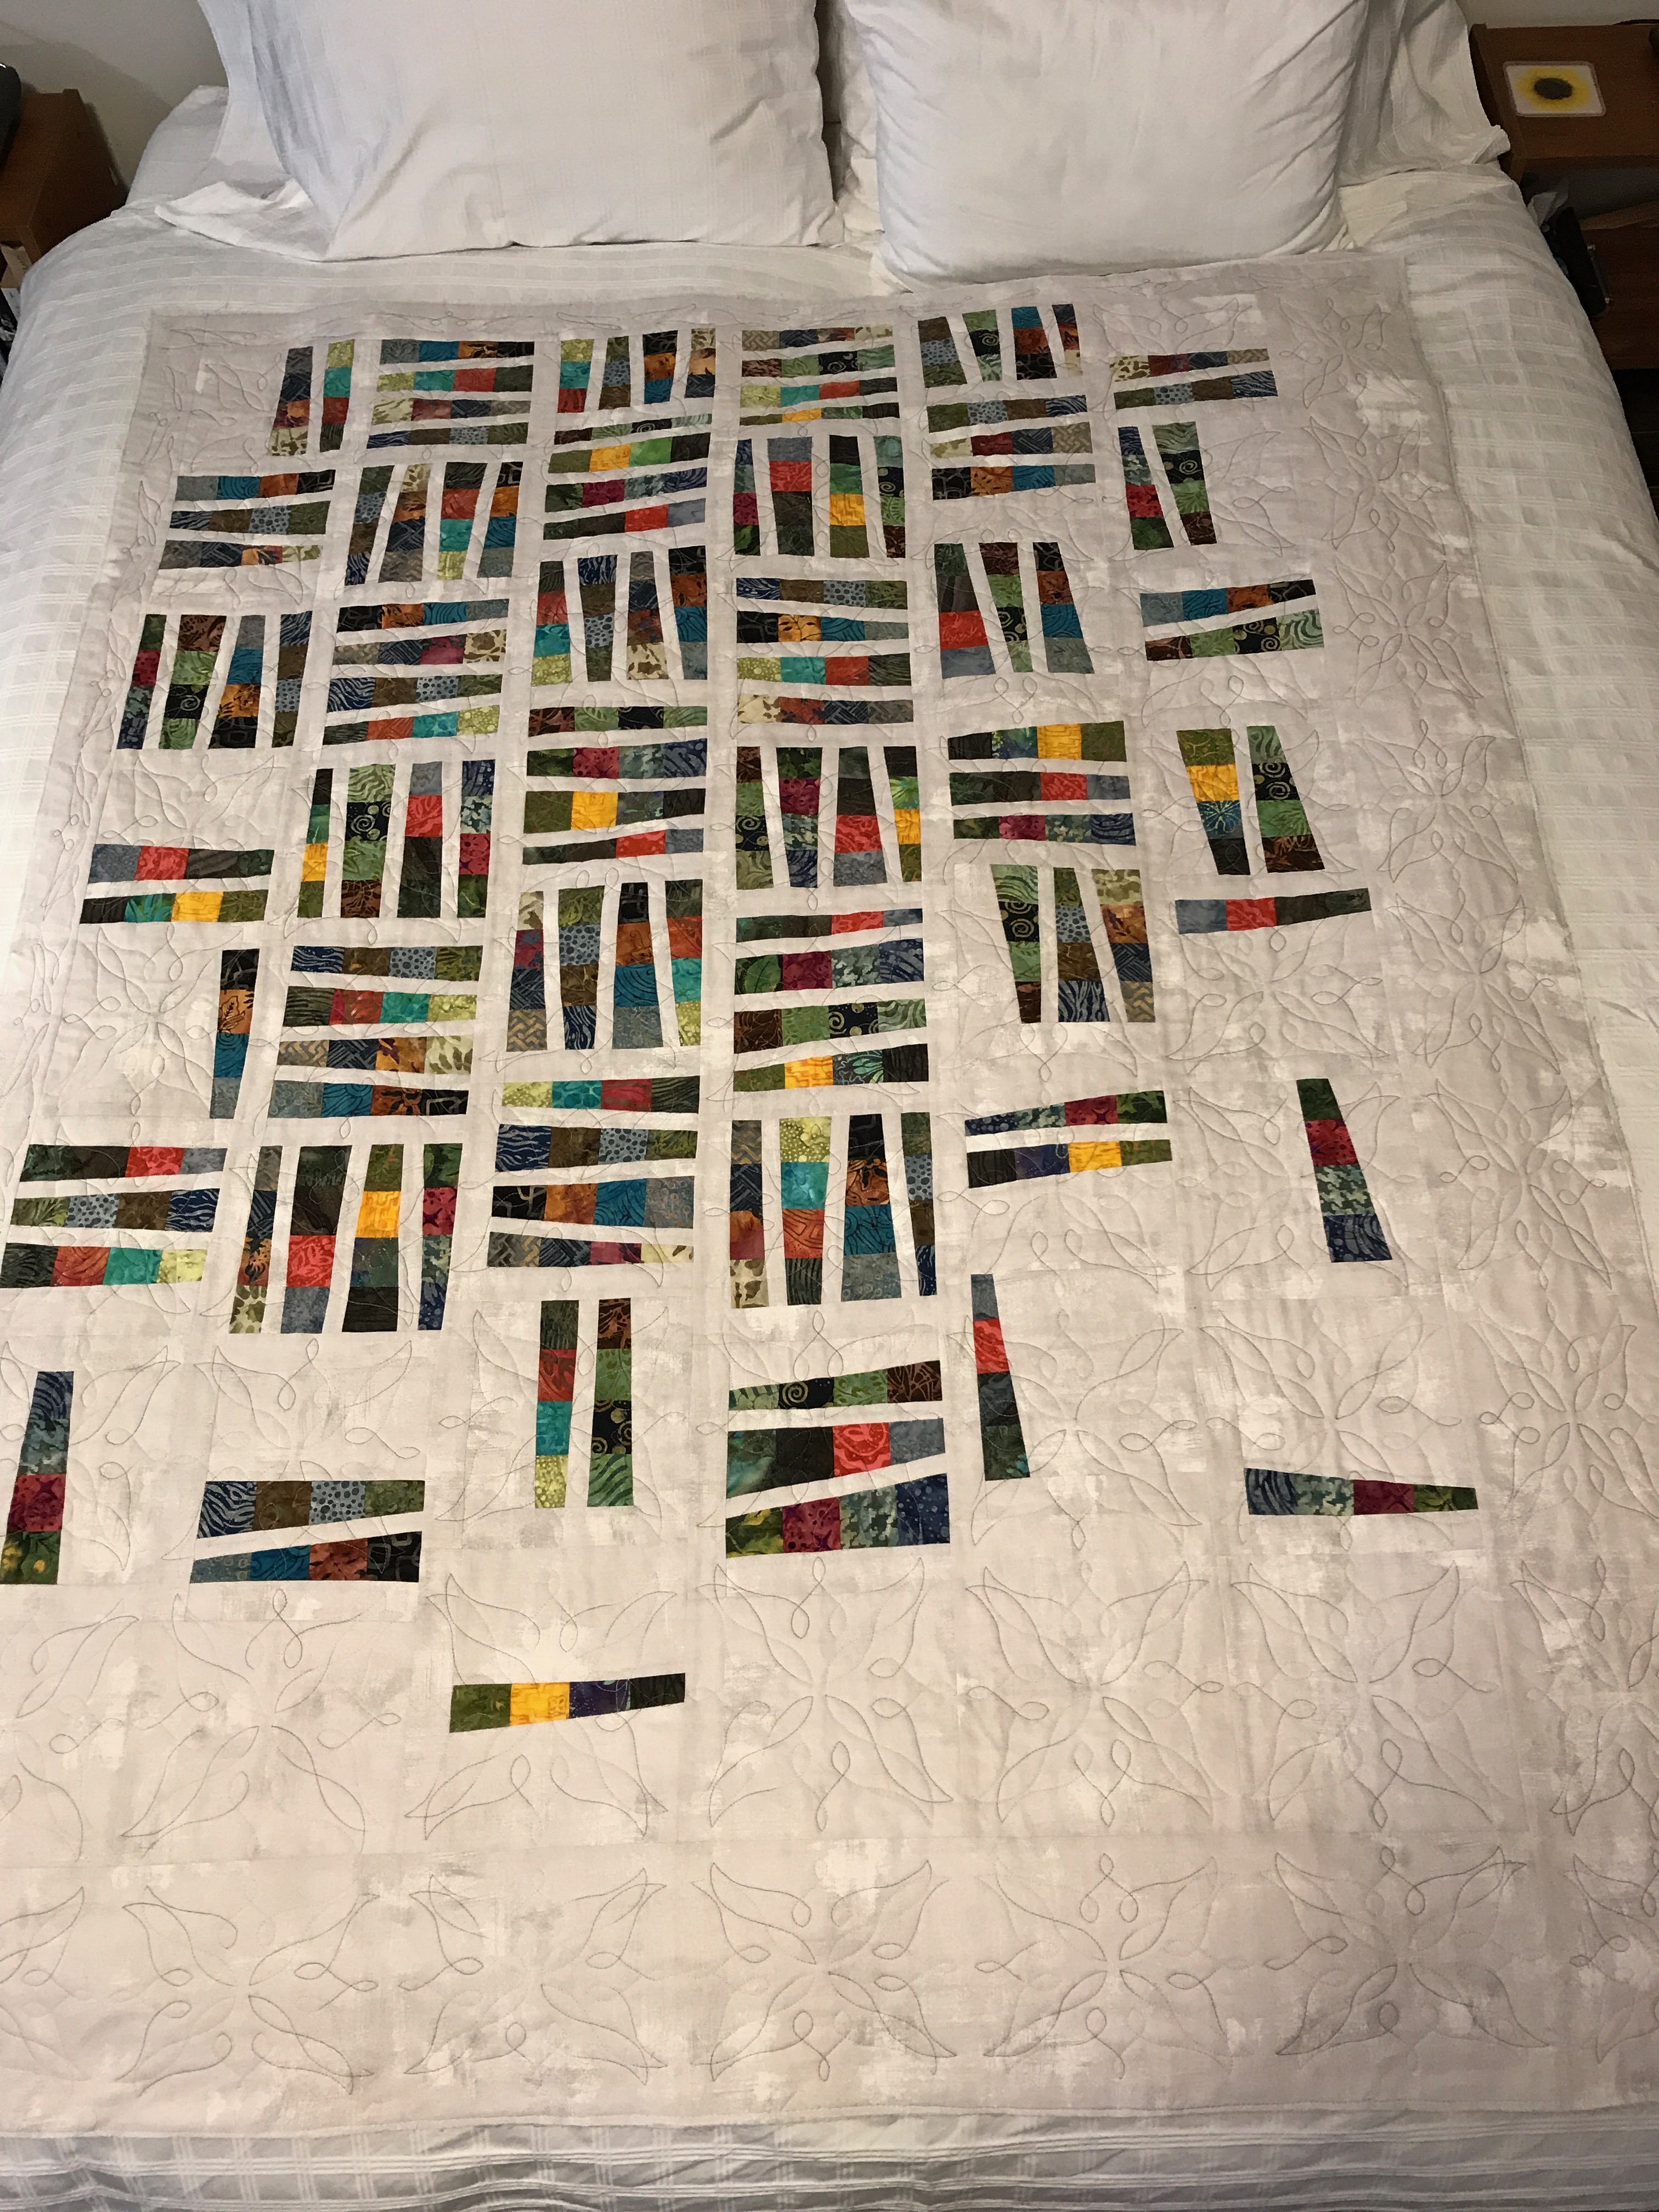
My first convergence quilt had strong contrasts and worked out well.

Convergence Quilt #1

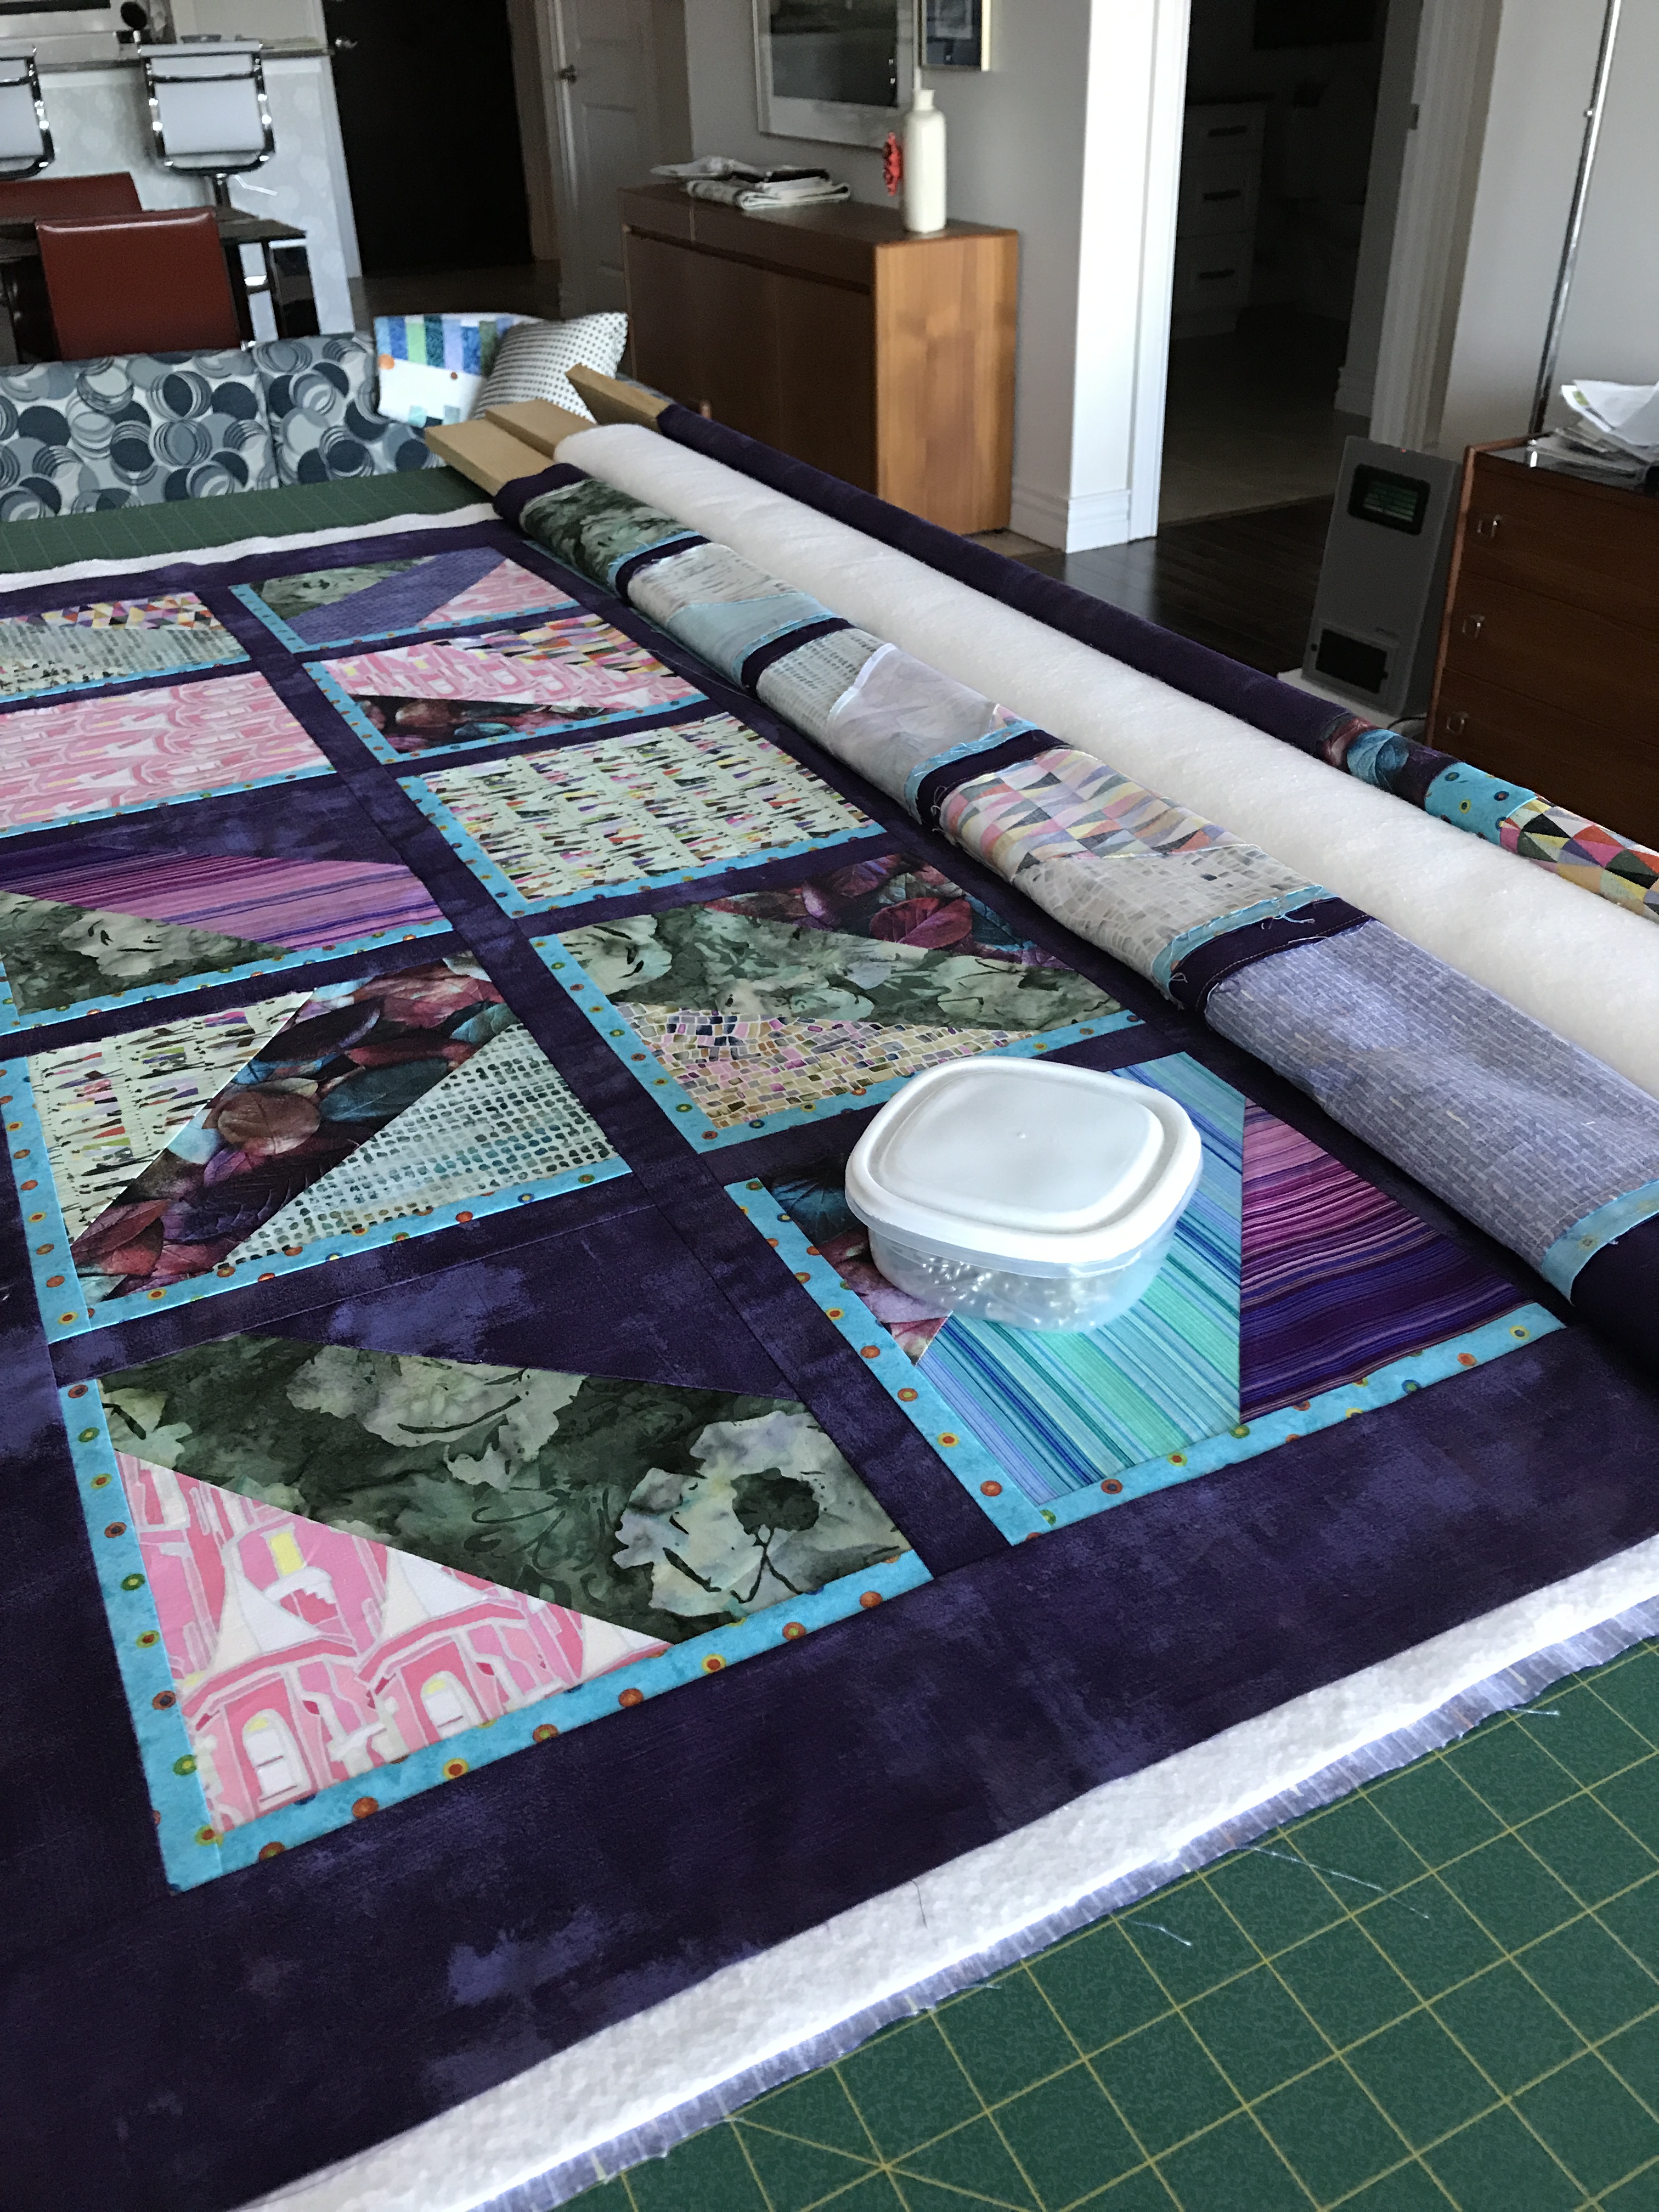
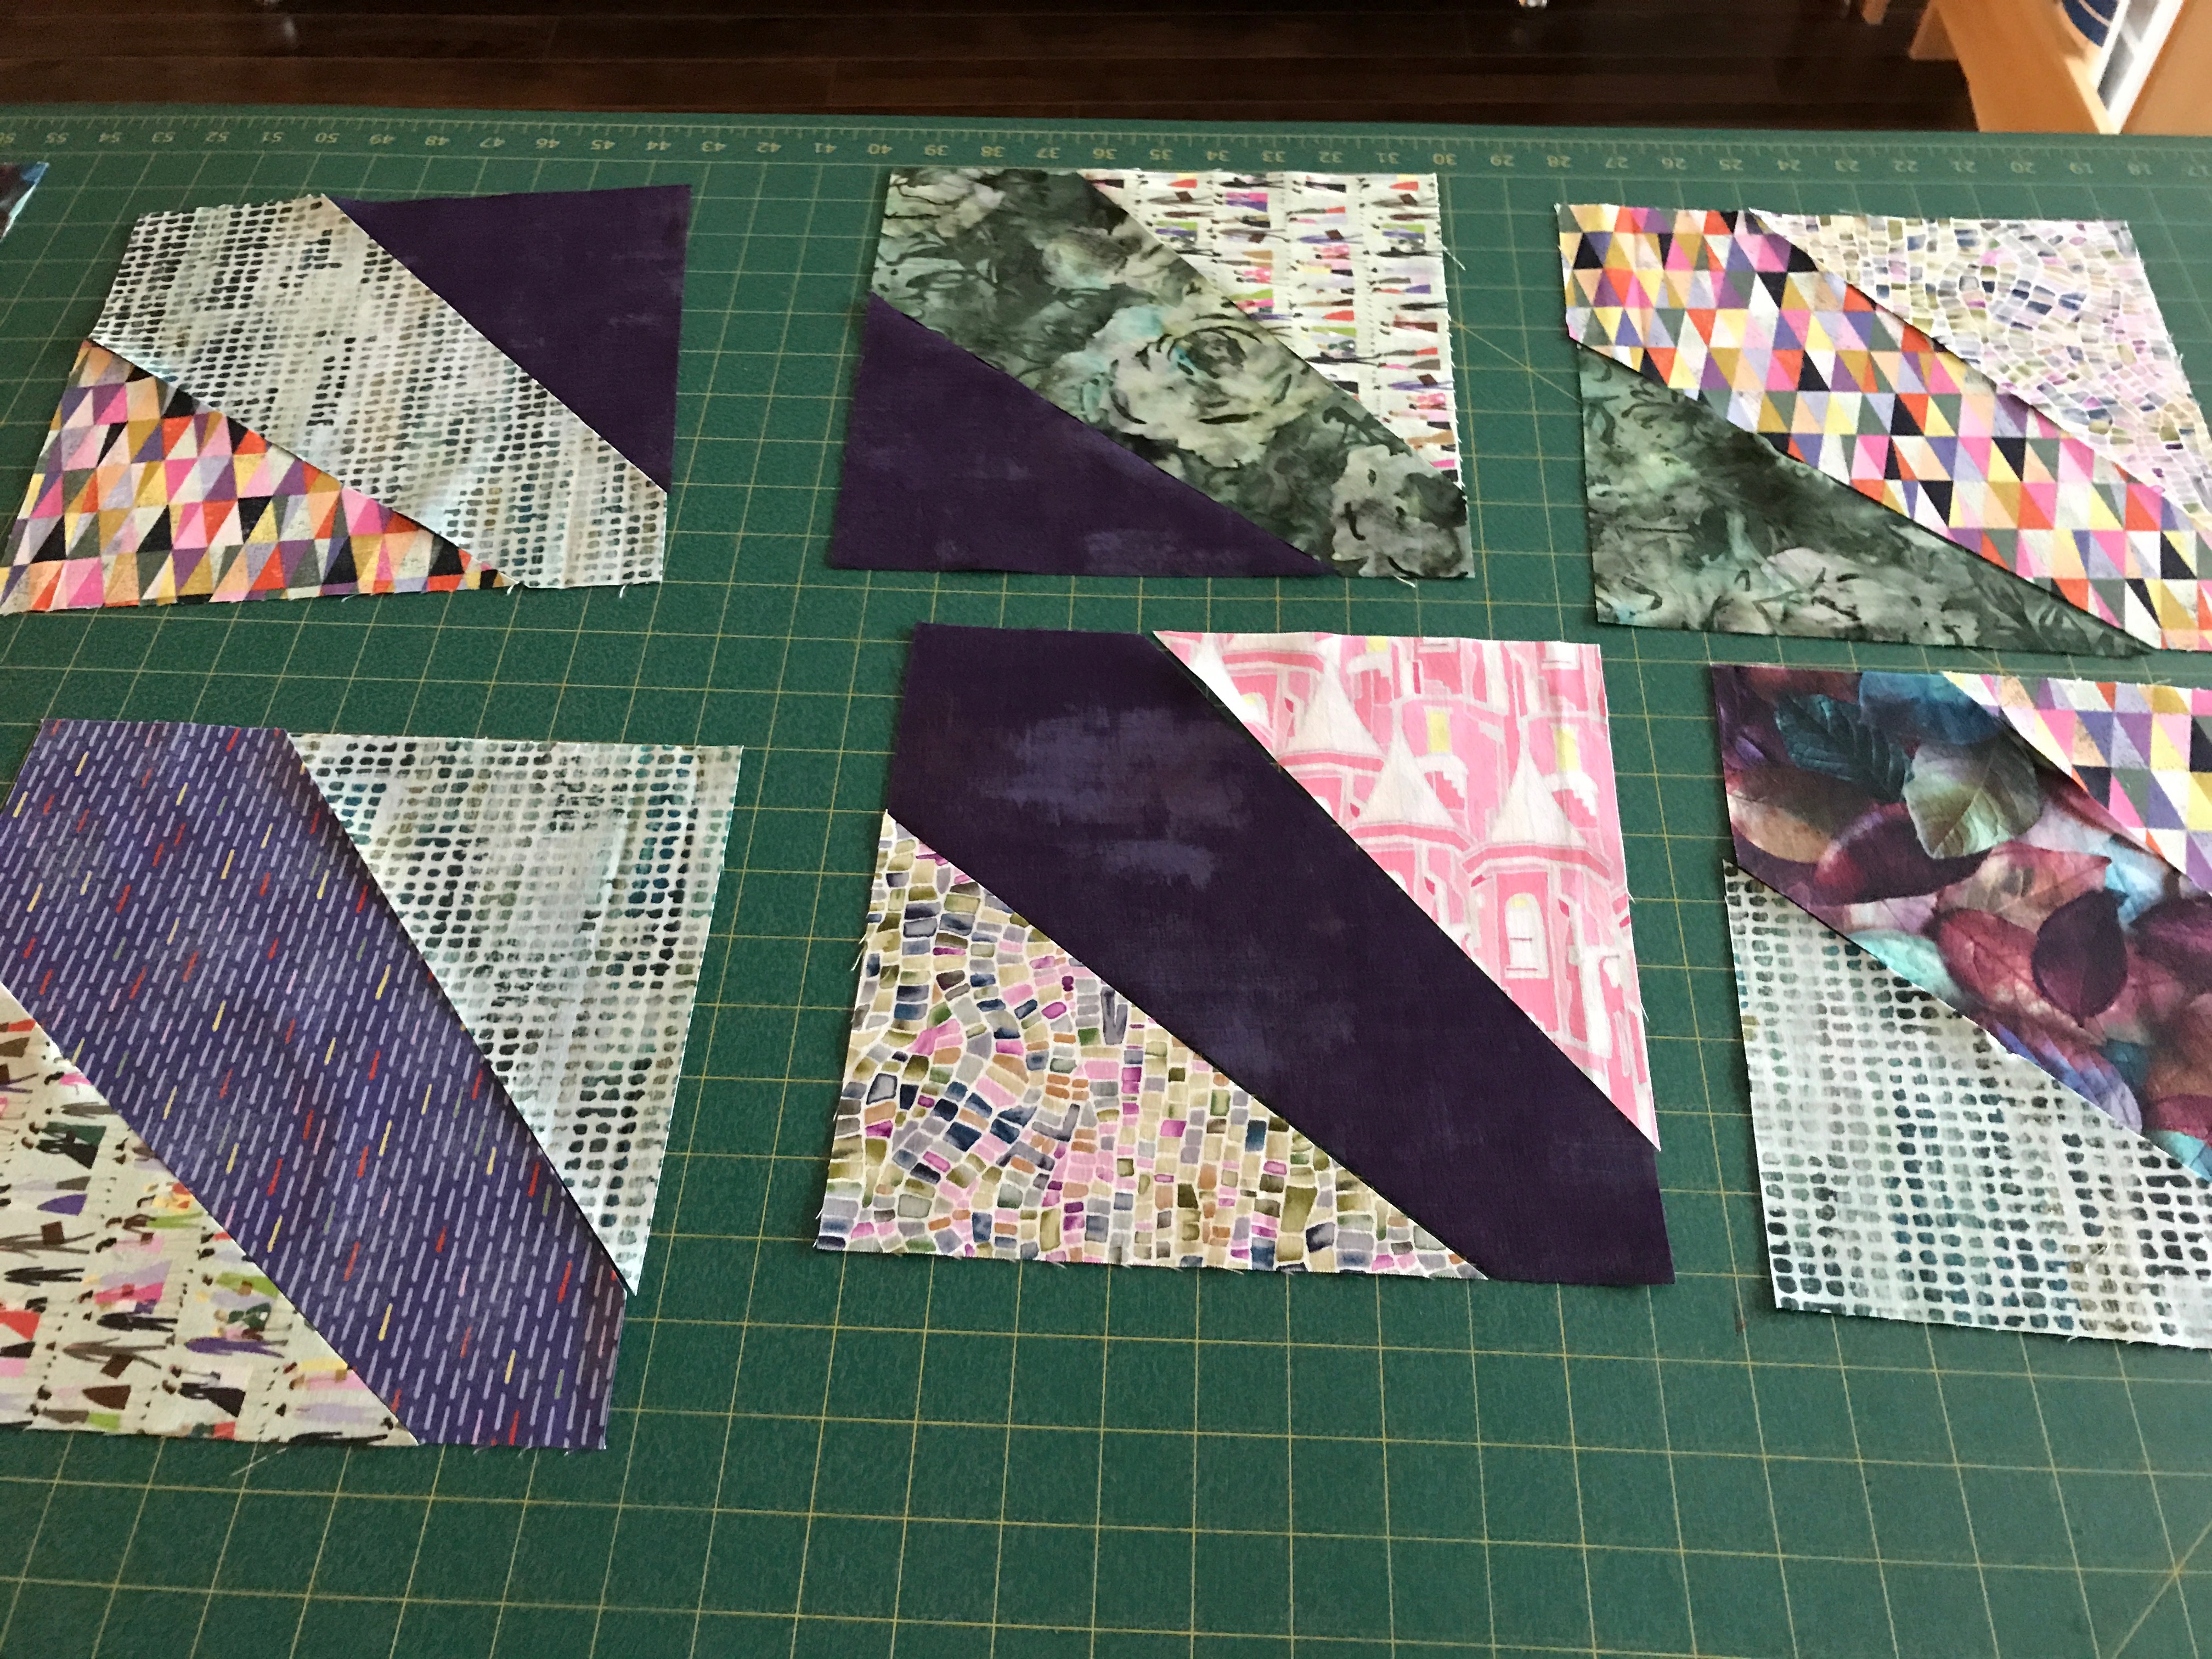
The contrasts with the ombre fabric aren’t so defined although the ombre sets up a workable contrast in two quadrants. The challenge is finding appropriate fabrics for the other two quadrants.

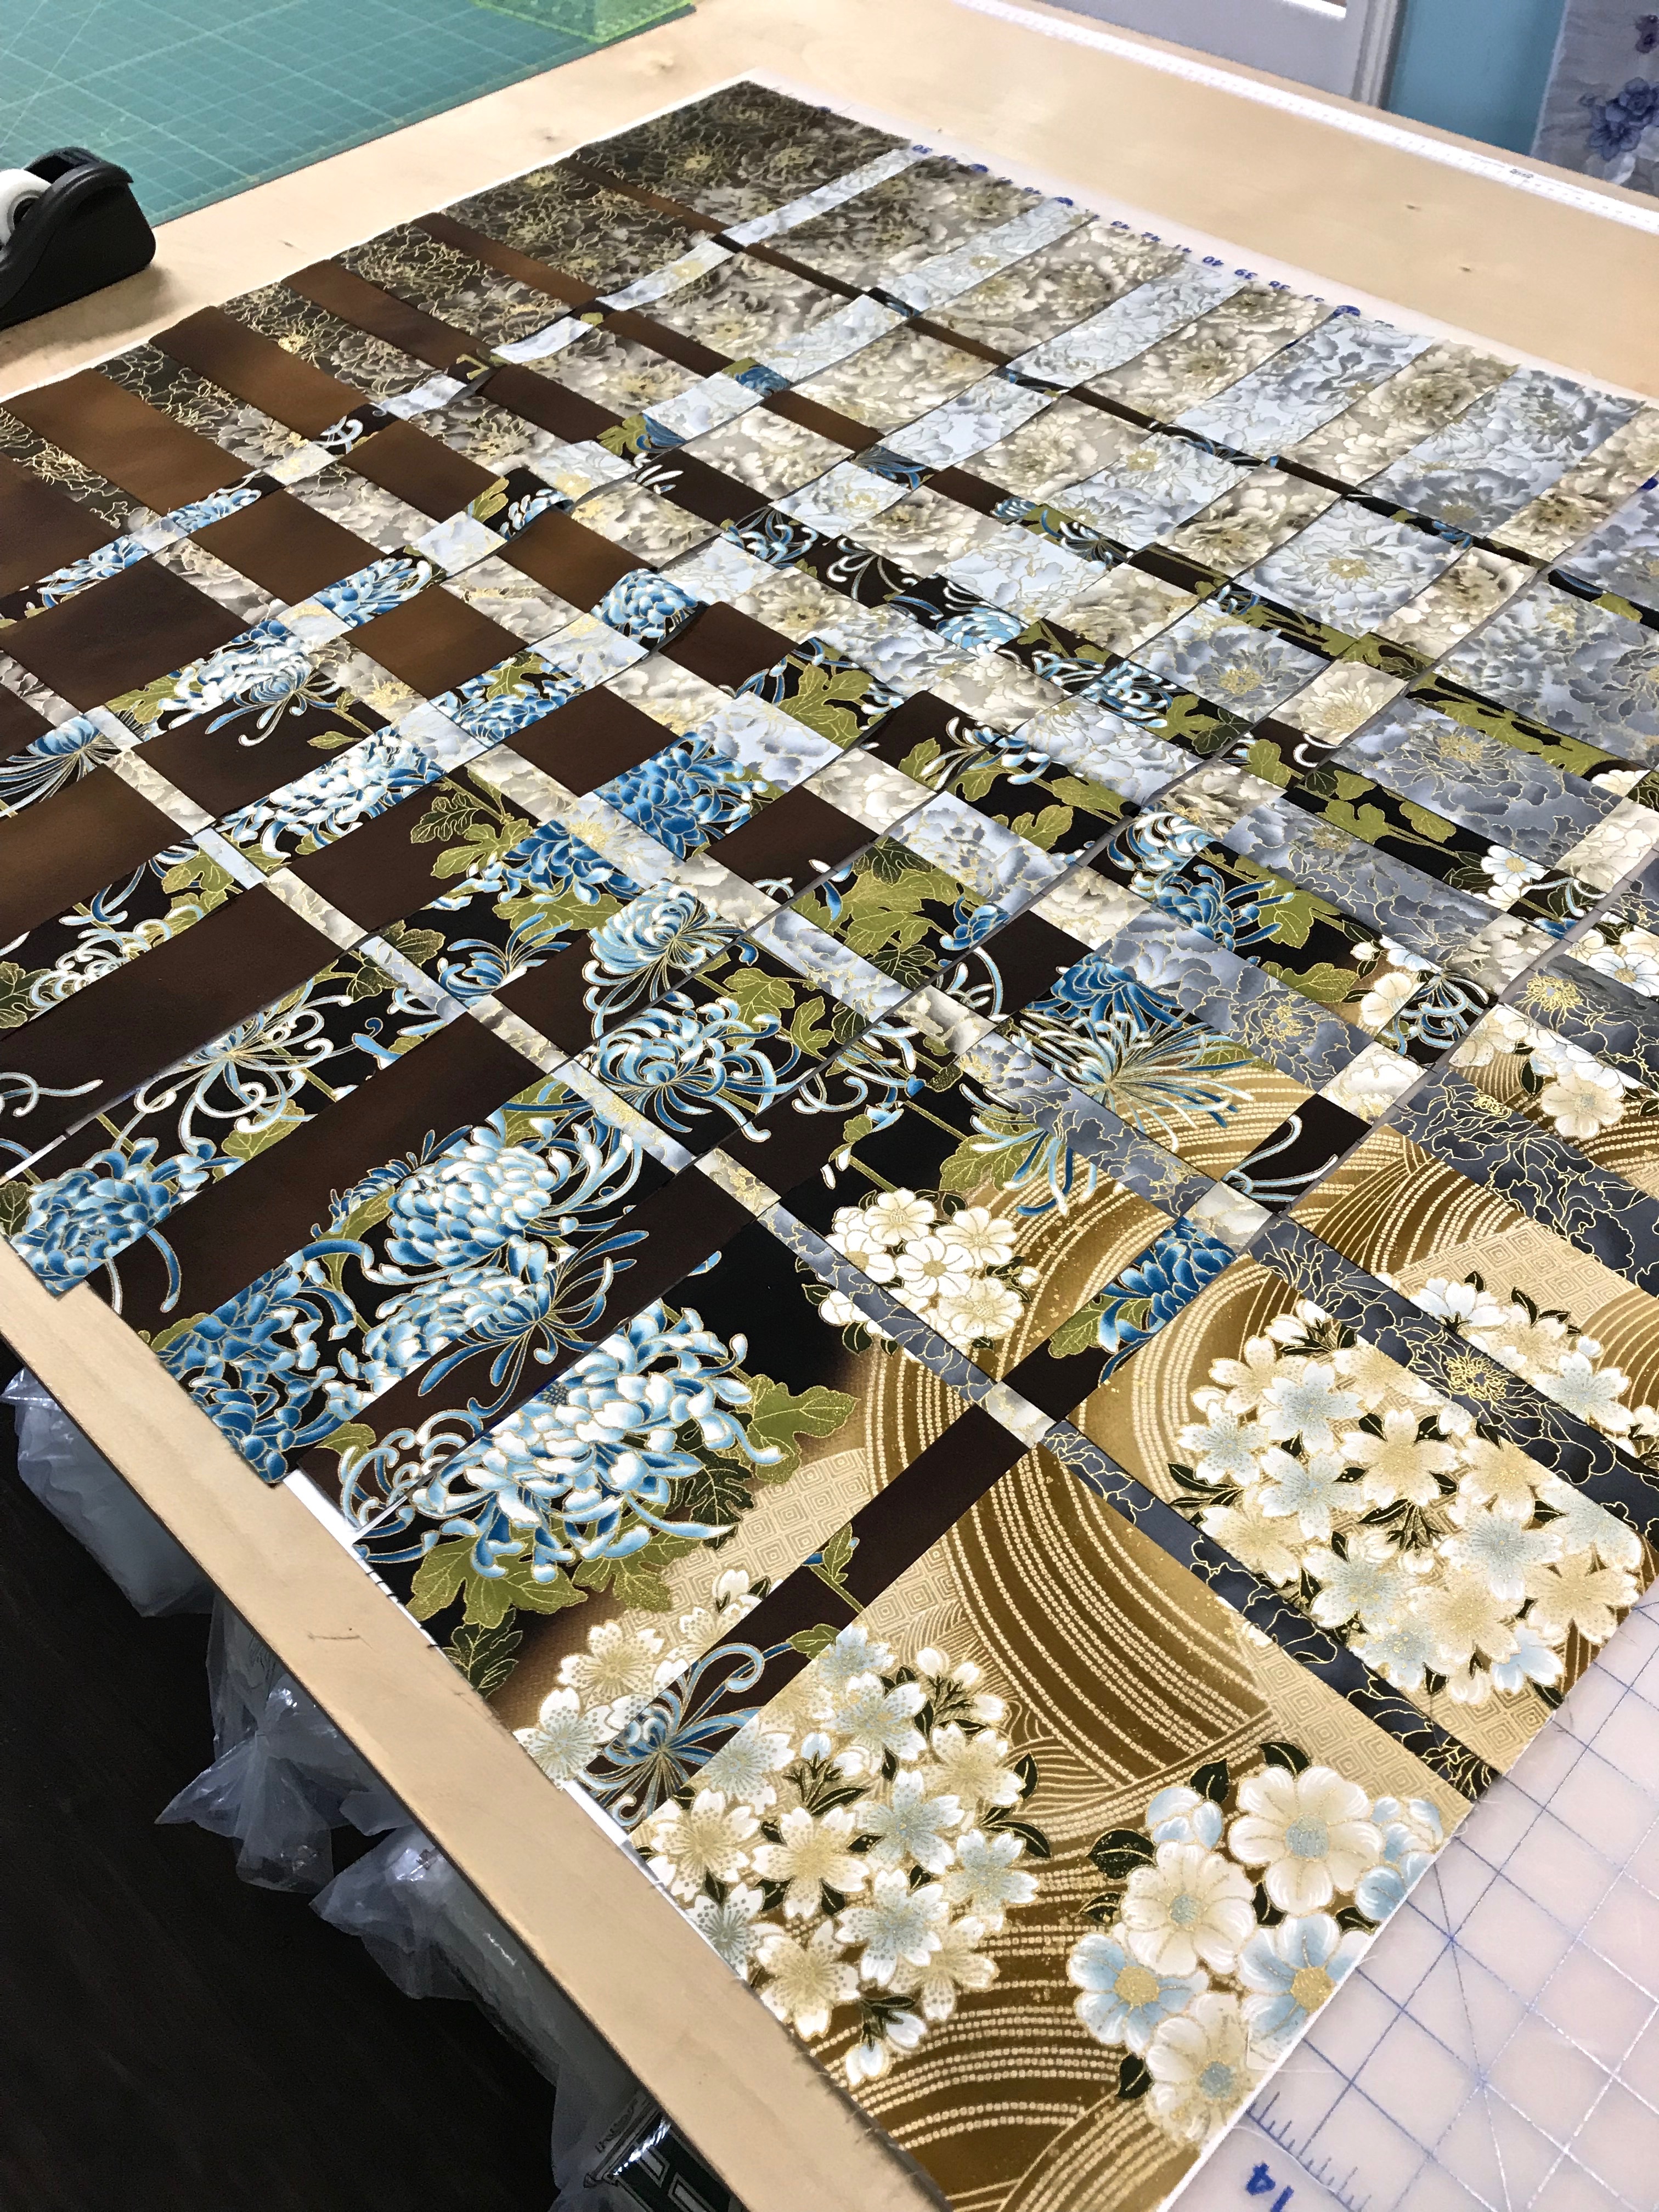
Convergence Quilt – in progress

This convergence quilt in progress was created in a class I taught a year or so ago – the participant had two lovely contrasting ombre fabrics which blended together amazingly well. I don’t have a second ombre so I’m trying to set up the contrasts another way.

This is how improvisation works – one idea doesn’t pan out, you try another until something just feels right. I’m working on the feels right part – not there yet!

Possibilities…

I’ve had this piece of ombre fabric sitting around for a while – I bought a metre at the time because I liked how the colours shaded from grey to brownish. I had nothing to go with it; I just put it away.

Today I was at Sew With Vision (my local Pfaff/Husqvarna dealer and fabric shop) to pick up a new foot for my Pfaff embroidery machine and there were two stacks of recently arrived fabric sitting on the edge of the cutting table. I wasn’t thinking about the ombre fabric but no sooner had Cathy cut me 1/2 m of three of them (grey circles, brown circles and grey/beige with metallic lines) that I remembered the ombre and realized they’d go together.

Ombre Fabric With Possible Companions

I came home, and went through my stash and came up with some other fabrics I had on hand and pulled them out. Looks like “dots” were calling to me. The greys (sitting at the brown end of the ombre) need one more darker grey to pick up the darkest grey shades at the nearer end of the ombre. Probably could also use one more tan-ish fabric as well. AND I need some kind of contrast – I’m auditioning the turquoise/yellow batik but that may not be what I want. I may have to take the pile to Sew With Vision to see if there’s anything else there that works with the greys and browns and beiges that will bring those colours to life.

And what might I do with them? Not a clue, yet!

Here’s where I need to browse pictures of modern quilts to see if anything presents an idea. I always thought the ombre might be used in another convergence quilt, but this collection of fabrics doesn’t lend itself to that. Nope, at this moment, I have no idea what shape this quilt will take. Just need to sleep on it, walk around the fabrics for several days – something will suggest itself….

Purple Passion – Finished

The quilt turned out a bit larger than I usually make – the addition of the drop shadow sashing added 2.5″ to the width and 3.5″ to the length and the outer border added another 6″ – finished size: 54″x 72″. But the drop shadow sashing was needed to brighten the whole thing and make it less “pink” and the top needed the wide outer border to give the quilt definition.

In the end I did quilt-in-the-ditch along the sashing and the drop shadow. I quilted with a block single run embroidery. The border was also quilted with a long, narrow embroidery which turned out well. I used a purple variegated Sulky 30wt cotton. (Can be annoying because if you don’t use a 90 top stitch needle the thread is prone to fraying and breaking. I used a 90 stop stitch needle and I still had some breaking.) However, the quilting went relatively smoothly overall.

Quilt Top

I’m pleased with how the quilt back turned out as well – the large pieces of fabric with narrow contrast elements plus the pieced strip worked out well and the horizontal stripe adds more interest. I must say, I like the Grunge (Moda) fabrics – the tonal quality of them adds lots of life to a fabric, very useful for quilt backing.

Quilt Back

You won’t notice it but I added a piece of the turquoise contrast fabric to the binding “just because”.

That’s quilt #5 since August – five quilts/four months – not bad. That’s it for quilts at the moment – now onto a Kantha jacket for a friend, then a couple of pairs of cords for me and a wall art piece based on a photo I took in Italy in April. No end of projects, just not enough time.

Sweet Kugel Time Again

It’s time to make my mother’s sweet kugel again – it’s a once a year thing which I bake around Christmas time. I’m a week early this year mostly because I’ve committed to making four and I wanted to get them done and in the freezer so I can cross them off my “to-do” list.

Sweet Kugel In The Oven

This year I had help – I was mentioning today would be kugel making day and Deb thought it would be interesting – I Invited her to help me make them. With two of us preparing the dough, slicing the apples, rolling dough… we were done the whole production in just over an hour including the clean up!

I took the kugels out of the baking dishes before they were fully cooled because the juices get very thick when cold and I wanted the pastry to fall out onto waxed paper when I inverted the dishes. They’re all wrapped and in the freezer and the dishes washed and put away.

A brief recap: this dish is made with a sticky stretchy dough – flour, a beaten egg, 1/4 c vegetable oil, 3/4 c water (pinch of salt). Once rolled out it’s covered with cinnamon/sugar, strawberry jam, cranberry sauce (with berries), finely sliced apples, raisins. Then you fold the dough edges over the filling, gingerly pick it up and plop it in to a greased baking dish bottom side up, sprinkle more cinnamon/sugar on top, bake at 425 for 15-20 minutes (until top starts to brown) then reduce heat to 325 and bake another hour, hour and a quarter, covered. The kitchen smells wonderful by the time the kugels are baked.

I described in detail how the kugels are made and provided the recipe two years ago. I made them the same way this time.

Wonderful with poultry.

I had one in my freezer from last year and when my friend Elayne was visiting late summer I was looking for a dessert and decided to defrost it and we had it with ice cream so while the dish is intended to be served as a savoury – it’s also a lovely dessert!

Sparkle Socks II

This is the latest pair of socks – finished last evening. I bought two balls of Opal sparkle yarn and have now knit both. I like the stripes in this yarn and I like the wee bit of glitter the “fifth” ply provides.

Sparkle Socks – Pink

Because of where in the variegation the toe fell, I decided to finish the toe without changing yarns. Worked out nicely.

I’ve picked out the yarn for the next pair of socks which I’ll start this evening.

Purple Passion – Quilt Back

Assembled the back for Purple Passion yesterday. The point was to use up leftovers and retain enough of the purple grunge fabric to be able to bind the quilt without having to buy more fabric!

Purple Passion – Quilt Back

I used leftover blocks from the quilt top, cut in half to assemble the narrow pieced strip, then used large blocks of the leftover fabrics to create a wide strip. I decided this time not to insert the strip but to use it as a panel on one side, instead.

Then I set up the quilt sandwich – I’ve described how I do this somewhere in the blog but can’t find the specific post. When I started quilting, I would tape the quilt back to the floor, lay the batting on top, then position the quilt top, smooth out the whole thing and pin.

Pinning The Quilt Sandwich

But getting up and down has become difficult – it’s an age thing – and one day I tried rolling each layer on a pool noodle, and working on my dining room table. That made assembling the quilt sandwich quite a bit easier.

One day it dawned on me that 1 x 4 boards would provide some weight and allow me to apply a bit of tension to each layer as I progressively pinned the sandwich. That’s what you see here. Each layer is rolled on a board, the layers placed on top of one another. I will pin the exposed layers, roll that part up and continue pinning until I’ve reached the other end, taking care to keep the quilt back as smooth as possible. I’m working on my cutting table which is a good height for this step – I don’t have to bend over as I did on my dining room table – much easier on my back.

I’m now ready to begin pinning. Once that’s done, I will stitch-in-the-ditch to stabilize the sashing and outline the narrow drop shadow border. Then I’ll quilt each block once I’ve created an embroidery for this quilt.

Purple Passion

I described the start of this quilt ten days ago. Here’s the quilt top completed.

Purple Passion, Top

Turned out to be a real challenge to distribute the colour when I tried laying out the blocks! Because I had decided to use three different fabrics in each block, that meant I was continually running up against the same fabrics when I juxtaposed blocks in a row and across rows. I did a ton of swapping around to little avail because I would find that same fabric in an adjacent block. Also I wanted to alternate the diagonal blocks with fat pointed ends coming together in sets of four at the same time I was trying to distribute the solid blocks. In the end, I just started adding the contrasting turquoise sashing and stitching the blocks together in rows! That’s what you get when you’re not working from a pattern or a set of instructions but trying to improvise as you go along. The result is OK but not spectacular – I’ve ended up with clumps of colour rather than it being distributed more evenly. The problem would have been less severe had I elected to use fewer fabrics – twelve turned out to be too many.

Now on to the back. I picked up more purple grunge fabric yesterday. I will need to create some kind of insert to widen the length of backing. I will have to look through my Pinterest collection of quilt back photos for ideas.

I came across another face the other day:

“Face”

It was sitting on a friend’s kitchen table. A rather scary face – mask-like – with big eyes and a grimacing mouth. I also saw an ad recently (can’t remember what it was for) that subtly used sink faucets as faces in the background. I’ll have to keep an eye open for it – not great advertising if I can’t remember who was doing the advertising!

Sparkle Socks & Danish Paper Stars

You can’t really see the sparkle in the photo but there’s a polyester strand in the yarn that glitters. Click on the photo and you can see the sparkle.

Finished these socks last evening. The pattern was interesting enough that the knitting went reasonably fast. When the pattern changes in short intervals the knitting always seems to go faster – probably doesn’t but I feel I’m making progress more quickly.

Sparkle Socks

Danish Paper Stars

Years ago I used to make Danish Paper Stars for tree ornaments and give them as gifts. Haven’t done them for ages but I thought they’d be a good addition to the silk scarves I’ve done for the knitting ladies.

I tried remembering but the critical part is getting the initial intersecting of the strips going in the right direction and in the end I had to find instructions online.

Danish Paper Stars

After three stars my hands have recovered the moves – particularly the twist needed for the 3-D points on each side. My intention is to make about 20 stars but in years past I often made as many as 50+. I’ll add string to them so they can hang.

New Quilt

A while ago I came across a photo of a quilt constructed from a block I thought was interesting – two equal diagonal cuts creating three pieces – two triangles and one six-sided, double pointed polygon. In the photo, the triangles and polygons were mixed and matched in the piecing of blocks.

The blocks appeared to be perhaps 15+” square (the quilt was a 3×3 array incorporating solid blocks, sashing and borders). A block that size is problematic for me because the widest embroidery hoop I can use for quilting is 250mm (a shade under 10″, my preferred hoop is 200mm square (~8″). So my plan was to downscale the blocks to a size I could manage. I created four 9.5″ squares from 10 different coordinating fabrics.

To cut these blocks into sections I realized I needed a template of some kind so I constructed one out of quilter’s template plastic.

9.5″ Block With Template

To keep the template securely positioned, I used double sided tape on the back which stuck it to the top layer of fabric (I was using a “stack ‘n whack” technique so the triangles were interchangeable).

Cutting The 9.5″ Block

The template plastic is not thick enough to use with a rotary cutter, however, the edge of the template provided me a reliable guide for positioning my ruler.

9.5″ Block Cut

With the 9.5″ blocks cut, I laid out the elements for stitching:

Cut Blocks

I chain pieced the blocks – sewing one triangle to one side of the polygon, pressing, then sewing the second triangle to the other side, pressing, then trimming the resulting blocks to 8.5″.

Pieced Blocks Trimmed to 8.5″ – Laid Out

I now have a 5×7 array on my floor. I have two interesting pieces of turquoise fabric that coordinate well with the fabrics in the blocks which I plan to use for sashing. I also have lots of dark purple grunge fabric (Moda) for a wide border.

What I haven’t decided is whether the polygons should all point in the same direction or whether they would be more interesting pointing in all four directions – at the moment they’re pointing the same way. I can also see from the photo that I have to revisit the block distribution because the pink bits are clustered. I have six extra blocks which I might substitute for a few of the pinks.

Lots of headway on this quilt today. I’ll pick it up again tomorrow.

Oh, and I finished the binding on the strip quilt yesterday, as well.

Strip Quilt – Almost Completed

The quilting is done – just the binding left to do. I’ve decided to bind the quilt with the same background fabric which will accent the colourful blocks and strengthen the off-centeredness of the design. A coloured binding would pull your eye away from the design elements – a binding in the same backing fabric will blend with the borders.

Finished Quilt Top

The quilting itself was a challenge because I’d chosen to quilt it as if it had been regular blocks but I was short a vertical sashing on one side and across the bottom which left me having to resize the quilting design at least once in each column – you can’t really see the different size blocks but it meant measuring each “block” as I was quilting to make sure I was using the right size design to fill it.

Also, I had difficulty with the quilt backing – I’d been careful to smooth it out when I wound it onto the 1×4 board, but there was a small uneven distribution of backing fabric toward the strip insert resulting in backing overlaps within a couple of blocks which I didn’t discover until after they’d been quilted, which meant I had to unstitch those blocks, spray them with Best Press to shrink the fabric as much as possible, before rehooping the block and restitching it.

Finished Quilt Back

In the end the quilting worked out, the backing is laying flat, and the borders turned out balanced – in particular, I was able to start and stop the embroideries in the narrow border so they abut perfectly!

Tomorrow I’ll add the binding and the quilt will be finished.

Then on to the next one.