Blushing Peonies II – Finally Finished

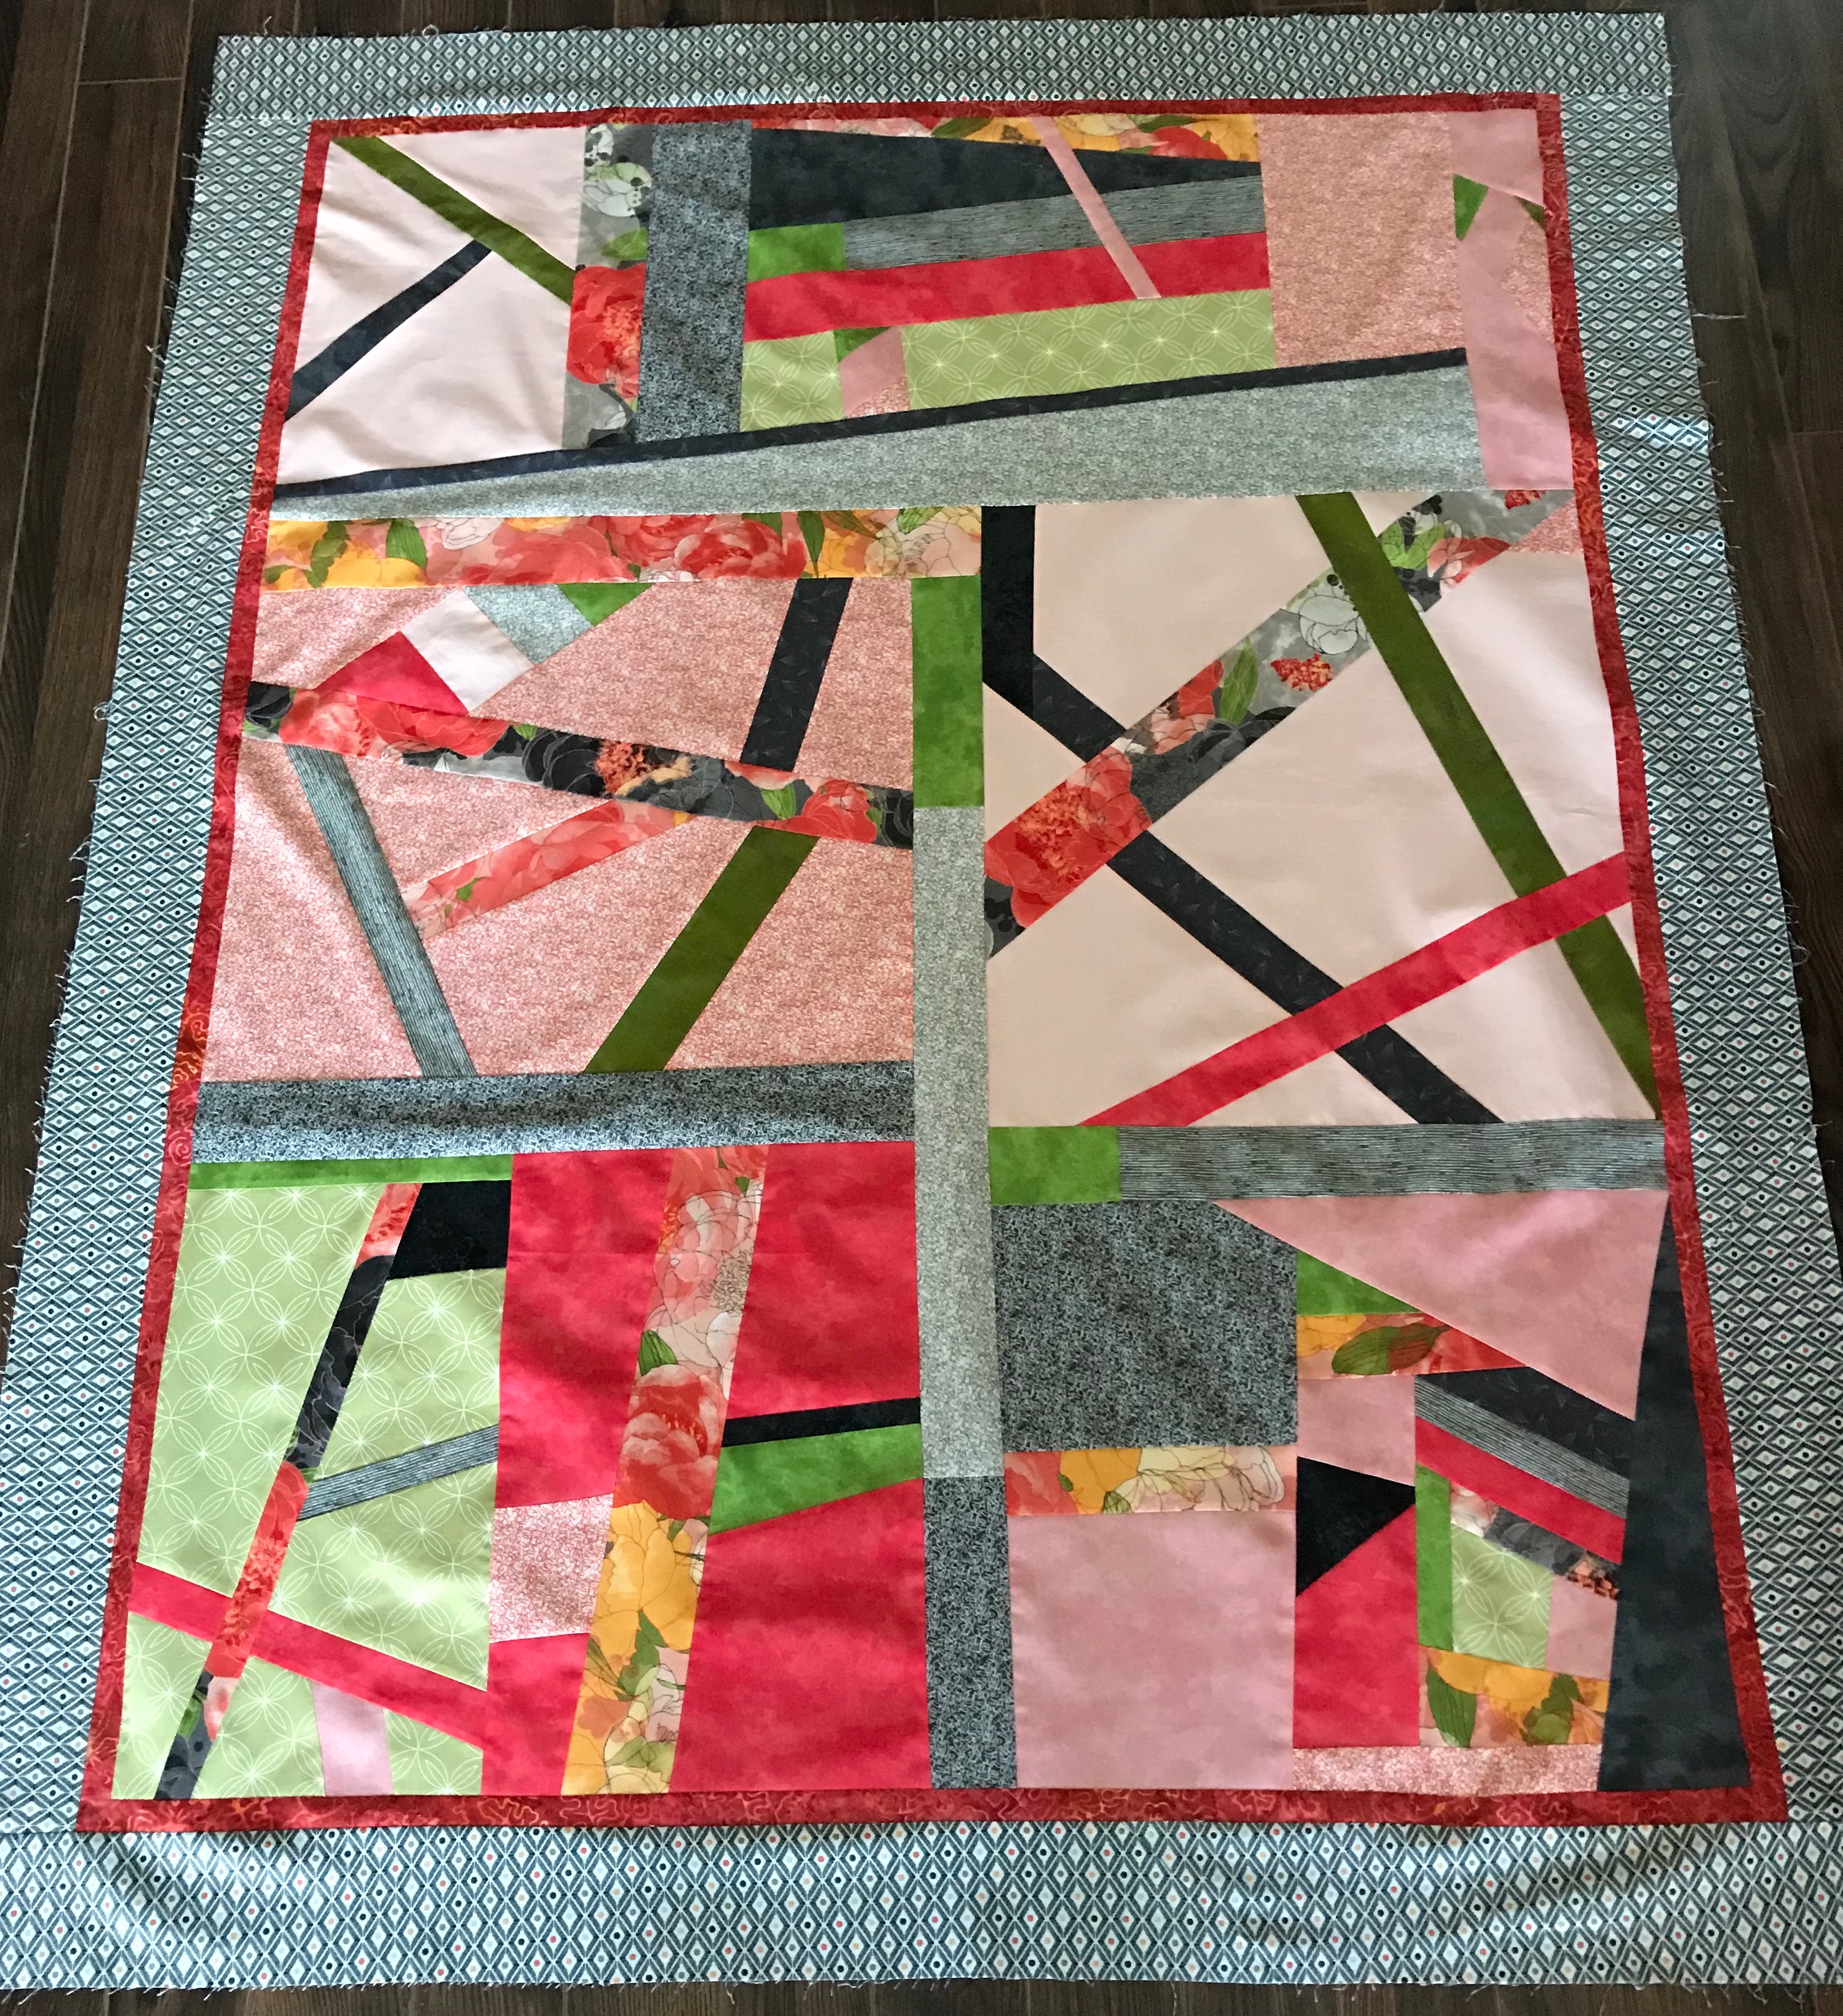
Finally finished, binding and label. I’m much happier with the quilt now that it’s finished. The quilting using a darkish bendable thread tied the Kona cotton elements to the rest of the quilt quite well and I have to admit I did one other thing – I toned them down using a fabric pastel crayon which darkened them a bit and hints at texture in much the same way some of the other fabrics do. Once pressed with a steam iron, the pastel dyes the fabric and will withstand washing.

It has the impact of a modern quilt.

Blushing Peonies II – A Modern Quilt – Top

I used flying geese to make a strip to widen the back – they don’t look like flying geese because there isn’t a consistent “background” to highlight the “geese” – however, the pattern created by the large and small triangles showcases the fabrics. The sashing elements I decided to make asymmetrical and I like how they offset the strip and tone down the red backing.

Blushing Peonies II – quilt Back With Flying Geese

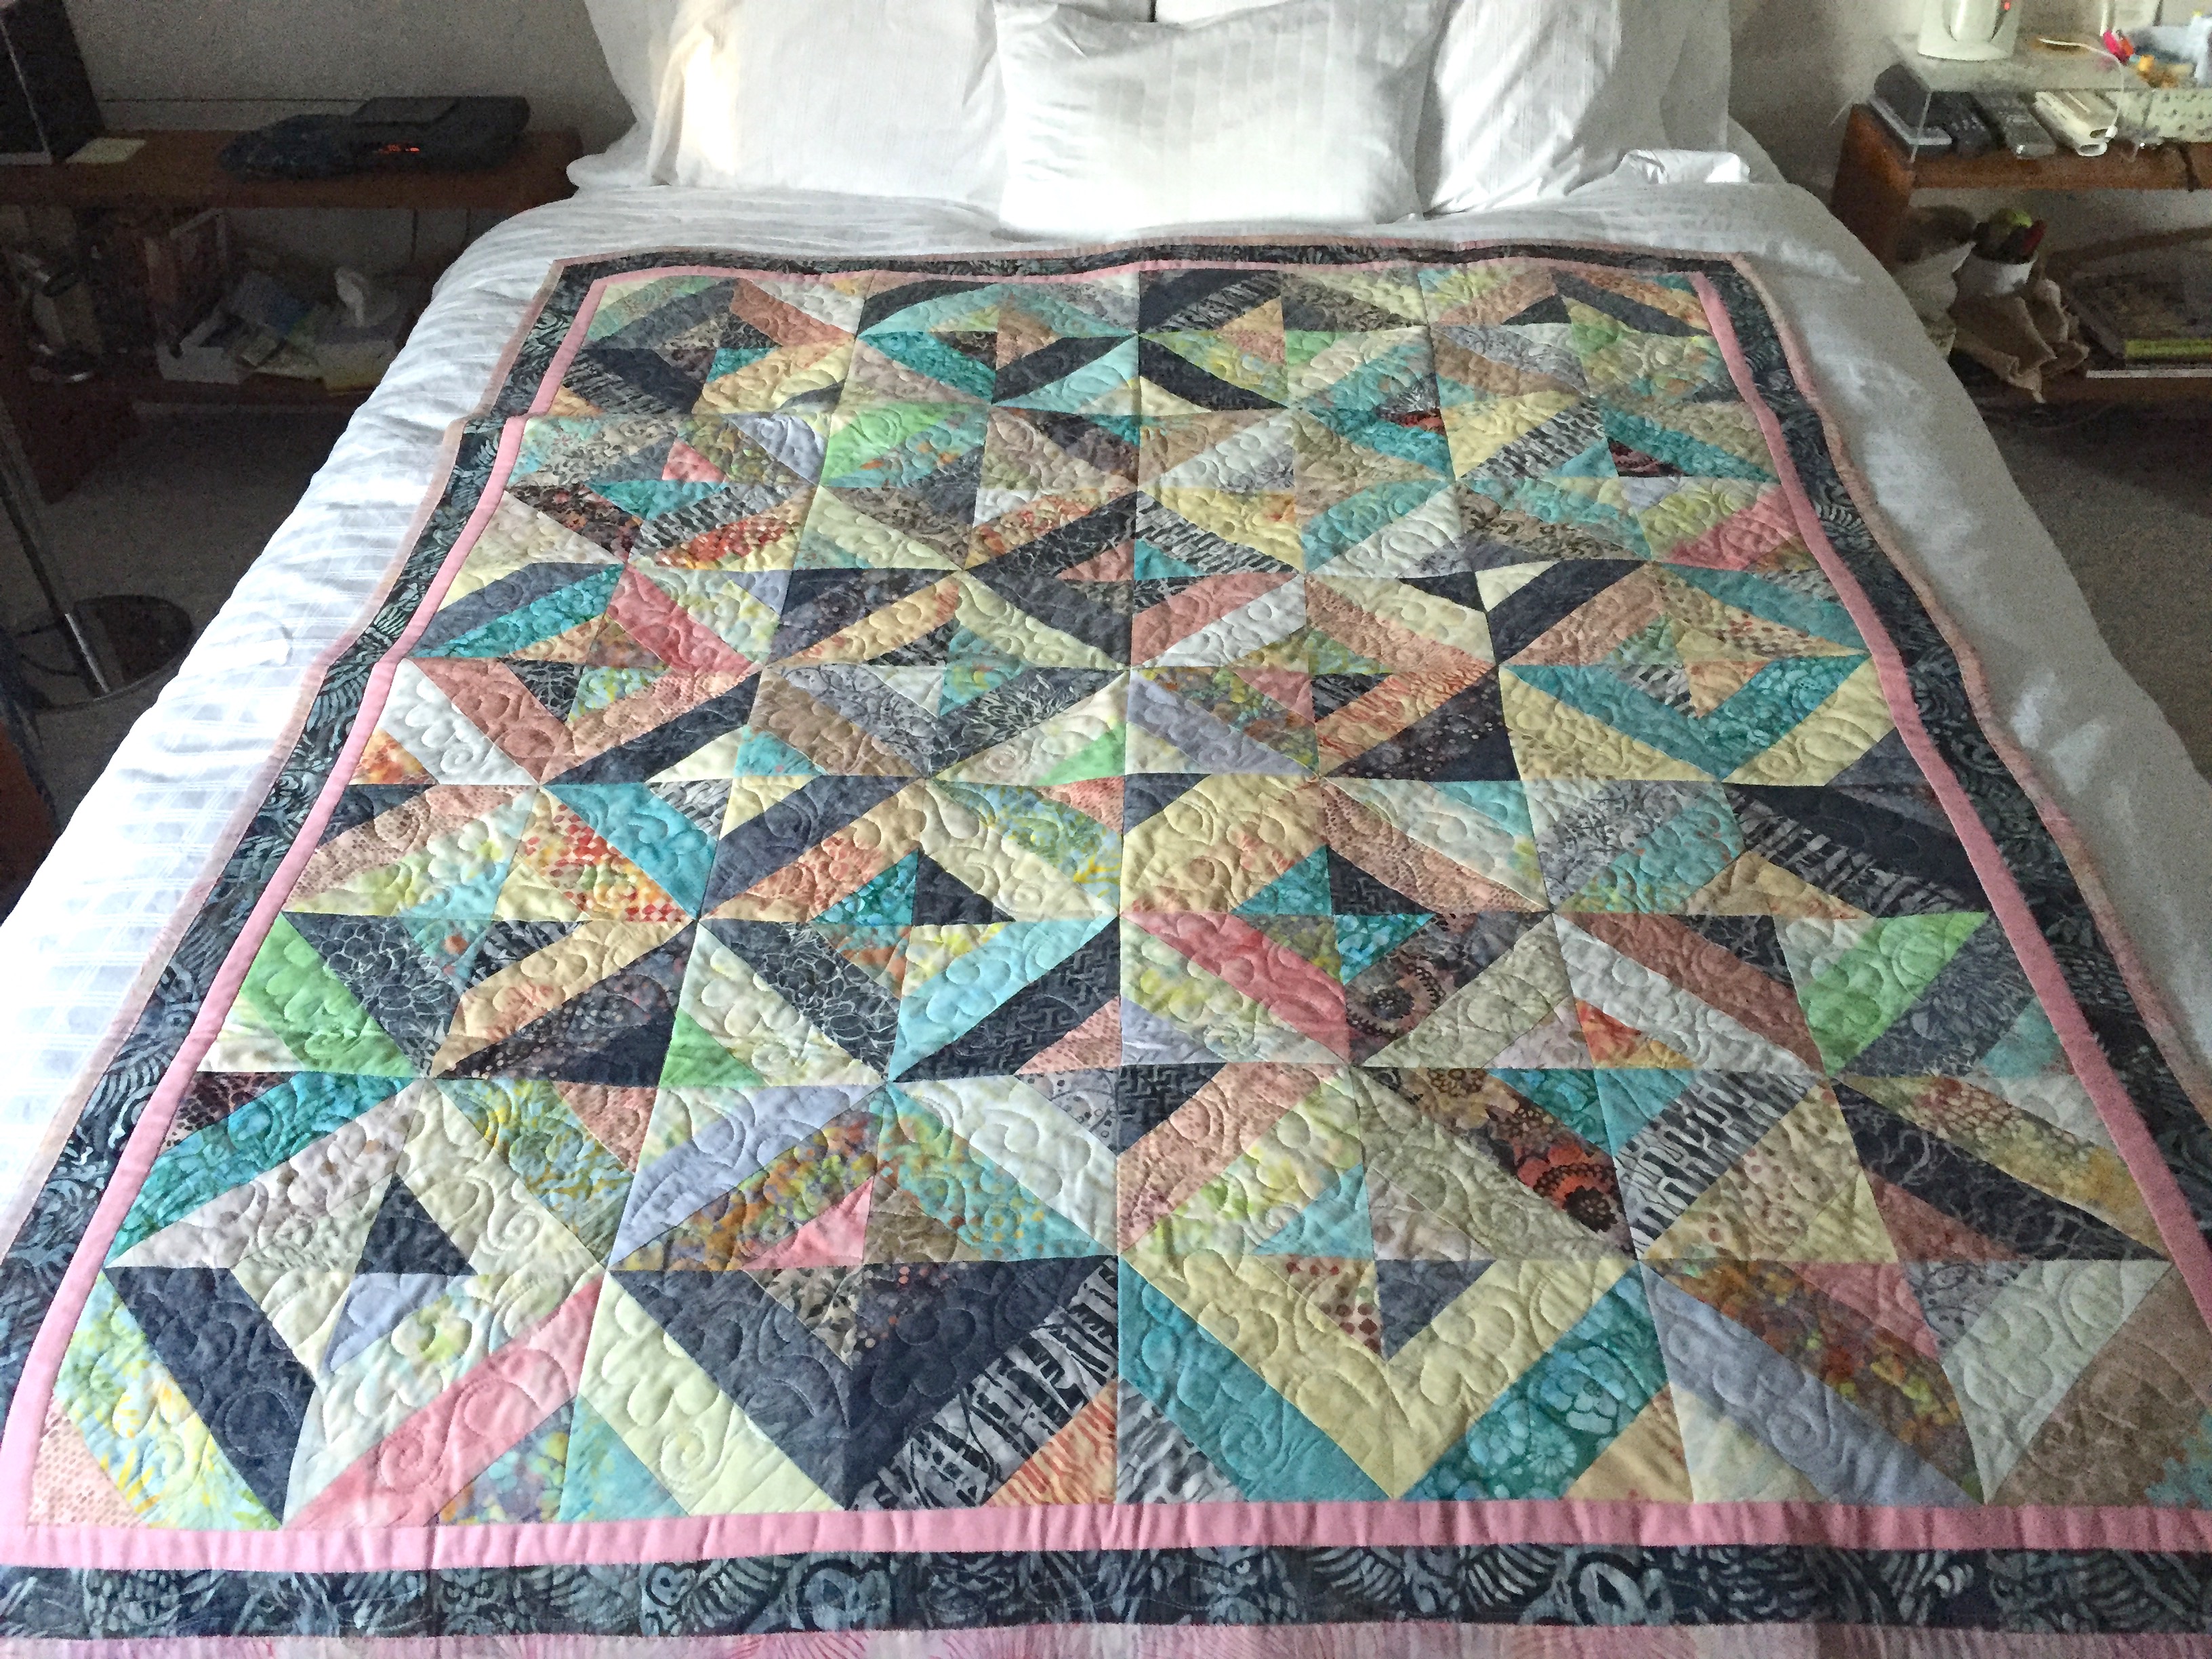
After the showing in Parrsboro, my sister Donna expressed interest in the Bordered Diamonds quilt. I gave it to her. She has it hanging in in this bright green room. I love how the green makes the batik fabrics pop and how the colour flow in the quilt ties in with the navy sofa.

Bordered Diamonds – 2012

The other day I was at the physiotherapist – I was at one end of the room and this photo at the other end caught my eye – at the distance a face popped out – two eyes, the left cheekbone, mouth, the suggestion of a blue hat. It’s actually a photo of a waterfall but for me – it’s a face!

The Receipt

A couple of months ago my youngest great-nephew (age 6) decided to start a business – he loves sparkly paper, saw a business opportunity, and decided he should sell some. His father and grandfather are businessmen, so with dad’s help he built a website with images of different kinds of sparkly paper, information about the “founder” himself, statements about “100% satisfaction guaranteed”, “Committed To Quality” – but the bit of information that makes me chuckle every time I see it are the hours of operation:

Open after school Monday – Friday (except closed on Wednesday – he has dinner with his maternal grandmother), after swimming class on Saturday and all day Sunday! He provides a phone number and email address as well as a contact form so you can place an order. The website has been dynamic – becoming more and more focused (I noticed two small typos when I looked today) as he figures out how a business website needs to function.

I think I was his first (maybe his only) customer. I began an email conversation about types of sparkly paper, cost of each sheet, how to send payment… I got succinct answers to my questions. I finally placed an order and received in the mail two pieces of letter-size sparkly paper. I sent a cheque to the house with a thank you note. This all happened about a month ago.

Today I get a receipt in the mail:

Receipt for $12

My academic career focused on literacy learning in children and adults, helping teachers understand the ways children figure out how reading and writing work and what instructional situations support rather than hinder their literacy development. The receipt is a wonderful artifact of a six year old negotiating an adult literacy form – confirmation of a transaction.

He’s got the company name and the quantity of paper I purchased, and the amount I paid him. What leaps off the page for me are his attempts at writing the numeral “2” – his sense of direction is still ambiguous and we see in both instances where he wants to write a “2”, he starts from the right instead of the left, crosses it out and changes direction. He’s got all the letters in “received” and his guess at the “ee” vowel is a common writing error (remember the “rule” – “i” before “e” except after “c”? However, there are quite a few English words that actually use an “ie” spelling after a “c” (science, conscience, sufficient…) and vice versa that use “ei” after other letters (protein, forfeit…)). He’ll sort that confusing spelling situation out in the same way the rest of us have – through reading and writing, trial and error, along with a bit of memorization.

It continues to amaze me just how much we can discern about a child’s literacy strategies from such a succinct sample of writing.

All Set To Bake

I’m all set to make and bake the Christmas cakes on the weekend. The fruit will have soaked in rum for a week (large white bowl with blue lid). I have the flour and sugar, baking soda and baking powder, molasses and semi-sweet chocolate, real vanilla and almond extract, ginger, nutmeg, clove, allspice and cinnamon (the seville orange marmalade has already been incorporated into the soaking fruit).

The foil baking pans and parchment paper are on hand, butter and eggs still in the refrigerator but I’ll bring them out Friday night so they can come to room temperature before I start to mix ingredients.

The Ingredients Ready To Go

I’ll start by prepping the foil load pans by adding a wee bit of vegetable oil to the bottom and sides of each (to stick the parchment in place), fitting in parchment paper (so I can lift out the cake more easily after they’ve cooled). Then I need to retrieve my lobster pot (an old 21 litre blue/white enamel canning pot I mostly use for mixing the Christmas cakes), wipe it out, find a sturdy mixing spoon because the fruit is heavy to mix.

21 litre Canning Pot

It’ll take me close to an hour to mix the batter, add and blend it with the fruit. Finally, I’ll partially fill the lined loaf pans (too full and they’ll overflow into the oven), then bake them in a slow oven until a skewer comes out clean.

If you’re interested here’s the recipe. Trust me, it’s a delicious dark fruit cake if you like dark fruit cake.

I haven’t mentioned the Christmas shortbread bars yet. It’s the only other Christmas baking I do. I make one cookie sheet, cut it into eighths and give 7 away! They’re too rich to keep around. They’ll get made closer to Christmas and this year I will try to remember to take a picture to share.

Kitchen Chore

It started Saturday when I bought the candied fruit for the Christmas Fruit Cakes. I picked up a quart of rum as well. Came home, dumped the fruit into the large covered Tupperware bowl, added some rum and now the mixture is soaking until coming weekend when I’ll bake the cakes (I flip the covered bowl twice a day to make sure the rum gets absorbed by all of the fruit).

Yesterday, I pulled out the cake recipe to see what ingredients I had in the house and what I needed to buy: flour, white sugar, molasses, bakers’ bittersweet chocolate, baking powder, eggs (I had brown sugar, baking soda on hand). Then I checked the spices – ginger, allspice, clove, nutmeg – had enough of each of those but no cinnamon. So I headed to Bulk Barn to pick up some cinnamon. While I’m standing in front of the spices I think it’s a good idea to pick up fresh amounts of the other four as well. I came home, emptied the old spices out, washed the bottles and put the fresh spices in. Even made labels for the jars.

Then, I looked at my spice rack and think to myself – I meant to renew those before I moved out of the house, then after I moved into the apartment – it’s two years and I still haven’t done it. So I did the deed – I dumped out all the spices and herbs, put the jars in the sink to soak. Cleaned them, removed labels and set them aside to dry.

Spice Jars (With Matching Tops) Drying

Today, I made a trip back to Bulk Barn with my alphabetized list of spices and herbs (that way it was easy to find what I needed since the spices in the store are arranged in alphabetical order) to get small amounts of each to fill my clean, dry spice jars.

Just finished the job. Each jar is labelled. The spices and herbs are actually stored in alphabetical order (I’m sure they won’t stay that way but it’s a good starting point). I didn’t replace everything – only those I might actually use – didn’t bother with herbes de provence, garam masala, 5 Chinese spice, whole allspice, whole cardamom… in other words, stuff I’d picked up for a single recipe and never used again! So I actually have about 15 jars to spare which I’ve tucked in a shoe box and stashed in the cupboard above my refrigerator for when I might need one.

Addendum (Oct 16) – Just for information – the price on the back of many of the jars was 49¢! That tells you just how long ago I bought the original spices. I’ve refilled the jars many times over the years but I bet the spices in some of jars were 20 years old.

Now to return to sewing a back for the latest quilt.

Ombre Socks

These are my latest socks, finished last evening. They were interesting to make; I wasn’t sure where the colour transitions were going to happen. I knit a leg that is 80 rows after a 12 row cuff. I like a longer leg – it keeps my ankles warm since the sock comes up under my pants. However, the ombre would have worked better in this case had I only done about 65 rows and then started the heel. I wouldn’t have had such a sharp transition of colour when I picked up the front after the heel was completed.

I could have unravelled back to the 65 row point and reknit the heel. But the overriding choice is the longer sock and nobody will ever notice the transition. So into my sock drawer they have gone. I’ll start a new pair this evening.

I’ve done all the preparatory work on the alpaca yarn I bought in Italy – the skeins are now balls. I’ve even downloaded a Fair Isle  pattern.

Fair Isle sweater pattern

The challenge is my yarn is not the same weight as the yarn used for this pattern. I have to knit a sample square to see what kind of size it will turn out. Then calculate the stitch number to be able to make the pattern fit. The major part – the flowers – is based on a 16 stitch repeat so I just need to end up at the yoke with some multiple of 16 for the pattern to turn out.

My plan is to tackle the sweater sometime soon.

Borders Added

I added borders. Changes the look of the piece entirely – contains it (as borders do), but the borders also seem to change the colour focus in an interesting way. The narrow inner red frames the panel and the wider outer border allows the greys and greens to stand out somewhat more.

Quilt Top With Borders Added

I showed the panel to a friend last evening – someone who’s been a close friend for 60+ years! – she tells me the truth. She found something jarring in the panel but couldn’t identify precisely what. I think the problem resides with the pale pink solid Kona sections. They’re flat/dead in comparison with the other parts of the top.

Now, I could take those two parts out and replace them with something else, but given this quilt top is an improvisation, an opportunity to explore and learn, I’m going to carry on. I can do quite a bit to change the texture of those pale pink areas with quilting, particularly if I use a contrasting thread and a more dense quilting embroidery than I was originally planning on using. It would fill up those pale empty areas and provide flow to the other parts of the panel.

So stay turned to see how things progress. Next step is to set up a back panel – it will need an insert as usual to make the fabric wide enough. Not sure what to do – I’m thinking about carrying on with large pieces assembled into a strip using these same fabrics.

Quilt Top Assembled

Instead of two shorter rows (one on top and one on bottom), this addition turned into a single longer piece I decided to add to one end. For some reason I can’t articulate, that addition feels like the “top” – almost where a pillow would go had this been a twin size quilt. Instead, it will be a largish lap quilt or throw. It still needs a border, maybe it will want a very narrow inner border – not sure yet.

Quilt Top Panel Assembled

Now I need to walk around this for a bit, at the same time I need to go through my fabric stash to find a fabric that could work as a narrow inner accent border, and something for the wider outer border.

And I guess I should be thinking about a name for the quilt – no idea what it might be.

Finally Back At The Quilt

Just added another two sections to this quilt improvisation. It’s now close to a square – in the ballpark for width and still needing another 12″-15″ in length; I’m thinking I’ll add two narrow strips – one to the top edge and one to the bottom.

The Growing Quilt – now a 42″ x 45″ panel

My goals here are 1) to use up leftover fabric from the previous quilt so I don’t have to try to find room in my fabric storage for it, and 2) to set up a new quilt for a class (Slash ‘n Insert Quilt) I hope to be teaching in a couple of weeks.

What I’m trying to construct is a modern quilt based on large sections of slashed fabric with a few prominent insertions rather than a meticulously pieced panel. Before I started I thought this would go quickly – wrong! The deciding where to cut and whether/how to align elements after cutting is proving more time consuming than I anticipated. That’s why I avoided working on this for nearly 10 days! Anyway, back at it finally and closer to a quilt top than I was yesterday.

Hoping to make time in the next few days to add strips to the top and bottom edges of this panel. Then I intend adding a 4″ (or so) border. By next weekend, I would like to have pieced a back and created the sandwich. I now need to start thinking about what kind of embroidery I need to quilt this – likely an edge-to-edge design of some kind.

Courage Of The Morning Sun

Finished these socks yesterday. Used Opal yarn: Courage Of The Morning Sun. I loved the colour combination and the way it knit up. I happened to have a ball of Sisu yarn in a complementing shade of burgundy to go with the burgundy in the Opal yarn. It set up a striking pair of socks.

Courage Of The Morning Sun

The only challenge, which you can’t see in the photo, is that I didn’t quite get the start point for the second sock right. I didn’t remove enough yellow yarn before starting the sock so the strips don’t line up perfectly between the two socks. Given the nature of the “pattern” it doesn’t really matter. Nobody is ever going to notice when I wear them.

Modern Quilt – Improvisation

The start of a new quilt. This is fabric left over from the Blushing Peonies Quilt. I’m working to use it up because my storage drawers and boxes are just about full and there’s really nowhere to put both the large and small fabric pieces.

I decided to use them instead of leaving them lying around gathering dust.

Blushing Peonies – Modern Quilt

What I have so far is this compilation of strips and block sections created by starting with a large piece of fabric, slashing it, then slashing the resulting pieces further, and inserting bits of fabric and recompiling the original block with the insertions included. I’ve done two largish blocks so far, the resulting piece is about 20″ wide x 22″ long – a good start.

I’ll keep adding segments to what I have here intending to end up with a good lap-size quilt 50″ x 65″. What I’m after is large sections with strong insertions – particularly showcasing both blushing peonies fabric – the peach version as well as the darker fabric I used in the original quilt.

Just gotta keep going.

I had originally intended on doing something quite different with the fabrics based on 2 1/2″ strips but the idea I had wanted the central smaller square to be one piece (instead of 4 triangles) using the blushing peonies so the flowers would show.

Garden Trellis – from a jelly roll

Setting up a block like that, however, proved more complicated than I was willing to take on – getting the mitred corners on the surrounding pieces was just too fiddly to bother with. Scrapped that idea for now.

So modern quilt it will be.