Skyline #2 – Still A Work In Progress

I had started stitching-in-the-ditch on each side of the sashing ten days ago or so – got a few rows done and then put the quilt aside. I just couldn’t carry on – not sure why that was because I knew if I started sewing it wouldn’t take me terribly long to stabilize the sandwich.
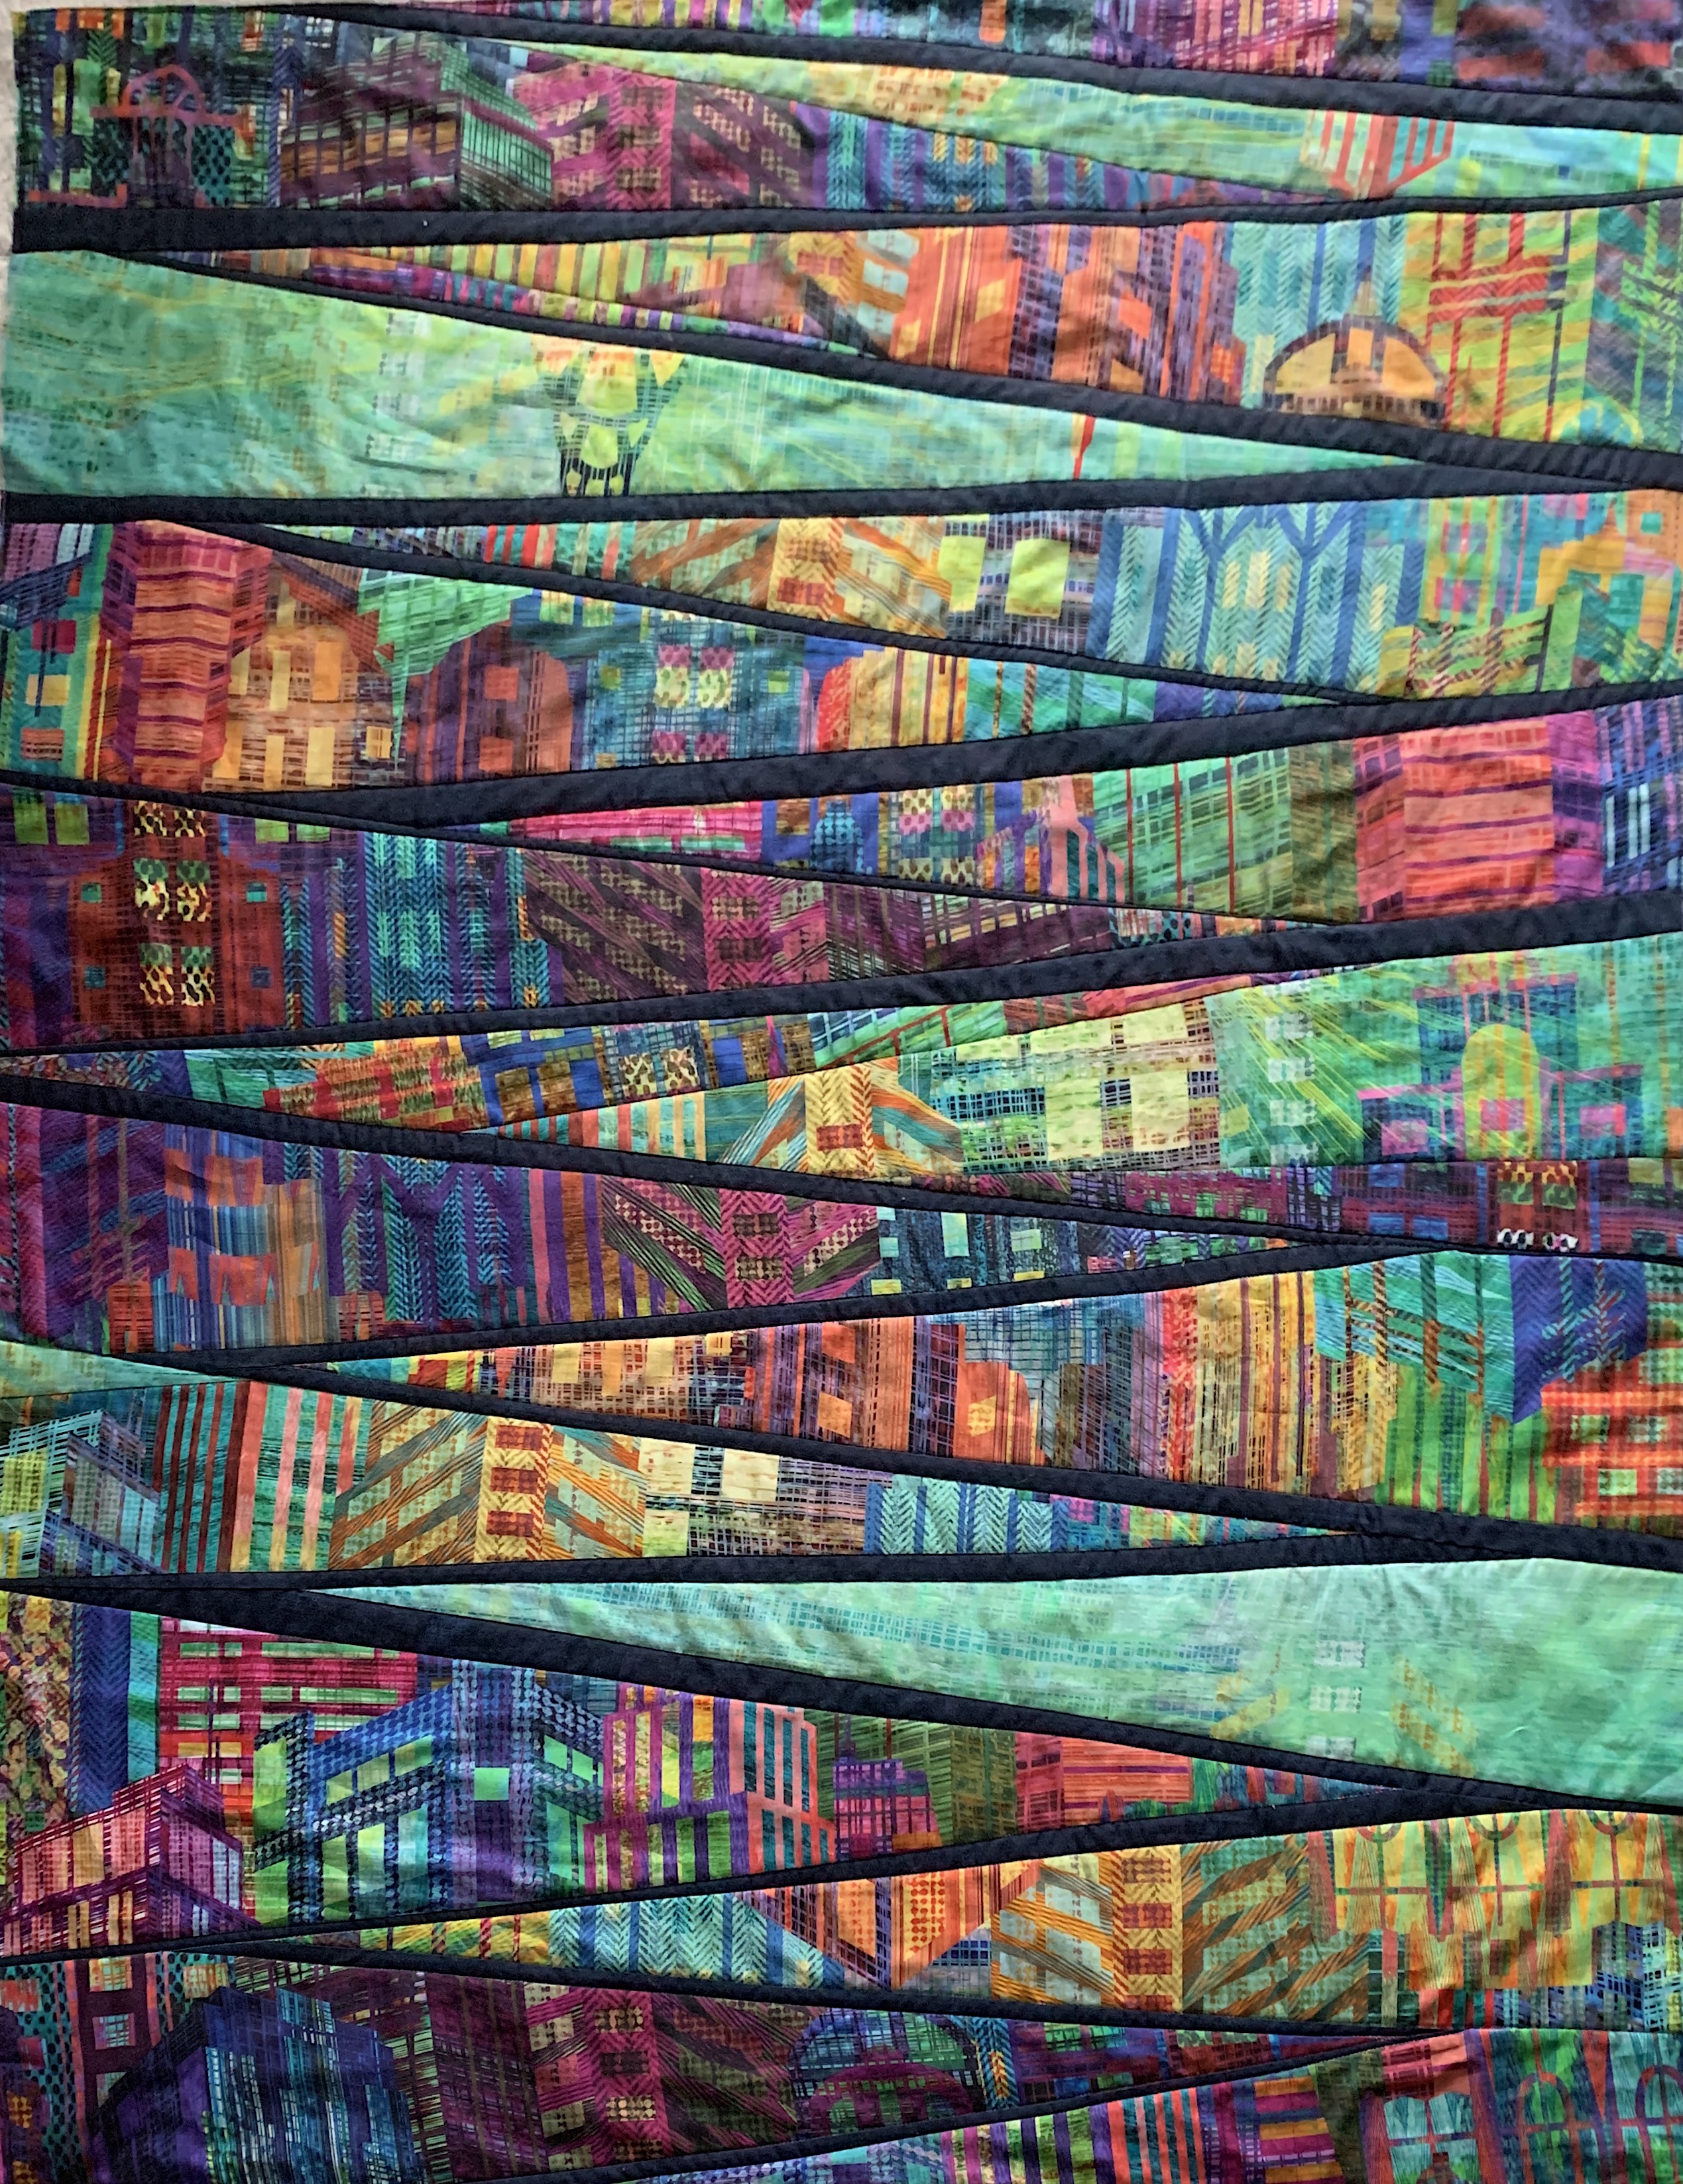
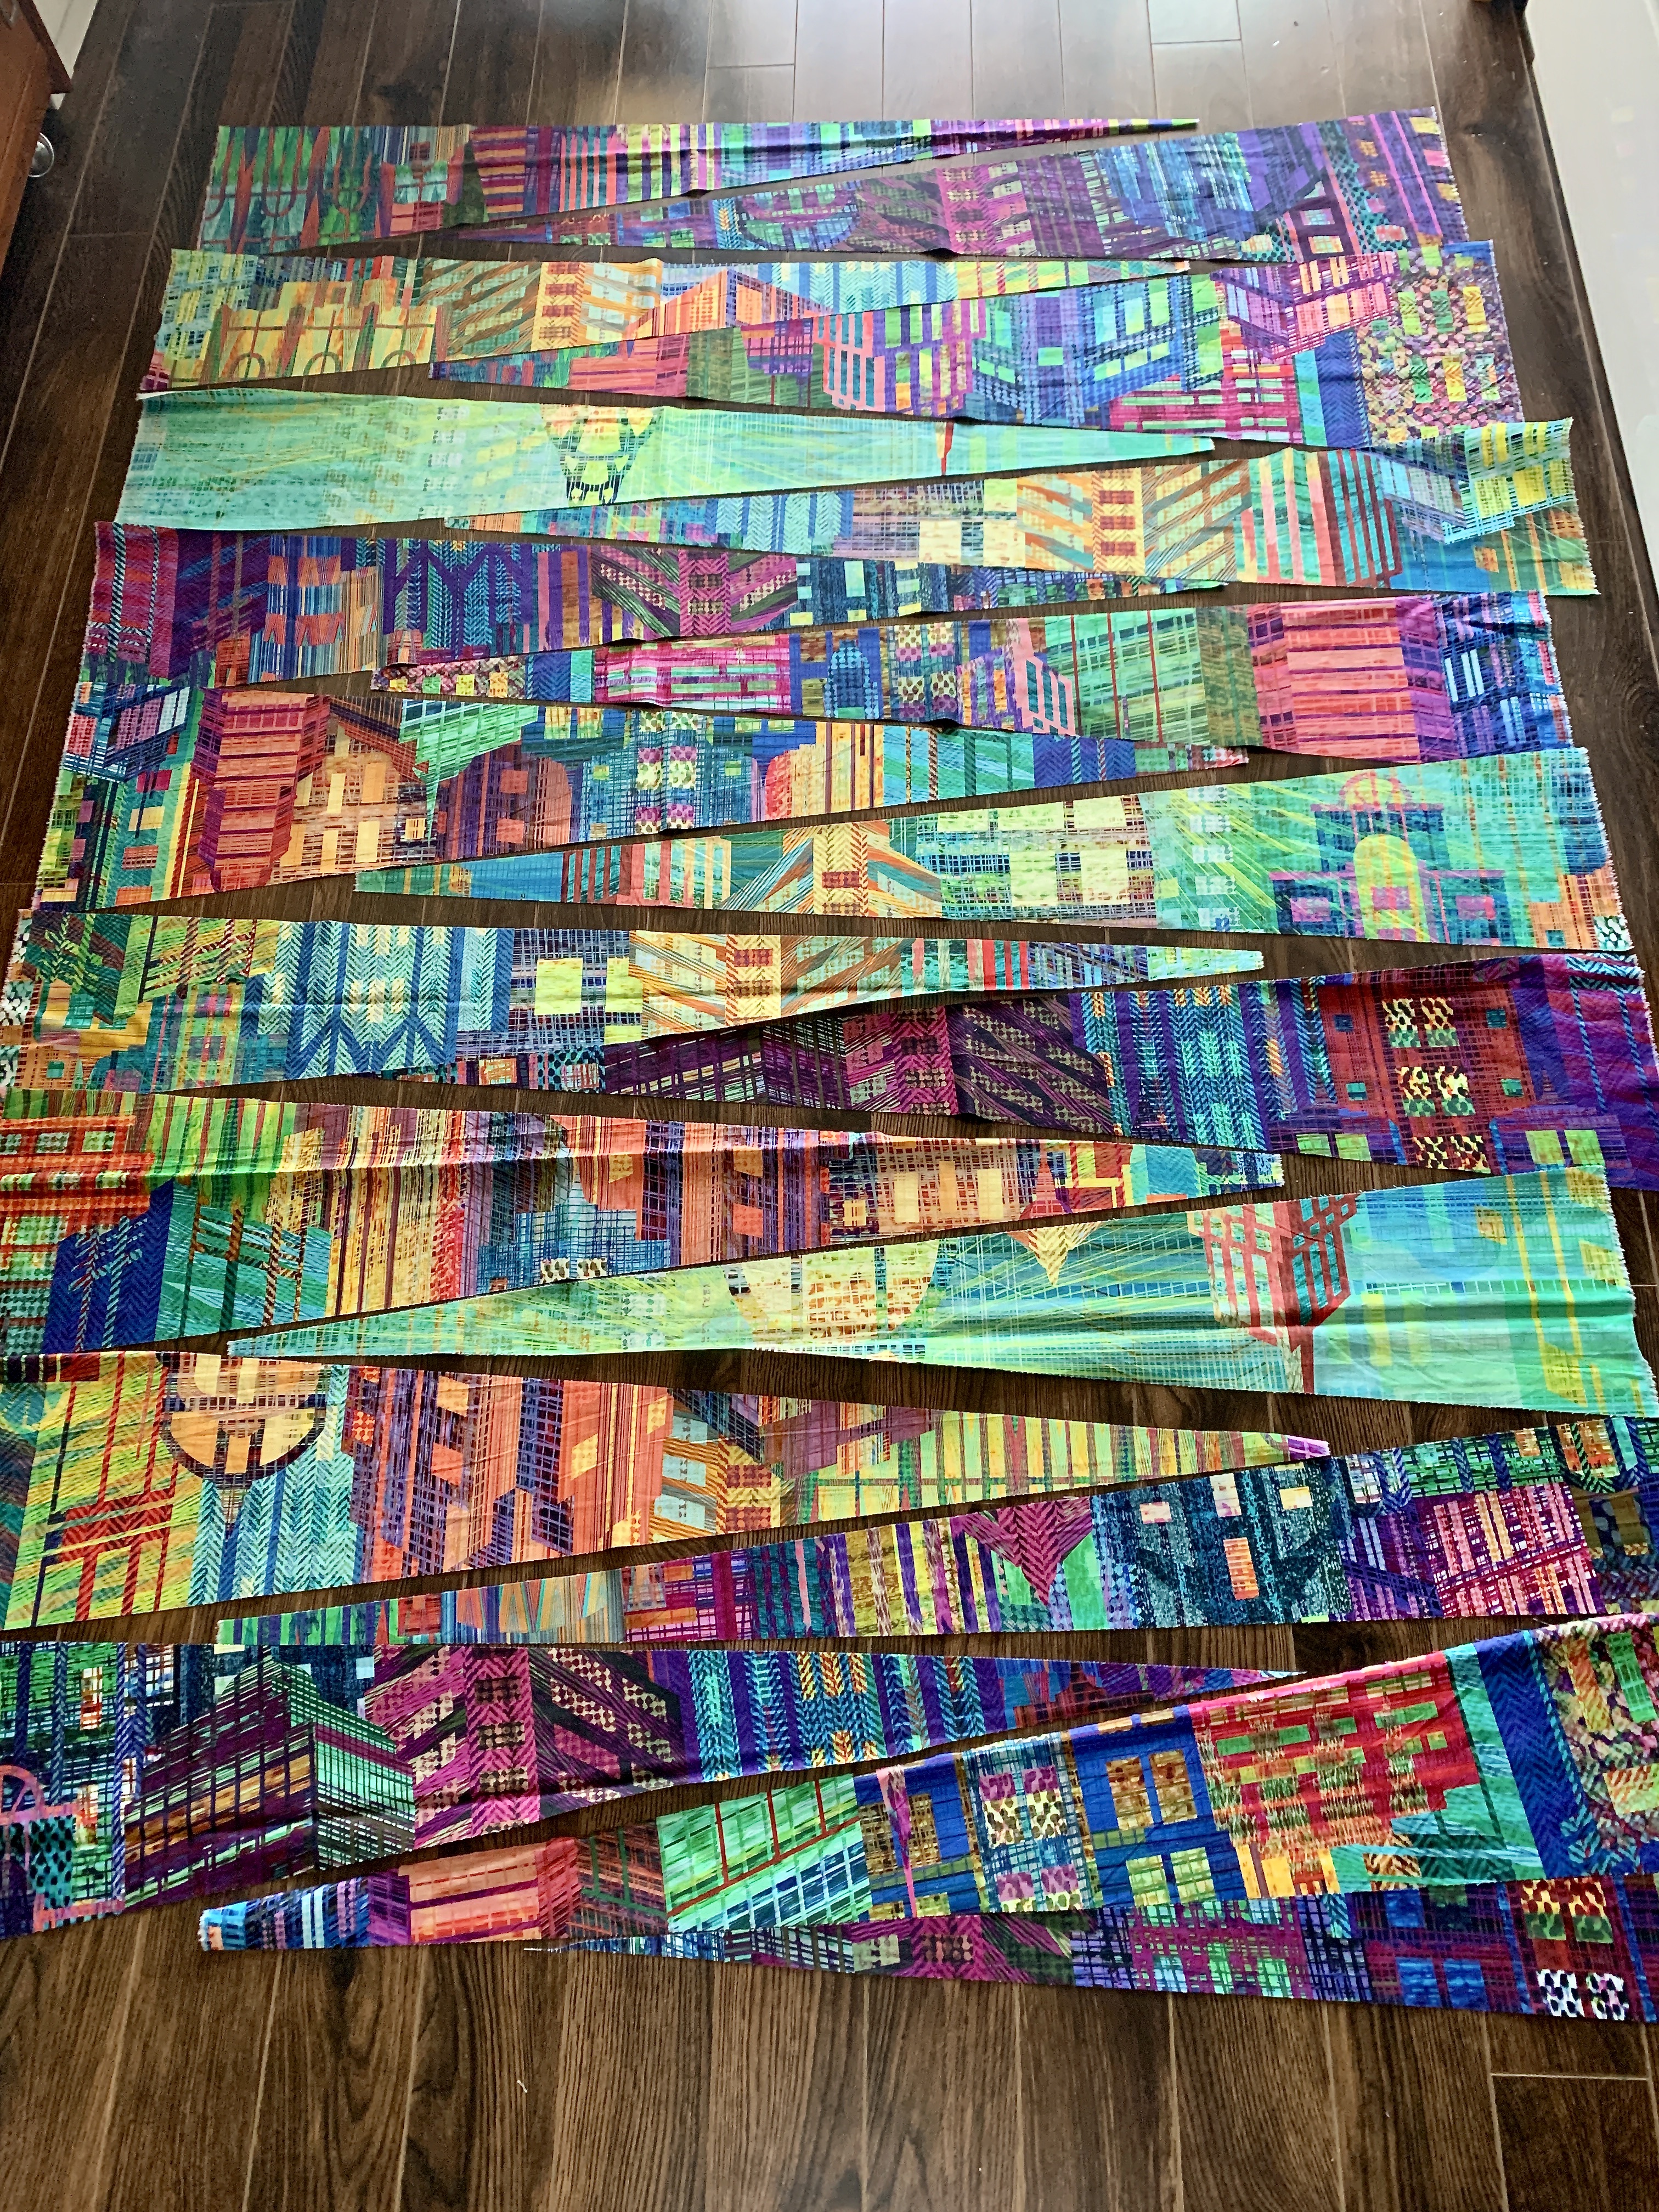
Skyline #2

This morning I finally picked up the project and stitched the remaining sashing, and around the outside. The back is nicely flat – the top has a bit of fullness but a good spraying with BestPress and a steam iron and it should be starched and pressed enough to give me a flat surface to quilt.

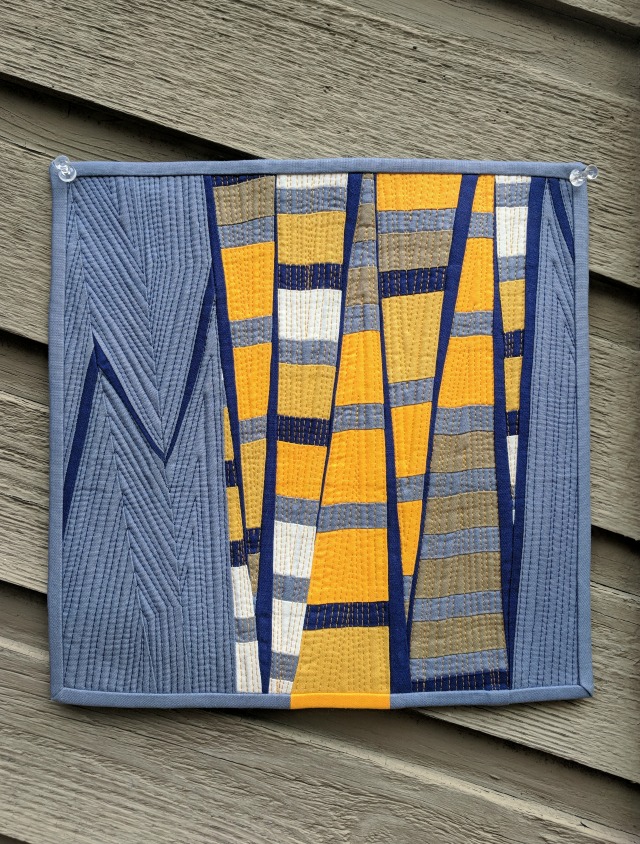
The question is what do I want to do next. I can’t leave the project as it is – there isn’t enough quilting to make the whole stable so I have to add a lot more stitching. I simply cannot do consistent free-motion work, my stitch length is inconsistent and my lines wobbly; I’m never satisfied with how it turns out which is why I quilt-in-the-hoop. But given the shape of these wedges that isn’t an option here. I’m leaning toward echo stitching the wedges and leaving the sashing alone. Once I start there will be no stopping until each of the 20 wedges is relatively densely stitched. Do I want to echo-stitch 1/4″ or 1/2″? Maybe a combination of both. What colour thread? Probably a mixture of the variegated threads I used on Skyline #1.

Tomorrow, I’ll start the process and see how it looks.

I’ve also been thinking about Skyline #3 – drunkard’s path blocks. Probably 8 1/2″ blocks with some 4 1/2″ blocks as filler. I may even try a “porthole” or two.

I just made an 8 1/2″ pair of templates (I have a commercial pair that size, but the pie-shaped piece is quite a bit smaller / the “L” shaped piece larger – I want the joins to be closer to a 1/4″ seam allowance…)

8 1/2″ Templates

Then I constructed a pair of test blocks:

8 1/2″ Test blocks

which turned out rather well. My seam allowance from the edge of the curved seam is closer to 1/2″ – that leaves me with two options: trim the block to 8″ (giving a finished 7 1/2″ block) or remake the templates. I’ll sleep on that decision.

I want a finished quilt size to match the other two Skyline projects – 48″ x 64″. If I wanted a border then I could actually go smaller or fewer: set up a 5 x 7 block array (40″ x 56″) – actually the fewer might be just fine. I’m better off staying with the finished 8″ block because that makes it much easier to do a few finished 4″ blocks as filler.

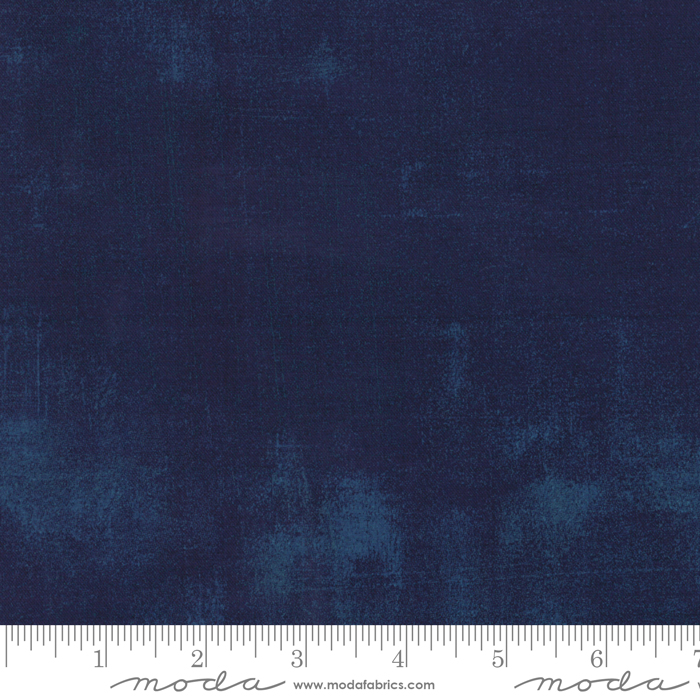
I also now have to think about a balance between my Skyline fabric and some Grunge inserts – I want some bright Grunge fabric to broaden my colour range. The Skyline is colourful, but when it’s cut up and reassembled some of the brightness disappears.

I’ll start by cutting the Skyline into 9 1/2″ squares – that’s large enough to cut out both drunkard’s path template pieces without a lot of waste, then mix and match the two elements to see what it will look like… After I finish quilting Skyline#2.

Skyline #2 – Top Pieced

The Skyline #2 top is finished.

I took what I’d done apart – I had to because the panel was not laying flat! I didn’t have to take every seam out, but I did have to take quite a few apart. Now it will lay flat on the batting and cling smoothly enough to permit me to quilt the whole.

Skyline #2 – Top Pieced

I still don’t know how this quilt will turn out. I’m happy with the overall flow of colour. The next challenge is quilting the project. The quilting will pull the piece together (or, frankly, it could kill it).

I’m intending to echo-stitch the wedge elements, including the sashing. I expect the quilting will need to be quite close but not evenly spaced. I plan on using the same threads I used for Skyline #1 – a mix of variegated purple / turquoise / red to blend with the print (instead of contrasting with it).

In the meantime, I need to square the piece – tricky, actually, because although the top is relatively flat now, laying it on my cutting table and keeping it in place while I trim edges will need weights to prevent slipping.

The top is still a bit wide and I think 3-4″ longer than I finally want it to be so I do have a bit of wiggle room as I square it up.

The backing will include an offset uncut strip of the original fabric with sashing to border it as I did with Skyline #1.


Skyline #2 – Update

A quick update. Got a bit further this morning – I added 6 wedges with sashing.

Skyline #2 – In Progress

Not easy to do and keep the panel flat. The angle at the apex of each wedge causes a wobble in the developing edge – you can see it at the bottom of the image. I had to figure out a way to overlap each new wedge with the previous ones in order to keep the panel flat.

I think I’ve figured out I have to lay out the sashing strip, trim the panel so the sashing is applied straight, then trim any excess from the panel edge so I can sew a straight seam. When applying the next wedge, I can play with the width of the sashing so it narrows either at the point or at the outer side of the panel whichever seems right at that spot.

I’m about half done at this point. I have another 9 wedge pieces to add. I’ve squared the top and sides – the width is still around 52″ – I will trim it to 48 1/2″ (maybe 49″) when I’ve completed the whole panel.

I’m still not sure whether I want to use the piece with this horizontal layout, or whether I will rotate the panel 90° – that would necessitate adding something to either end because the panel at 52″ is not long enough – I’d need another 12″ or so.

I want to finish at close to 64″ in length whether the wedges are horizontal or vertical….

Skyline #2 – Starting The Panel

I spent some time this morning beginning to assemble the panel – some interesting problems to solve here. I don’t want all the points at the same level so I have to figure out ways of staggering them in both directions!

Also the width of the navy grunge “sashing” is something I’m going to have to work out piece by piece. I’ve cut sets of 1″, 1 1/4″, 1 1/2″, 1 3/4″. I think the easiest solution is to apply a strip to the ongoing edge as it is, but graduate it when I apply the next wedge so the dark blue is also present as a wedge – sometimes wide/narrow other times narrow/wide.

Skyline #2 – assembly beginning

It’s going to take time to assemble this panel because each adjacent wedge has to be attached in a way that doesn’t distort the panel – I need to keep it flat. I may have to add small wedge inserts as I go along to even out the joins between sections.

Anyway, I’ve got the panel started. I’ll try getting further tomorrow.

Skyline #2

So here goes…

I took my second panel of the Hoffman “Skyline” fabric and cut it into wedges – some narrower than others.

I laid them out on my floor in alternating directions, spreading the array a bit wider than 50″ – close to the width I’d like to end up with (allowing me room to trim after I’ve assembled the panel).

Skyline #2

I didn’t cut the lightest end of the fabric and I see now I may want to include at least one very light wedge in the array. I’ll leave this fabric on the floor and move wedges around over the next couple of days trying to decide on colour flow.

My next step is to cut my dark navy grunge fabric into strips (slightly wedge shaped, maybe) and attach those pieces to one edge of the coloured wedges. That will set up a stronger colour contrast and make the print colours brighter.

The inspiration for this project comes from Debbie Jeske’s 10″ block “Loosely Connected

Loosely Connected by Debbie Jeske

I’d come across the image on Pinterest after I’d bought the Skyline fabric and thought it was an interesting idea – I wouldn’t need to piece the wedges – just use the colour flow within the print. I’m not planning on solid end pieces, but who knows – once I have a panel assembled I might decide to include a grunge contrast at the ends, even along the sides.

I’m aiming for a finished panel about this same size as “Skylines #1” – 48″ x 64″.

So now to cut the dark blue grunge strips and begin adding them to the wedges….

Skyline #1 – Completed

Here it is. Finished. I just hand-stitched the hidden binding and the label in place.

Skyline #1

I’m quite pleased with how this piece turned out. Final dimensions: 48″ x 64″ – not a bad size for a throw quilt and still reasonable to be hung on a wall should anyone be interested.

I used three different colours of variegated Aurifil (50wt) to quilt the project – on top a darkish purple (with mauve) in the purple corner, a medium turquoise (with light turquoise) in the lighter sections, and a red blend in the peach sections. You really have to look hard to see the differences but it was necessary – a occasional dark purple segment in the turquoise or peach sections would have stuck out; same with a turquoise or red in the dark purple on the bottom right. I used a green variegated thread for the back throughout. That worked well.

I was fortunate, that when I trimmed the backing/batting off, I had enough backing fabric from the four sides that I was able to use the offcuts to bind the quilt. So the hidden binding matches the quilt back!

Skyline #1 – Back

This is the third quilt I’ve used a hidden binding on. I elected to do that here because I felt a regular binding would “frame” the quilt top and I wanted it to be open, without limits. Same with the back, the hidden binding brings the elements to the quilt edge nicely.

Now on to the second in this series.

Black Rock Beach – Completed

Just finished. Unfortunately, the photo doesn’t do the piece justice – I’ve tried lightening the blue of the frame and can’t get close to the real colour without distorting the body of the  piece.

Black Rock Beach

I’m happy with the balance of the whole. The piping, which doesn’t show well in the photo at all, pulls out both the orange of the vest and the blues of the water.

Now to find a place to hang it in my apartment – there isn’t obvious wall space in any room. I’m going to have to walk around and decide what to take down so I can display this piece of art.

Black Rock Beach – IV

Day before yesterday I took apart the stitching of the water near the shore. Yesterday I stitched in new wave lines which run more parallel to the beach. I stitched in small wavelets as they reach the beach. I also stitched the rubble at the beach line and at the bricks at the bottom right.

Thread Painting Finished

Today, I stitched around the rocks and pebbles on the beach. I worked in the bits of vegetation and wood debris amid the rocks.

Finally I added David.

David Up Close

I very carefully stitched the shading of his clothing and around the edges of the fused appliqué.

The last thing I stitched was my signature in the bottom right.

Auditioning Fabric for Framing

I’ve stopped for today, but I’ve cut and laid out fabric for an inner border. I auditioned several fabrics for the piping including both bright and muted orange pieces but they pull the eye away from the vest. I think I’ve settled on a dark teal solid which will allow me to use a mottled grey print for the wide outer framing.

I’ll do the framing tomorrow.

Black Rock Beach – III

I spent several hours yesterday working on the thread painting on Black Rock Beach – the sky, the distant shore, the black rocks point, the water near the shore.

Black Rock Beach

I closely stitched the Black Rock Point

Black Rock Point

Then I worked my way toward the foreground

Black Rock Beach III

Standing back from it I can see the curvature of the waves is jarring. The piece would feel more calm were I to straighten out the water movement. That’s a challenge – because I’m not sure I won’t be left with stitch marks I won’t be able to eliminate once I’ve taken that stitching out.

However, I’m going to give it a try because I’m not happy with how the water near the rocky beach is flowing.

A Return To “Black Rocks Beach”

This “staying at home” has my brain befuddled. I was able to feel productive while engaged in face mask production but for the past week I have not been able to settle on a new quilting project or wall art project or any garment making. I’ve whiled away my time with puzzles and following news, a minimal amount of cooking, and an occasional walk but I’ve not been getting anything creative done.

Day before yesterday I put the “Black Rocks Beach” piece (started a year ago!) back on my cutting table. Last spring I concatenated three photos to create the one image. In December/January (I can’t remember when, exactly) I’d got as far as laying in the background sky, far shore, the black rocks, the near shore but stopped short of doing any thread painting.

Two days ago I fused small bits of fabric to indicate the movement of the water near the beach. I think today is the day I pull out my boxes of rayon embroidery thread and start working on water and sky.

Black Rocks Beach

David’s figure is fussy cut and ready to go but not fused to the scene yet – the water has to be thread painted before I can put him in place and thread paint his clothing. This is one of those moments where I have to take a deep breath and just start stitching – there will be no going back, no correcting what I’ve done. Here’s where the art form is unforgiving.

Ready – set – go.