The Destruction

This morning in my email there were links from friends, passing on items I hadn’t seen because I don’t do Facebook. Three of them are serious analyses of this past week in the US.

I also found today’s NYT Editorial “Now Is Not The Time To Tune Out

It’s becoming obvious that people in the US are finally waking up to what is really going on in their country and they’re starting to push back. Too bad they weren’t paying attention before the election! The warnings were there, loud and clear. People needed to see what the real consequences of putting trump in the presidency would be. And they’re not pretty.

It was all predictable. trump wasn’t hiding his plans. Project 2025 laid them out clearly in hundreds of pages of detail! The majority of people disregarded it all. But his agenda has been clear since 2015! And now he (and his oligarchs) are executing the plan!

I could see it coming – I wrote this the day after the election in November:
https://jmn111.wordpress.com/wp-admin/post.php?post=11973&action=edit&calypsoify=1
Lots of other people could see it coming, too. Now it’s happening.

People are also writing about how citizens can resist – Robert Reich offers a long list of actions individuals can take to push back against the destruction: Robert Reich – What You can Do

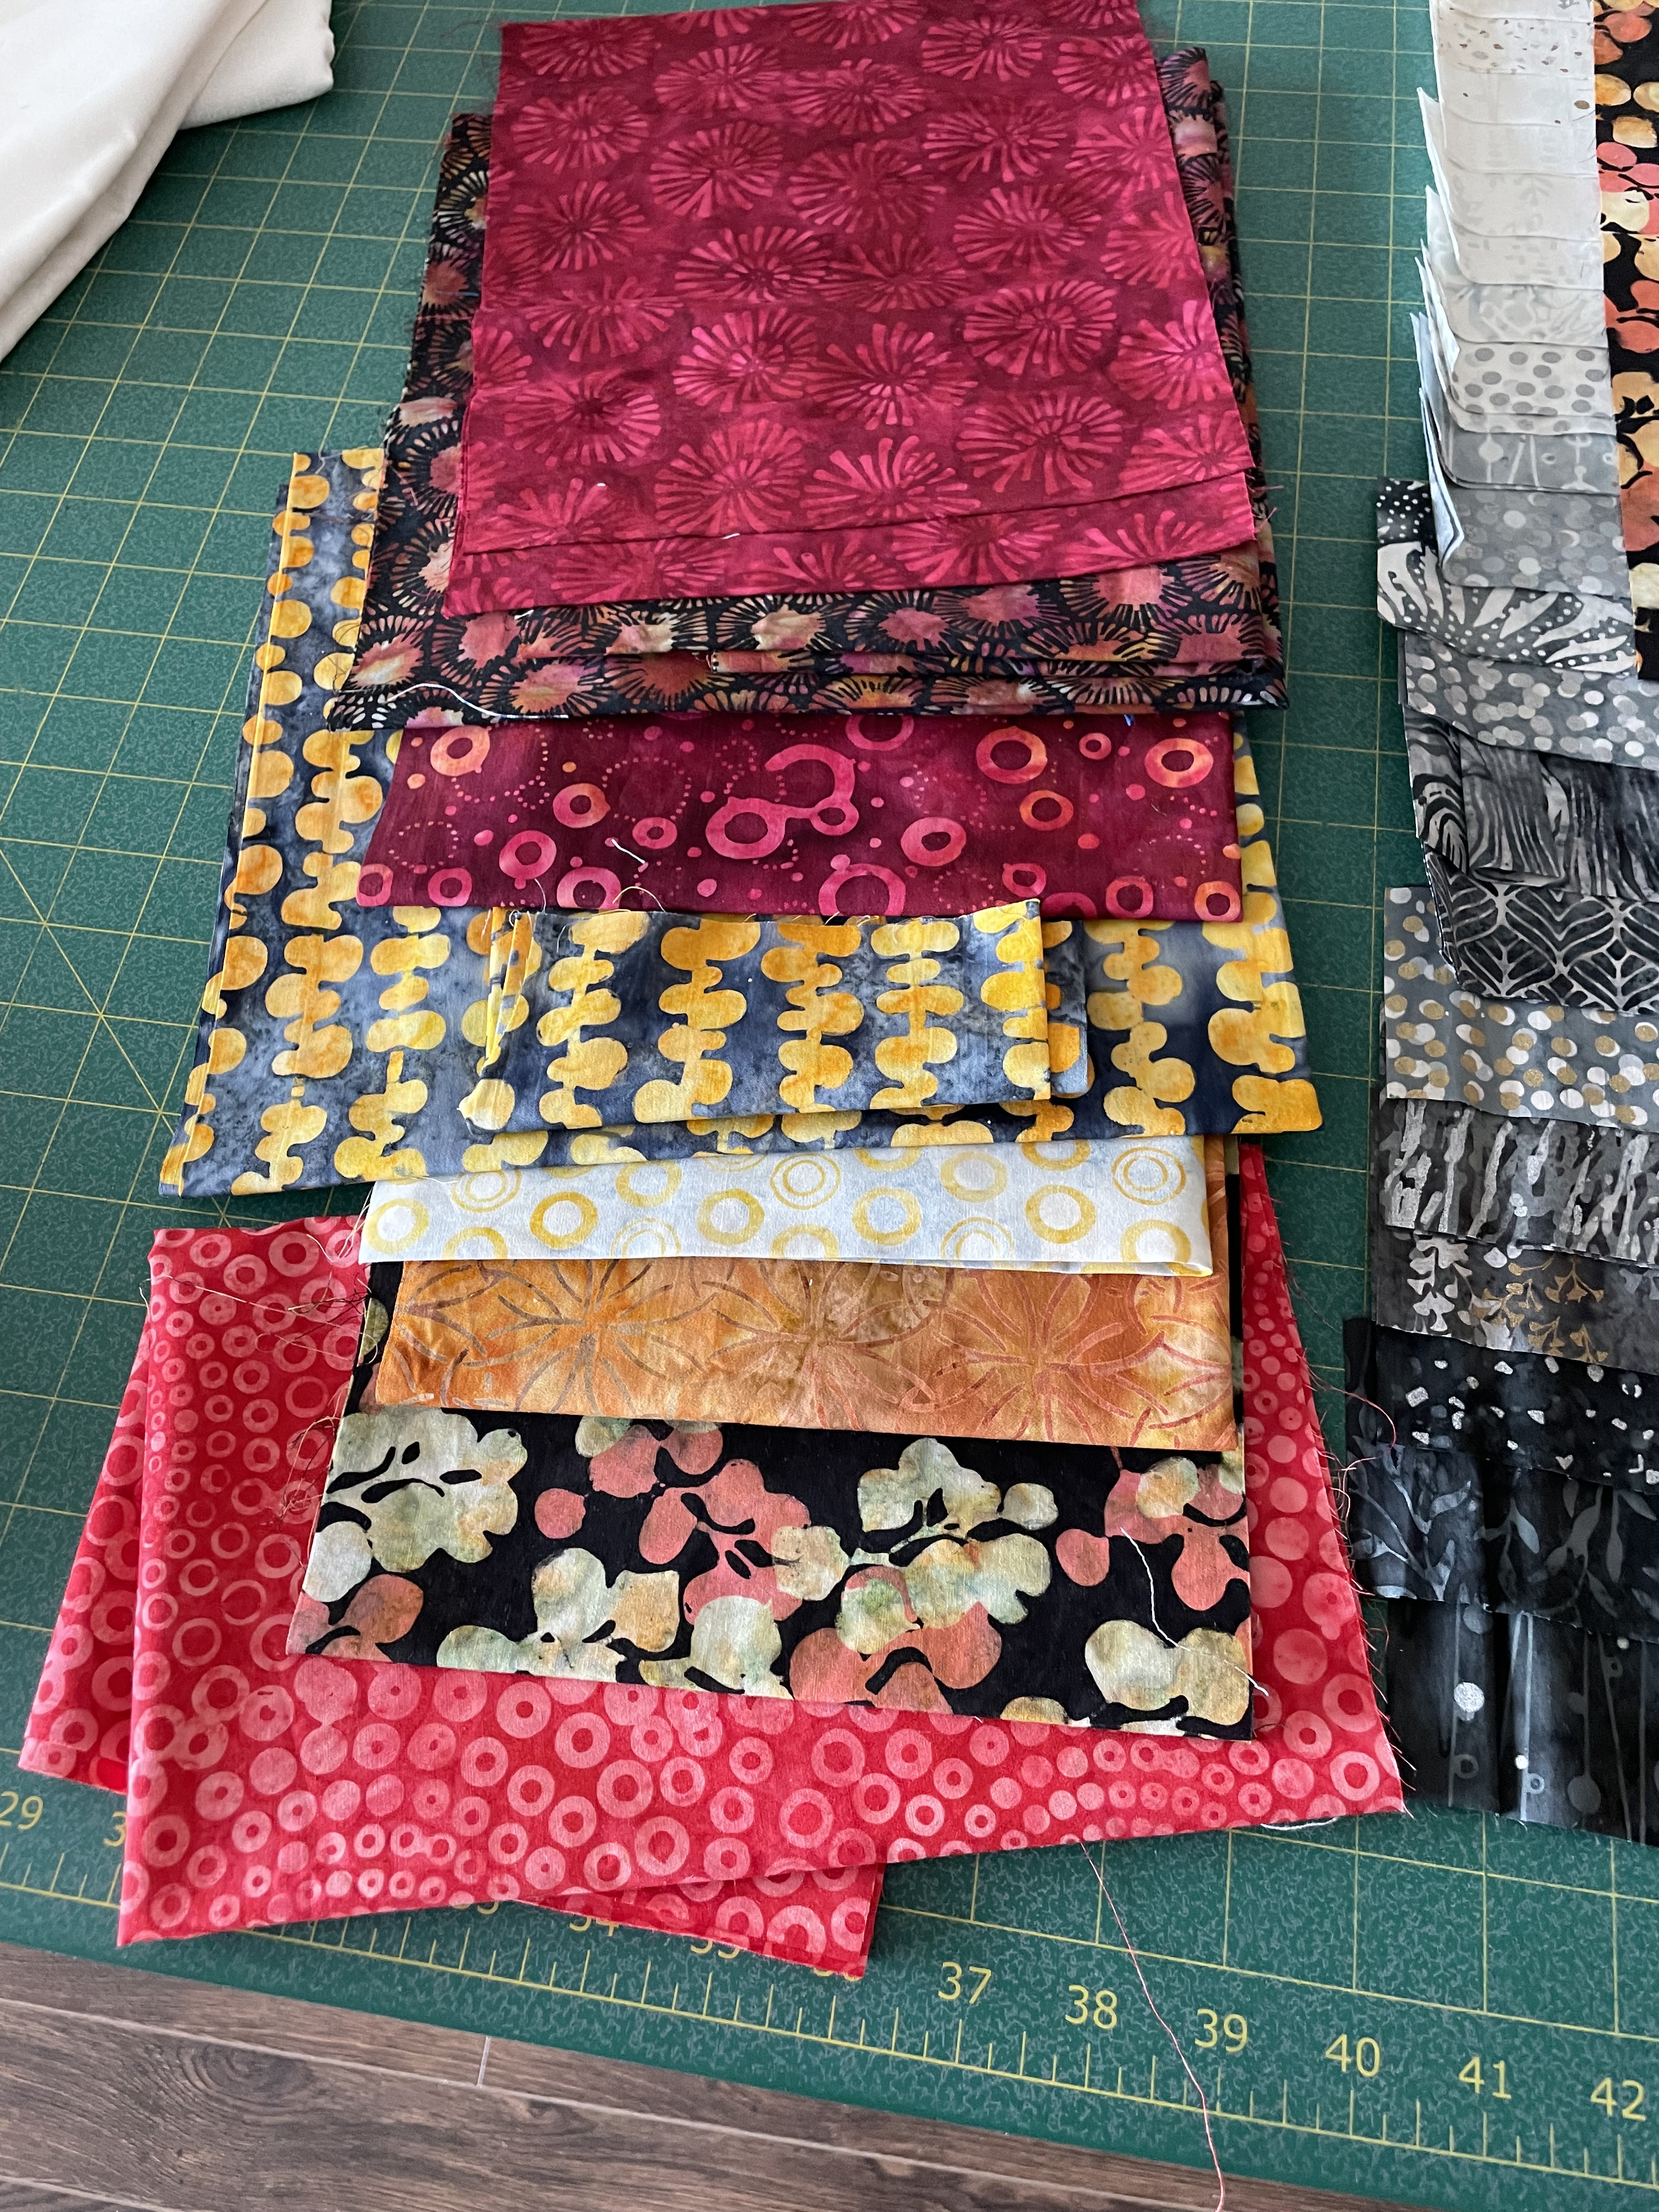
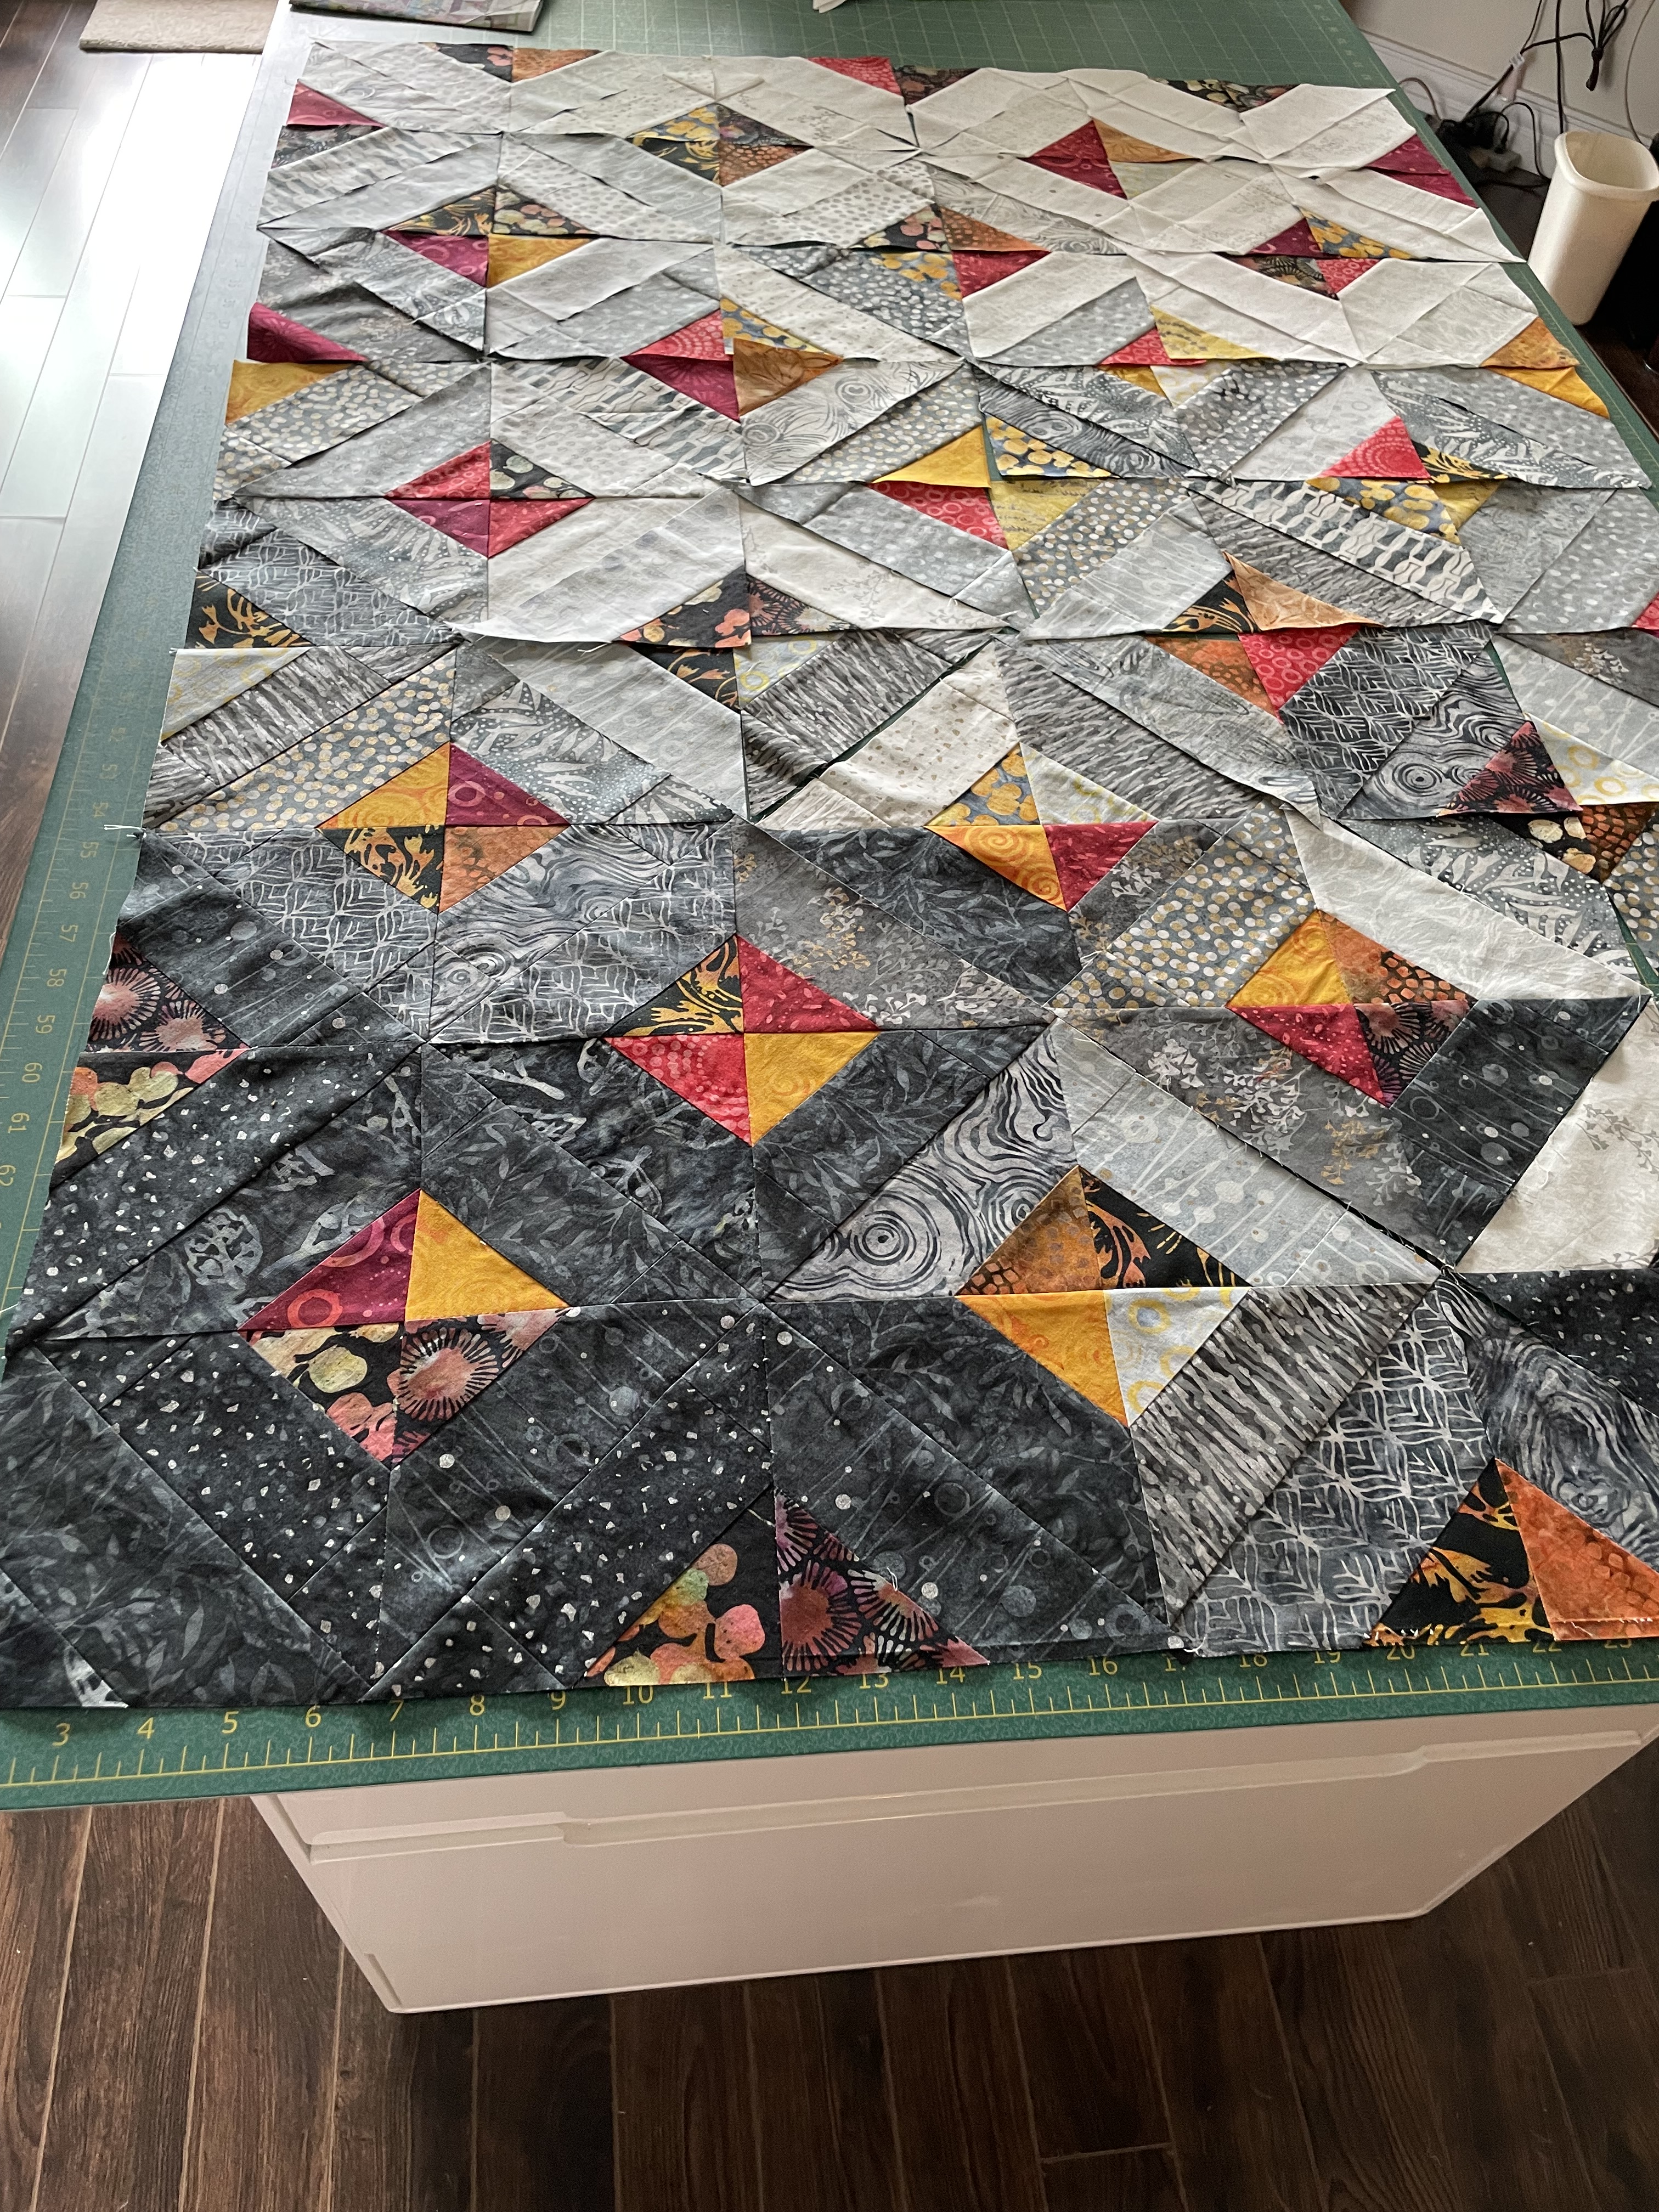
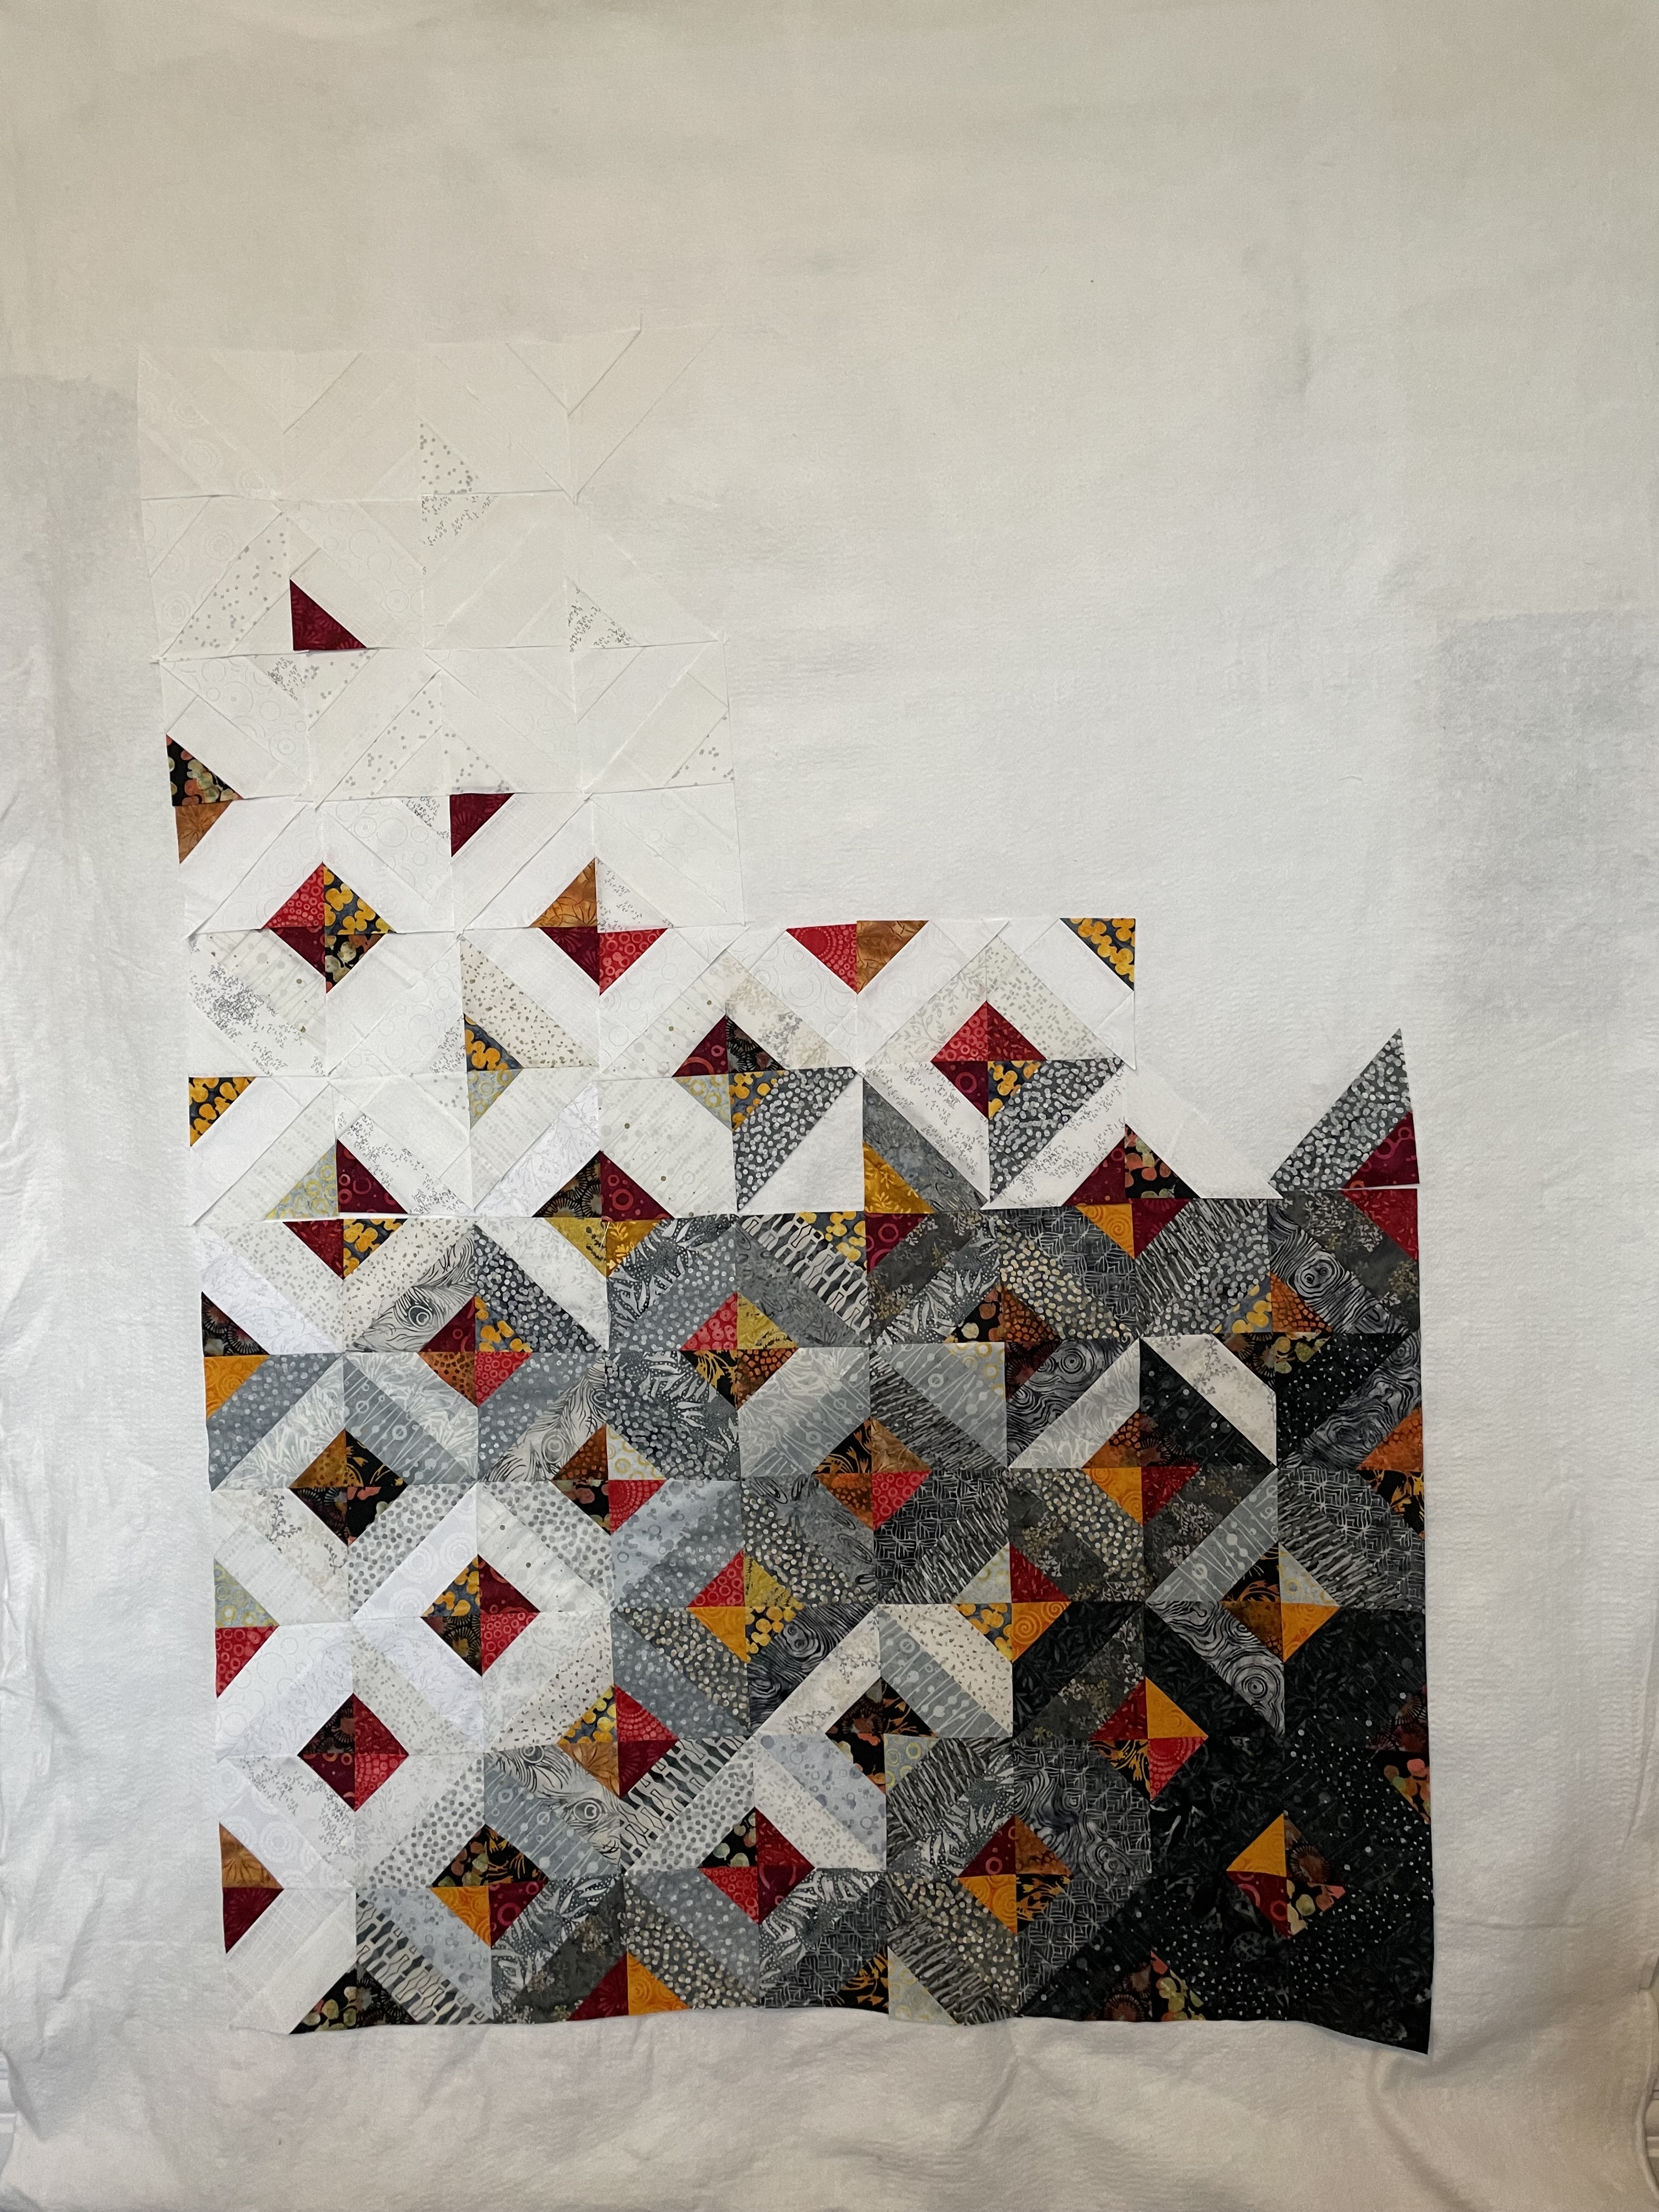
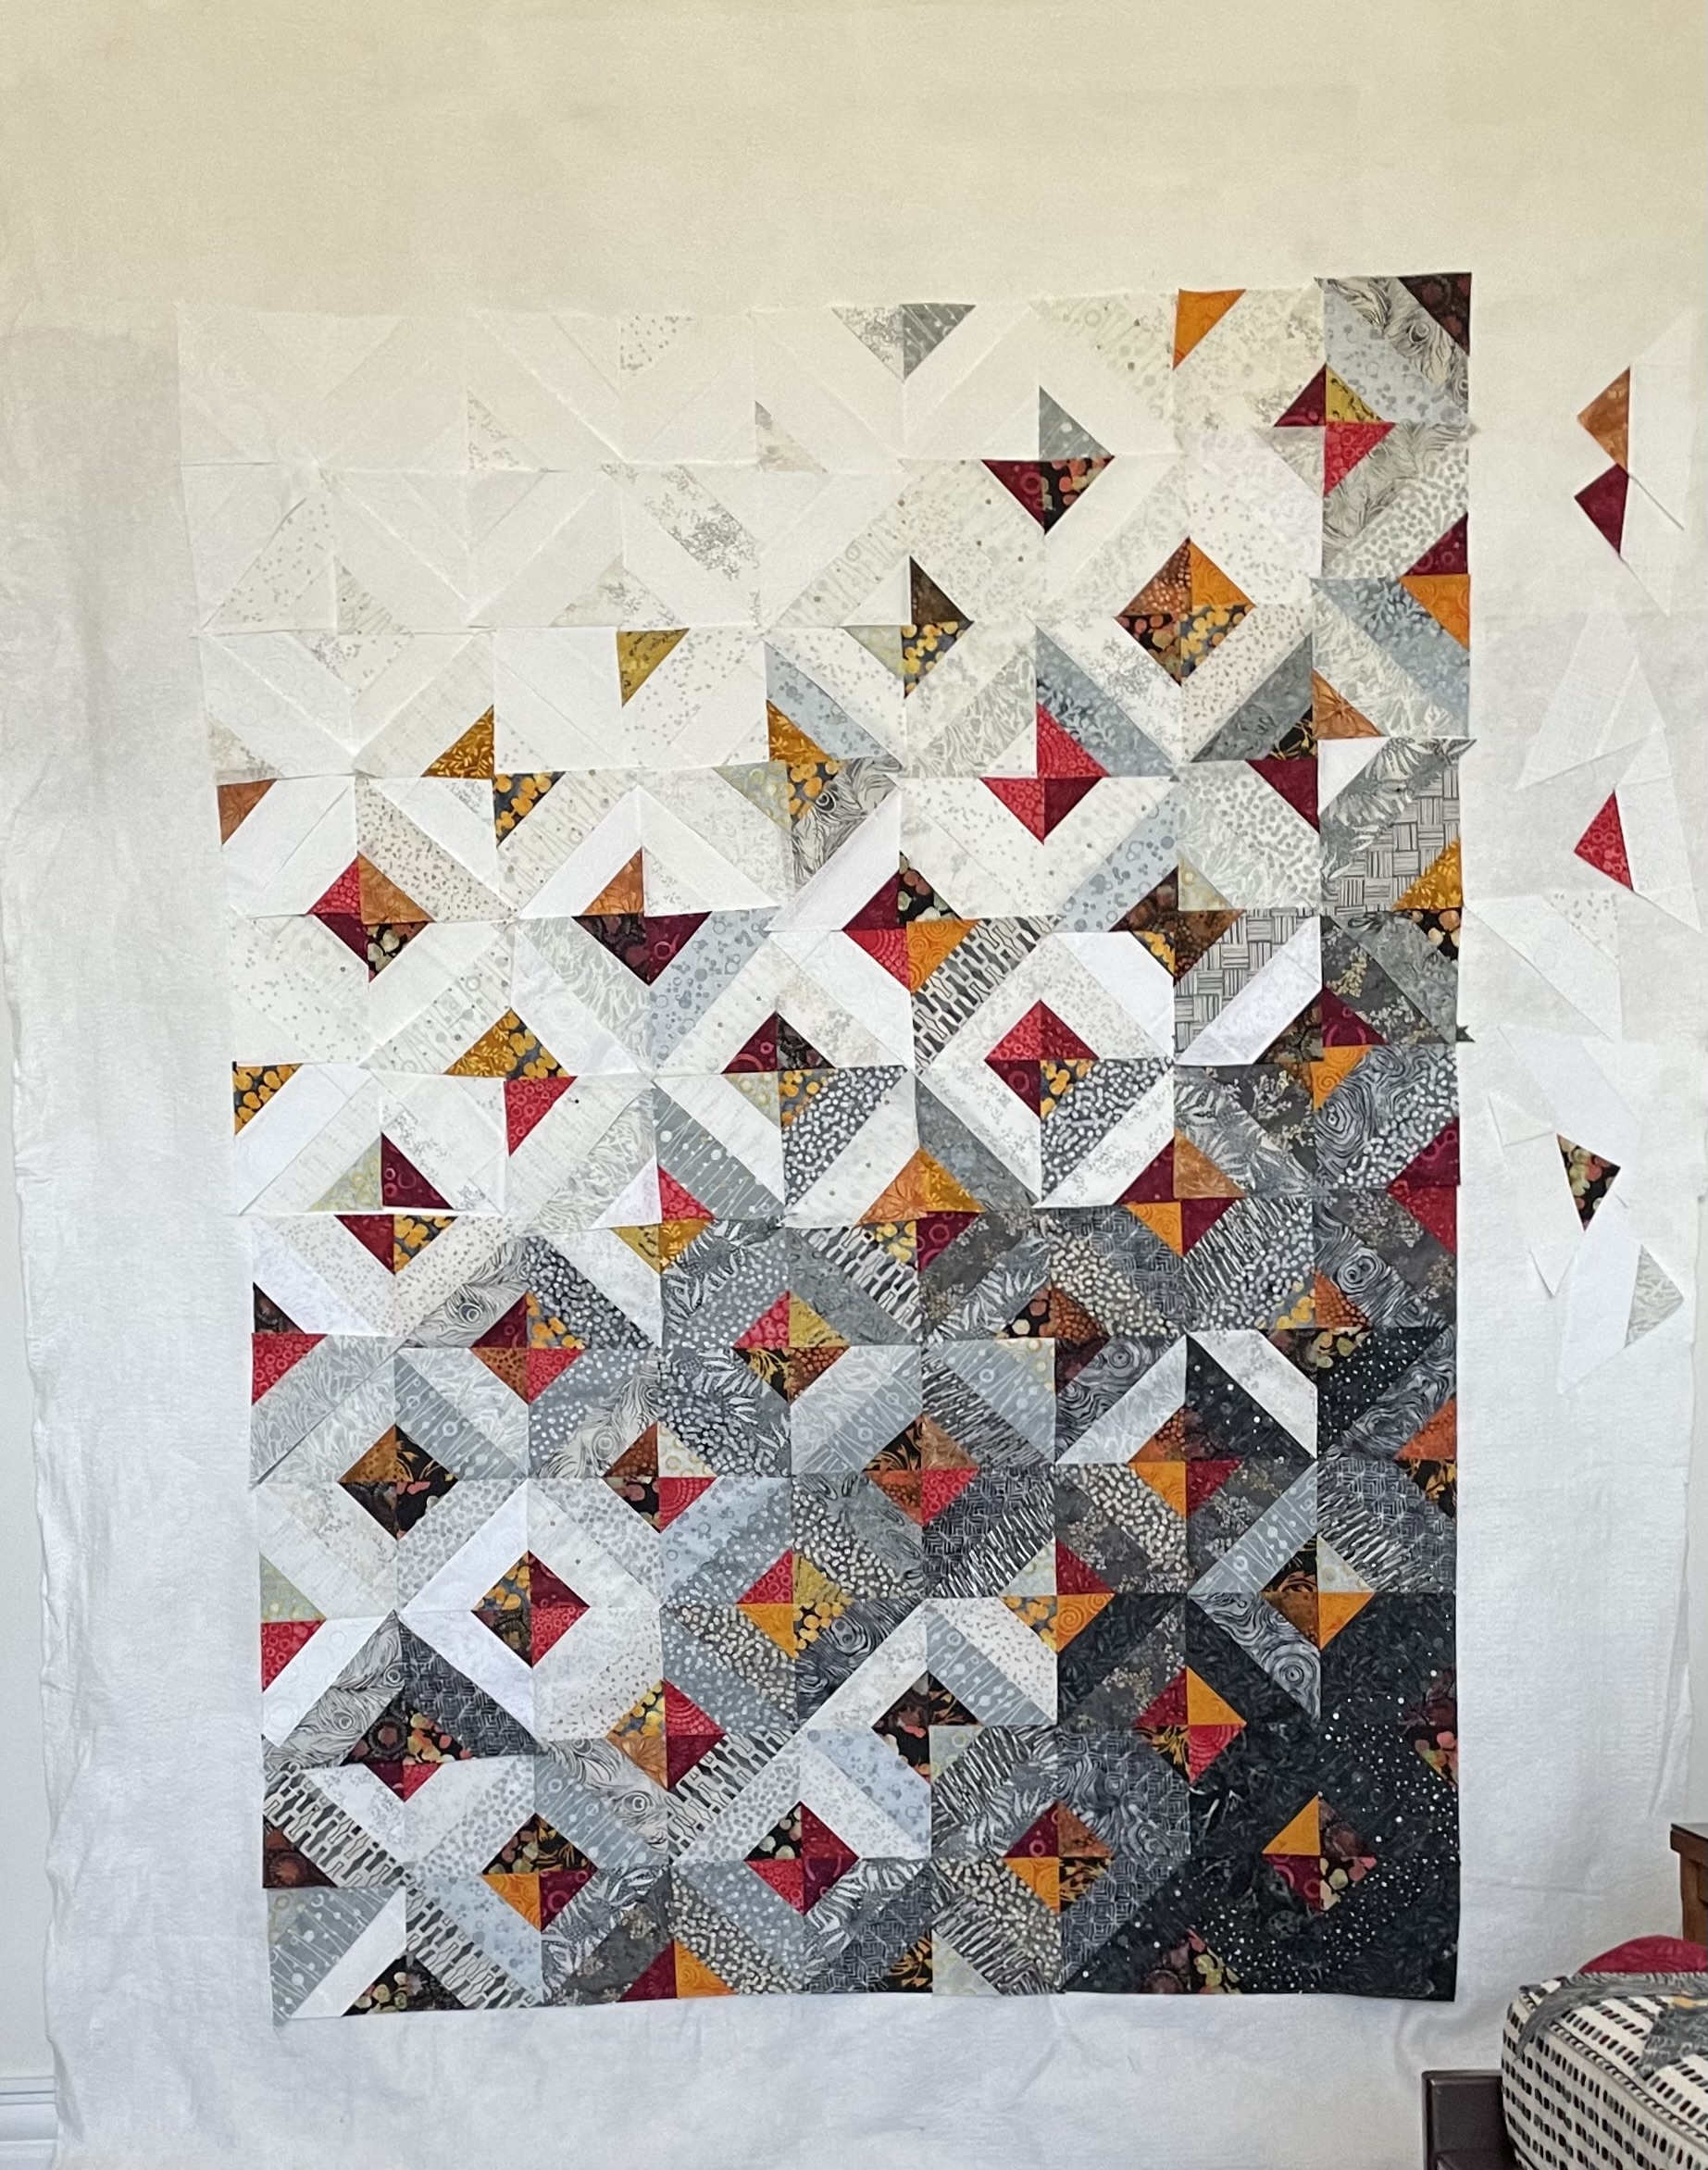
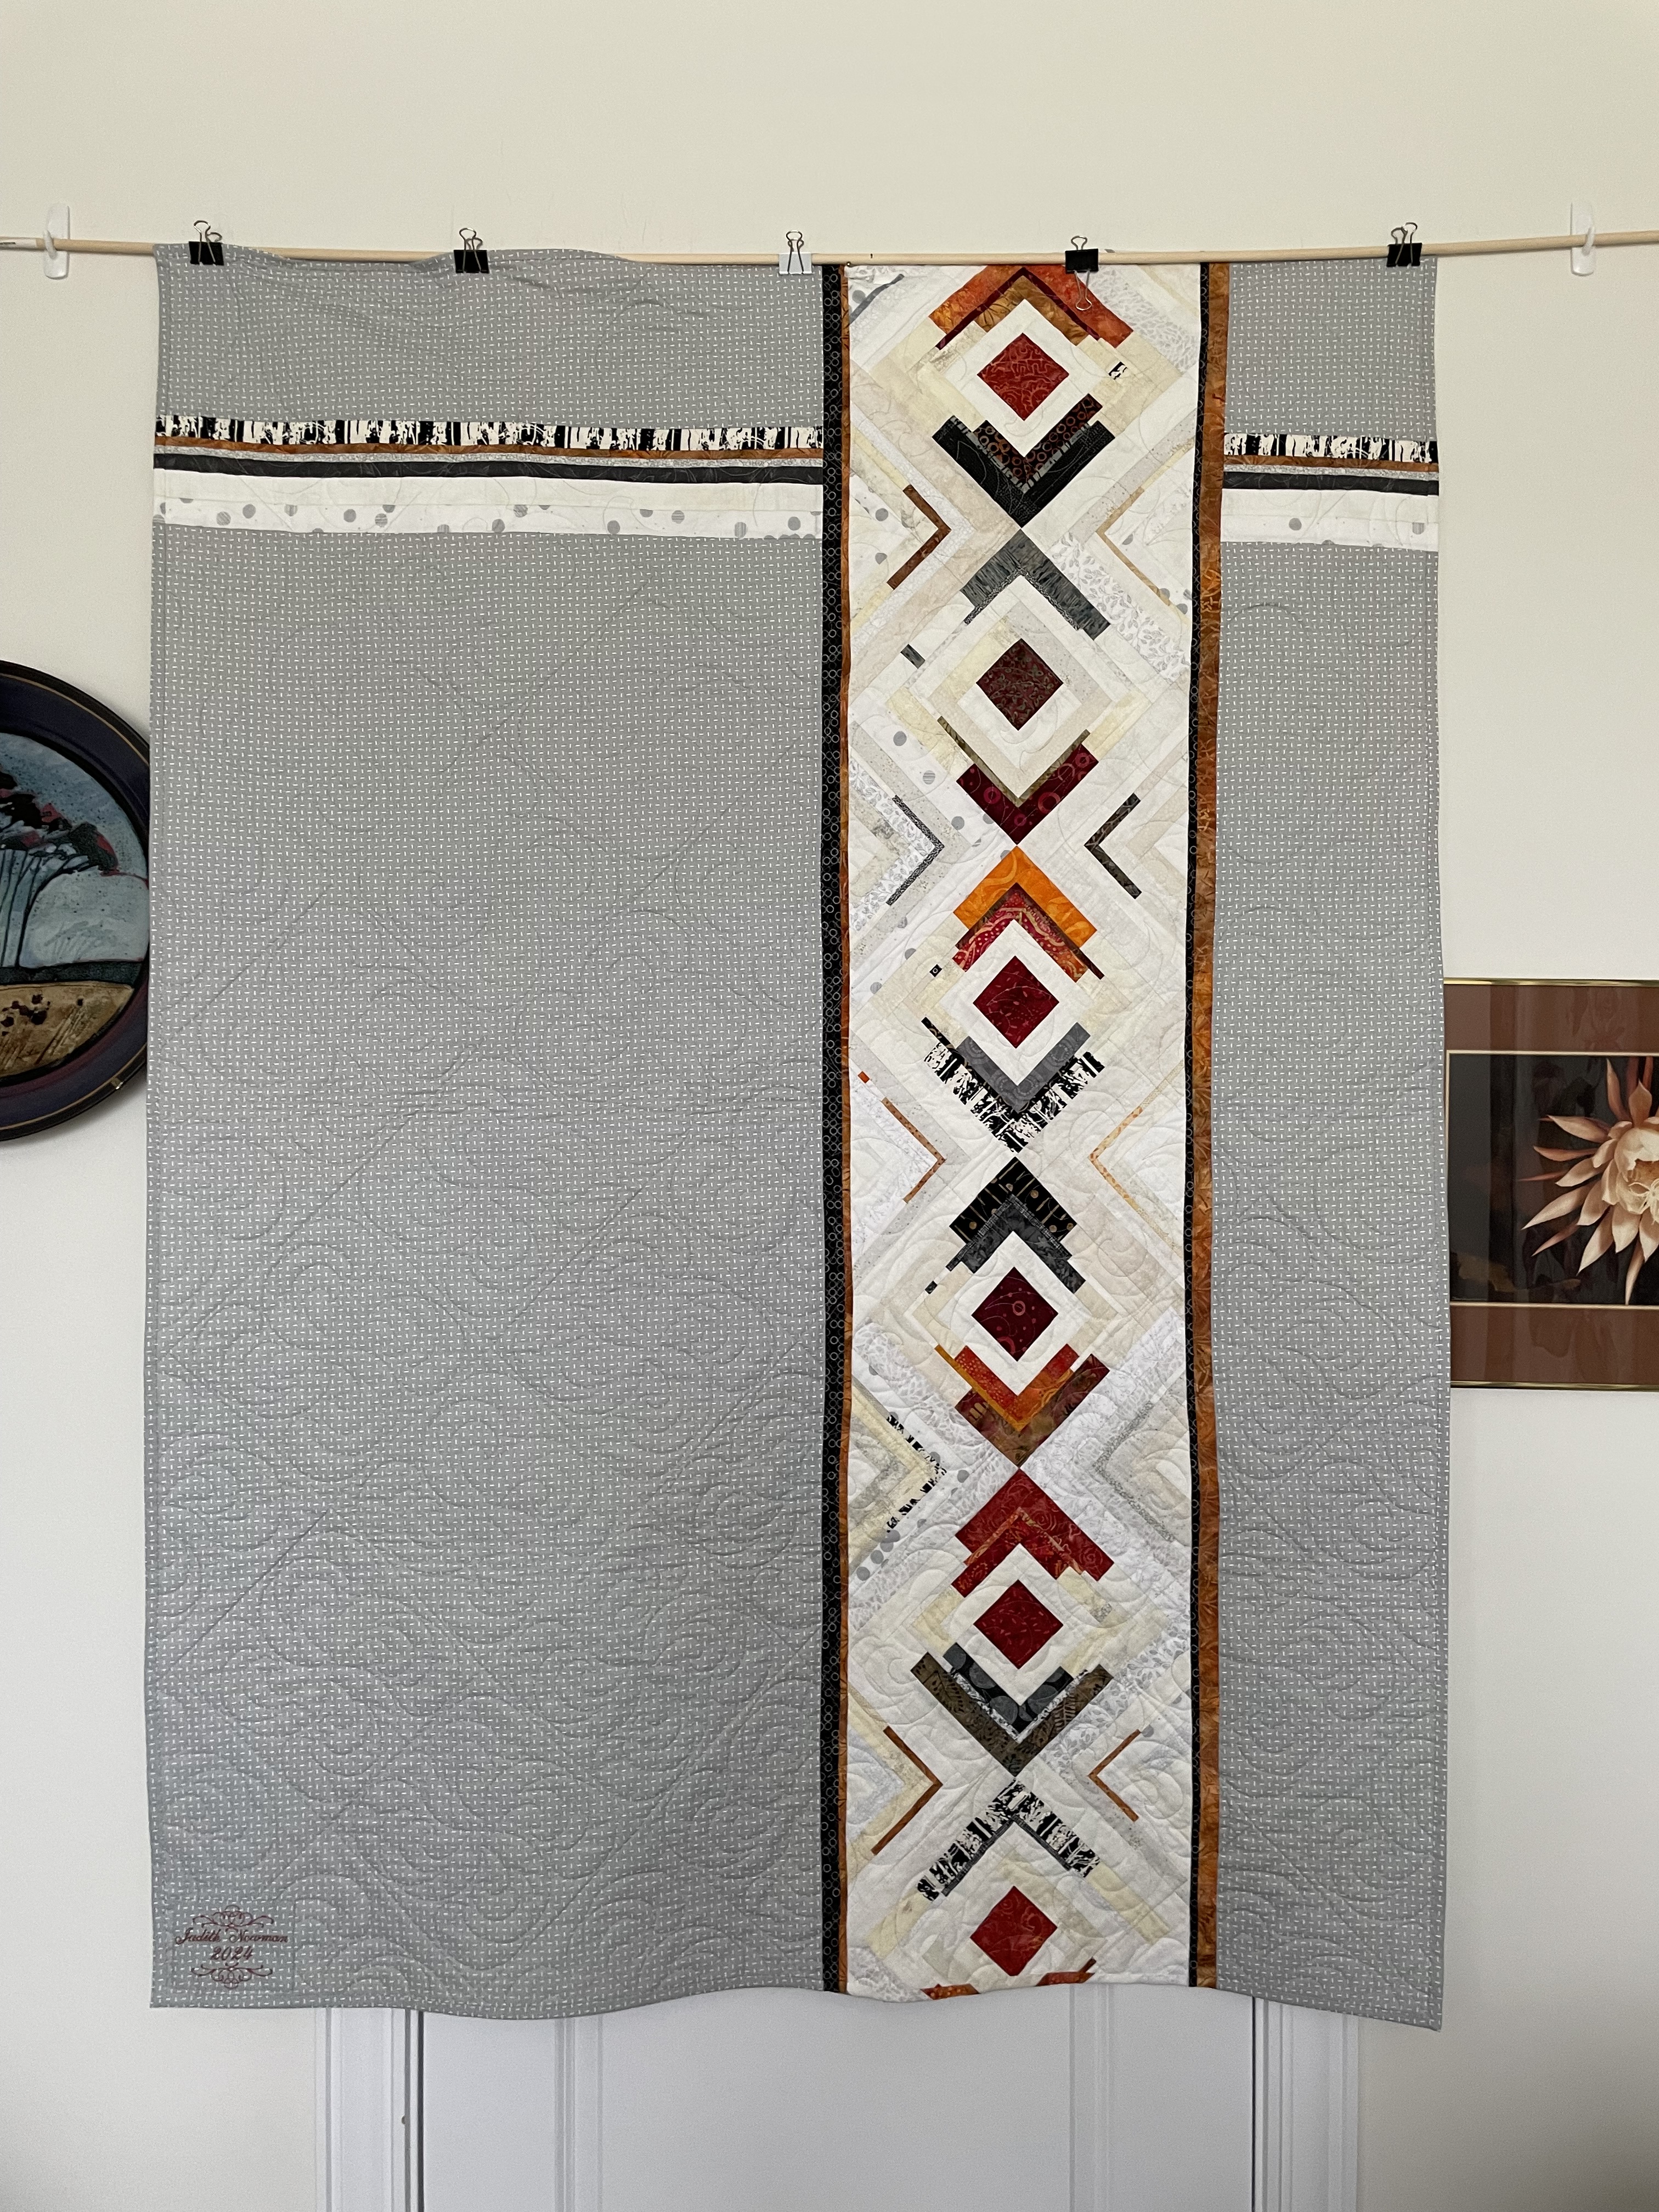
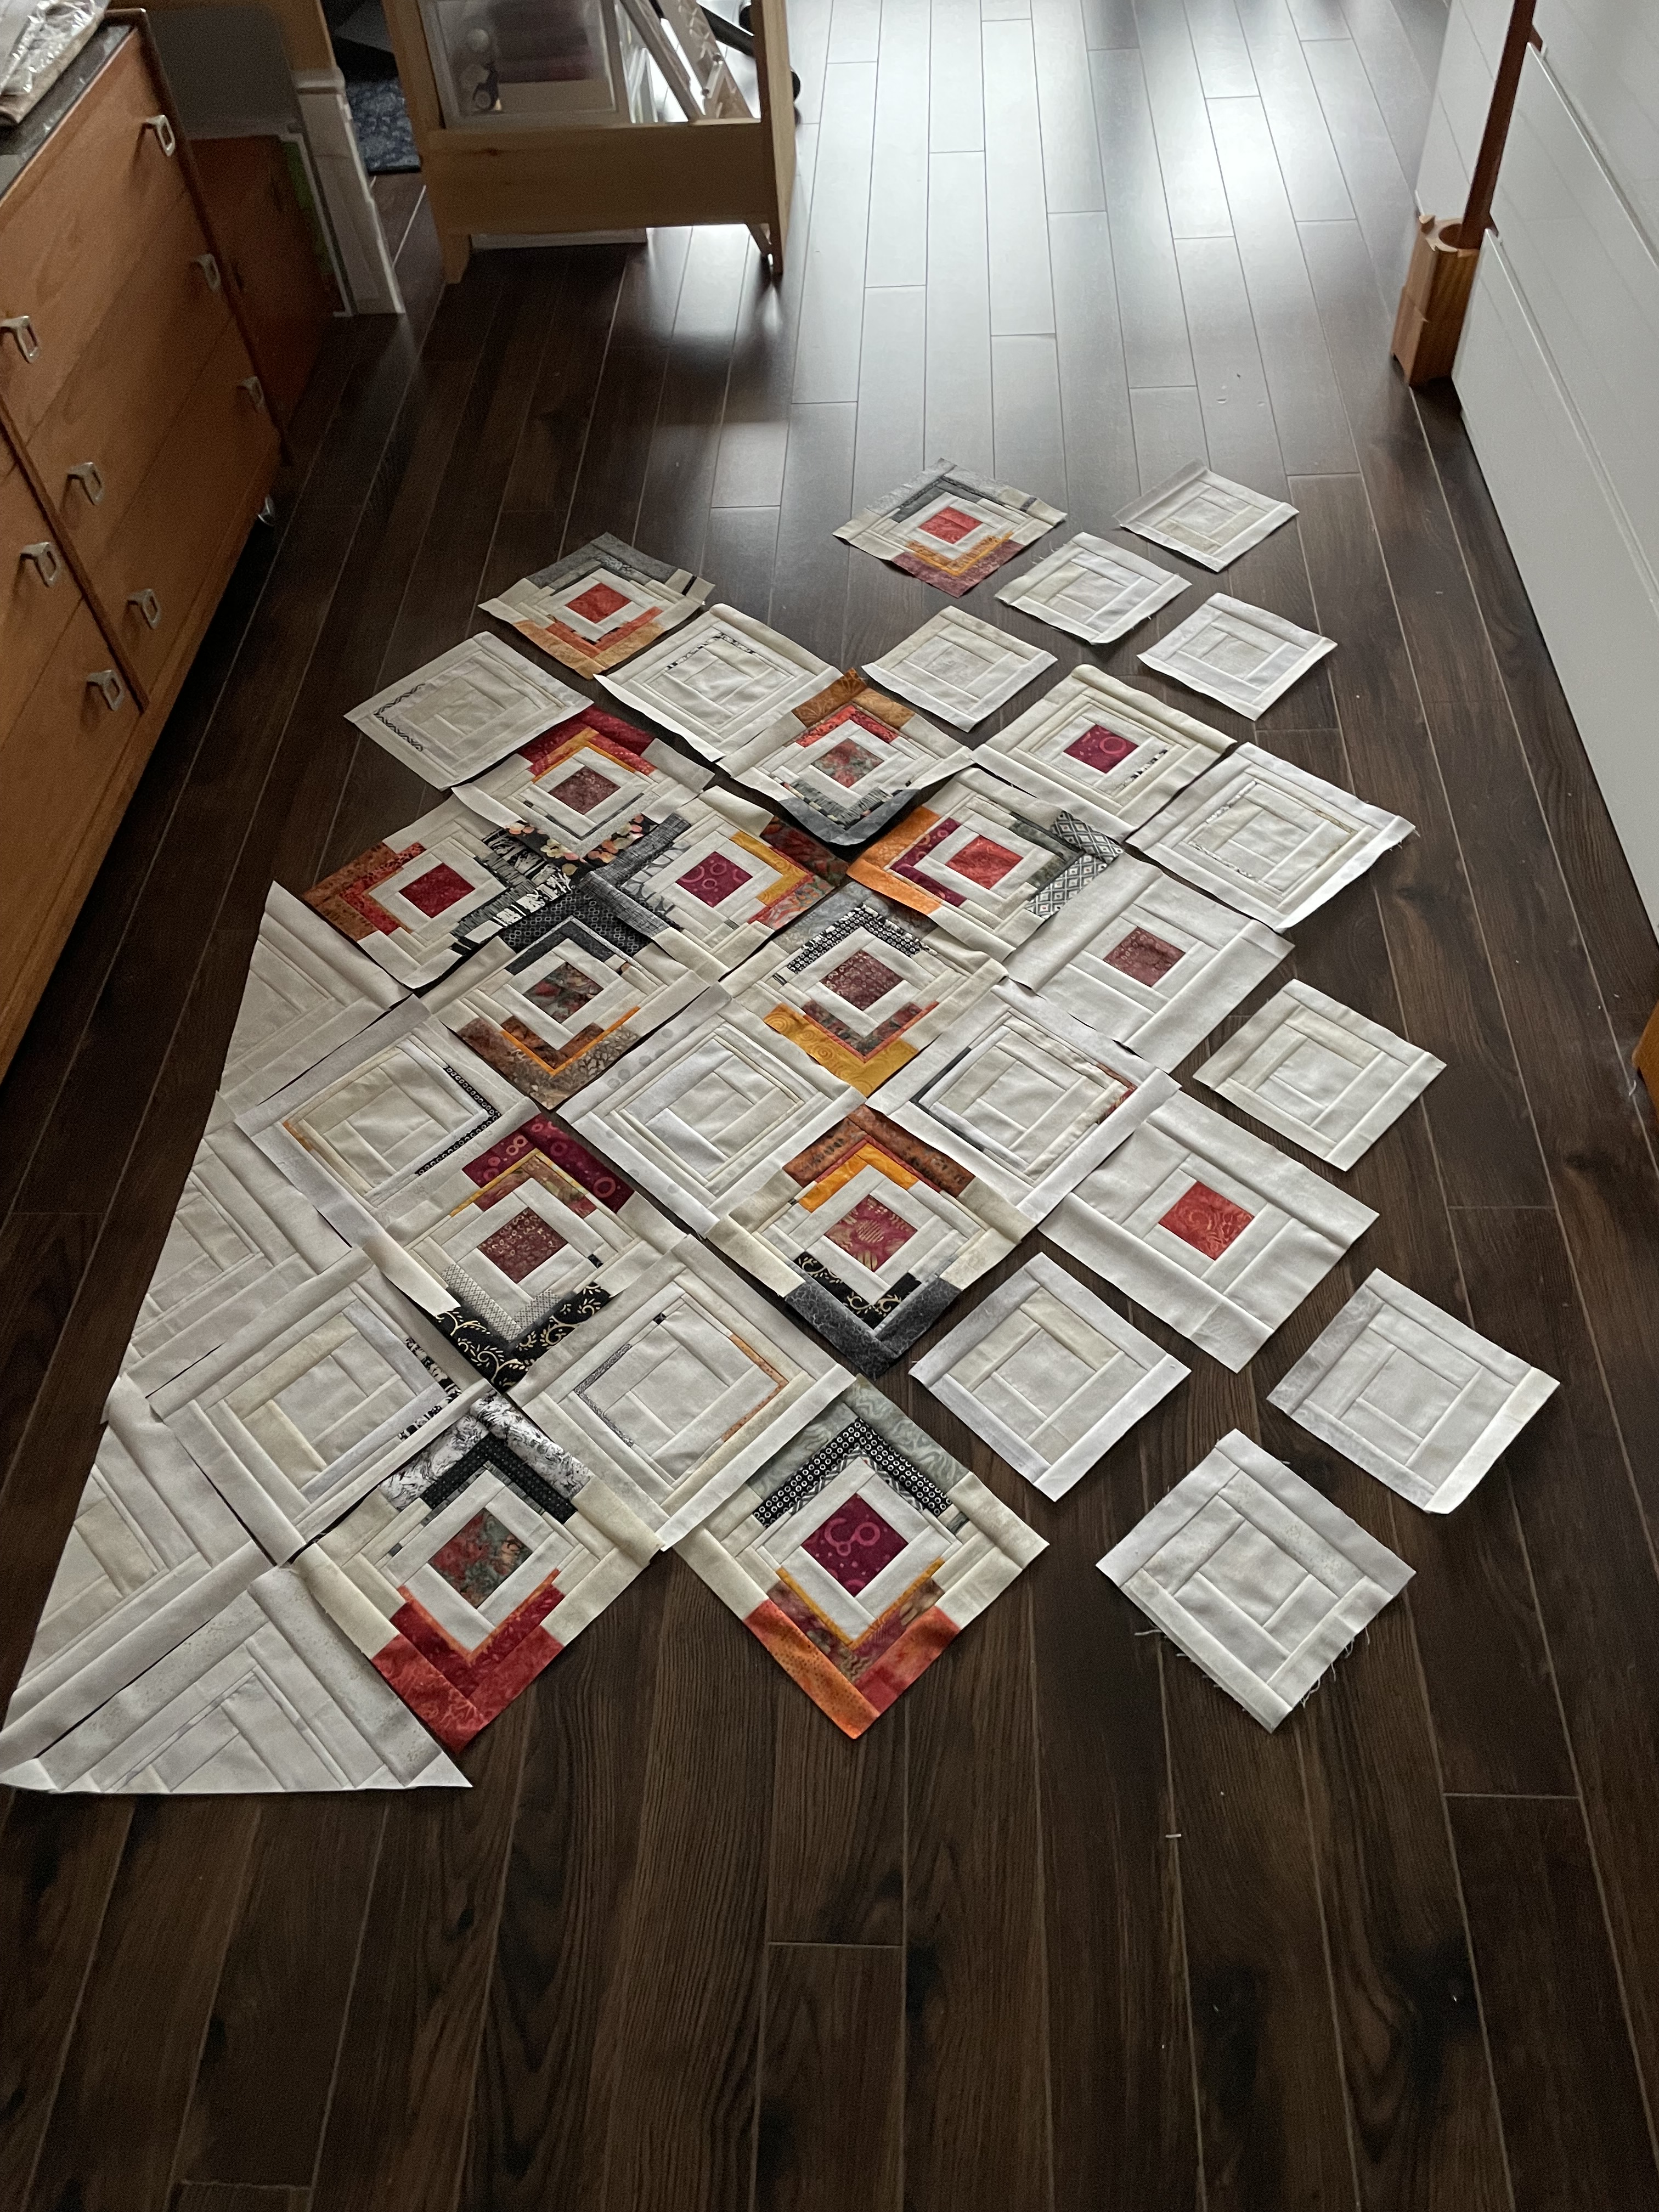
I wish I could be sharing my fibre art but I’m not producing much these days (I’m not even getting much knitting done, either). I managed to edge stitch the appliqué circles on that piece I was working on. I began thinking I was making a quilt – this is as far as I could go with the idea. The background is too dark – a reflection of what I’m feeling these days? I need to try another using lighter fabrics. Perhaps that will brighten my outlook!

It still isn’t finished – I’m planning on a very narrow binding using a black fabric with tiny circles. I’m also going to back it with a bit of stiffening so it retains it shape when it’s hung. Another day or so of work to finish it. After that – I have no idea. Likely a couple of garments that are waiting to be made.

My creativity seems to be on hold right now when I definitely need it most!

Finally Back Again

Been gone a month – I’ve been busy sewing and knitting, and engaged in my daily/weekly routine but for some reason I haven’t managed to sit at the computer and describe what I’ve been up to. So let’s get to it.

Mid August, I wanted to start a new quilt. I looked through my fabric stash and decided to use a jelly roll I’ve had for a couple of years.

The jellyroll fabrics (20 strips) ranged from black to white with many gradations of grey. Dull on its own – I decided I needed some strong contrasts. Because the strips were batik, I selected bright batik scraps to contrast with the black/white. I decided to make “square in square” blocks, cut them into triangles on the diagonal, then arranged them in squares again. All is fine, until I try arranging the resulting squares into a larger array only to end up with a hodgepodge I wasn’t happy with.

First Attempt

There’s a hint of a gradation from black to white but it doesn’t work overall because each of my blocks has light/medium/dark elements and to get a good colour flow I need some blocks that are very dark and some that are completely white. To make that happen I had to make many more blocks from scratch.

Second Array

This time, I established a dark corner and a light corner and tried filling in. I was working on my cutting table, rather than on my floor beside the cutting table as I usually do, because I’d injured my right knee and couldn’t get up and down. It didn’t occur to me at that moment that I could set up a design wall using a length of batting hung from a rod in my spare room (in front of the closet door) to hold the triangles/squares to audition placement – that came later.

So I filled up my cutting table with a layout I thought would be the darker bottom half of the quilt top. I made the mistake of actually sewing these blocks together into a 6×12 array. I was planning on filling the cutting table again this time with the top half but then I couldn’t see what I’d already constructed. This was when I set up a design wall:

Array #3

I placed the assembled bottom half of the panel at the bottom of the wall and started laying out more blocks. Two things were immediately obvious: 1. I didn’t have enough “black” extending from the lower right corner and 2. the grey extended too far across in the middle of the emerging piece. I’d also run out of triangles at this point and needed to make another 60 or so.

By this time I had stopped making squares in squares and instead I cut trapezoids from the jellyroll strips (I had to open the second package I had on hand) as well as triangles from the contrast fabrics. I’d figured out that working with reassembled squares wasn’t helpful – I was better off constructing just triangles where I could control the colours I was juxtaposing and had more freedom when placing them.

Array #4

Close, I thought but I still wasn’t completely happy with the colour flow so I played with it over the next few days – shifting blocks in the top half, and pinning other triangles over existing triangles in the sewn bottom portion.

Final Array

It took a couple of days looking at the design wall and moving and pinning elements until I was finally satisfied with the look of my panel. Yesterday, I took a photo, then very carefully stacked the pieces in the top six rows, numbering each stack so I knew the order and orientation of the pieces in each stack. Then I carefully repinned and labelled the changes I’d made to the bottom panel – knowing I would have to take much of it apart in order to get the arrangement I wanted.

It’s taken the better part of two days to reconstruct the bottom half of the quilt top:

Now I have the bottom portion of the array back together – many of the changes were subtle ones, mainly involving extending the darker batiks further across the panel, limiting the lighter, brighter trapezoids and triangles until the mid area.

Tomorrow I’ll start sewing the six top stacks together, row by row – it won’t take long because I’m not having to carefully unstitch many interlocked seams!

As you can gather, this whole process would have been much easier had I planned out on graph paper what I was thinking about, but that’s not how I seem to work. I much prefer just starting and building and designing as the project unfolds. I find improvising so much more interesting because I have no idea where I’m going to end up. Always a surprise and satisfying. It’s how I write as well – just get some words on the screen and see where they take me. I never know what I’m writing about until I get well into something and an ending emerges. That’s my creative process.

I have no idea what I’m going to do with the back – do I want to make another 36 of these triangle elements for an insert or do I want to try something else – still thinking about that.

Minimalist Quilt – Finished

It took longer than I had planned (a variety of distractions took over and slowed the quilt work), but this quilt if finally completed! Piecing the back needed improvisation – I was short about 8″ of backing fabric so I inserted a horizontal strip. In the end I decided to use the trimmings from the back to do a narrow 1/4″ binding which I hand stitched on the back.

I’m pleased with how the quilt turned out. I like the range of shades in the “background” elements and the placement of the strong log cabin blocks (in fact all the blocks are constructed as log cabin, although the dimensions of the background blocks (light coloured ones) is different than the brighter coloured ones – this was necessary to vary the placement of the thin elements in each block.

I still have a box full of strips from this quilt that I’m going to have to do something with – I have no idea what yet, but I think if I start sewing strips together I’ll come up with some kind of block I can use for a new quilt.

Coming weekend I’m working with a group of women on the Zippered iPhone Case. One of the gals wants to use a #5 coil zipper (a standard zipper is #3 coil) on a somewhat larger case. So I figured I ought to try one myself.

Zippered Case with Decorative Zipper

There’s a challenge to working with a decorative zipper! Because it’s placed on top, it’s not simple to attach it to the fabric and lining. The accommodations I made for the front pockets were relatively straight forward, but adding the side zipper made it impossible to slip the open-end lining into the back…

Botched “phone” pocket!

Because of how I applied the side zipper which involved stitching down the lining, it was impossible to slip the phone pocket in behind the zippered pocket on the side!

I have to take this whole project apart and start over – I need to come up with some other way of adding the lining to the zippered side pocket so it lets the phone pocket slip in where it should go.

Quilting The Quilt

After I finished the backing using the strip I created from the leftover blocks, I assembled the quilt top/batting/backing, pinned it all together.

I set up a couple of embroidery designs to audition for the quilting. The first was a straight line design that more or less followed the log cabin layout of the blocks – the first block stitched reasonably well; the second wouldn’t align with the first! So I carefully unstitched both blocks and returned to the drawing board.

Quilting The Diagonal…

Next I decided to try quilting on the diagonal, more or less following the piecing lines at somewhat unequal intervals… I did quite a bit of stitching before I decided I couldn’t live with it and again carefully picked it all out!

Quilting The Quilt

Third I set up an enclosed embroidery design that fit the 8 1/2″ block size. The problem I ran into had to do with my embroidery machine losing calibration each time I tried precise positioning the embroidery within each block! The issue, I thought, was the belt driving the “y” axis element of the embroidery unit was a teeny bit loose, as a result it slipped when I tried locating the corners of each block. The drag created by the quilt itself was too great for the unit to move the hoop consistently without the belt slipping and losing calibration.

I packed up my machine, embroidery unit, and quilt on Thursday morning; took it into the nearby shop so the repair guy who comes in once a week with the machines he’s fixed that week could see what was happening. I set up the machine on a table in the classroom, started quilting – all went smoothly! When Neil arrived do you think I could make the “slipping” happen? I could not. I rehooped the quilt a couple of times trying to position the bulk of the fabric so it would pull against the embroidery arm when I attempted to locate the corners of a block. I COULD NOT get the embroidery arm to go out of calibration. So I packed the whole thing up and returned home.

Before I set it all back up, I happened to visit my friend Deb who mentioned that the new Husqvarna Epic 3 machine warns new owners to make sure the machine is LEVEL so the embroidery arm works. Maybe I was having a problem with my sewing table having developed a dip and the machine was not sitting level, now. So I pulled out my trusty spirit level and placed it on the bed of the machine in front of the needle. Ever so slightly dipping toward the embroidery unit!

I loosened the feet on the unit to lift it a bit; not quite enough to bring the spirit level to neutral. I placed a small piece of foam core under the feet – that did the job. The machine was now level. Guess what – the embroidery arm hasn’t slipped since (well just once in the 16 embroideries I’ve completed). Whether that was actually my problem, or something else inadvertently fixed itself I’ll never know, but I’m starting to trust the embroidery arm again.

[I won’t bore you with the long story about how I broke the “y” axis drive belt on the embroidery unit; Neil repaired it, and it looks like the arm is now working as it should!]

Quilt Back Panel Assembled

Back Insert Assembled

This is the back insert now sewn together. It’s 6″ longer than the front which will allow me to use the trim for a hidden binding on the quilt back. I’m planning on a narrow rust/golden sashing, next to a wee bit wider black (with circles) strip, with an asymmetrical wider outer sashing in the light grunge fabric. The finished insert will be sandwiched between two soft grey fabrics with different small scale prints. Their colour doesn’t quite blend but I think the insert will override that slight difference.

Time to move on to other stuff – I’ll get this back done tomorrow; maybe I’ll even manage to create the quilt sandwich. Then I have to decide how to quilt the project. Once it’s pinned I’ll have a better idea what would work with the colour and texture flow. I’m anticipating straight stitching that is echoed at unequal intervals will likely look best (starting with some stitching in the ditch to stabilize the layers…).

Top Done!

Finished Quilt Top

Just finished sewing the panel. No more mistakes that had to be taken apart! The stitching went smoothly. What I’m liking when I see it like this is the shading within the background – not too in-your-face. That’s probably because the contrast is strong enough to draw your attention away from the background.

Now to start on a backing. I’ve got to make two more bright blocks to create an on-point vertical row and several background blocks to fill in as triangles. I have two suitable light grey print fabrics that work together. With a wide strip between them they’ll work fine. (The point is to use what I have in my stash!).

Assembling The Top

Partially Assembled

On-point blocks get sewn together along the diagonal with the end triangles attached to the side of the adjacent block. So what emerges are the quilt edges.

I have to work from one corner to the diagonally opposite one, one strip at a time, making sure I’ve pressed the “matching” seams to the opposite side from the previous row. You’d think it would be possible to work from one corner to the middle, from the other corner to the middle and join the two pieces – but you could find you’ve got the nesting seams pressed wrong! So better to start in one corner and keep going, even though you have to work with the increasing bulk of the growing top!

Another possible pitfall – the one I fell into – was to attach the last row in the wrong direction so the colour flow I wanted didn’t happen! I had to rip that seam, carefully, rotate the row and resew it. You can see, I’m checking position of the next row before sewing it!

I hope to have this assembled in about an hour…

Filled In…

Filled In…

The quilt top is finally filled in, although I’m probably going to change the two top corners. I did a kluge, building on a partial block I had left over from the light blocks which I cut on the diagonal. However, the orientation of the corner blocks is obviously out of synch with the rest of the triangle border – I have to build one more large block and cut it into quarters to get the corner orientation I’m after.

Also this probably isn’t the final block placement – I’m happy with the bright blocks, but the light ones are still place holding. Nevertheless, you get the drift of how the quilt top will look.

I have to clear some of the mess on my cutting table and around the machine I was using to piece these blocks before I can assemble the top. Also I now need to think about what to do with the back! And it’s not too soon to consider how to actually quilt the project. Because the piecing is intricate, I may not get away with an embroidery based on curved elements. I may have to actually do a lot of echo quilting along the diagonals – not sure how my back will stand up to that close work!

For now, I better build two new corner blocks for the upper corners…

On The Go

An update on the “log cabin” quilt – I’ve been building light blocks to fill in around the coloured ones:

Filling In

Eight of the light blocks are only partially constructed – I hope to complete them today. I think I’m also going to add one more row to the top end which will mean three more light blocks – that addition will add 6″ to the length of the quilt which will give it better balance: ~50″ (width) x ~68″ (length).

To be able to continue making the fill-in blocks I went shopping two days ago to pick up a half-dozen more light fabrics. I wanted a bit more variation in the colour pallet for those blocks than I had. Hard to tell from the photo but I’ve blended those fabrics into the blocks as I’ve been constructing them.

This project is coming along block by block. I’m not pre-cutting pieces, but rather working with the long strips and trimming after I’ve attached each piece to the block. When the blocks are finished, I need to do the triangle elements for the edges – those will be tricky because I want to include narrow contrast elements in them and will have to anticipate placement as I construct each of the large blocks (10 1/2″) from which the triangles will be cut!

Finished Socks

Yarn from Hobbii.com

When this yarn arrived, I thought I’d never bother knitting it into socks because the black was such a stark a contrast to the red and orange. But as my yarn stash has dwindled (I’m trying to use up what I have) I picked it up and started working on it. The dark red cuff/heel/toe balanced the black nicely. I finished the socks and put them in my sock drawer – perfect to wear with burgundy, or black, or dark grey pants.

JoAnn’s Socks Finished

JoAnn is a member of our Friday afternoon knitting group here in the building. Since everyone is knitting, she wanted to knit, too. Her hands no longer coordinate well enough to work with needles, but she was fine with a knitting “loom”.

Knitting Loom with Stylus

She’s worked away at her socks for the better part of two years, I’m sure. But last week she completed the foot on the second sock. I took over from there, taking the sock from the loom and knitting the toe for her. Then I washed and blocked the socks. I decided to add a row of single crochet to the top of the socks to stabilize that edge (careful not to make it too tight).

[I also knit the heels – I couldn’t figure out how to do that on the loom, so when it came time to turn each heel, I took the sock from the loom, put it on needles, turned each heel, then restored the sock to the loom so JoAnn could continue her knitting.]

JoAnn’s Socks

I was happy with how they turned out. I’m sure she will be, too. The mismatch happened because the pattern didn’t play out precisely the same in each ball of yarn and when she got to the second toe (the one on top), I had to work with a small ball of yarn leftover from the first sock so the pattern didn’t synch. Who cares, right? The toes are inside her shoes.

The Certificate of Completion

I even did up a “Certificate Of Completion” to celebrate her accomplishment!

More Sock Repairs

My friend Ruby slowly knits away making socks but when it comes to repairs, forget it. The socks on the left belong to her daughter Debbie. The heel (of the sock on top) came to me with a very large hole in the heel (why one heel and not both I can’t explain). So I cut out the old heel and knit a new one. I had more yarn like the original (it’s no longer in production), just not in the same colour. Same with the toe replacements on Ruby’s socks – the mismatch is less obvious there because I was able to find a spot in the yarn that kind of matched with the original socks.

I still have one last repair job waiting for me. My very old LL Bean cotton sweater has worn out in one arm – I discovered a large hole the last time I wore it. The question is whether to do a visible repair, or to see what I can find in a matching yarn, to close in the hole. I want to get to it soon so I can clear off the table beside my chair where I knit in the evenings (while watching TV, of course).

One Last Thing

Today my boomerang quilt was showcased in Nancy’s Notions Thursday Newsletter! I submitted the information (with photos) a couple of weeks ago. I’m delighted the quilt will be seen by a lot more people. It may inspire some to improvise from quilts they come across, or at least try to replicate them without a pattern. As a teacher my aim is to help people learn to deconstruct how a quilt is assembled so they can improvise quilts of their own based on traditional quilting techniques. In the piece, I explain how I made this quilt so others can give it a try themselves.

A Few More…

A Few More Blocks Completed

I had time early afternoon to construct five more blocks and set up three more with red centres which will be predominantly white. So try imagining the empty spaces with blocks constructed using just the light fabrics (with maybe a hint of grey, or perhaps a touch of red/orange in one of the layers.

I’ve decided laying the blocks on point lets the colour flow better than having them sewn in straight horizontal/vertical rows/columns. (Although I may try that layout once I have all the blocks constructed.)

I hope to get the remaining coloured blocks sewn tomorrow. Then on to making a bunch of white one.