Double Convergence Quilt Top

I’ve spent days looking at the double convergence panel not knowing how to finish it. I finally decided to add a narrow dark border, then complete the outer border using the four fabrics I used to construct the convergence.

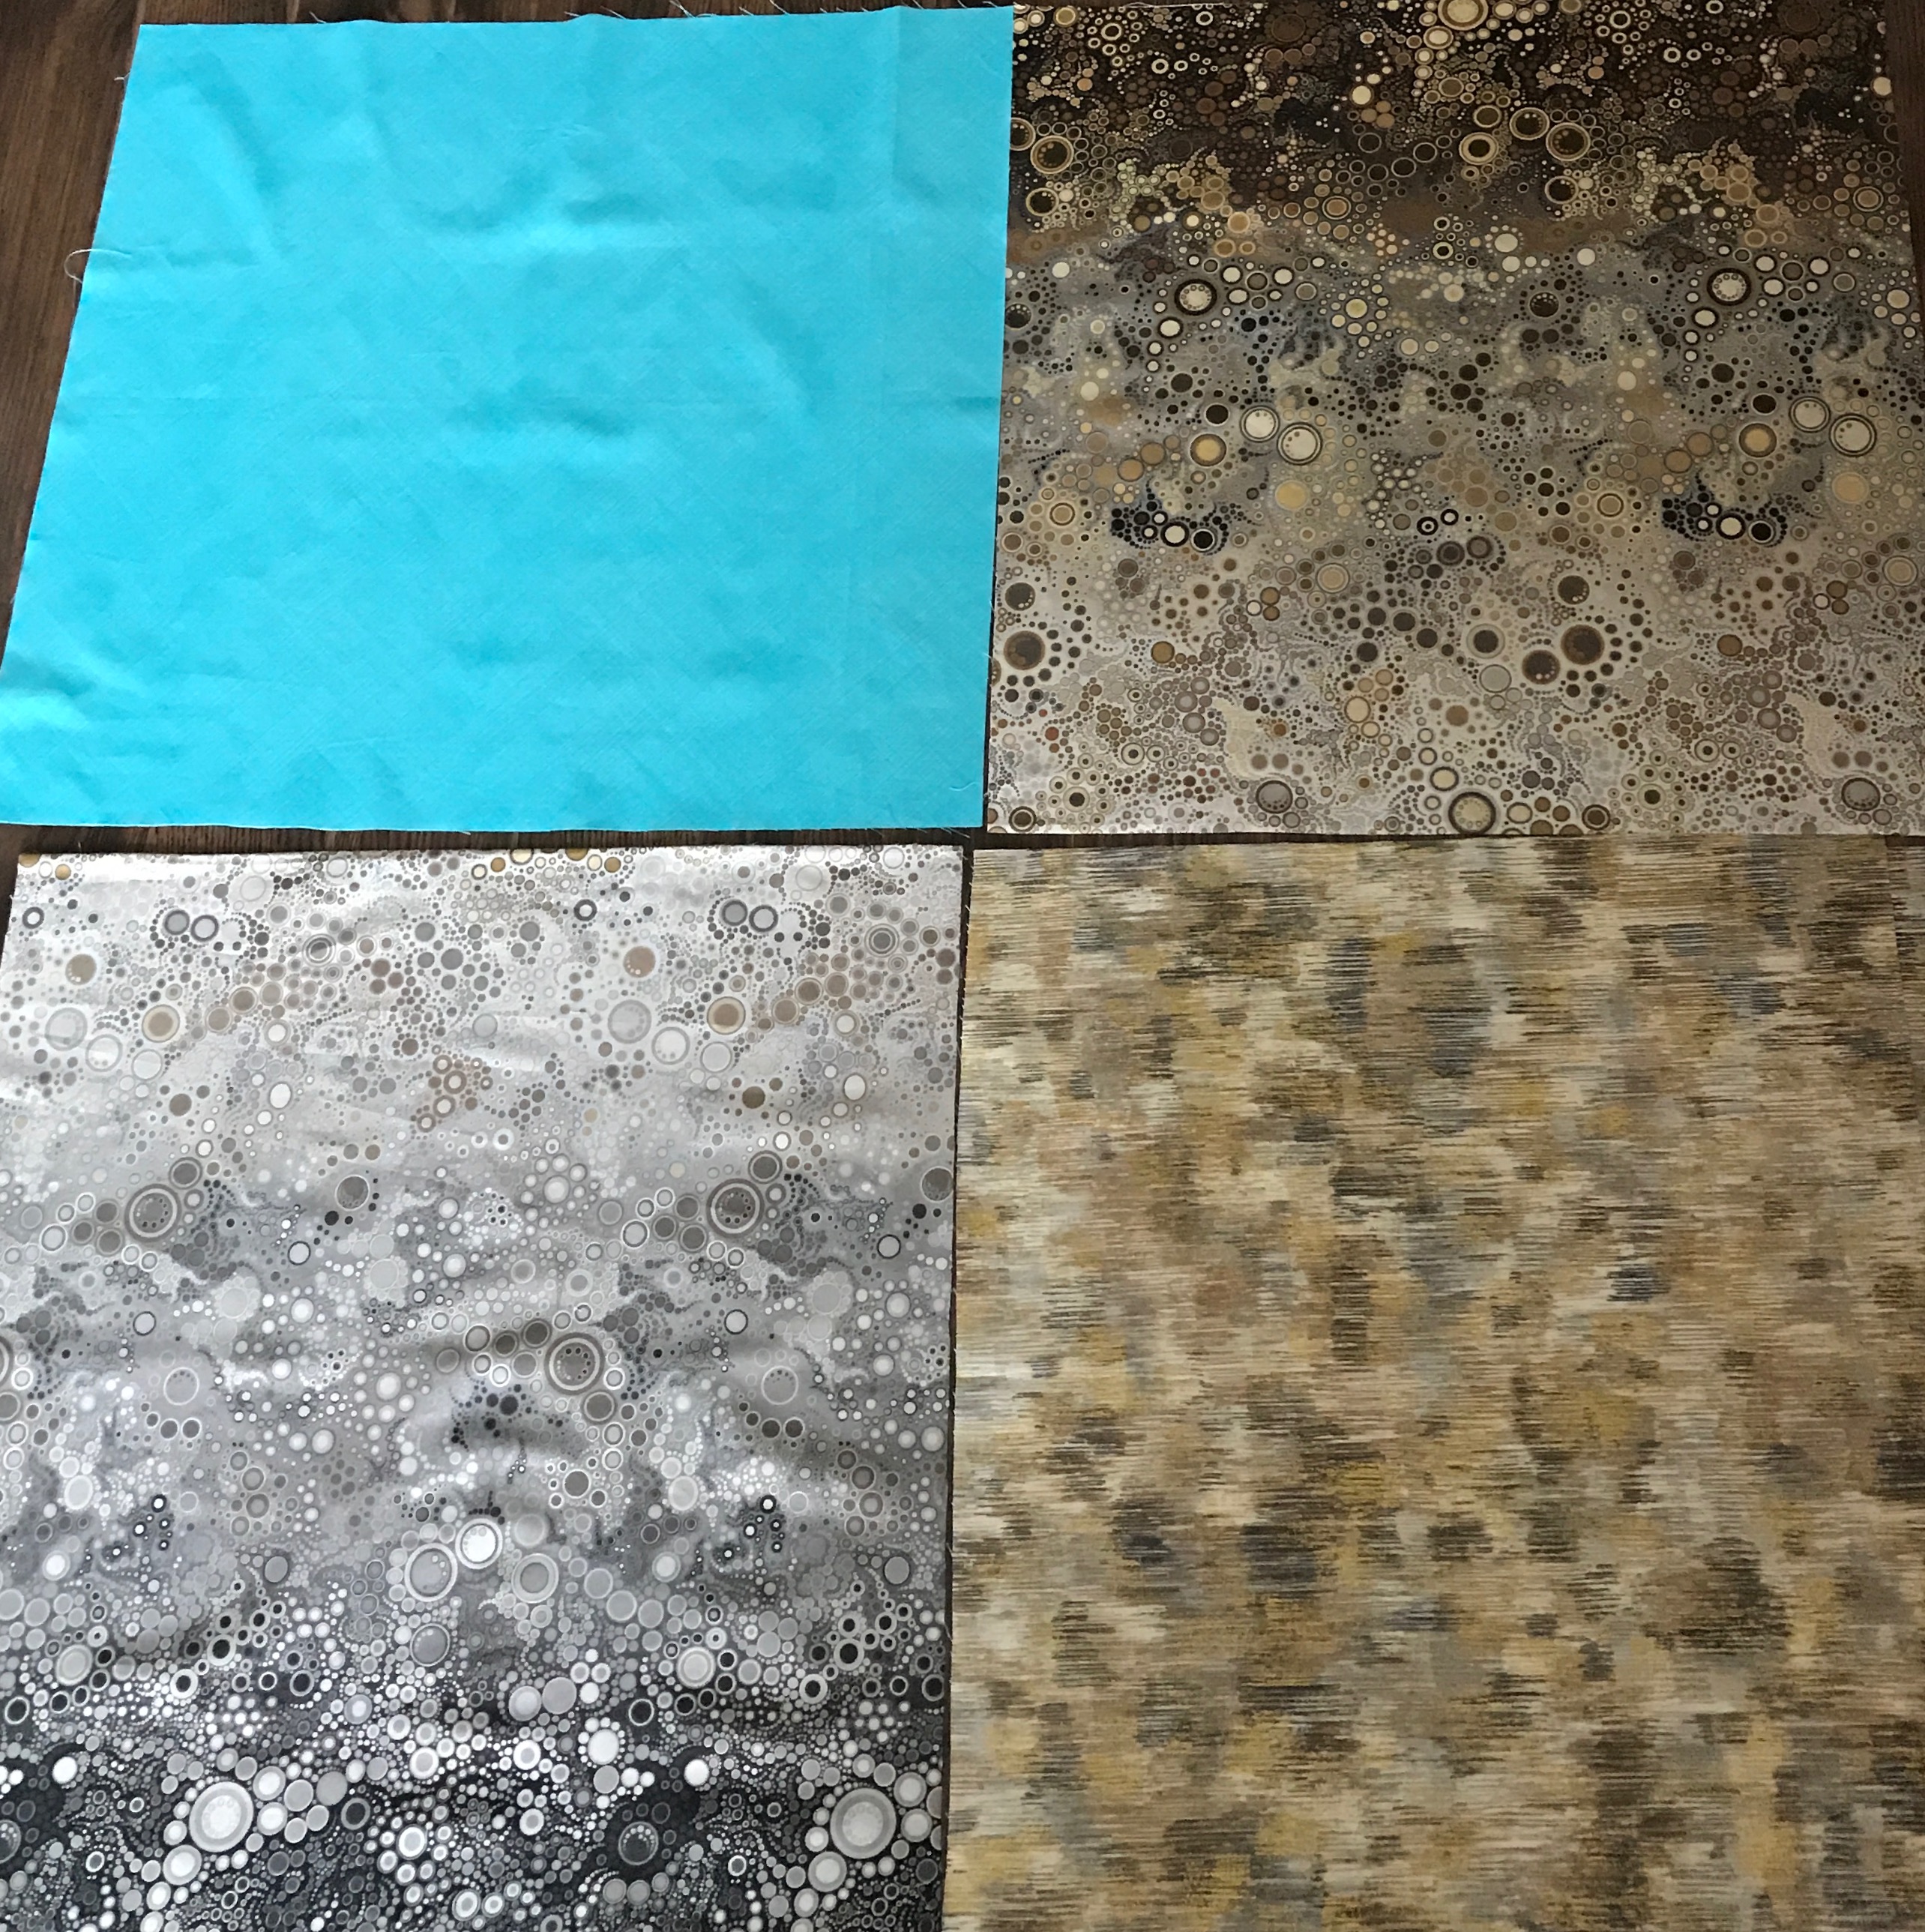
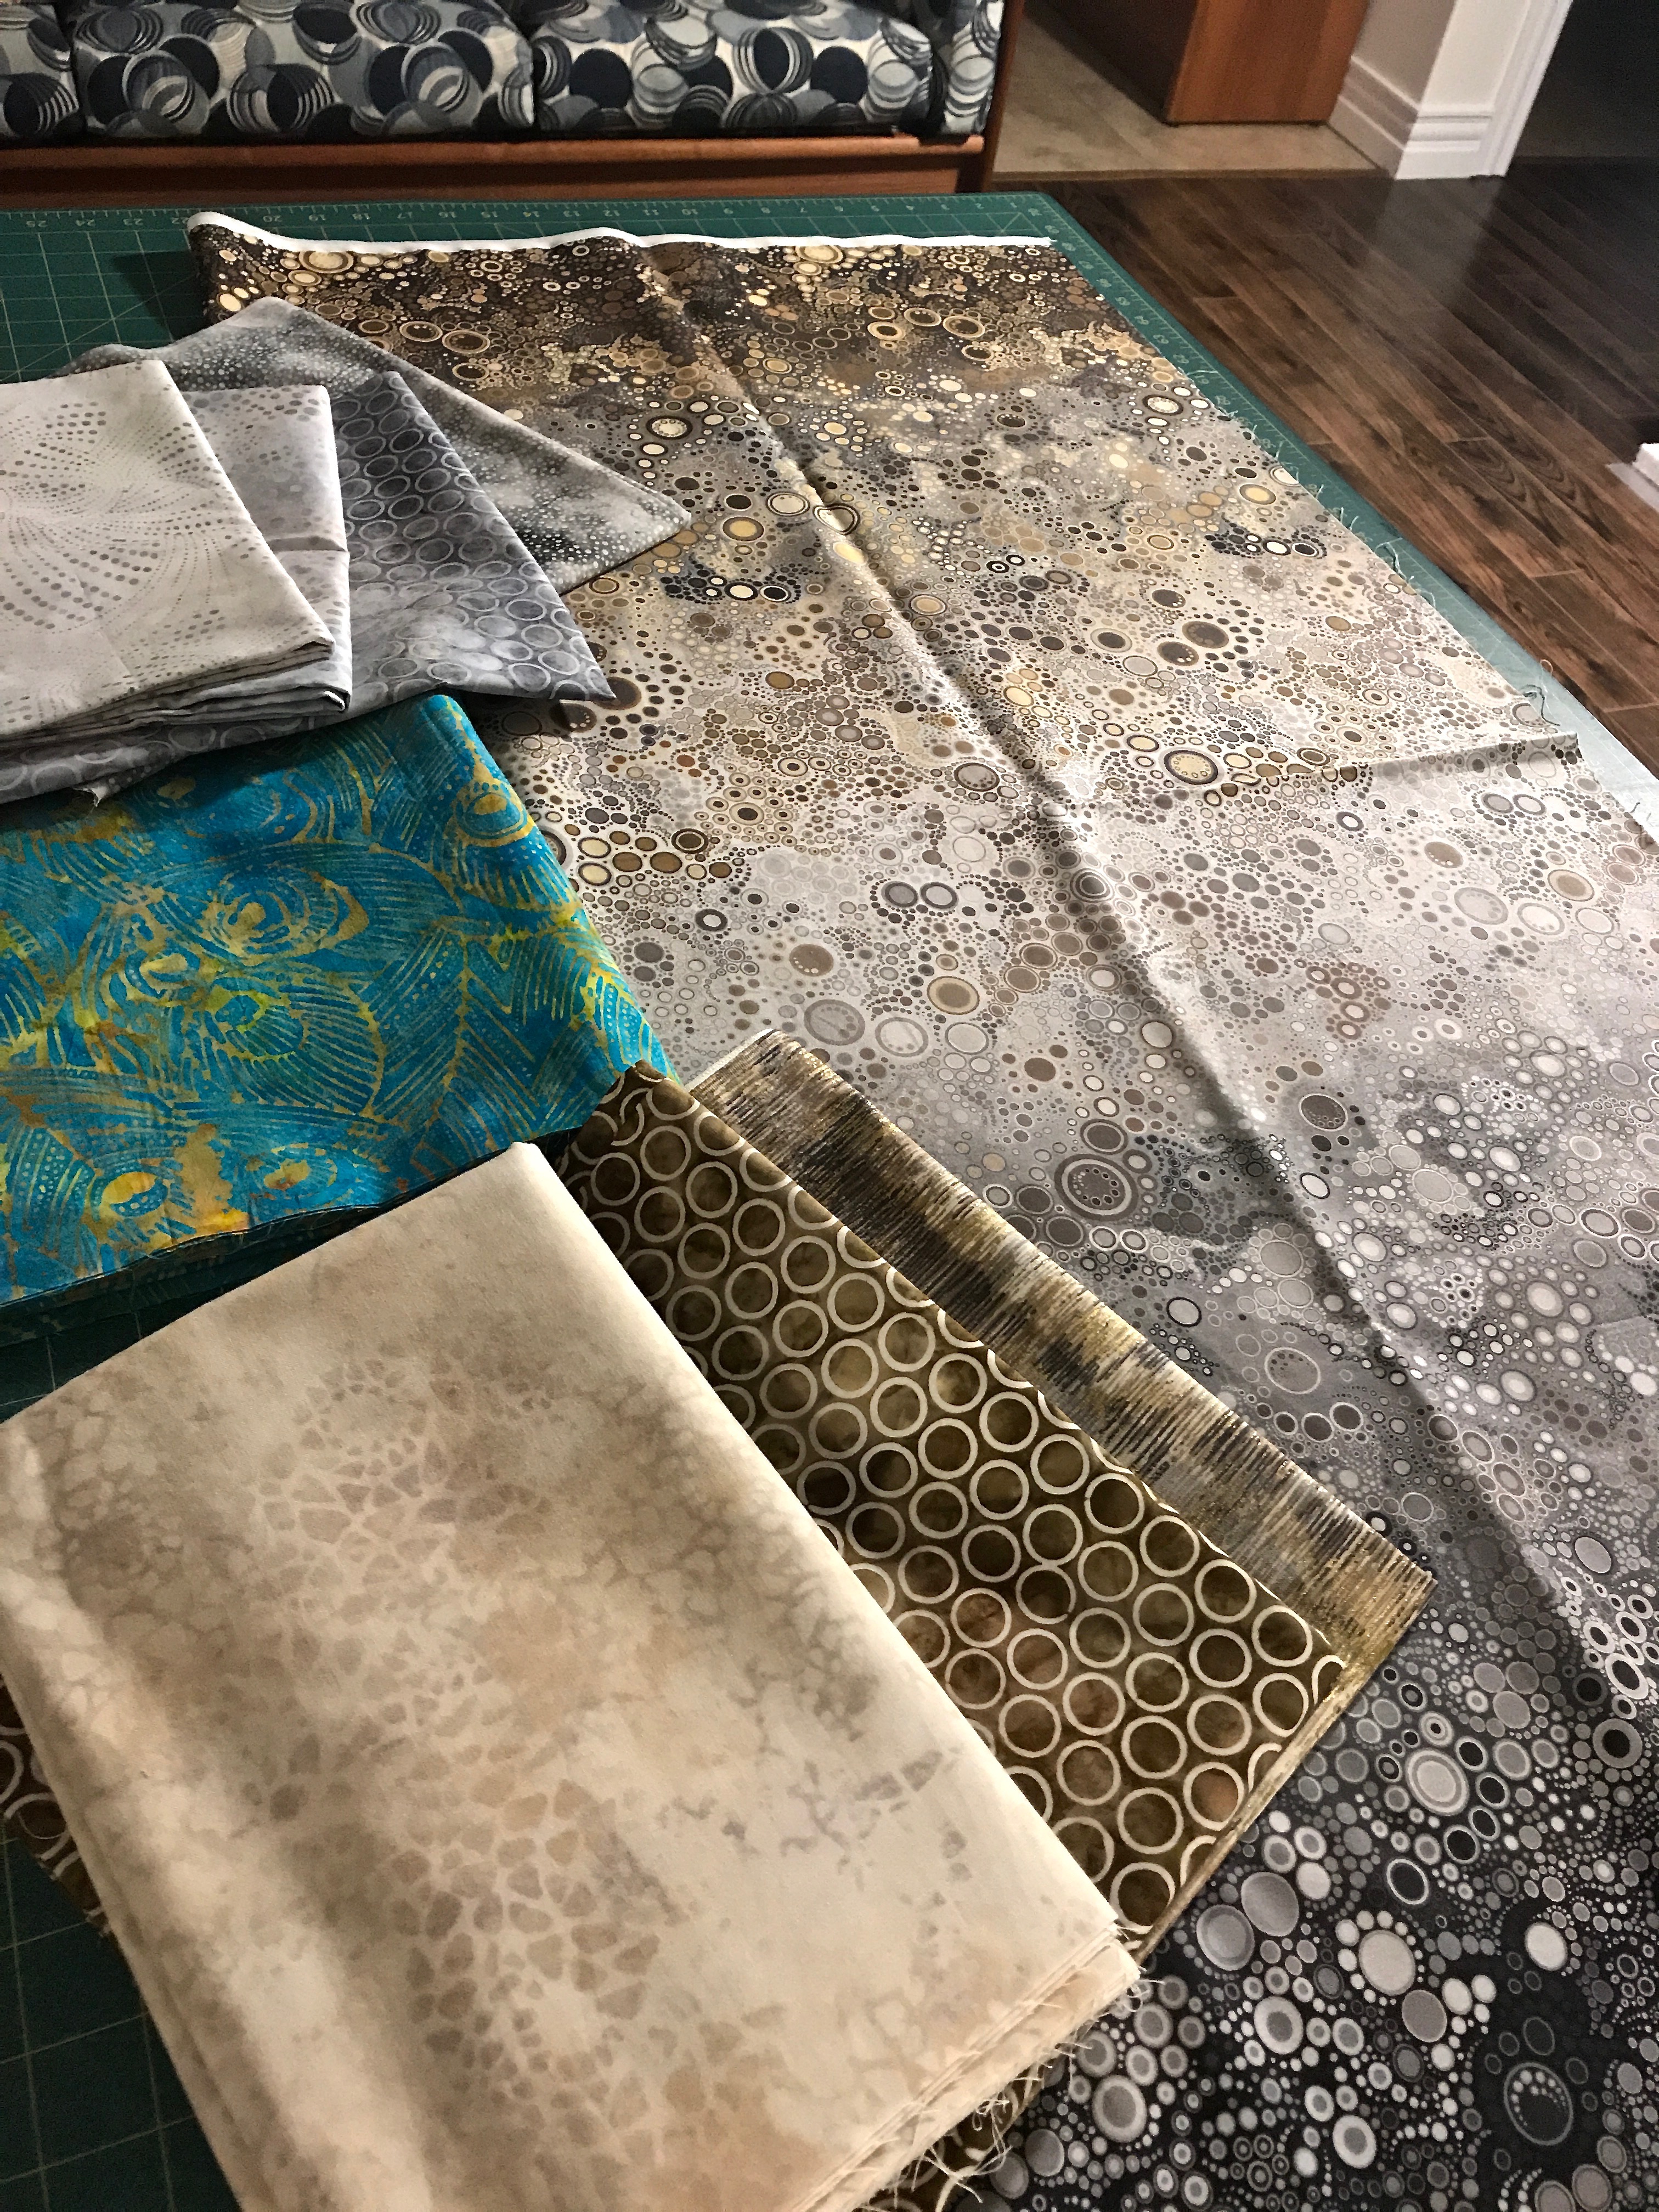
I thought about a second narrow border bringing in another contrasting colour but I couldn’t find anything in my stash (and my stash is large) that felt right – red? pink? green? yellow? I had a grey batik with small yellow circles, that was as close as I could get to something that possibly worked. In the end I elected to stick with just the four fabrics.

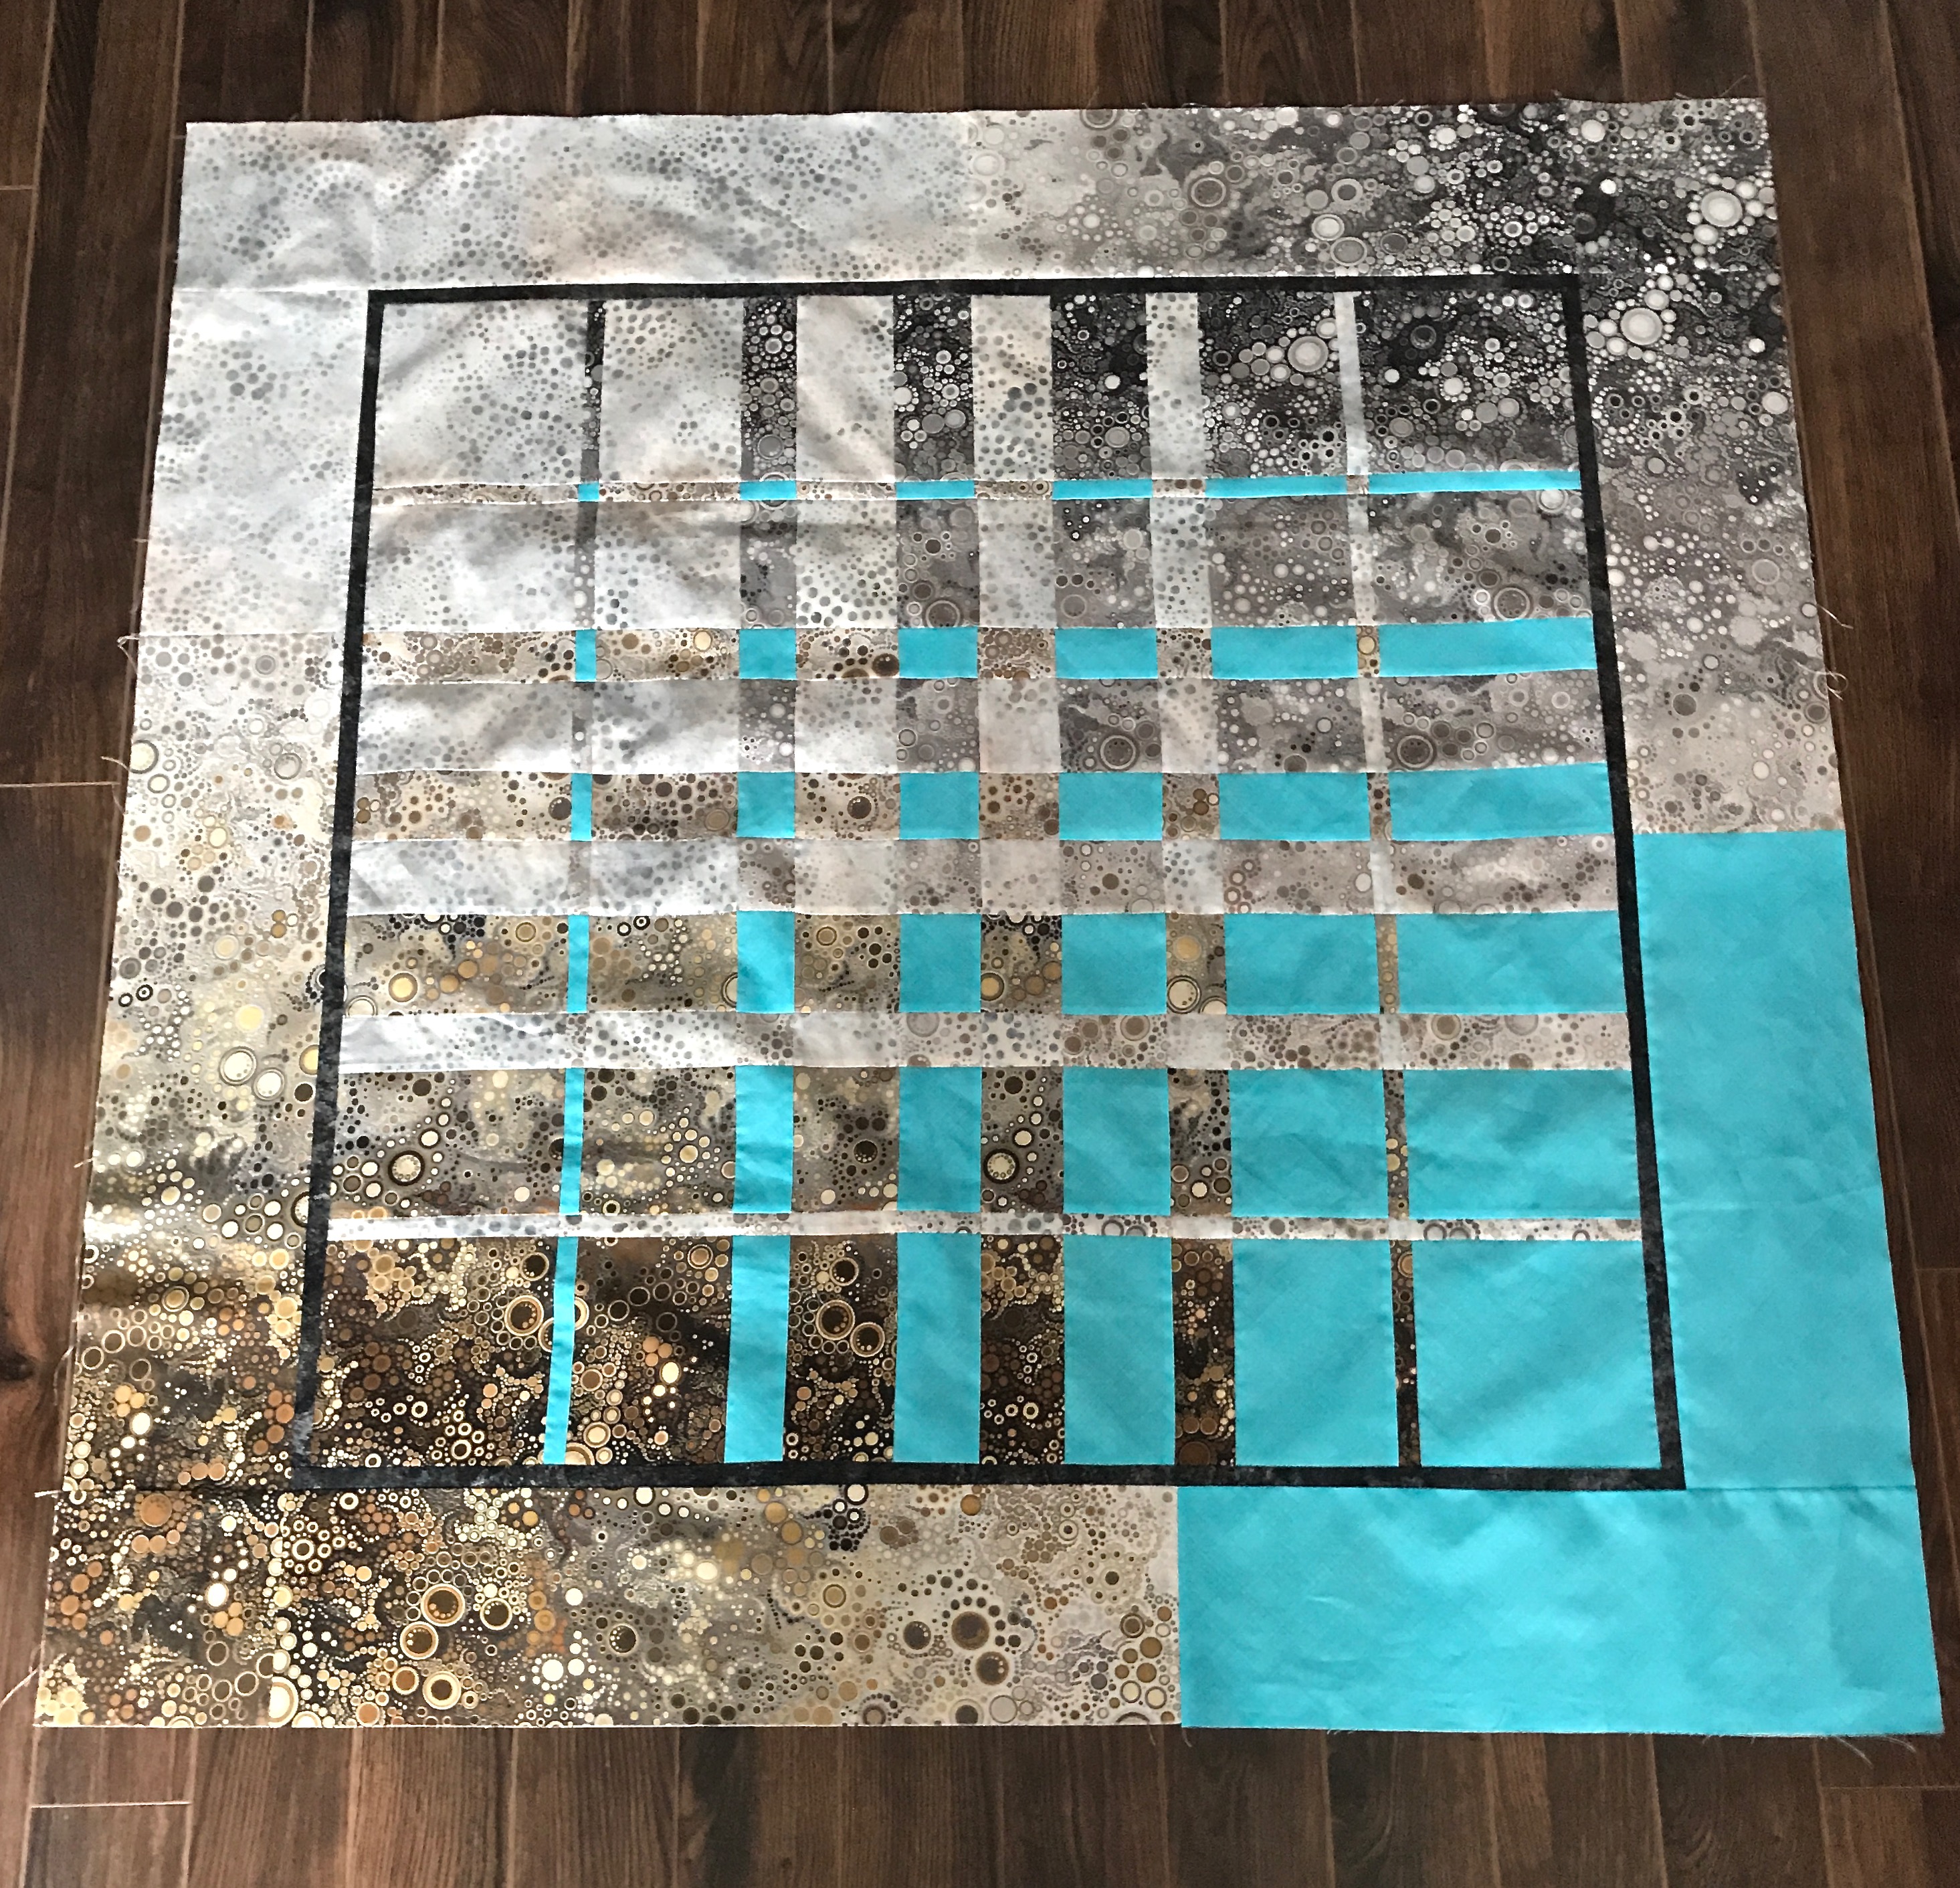
Double Convergence Quilt Top With Borders

To construct the outer border, I was limited by the amount of grey and turquoise fabric I had left. I was able to find some of the ombre online and ordered a yard (at great expense!) so I had options with constructing the ombre corners but I had barely enough grey and turquoise left to make a 6″ border.

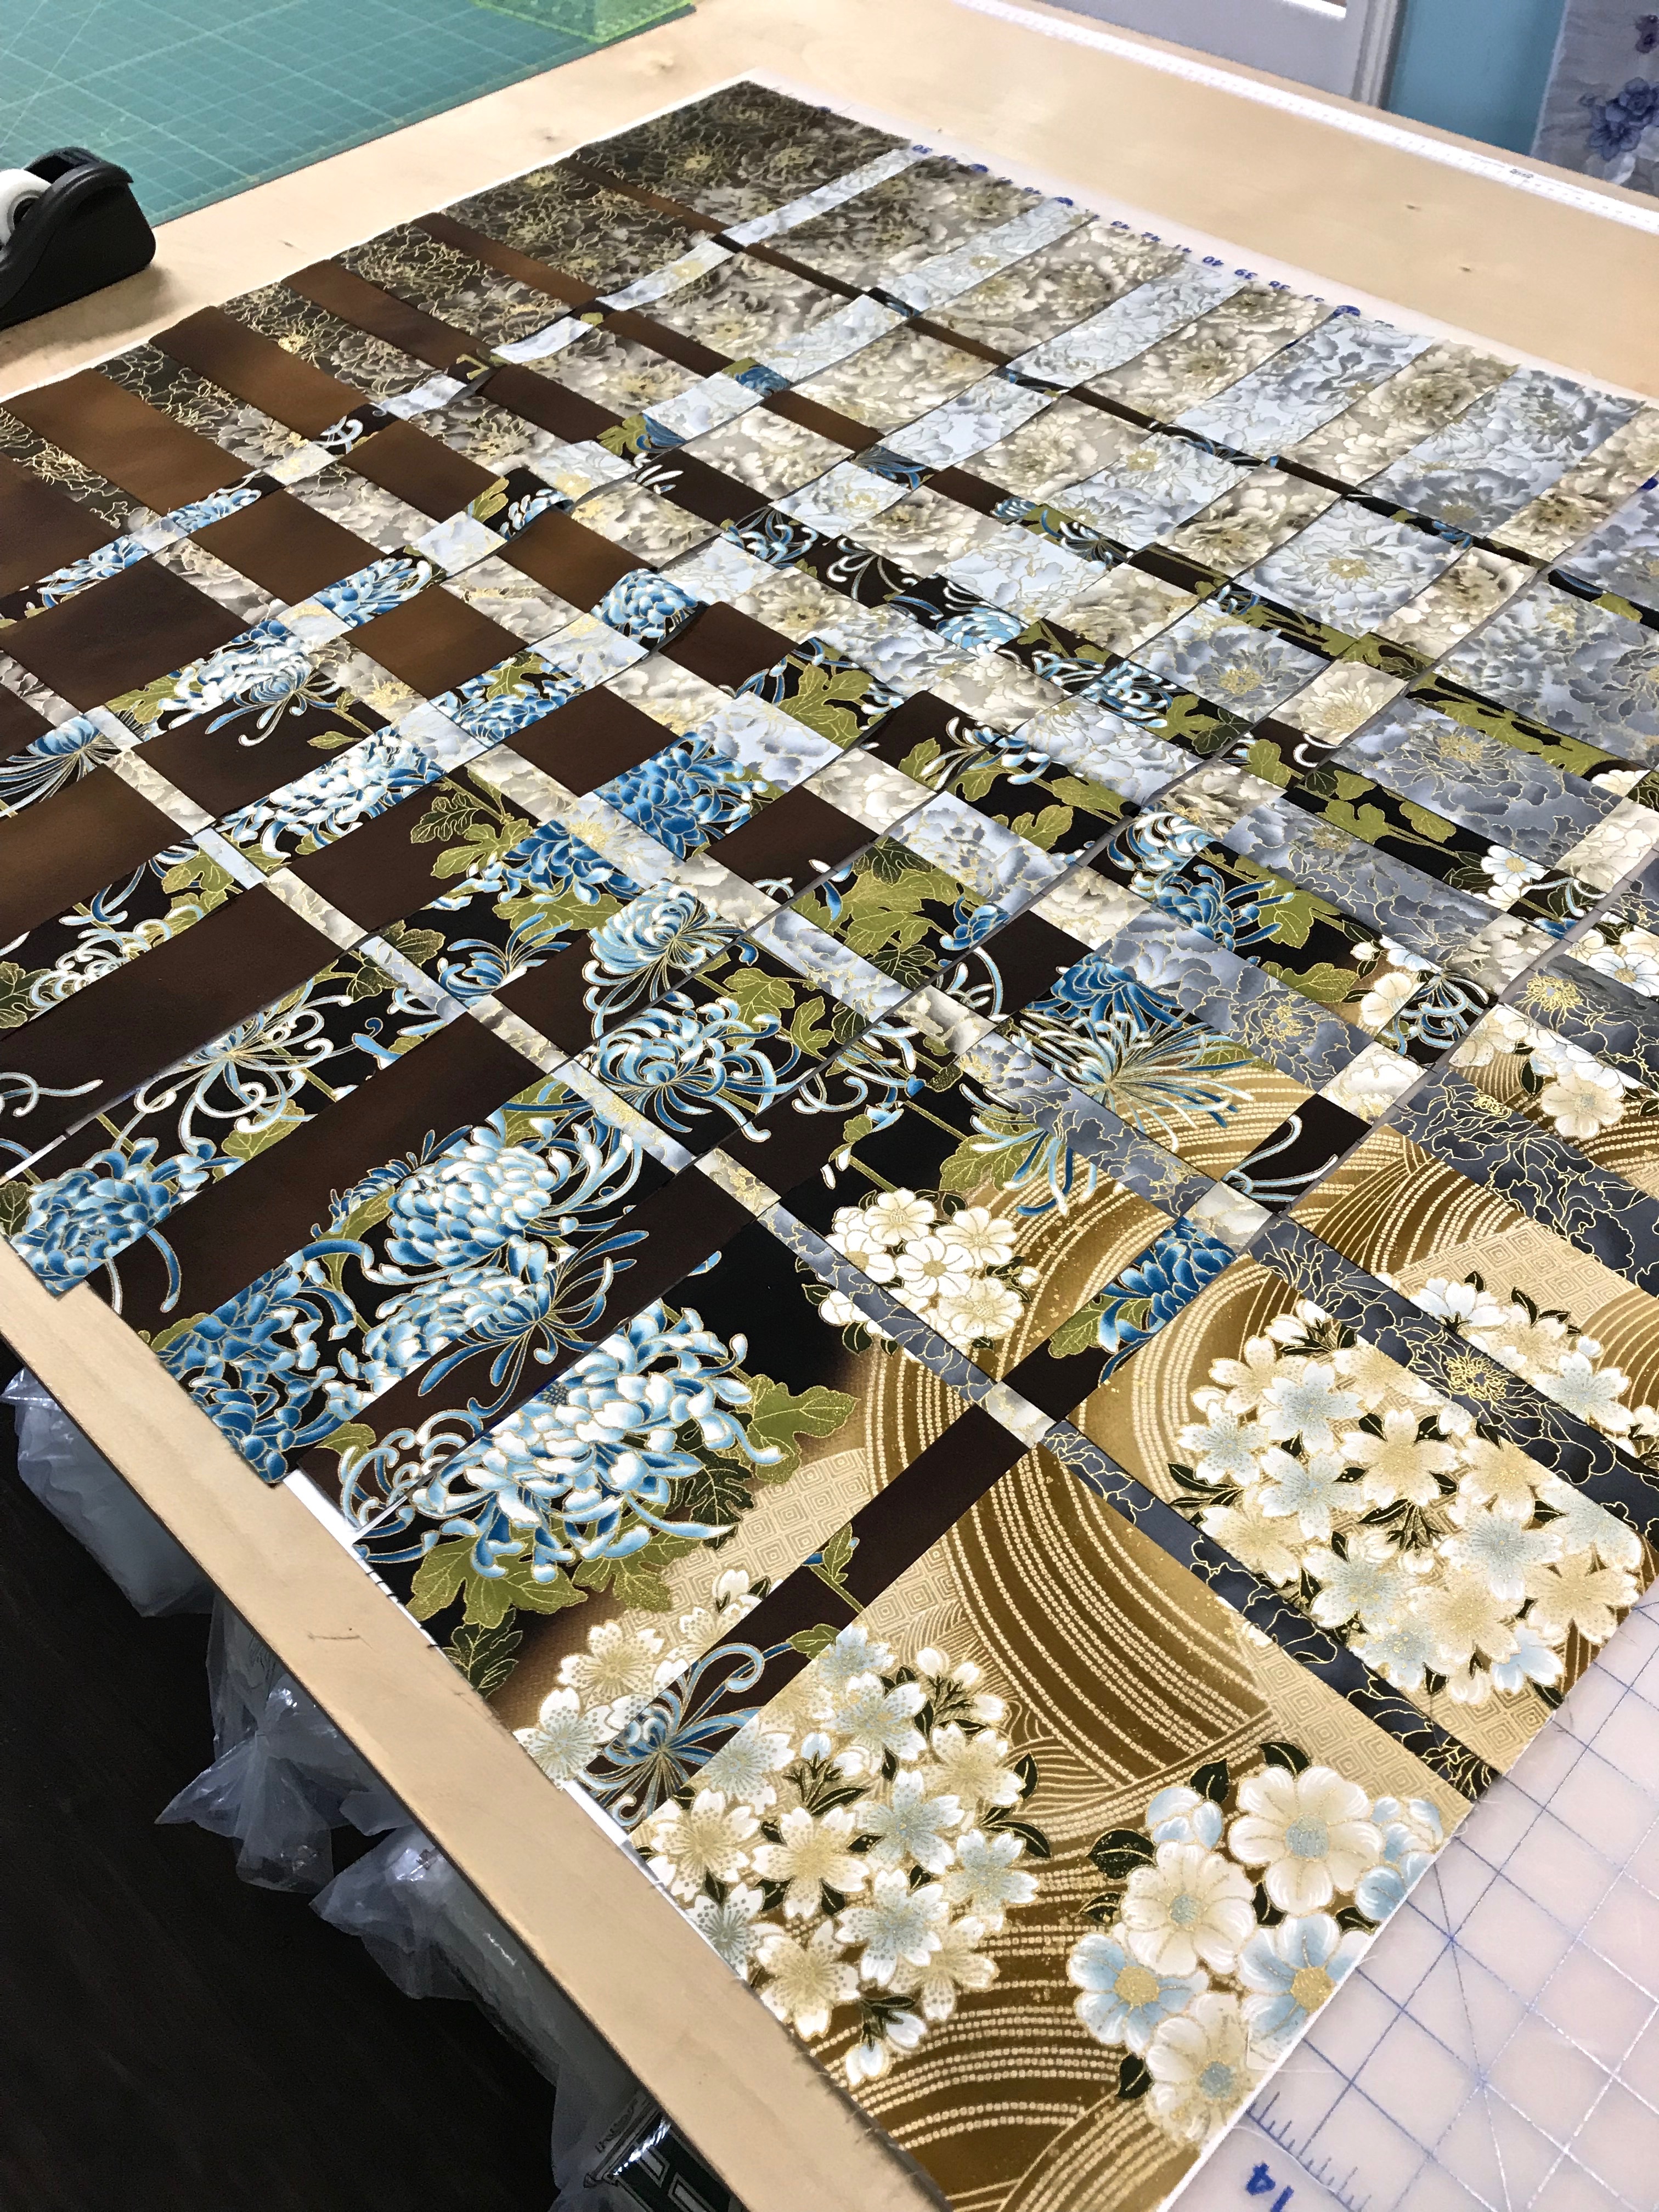
I thought about adding a bit of dark fabric where two fabrics met, but when I photographed the layout I didn’t like how that broke up the unity of the border.

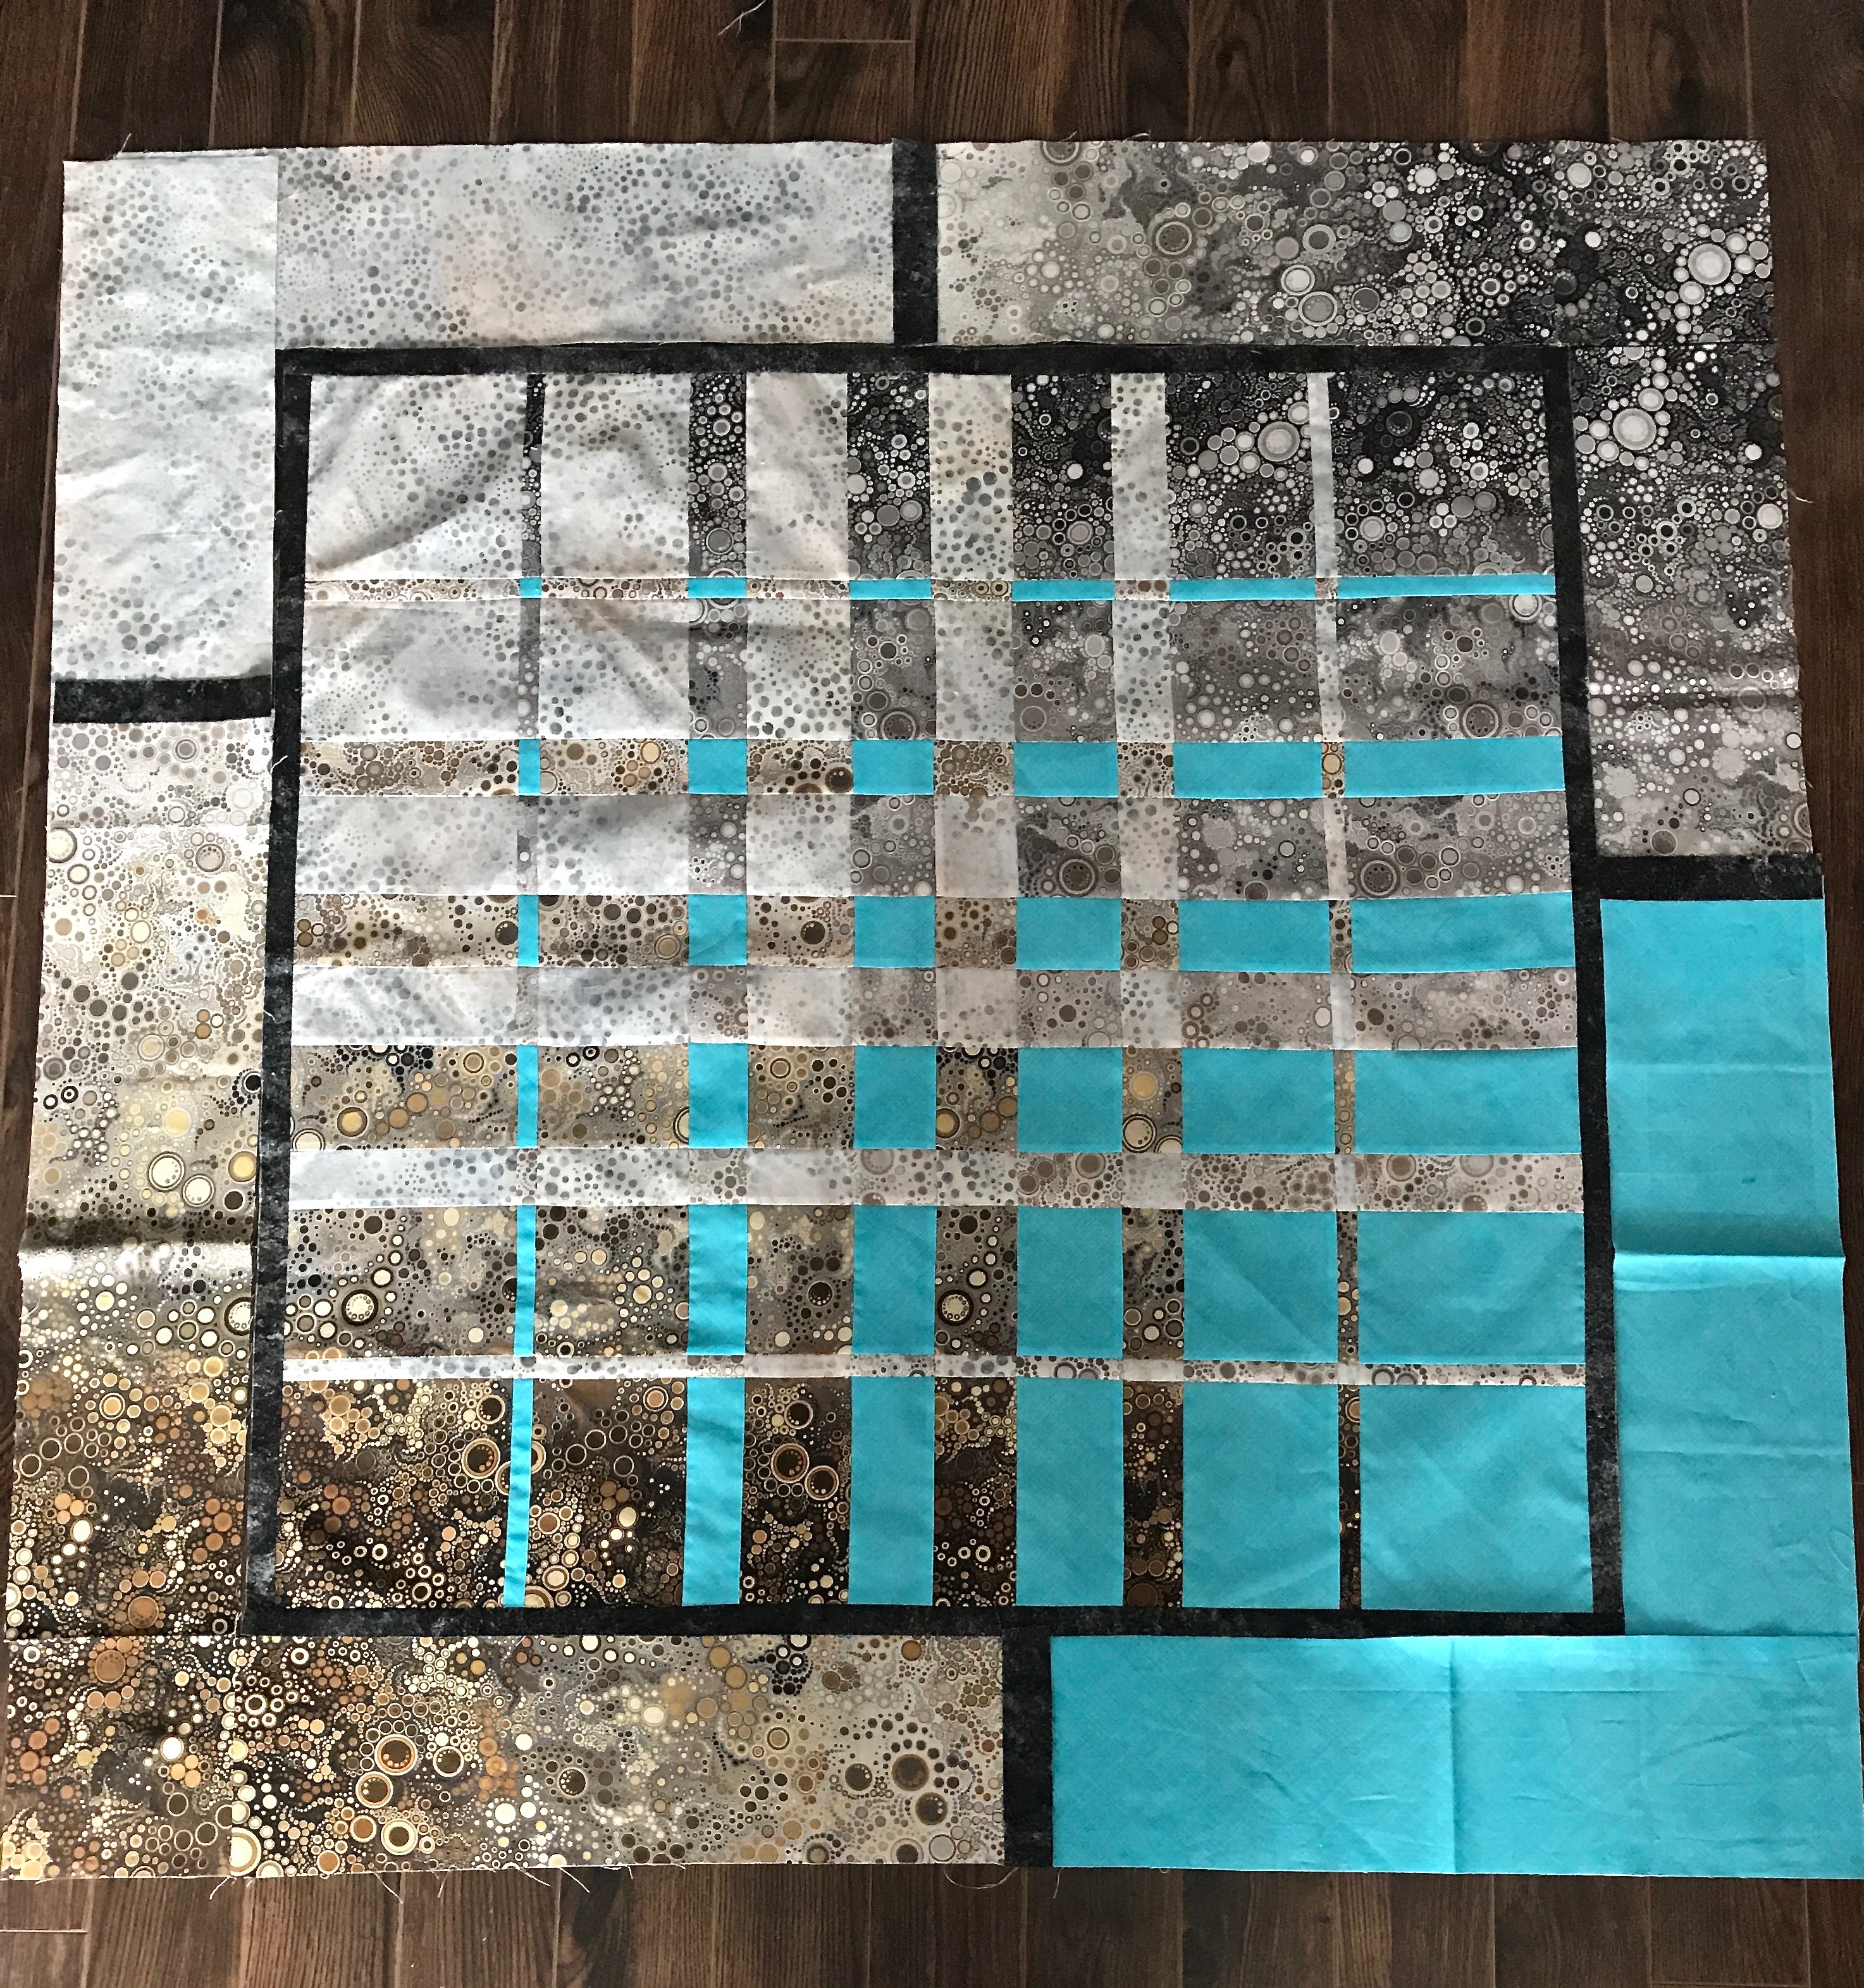
Top Layout With Joins Marked

I also thought about using a mitre to make the joins but I didn’t have enough fabric to make that work.

Looking at the finished panel I’ve decided to finish the quilt with a hidden binding – I have no more grey batik or turquoise and I think using the ombre for a traditional quilt binding will just add unnecessary detail.

When completed the quilt will be a rather small throw/lap quilt or a largish wall hanging – it’s ended up an awkward size, but I can’t see any way of extending the “length” that wouldn’t mess up the symmetry, so this is it.

Tropical Flowers III

Yesterday I finished a second leaf. For the moment I’ve left the medium teal unstitched and I think I like how it looks. I’ve covered the grey with the light teal thread and the dark areas are stitched but I like the texture leaving the medium coloured area as is, for now, at least.

Second Leaf

Next I will tackle the red/pink anthuriums – they will actually be a bit easier to work on because the colour moves in a way that will make the stitching flow. Probably not today, though. This morning I went back to the double convergence quilt top.

Tropical Flowers II

One leaf done – a second underway and weeks of work left to do.

One Leaf Done; Weeks Of Work To Do

The question is why bother? Why didn’t I just fussy cut the flowers, fuse and edge-stitch them in place and leave it at that? Good question. The thread painting, in spite of the large amount of work involved, adds interesting texture and dimension to the fabric turning it into a piece of wall art. I probably should have thought more about the size of the piece before I began, choosing fewer elements, but this panel does make an interesting art object. So I committed myself to the work. In addition, the fabric raw edges are inclined to fray because the bark cloth is loosely woven – thread painting lets me densely edge stitch creating a sharper outline for the flowers and leaves.

Tropical Flowers – Bark Cloth

I started with printed bark cloth given me by a friend – 4 one metre pieces with different coloured backgrounds. I chose the blue to work with here but you can see from the black piece just how clearly printed the flowers are. The fabric provides a lovely foundation for doing thread painting.

Tropical Flowers – A Selection

The first step is to choose a few flowers/leaves and cut them out. Next I apply a fusible web to the back of the fabric, pressing the whole thing flat, then fussy cutting before removing the paper backing from the fused web – the paper makes cutting out much sharper. Once the flowers are fused to a background fabric, thread painting can begin.

So that’s where I am in the process. It will take many hours to fill in the colour gradation of the leaves and flowers – I’m working to eliminate the grey using light values of the adjacent colours so “grey” won’t mean grey when I’ve done thread painting – there will be pale green, or pale teal, or pale pink where grey currently is found.

The flowers/leaves on the black backed fabric don’t have grey, instead the fabric has appropriate light shades for each element, making the decision-making process somewhat easier. But now, back to the teal leaf which I began yesterday….

Thread Painting – Tropical Flowers

You’d think because this piece has borders and piping that I’ve done all the thread painting – wrong! I started adding borders on the weekend because I was having the second session for the thread painting workshop and I needed to be able to show the gals how I finish a piece. I’d carefully marked (using a heat removable Frixion pen) a centre vertical line, used that to set up the inner border line. I kept all the markings visible as I partially bordered the piece. (Here are instructions for how I do borders with piping: creating borders). I marked locations and created a signature to show how I position the signature embroidery, as well.

Then I began thread painting – this is going to take several weeks – there’s a lot of fabric to cover – I did enough on the leaf on the bottom left to give an idea of how I shade the colours using two different but similar rayon threads through my needle eye. This provides a bit more texture than using just a single thread and lets me fill in spaces more quickly.

Thread Painting Underway On A Leaf

My plan is to eliminate the grey on leaves and flowers using other shades to in-fill spaces. In this leaf, I’ve used pale greens/yellow greens to stitch in the grey areas. I also did pistils on the anthuriums, flower stems, and leaf central veins while I had a specific thread combination on the machine. This is not my usual way of working but in order to share technique with the gals I did a lot of skipping around.

Now I need to settle in to resume thread painting; this weekend I plan on finishing this leaf and move on to the darker green one above. I also need to baste the edge of the outer border to the batting so I can more easily move the piece around while threading painting.

Possibilities #7

Finally finished this convergence quilt yesterday. Got the binding done and label sewn on. Two sets of mistakes that went together – totally unexpected and unplanned. It definitely worked out quite well.

Finished Quilt Top

I’m happy I took out the narrow vertical turquoise stripe – it disrupted the left-right movement of the convergence flow. Replacing it with the narrow turquoise border was a good decision. I didn’t have enough grey crackle fabric to complete the binding so I incorporated a turquoise piece I trimmed from the backing after I’d finished quilting. I ran out of binding as I was coming to the join and inserted another small piece of turquoise to complete it. I like where that insert landed.

Fiished Quilt Back

To create the quilt back I set up a “jellyroll race” using leftover bits of fabric from the top, with a narrow strip inserted and two unequal sashing strips. Using the turquoise for the backing sets up an interesting flow from top of quilt to the back. There’s enough turquoise in the top that when you flip the quilt over you retain the connection between top and bottom.

The ombre fabric I ordered online arrived Friday so I will now work on completing the double conversion quilt featuring the ombre fabric.

But before I can get to that, I’m have to work on the thread painting wall hanging.

Detail – Thread Painting Floral Wall Art

I started the thread painting last Tuesday as part of a class I’m teaching (I stitched the dark green parts of this and another leaf although you can’t really see what I’ve done in the photo). We meet again coming Tuesday and I have made no progress on the stitching work. Nevertheless I need to move on to framing the piece so I’ve trimmed it, I’m in the process of adding a bit more batting to the edges to allow enough background to balance the floral arrangement and provide support for the borders. Then I have to set up the marking (using Friction heat erasable pens) so I can apply the borders – have to get that process well underway before Tuesday – not completed, but started so I can demonstrate how I add borders. The framing of the piece won’t hinder the massive amount of thread painting I will still have to do.

Possibilities #5

Yesterday I removed the turquoise vertical strip and resembled the quilt top panel – much happier with the flow across the two sets of strips – they’re not interrupted with that contrasting element that really didn’t work well.

Hodgepodge with turquoise vertical stripe removed, sashing and borders added

The colour was right, though, and I used the turquoise fabric to sash the panel – the narrow contrasting sashing provides closure to the panel and brightens it.

The border – that was a challenge – I had several grey fabrics in my stash – I tried all of them. At one point I thought one of the taupier ones would look OK (I used two different Grunge taupe fabrics in the brightly coloured strips) but in the end I used wide strips from the grey Crackle (Moda) I’ve had in the stash for a while (I thought the fabric pattern was long out of stock but I just found more in a wide range of colours online so I bought two yards to replace the piece I’ve used).

Now on to a backing panel with a wide strip of some kind. How I choose to quilt this will also make a difference to how the final quilt will look – quilting design, thread colour should help tie the elements together as well.

Possibilities #4

Today, I looked at the two sets of discarded strips and decided they could go together and kind of work. The miscut ombre strips needed lengthening to match the pieced strips – I used my last bit of ombre (from the dark brown end) to extend them. I sewed the two sets of strips together this afternoon. The width proportions were the same so I put them together  wide/narrow, wide/narrow until they were assembled.

Hodgepodge

I don’t like the turquoise strip in there, however – I might actually take it out because it interrupts the flow of the strips in both directions. I’ve ended up with a panel 36″ x 43″ – reasonable proportion for a throw/lap quilt with narrow sashing and wide borders added.

Tomorrow I will take out the turquoise strip, then see what I can do about a narrow sashing and a wide border to get me to around 48″-50″ in width, 56″-58″ in length.

And here I am quilting when I intended to be making pants – the corduroy is sitting on the dresser waiting for me to get to it; the pattern is there, too. I wanted to get both pair done by the end of the holidays – nope! It’s quilts instead. Gotta follow the inspiration.

Oh, and I never work on more than a single project at a time, and here I am deeply engrossed in two.

Possibilities #2

Christmas day is just another day. I read the news (stupid way to start the day these days – nothing but seriously ominous views of the world). Then I picked up the strips I constructed yesterday, dug out some grey backing fabric from my backing collection and laid the strips on it – I inverted adjacent strips to mix up the colour and added one narrow contrasting turquoise. Now the strips aren’t fighting the complementary fabric. This is a possible arrangement for a quilt top.

Possibilities 1

But I wondered what it would look like if I kept the strips all in the same direction and skewed them a bit and I think I prefer this layout. I’ll cut off the overhanging bits and resew them at the opposite end so the strips will be the length of the width of fabric. I will mirror strip widths in the interstitial fabric so the assembled top will have a balanced feel.

Possibilities 2

I didn’t stop there. Here is the first pass at the convergence quilt – and I got it wrong! The ombre/turquoise is right but the batik/ombre is backward – I wanted the dark to go from wide to narrow and I inadvertently did the reverse.

Convergence II

Doesn’t look awful like this but the balance is not what I was aiming for – I wanted the two dark parts of the ombre to be at opposite corners from one another. I must have laid the ombre/batik panel upside down when I cut the strips. Fortunately, I have another dark ombre piece and enough of the batik to recut/resew/and recut those strips – wasn’t planning on having to do that, however.

This is one of those times it’s a good idea to stop and walk away from it all. Take a breath and come at it again tomorrow.

Season’s greeting to anyone who has bothered reading this far.

Possibilities #1

That pile of fabrics with the Ombre fabric as central has been calling out to me. So this morning I decided to have a go. My idea was to keep the ombre as intact as possible and to set up some kind of convergence idea using the other blending/contrasting fabrics.

Well that didn’t work! The strips of contrast fabrics kill the ombre – they’re way too strong; they overwhelm the ombre fabric. I’ve gathered them up and put them aside to use them in something else.

Ombre Idea #1

So then back to Ricky Tims basic convergence quilt idea – four squares of blending/contrasting fabric which are cut into graduated strips, sewn together in one direction, then sliced again in graduated strips and stitched once more. The question is what will go with the two blocks of the ombre.

I tried a light and dark turquoise – the darker fabric is lifeless against the ombre.

Possible Ombre Idea #2

The lovely lined fabric doesn’t have near enough contrast to work at all.

Ombre Idea #3

For the moment I’m contemplating this selection – the turquoise should make the overall assembly bright and the paler batik blends reasonably well with the two halves of the  ombre fabric…

Ombre Idea #4

I will walk around that for a day or so before cutting further – at the same time going through my stash again to see if I have any other fabrics that might work better.

My first convergence quilt had strong contrasts and worked out well.

Convergence Quilt #1

The contrasts with the ombre fabric aren’t so defined although the ombre sets up a workable contrast in two quadrants. The challenge is finding appropriate fabrics for the other two quadrants.

Convergence Quilt – in progress

This convergence quilt in progress was created in a class I taught a year or so ago – the participant had two lovely contrasting ombre fabrics which blended together amazingly well. I don’t have a second ombre so I’m trying to set up the contrasts another way.

This is how improvisation works – one idea doesn’t pan out, you try another until something just feels right. I’m working on the feels right part – not there yet!

Possibilities…

I’ve had this piece of ombre fabric sitting around for a while – I bought a metre at the time because I liked how the colours shaded from grey to brownish. I had nothing to go with it; I just put it away.

Today I was at Sew With Vision (my local Pfaff/Husqvarna dealer and fabric shop) to pick up a new foot for my Pfaff embroidery machine and there were two stacks of recently arrived fabric sitting on the edge of the cutting table. I wasn’t thinking about the ombre fabric but no sooner had Cathy cut me 1/2 m of three of them (grey circles, brown circles and grey/beige with metallic lines) that I remembered the ombre and realized they’d go together.

Ombre Fabric With Possible Companions

I came home, and went through my stash and came up with some other fabrics I had on hand and pulled them out. Looks like “dots” were calling to me. The greys (sitting at the brown end of the ombre) need one more darker grey to pick up the darkest grey shades at the nearer end of the ombre. Probably could also use one more tan-ish fabric as well. AND I need some kind of contrast – I’m auditioning the turquoise/yellow batik but that may not be what I want. I may have to take the pile to Sew With Vision to see if there’s anything else there that works with the greys and browns and beiges that will bring those colours to life.

And what might I do with them? Not a clue, yet!

Here’s where I need to browse pictures of modern quilts to see if anything presents an idea. I always thought the ombre might be used in another convergence quilt, but this collection of fabrics doesn’t lend itself to that. Nope, at this moment, I have no idea what shape this quilt will take. Just need to sleep on it, walk around the fabrics for several days – something will suggest itself….