Bamboo – Making Progress

I’m making headway slowly on the Bamboo quilt top. I’ve created some more blocks – they’re getting better even though I’m not getting faster! The tapering of the inserts is looking more like I want it to. I’ve also started joining blocks and fitting in inserts where needed to make row segments. I’ve got 15 blocks assembled – I figure I’ll need between 35 and 40 to make a lap-size quilt.

Bamboo – Beginning To Take Shape

In the picture I saw originally, there are some leaves overlapping from one block to another: 

The only way I think this can be done is if the whole quilt top was constructed using raw edge appliqué. I’m doing this with slashing and inserting contrasting fabric.  I’m stumped about how to accomplish the overlapping across blocks! Nevertheless I’ll keep working away at these blocks.

What I’m Working On…

A couple of days ago I started a new quilt – the previous one really didn’t challenge my sewing skills (I was making it specifically for a friend who didn’t want anything too “fancy”).

This time, I’ve started building something I think I’ll end up calling “Bamboo” – blocks cut freehand with contrasting inserts to look like stems with long narrow leaves. Quite difficult to execute, actually – these first five blocks started out with 9″ wide fabric but trimmed up somewhat less than 6″ in width because of the curvature that occurred with the leaf insertions.

Free-form Blocks

However, after eight blocks I think I’ve finally figured out how to execute the blocks – do the initial slashing cuts, then lay out the pieces and remove fabric from each cut so that when the inserts are stitched and pressed the block retains most of it’s shape and the size will be closer to the starting size. This block is cut, now to add the leaves and stem.

Setting Up The Block

I’m not worrying about keeping block size consistent – they’ll come out whatever size they do; then I’ll fill in with other smaller piecing to make the whole work out.

Amaryllis 

My amaryllis now has 6 flower blooms – four showing and two to come. That’s the most I’ve ever had on a stalk. The third stalk is still peeking out of the bulb – it’s not clear if it will actually grow or not.

Amaryllis Stalk #2 – with 6 blooms!

This set of blooms makes me smile each time I look at them.

Help!

In the late summer I offered to finish off, back, and bind a queen-size hand embroidered crazy quilt my friend Ruth has been working on for the past many years. She almost finished, then lost interest and put the quilt away. I know she intended going back to it, but I also knew she probably wouldn’t get there. So I offered to complete it for her – with my sewing machine using decorative quilting stitches where she’s done hand work, but it would work.

Yesterday I dug out the quilt from the closet, this morning I opened it up and started by trimming the quilt edges to make them straight, machine basting flapping bits of fabric – there’s quite a bit of beading near the edges – broke a needle on one. My next task will be to remove beads near edges so I can properly machine sew where I need to.

I also need to add fabric to three corners, and figure out a way to decorate a seam that joins a panel across the quilt near one end – lace, silk, bits of crochet, whatever bits and pieces I can find in my collection of stuff that kind of goes with what Ruth has used.

Hand Embroidered Crazy Quilt

Here’s my problem – the quilt needs a backing. I can set up a backing using a light cotton (the quilt is VERY heavy already and doesn’t need anything weighty on the back). But how am I going to stabilize the top to the back? I can’t stitch over existing embroidered edges because it would look awful and there are beads on lots of those edges. Do I tie top to back with bits of yarn? I have to do something.

If anybody has any idea how to attach a back to something like this, I’d love to hear your suggestions because I’m stumped, I must say. The underside of the quilt does need to be concealed because there are thread ends and raw edges throughout that will ravel and come out if left exposed.

Charm Pack Quilt – 2

Just finished piecing the charm pack quilt. Three borders – two narrow and one wide. The overall finished size will be 47″ x 60″ – a good lap quilt size.

Quilt Top Pieced With Borders

Now my problem is the back. I have 53″ of potential backing fabric (the same fabric I used for the dark wide border). To make that work I have to extend the length by 12″ in order to have enough hang-over to be able to quilt the project. I have enough leftover blocks to create a strip and with borders I can make the insertion strip the required width to give me the length I need for the backing.

The width also has to be extended – I have a workable 42″ in the width-of-fabric – I need a finished width of  51″. I will have to extend the width another 11″ – 12″. That will mean using almost a third of the blocks in the unused pack for an insertion strip.

The easiest way of doing this is just to extend one side of the length and of the width but that  will end up being trimmed and I want the entire inserted strips to be included in the back with the trimming coming from the major background fabric. Those extension strips will need to be inserted approximately 8″-9″ from one edge of both length and width.

That’s for tomorrow. Done enough for today. Got further than I expected.

Charm Pack Quilt – 1

A couple of weeks ago my physiotherapist handed me a Northcott charm pack with blue/turquoise fabrics – forty-two 5″ squares in 10 different coordinating colours. Not enough to make a quilt on it’s own. I went through my stash pulling out blues and turquoise fat quarters, half-yards, and scraps to cut another forty 5″ squares which would get me closer to what I’d need for a good-sized lap quilt. This quilt isn’t for me – she wants it to use in her new house.

Charm Pack with Quilt Backing Fabric

I thought about a lot of possibilities – finally decided to do a disappearing 9-patch. I didn’t want to invest a huge amount of time executing fine detail – setting up a 9-patch didn’t take long, cutting the blocks into quarters went quickly, arranging the resulting blocks is now my challenge. Because I didn’t think the blues/turquoises had enough life, I decided to use a golden yellow (with hints of blue) as an accent colour. I placed the yellow blocks at the centre of the 9-patch so they were all cut into quarters when I spliced the 9-patch blocks. Here is my current layout:

Disappearing 9-Patch using Charm Pack

Not big enough for a good size lap quilt – so far just a 5×7 array. The question I’m deliberating right now is whether to extend the quilt with a narrow border in light blue along with a wide dark border (I actually bought a second charm pack, in case I didn’t have enough for the quilt center – I could use the charm pack squares to piece an intermediate 2.5″ border then finish with a wider dark border). Or, I could add sashing between blocks/rows and space out these elements – but what colour to use for sashing?

I have to keep thinking about this – not sure what to do,  yet.

Oh, and I came across some appropriate backing fabric for half-price so I picked it up.

As I was leaving the physiotherapist’s office Tuesday, I noticed the additions to the tree in her yard. I think there’s a pottery studio in the garage – used by the previous owner – these faces bits of the potter’s work (top face missing it’s left eye).

Faces

Amaryllis 2 2018

I got a second amaryllis for Christmas – so far the first stalk has completely bloomed. There’s a second stalk well on the way and I think I’m seeing a possible third stalk peeking out….

Amaryllis 2 2018

Crazy weather – it snowed last night, then turned to rain, then the temperature dropped well below freezing leaving black ice patches. I haven’t been out yet today, but just about to venture forth.

Kantha Jacket – Completed

Just finished the jacket. Yesterday, I assembled the double-welt pockets, stitched the shoulders, added the collar, pinned in the sleeves. This morning, I sewed the sleeves in (bound the seams), stitched the sleeve underarm and jacket side seams (bound those seams), and finished with a hidden binding on the bottom edge.

The buttonholes took a bit of crafting – in the end I used a double thread (a black combined with an almost navy) to provide a bit of definition to the buttonholes so they show (a single thread wasn’t really visible). Last the buttons.

Kantha Jacket – Front

Then I tried the jacket on – it fit, but the sleeves were about an inch and a half too long. I removed the cuffs, shortened the sleeves and restitched the cuffs. The sleeves are now a little longer than 3/4 length – I can bring them down by lowering the cuff should I want to.

Here’s the jacket back:

Kantha Jacket – Back

I’m pleased with the result. It fits like the jacket I bought in San Francisco three years ago – a useful addition to my wardrobe.

Double Welt Pocket

There are lots of ways of constructing a double-welt pocket. I never attempt one without first doing at least one test run! Here’s a sample I mocked up late yesterday.

I want the pocket opening to be on a slight diagonal rather than cutting straight across (this way I can make a wider opening in a shorter width distance). The 1/4″ welts are small but set up a stabilizing contrasting detail against the very busy fabric.

Double Welt – Front of Fabric

In this practice pocket I didn’t interface the welt fabric – I need to do that and I need to use a small (slightly stiff) interfacing on the jacket fabric itself so that the pocket opening is crisp and flat.

A normal double-welt pocket uses a pocket bag – but because I want to use patterned fabric on the inside as an accent to the solid of the reverse of the jacket fabric that won’t work – too much bulk. Instead, I’m going to cut out a single piece for the pocket, do a Hong Kong finish around the edges, attach it to the inside of the top welt fabric, then straight stitch the pocket piece to the front forming the pocket. In addition, I’m going to position the top of the pocket piece to match the angle of the double welt and align the pocket piece on the vertical.

Pocket on Back Side of Fabric

I used the dimensions suggested in Andrea Brown’s tutorial – begin with 7″ x 3″ welt pieces. But the resulting 5″ opening is a tiny bit too narrow. I want to end up with a  6″ opening which might actually bring the pocket to the side seam – or very close to it. But because the welts are small, that should look OK.

Now to add the pockets to the jacket front pieces – easier to do before they’re attached to the jacket than after the parts are sewn together.

It’s All About The Pink – V

Just finished the pink quilt  – I bound it in the same fabric I used for the wide border. In the end I left the narrow border alone – I began stitching the leaf motif but two repeats of the stitch and I stopped and picked it all out – the stitches weren’t quite even and it just didn’t look good.

It’s All About The Pink – Completed

That’s likely it for sampler quilts – while I enjoyed creating the 63 different blocks, most of which I’d never constructed before, the task is time consuming because each block had to be cut out and pieced individually – couldn’t streamline the process.

The back – because the quilt top is so busy I decided to simplify the back insert – I used large pieces broken up with strips of accent fabric. The quilting shows on the back – you can barely discern it on the quilt top.

It’s All About The Pink – Back

Another winter scene: Friday, after the storm – with ice pellets and freezing rain the night before – a beautiful sunny day, if cold, and the trees, shrubs, plants, grass – all sheathed in ice – a beautiful sight. This small tree made me stop and capture its image as I was leaving the pool after my morning exercise class. I tried capturing other photos but there was so much vegetation covered in ice that the images weren’t worth keeping.

Sheathed In Ice

In The Midst Of Winter

In The Midst Of Winter is actually the title of a recent book by Isabel Allende, but it’s apropos for today – snowing quite heavily right now, has been snowing all day. Expected to turn to rain during the night – the roads tomorrow will be horrendous, I’m sure. And I just checked – I have nothing on my calendar for the day so I can stay home and work on the quilt.

“In The Midst Of Winter”

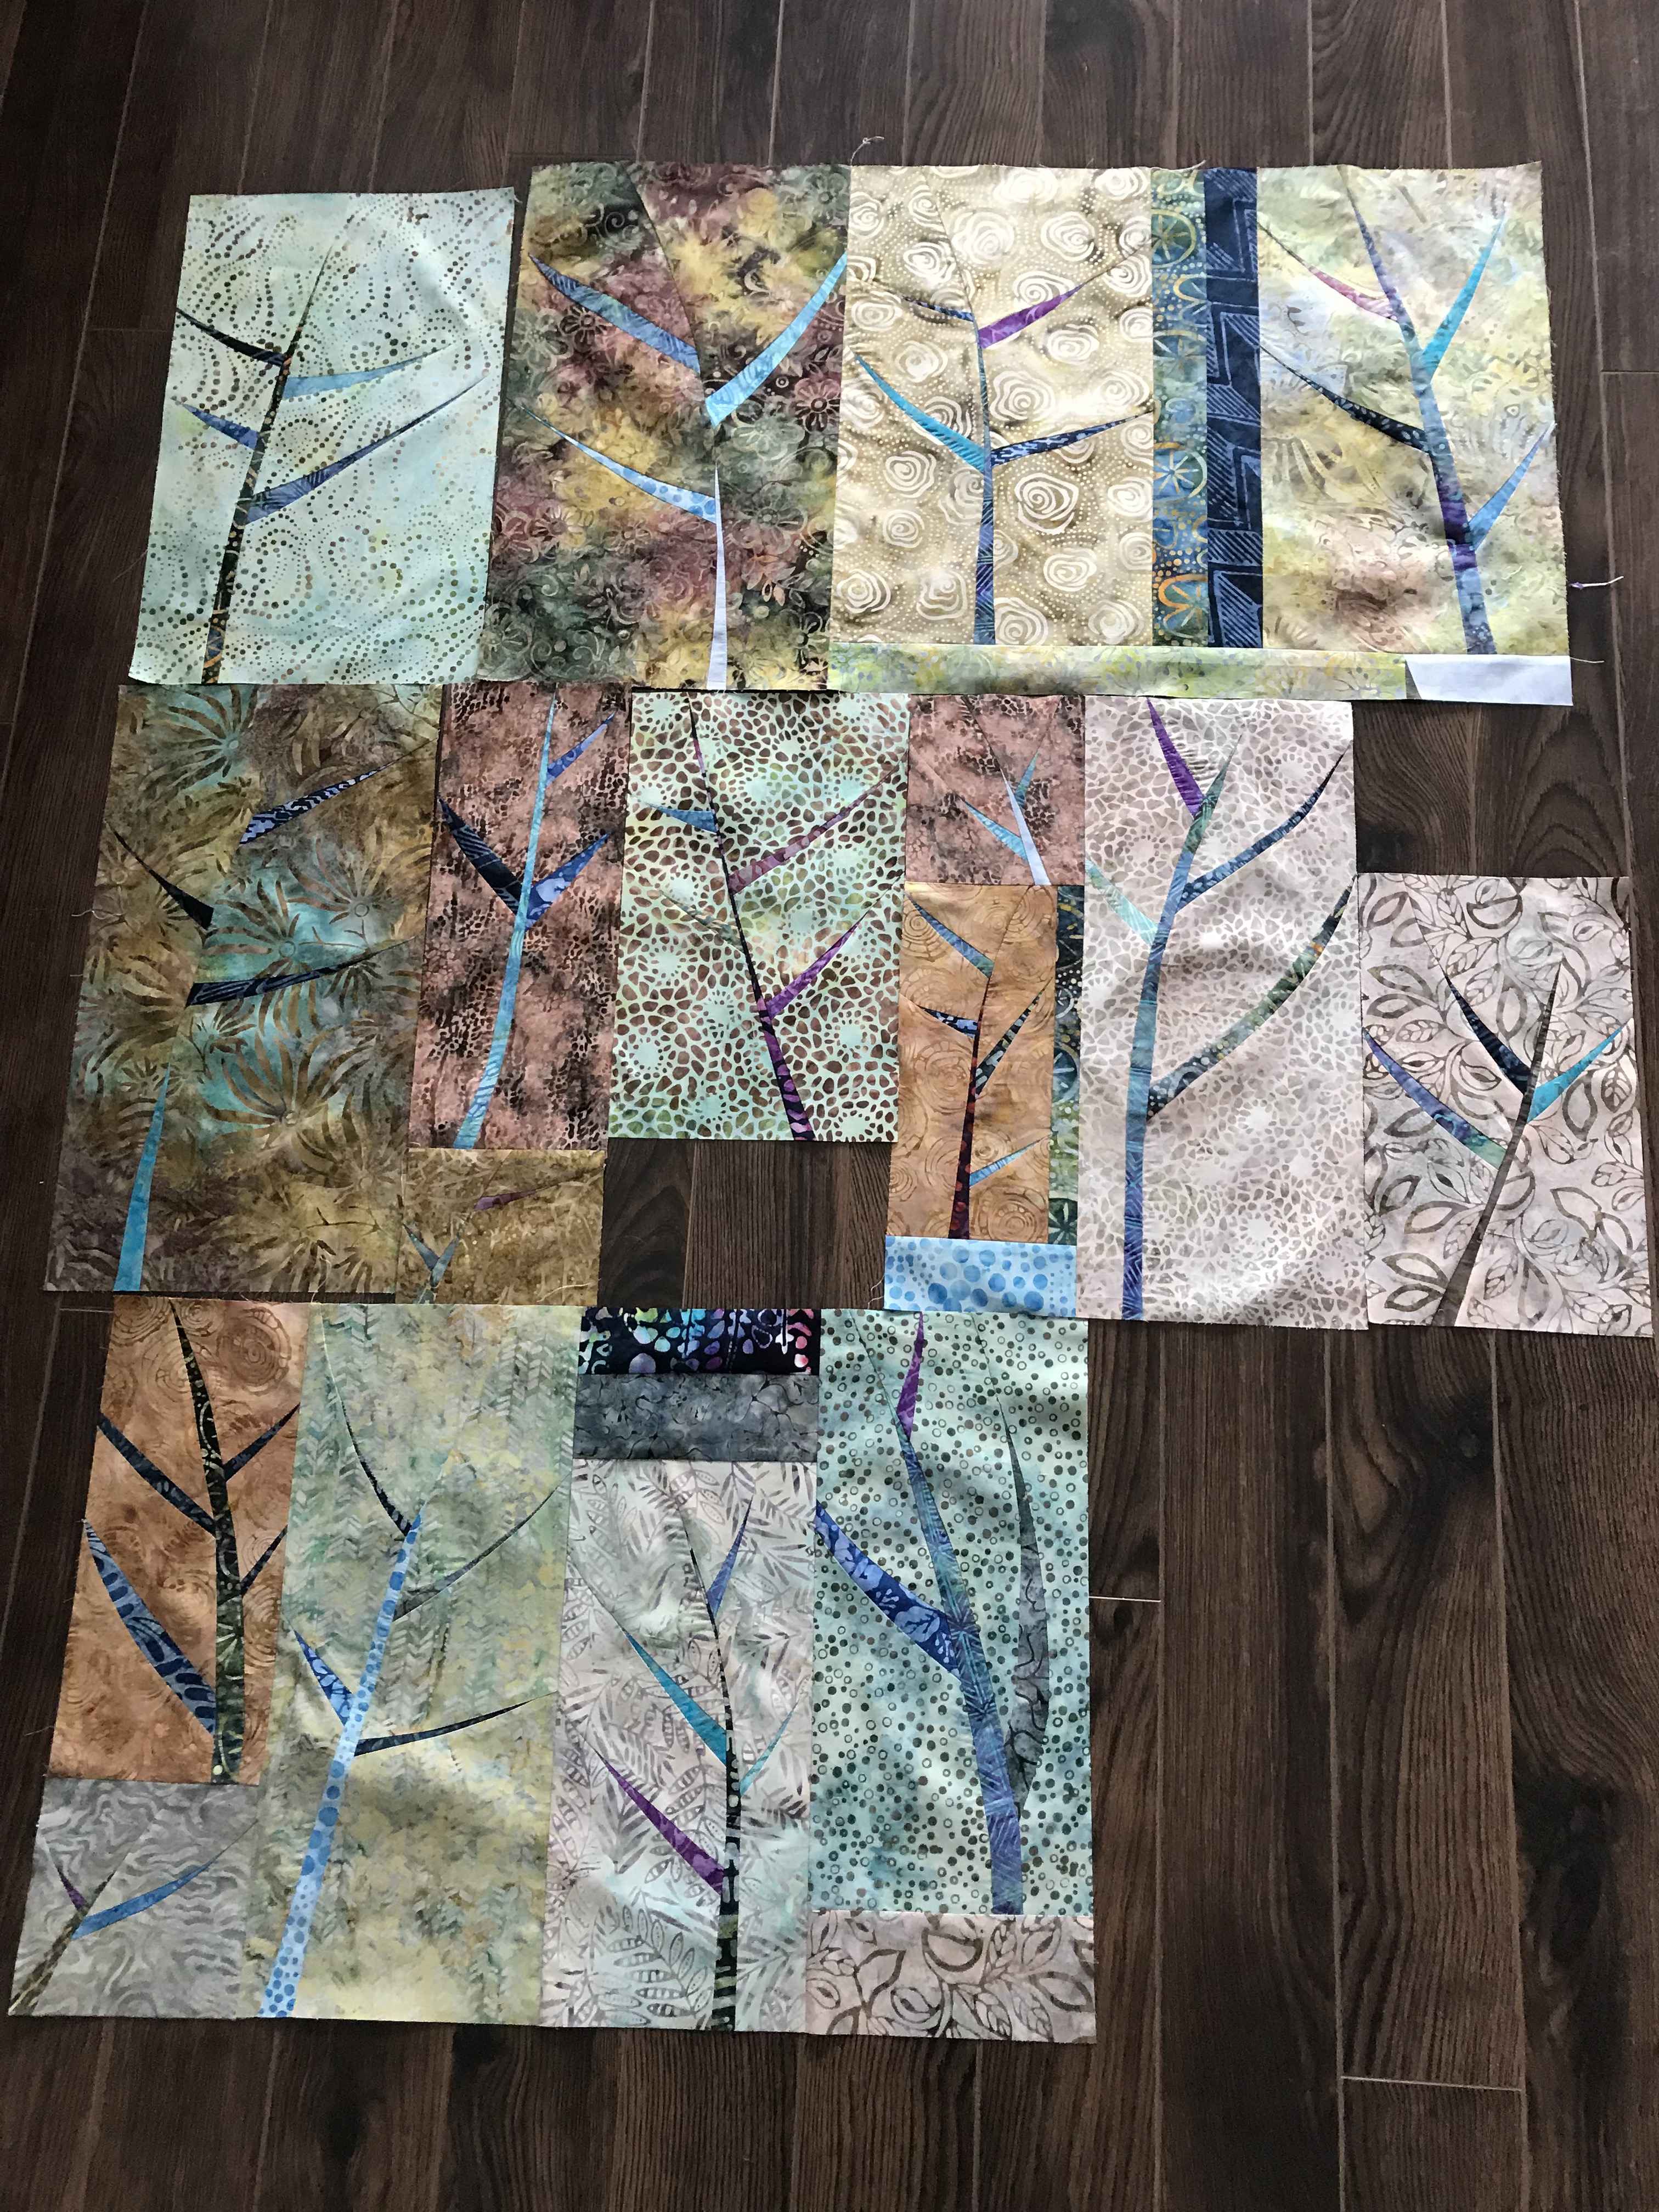
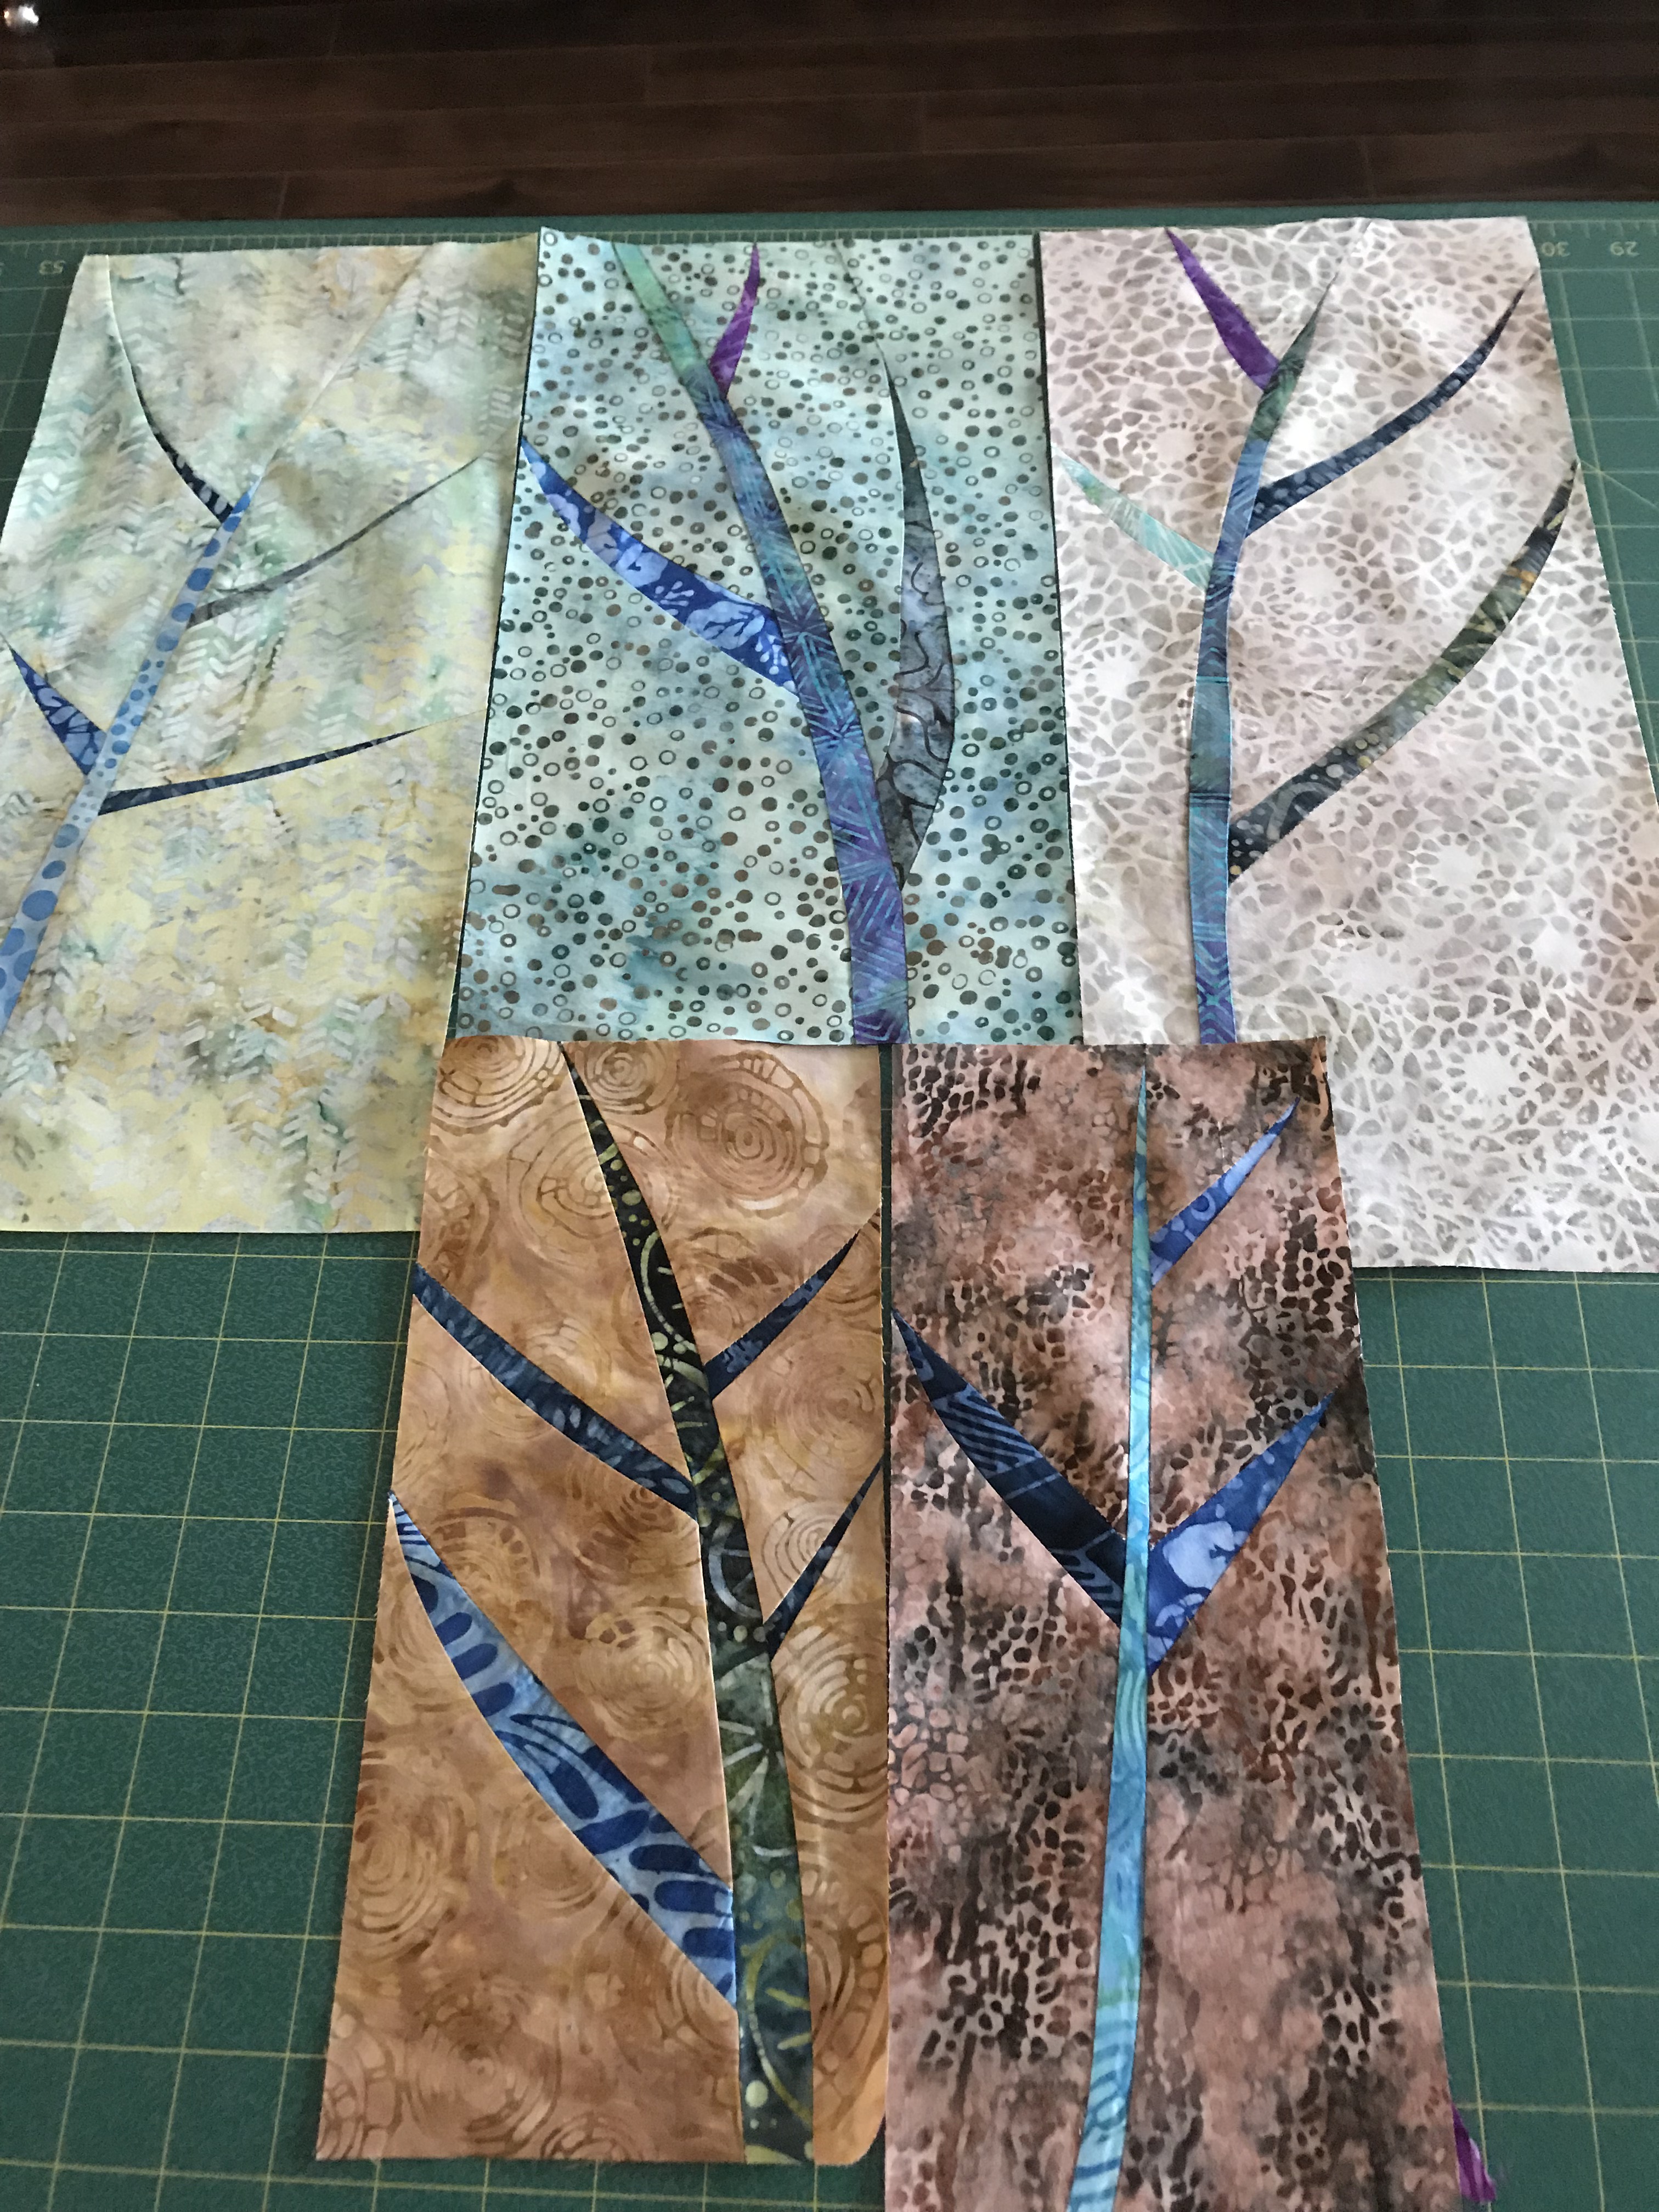
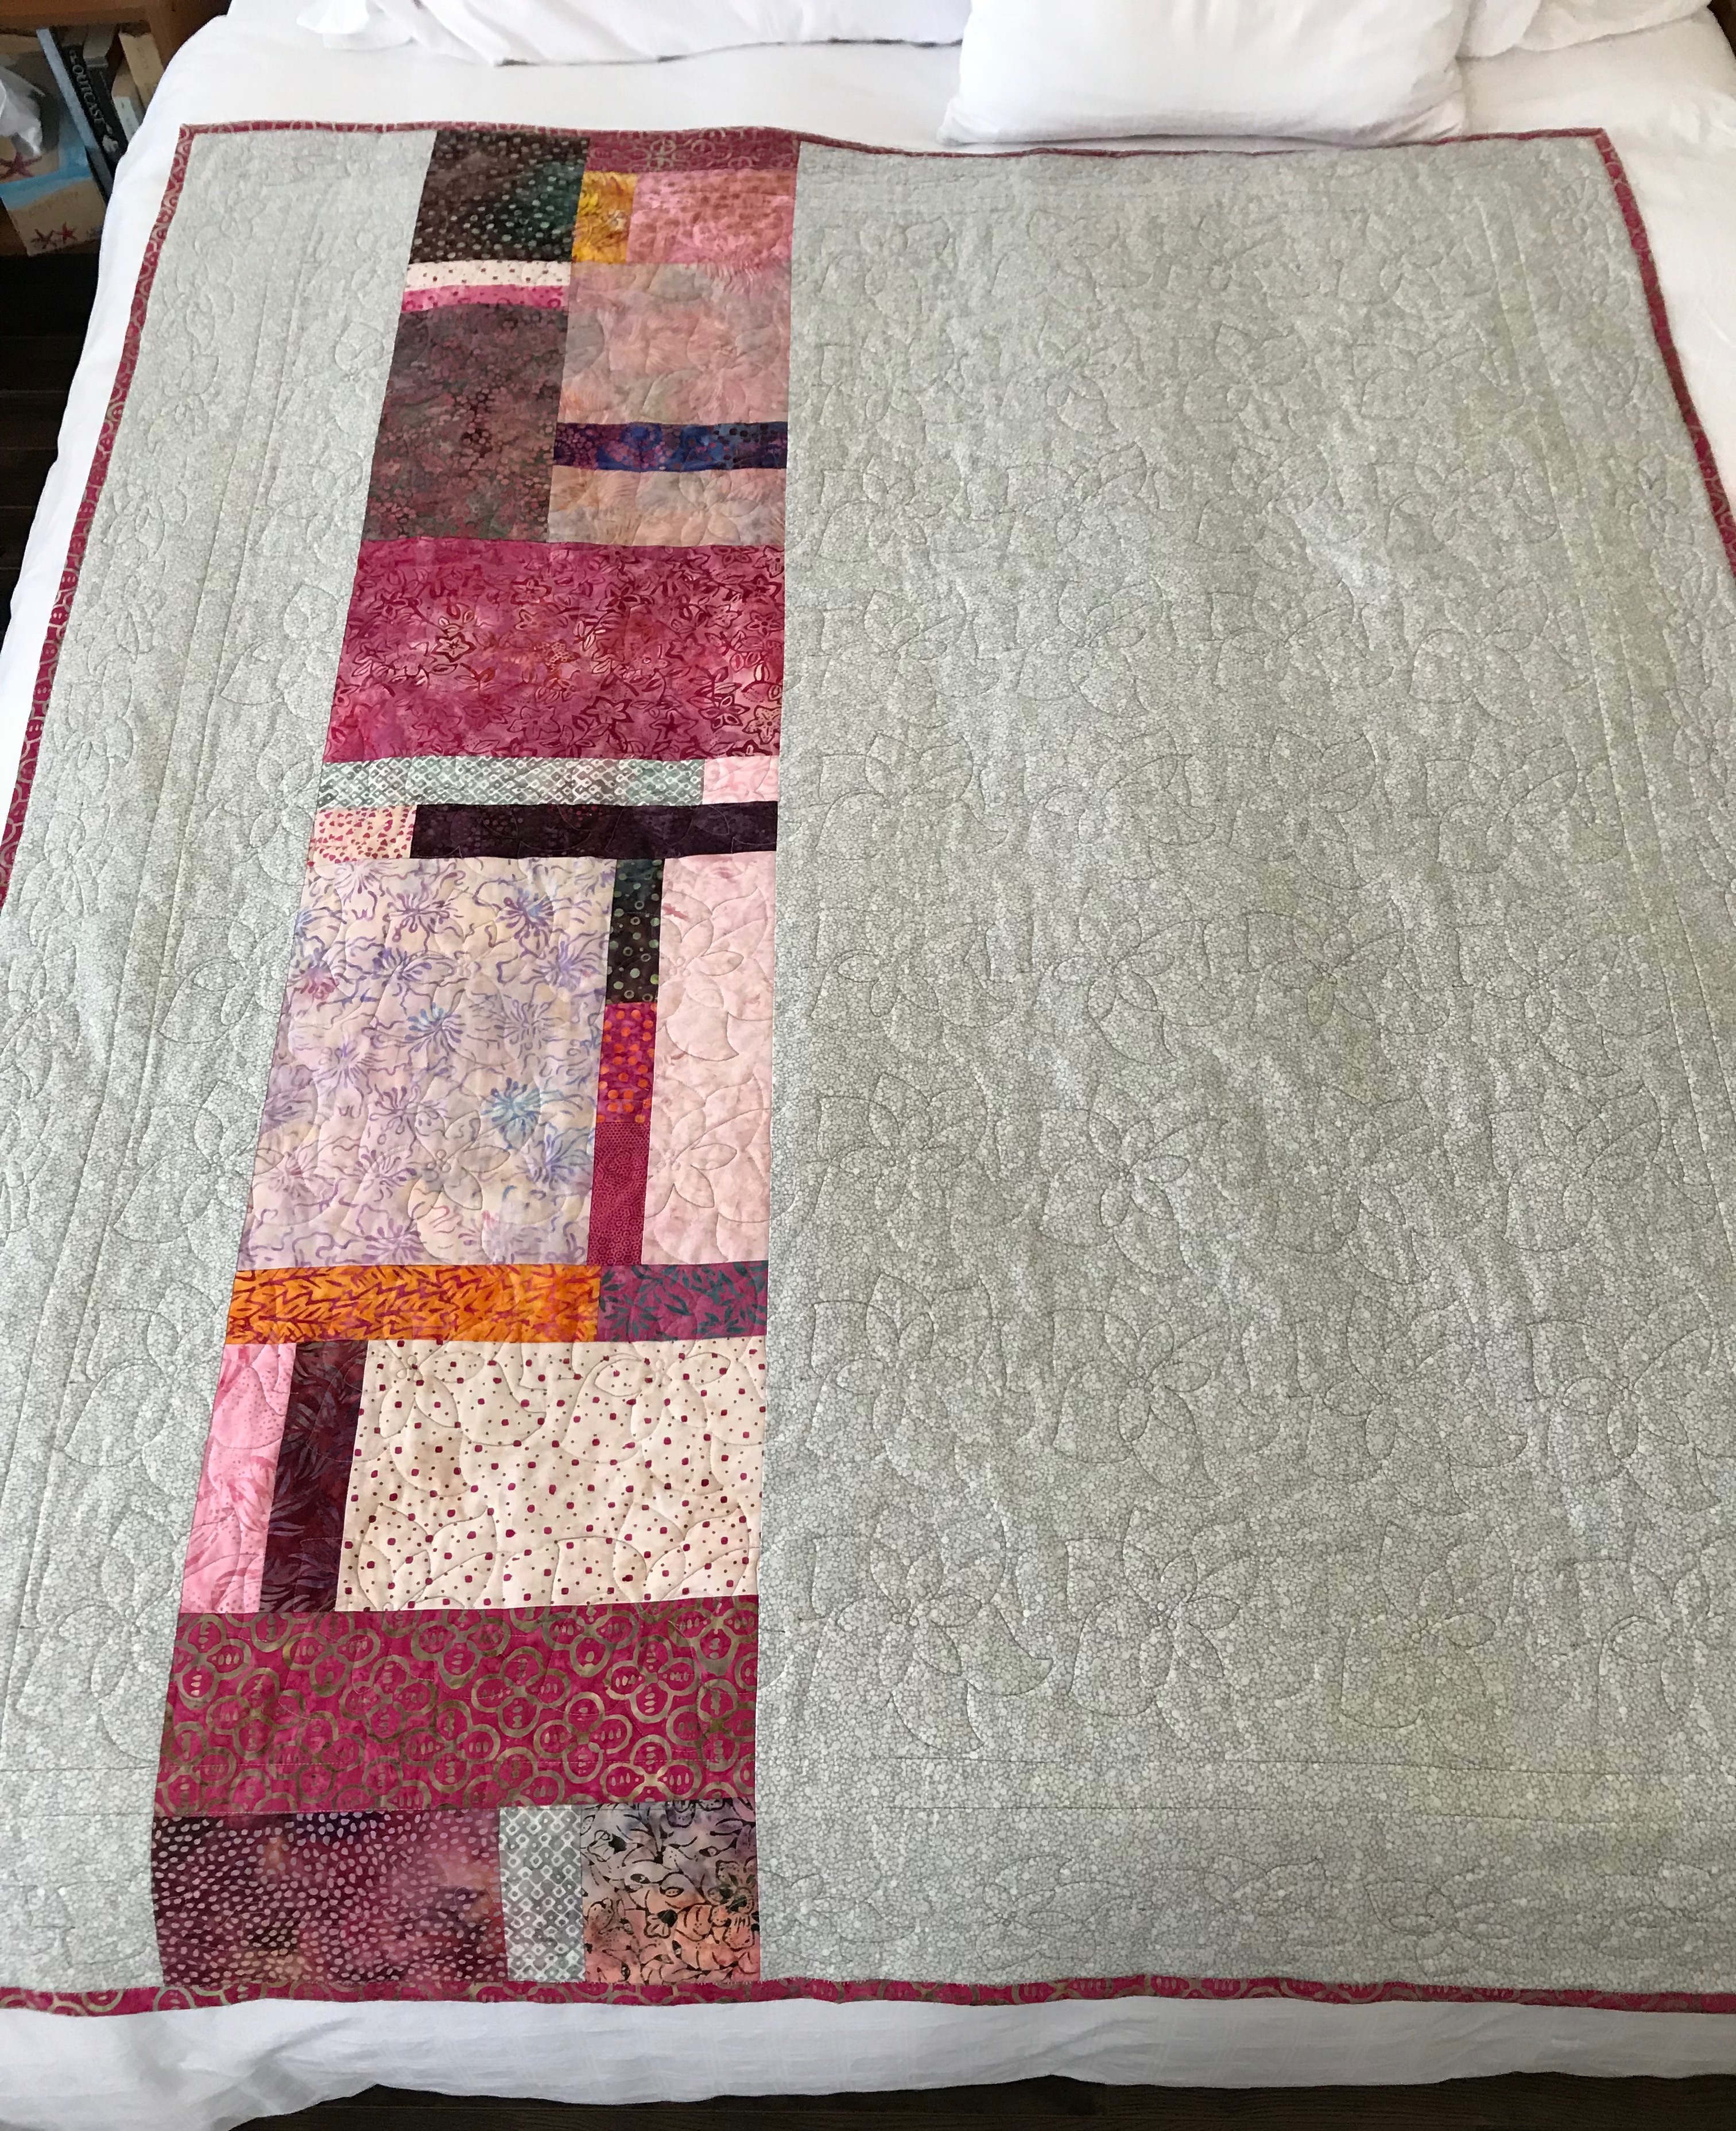
18 blocks embroidered/quilted yesterday, 25 completed this afternoon. That leaves 20 for tomorrow. Then I will need to stitch the narrow border and embroider the wide border – who knows, I might get all of that done by afternoon.

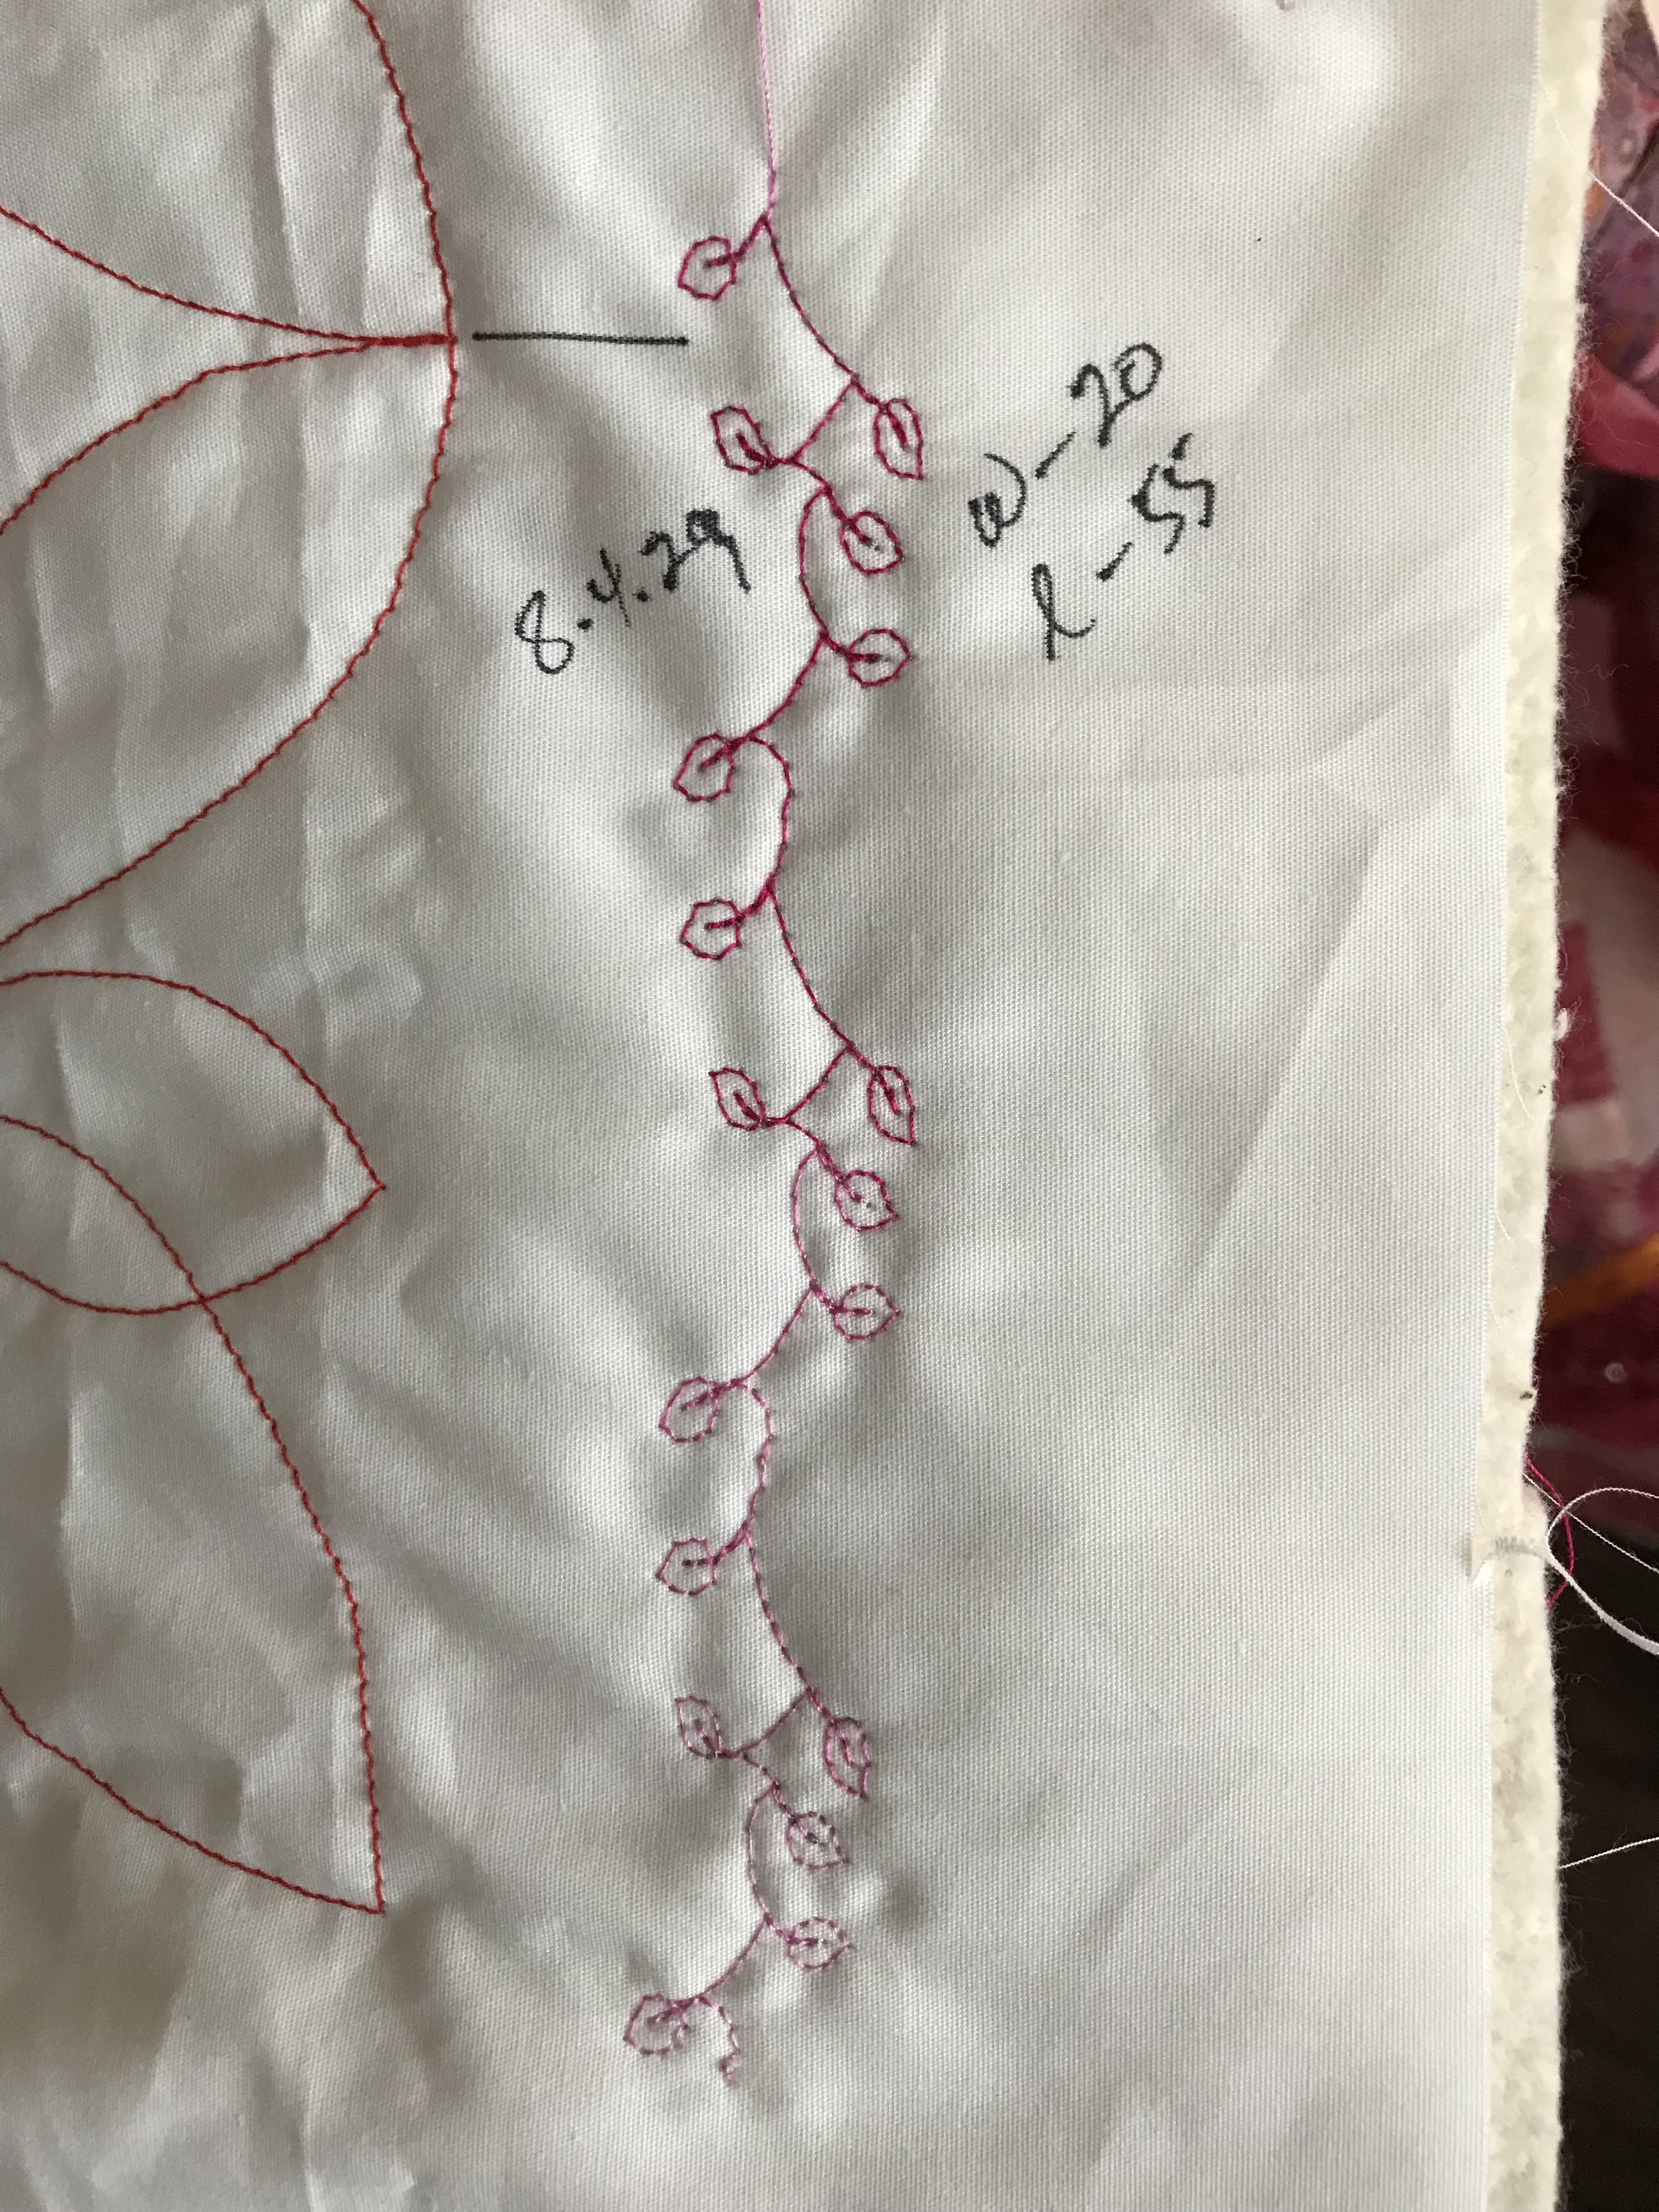
I tested a number of decorative stitches for the narrow border – I’ve decided to use # 8.4.29 on my Pfaff Creative Icon – modified to 20mm width, 55mm length – that should complement the overall embroidery design – because the narrow border is pale I think I will use a variegated light grey thread (Aurifil 4060) which won’t show much. The pink variegated thread I’m using for the quilting would stand out too obviously.

Stitch for Narrow Border

Yesterday, I dropped into one of my local sewing/quilting shops. At the counter there was a clay magnetic tool holder in the shape of a flower – I thought about buying one, but I knew I had a number of rare earth magnets on my fridge at home so I decided to see what I could create.

Wearable Magnetic Tool Holder

Wearable Magnetic Tool Holder – II

When I’m quilting I use three tools – small scissors, fine tweezers, and a self-threading needle (for burying thread ends at the start and finish of each embroidery). While I’ve always kept them close at hand on the sewing table – actually having them on my person means not having to look/feel for them at beside the machine. I’ve been wearing my improvised tool holder today while I worked – definitely useful. The holder isn’t large, but an adequate size and strong enough to hold my tweezers and small scissors. The padding allows me to store the needle while I’m working so I don’t have to hunt for it among the other stuff beside the machine!

Construction: I started by cutting out a 6″ square of fabric and batting, a circle from the lid of a plastic kitchen container. I taped one rare-earth magnet to one side of the plastic disc, then cut the fabric out in a circle (3/4″ larger than the plastic disc), stitched a running thread around the edge, pulled it taught and finished off with another smaller covering circle tacked over the back of the padded one. Then I embedded the second magnet between two pieces of clear plastic, taped it in place, cut out a circle of fabric and stitched the edge together. The second magnet is slipped under whatever I’m wearing to connect with the magnet on the larger, padded disc which gets worn on the outside.

So back to work on the quilt tomorrow.

It’s All About Pink – IV

I haven’t worked on this quilt since Dec. 31. I’ve read 5 mystery novels, watched some interesting series on TV, added elastic to the bottom of two sweaters, continued repairing socks in the “repair socks” basket (five pairs completed, six left to do), knit a new pair of socks and close to finishing the first sock for another pair. But no sewing on this quilt.

However, yesterday, I pieced the quilt back. Today, I pinned the quilt sandwich.

It’s All About Pink – IV

Yesterday, I also set up an embroidery to fit a 150mm x 150 mm block; I still need something for the borders – I’ll probably use one of the decorative stitches for the narrow border and something related to the block design for the out border – have to do that now.

And then the quilting in the hoop will begin.