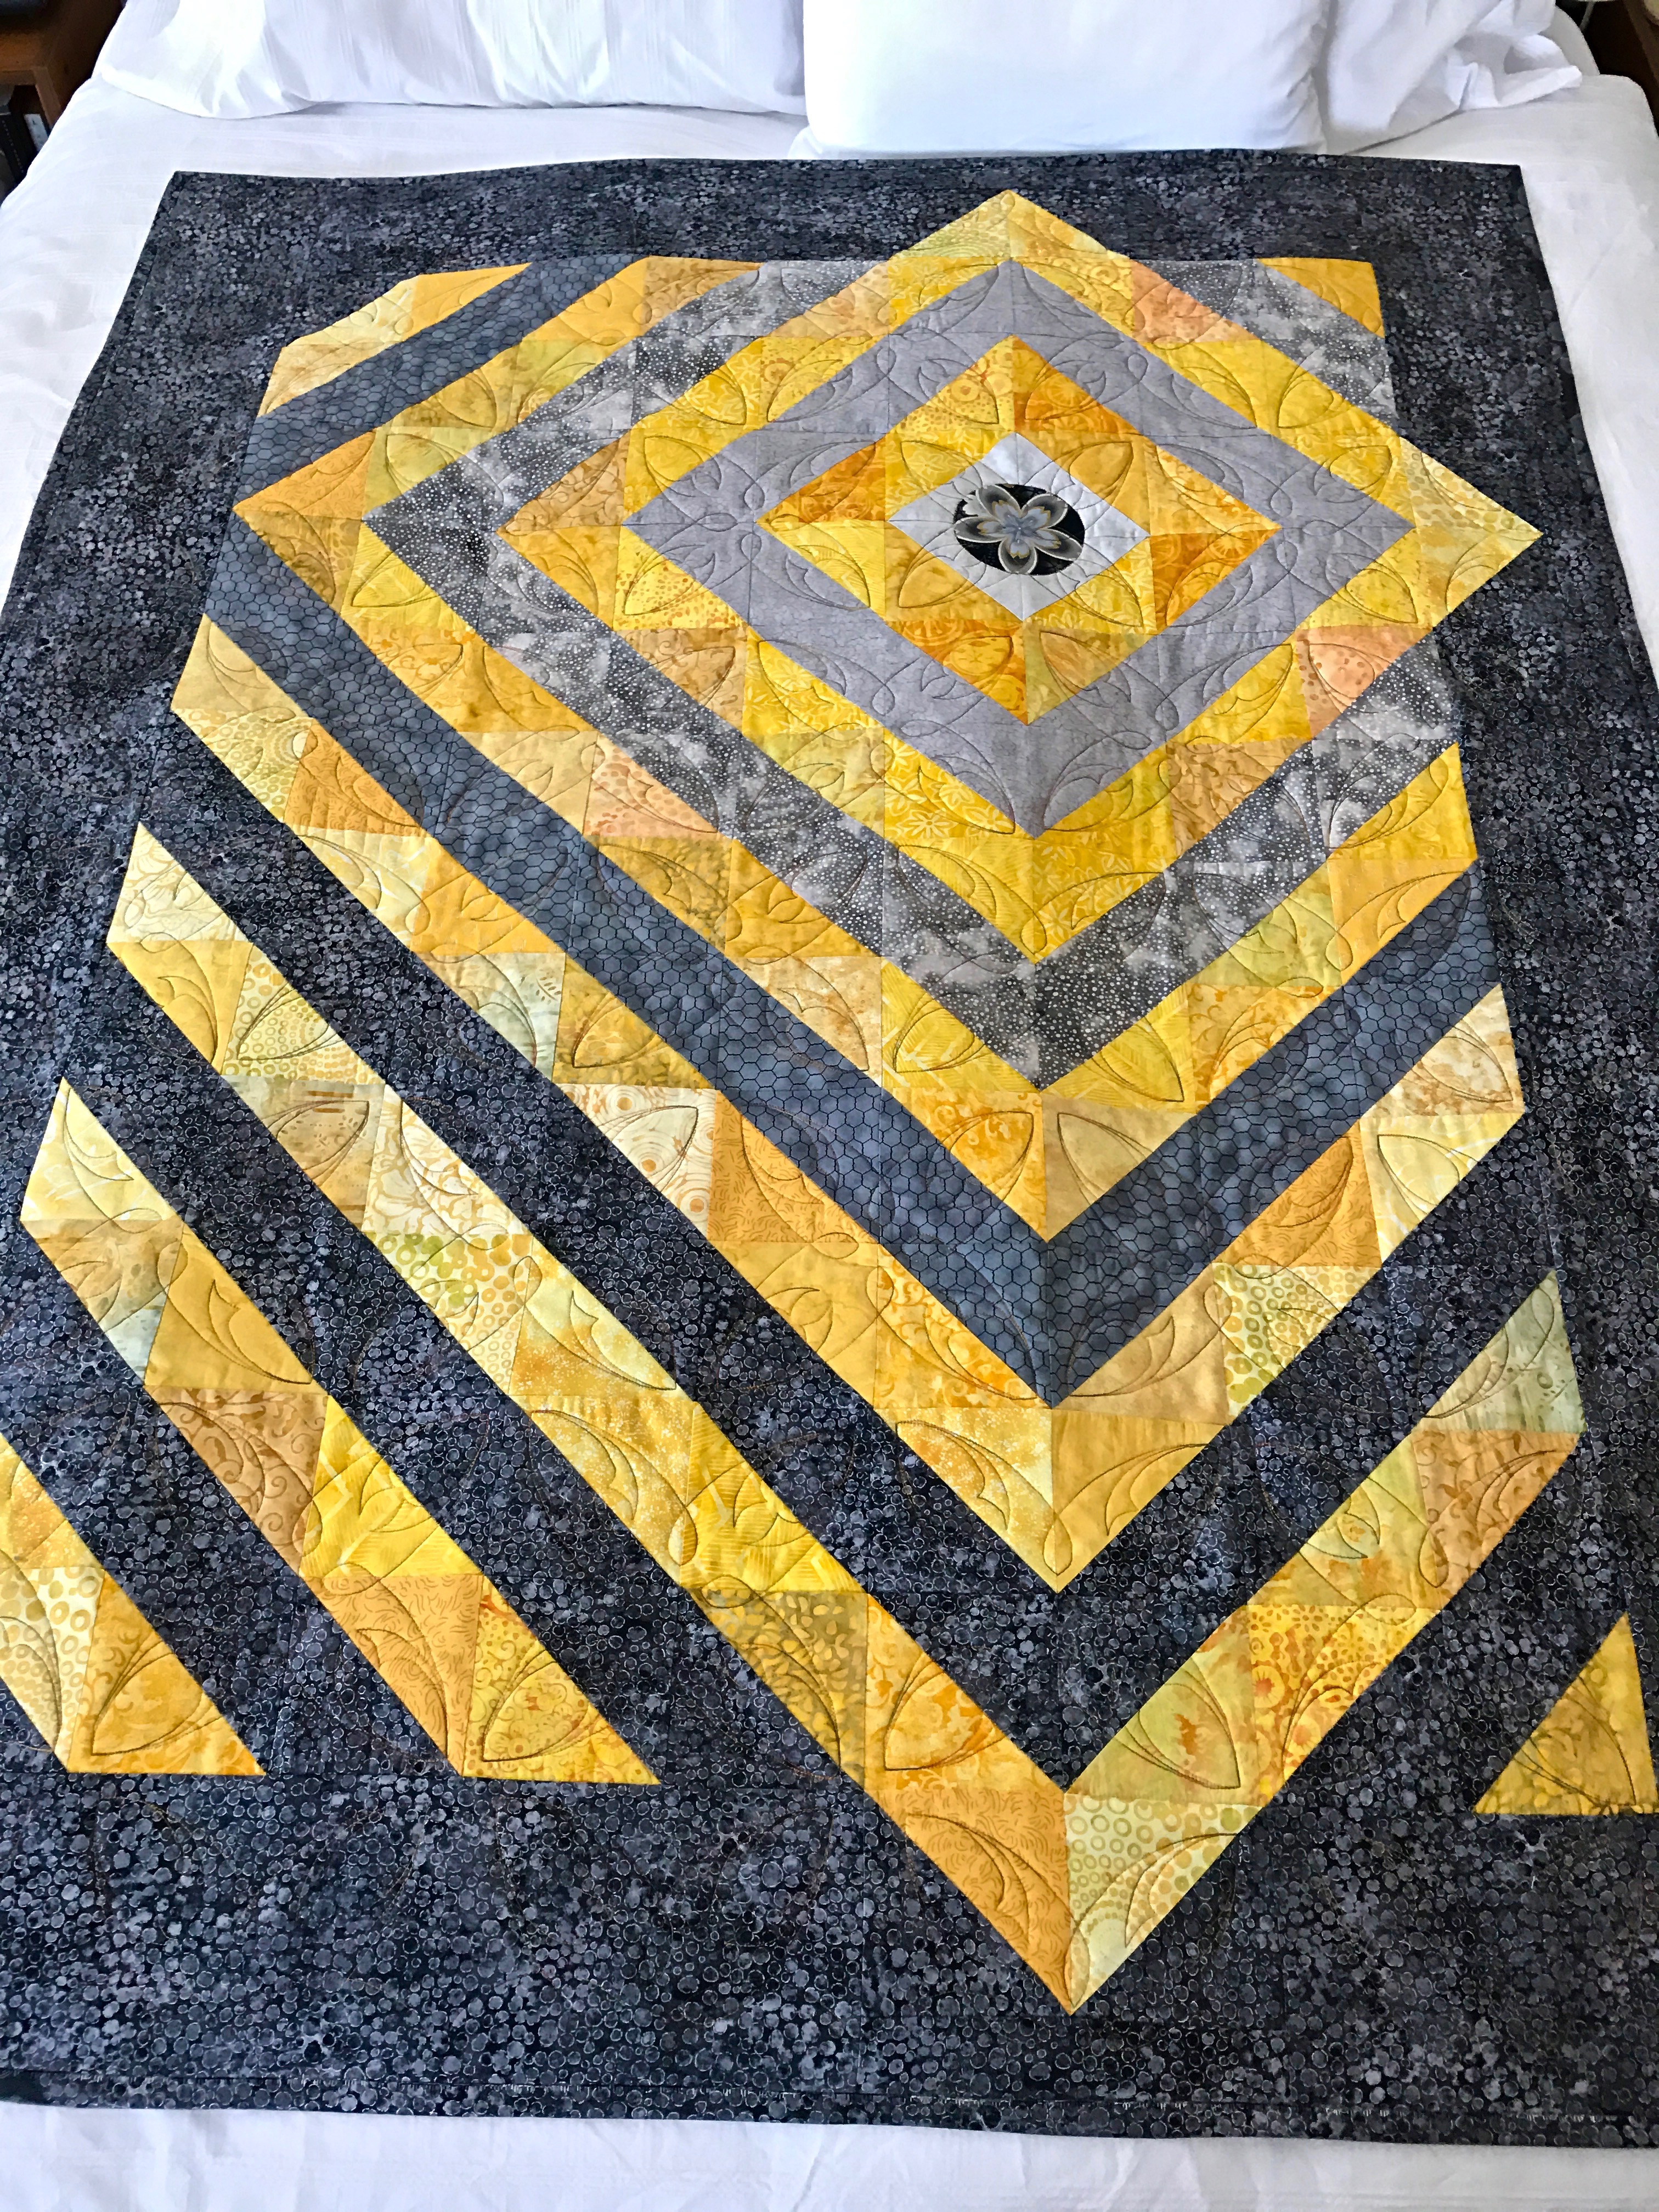
The grey-yellow quilt is finally quilted and bound. Before I left for Toronto, I’d assembled the quilt sandwich, pinned the layers, intending to get back to work on it as soon as I got home. Didn’t happen. We had a couple of severe snowstorms, I came home with a dreadful cold that triggered my asthma, so I spent the better part of 10 days doing little other than coughing.
Finally, last Monday morning, I managed to go to the pool for my regular water aerobic class (I coughed quite a bit, but managed to breathe well enough to stay for the hour). Afterward, when I got home, I looked at the quilt and decided it was time to get back to work on it.

Quilt Top
I fused and appliquéd the circle detail in position, and quilted the immediate surrounding block but didn’t get much further till the end of the week when I managed to get the rest of the central blocks quilted. Sunday, I quilted the border. This morning, I added the binding and label.

Quilt Back
Done!
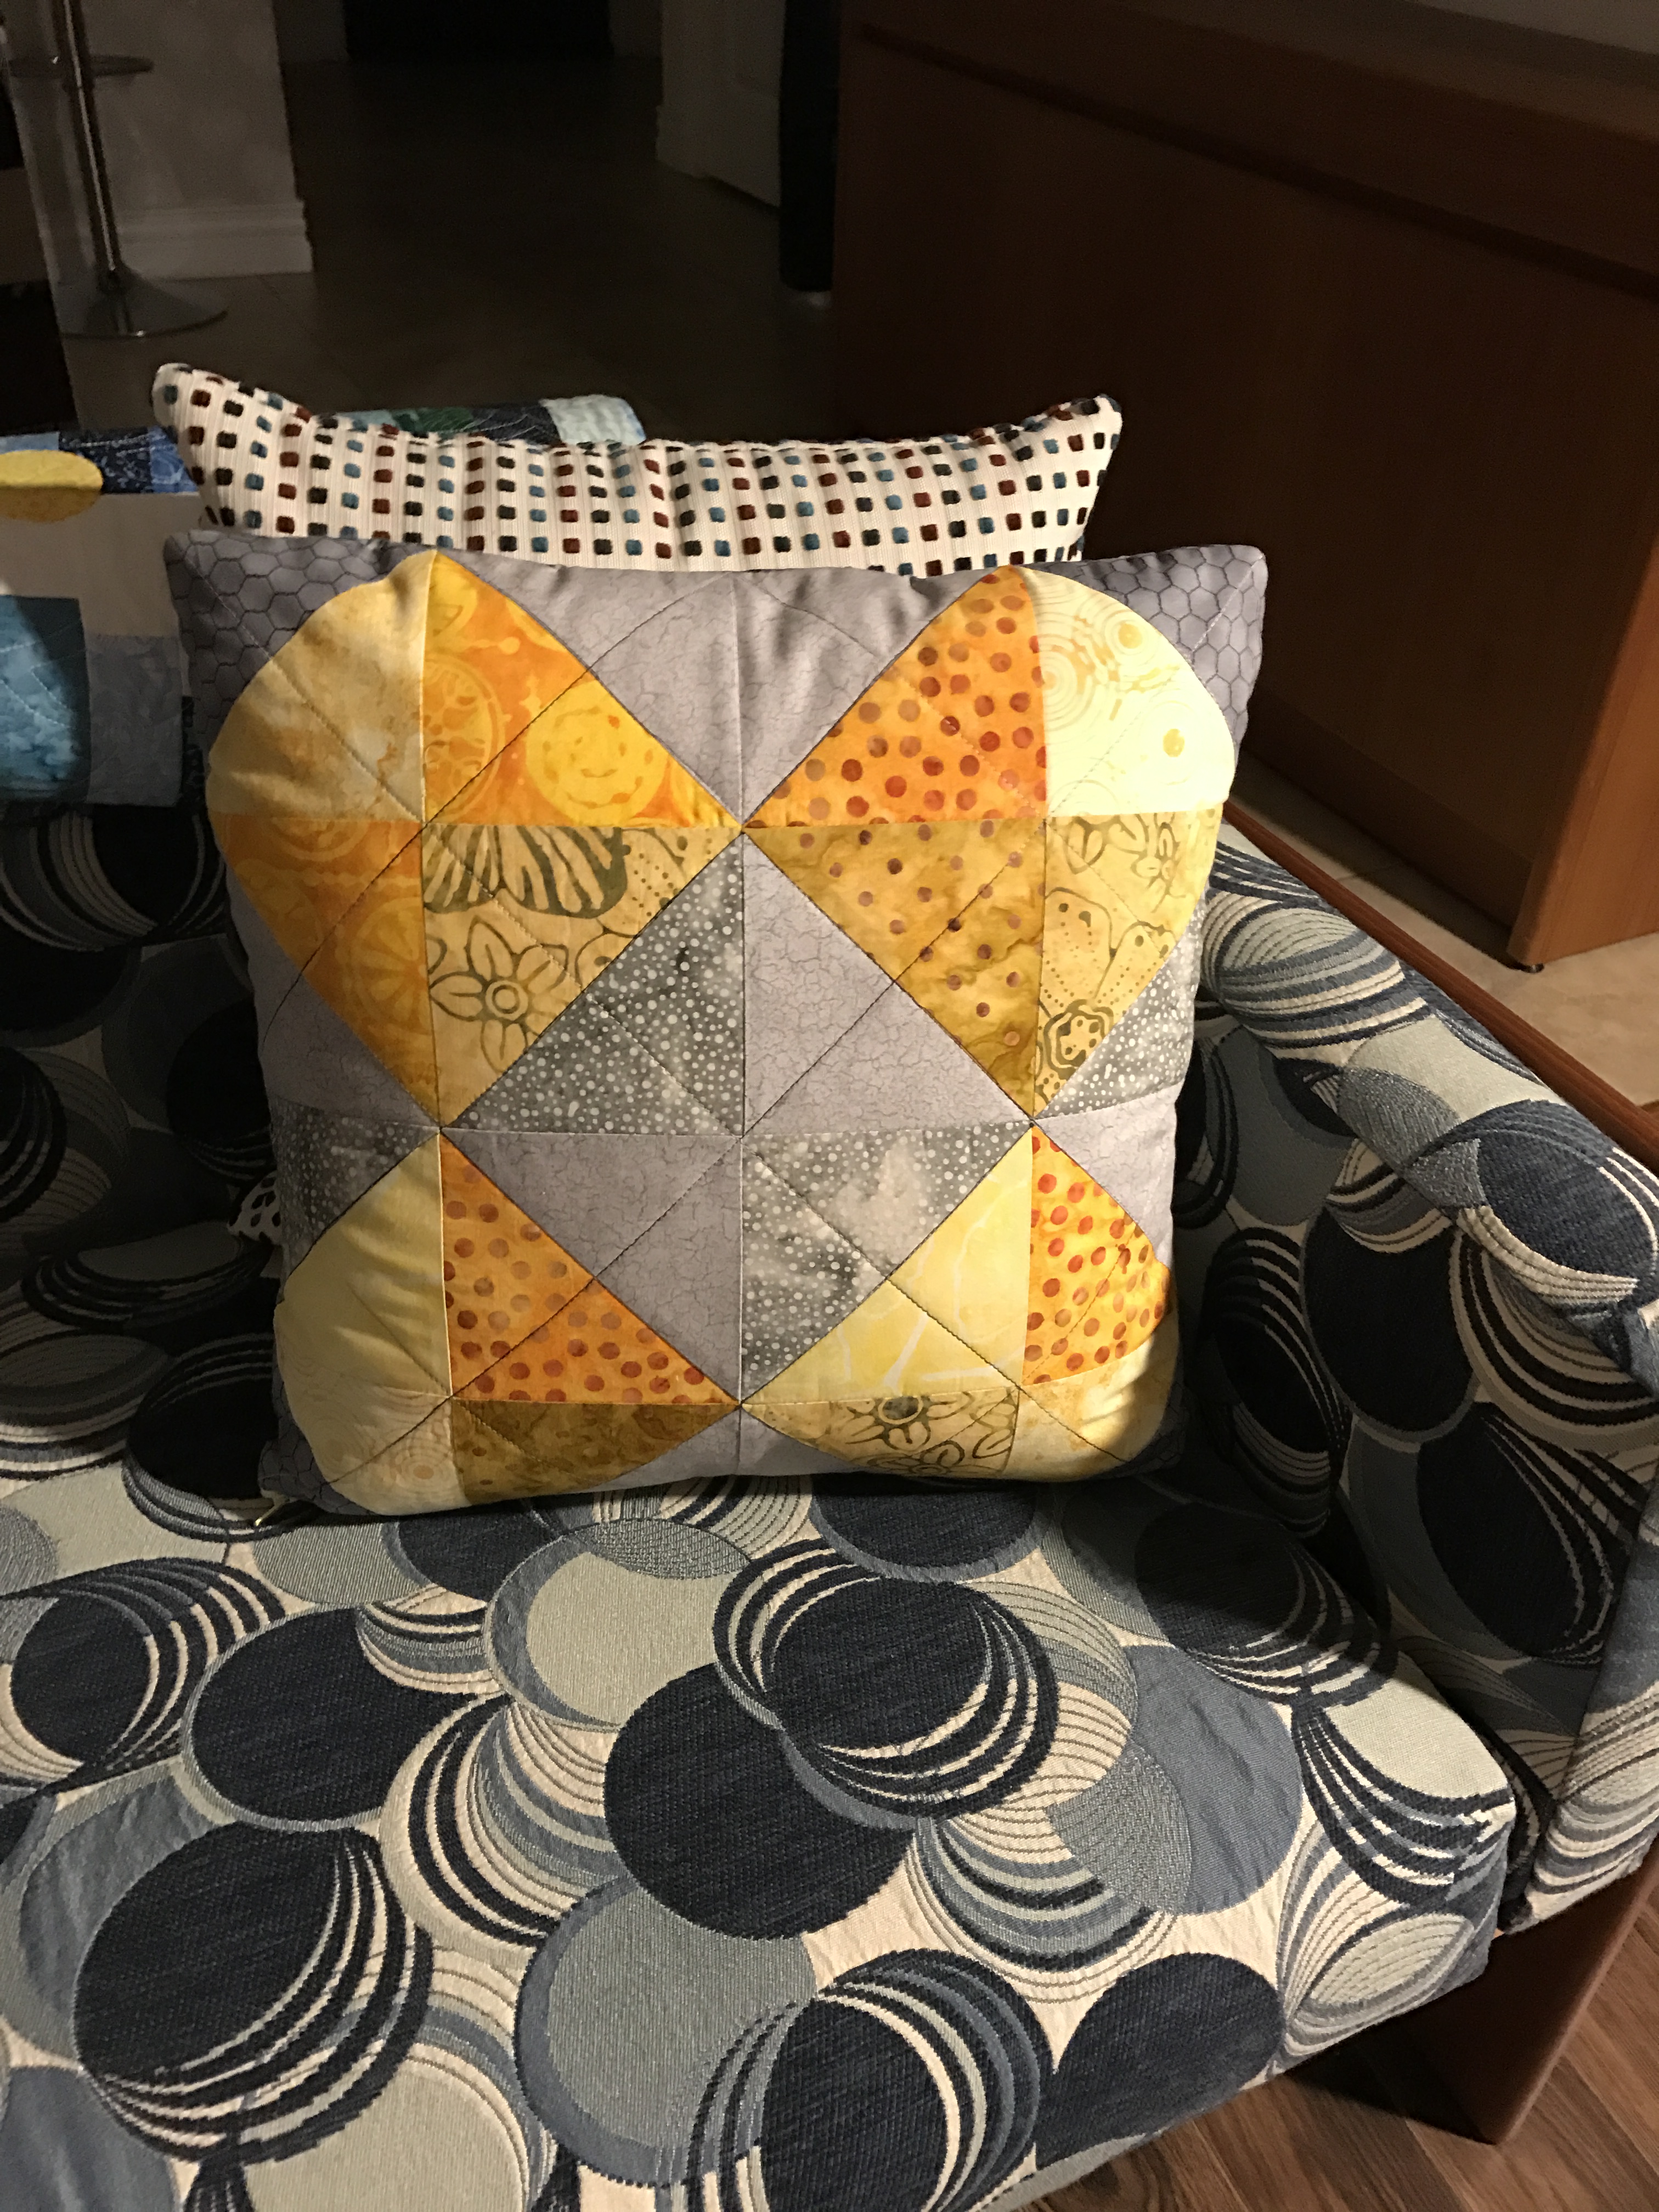
I still had a bunch of half-square triangles left over. I decided to use them for a pillow cover. Last week one of the other sewers in our Friday afternoon knitting/sewing group and I offered to assist those gals interested in making a pillow cover with piecing some half-square triangles into a 4 x 4 block. Five indicated some interest so Debbie and I are planning a sewing Friday in my sewing studio to make zippered, pieced pillow covers.

Pillow Top
I started by gathering together all my leftover blocks – I had 13 constructed which I laid out in a 4 x 4 array – I made another four blocks being careful to use the appropriate grey fabrics so I could build some symmetry into my layout. I used my darkest grey in the corners, distributed the other two shades evenly, then sewed the blocks together. I added batting, and quilted along the diagonals to build some stability into the top. Next I cut a 16″ square piece of batik which I also backed with batting and stitched on the diagonal.

Pillow Back
I trimmed the corners of both the top and back, slightly rounding them off, to create the illusion of ‘”squareness” when a 16″ pillow would be stuffed inside the cover. Finally, I added a zipper (a regular zipper, not an invisible one) to one end, unzipping it before sewing the two sides and the opposite bottom end.
Our instructions to the women were to purchase just two contrasting fabric from which to construct their pillow top. Here, I’ve used several yellows and three different greys. So, I decided, my next pillow cover had to be constructed from just two fabrics. I dug through my stash and came up with a somewhat dark blue/turquoise batik but I had nothing light to complement it, so back to the fabric store to buy 1/4 m. of a light batik.
I cut each of my two 10″ width-of-fabric pieces into four 10″ squares – paired light and dark blocks, marked the diagonals, placed right sides together and stitched 1/4″ on both sides of the diagonal lines. Then I cut along the diagonals and both the horizontal and vertical mid-lines to get eight 4 1/2″ half-square triangles from just two 10″ blocks! All I need for one pillow top is four 10″ blocks (two of each fabric). I’ve got those done and laid out ready to stitch, which I’ll do tomorrow.
I have already cut fabric for the pillow cover back, and batting squares for both top and back. I still could use an 18″ invisible zipper (I like using zippers that are longer than I need so I can ignore the slide when sewing them in place, trimming them after I’ve completed the side seams). It’s not that I don’t have tons of #3 zipper tape (and slides) from which to make an appropriate length zipper, but if I use an invisible one, you’ll barely see it when I’m finished. Besides, both Debbie and I think the gals will be pleased with themselves for having actually sewn in an invisible zipper which is not difficult to do.
So more tomorrow after I finish my second demonstration pillow.