Just finished the borders (with mitred corners) and I’m happy with the colour flow they provide. The hexagons bring out the hexagon blocks / the dropping dots showcase the dots within the panel – and the many fabric joins don’t show and when the borders are quilted they won’t catch the eye.
Next step: edge stitch the appliqué – I’m going to use a pale grey Invisifil thread which should disappear into the fabric. I wish I had a golden shade but I don’t and it doesn’t make sense to order one online (even on Amazon.ca the cost is prohibitive!). So, the pale grey it is with a 60 universal needle – very fine (which I have in my needle collection).
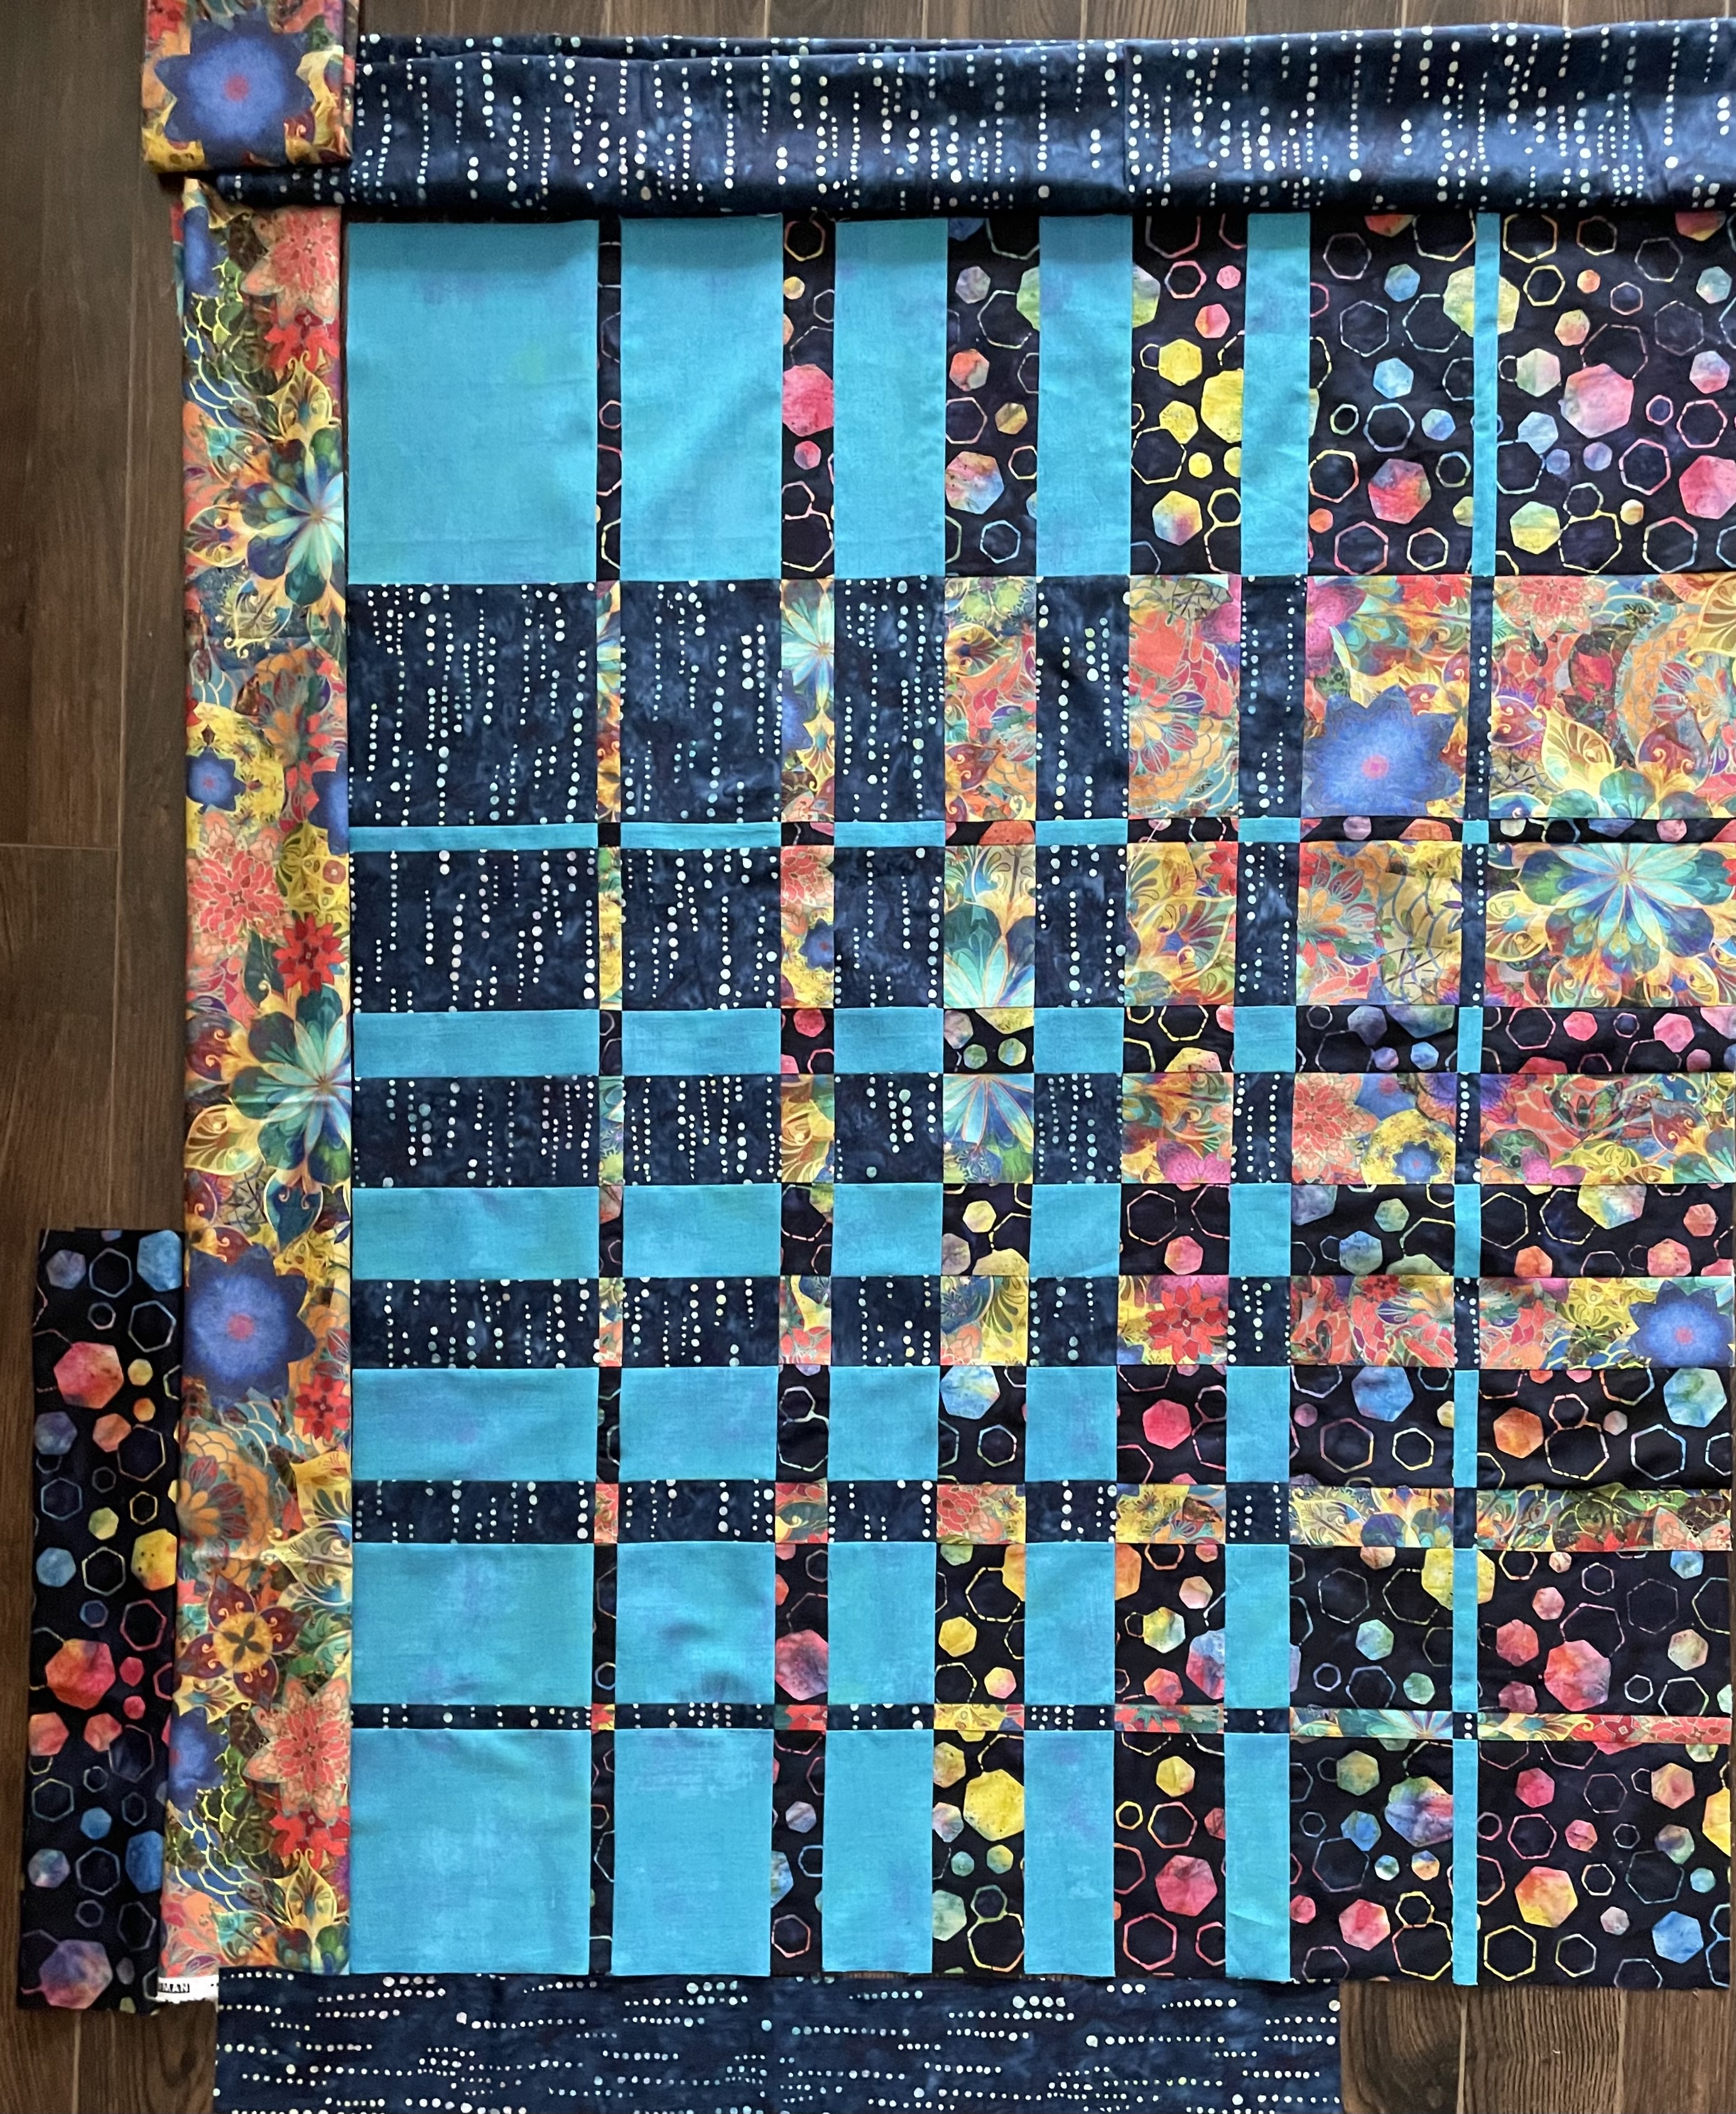
Yesterday, I added the gold and turquoise borders to the panel. Today, I spent a lot of time avoiding the next step because if I wanted the dots fabric to go in the right direction I was going to have to waste a lot of it and I didn’t have a whole lot to work with. I really wanted to border the whole panel with the dots – but I barely had enough to complete two sides and even then I had to do a lot of piecing to get enough length! That fabric is now attached with the mitred corner in the bottom left.
I’ve cut two strips of the hexagon fabric for the other two sides – I need one more to finish the corner. I have plenty of that fabric – not a problem.
I still have to decide at what point to edge stitch (and embellish) the appliqué – I could do it as soon as the borders are complete; I could do it after assembling the quilt sandwich – when I do it depends on how I think about quilting the whole project. The previous convergence quilts I’ve done were quilted overall in the hoop on the embroidery machine. I’m not sure how that will look with the appliqué, however. Stitching-in-the-ditch won’t do it, though because that leaves the larger blocks unquilted space. So I will probably choose to quilt in the hoop which means I should edge stitch the appliqué before assembling the back with what leftover bits of fabric I have.
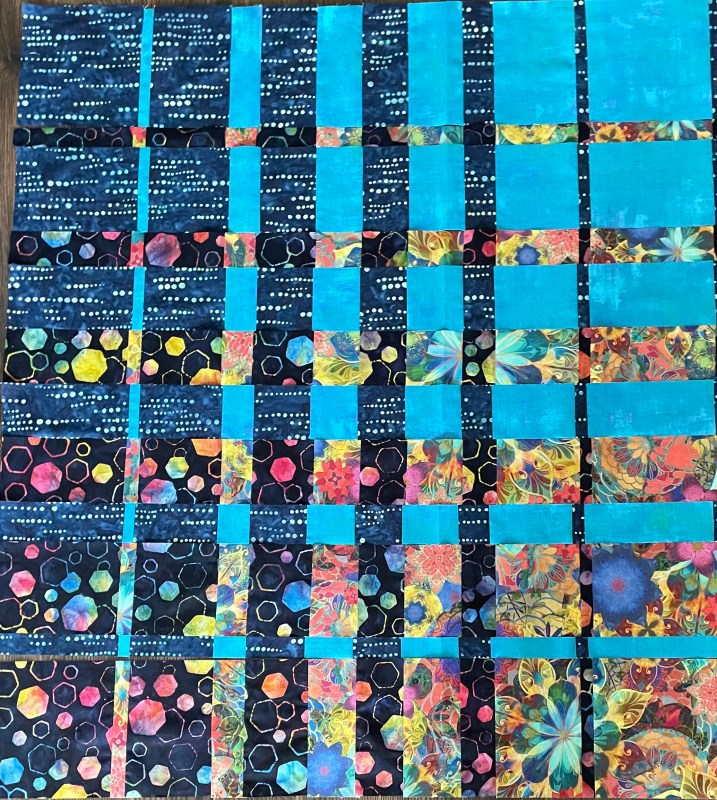
First thing I did today was to recreate the dots/turquoise pairing strips setting them up so when interleaved with the flowers/hexagons the dark fabrics would be opposite one another, not adjacent. My goal was to end up with a rectangular rather than a square panel. I accomplished that by adding a final 9″ row of the dots/turquoise pairing to one end to make the block longer.
I have just finished assembling the panel – 35 x 44 – not quite large enough for a lap quilt. I want to end up with something closer to 48 x 60. I can can obviously add borders – 7″ all around would give me a finished size of 49 x 58. If the borders were a bit asymmetrical I could fudge the final size closer to 60″ in length.
However, first I need to sort out a narrow framing border around the panel to set it off from the borders which I can then assemble by piecing the original four fabrics. So back to the stash to see what I have that might close off the panel in an interesting way.
I’m also going to appliqué some flowers from the yellow fabric over the turquoise blocks at the bottom to bring that colour to that bottom right corner (in the photo on the left – I must have stood on the opposite side of the panel when I took the second photo!).
Afternoon Update
Panel With Fused Appliqué
I couldn’t leave the panel as it was – I applied some fusible web to the back of floral fabric, fussy cut a bunch of elements, then fused them in place. Now I need to edge-stitch and embellish them before I can go further. I’m definitely happier with those turquoise segments at the bottom partially covered – the appliqués extend the bright colours beyond their quadrant.
OK, I’ve played with Ricky Tims’ convergence quilt idea before. There are a bunch of subtleties to consider and I don’t always see them until I’ve sewn the strips together.
In Convergence #1, I didn’t realize how small the constructed block would be, so to make a decent size lap quilt, I used it on-point, filling the corners with the corresponding fabrics and bordering with something compatible but different. While constructing Convergence #2, I misjudged how the two light colours would go together, cut them the wrong way; but fortunately, I had enough of both fabrics to redo the panel and salvage the quilt. I used the miscut strips from Convergence #2 to construct Convergence #3 by interspersing them with a multi-fabric panel, cut in strips and interleaved with the greys. I lengthened the panel in one dimension to make the resulting quilt a rectangle.
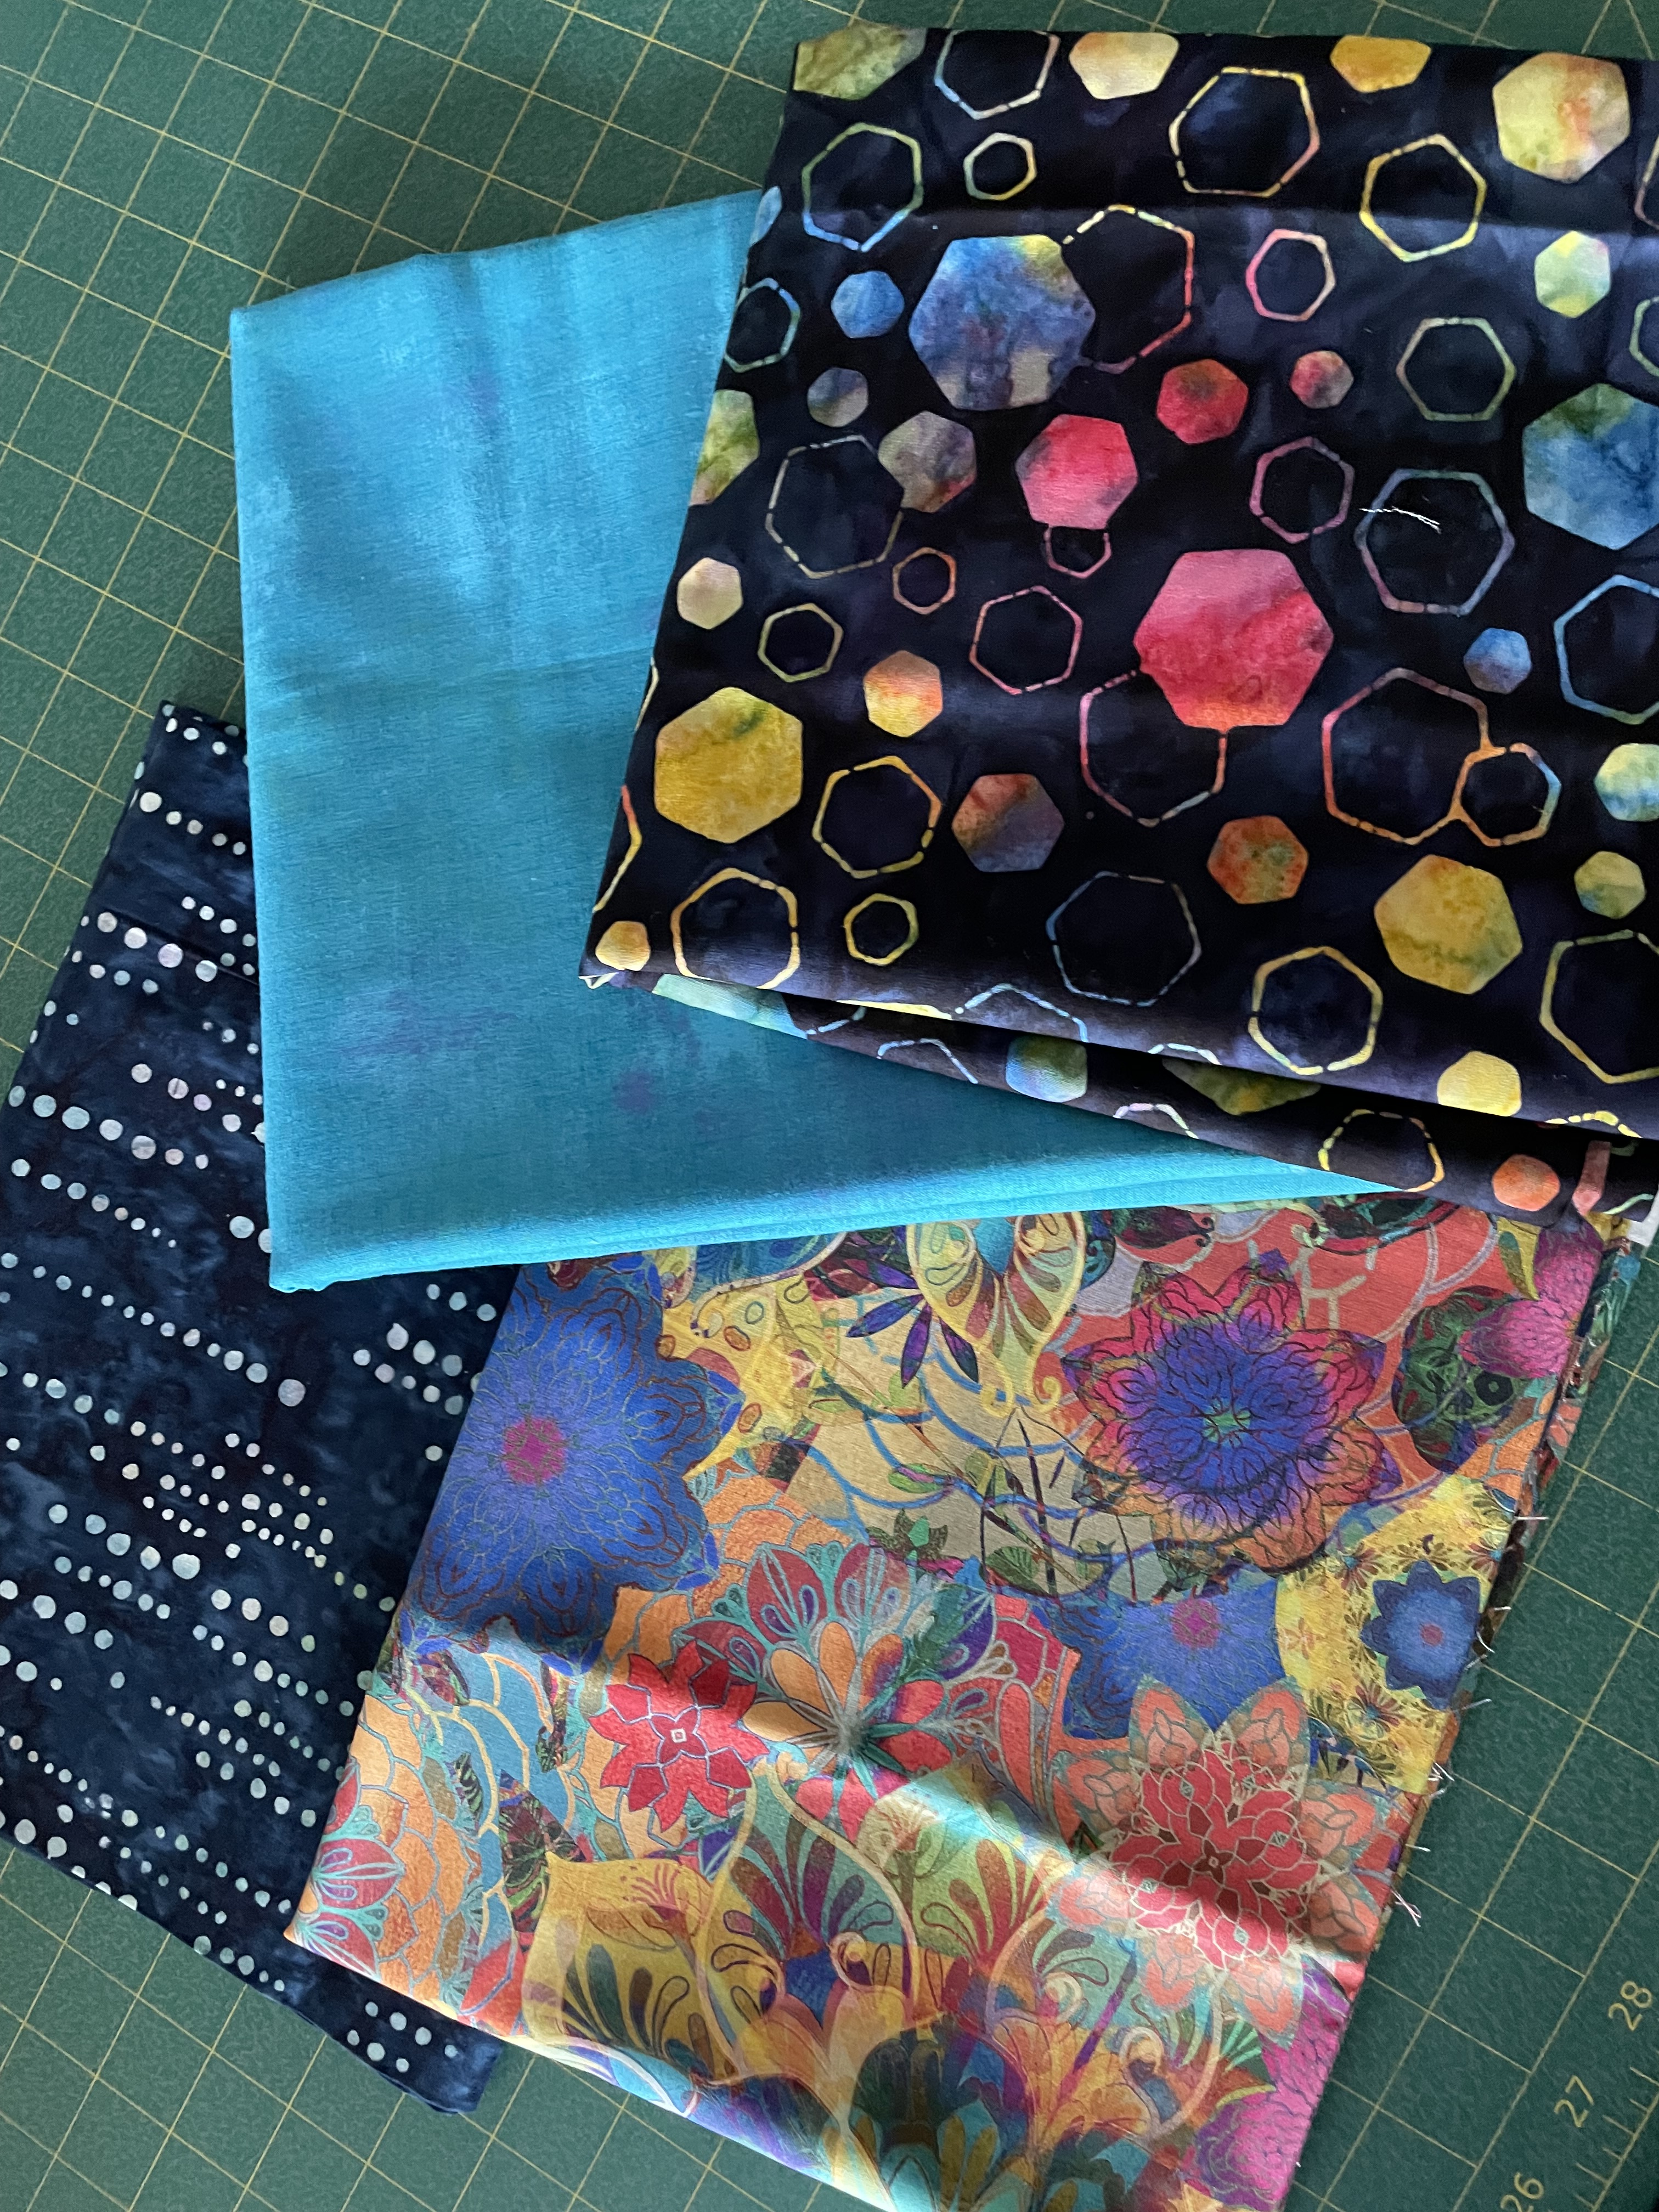
In thinking about another convergence quilt panel I chose four fabrics I thought worked well together (two batiks/two prints):
I thought the convergence array would make a bright panel.
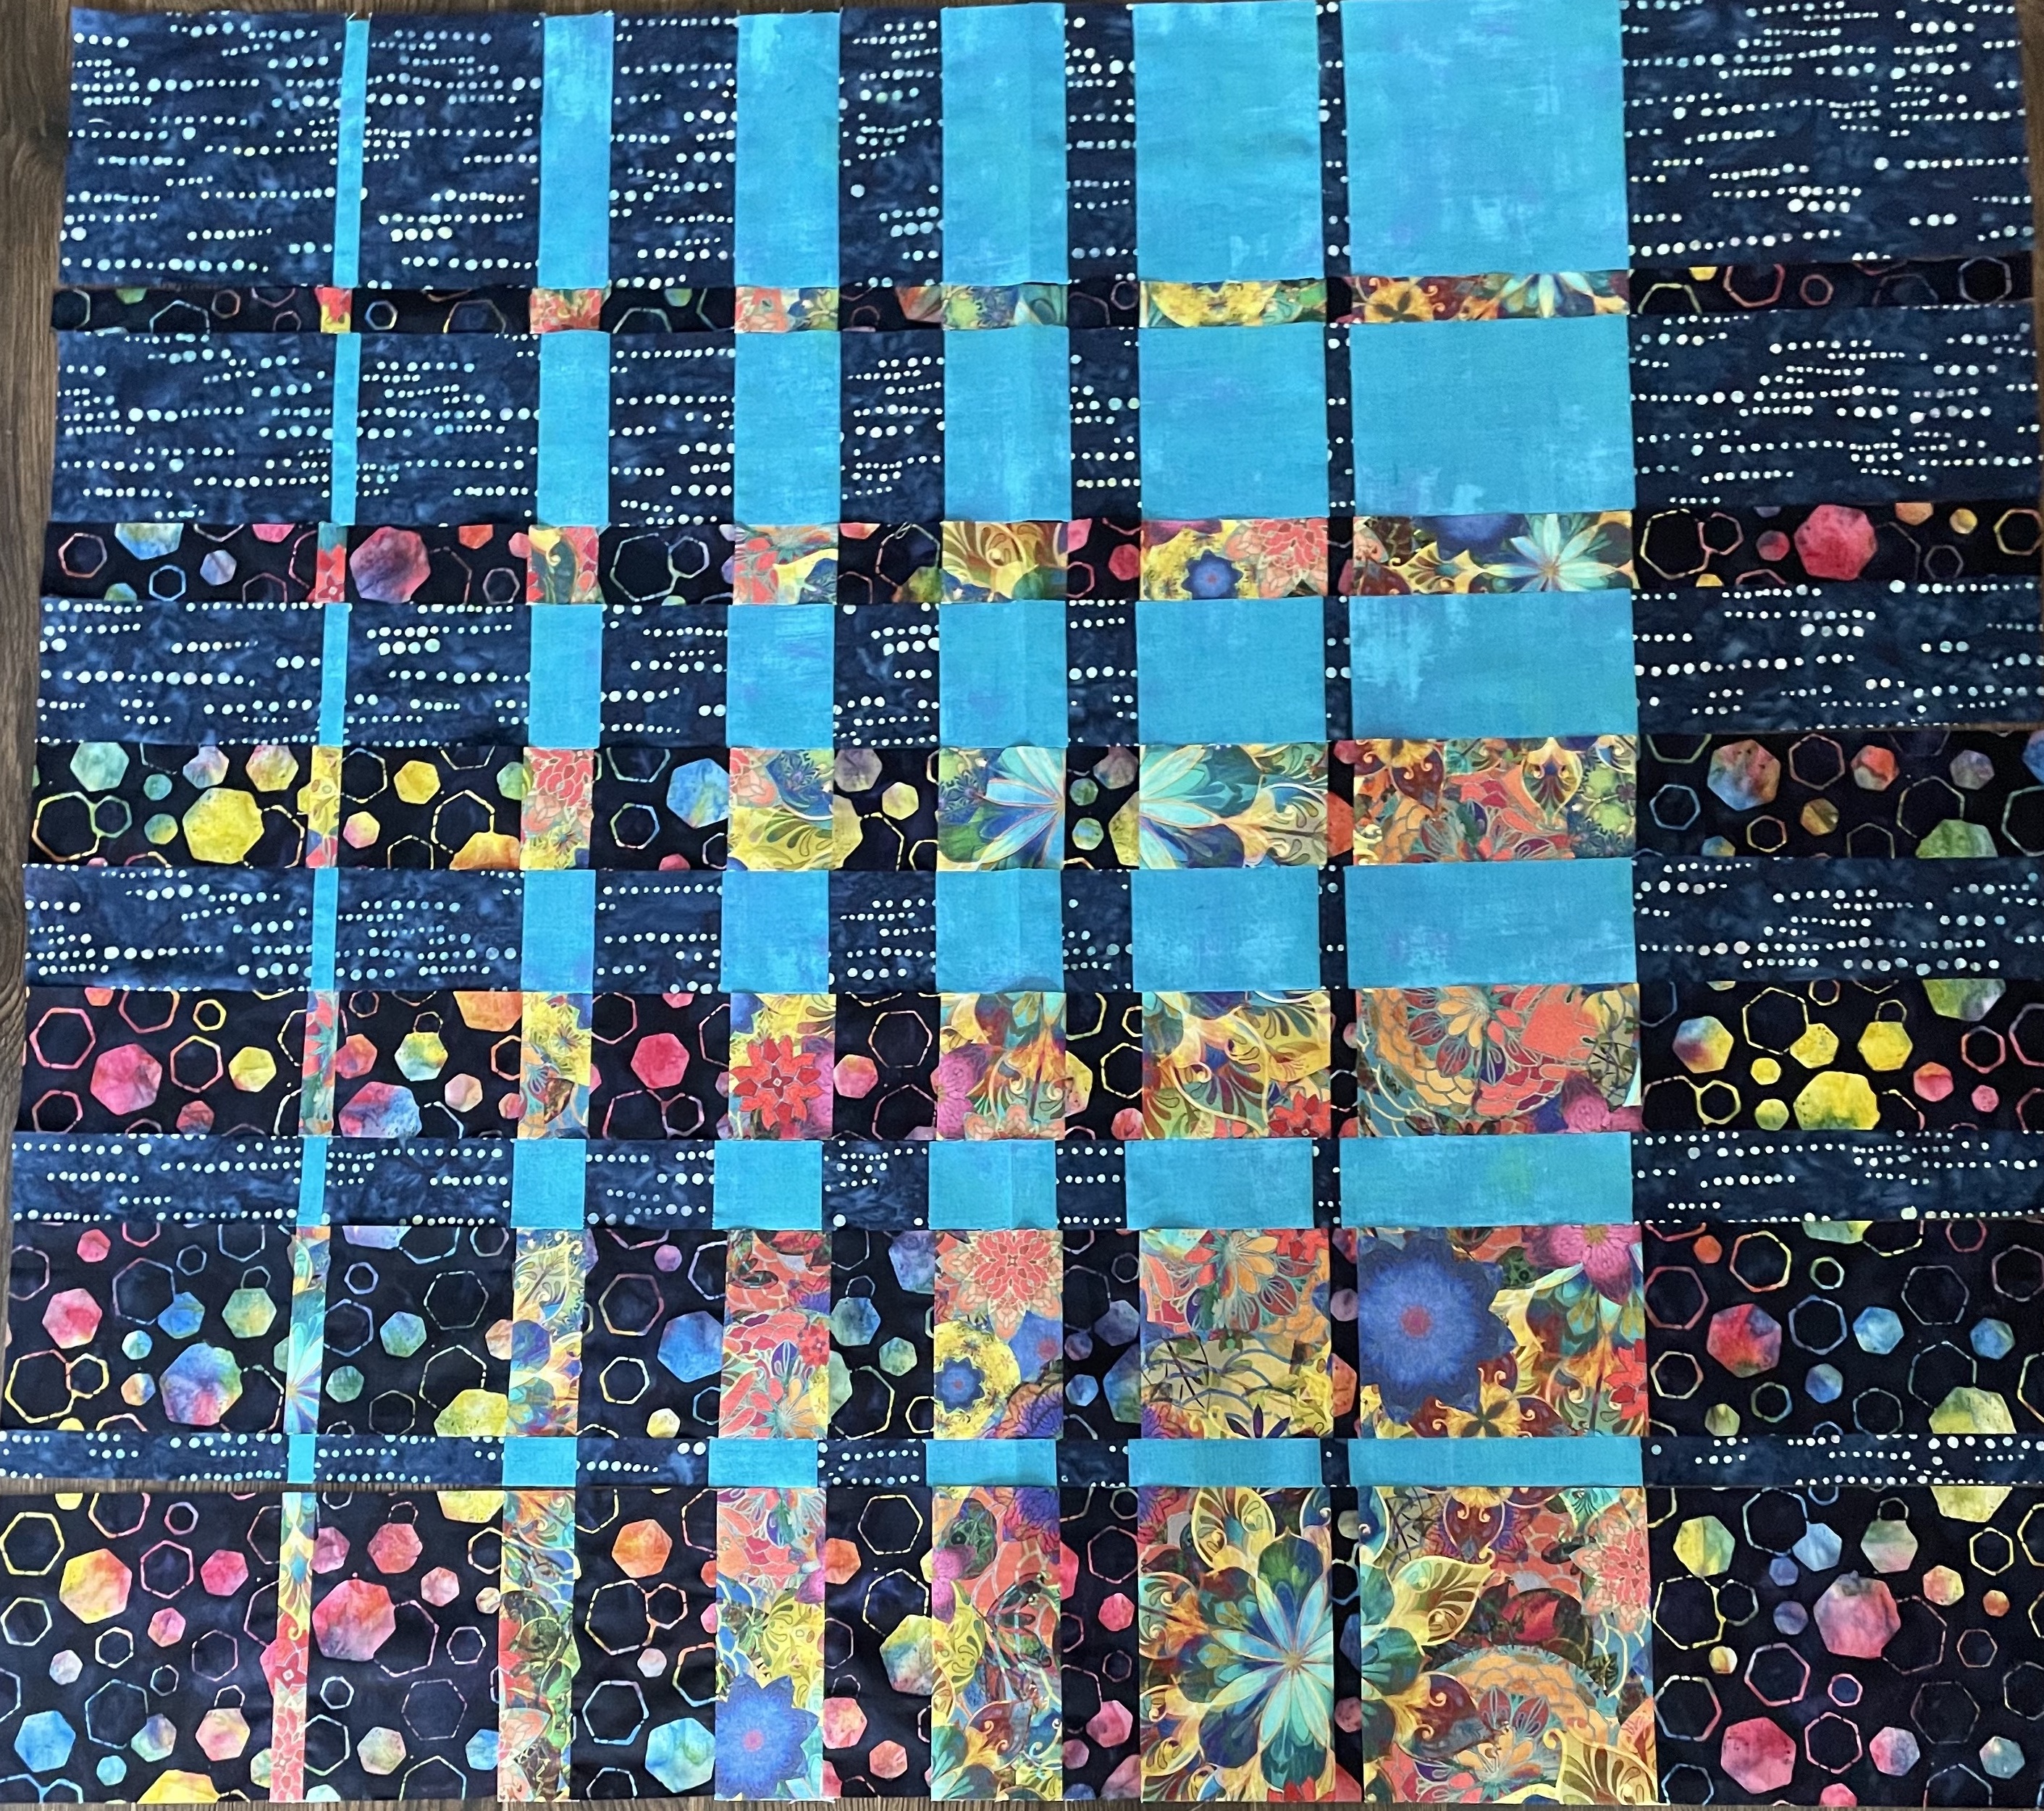
A Square Convergence – Laid Out
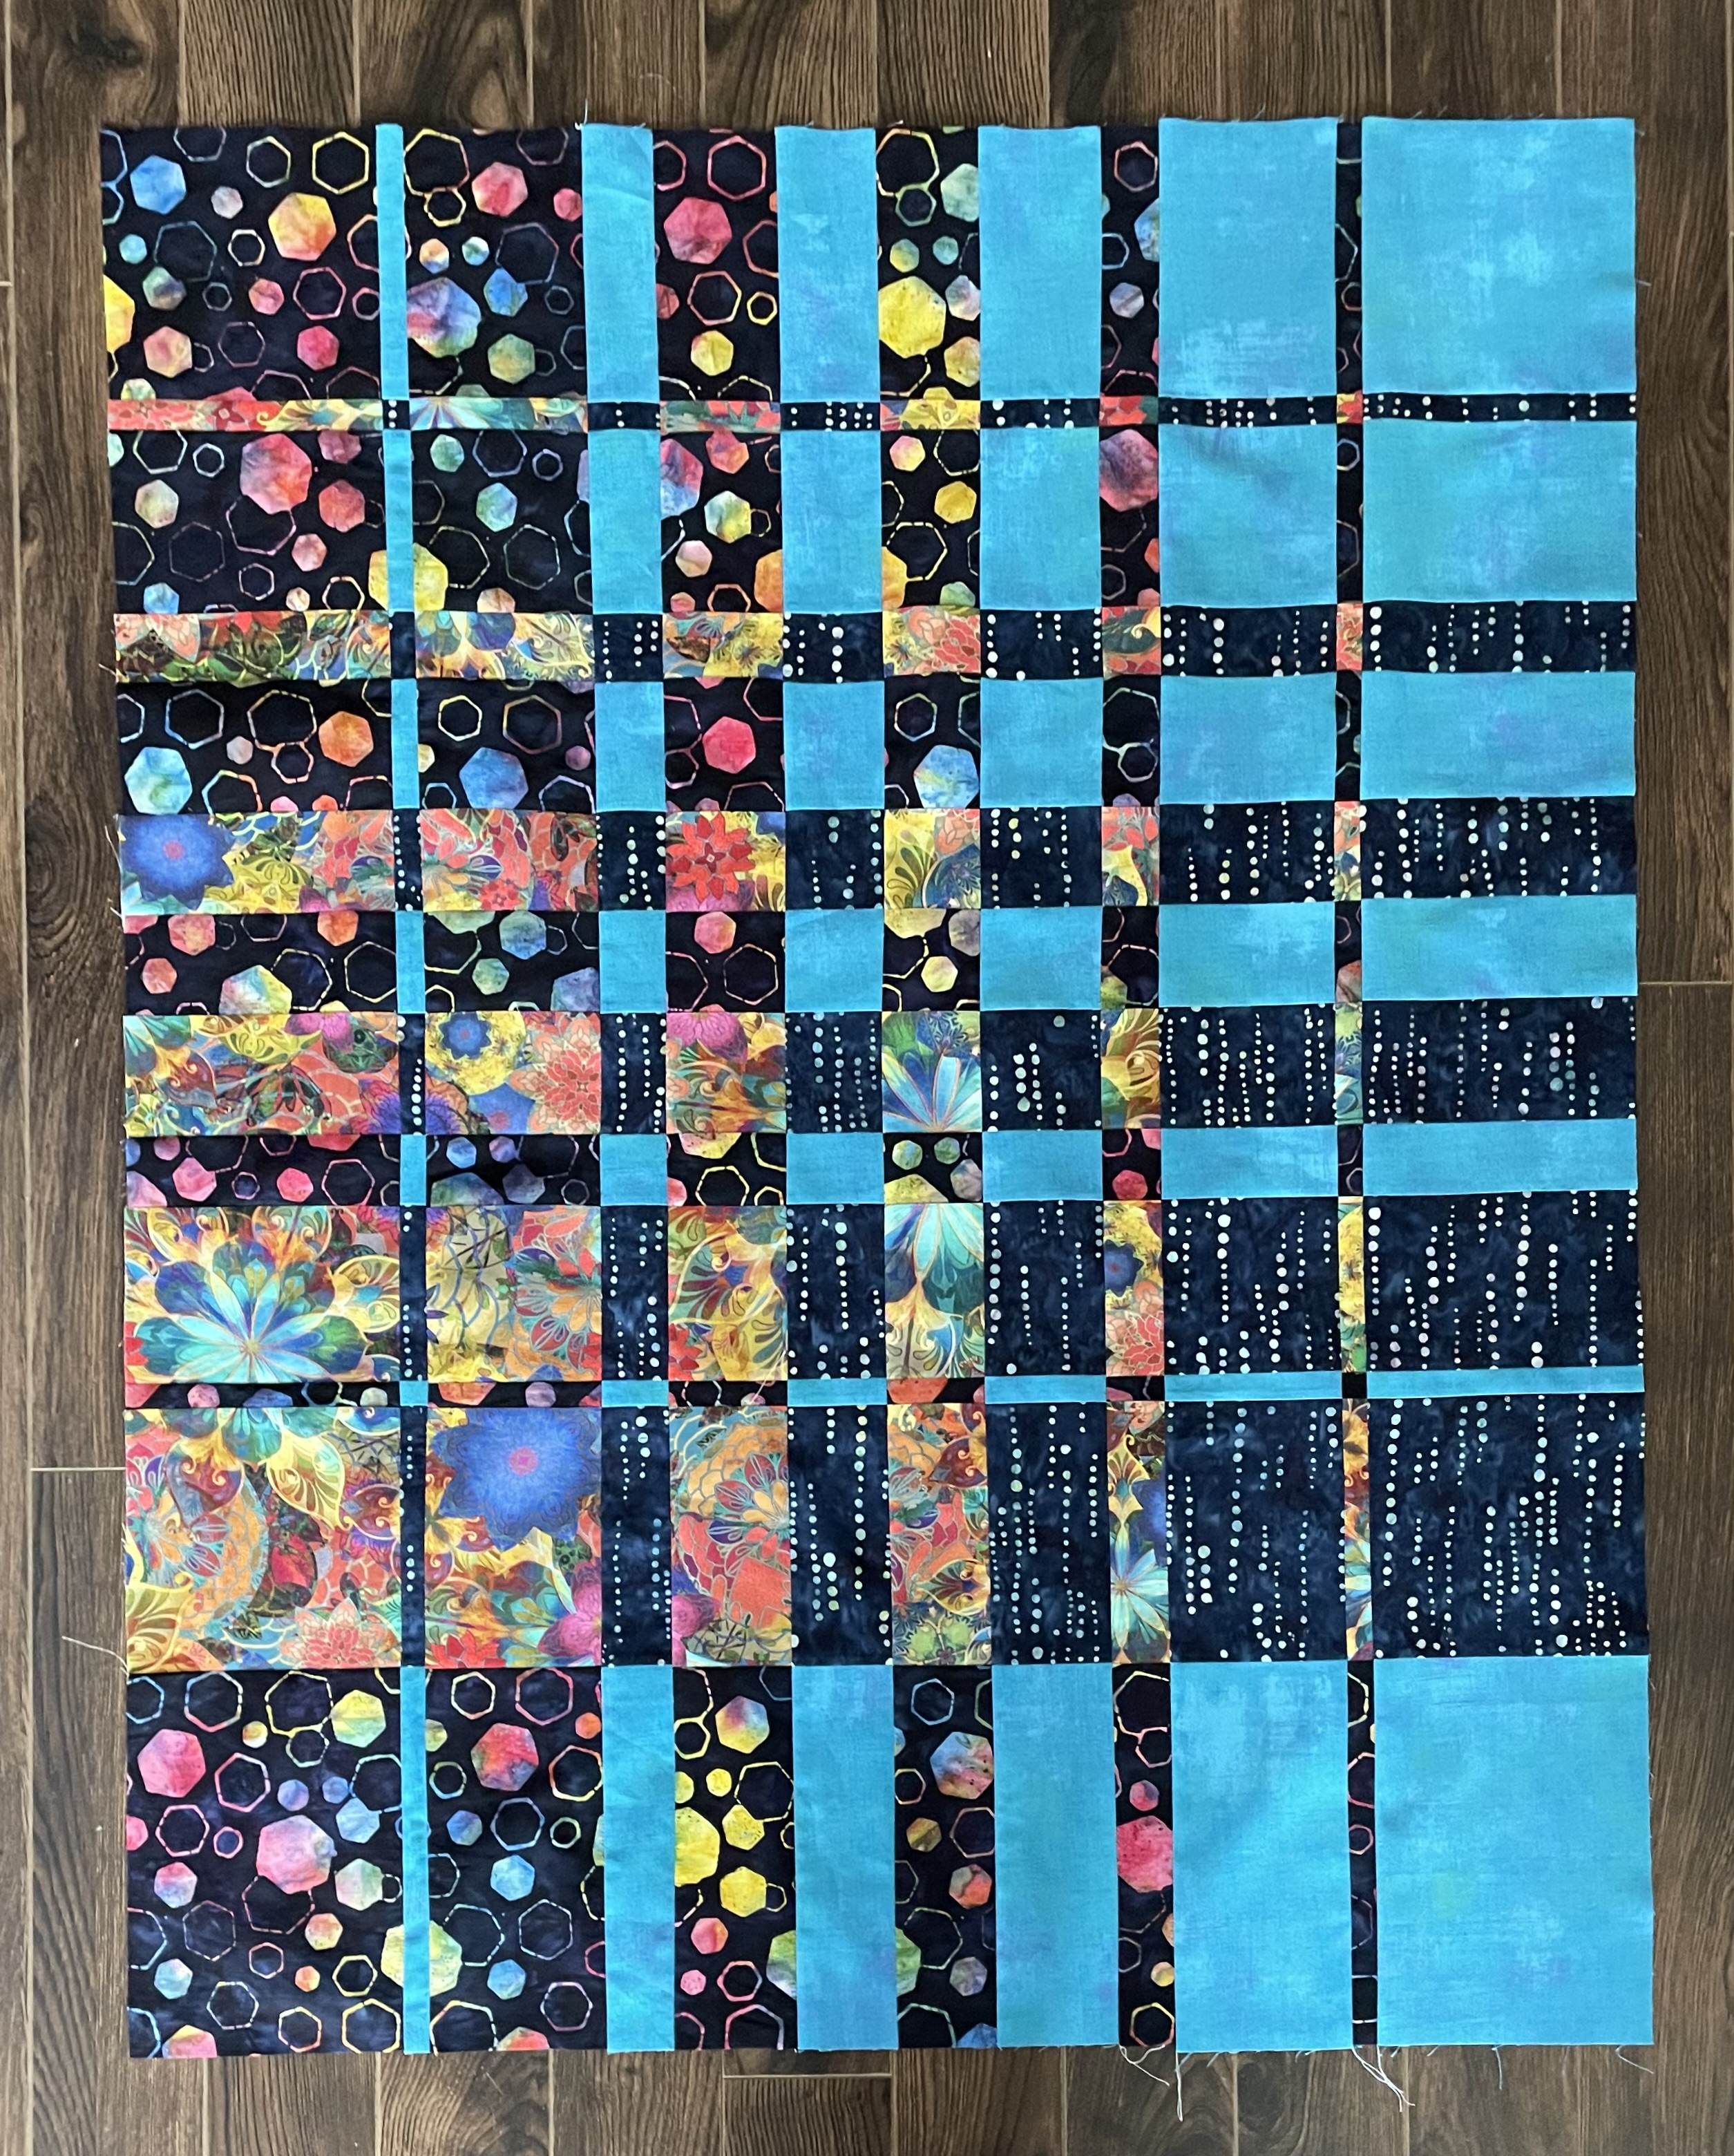
A square block works as you’d expect it to. However, I wanted a rectangular panel so I had added another dark 9″ strip to the contrasting end of each pairing:
Extended Panel – Laid Out
Here’s where I didn’t anticipate the fabric placement – instead of cutting the blue dots/turquoise grunge as I did, I should have reverse the fabrics. I’m going to redo that fabric pairing to see whether the overall panel doesn’t work better. Fortunately I have enough fabric to do that and I’ll set aside the strips I currently have and use them in another quilt top (as I did with Convergence #2 and #3).
I suspect this arrangement could be salvaged were I to choose a good contrasting narrow sashing fabric. I’d intended using the dark hexagonal batik for the outer border but I’m not sure that will work well with this array.
Next task – redo the blue dots/turquoise grunge strips and see what that looks like. Tomorrow!