
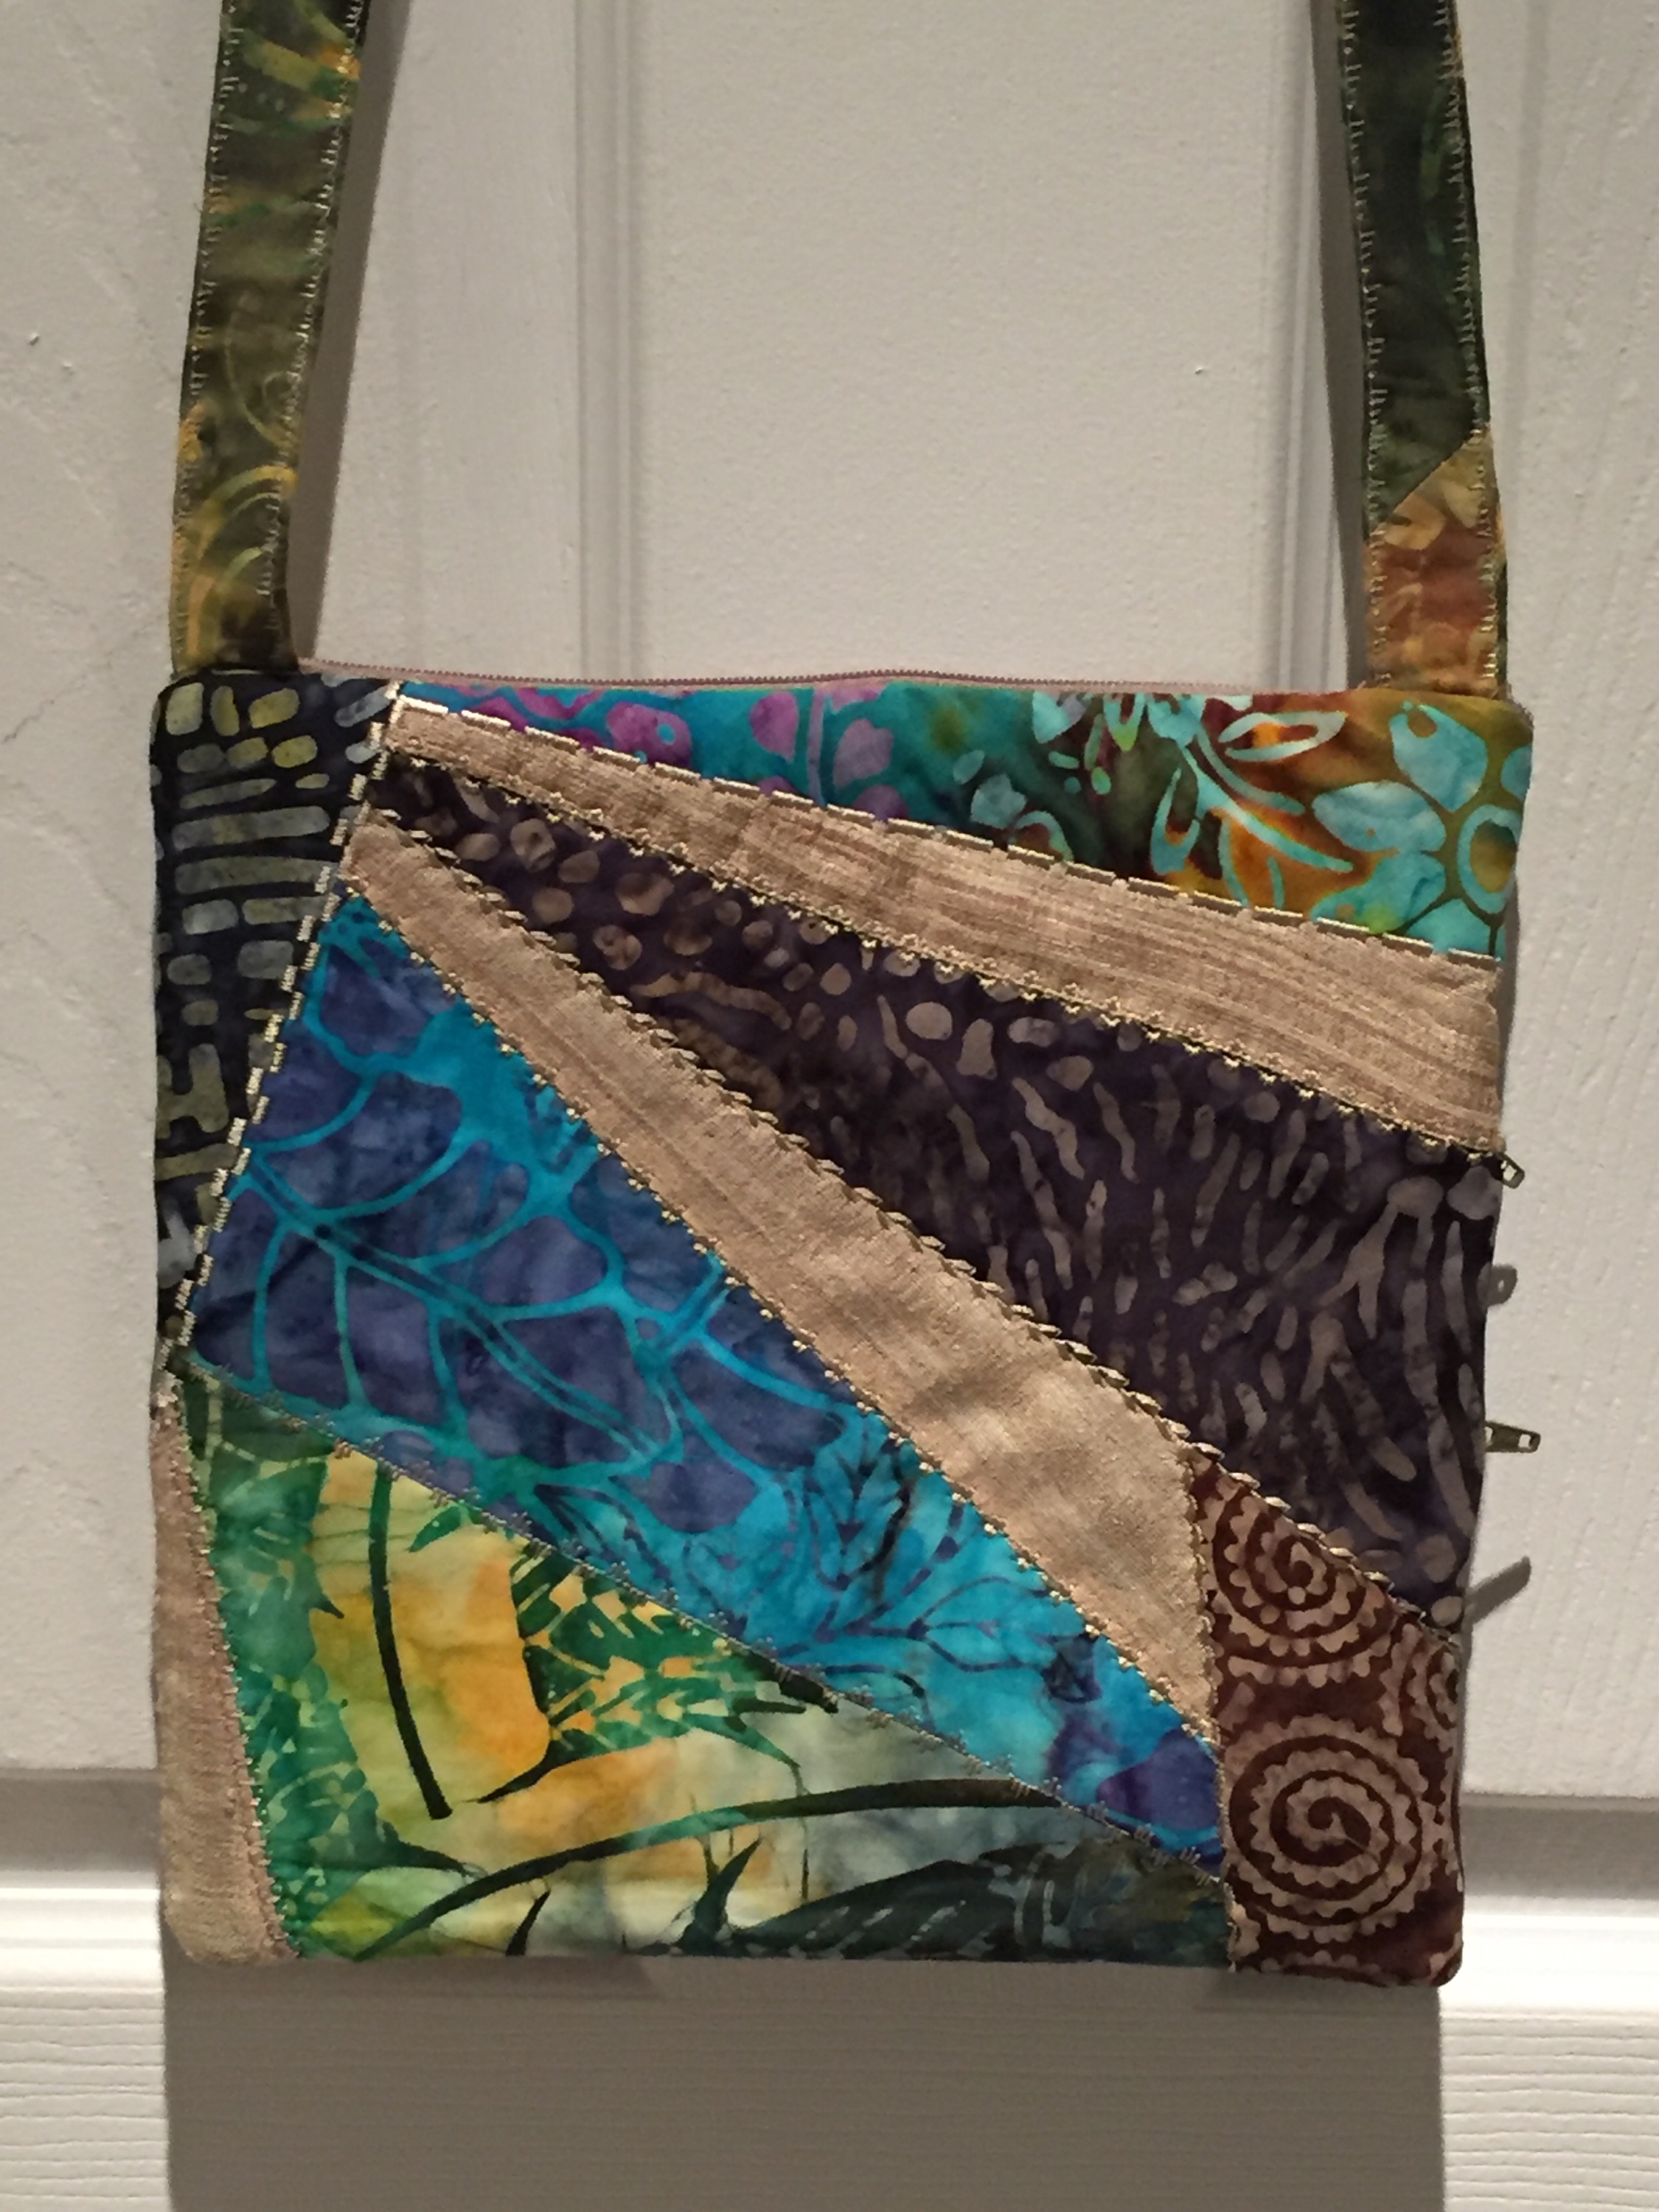
I started with some raw silk scraps, then gathered bits and pieces of batik from my scrap boxes.
Now there are a couple of ways of setting up a crazy quilt piecing – the easiest is to cut a muslin block in the projected size, cover it with fabric pieces using a stitch, flip and press technique, then trimming away the excess fabric when the block has been completely covered.
I didn’t make my fabric pieces that way. I began by sewing (and pressing) strips and largish triangles together until I had an assembled fabric 12″ x 10″ more or less. Then I created a second piece approximately the same size. Squared both pieces and trimmed them to 10″ x 10″.
Next I backed the crazy quilt fabric with a layer of quilt batting, top stitched each seam with rayon embroidery thread using a different decorative stitch for each seam.
I wanted a couple of compartments in my bag, so I cut one of the finished pieces in three, inserted zippers, and added the lining at each zipper location. Then the top zipper – the shoulder strap was attached at this point.
I added pockets to each side of the main compartment lining before attaching it at the top zipper. I finished the bag by placing right sides together and sewing the side seams starting with the lining; then the seam across the bottom of the bag (it’s a good idea to remember to unzip the top zipper before stitching the bottom seam so you can turn the bag right side out).
I turned the bag right side out by pulling it through the lining. Finally, I stitched the bottom of the lining and push it inside the bag.
The final step is to zipper the top of the bag and steam press it so it’s flat!
Generally, I prefer not to carry a purse, building pockets into my jackets and pants instead. But every now and again I need a small bag – this one will do nicely.
