Sunflower – Completed

img_8309

“Sunflower”

Just finished!

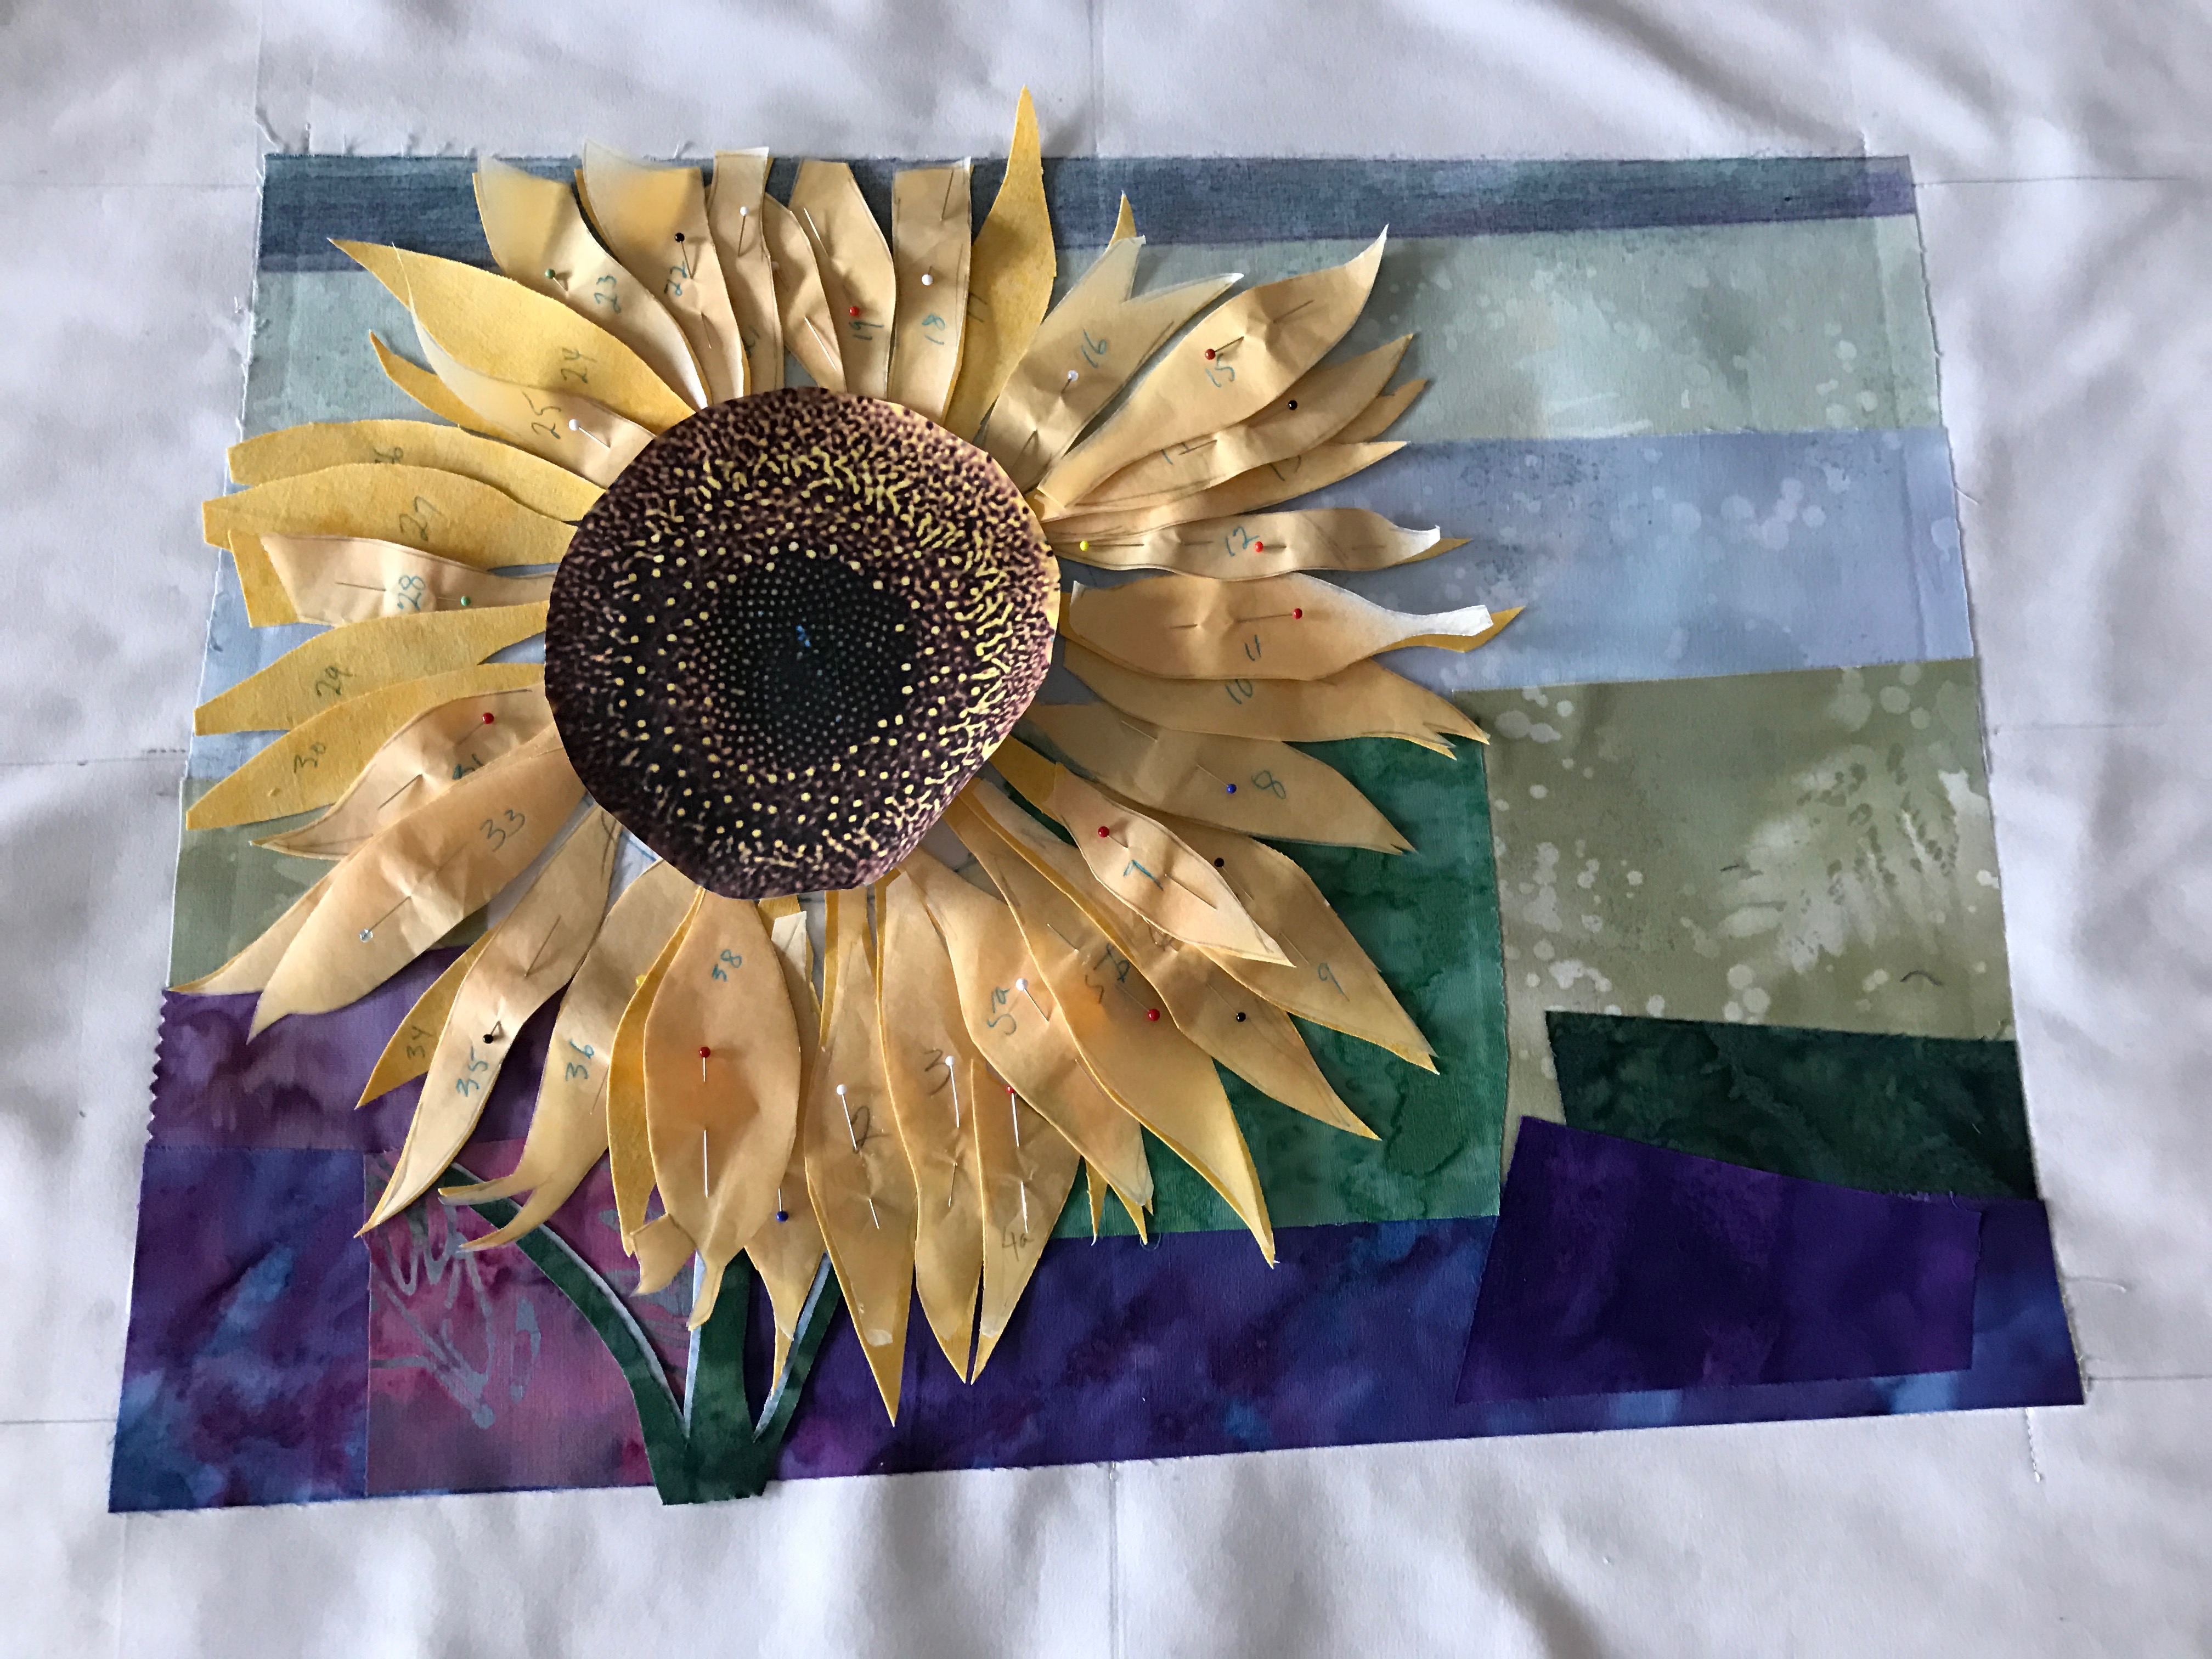
I started working on this piece two weeks ago. I began with the original photo – cropped it, enlarged it, then printed out sections, taped them together, traced individual petals using tissue paper, planned out the background and traced the shapes…

img_8310

“Sunflower” – paper template to enlarged size

Next I collected fabrics from my stash, bought some new pieces, started building the background, cut out the petals and arranged them in place,

img_8298

“Sunflower” – the elements cut out and positioned

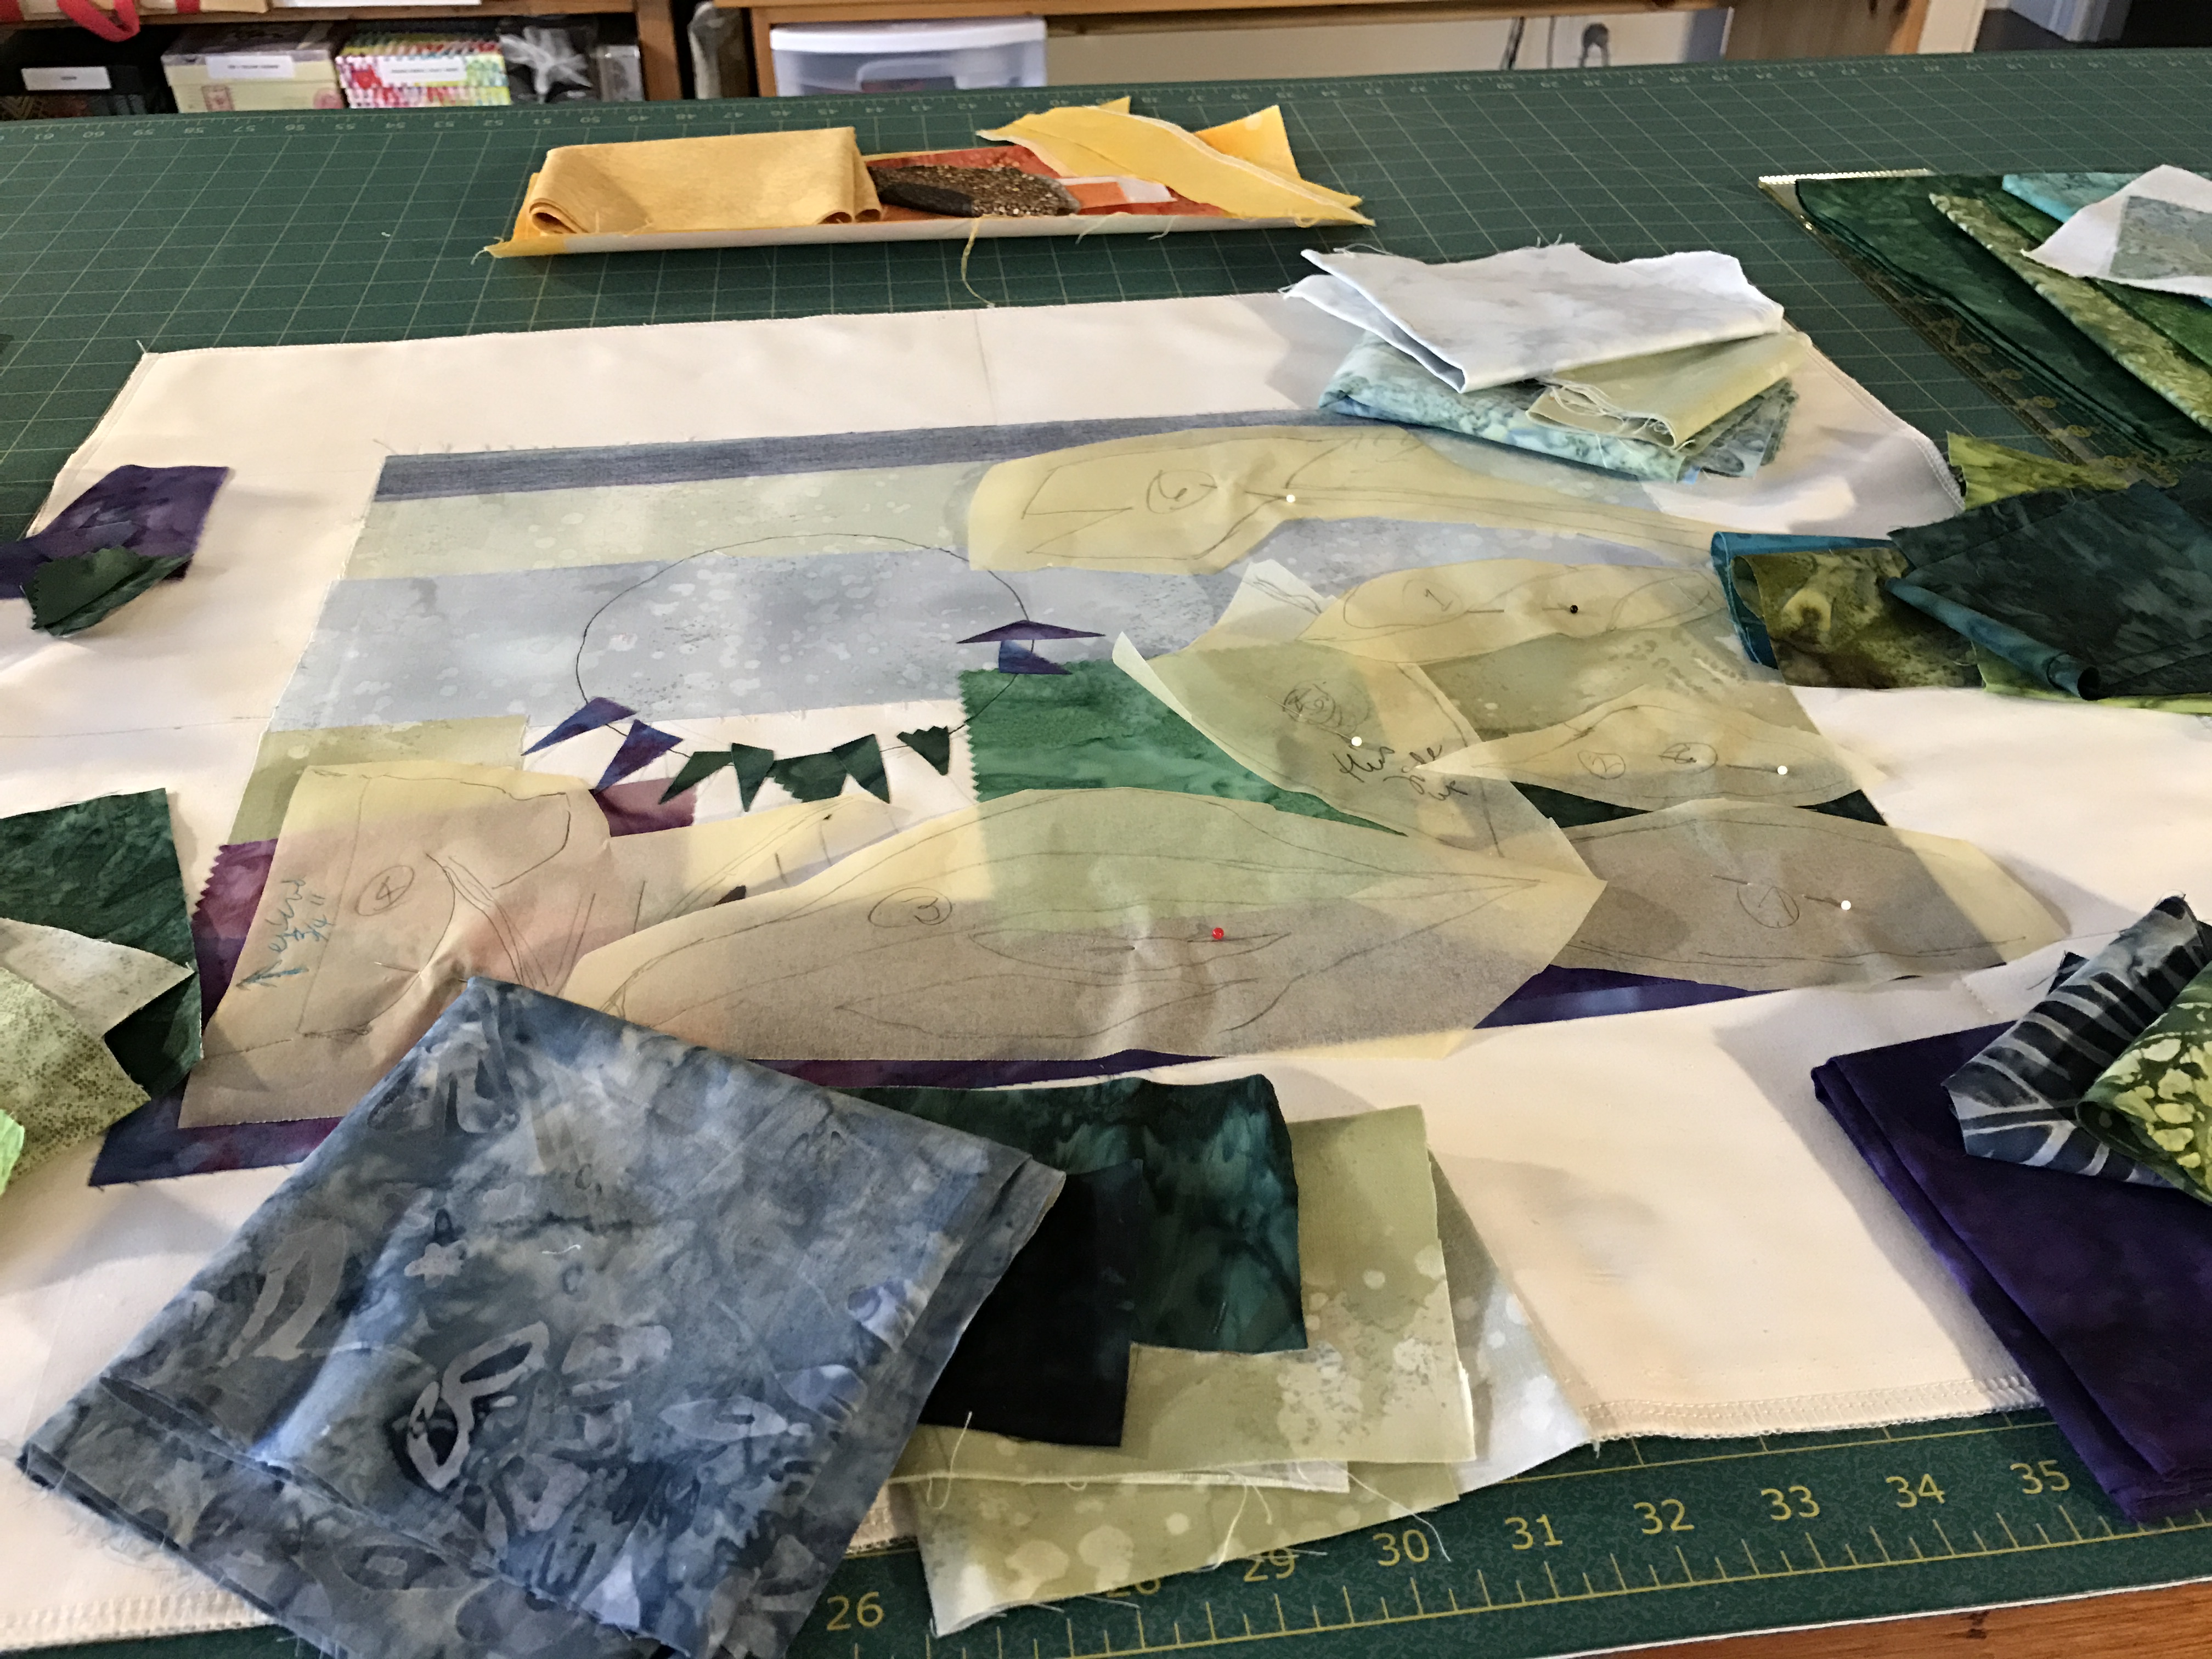
then started stitching: I laid down four horizontal strips of fabric from top to bottom, stitched them in place. Then added the leaf elements, edged stitched them – I didn’t “free motion” because I wanted more precision so, instead, I slowly freely stitched with my feed dogs in place – that allowed me to stitch very close to the edge of the appliquéd pieces. Next, I added a bit of detail and fill.

img_8300

“Sunflower” – background stitched

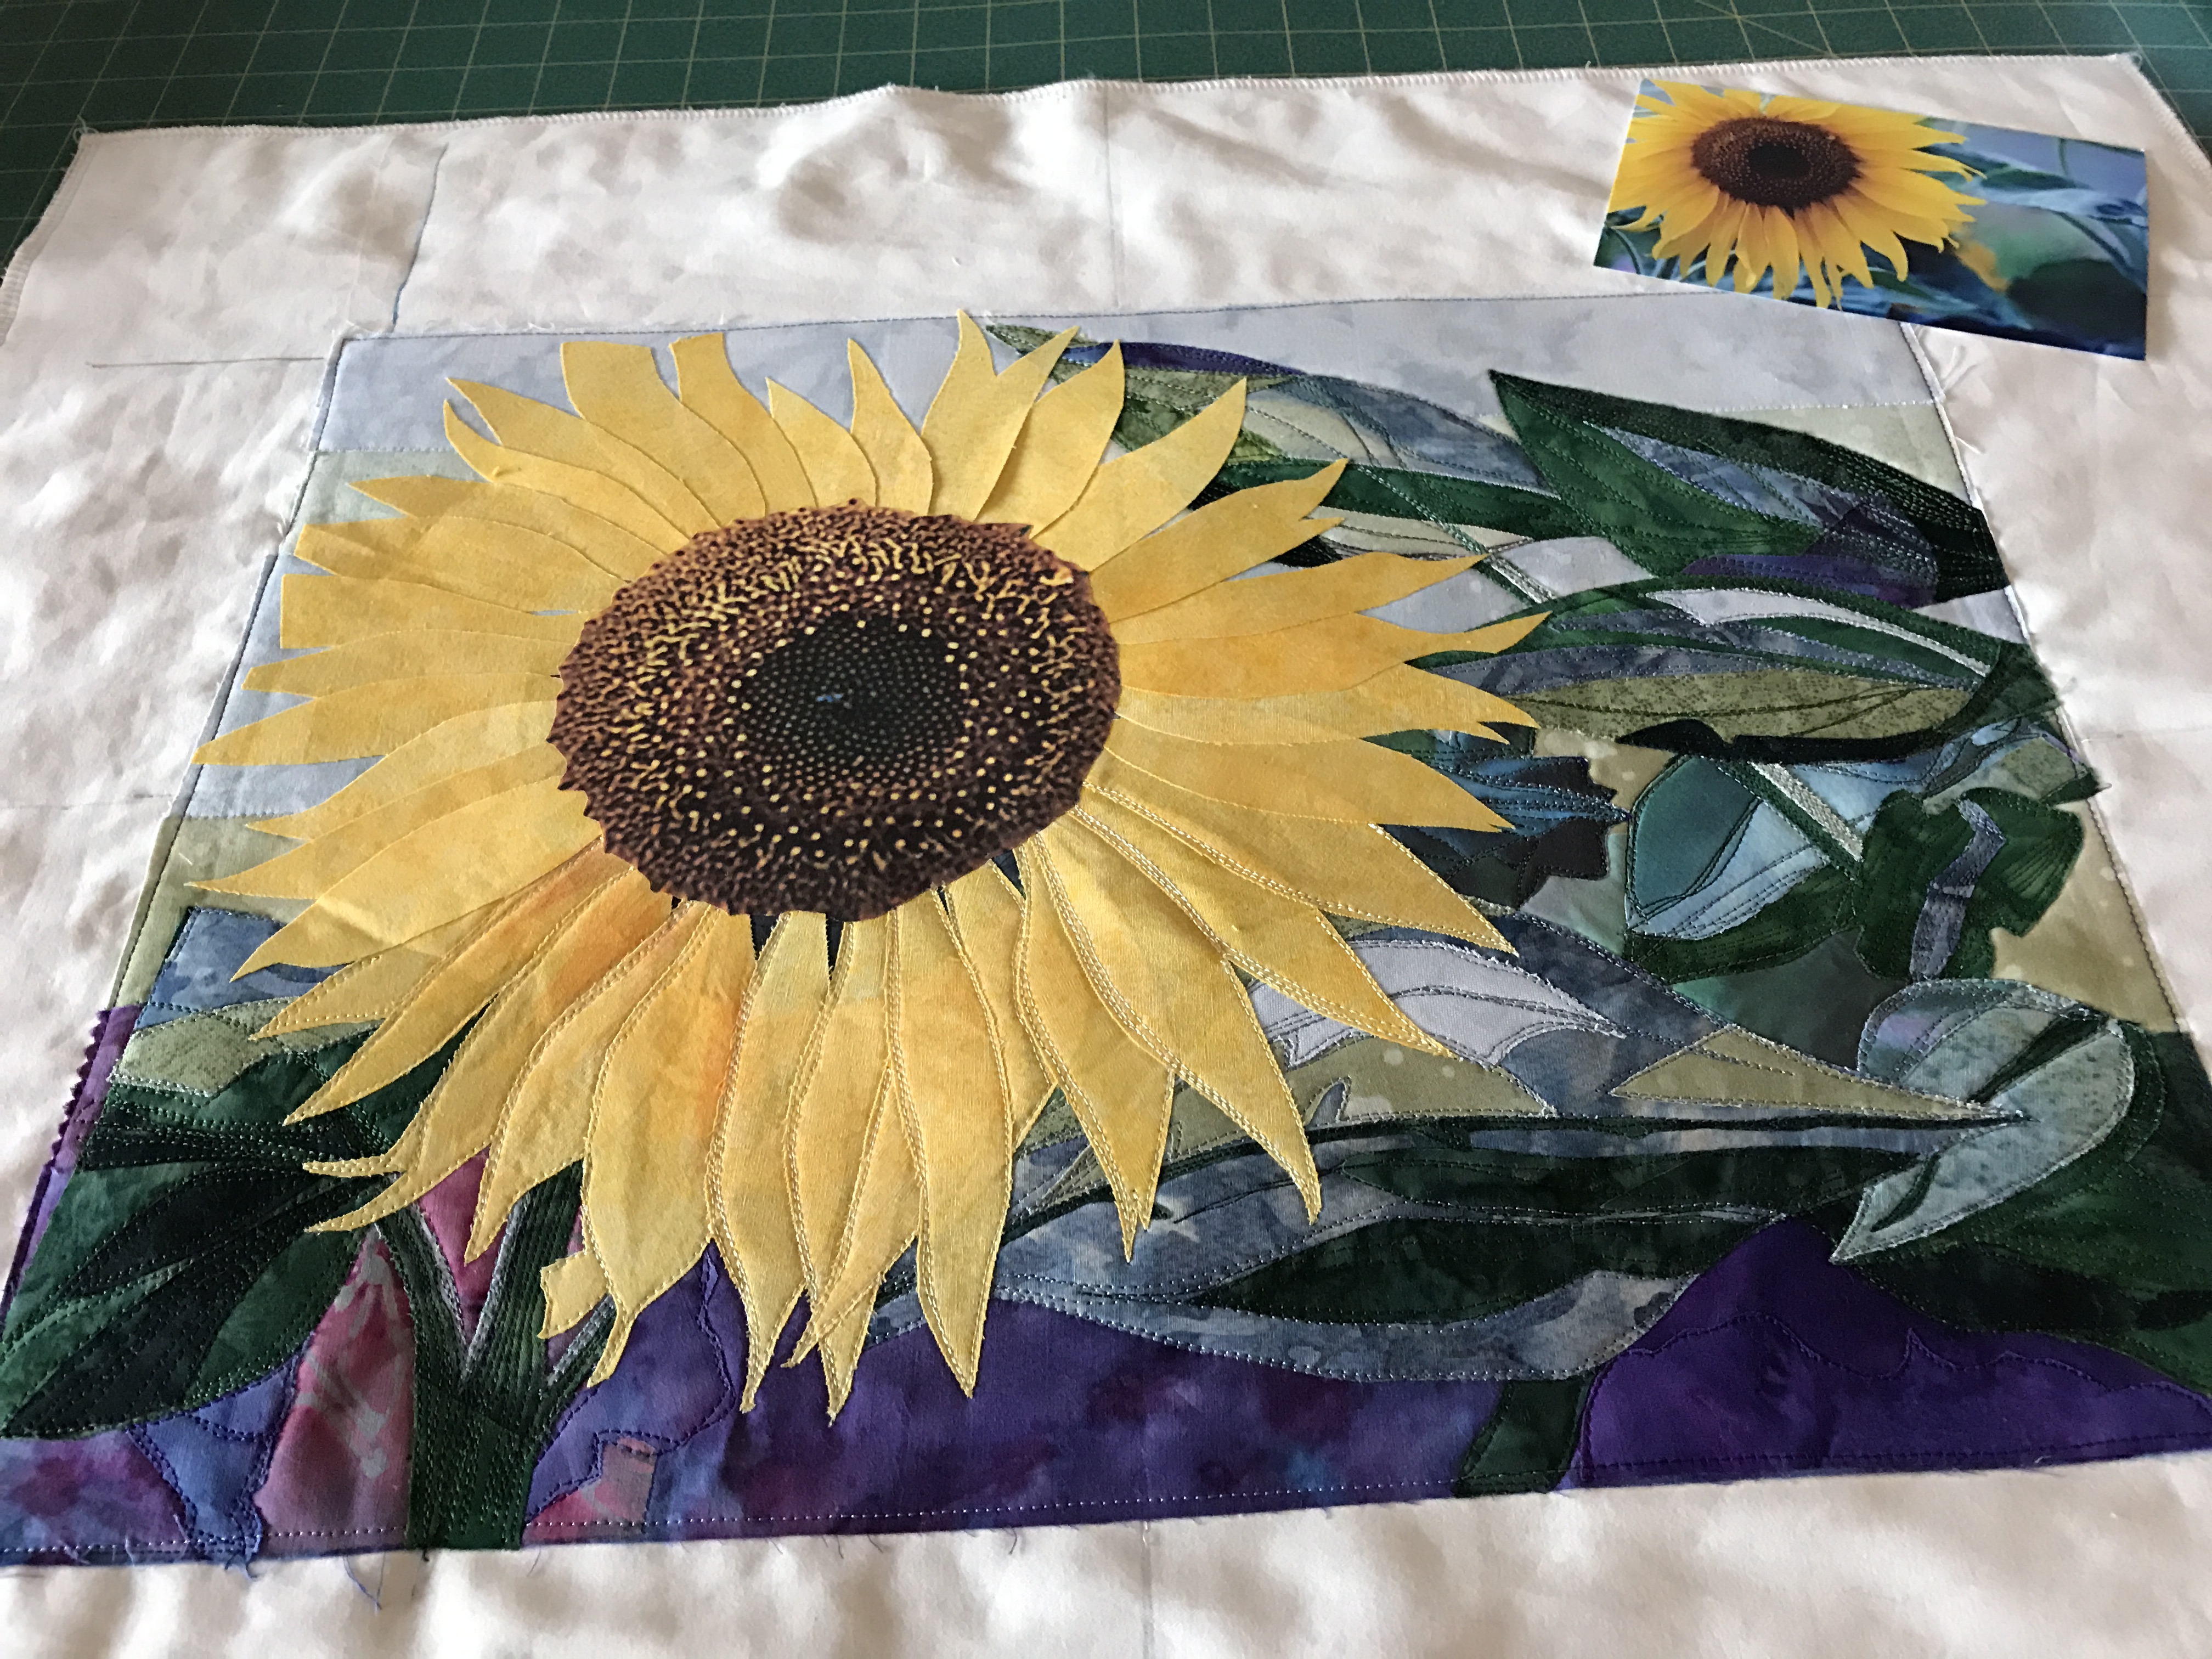
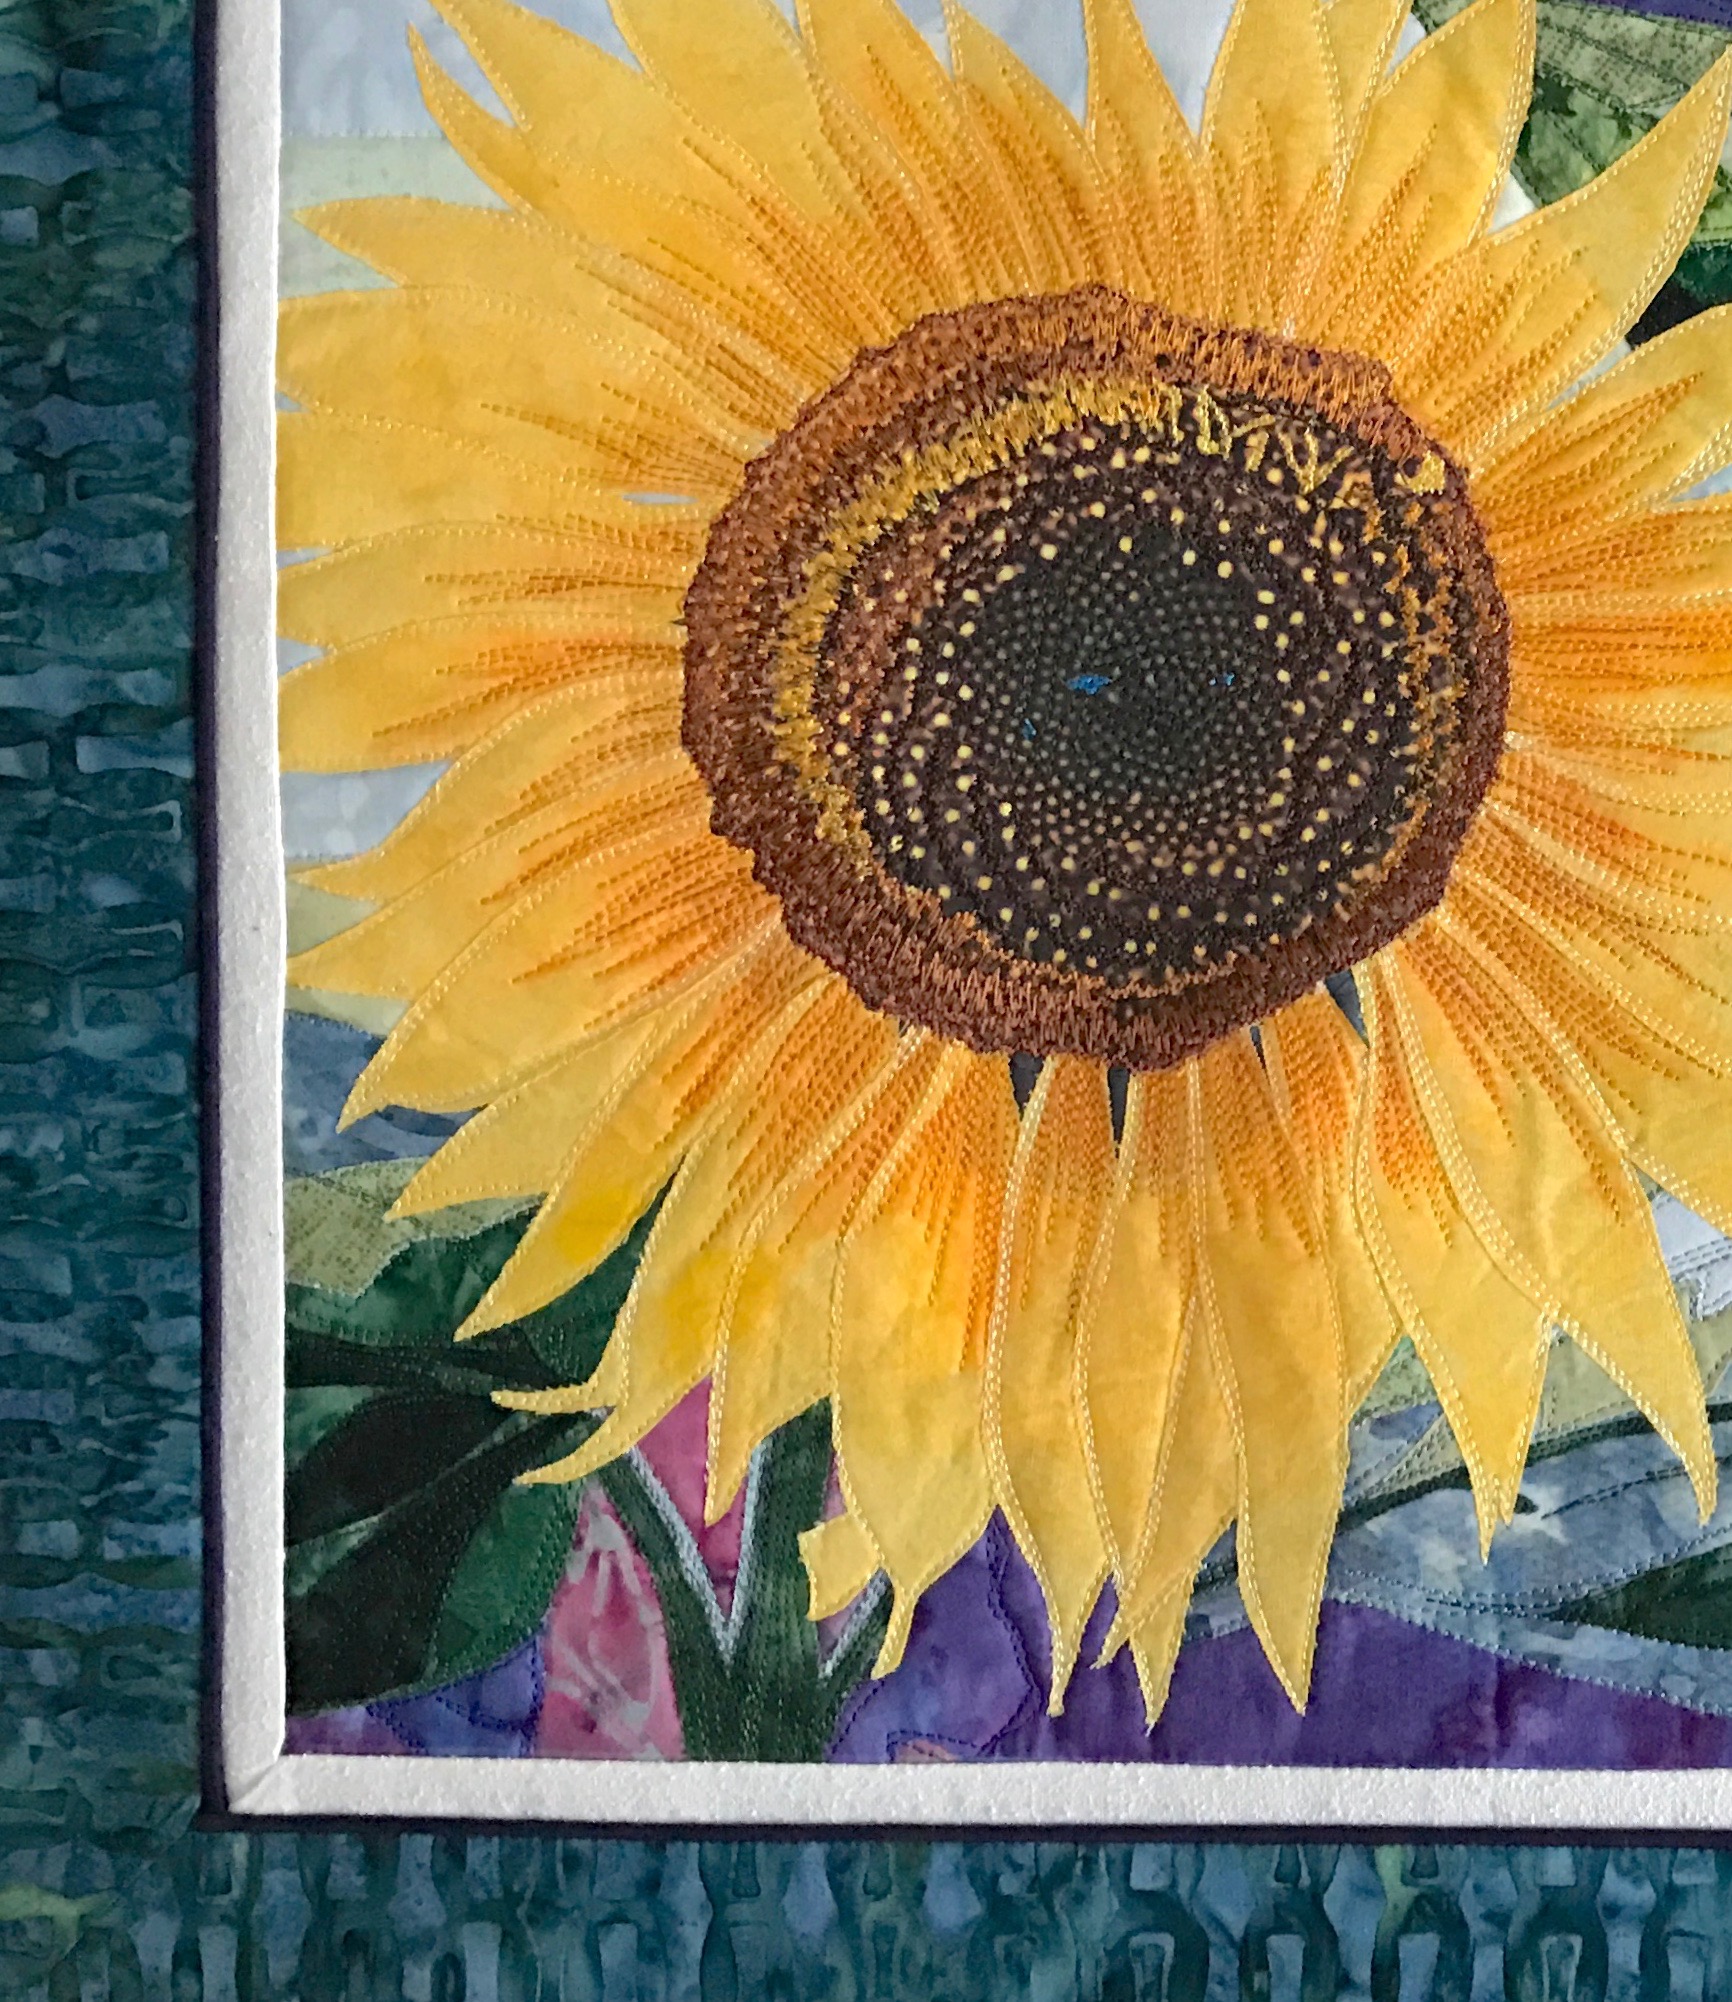
Once the background was completed, I laid out the flower petals, fused them in position, then began carefully stitching them, first using a light thread at the edges, then more golden/orange threads for the centre of each petal. Finally I stitched the centre of the flower – my goal was to bring out the spiral pattern of the florets (the centre of the flower was printed on fabric to retain the natural detail of the floret arrangement, as well as the few small bursts of blue – too small to add using cut bits of fabric).

To finish the piece, I added a 3/8″ inner border of raw silk, mitred at the corners, then a purple piping, and finally a 3″ batik frame also mitred at the corners.

Version 2

“Sunflower” – stitching detail

The whole piece I backed with muslin, including a sleeve for hanging at the top.

Now I’m walking around the apartment trying to find a place to hang it – there doesn’t seem to be one, without taking something else down! I’m really going to have to think about where to display it.

"Sunflower" without frame

“Sunflower” without frame

Sunflower I

I’ve been working on the “Sunflower” art quilt for the past few days. I pencilled in the layout on the prepared muslin backed with batting, traced the flower petals from a photo enlargement on to tissue paper then placed tracing paper beneath to retrace onto the muslin, fused some Heat ‘n Bond to the back of a piece of subtly printed bright yellow fabric, cut out all 38 petals and have so far put them aside because before I can fuse them in place I need to do all the work on the background! For the moment, I’m placeholding the centre of the flower with a paper printout to scale.

img_8291

Petals Pinned In Place

I decided to create the background working from the original photo because the detail was sharper and showed the elements in the background more clearly. I fused a pale green printed fabric to the top of the image area on the muslin (having darkened the top edge using fabric pastels – very little of that band will show when the piece is finished). Below that a soft blue. I laid in a purple/blue/pinkish batik strip as background at the bottom of the piece – leaves will be overlaid on that fabric and very little of it will be visible. I filled in most of the remaining background with pieces of greens and purples. These, too, will be mostly covered. Again, I’m using tissue paper for my templates so I can see through it to the photo enlargement, and when cut out I can see the fabric pieces beneath. I want to cover all the raw edges of the background with the foliage so that only a sense of colour peeps through.

sunflower3

Original Sunflower photo taken in 2002

Once I sorted out what fabrics I wanted to use for the foliage, I returned to working from the cropped enlargement to help me retain proportions.

Version 2

Enlarged, Cropped Image

I traced the leaves and have pinned the tracings in place on the piece. I’ve selected mostly batiks here because the colour variation in it will help with the subtlety of shading I’m trying to create. In the photo, the leaves are predominantly a very light colour reflecting the sunlight. The challenge will be achieving a realistic look to the piecing of the foliage. If, in the end I don’t like what I’ve got, I may print the foliage on fabric, fussy cut the leaves and stems, fuse that printed fabric in place and thread paint it.

Planning Out Leaves and Stems

Planning Out Leaves and Stems

I’m calling it quits for today – tomorrow I’ll begin crafting the leaves and stems hoping they will turn out as I imagine them.