Quilted Jacket

IMG_3244

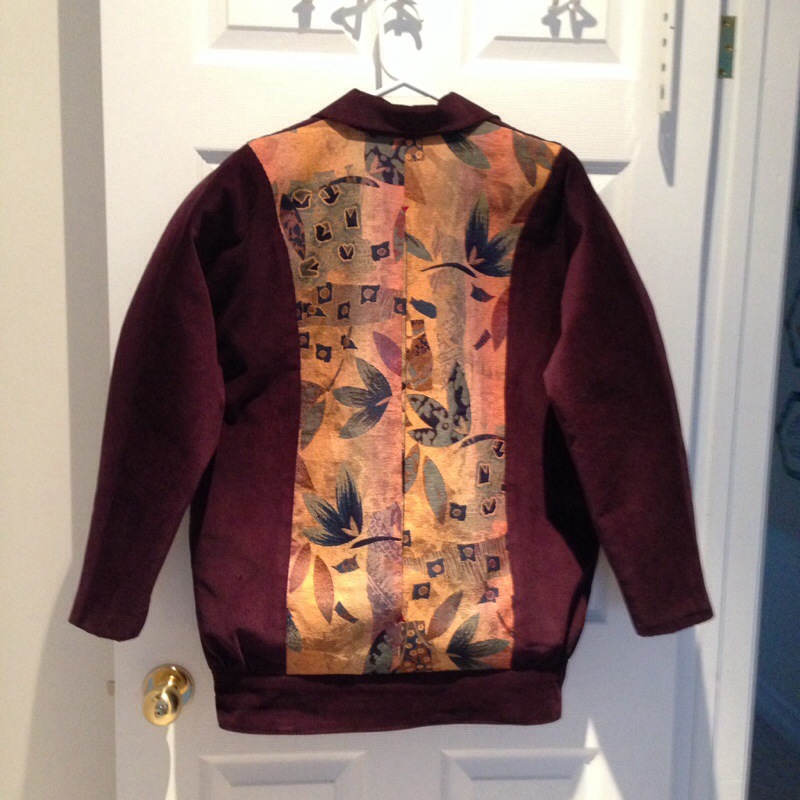
Like I need another jacket! However, when Bonnie mentioned the quilted jacket class I thought I’d enjoy sewing with the gals again, so I signed up.

First, select two different fabrics (I chose two batiks) – buy 3 meters. Then I left the fabric at Sew With Visioin (the Pfaff/Husqvarna shop where the class was going to be held) to make into a quilt sandwich with bamboo batting, then to have the whole thing quilted on the long arm quilter.

Thursday I went to class having prepped the pattern – traced a size small knowing it would need a bit of adjusting. Cut the fabric, pin based it, adjusted the fitting and then began to sew.

The point of the class (as far as I was concerned) was to learn ways of joining double sided fabric using bindings. For the most part that wasn’t terribly difficult – line up one edge of the binding with the edge of the seam, sew, press binding away from the garment, fold over seam, press, pin (I actually found it easier without pinning), stitch binding to garment on the second side. The tricky seam was along the underarm of the sleeve – it gets narrow pretty quickly so it’s slow going carefully keeping the binding flat against the sleeve as you go along.

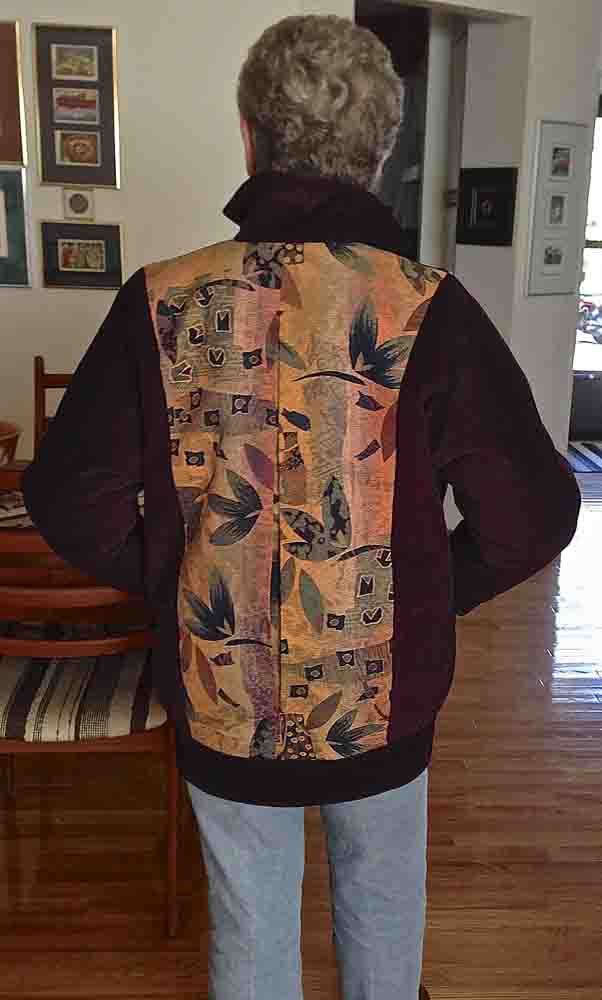
Because I wanted the jacket to be completely reversible and have pockets on both sides, I had to come up with a way to access the pocket on one side through a zippered welt opening on the second side.

IMG_3247

It looks as if there’s a pocket on the second side, but it’s actually just access through the front to the pocket on the other side.

The buttonholes took forever – I tried some samples on my embroidery machine but today the machine wouldn’t cooperate with me (it may have to go in for a check-up). In the end I decided to create bound buttonholes. This meant creating a facing for the second side to cover the unfinished buttonhole seams on that side. They turned out reasonably well.

Last thing – add buttons to both sides.

We’ve a second class coming Thursday but I’ve got appointments during the morning so I finished the jacket today. I’ll still go to class to show off my completed jacket and to socialize with the other gals.

New Jacket

Just finished the new jacket! I must say I’m rather pleased with how it turned out.

20131003-172853.jpg
In addition to the two outside pockets, there are eight on the inside (two with zippers, two with velcro). That was the whole point of the jacket – to be able to leave my purse at home, stowing my wallet, etc. in the pockets. As I was making it, the lining fabric was difficult – slippery and moving around and at one point I thought I should perhaps go buy a different lining fabric, but I persevered and it has turned out nicely after all. The other tricky part was the interlining for warmth – I used Insul-Bright (a polyester batting with a metallic film on one side) – it was just a bit stiff, so to reduce bulk I cut off the seam allowances and butt the pieces together using a zig-zag stitch to join them – it did reduce the bulk in the seams. Then I attached the interlining to the lining (reflective side on the outside – mainly to prevent moisture from coming through, I think it will still reflect my body heat back in) and assembled the whole jacket.

20131003-173710.jpg
Now that I look at it I think I probably should have made the front pockets from the tapestry as well, but that’s something to think about for another time.

Pattern: “Flight Jacket Two” from SAF-T-POCKETS Patterns – Patterns with Pockets. I made a size S (this jacket fits large).

IMG_2346 IMG_2347

Winter Jacket

IMG_2159

I have finally cut out the winter jacket. The fabric has been sitting in my dining room (I use the dining room table as my cutting table – with a protective cover, of course) for at least six months! Sunday, I finally cut the pieces for the jacket.

I’m making it in a deep wine corduory with the back panel in a tapestry fabric I’ve had for some time, using that fabric for piping on the front of the jacket. For warmth, I’m using Insul-Bright batting – a polyester heat reflective batting – needle punched mylar on one side – to keep rain out, and heat in. I am in the process of adding the batting to the wrong side of each lining piece. I’ll then assemble the lining and attach it to the assembled outer jacket.

I’m making the long version with the banded bottom, to keep my bum warm in winter! The reason for this particular jacket is that it has a total of 10 pockets – outside and inside, with zippers and without. Using the pockets effectively means I don’t have to carry a purse when I wear the jacket.