Muslin #2
A made two major adjustments to muslin #1: I drafted the pattern using a size C/D waist, B hip – which took quite a bit off all of the seams, on the back & side back pattern pieces I removed 3/4″ from just under the bum (tapering to the side/inner leg seams). I kept the size B crotch dimensions as is for now.
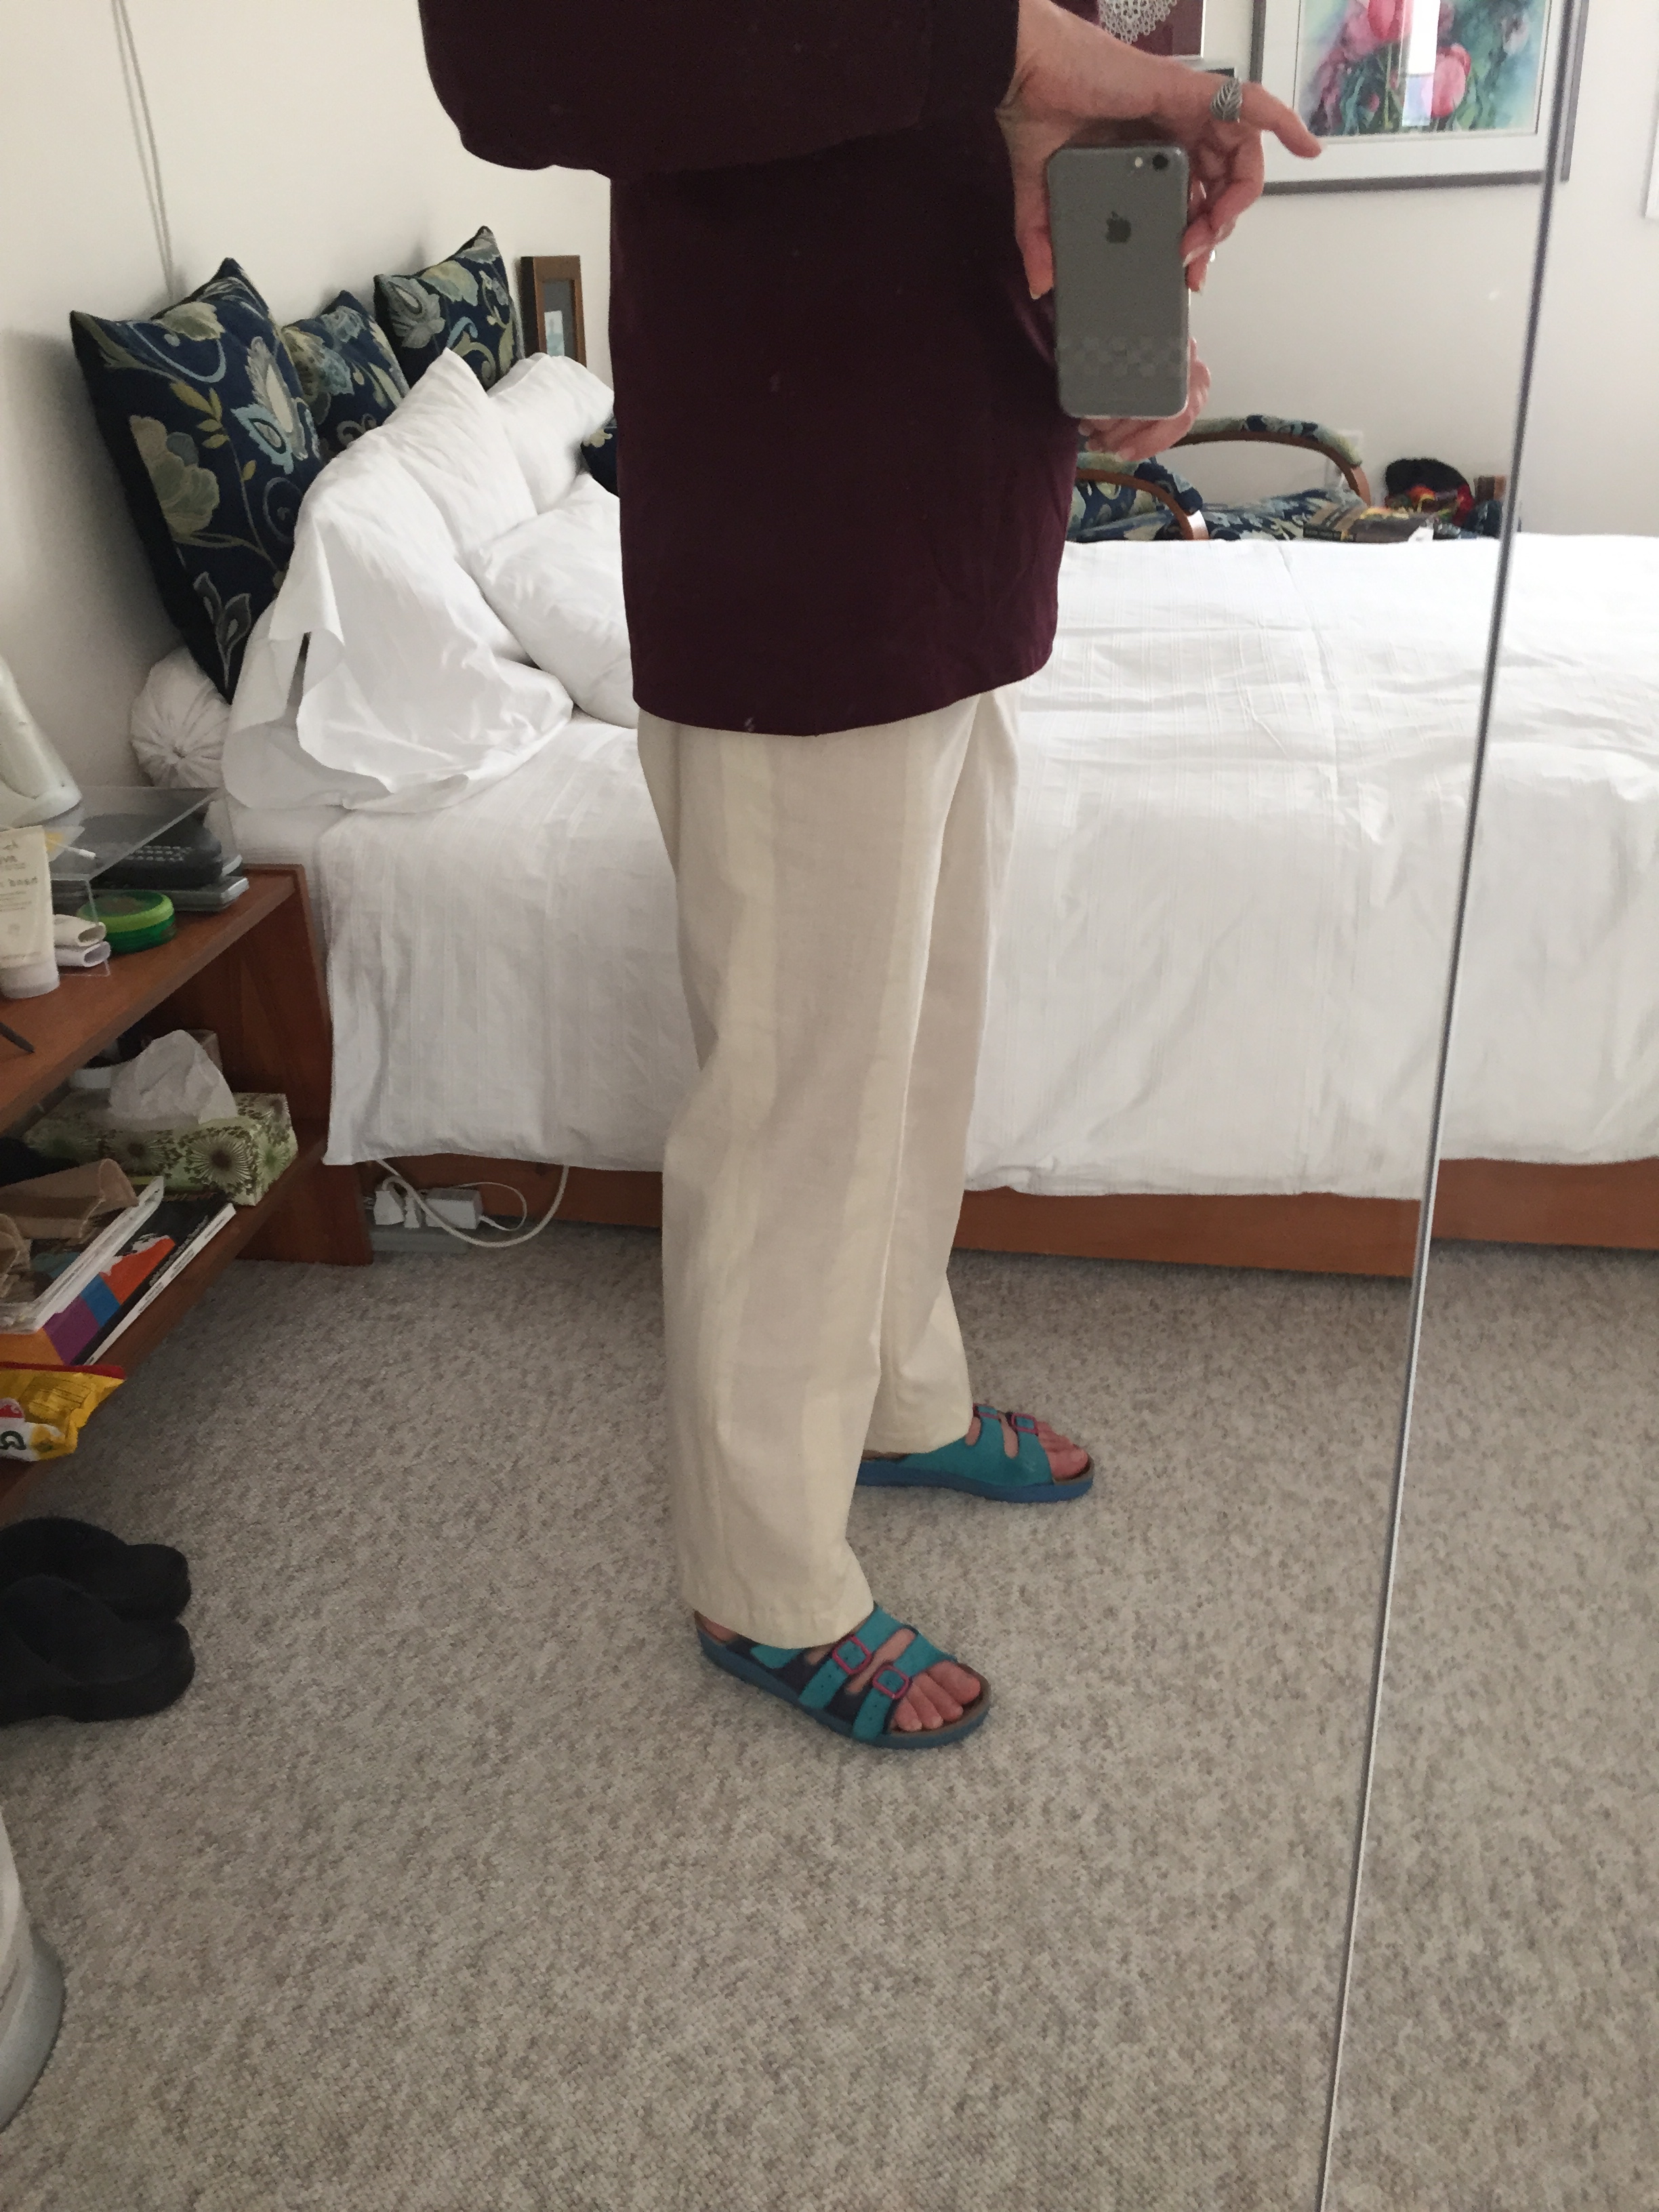
As you can see, the front fits nicely without pulling (were I to shorten the pants another 3/8″ the front below the knee would fall without breaking).

But the side view show a bum that is still too full! The side seam is straight, pulling neither to the front or the back. But you can see the extra in the bum and the extra fullness in the back leg – so on muslin #3 I will take those back seams in a bit (as well as increase the amount I take out horizontally under the bum).
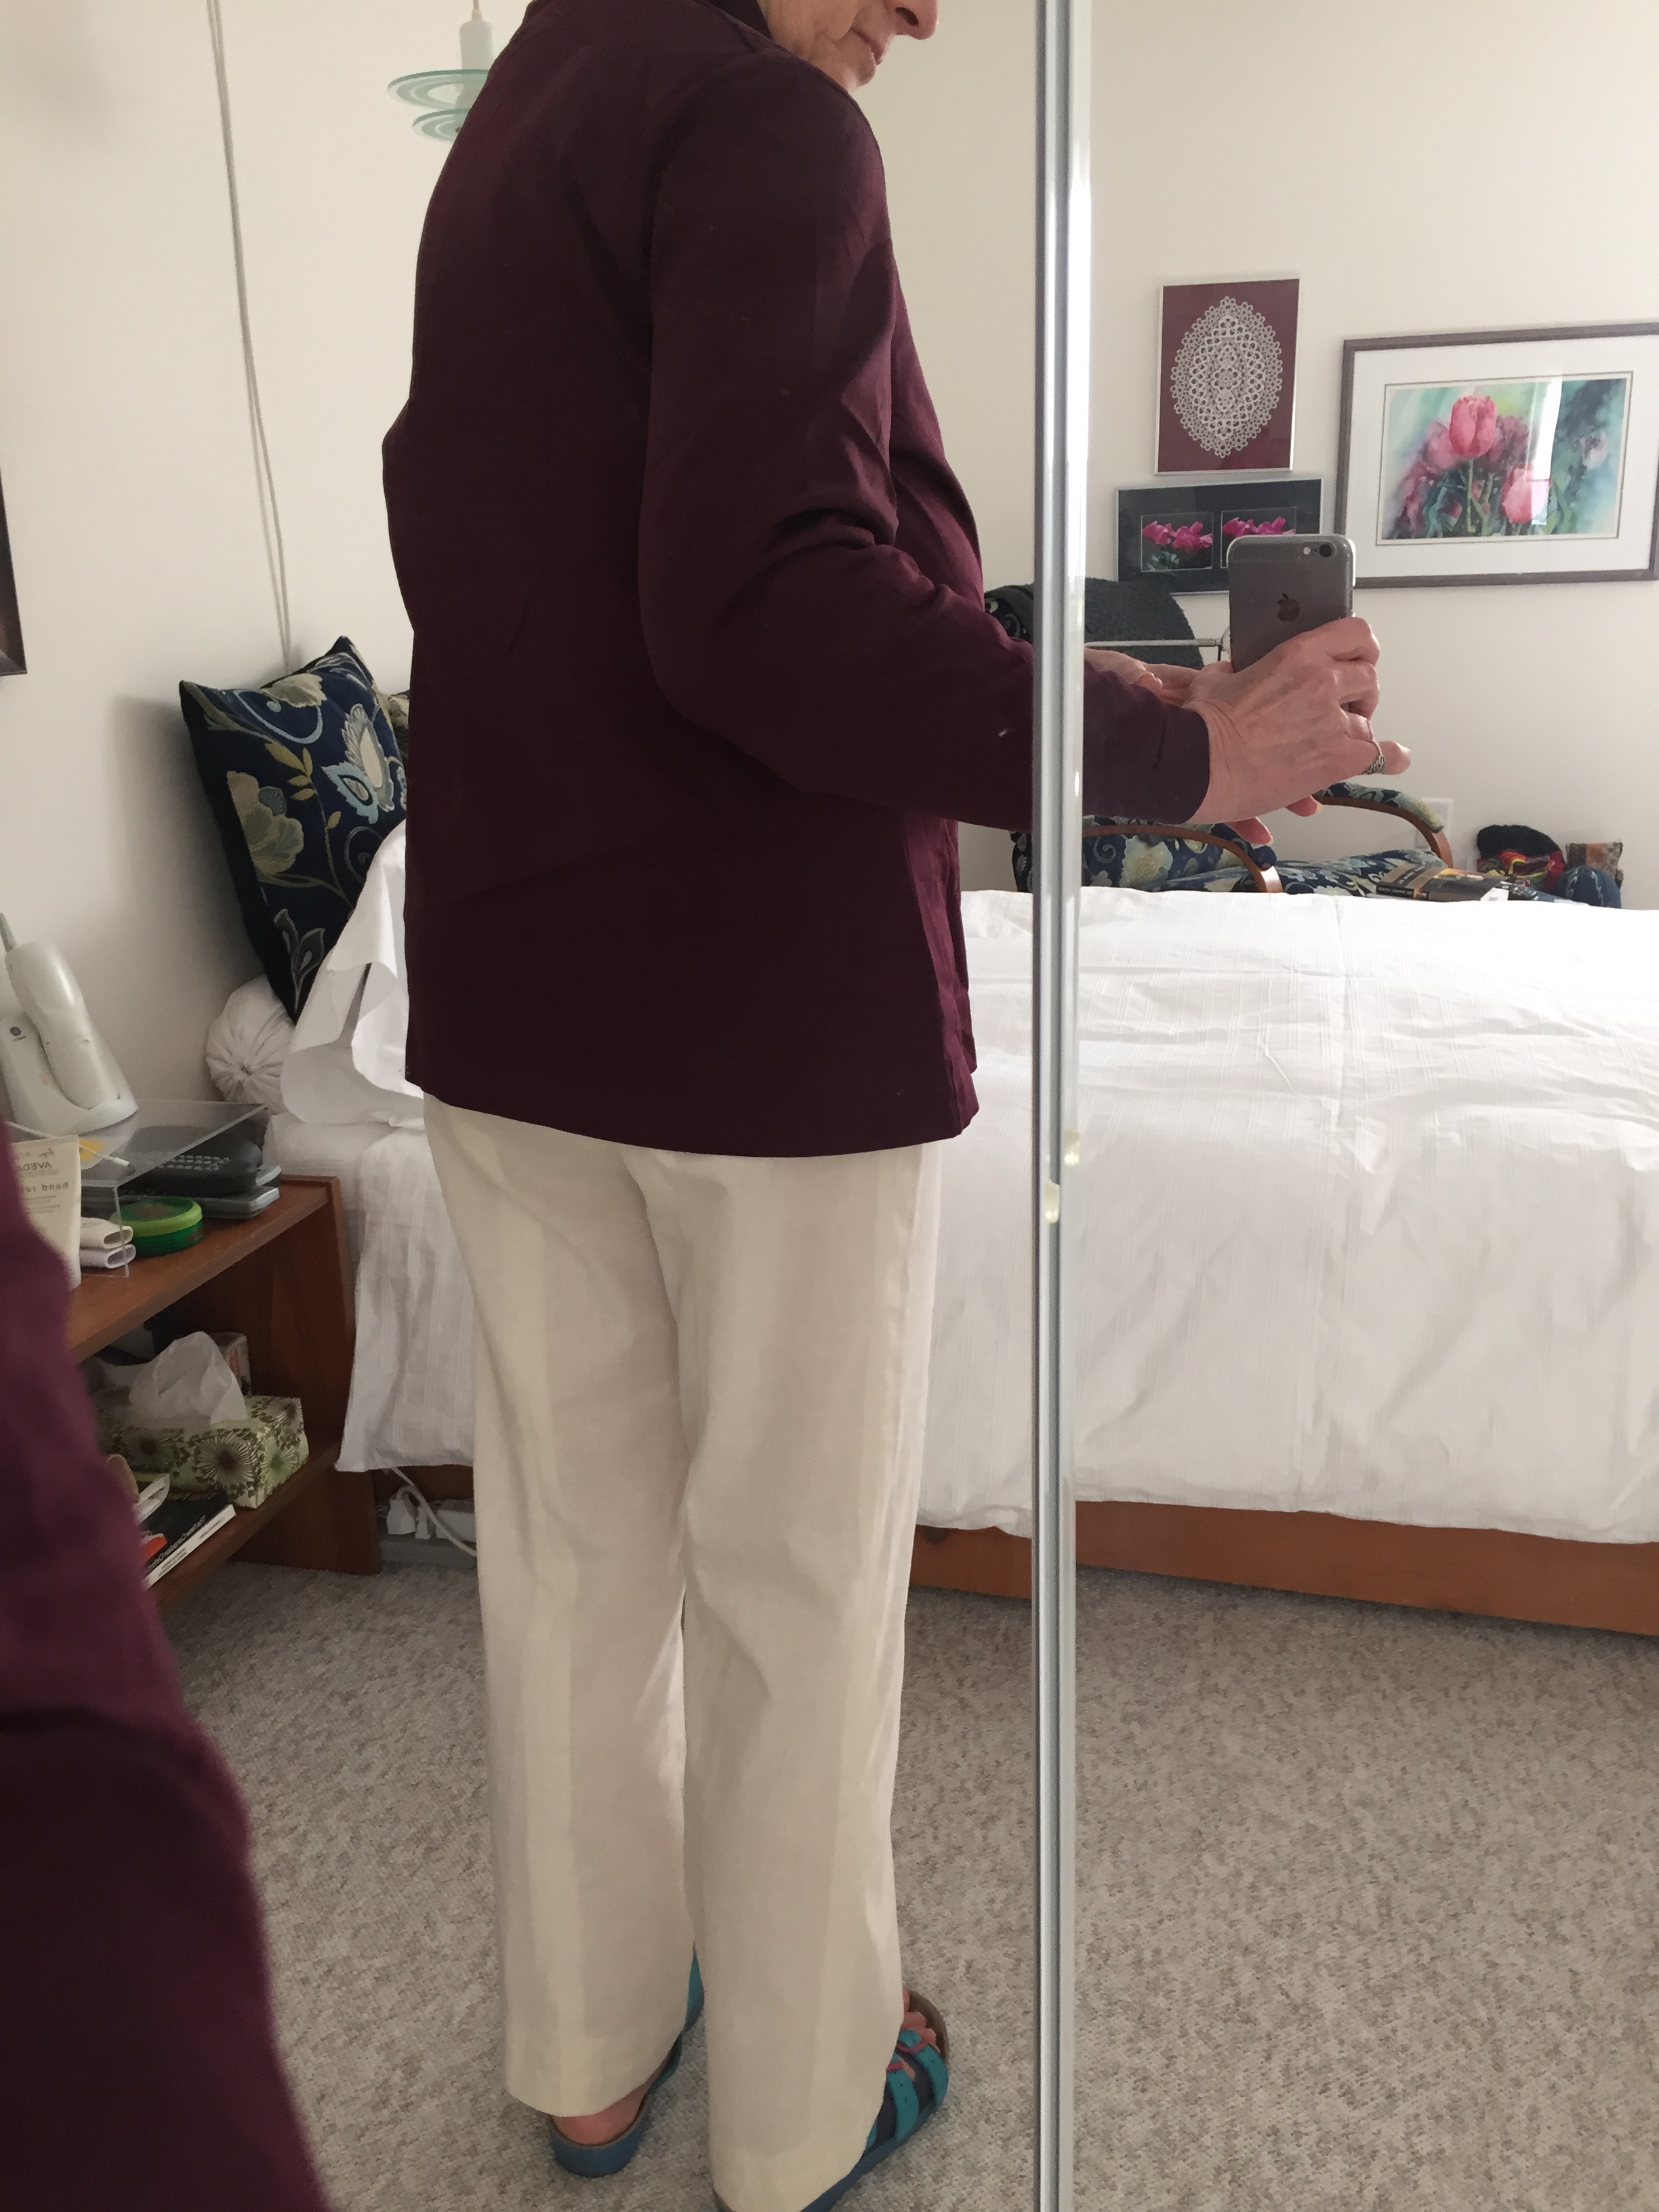
The back view looks not too bad – the back seams are straight – that’s a good thing, but I do need a bit more taken from the bum.
 So it’s on to drafting pattern #3!
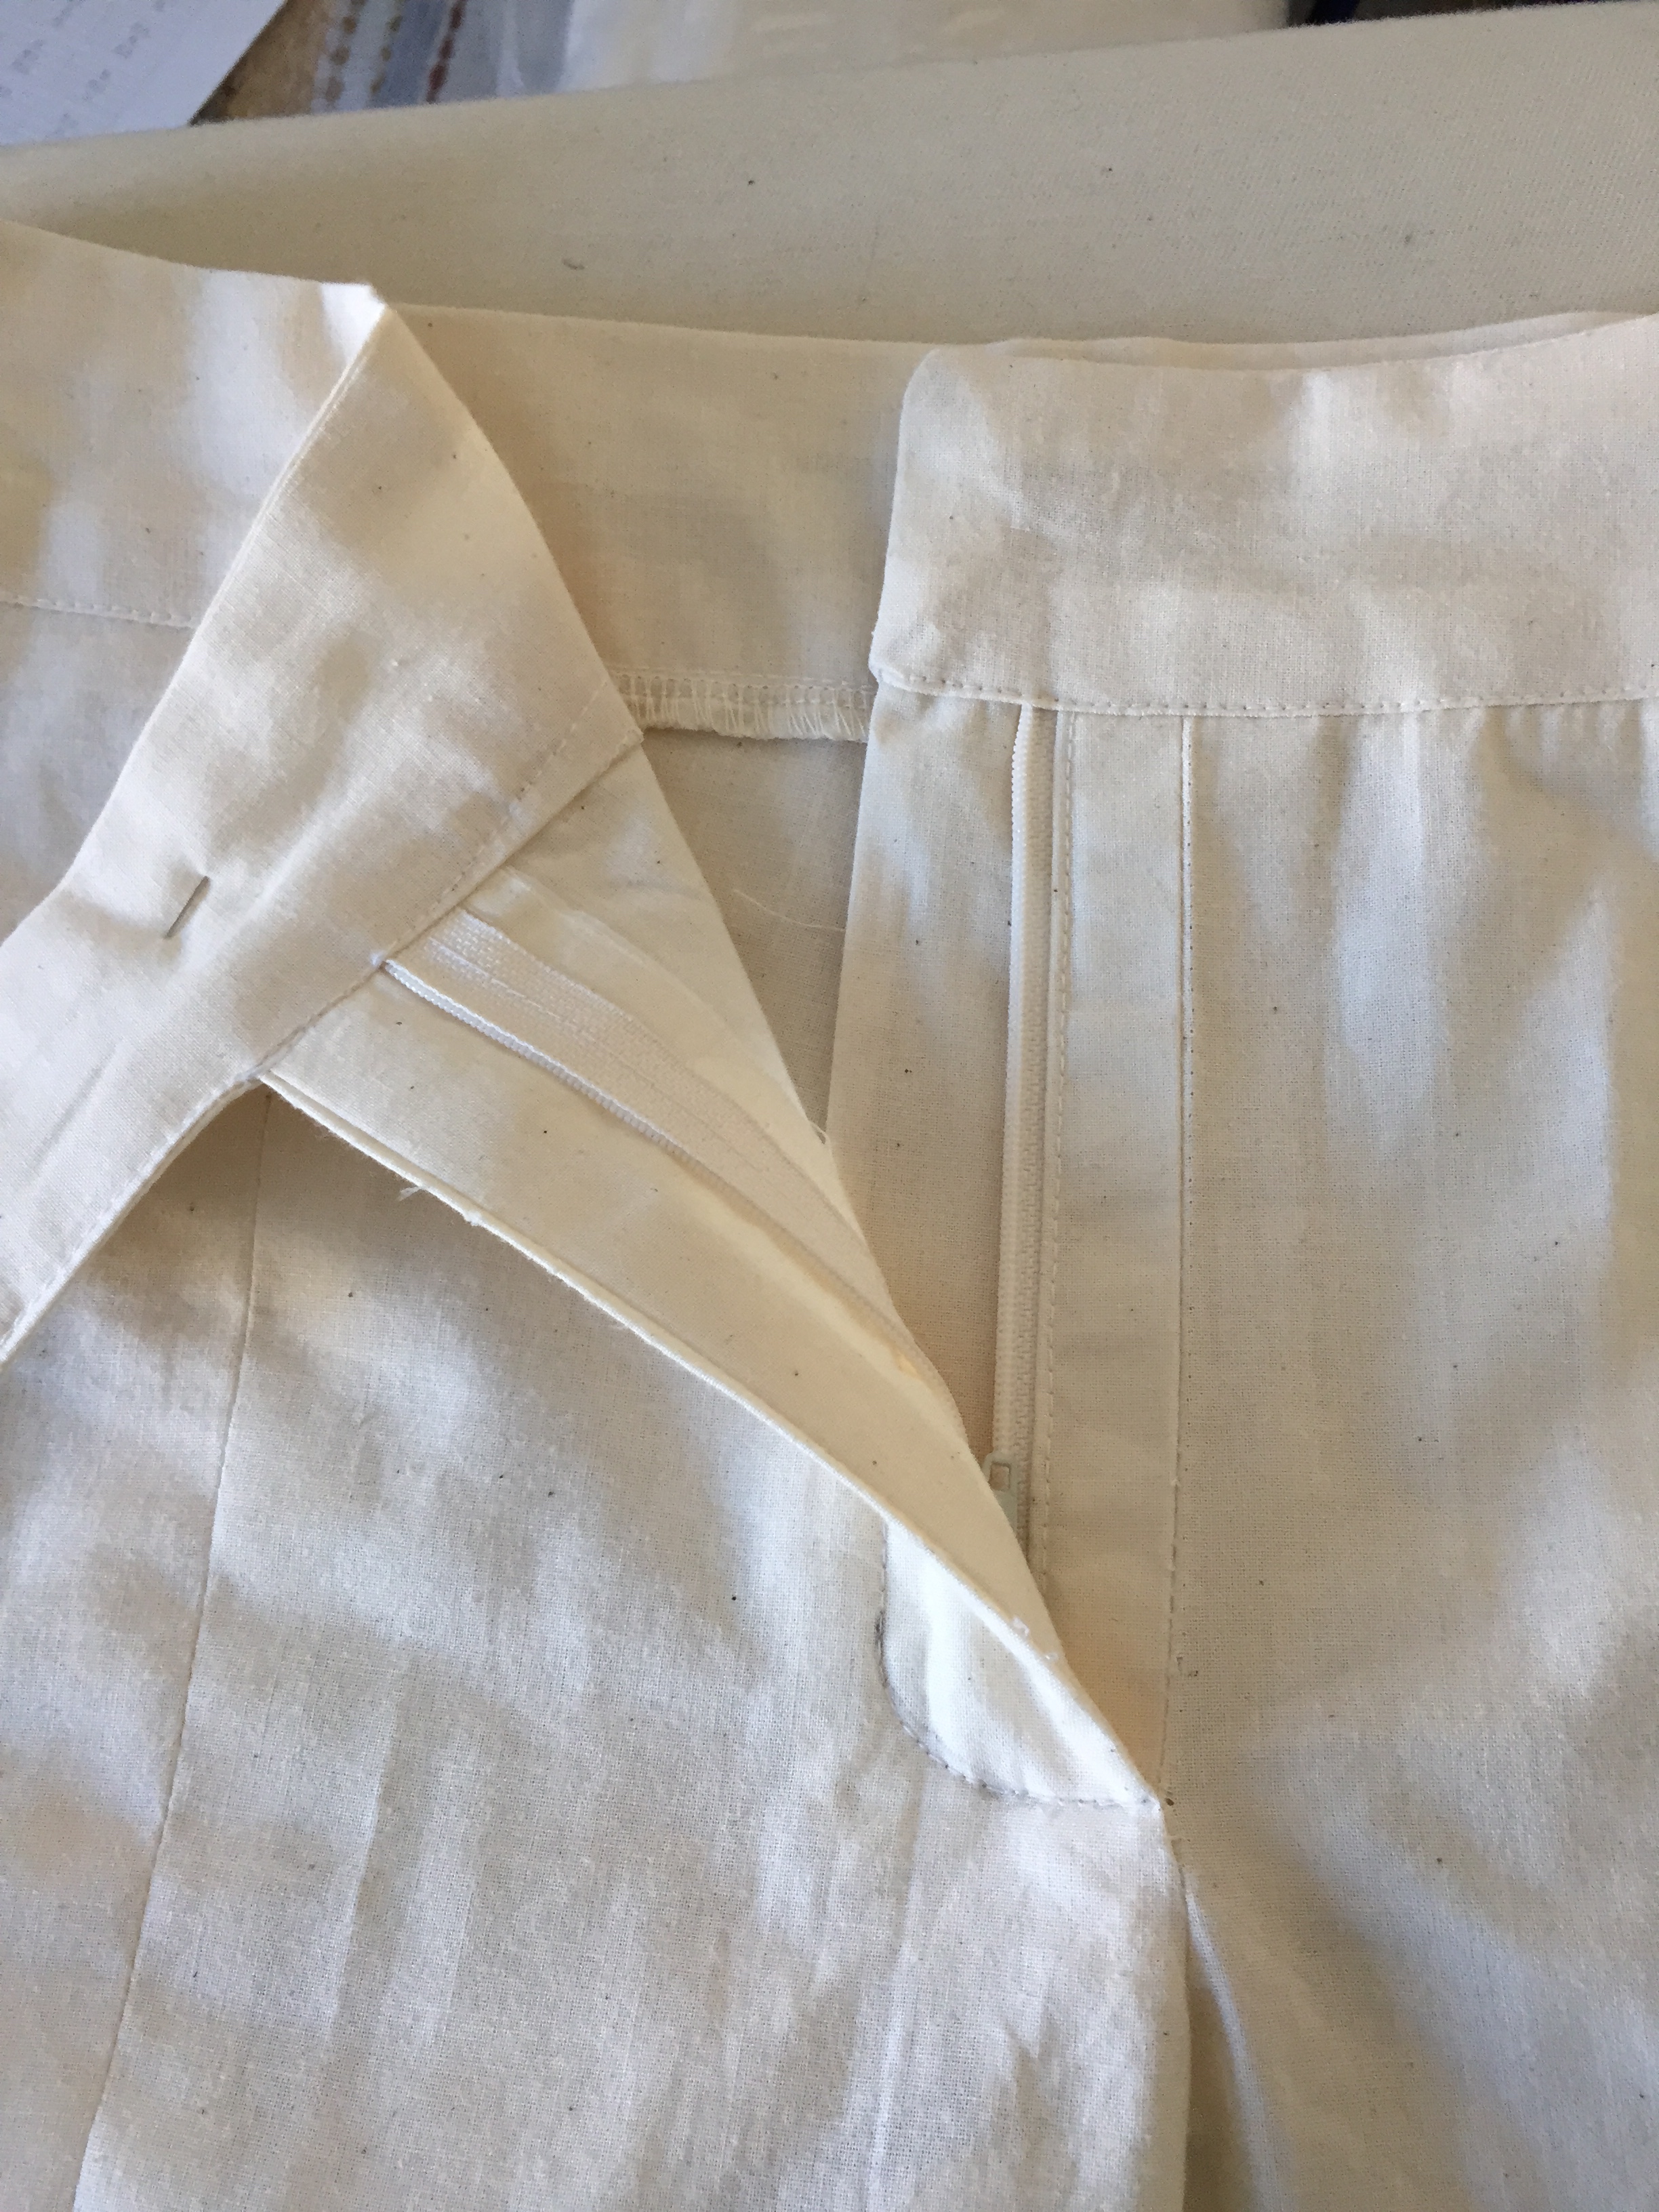
On this version I will go back to the original waistband from the pattern – I’ll use a size C/D but the hip edge will have to be fitted quite a bit which will mean I have to be careful to make sure it fits the top of the size C/D pants. I am also going to increase the length of the back about 1/2″ – when I sit down the back waistband pulls down – that may mean the crotch depth is too short! I’ll see what lengthening the back does.
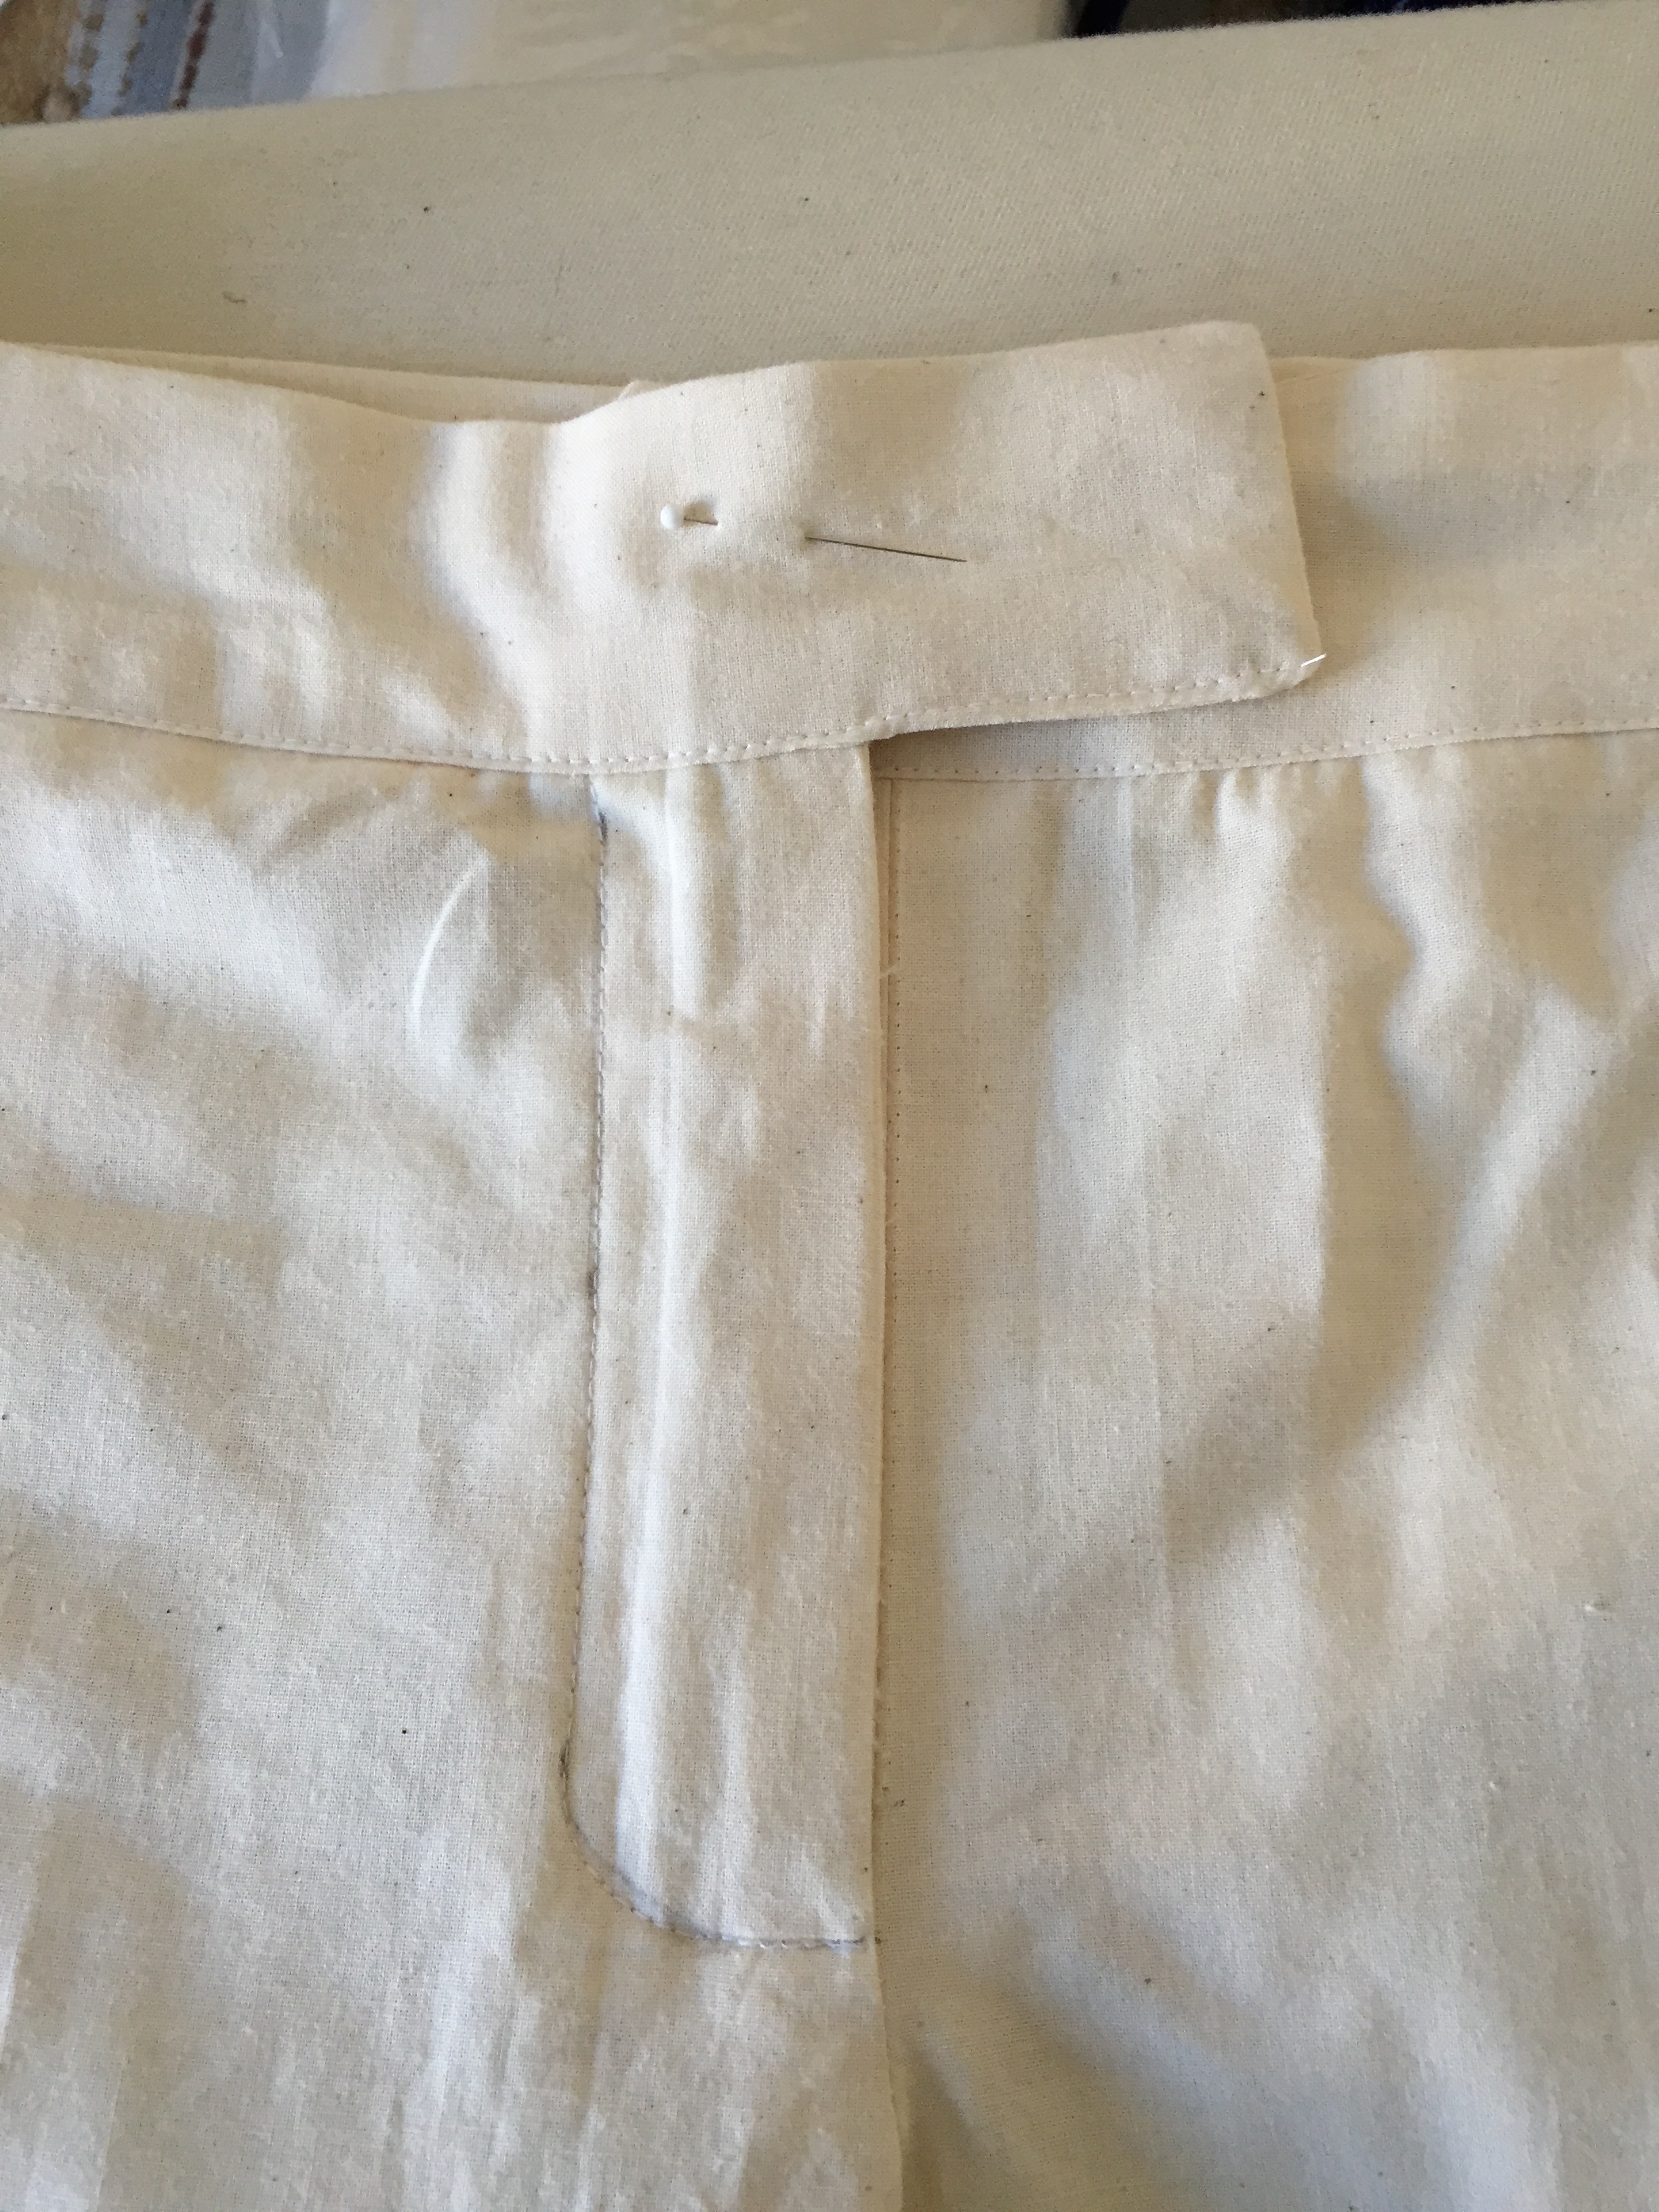
What was successful with muslin #2 was the flat fly front! That worked out well.
So each step of the way I’m learning more about how pants are designed – it’s not simple taking flat pieces and trying to fit a curved 3D body!