Yesterday, I enlarged and printed both the iris and its leaves on fabric then applied some Steam-a-Seam2 Lite (fusible web) to the back so the iris could be fused to the watercolour panel background. Last evening I fussy cut the iris, the bud, and the leaves.
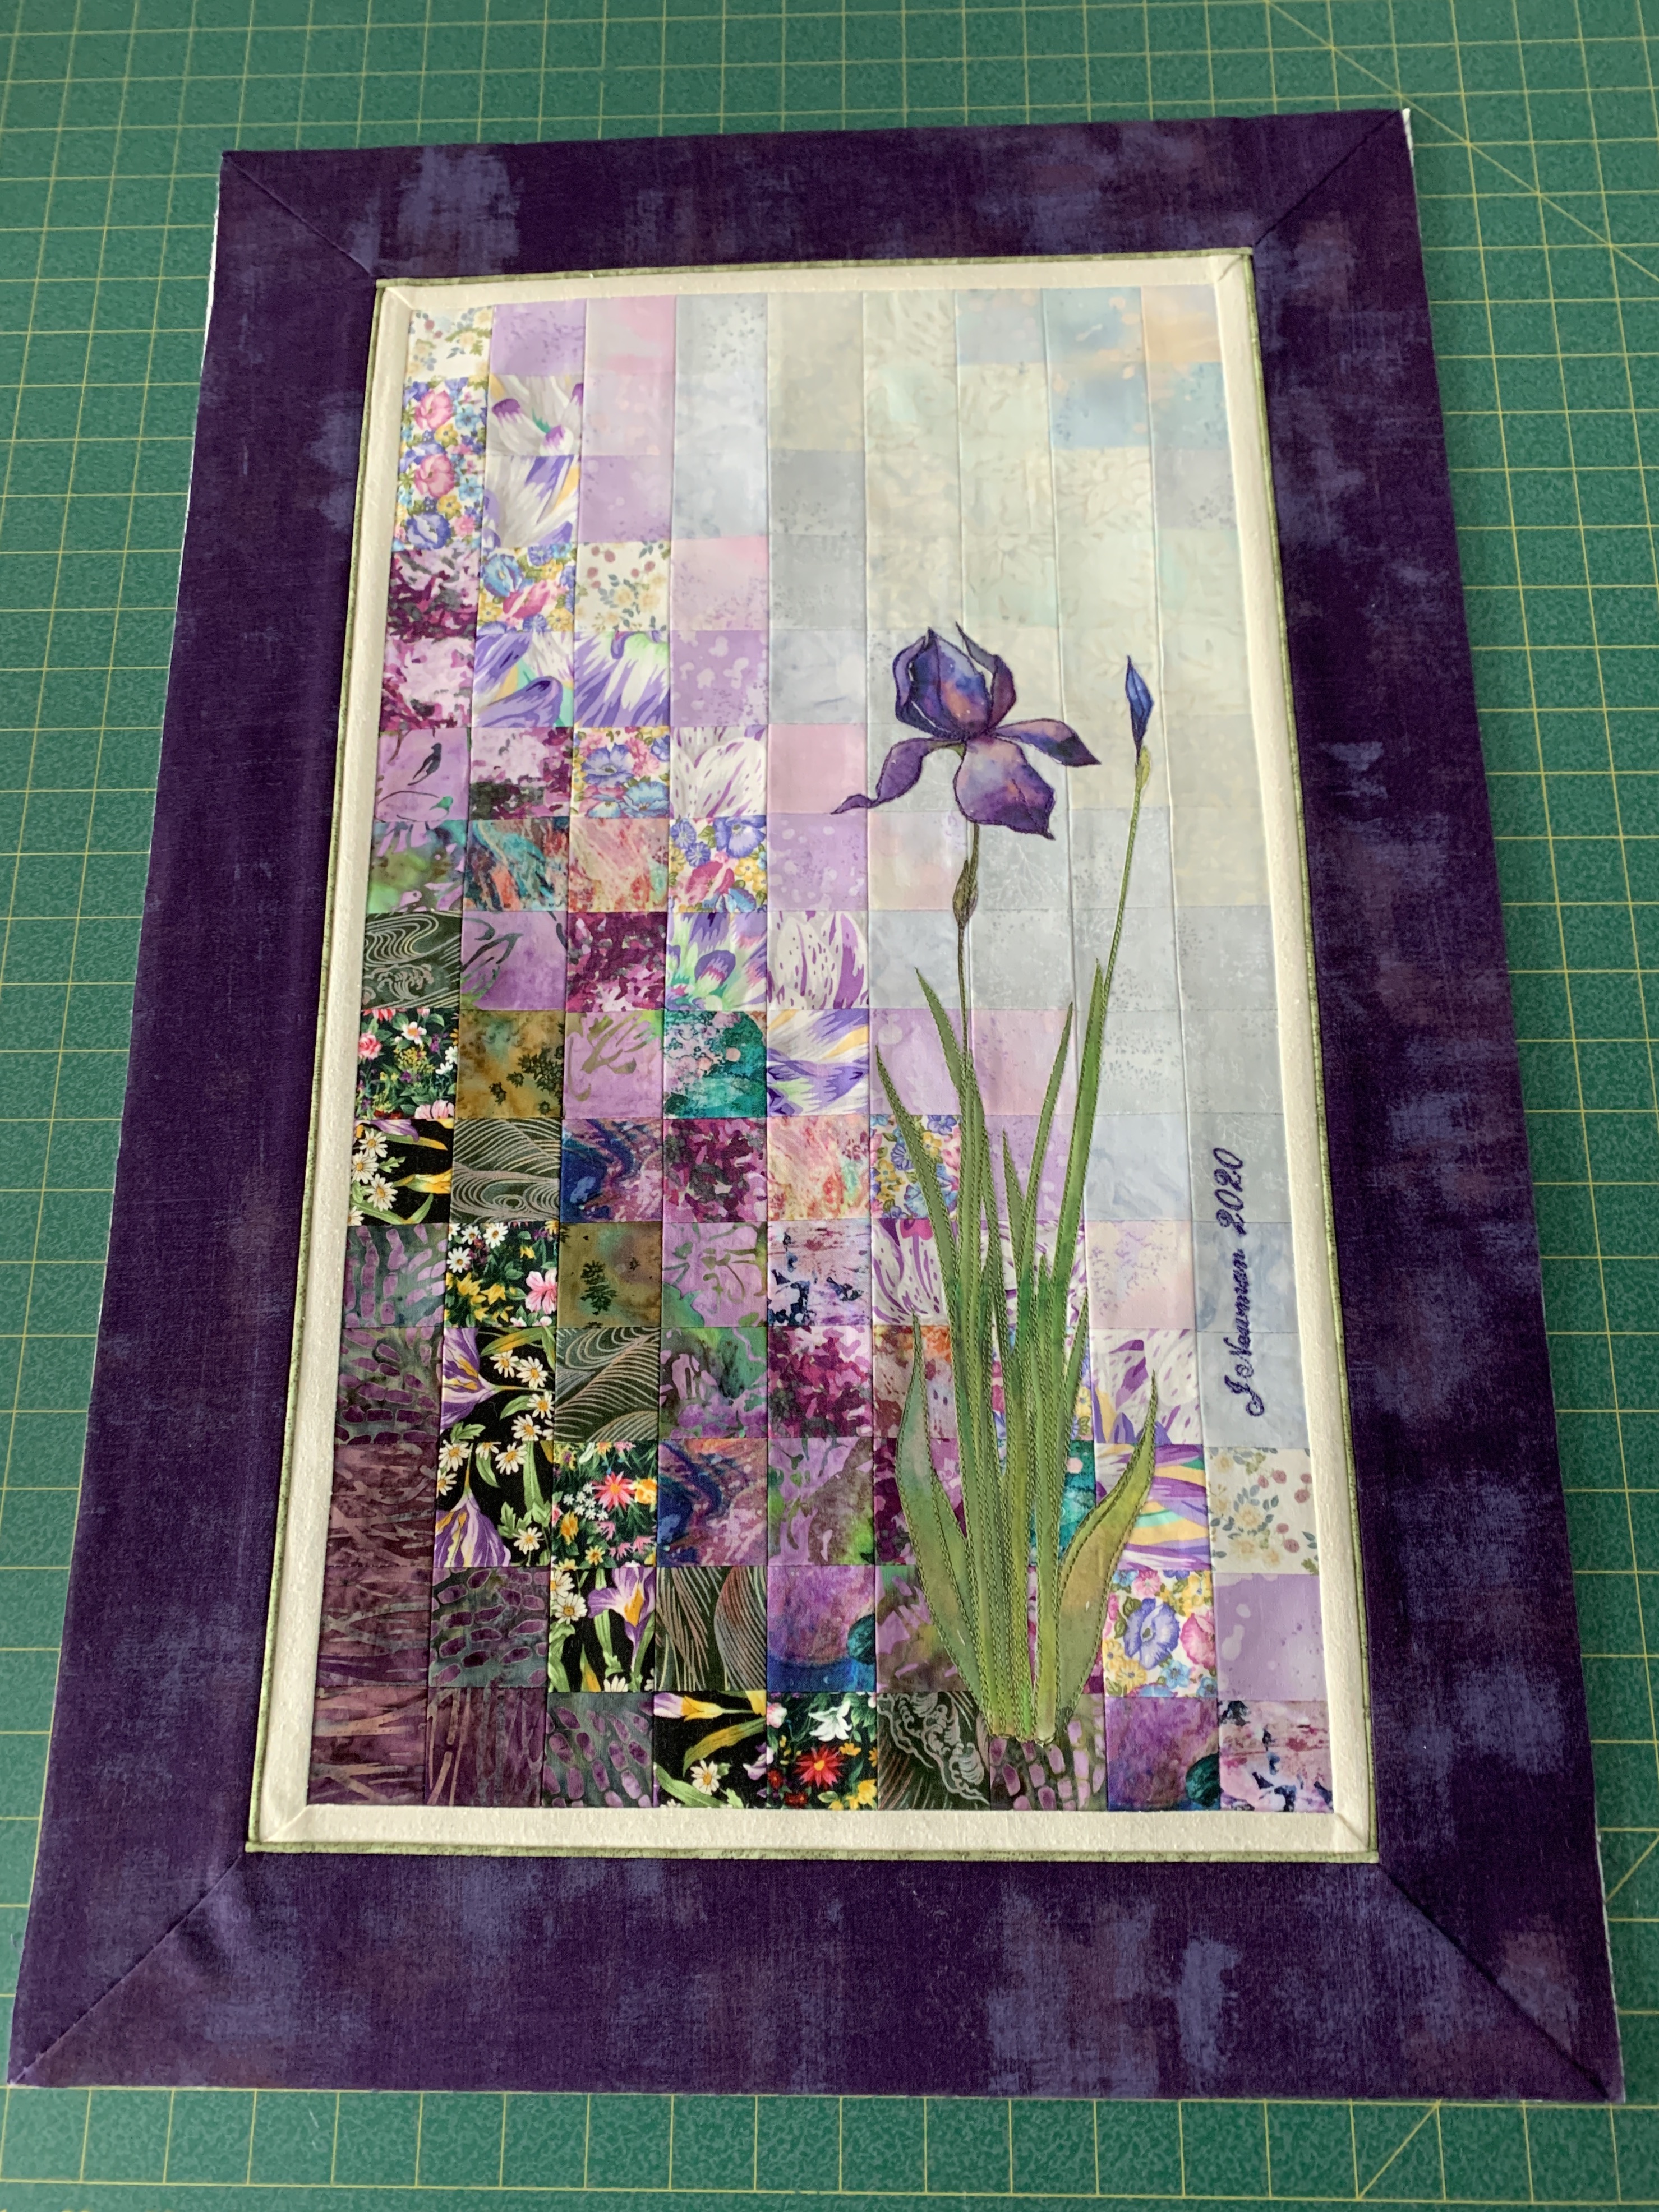
Complete except for hidden binding
This morning I fused the appliqué elements to the panel, then thread painted them, taking care to edge stitch everything so the appliqué won’t lift over time.
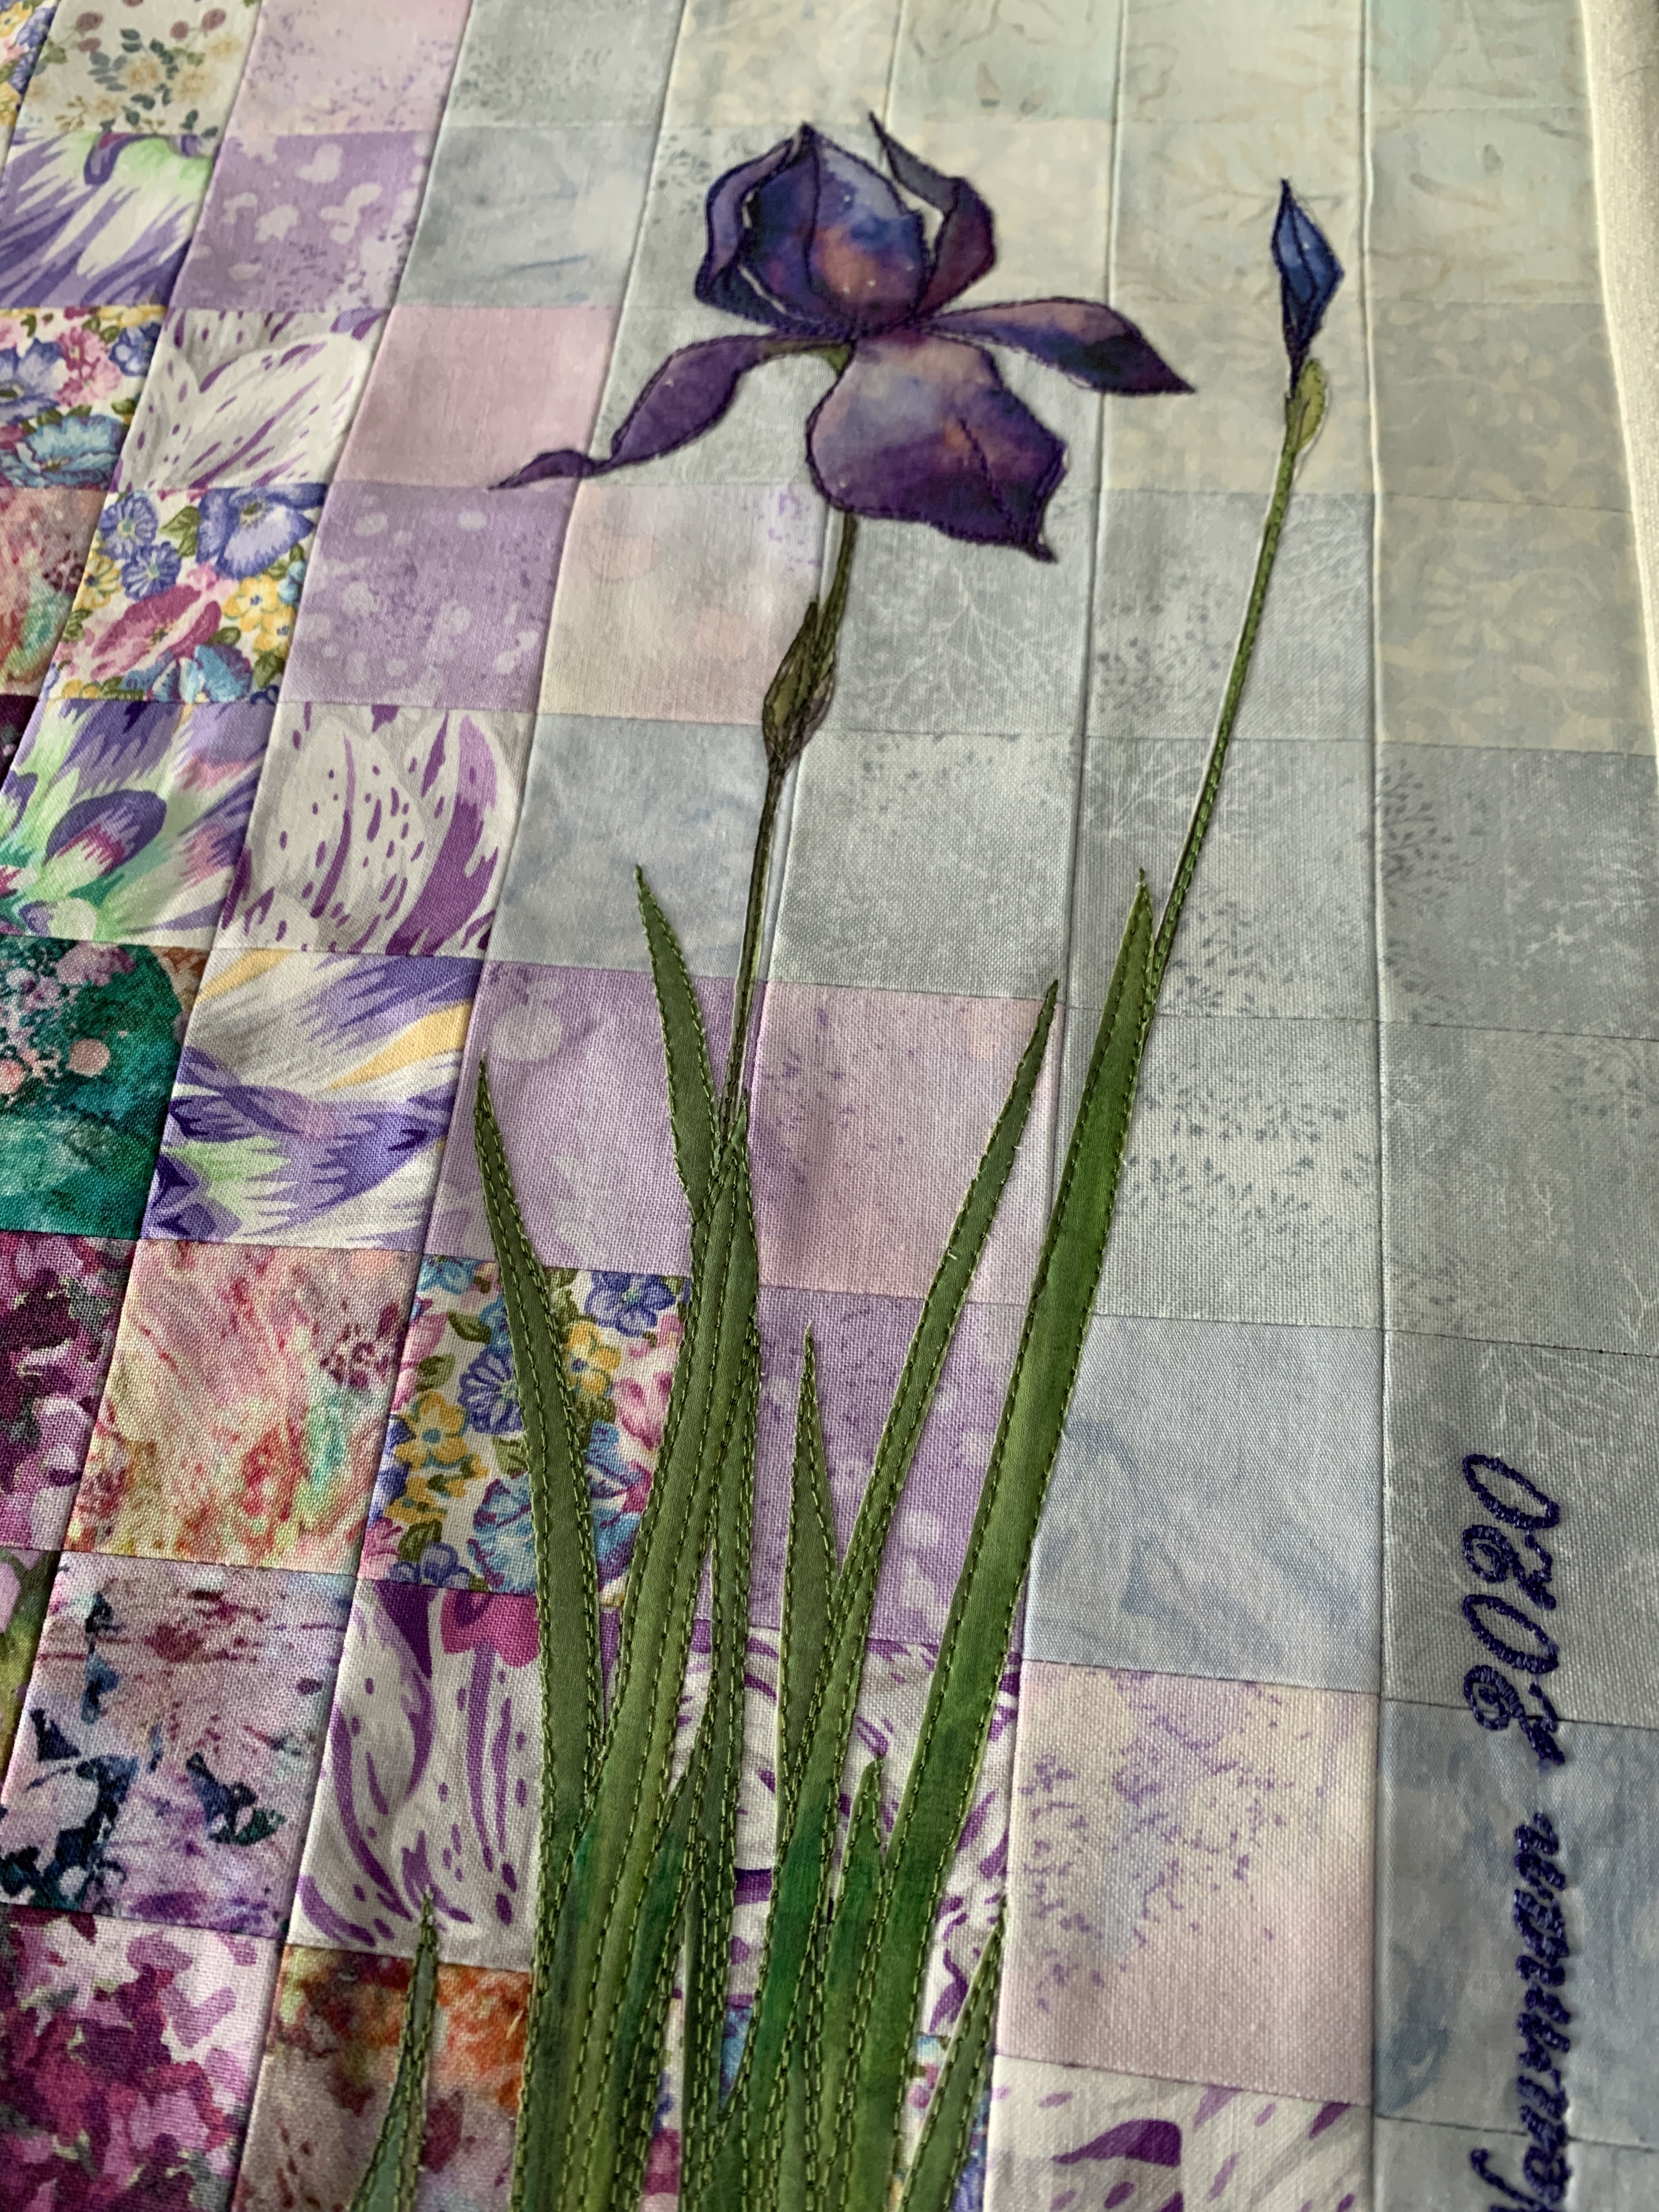
Iris – Thread Painting
Because the appliqué elements are rather small they didn’t want a great deal of stitching but I did want to work in a bit of shading on the leaves and on the flower – not so much that I obscured the shading within the appliqué.
I added a signature along the right side, then applied three border sections – first a narrow inner binding of natural raw silk, then small dotted green piping, last a 3″ purple grunge outer border.
All that’s left to do is add the hidden binding (I do have a small amount of purple grunge left but I’ll see if I can pick up 1/2m more because it’s a very useful colour to have on hand). Once the bindings are attached, I’ll insert a muslin backing and hand stitch the bindings in place on the back.
I will leave the piece as it is – while I can still lift the border to reveal the inner border construction. That will allow me to show the gals how I align the narrow border, and piping as I explain how I do it.

I love this wall-hanging quilt..
Hi… how big were your squares in this project?
Silvia Rudmik
Silvia, I cut my fabric into 2” squares fused the onto a fusible interfacing which had a 2” grid so sewing the columns and rows was uncomplicated.
Beautiful! Very quiet and refined. I do a lot of watercolor quilts too…love adding applique to a piece.
Pingback: Finishing Wall Art | jmn
I love it…It is so beautiful! Iris are my favorite flower….Beautiful Job! Jan
Thanks so much. Just finished the blind stitching on the hidden bindings in the back.
Outstanding!!!
Stunning!
Thanks