
I’ve time to get another wall art piece made before the exhibit in Parrsboro at the end of July through to August 19. I went through a bunch of photos I’ve set aside in a wall art folder on my desktop and decided to try this one – David walking on a driftwood log at Huntington Point Beach (West Hall’s Harbour/Simpson Road) taken Nov 1 2007.
My plan is to make a 12″ x 9″ image by piecing the background – sky, Bay of Gundy, hills, beach, seaweed – then printing the image on lawn fabric of David on the log (enlarging it about 115%), adding a fusible web, fussy cutting David and the log, and fusing the cutout to the background.
I started yesterday gathering fabric scraps from my many boxes of small fabric pieces. I now have a pile of stuff sitting on my cutting table. I hope to get to it tomorrow.
As you can see, I’ve sketched out the basic elements of the image on a muslin backing fabric. I won’t need large pieces of fabric to fill the area. I’ll start by trimming the scraps to an approximate size, adding fusible web to the back, then start to assemble the panel.
I’m also toying with another idea.
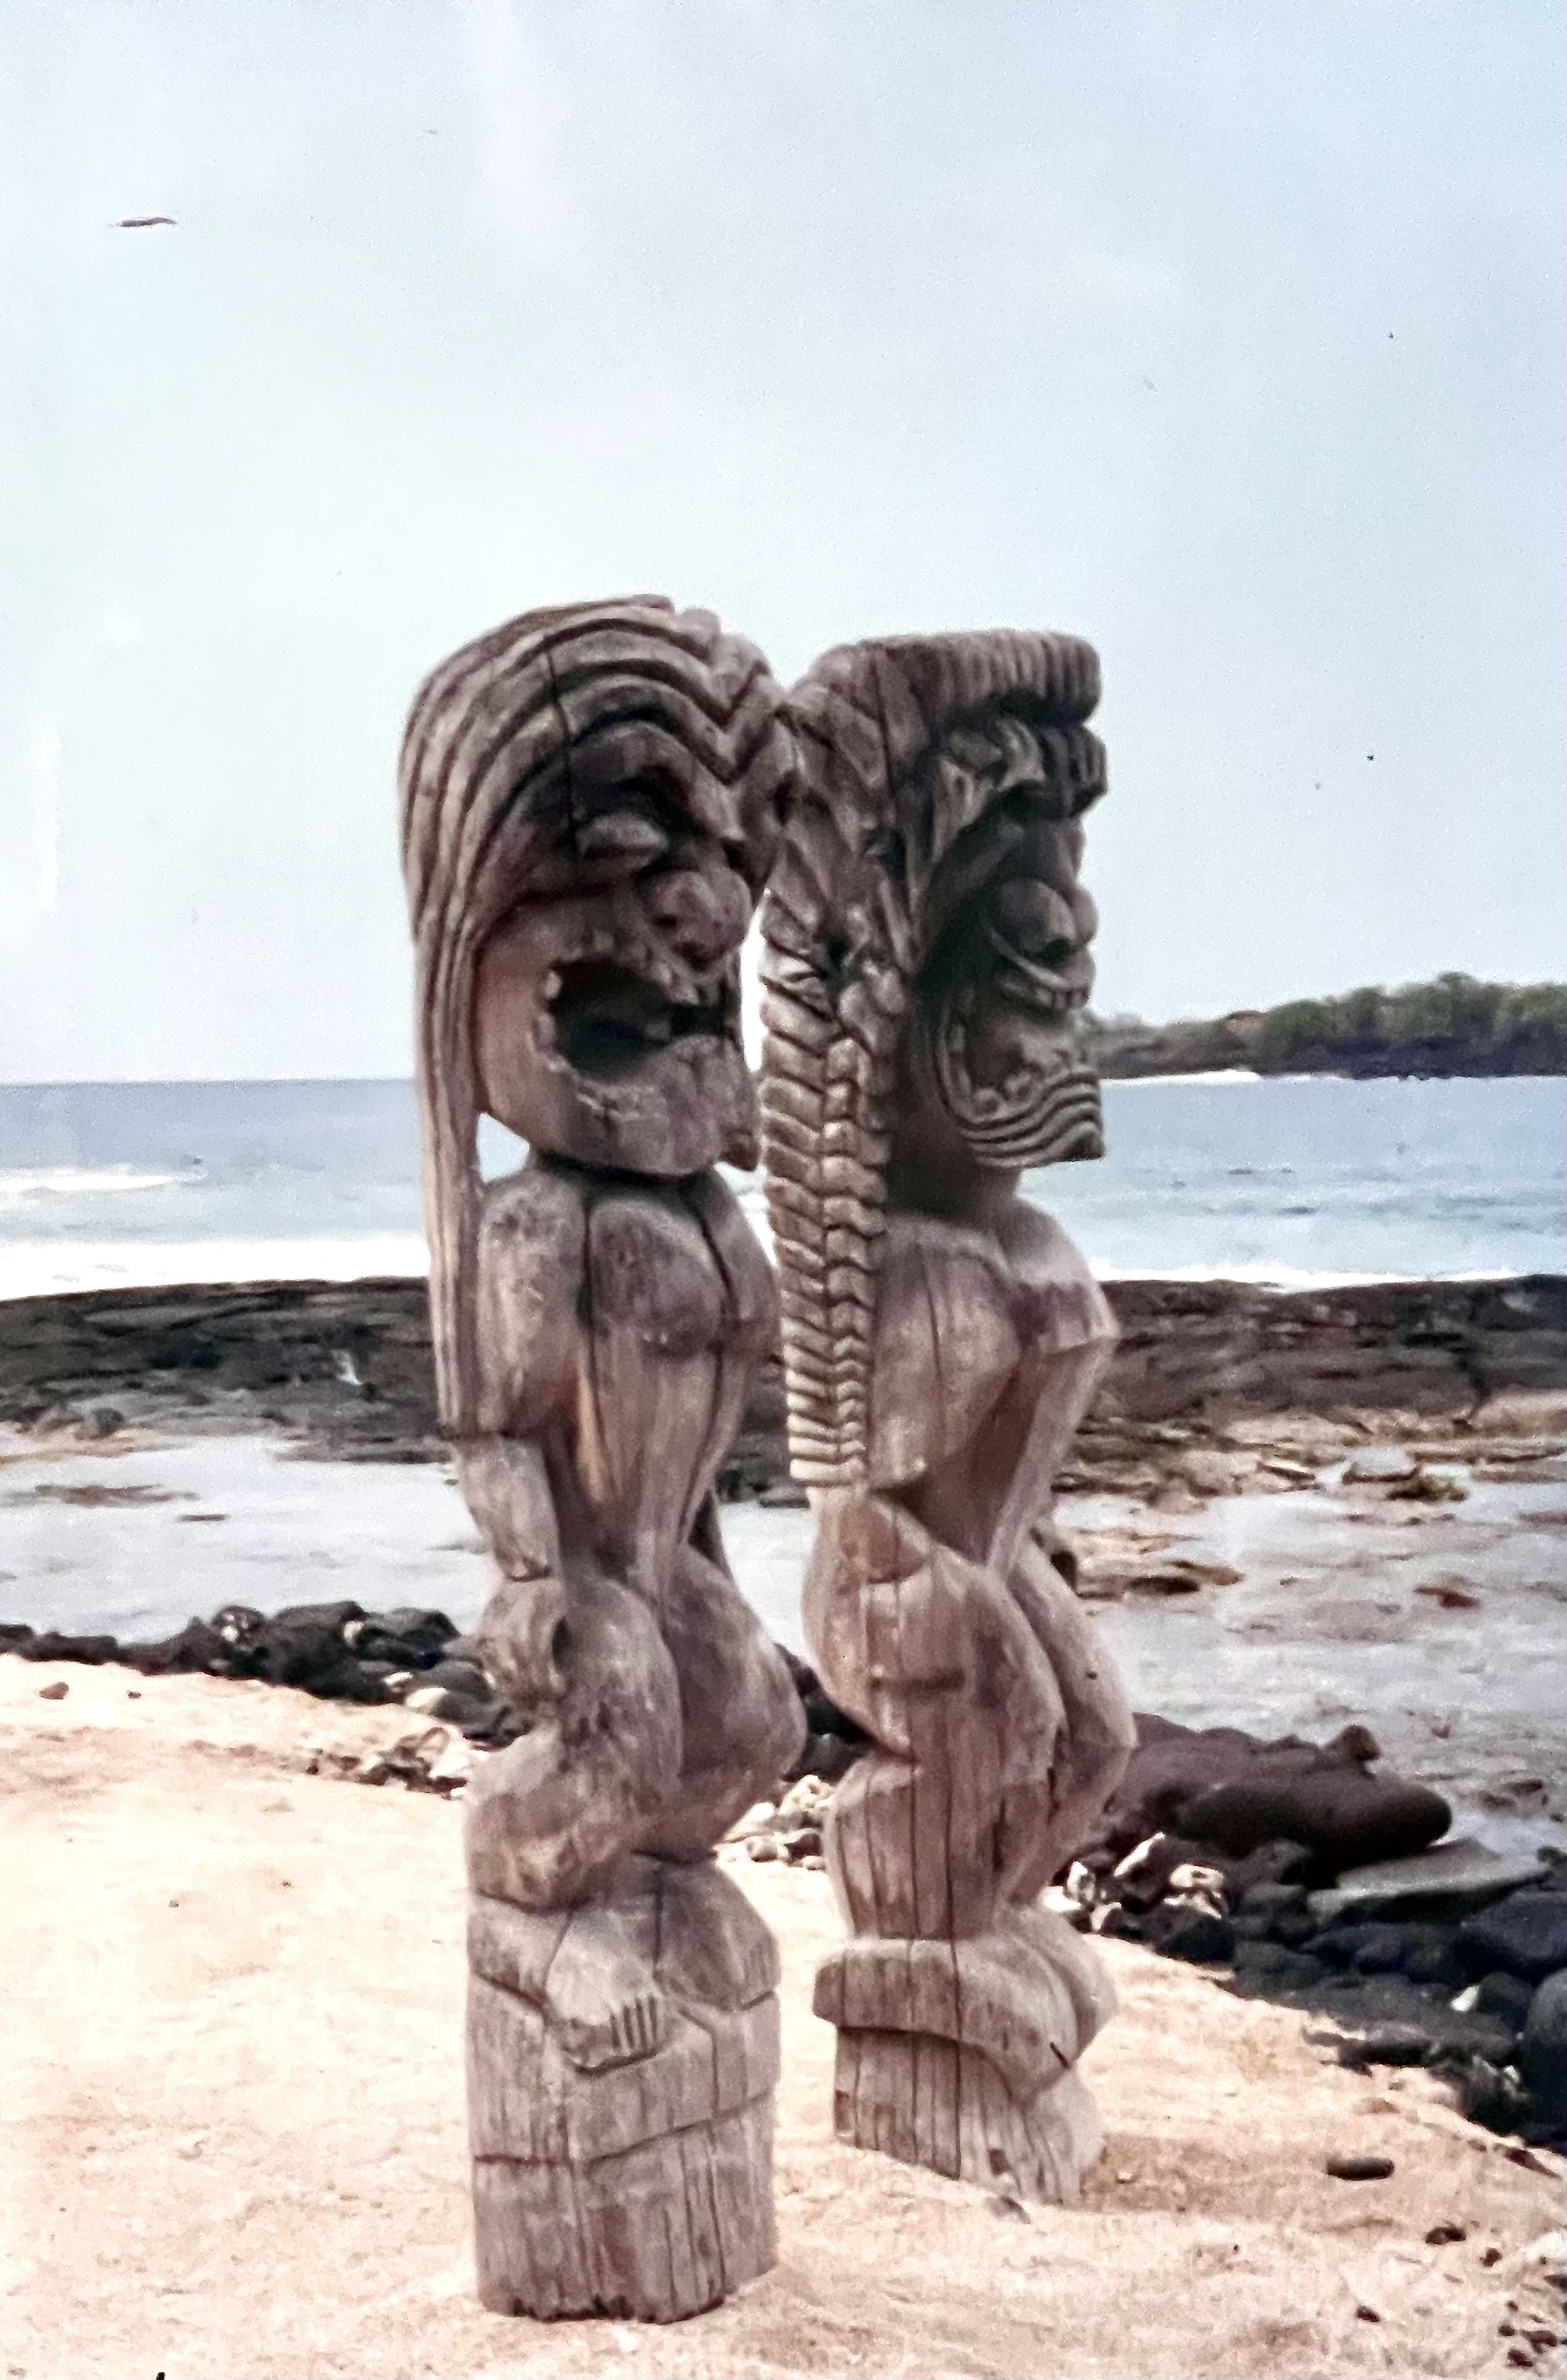
I took this photo at Puʻuhonua o Hōnaunau National Historical Park a gazillion years ago! I was fascinated by the Tiki on the beach there. So obviously connected to the totem traditions of Canada’s west coast Haida people. I have this photo hanging in my sewing studio. It’s in portrait view. I think these two wooden sculptures would make a great focus for a coastal landscape view with them off-centre on the left. I’m just trying to figure out how to sharpen the image so I can highlight the demarcations with stitching.
Another photo I keep coming back to is the one of Charlie’s first visit to a beach when he was maybe a year and a half.

I made a wall art piece from this photo in 2017 using appliqué and thread painting but I’ve always wanted to extract him from the photo and do the piece again.

The problem is the photo I have was send in small format from his dad’s iPhone and I can’t enlarge it and get any sort of sharp image! I’ve played with the photo endless times to no avail. I went so far as to call his dad, my nephew, and asked him to try tracking down the original. No luck, probably long gone. I may have to enlist some help from the iPhone Photography School people to see whether anybody can help me out.
For now, it’s David at Huntington Road beach and possibly the Tiki.


