iPhone Photography

The dogwoods have been spectacular this year. I never really noticed before how many there are around the city. This one is in my friend Mary Ann’s front yard. I love the hint of pink with the magenta edge. This tree is in a shady spot but it gets sunlight mid-afternoon. Here the sun is both catching some of the flowers directly while others are backlit. Makes for an interesting photo.

This dogwood is in another friend’s backyard. It was in full splendour a week ago.

I’ve driven past a number of glorious pink trees – just not taken the time to stop and grab some photos. Too busy getting somewhere. At least I noticed them.

I noticed the daisies beside the big rock next to our driveway on the weekend but didn’t stop to catch an image. The next couple of days were overcast but when I returned home from my morning Aquafit class the sun was bright and the daisies smiling. I parked the car and got out so I could grab some shots. I cropped several photos but lost the shadows on the rock which contrast with the daisies.

Socks, As Usual

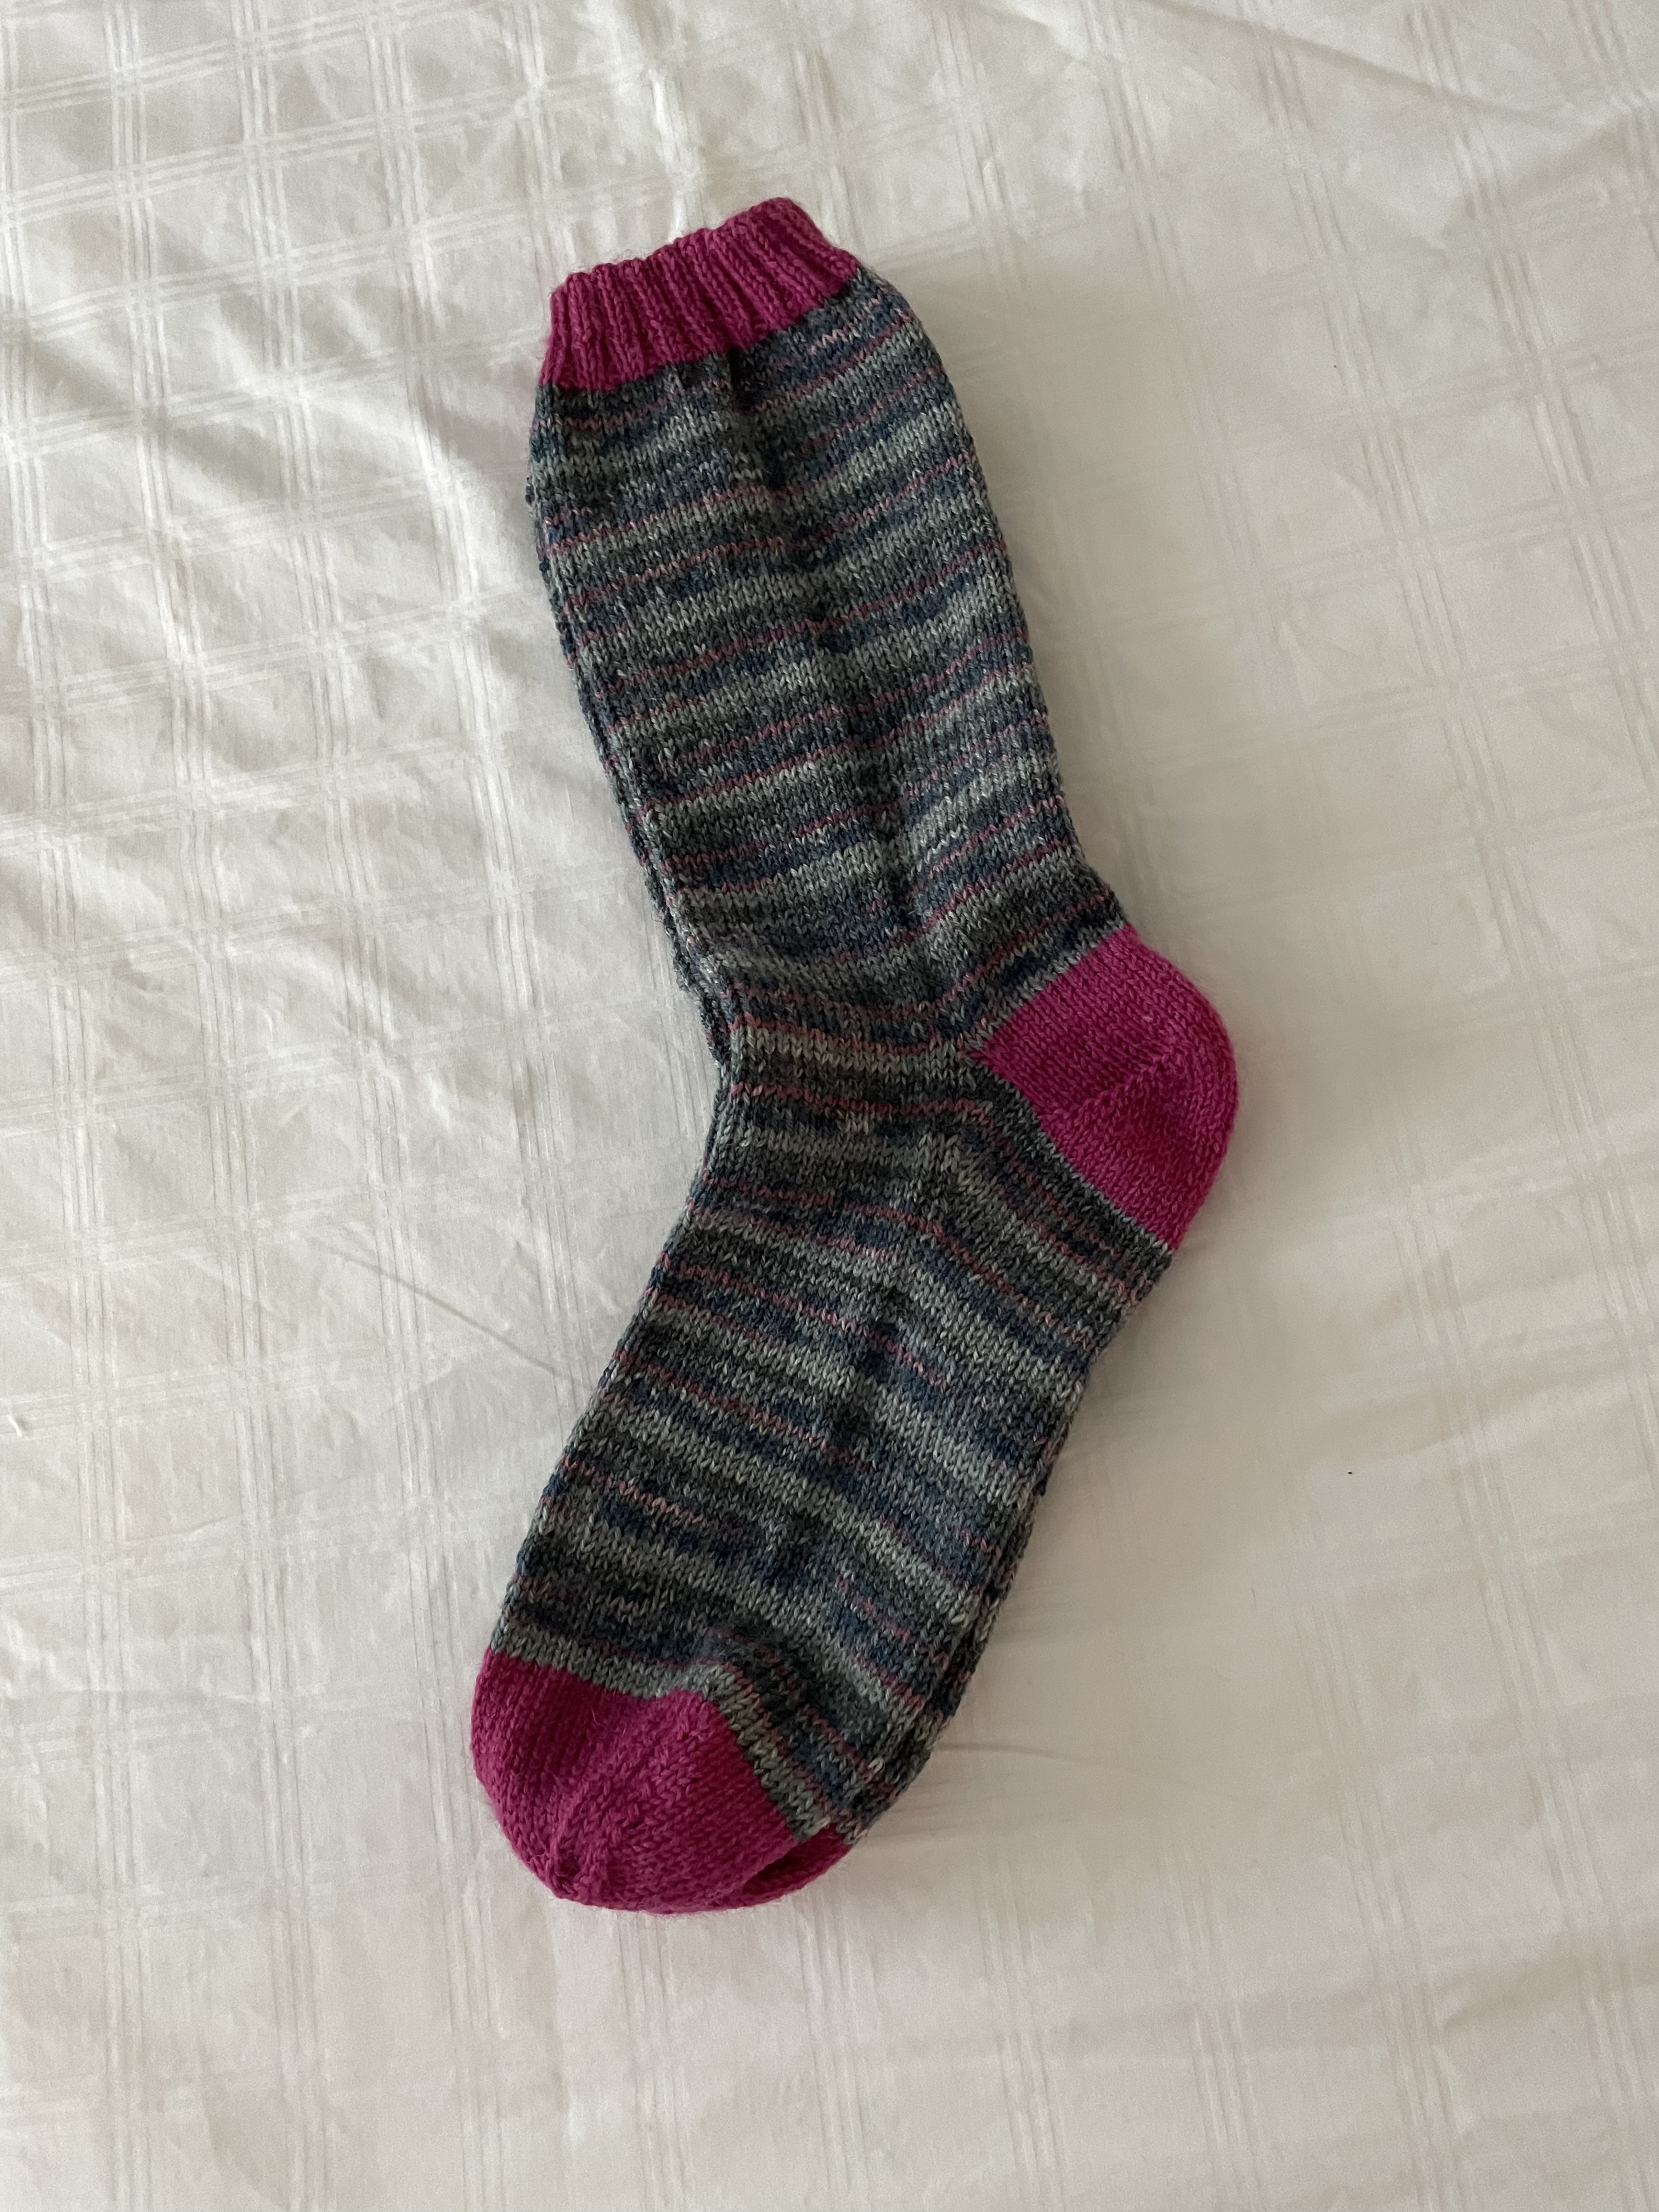
I just keep knitting. I CANNOT sit in front of a TV without something in my hands that doesn’t require my full attention but lets me feel productive. Finished this pair of socks a week ago. They’re not as drab as they look, there are hints of magenta and navy blue in the variegated yarn. They weren’t too boring to knit as some socks are from time to time.

This pair finished, I started on the next. I’m ready to turn the heel on the first sock, this evening.

I’m Still Here

I last posted June 22 – just over two weeks ago. Where have the days gone? We’ve had some lovely weather, some not so lovely weather (but I bet folks on the west coast would have given anything to have had a few cool, foggy, misty days – so no complaining).

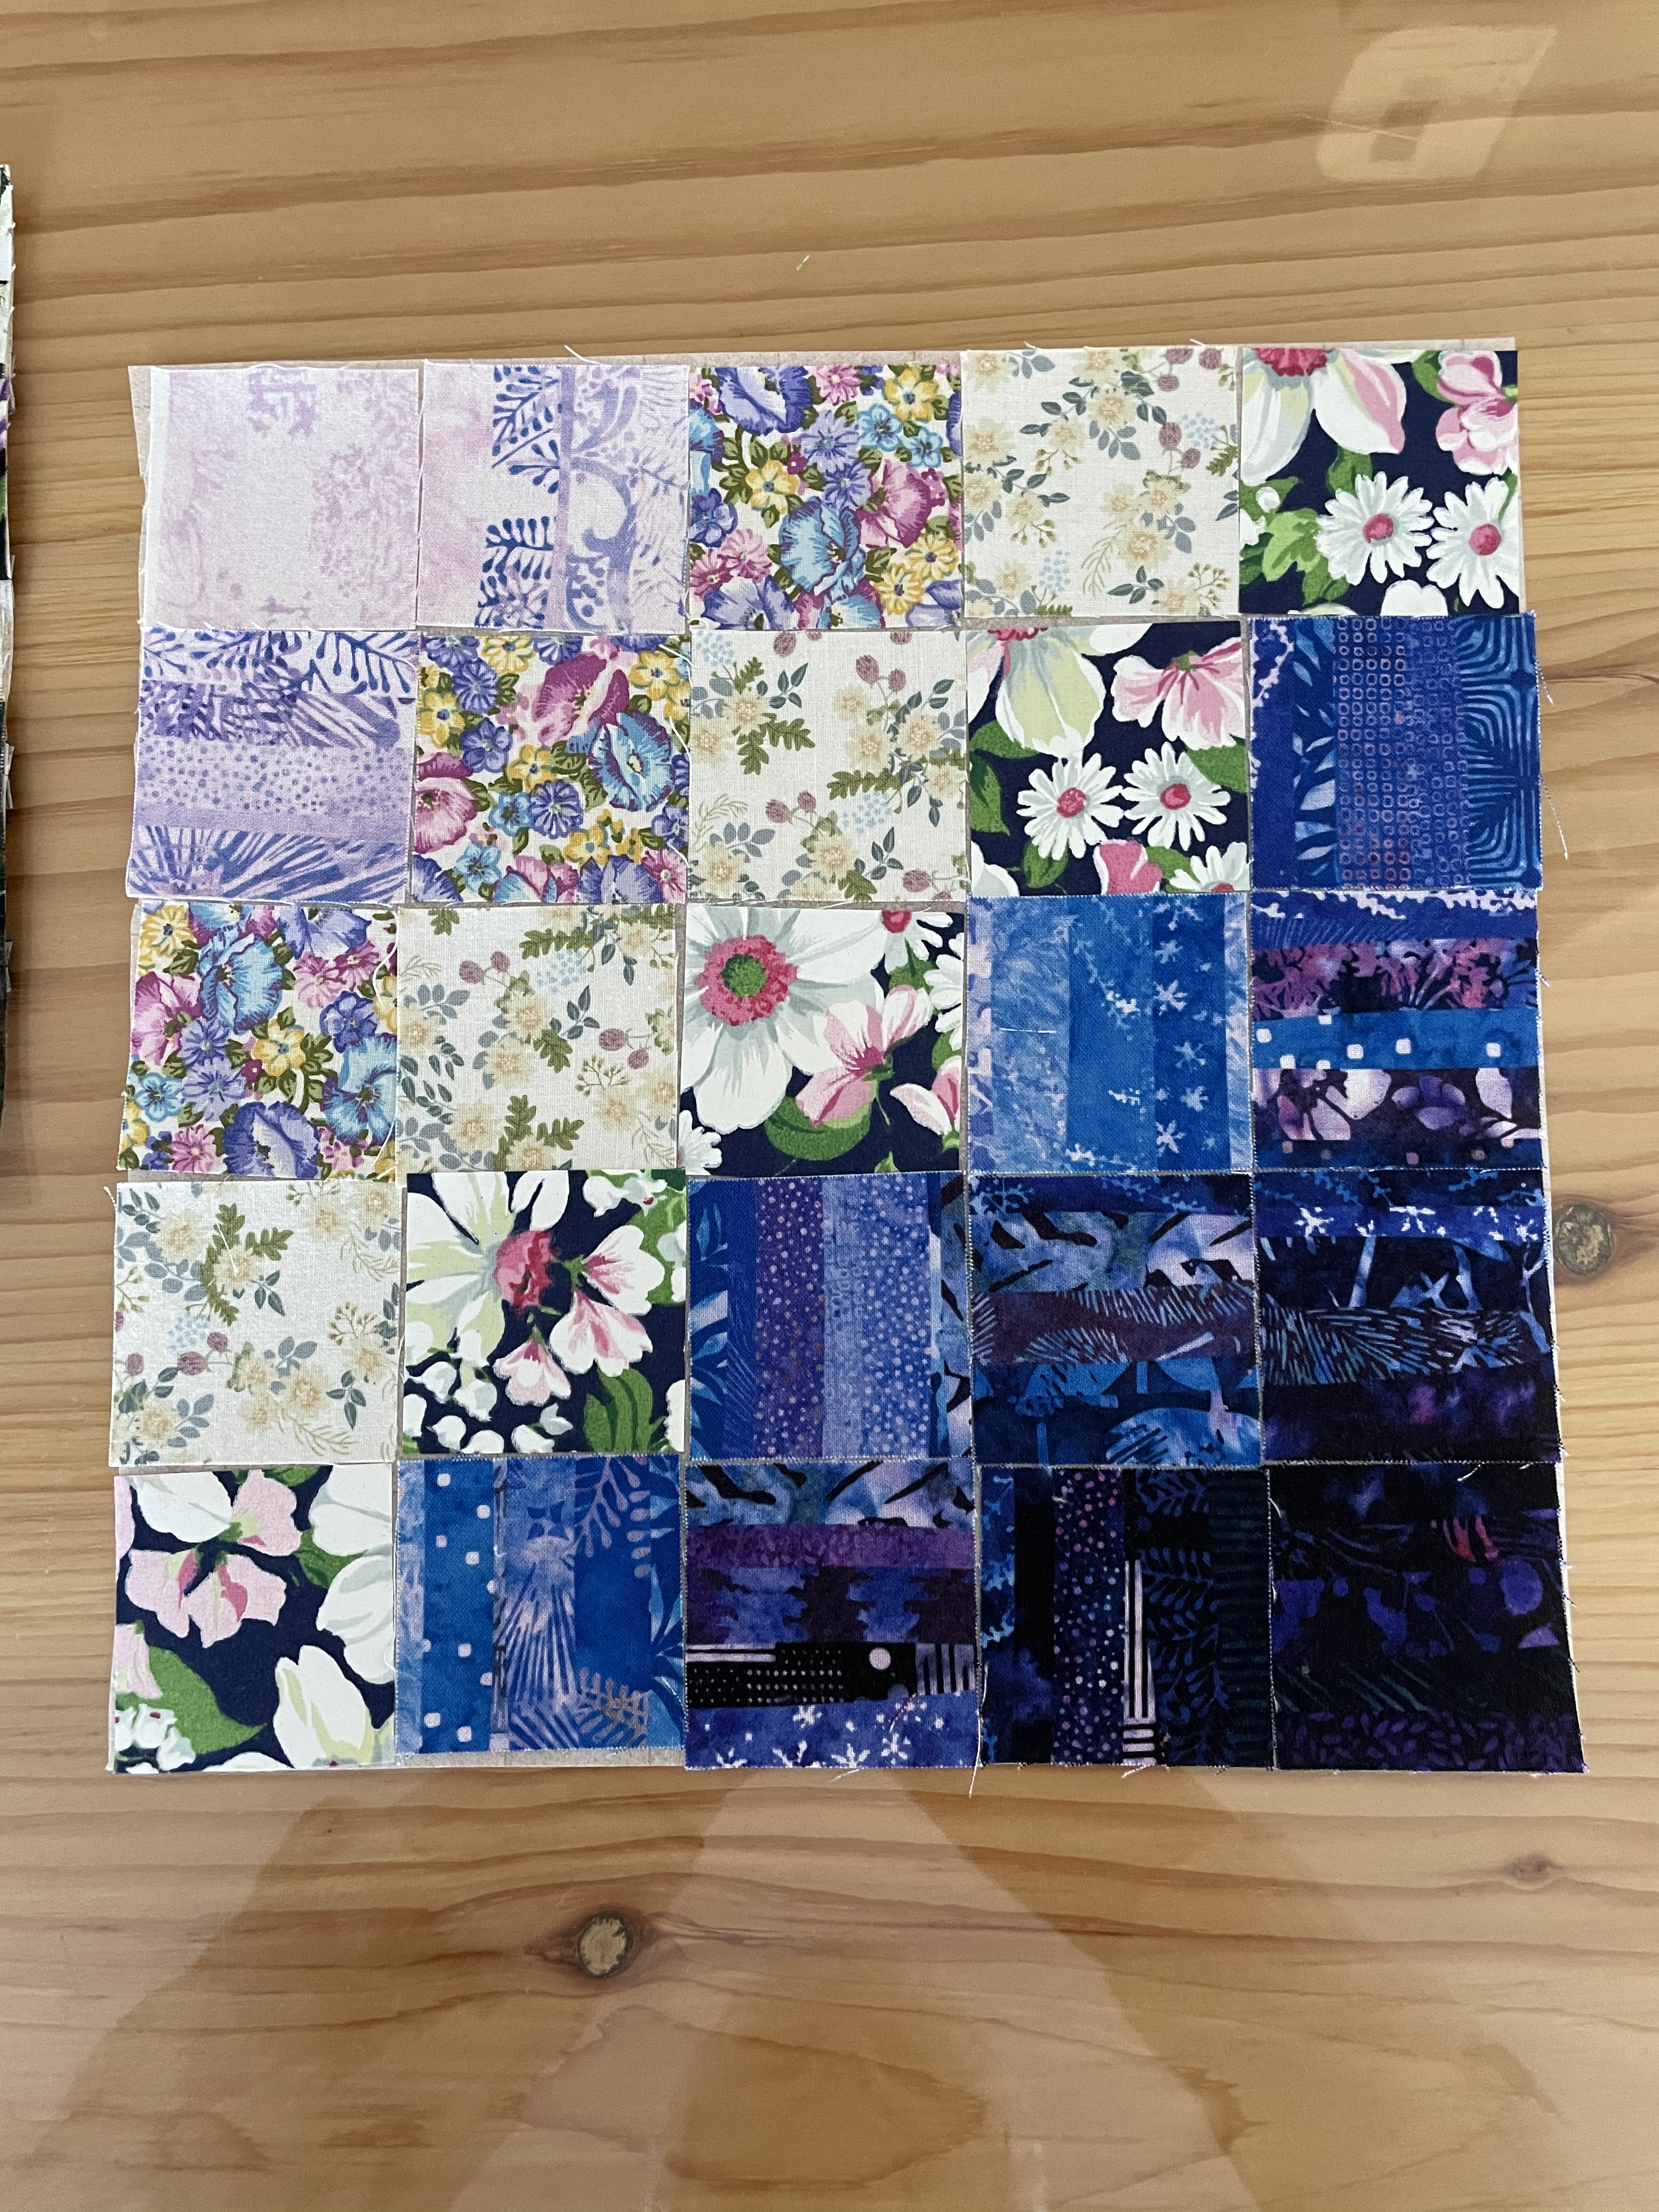
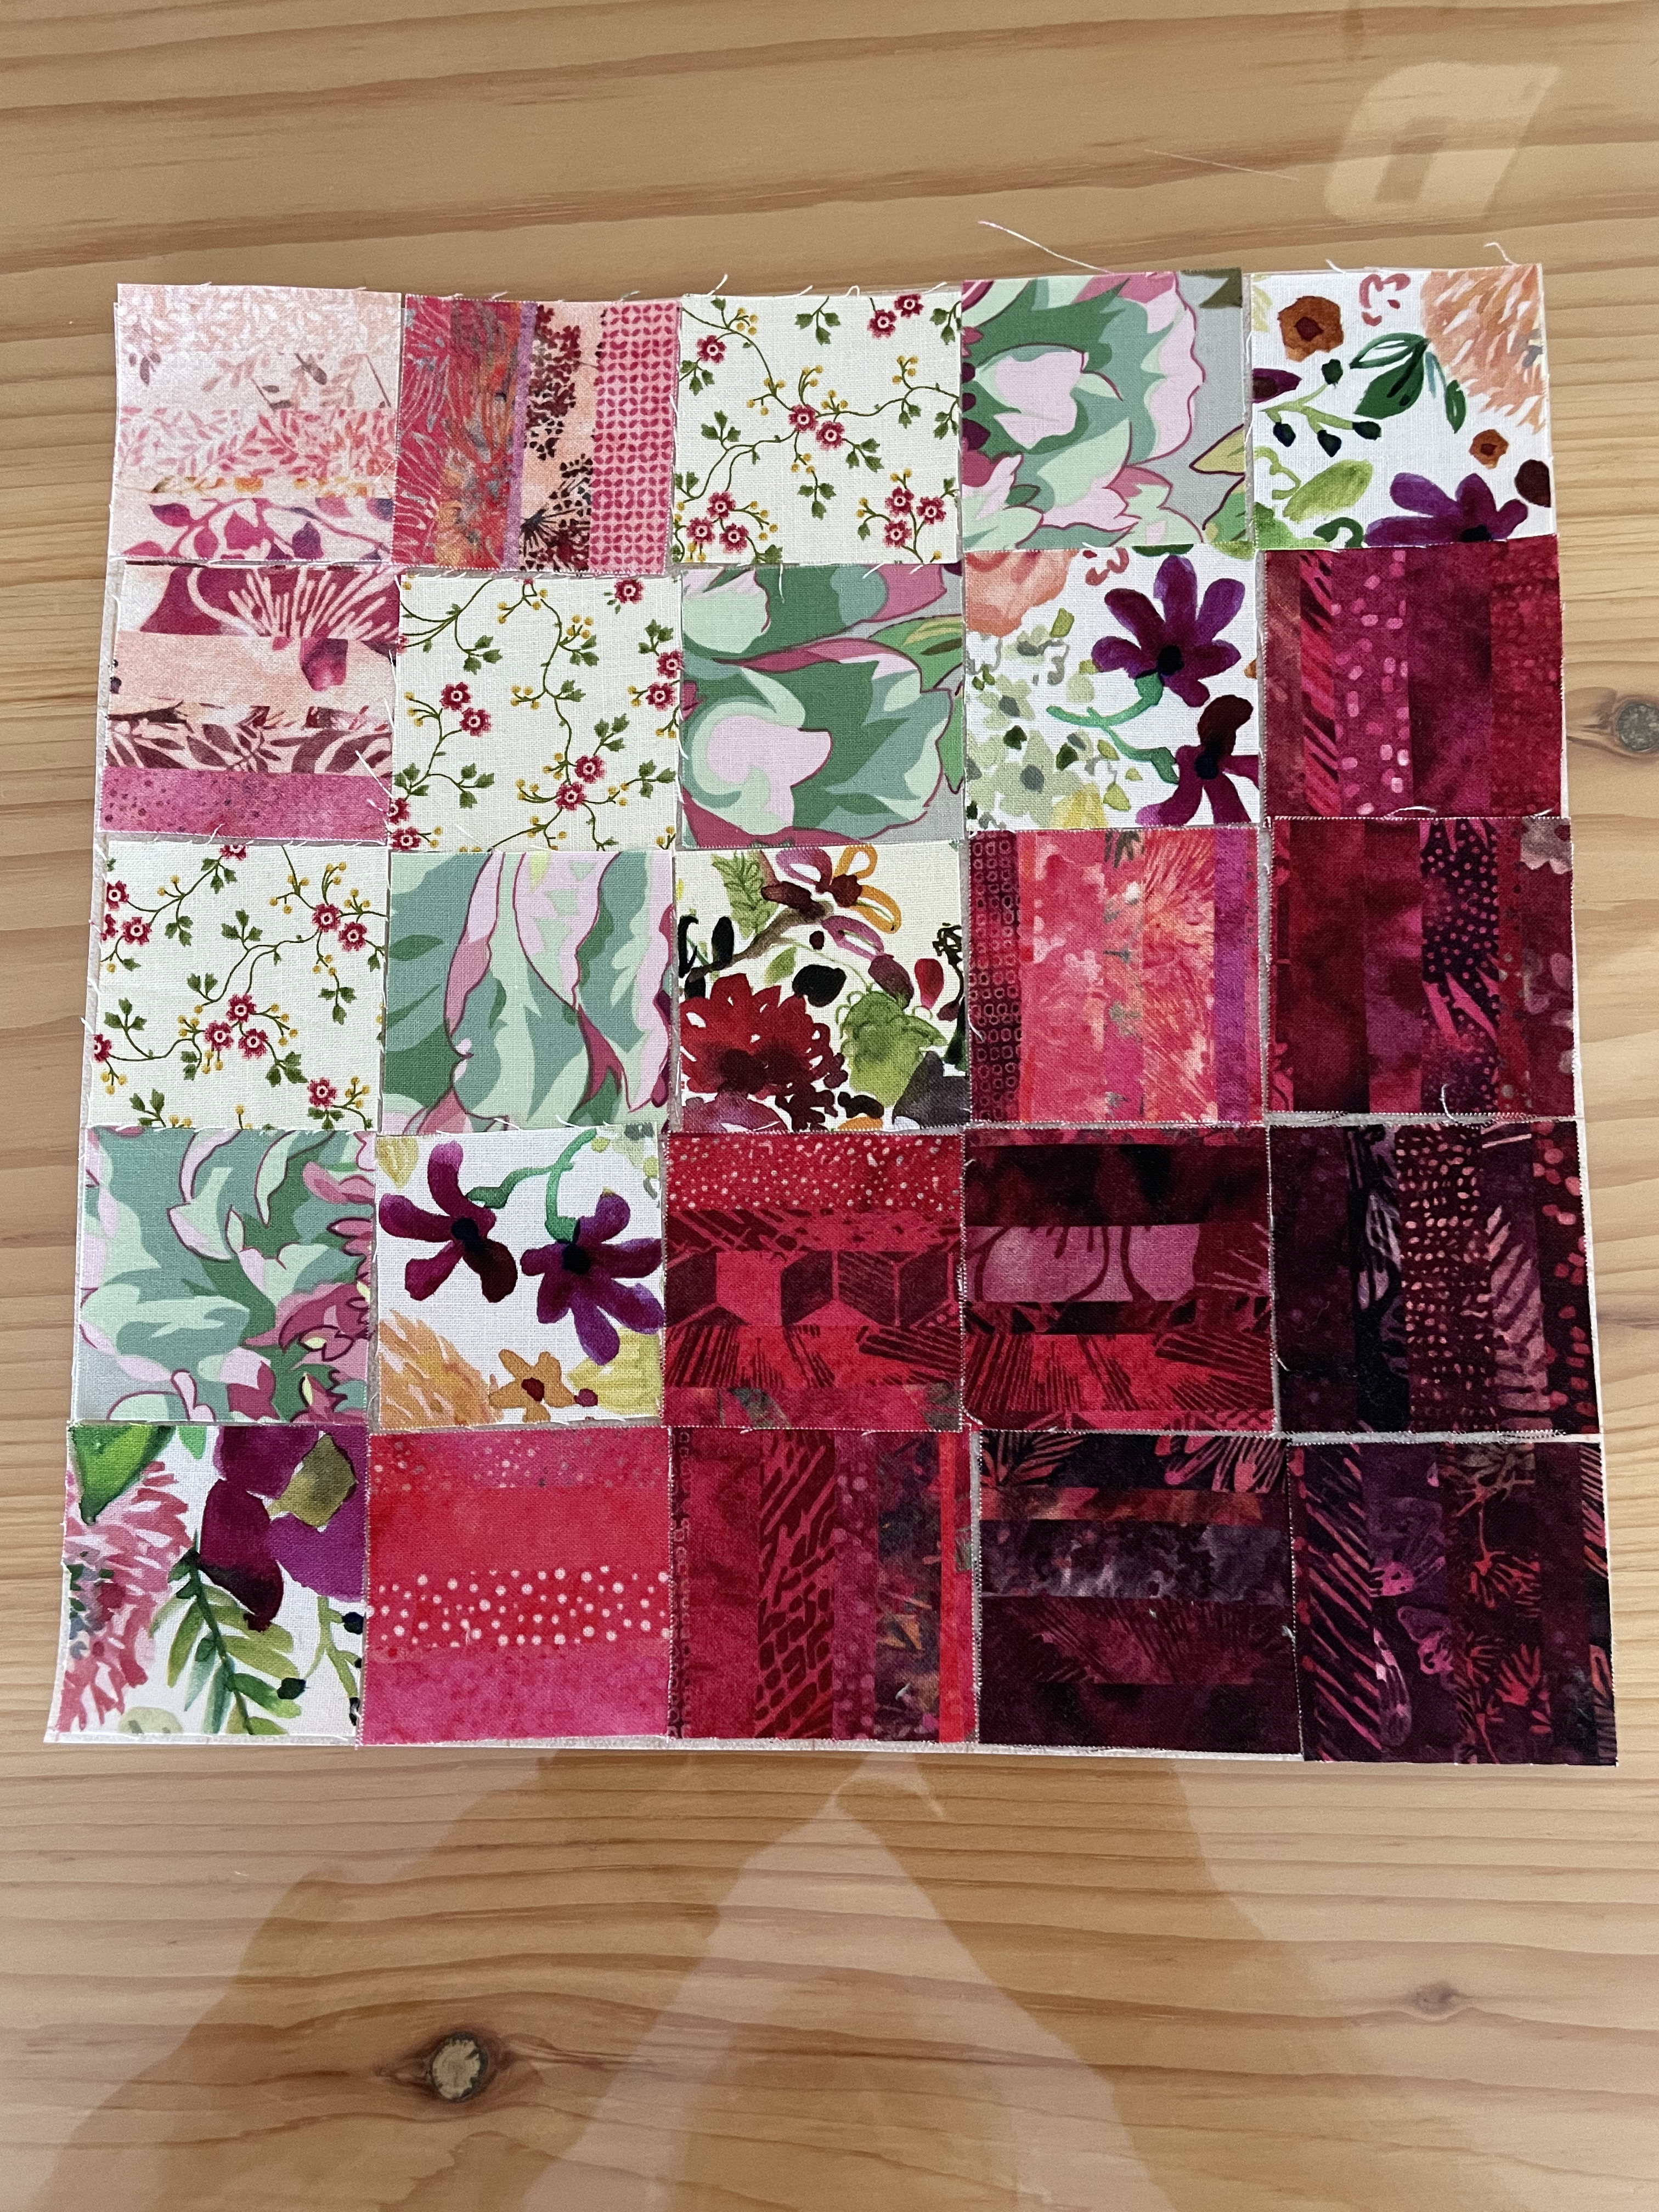
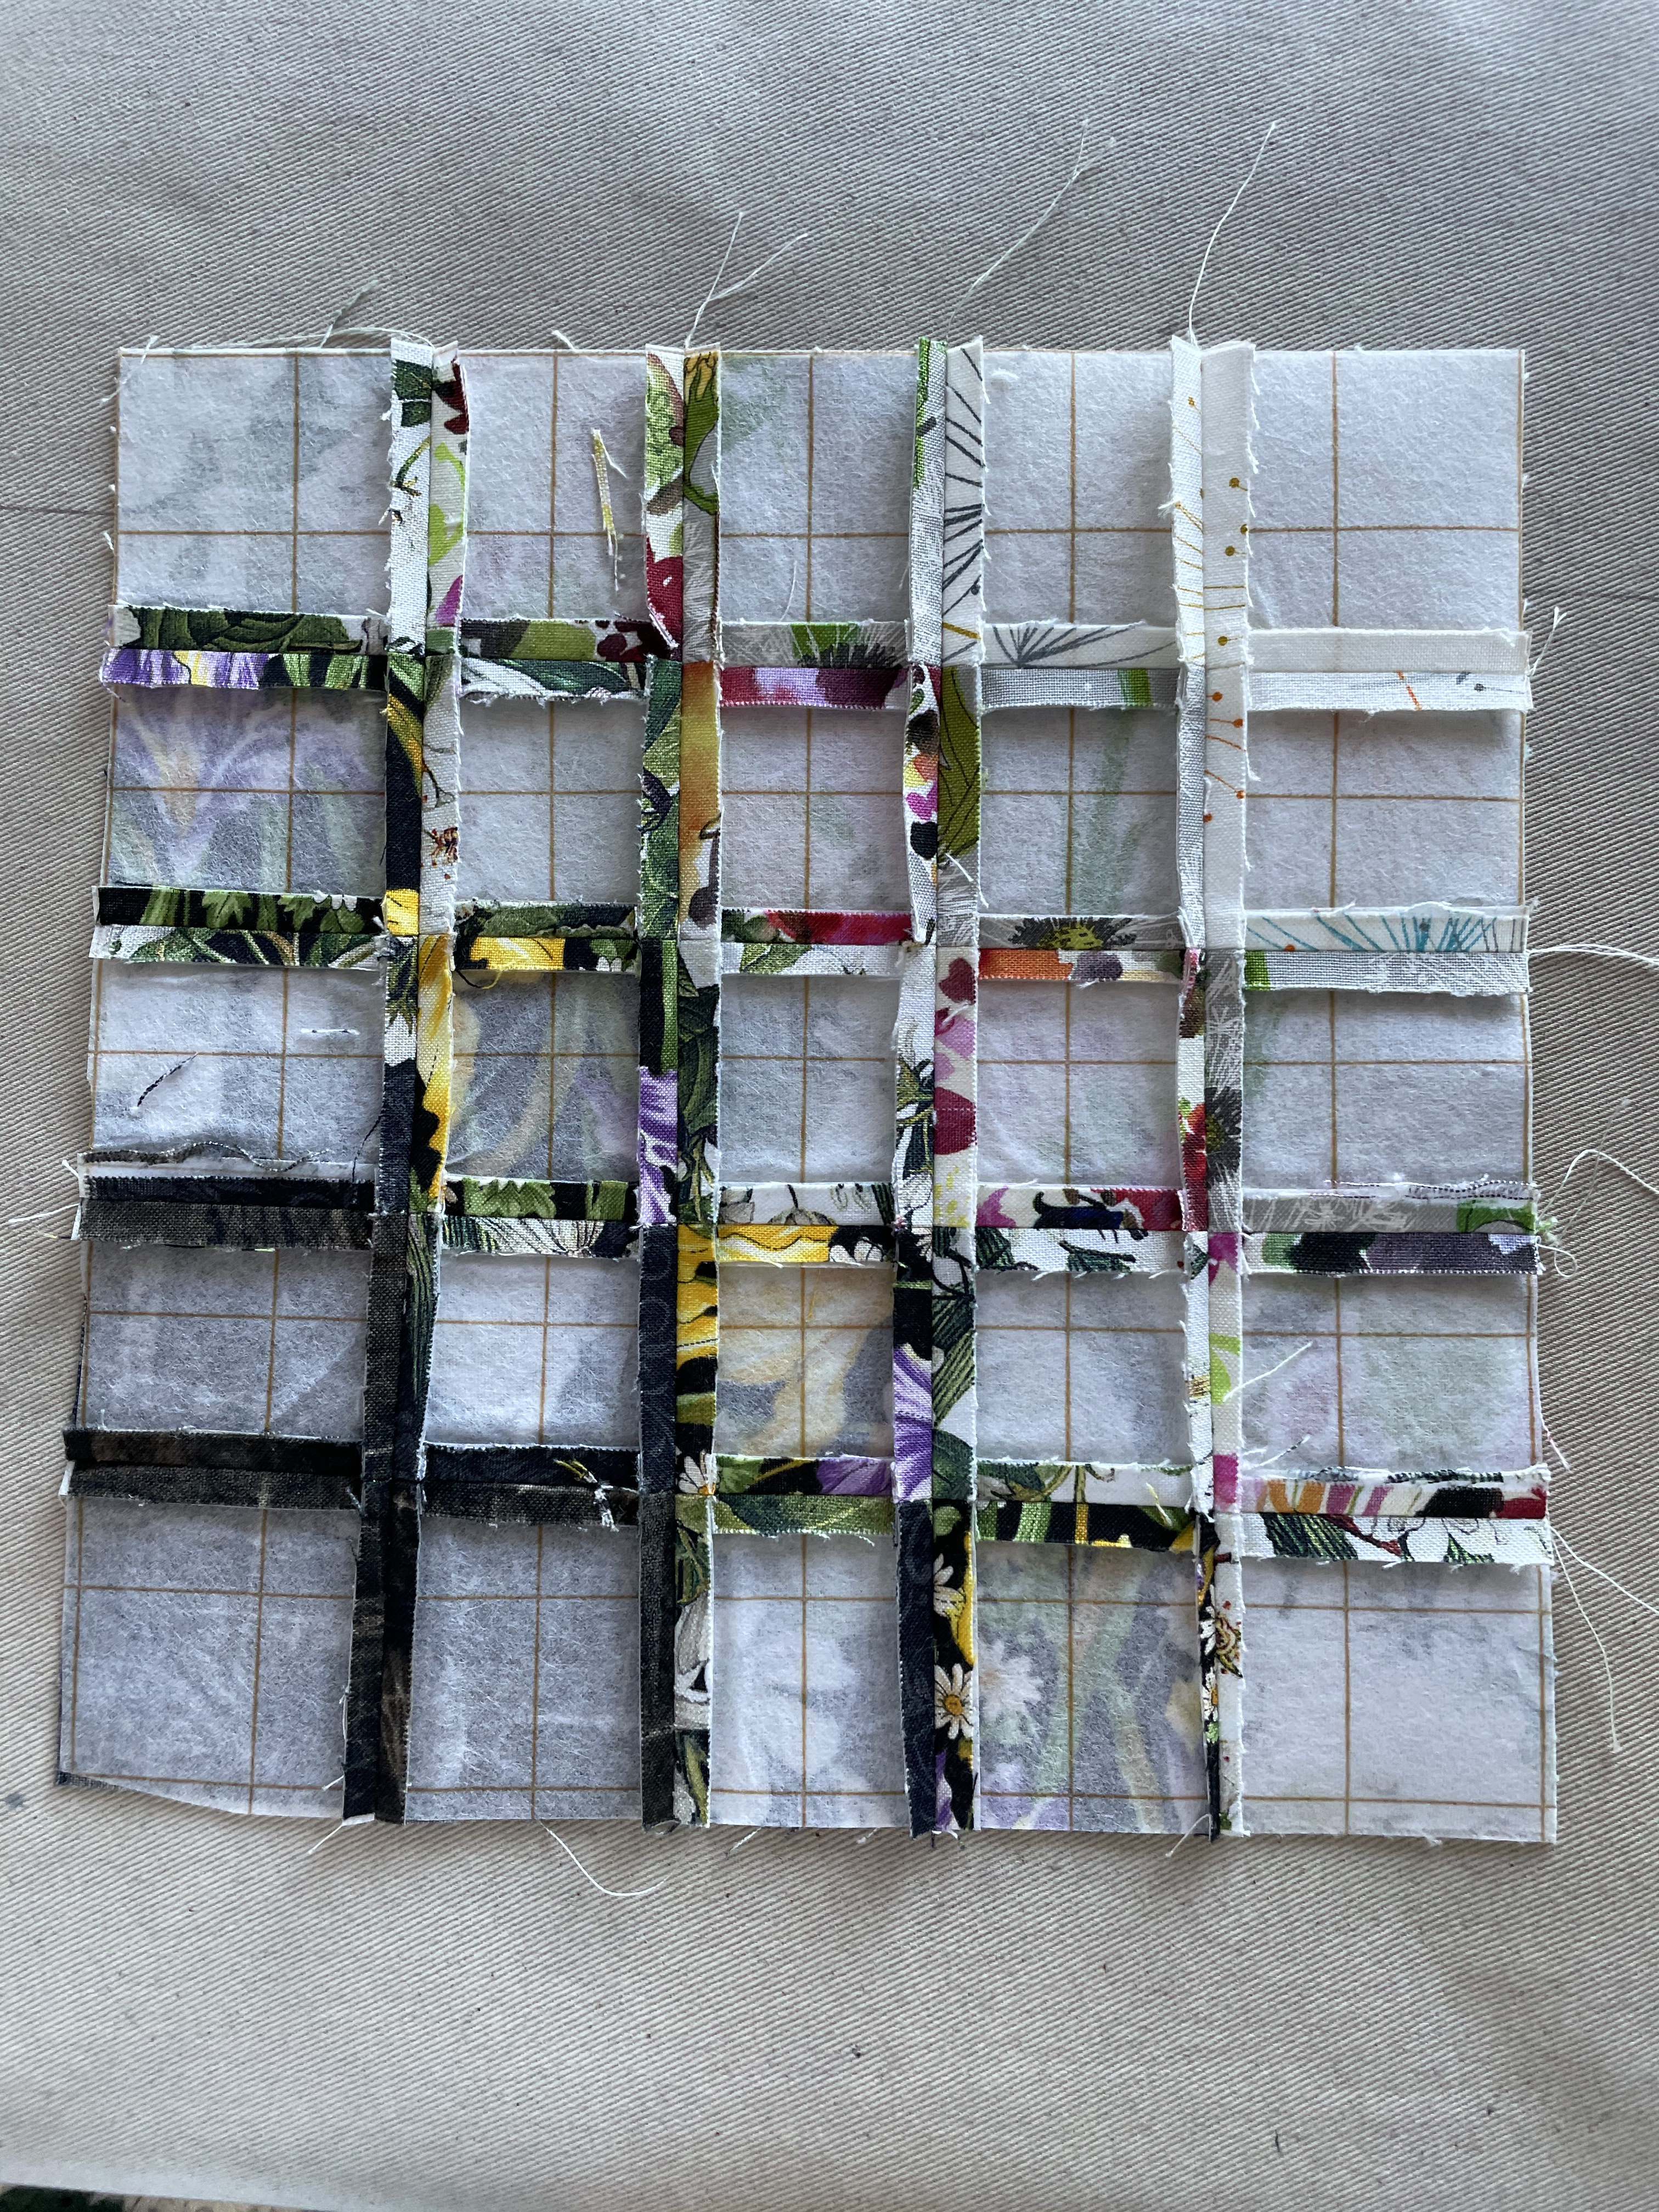
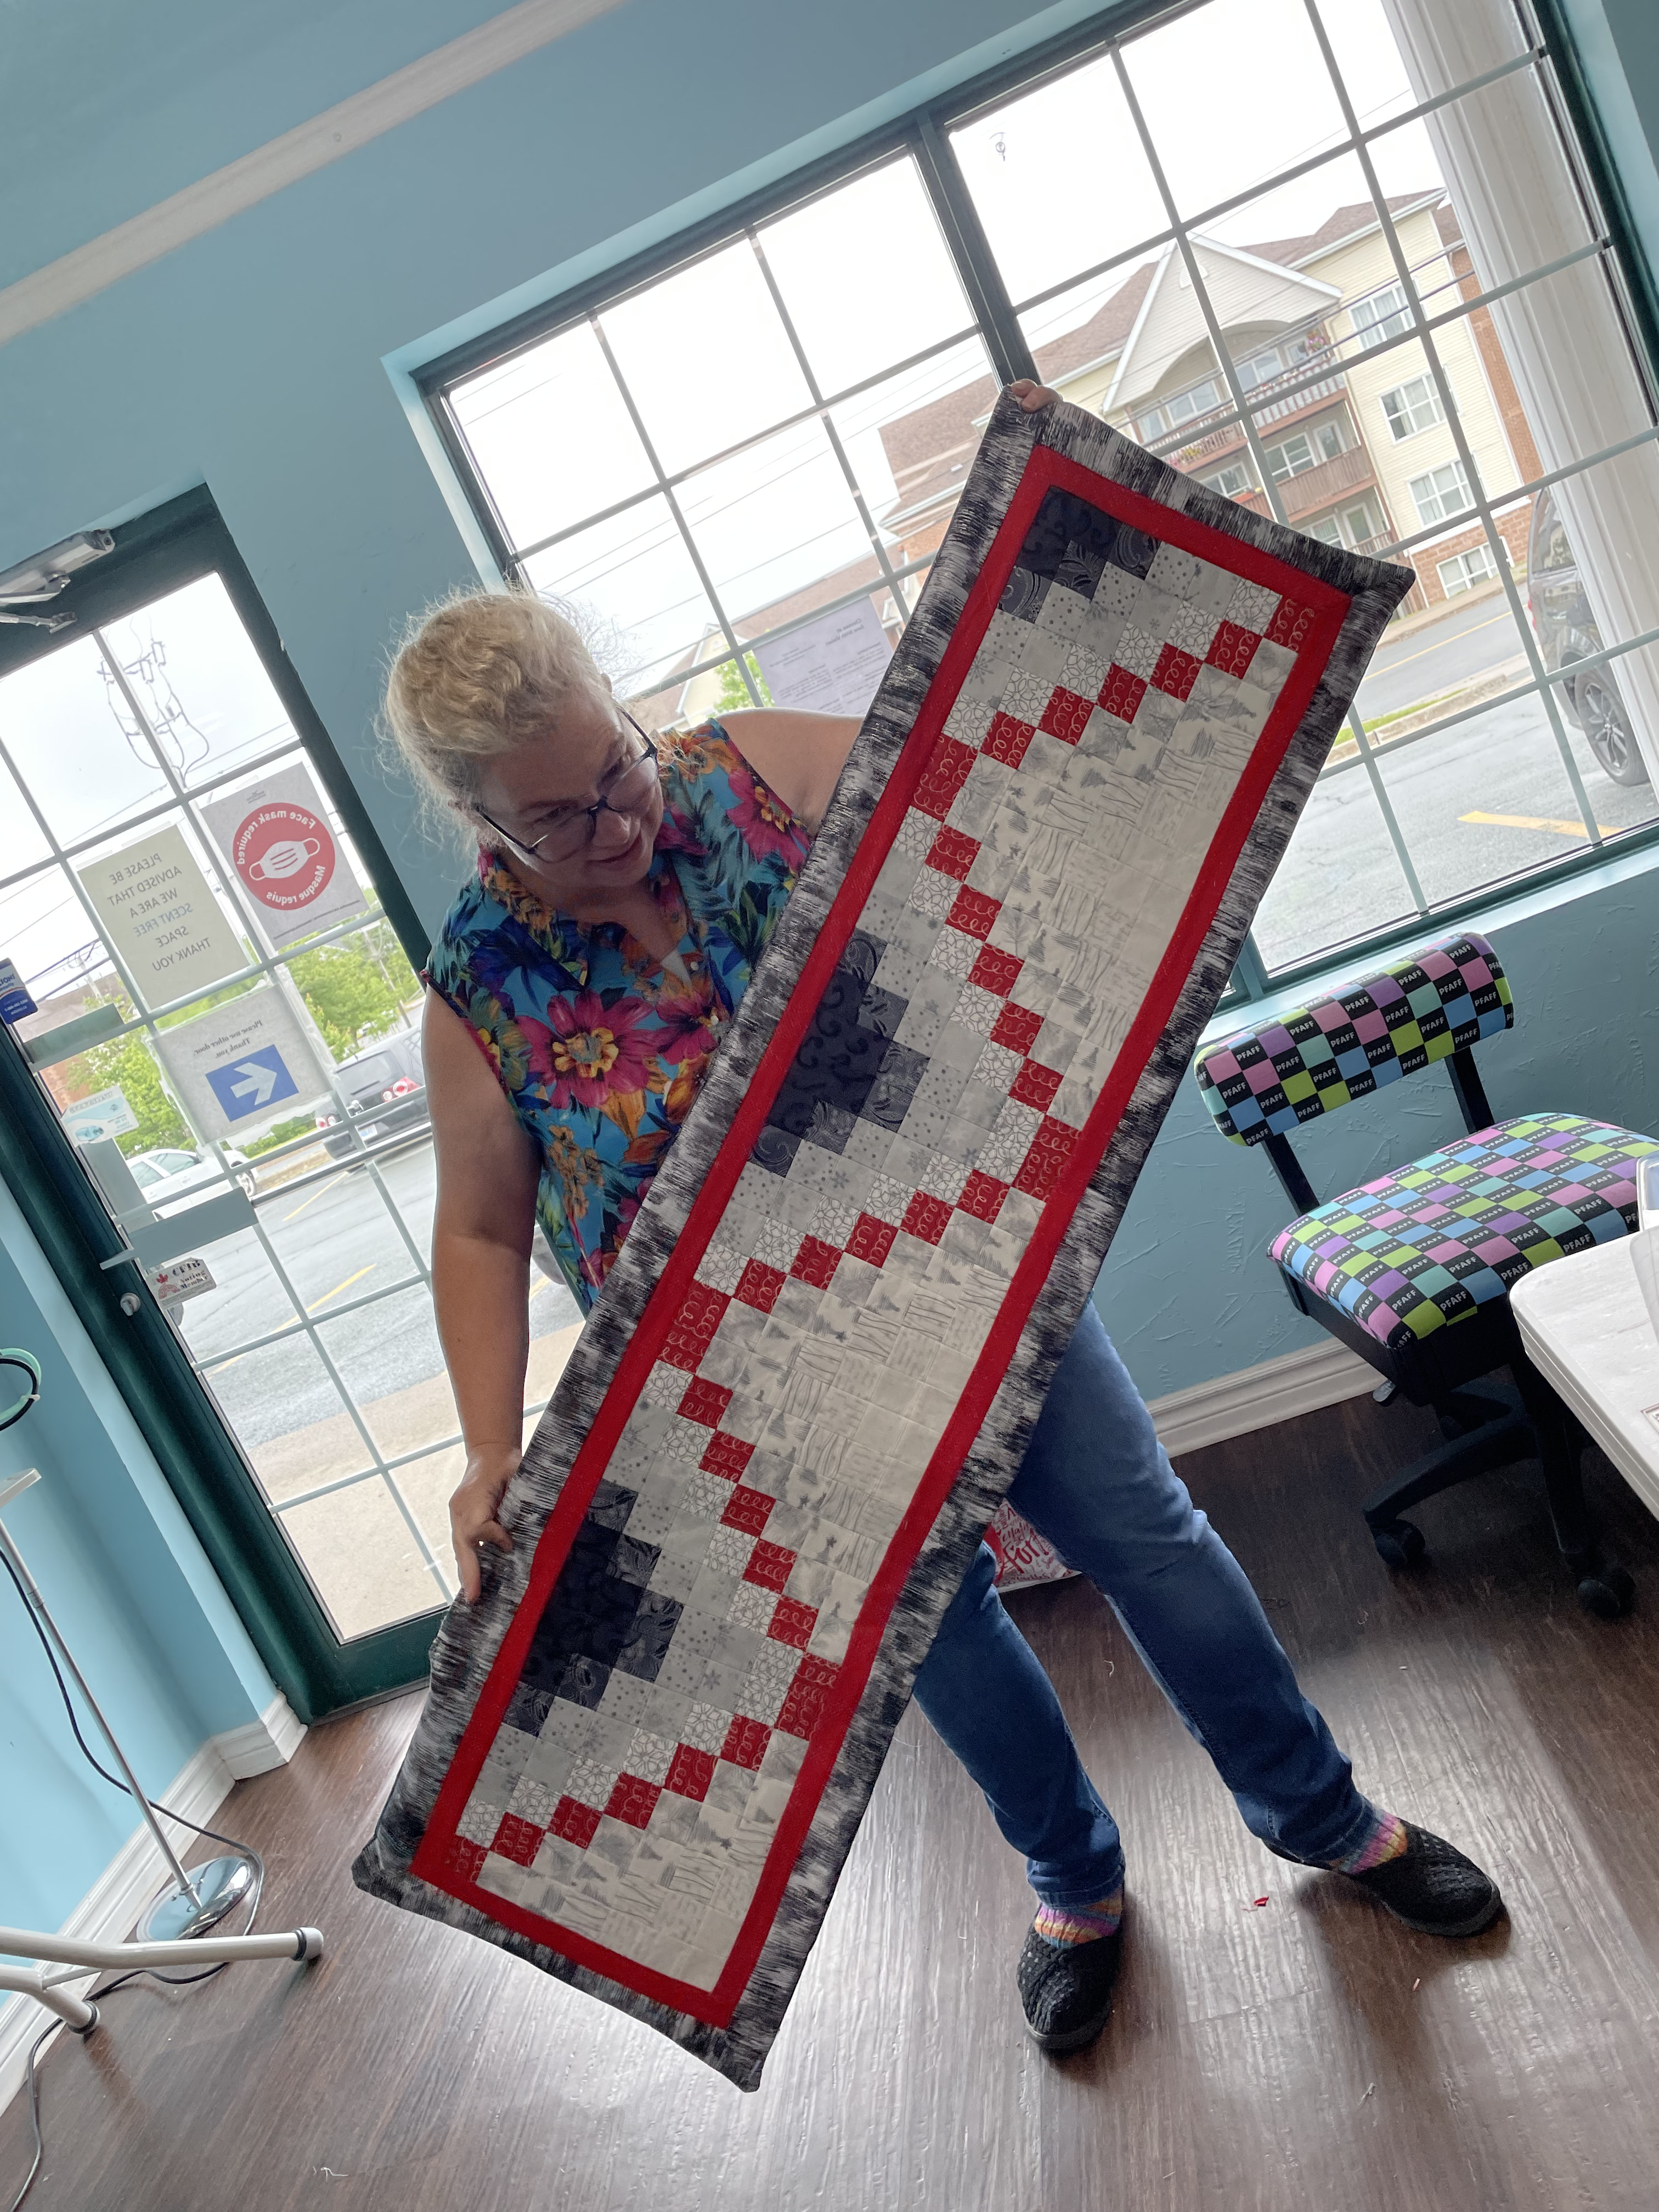
I’ve been working away at the usual stuff – I was teaching a class on building a table runner/wall art textile piece using “postage stamp” squares. The class was originally scheduled for late April/early May but didn’t happen because of our COVID-19 lockdown. But I’d prepared some samples to illustrate possibilities.

Block 1
Block 2
Block 3

I’d planned a 5 X 5 array but when I’d sewn one of the blocks together (the top block #1) it finished too small to be useful for a table runner – a 7 X 7 array would be better. So I created some instruction for the gals outlining how to prepare for the class, what to bring, etc. I did not add to my samples or create new ones – they could get the idea from what I’d done.

The first day the women chose from their plastic sandwich bags containing their 2″ squares and arranged layouts for their table runners, pressed the squares to a piece of quilters grid fusible interfacing and began sewing the blocks together by stitching the rows, shaving off the fold, pressing the seams open, then stitching the columns, shaving off the fold, and pressing those seams open. The technique gives you perfect joins which you don’t always get if you just sew blocks together in the usual quilting fashion. The interfacing also adds a bit of firmness to the panel which is useful in a table runner.

Back of my Block 1

The class met this past weekend – ten days after the first session – to finish the piece. The gals needed to decide how to put their five blocks together, what kind of sashing to add, and borders to finish the piece. All three of the women got the tops completed, one was able to add batting and backing – she finished the piece using a pillow case finish (laying backing and top right sides together and sewing a 1/4″ seam around the outside leaving an opening for turning the piece right side out).

A Christmas Table Runner (Not Yet Pressed)

Another had nearly finished a bed runner – just needed border for the top and bottom ends.

A Bed Runner In Progress

(The third had her top and backing pinned right sides together when we ended the afternoon so I wasn’t able to get a picture.)

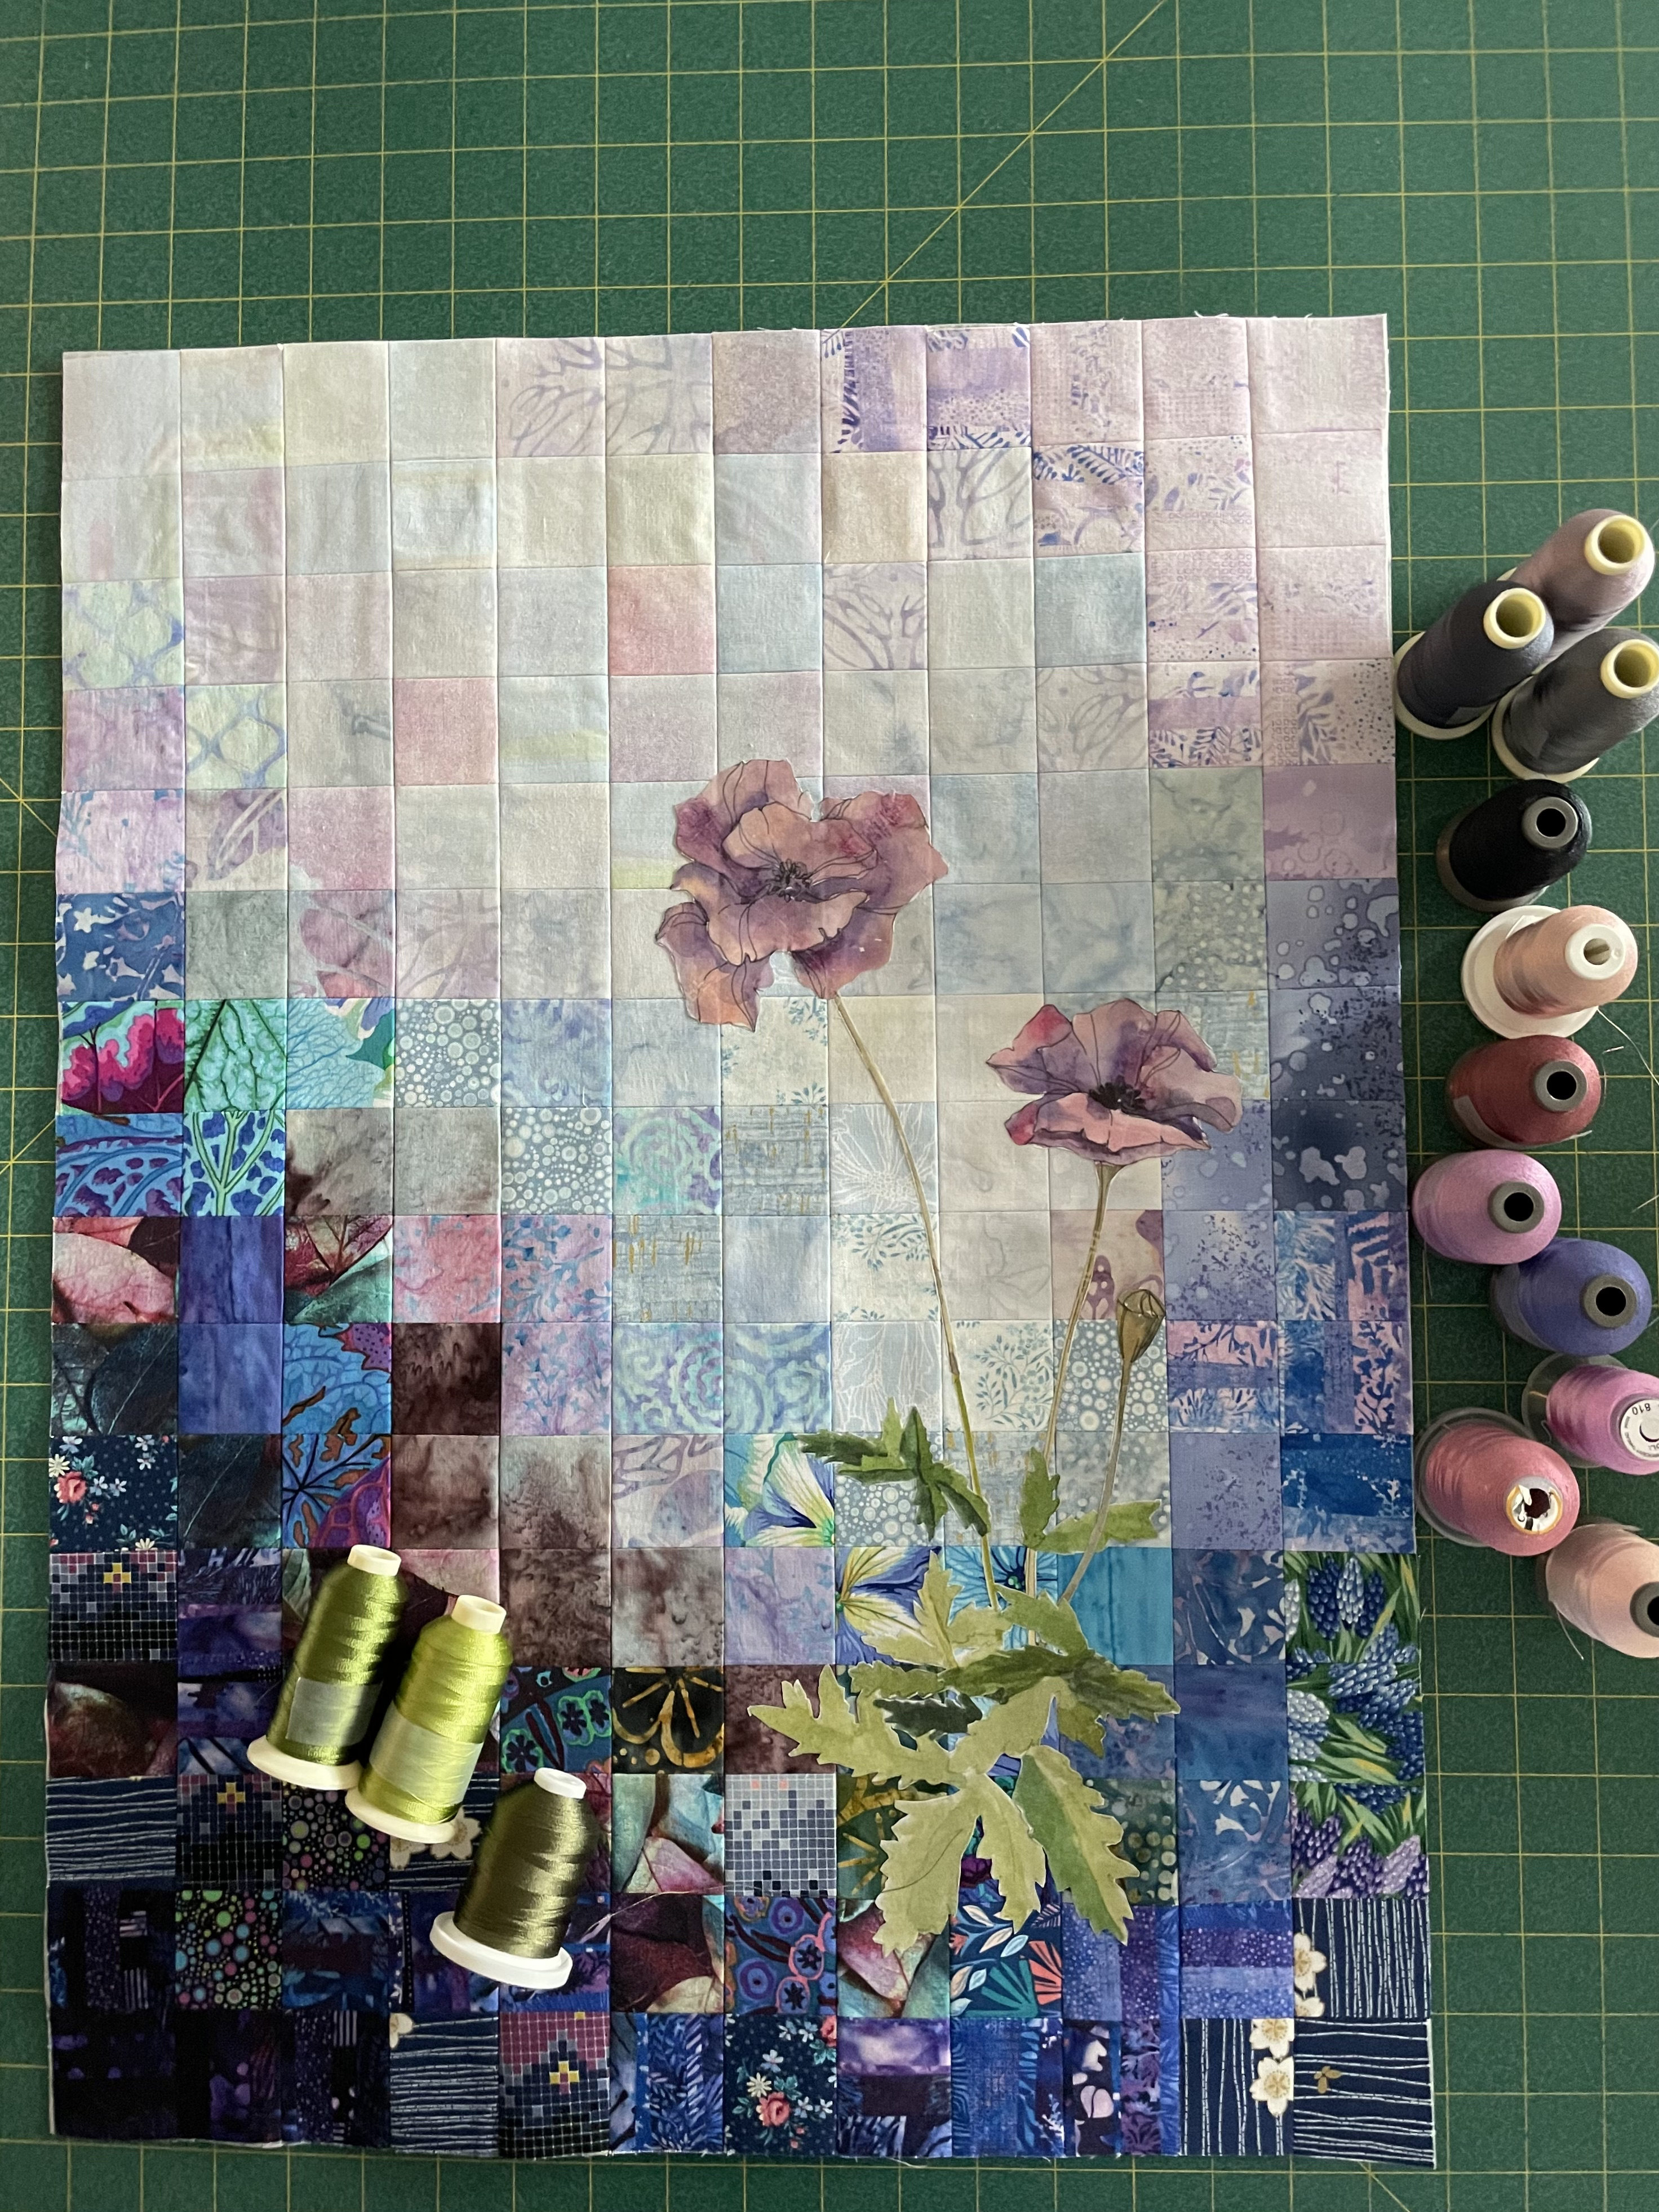
In the meantime, I’d started work on a wall hanging:

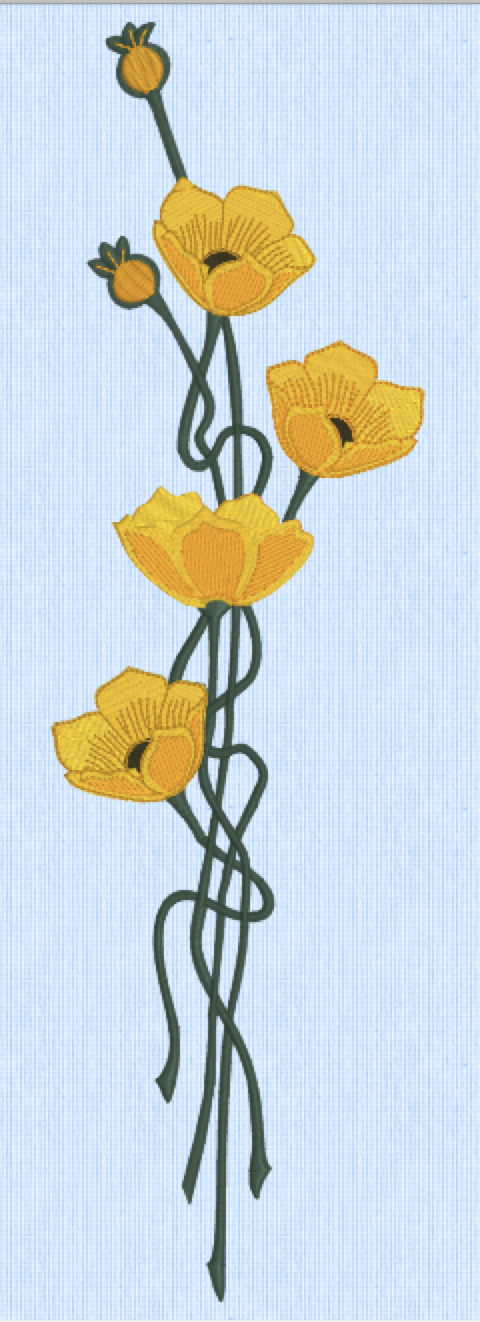
Only to discover that although I have hundreds of 2″ fabric squares in a wide range of colour, I didn’t have fabric to fill in the light portions of the layout! I’ve had to dig through scrap boxes to come up with more possible fabric bits. My plan is to build a graduated background, then to embroider a large flower of some kind (not another iris, maybe a yellow poppy) to overlay the light side of the layout. However, right now, I’ve got a pile of small light fabric pieces on my cutting table and I’m still walking around them. I hope to return to the piece this weekend.

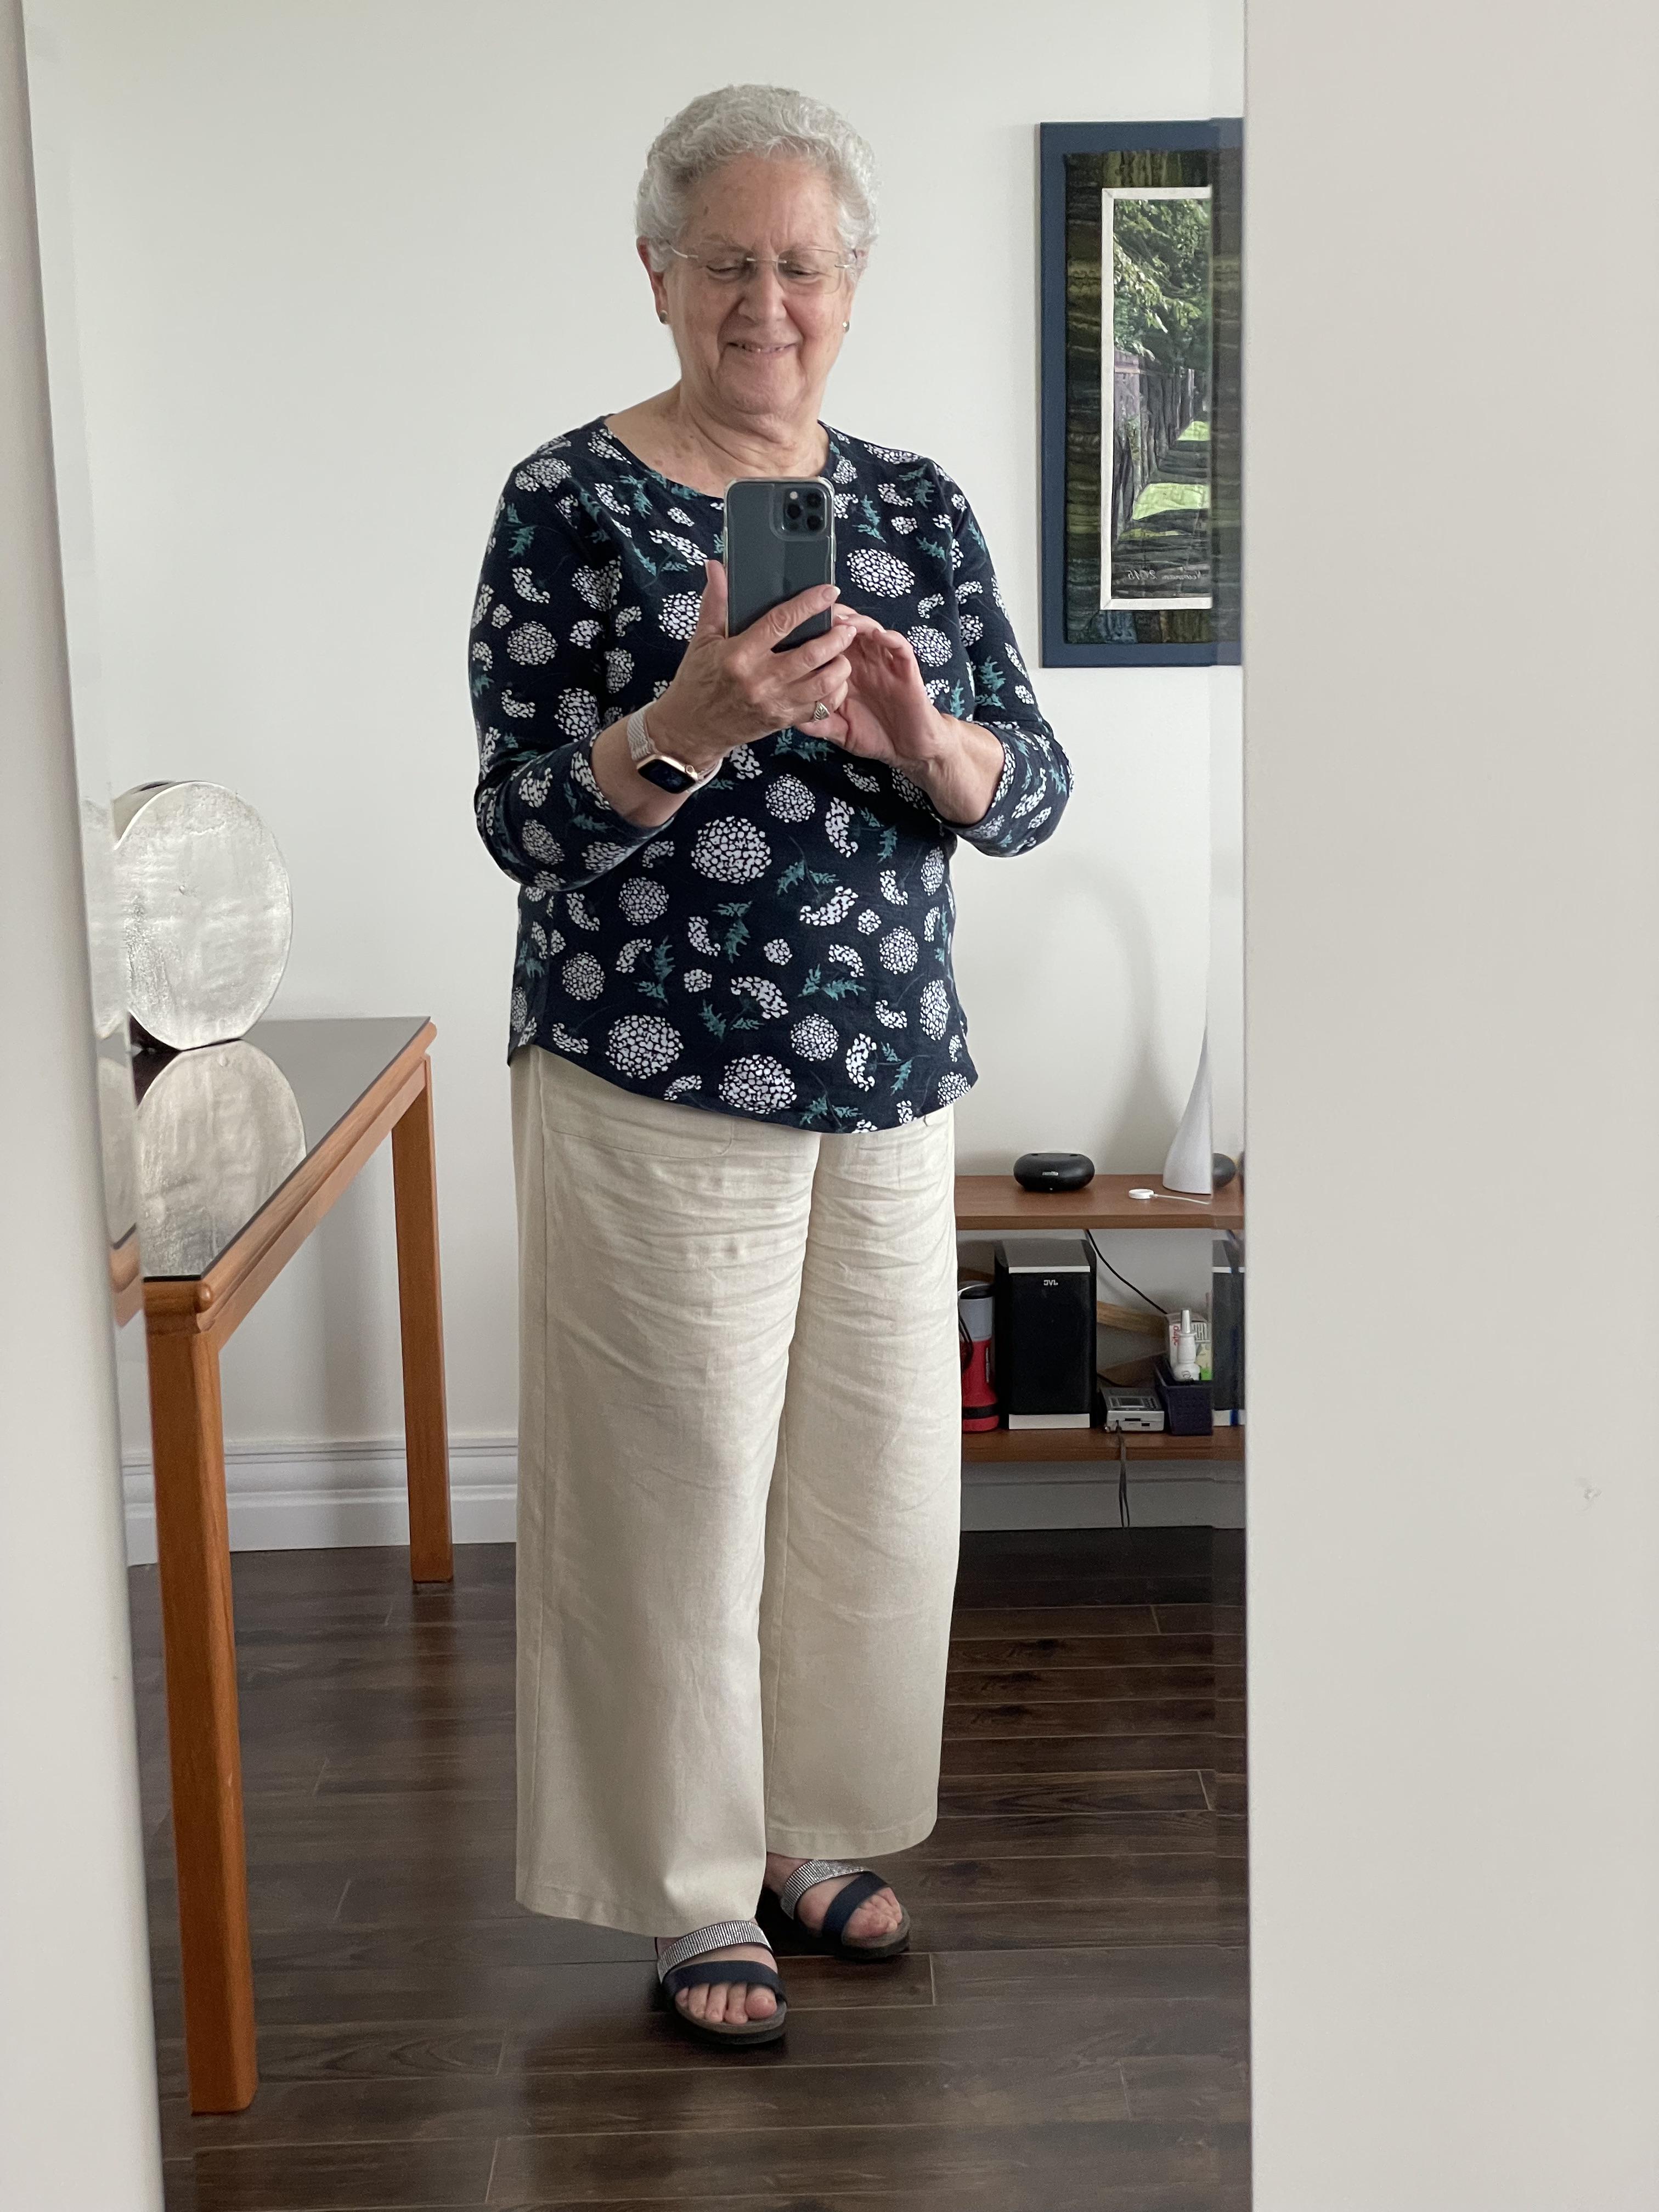
Because I was stuck I turned to pants making, once more. I had washed, dried, and pressed a piece of beige linen cotton blend fabric and wanted, this time, to make a loose wide-leg pants. I took my previous pants pattern, hauled out a pattern I had for pyjama bottoms, laid one on top of the other aligning the crotch seams, then drafted a new pattern with the higher waist of the pants and the wider legs of the pyjamas.

However, when I put the pants together I made a BiG mistake – I forgot the pattern didn’t need a waistband – because the body of the pants incorporated the waistband – I just needed a waistband facing! But instead I added a waistband and faced it – which of course made the body of the pants too long. They looked dreadful. I was about to throw them out but a friend wanted to try them on. They fit her better but would have still needed adjusting, so I took them back, and the next morning removed the waistband, added back the waistband facing, shortened the legs (which were also too long even with the shortened body).

Wide-legged Linen Pants

All I can say is, they’re wearable. They’re comfortable but they certainly make me look like a dumpy old woman! The front fits OK. The back drapes funny so I’m going to have to revisit my “pattern” because I want to make another pair.

So while I haven’t been blogging, I’ve still been sewing, really.

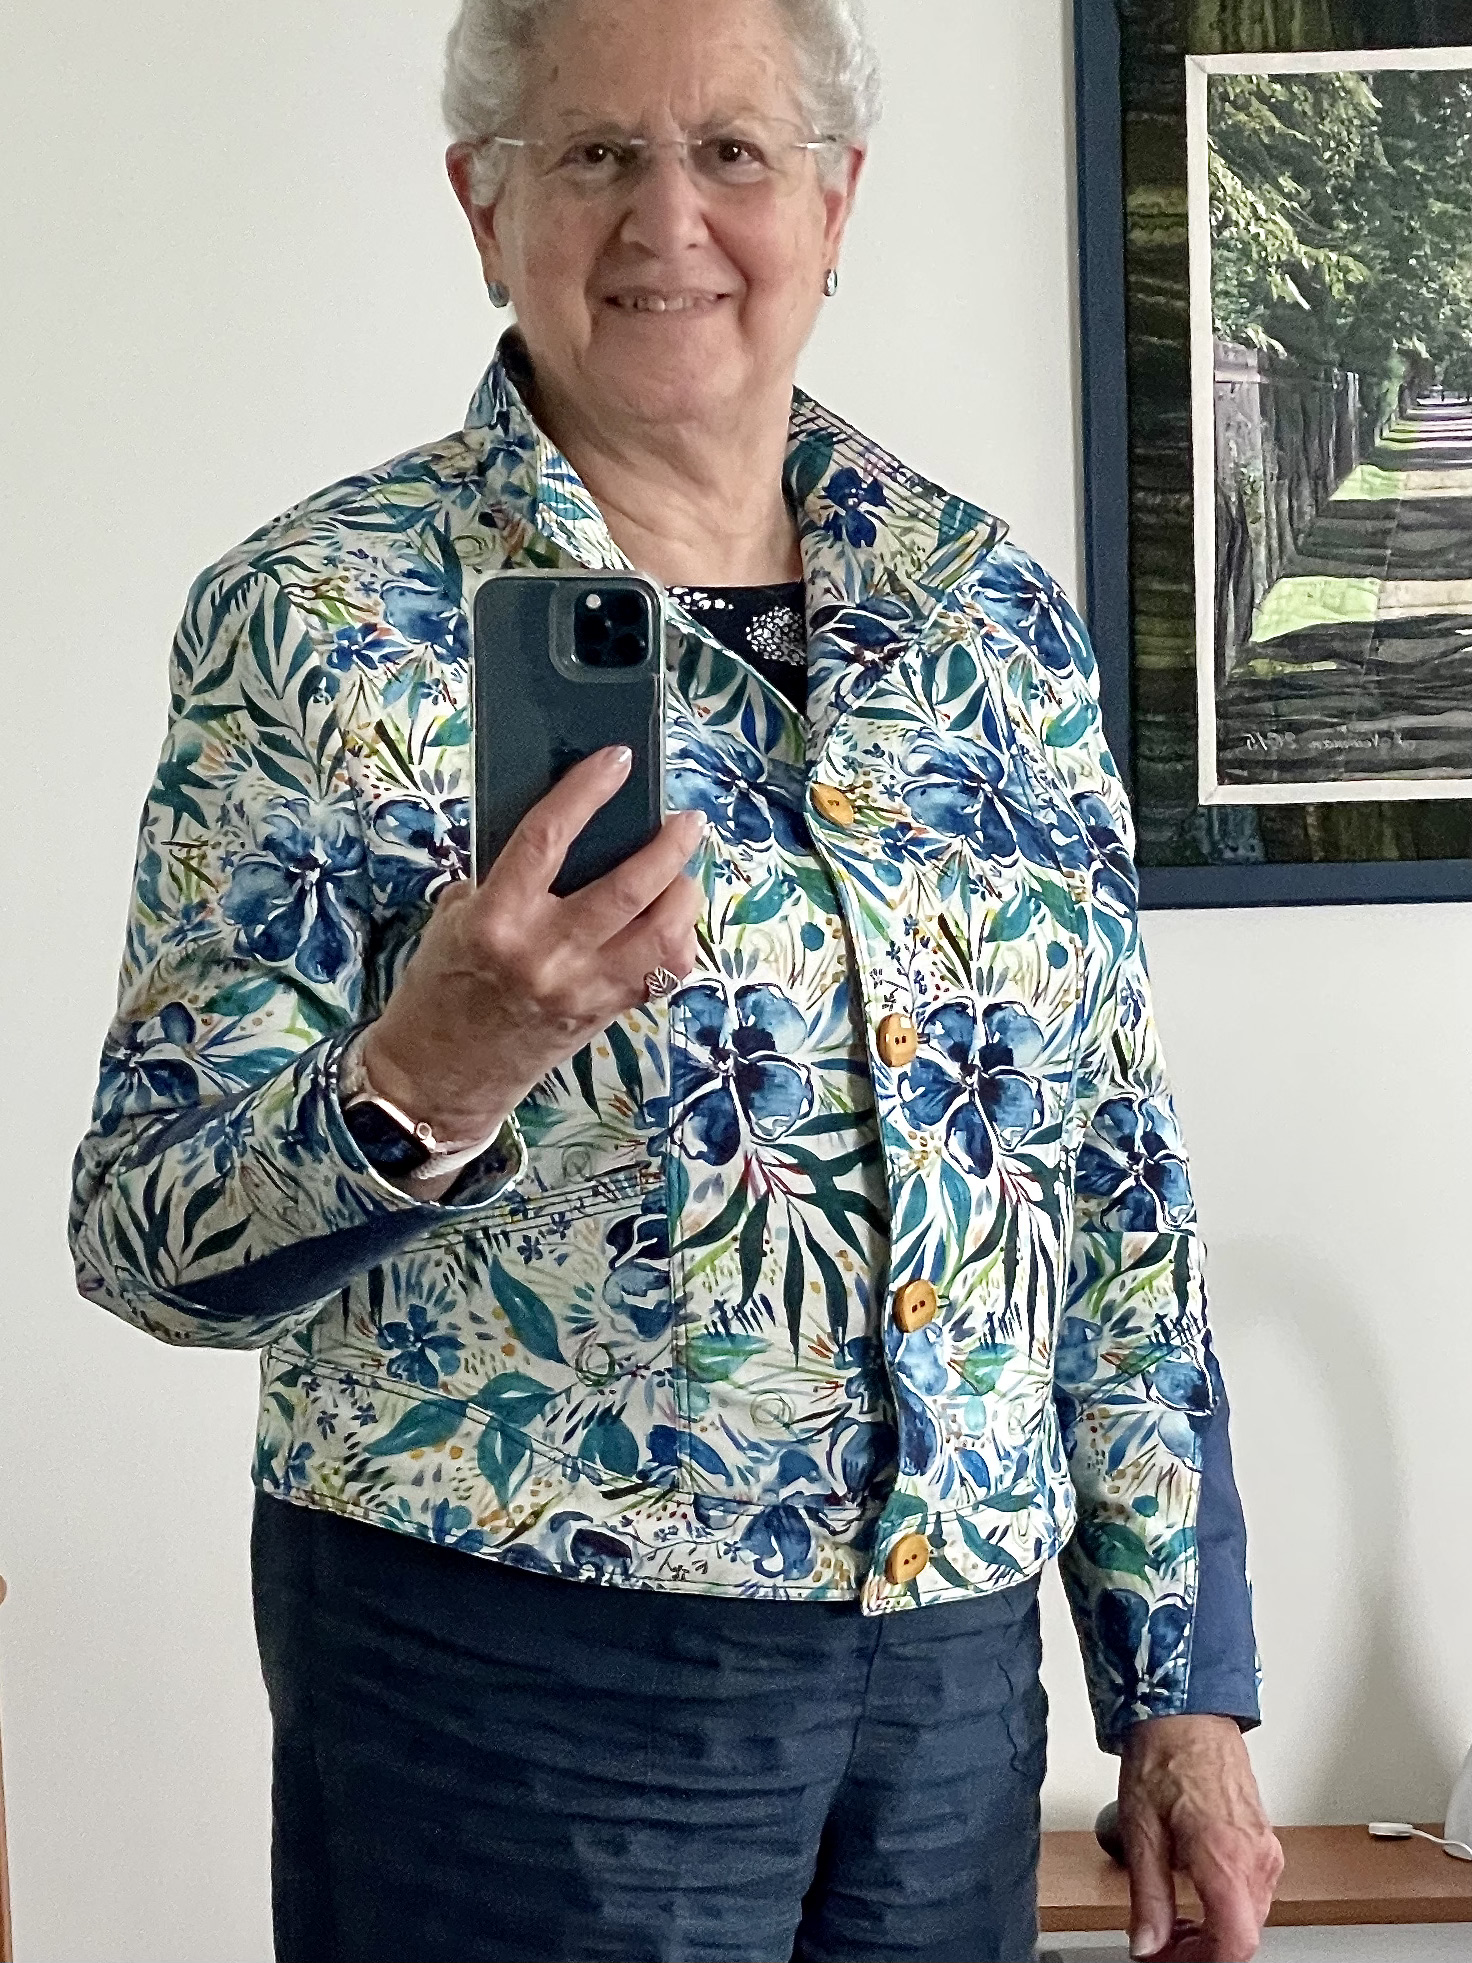
Finished Jean Jacket

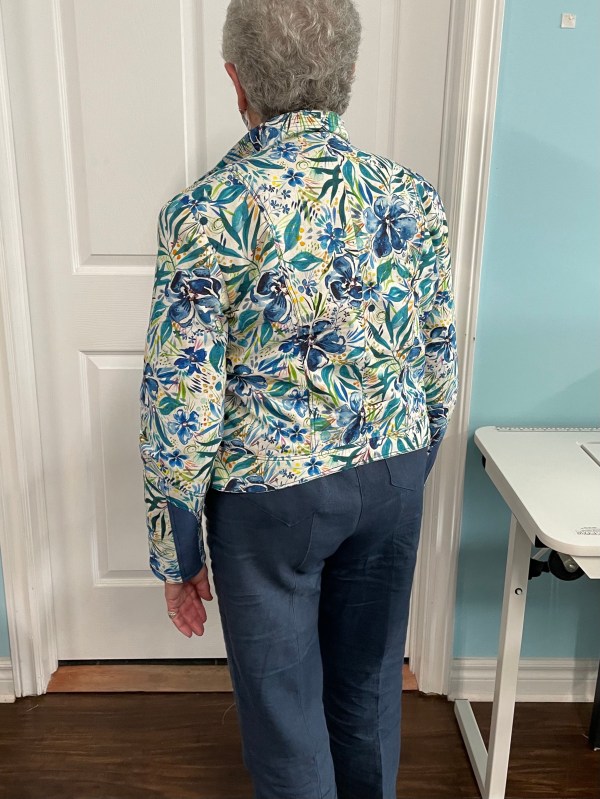
I finished the jean jacket this afternoon (I see from the photo, I need to reposition the second button from the bottom just a smidge to eliminate the ‘bulge’ in the bottom opening).

Finished Jean Jacket

The back

Jean Jacket Back

The back turned out nicely. The adjusted size E closes across the front as it should. Turns out, the linen was difficult to work with – stiff and coarse. The shoulder pads and sleeve headers do what they should – lift the shoulder a bit, and smooth the sleeve cap. Fiddly to do but worth the effort. The lining fits in well and is slippery enough that my arms slip into the sleeves easily. And I like the contrast elements in the sleeve bottom.

This is the fourth jacket from this pattern – it’s a well designed pattern (the inside zipper pockets are a good addition) – the markings all align and the parts fit together precisely.

I’m Back

It’s not that I went anywhere – I’ve just been working away at several things and not finished much to write about. But I’ve not been idle!

I’ve been working on a linen Jean Jacket (Out of print pattern by Sandra Betzina)and slowly making progress. It’s a lined jacket, with lots of top stitching and I’ve added two inner zippered pockets at the front facing/side lining seam so I can actually carry something in a pocket. The jacket pockets are no good for even carrying a Kleenex – they’re too shallow and anything I’d put in there would just fall out.

Partially constructed Jean Jacket

I’ve made three of these jackets over the years – a cotton/linen blend, a wild printed fabric, and one in denim – the problem is they’re TOO small – they don’t fit – I can’t button them up. I needed another one in a larger size. I’d bought the linen to make a dress but after a couple of washings and dryings the fabric was still too stiff to use for a dress or pants so I decided to make a jean jacket.

I’ve got the lining constructed, the sleeves (which have quite a bit of detail) are done. I’ve set up the sleeve facings having added a Hong Kong finish to the open edge. Now I’m working on putting the rest of the lining together. I expect I might be finished the jacket tomorrow or over the weekend.

In the meantime, I decided I needed a new iPhone carrying case – not much larger than the ones I’ve made before but larger enough that I can carry a credit card, my drivers licence, health card, some money in addition to the cough candy and chewing gum I always have on hand (because of my pesky cough – which BTW has subsided substantially recently – not gone but much less of a problem). My first try wasn’t quite wide enough and the top pocket was too deep. So I made a second.

iPhone Case 2.0

What I did was figure out how to add two zippered pockets to one side in addition to the zippered pocket along the length!

I haven’t written any instruction for how to do this version. When I get around to making another one and taking photos as I go along I’ll set up some instructions to share.

It’s still not large enough to fit my keys in but I have a hook on my key ring which I can hang on the strap if I don’t want to carry them in a pants or jacket pocket.

And I’ve almost got a sock finished from the new pair I’m working on – that will probably be completed this evening.

But since it’s been just over two weeks since I reported on anything I though I should update what I am working on.

New Turquoise Socks

This turned out to be a subtle, but interestingly detailed pattern when the socks were finished. The hint of white separating the blue from the turquoise created a clear colour boundary.

The yarn was one of the remaining balls from the yarn I’d bought last year from Hobbii in Denmark. I didn’t plan the layout – I just started with the interior end that presented itself (I almost always work from the inside of a ball to the outside – that way the ball doesn’t roll around). It was just luck that I was able to begin and end with the blue leaving the turquoise element in a nice location on the leg and foot! I did have to match up the yarn for the second sock – but that’s usually how it goes. Because of the way the pattern worked out, I decided to keep knitting the toe in the blue, rather than change to the solid I used for cuff and heels.

I just might put this pair in my sock drawer.

New Clothes

The Escher Quilt finished last week, I started on some summer clothes. I’ve gained weight since I moved into the apartment, particularly this past year, and none of my summer pants fit me! None of them. The waists are waaaay too tight, but also across my belly the zipper has a hard time closing. So rather than trying to remake them, I decided to start from scratch.

Linen Pull-on Pants

A couple of months ago I bought one metre each of three different colour linen fabrics from Blackbird Fabrics (online) – nice weight, and I thought the fabric width would be wide enough that I’d be able to scrape out a pair of pants – well almost – I would normally buy 1 1/4″ metres for a pair of pants why I didn’t call and ask them to sell me the correct amount, I don’t know!. As it worked out, I was just able to fit in the fronts and backs and the front and back pockets but all facings and had to be cut from something else. With the red pair I had to create hem facings because the legs weren’t long enough to turn up; the mauve pair ended up somewhat cropped; the navy pair were OK in length. Because I intend to wear them with loose tops (I haven’t worn “tucked in” in a long time) I can get away with an elastic waist, pull-on pants.

I want to make one more pair but that will have to wait until the fabric stores here in town reopen – Wednesday, this week, I think – to buy some khaki/beige linen blend fabric.

In the meantime, I’ve turned to tops and dresses.

Top Recut From Dress

This top is a dress remake of the dress I made in 2014 for Benjamin’s Bar Mitzvah. 2014 – that’s a while back – the dress was just too small. I put it in the give-away pile and then decided to use the fabric as a “muslin” to recut the dress as a top to see how it would look in a larger size. Not bad. I can certainly wear it with white or red pants and a bit of jewelry and look decent.

I was using this garment as a mock-up for a longer casual summer dress. Working from a pattern I’ve had forever

I retraced the size 14 I now needed, carefully drafted neck “yoke” pieces (the pattern uses a neckline facing, but the neckline is a bit too large so I decided to add an insert (“yoke”) to make it higher, rather than change the neckline on the pattern) and I also lengthened the sleeves to close to elbow-length.

I had bought some viscose/cotton/flax/ print fabric a few weeks back with this dress in mind. Yesterday, I cut it out and assembled it.

Floral Viscose/Cotton/Flax Casual Summer Dress

I’m not going to be glamorous in this dress, but it’s going to be loose and cool and comfortable on a hot summer day (OK we don’t get a lot of those here in NS but we do get an occasional warm one).

I’m just about to make a second dress using some batik rayon I stamped myself in Bali in 2014.

Bali Rayon Batik

I purposely used two tjaps (stamps used to apply hot wax to the fabric) to create my design intending to use the “rectangles” as a border at the hem of whatever I eventually made. We stamped two “border” sections so I’d have enough. I came home with 5 metres of this batik rayon fabric – the dress will take about 1/3 of what I have – I’m going to try to border the sleeves a wee bit, as well, if I can.

That’s today’s project. I have more linen and linen blend, as well as rayon, fabrics in my stash to make several more garments but I really don’t need more than two dresses – we don’t get that many hot days here. So that fabric will stay put for another summer.

iPhone Photography

Crab Apple Blossoms, Just Out

I’ve been taking an online iPhone Photography Course for the past couple of months. I always have my phone/camera with me so I’m making a point of taking some photos every day.

The first lessons had to do with learning about the iPhone camera features – and there are a lot of them. Next, the lessons moved onto to general photography principles – how to establish a focal element, leading lines, balance in the image…. Followed by, editing.

I took the photo above early last week (nearly two weeks ago) on my walk to the neighbourhood high school. The crab apple blooms were just out. I liked the light and shadow on the flowers as well as the texture of the bark. I cropped the original image and strengthened the contrast between sun and shadow but I did little else with the image.

Here’s another shot from the same tree. In this one you can see the dark red colour of the pistil at the centre of the flowers. I took this photo in “portrait” mode which sharpened the foreground and blurred the background. That let me consider some dramatic editing:

Portrait Mode, Stage lighting

Editing with the iPhone provides an amazing array of options, with the Photos app itself as well as any number of photo editing apps. Because I took the photo in “portrait” mode, using the Photos app on the phone, I was able to darken out the background while brightening the foreground to create quite a striking image.

I’ve been having lots of fun exploring with the camera. Not every photo is outstanding, but the iPhone is capable of taking good photos. I’m working at getting better at it. It all takes time, however, what with sewing and knitting, and a bit of house cleaning, grocery shopping. While we’ve been locked down, I’ve had no shortage of interests to occupy me – there’re just aren’t enough hours in the day to get to everything I want to do.

Escher Quilt – Finished

Escher Quilt – Finished size: 53″ x 67″

Just finished. I wasn’t sure it was all going to work but it has.

If you click on the image above you will see the quilting detail. I thought about some kind of detailed quilting design but there were two problems. First, I didn’t have a hoop large enough to manage any kind of large block and there isn’t a really clear hexagonal shape to work with, even if I did. I defaulted to a diamond shape which is all I could accommodate. Second, any kind of detailed quilting, like I used on the previous diamond quilts, was going to detract from the effect of the rising, interconnected, vertical elements of the quilt design.

In the end I quilted the “diamonds” using a straight line design alternating the direction of the diamonds to fit into the overall array of interconnected elements.

Quilting Detail

Then what to do with the borders? I decided to use a rather dense floral quilt design; I set up a modified version which I used to fill in the half-diamond elements top and bottom. That decision turned out well.

Quilt Back

I assembled a double strip of pieced strips to allow me to widen the backing enough to fit the quilt top. I bordered the insert strip with unequal strips of a light batik which blended nicely.

I finished the quilt with a narrow 1/4″ conventional quilt binding using 1 1/2″ strips from some Skyline fabric still in my stash which let me get away without having to piece a gazillion tiny leftovers from the Kaffe Fassett Collective fabrics. The binding finishes the quilt hinting at the colours in the main panel.

So, the quilt is done. I started playing with the idea on May 6 – so 2 1/2 weeks is the time it took me to construct, quilt, and complete the project. I’ve had a lot of uninterrupted time to sew since we’ve been on COVID-19 lockdown here in NS since April 25 (we expect to remain locked down until at least the middle of June – maybe longer because while new case counts aren’t going up to any degree, they’re not going down, either!).

Now it’s time to turn my attention to sewing some summer clothes – a couple of dresses, maybe a jean jacket, some linen pull-on pants. I have the fabric on hand. I’ll start by washing it all tomorrow.

Escher Quilt – 7

Redone – I removed the side border, extended the top and bottom borders, and added the 8th column.

Escher Quilt Top – Redone

I’m much happier with the balance. I understand why most people who make this quilt top choose to straighten the top and bottom edges but I find the zigzag edge an interesting detail.

So the top is now complete.

Next, the quilt back. I have to pull out the Kaffe Fassett Collective fabric leftovers and see what I can do with them. I have lots of the backing fabric (Ruby Star Society Speckled Metallic Navy 2021). I was able to pick up 3m on Wednesday at my local fabric store.

So now full steam ahead….