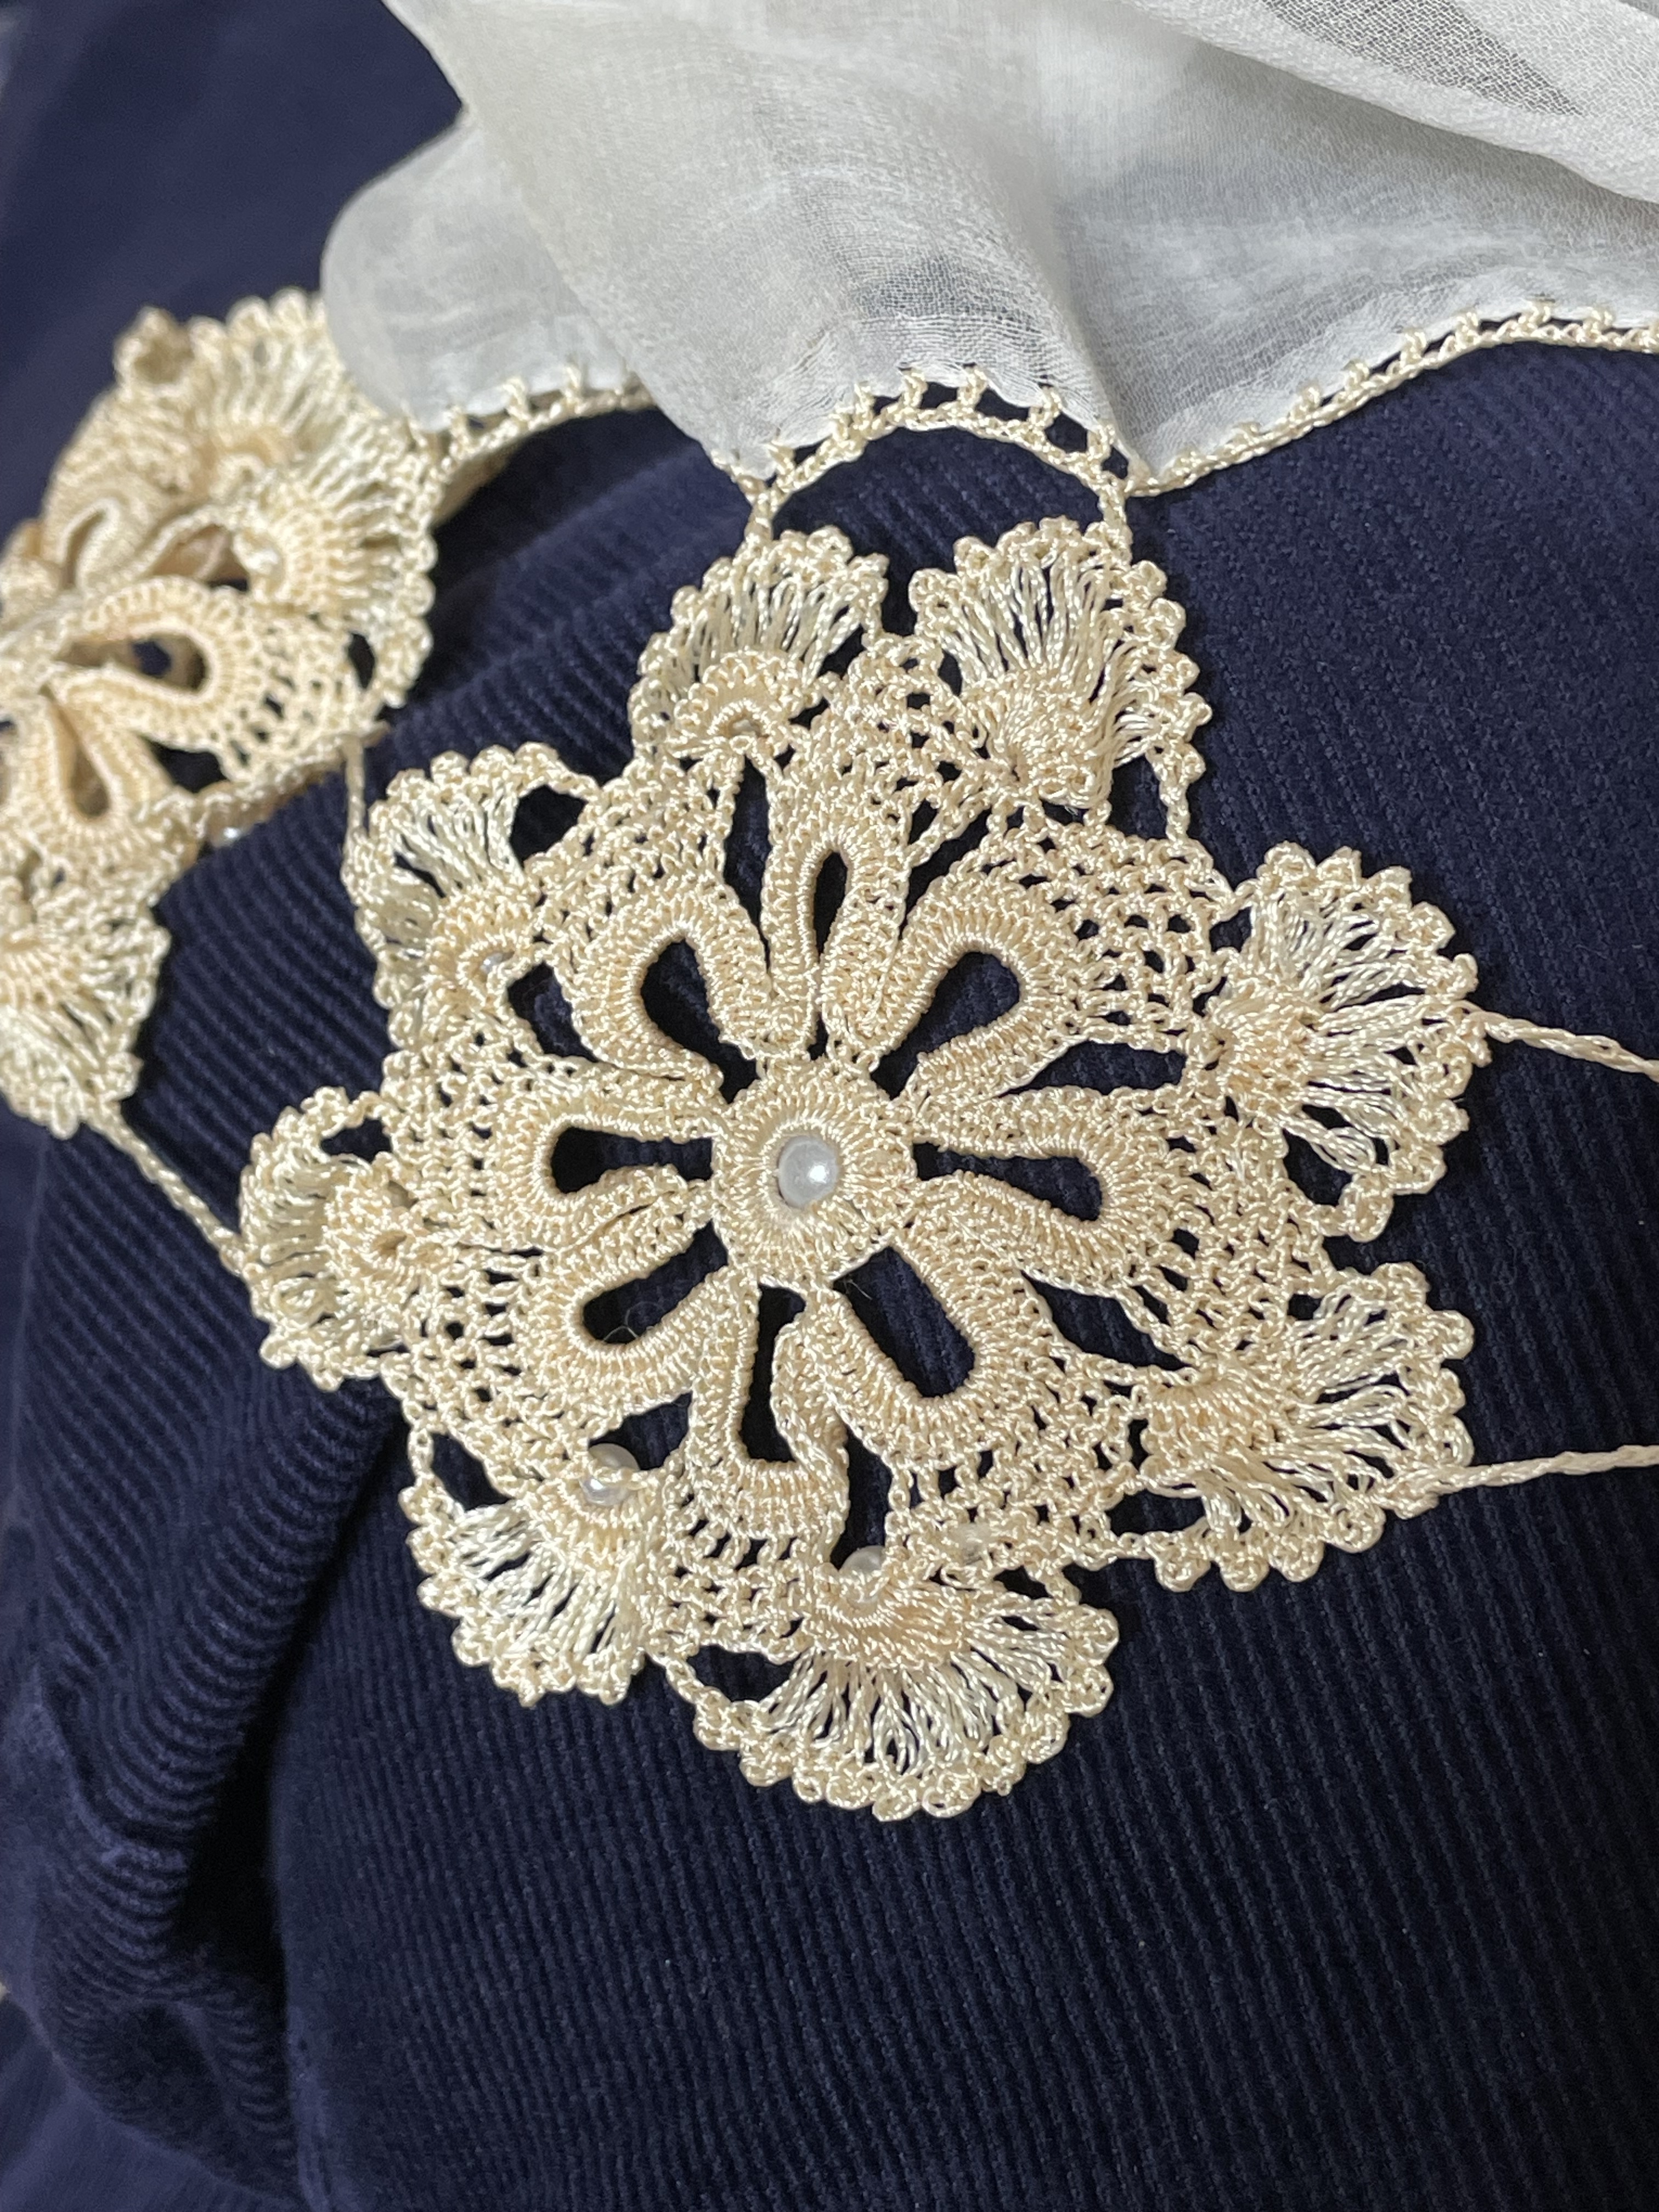
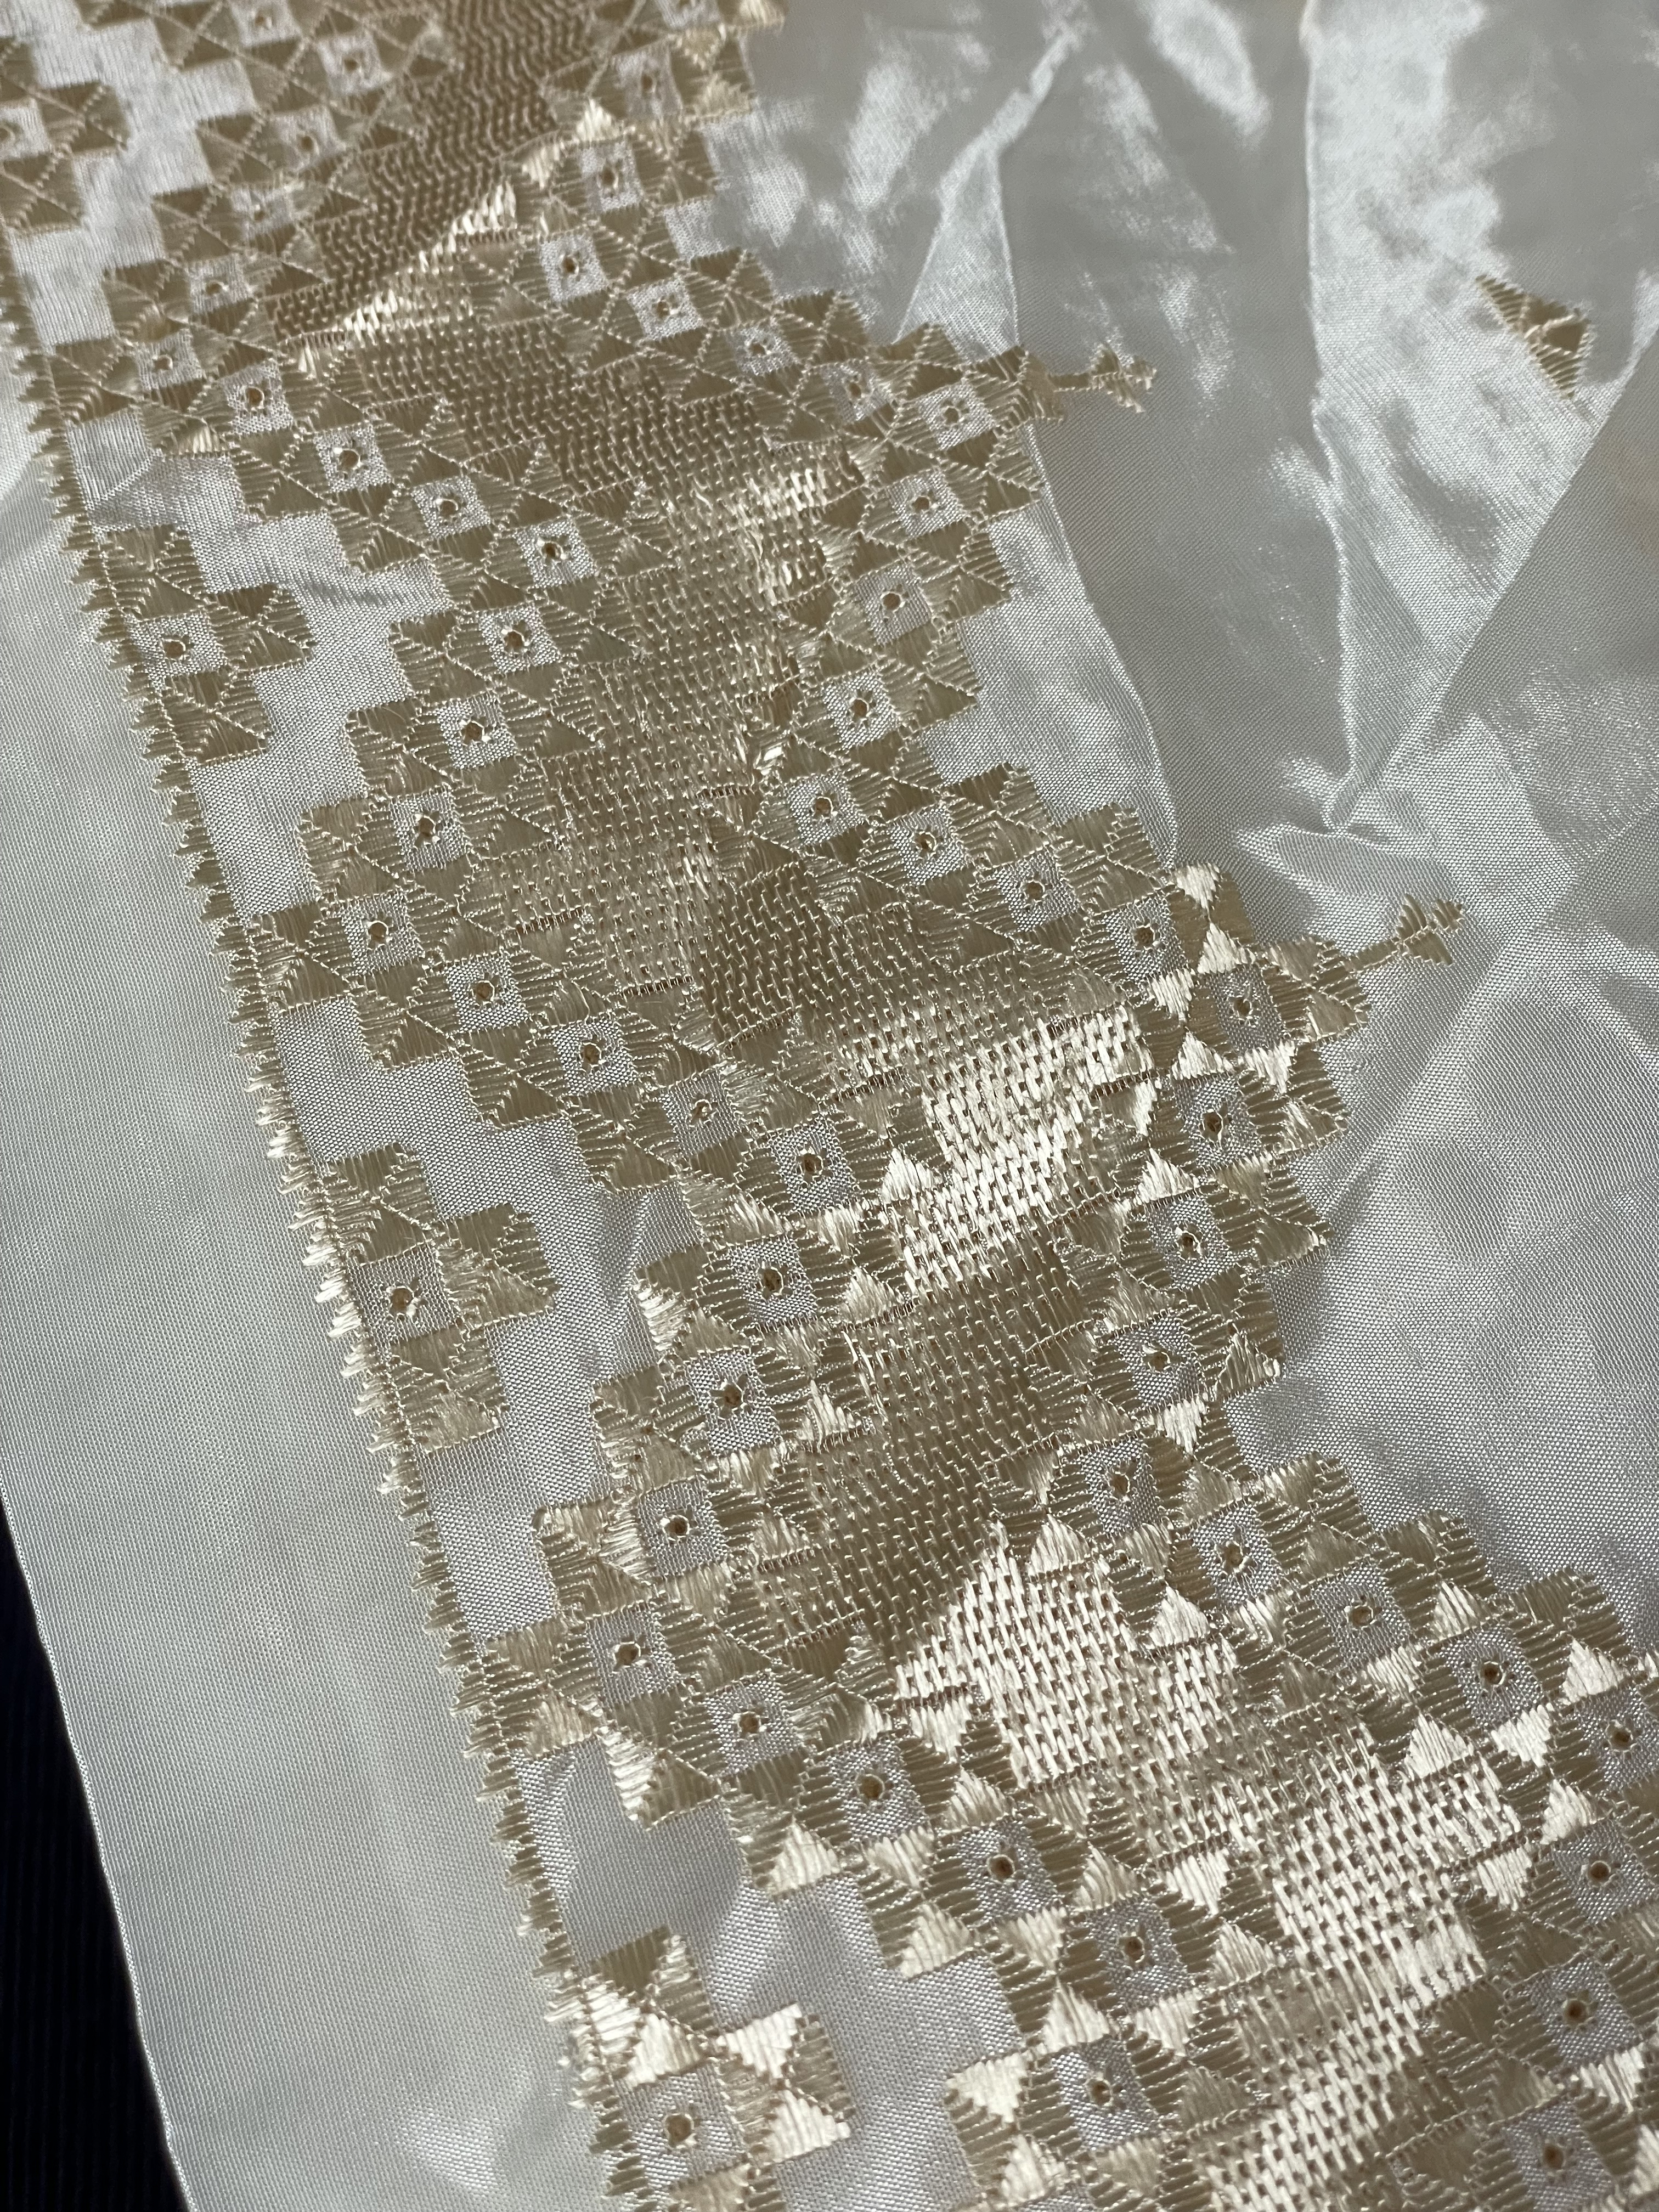
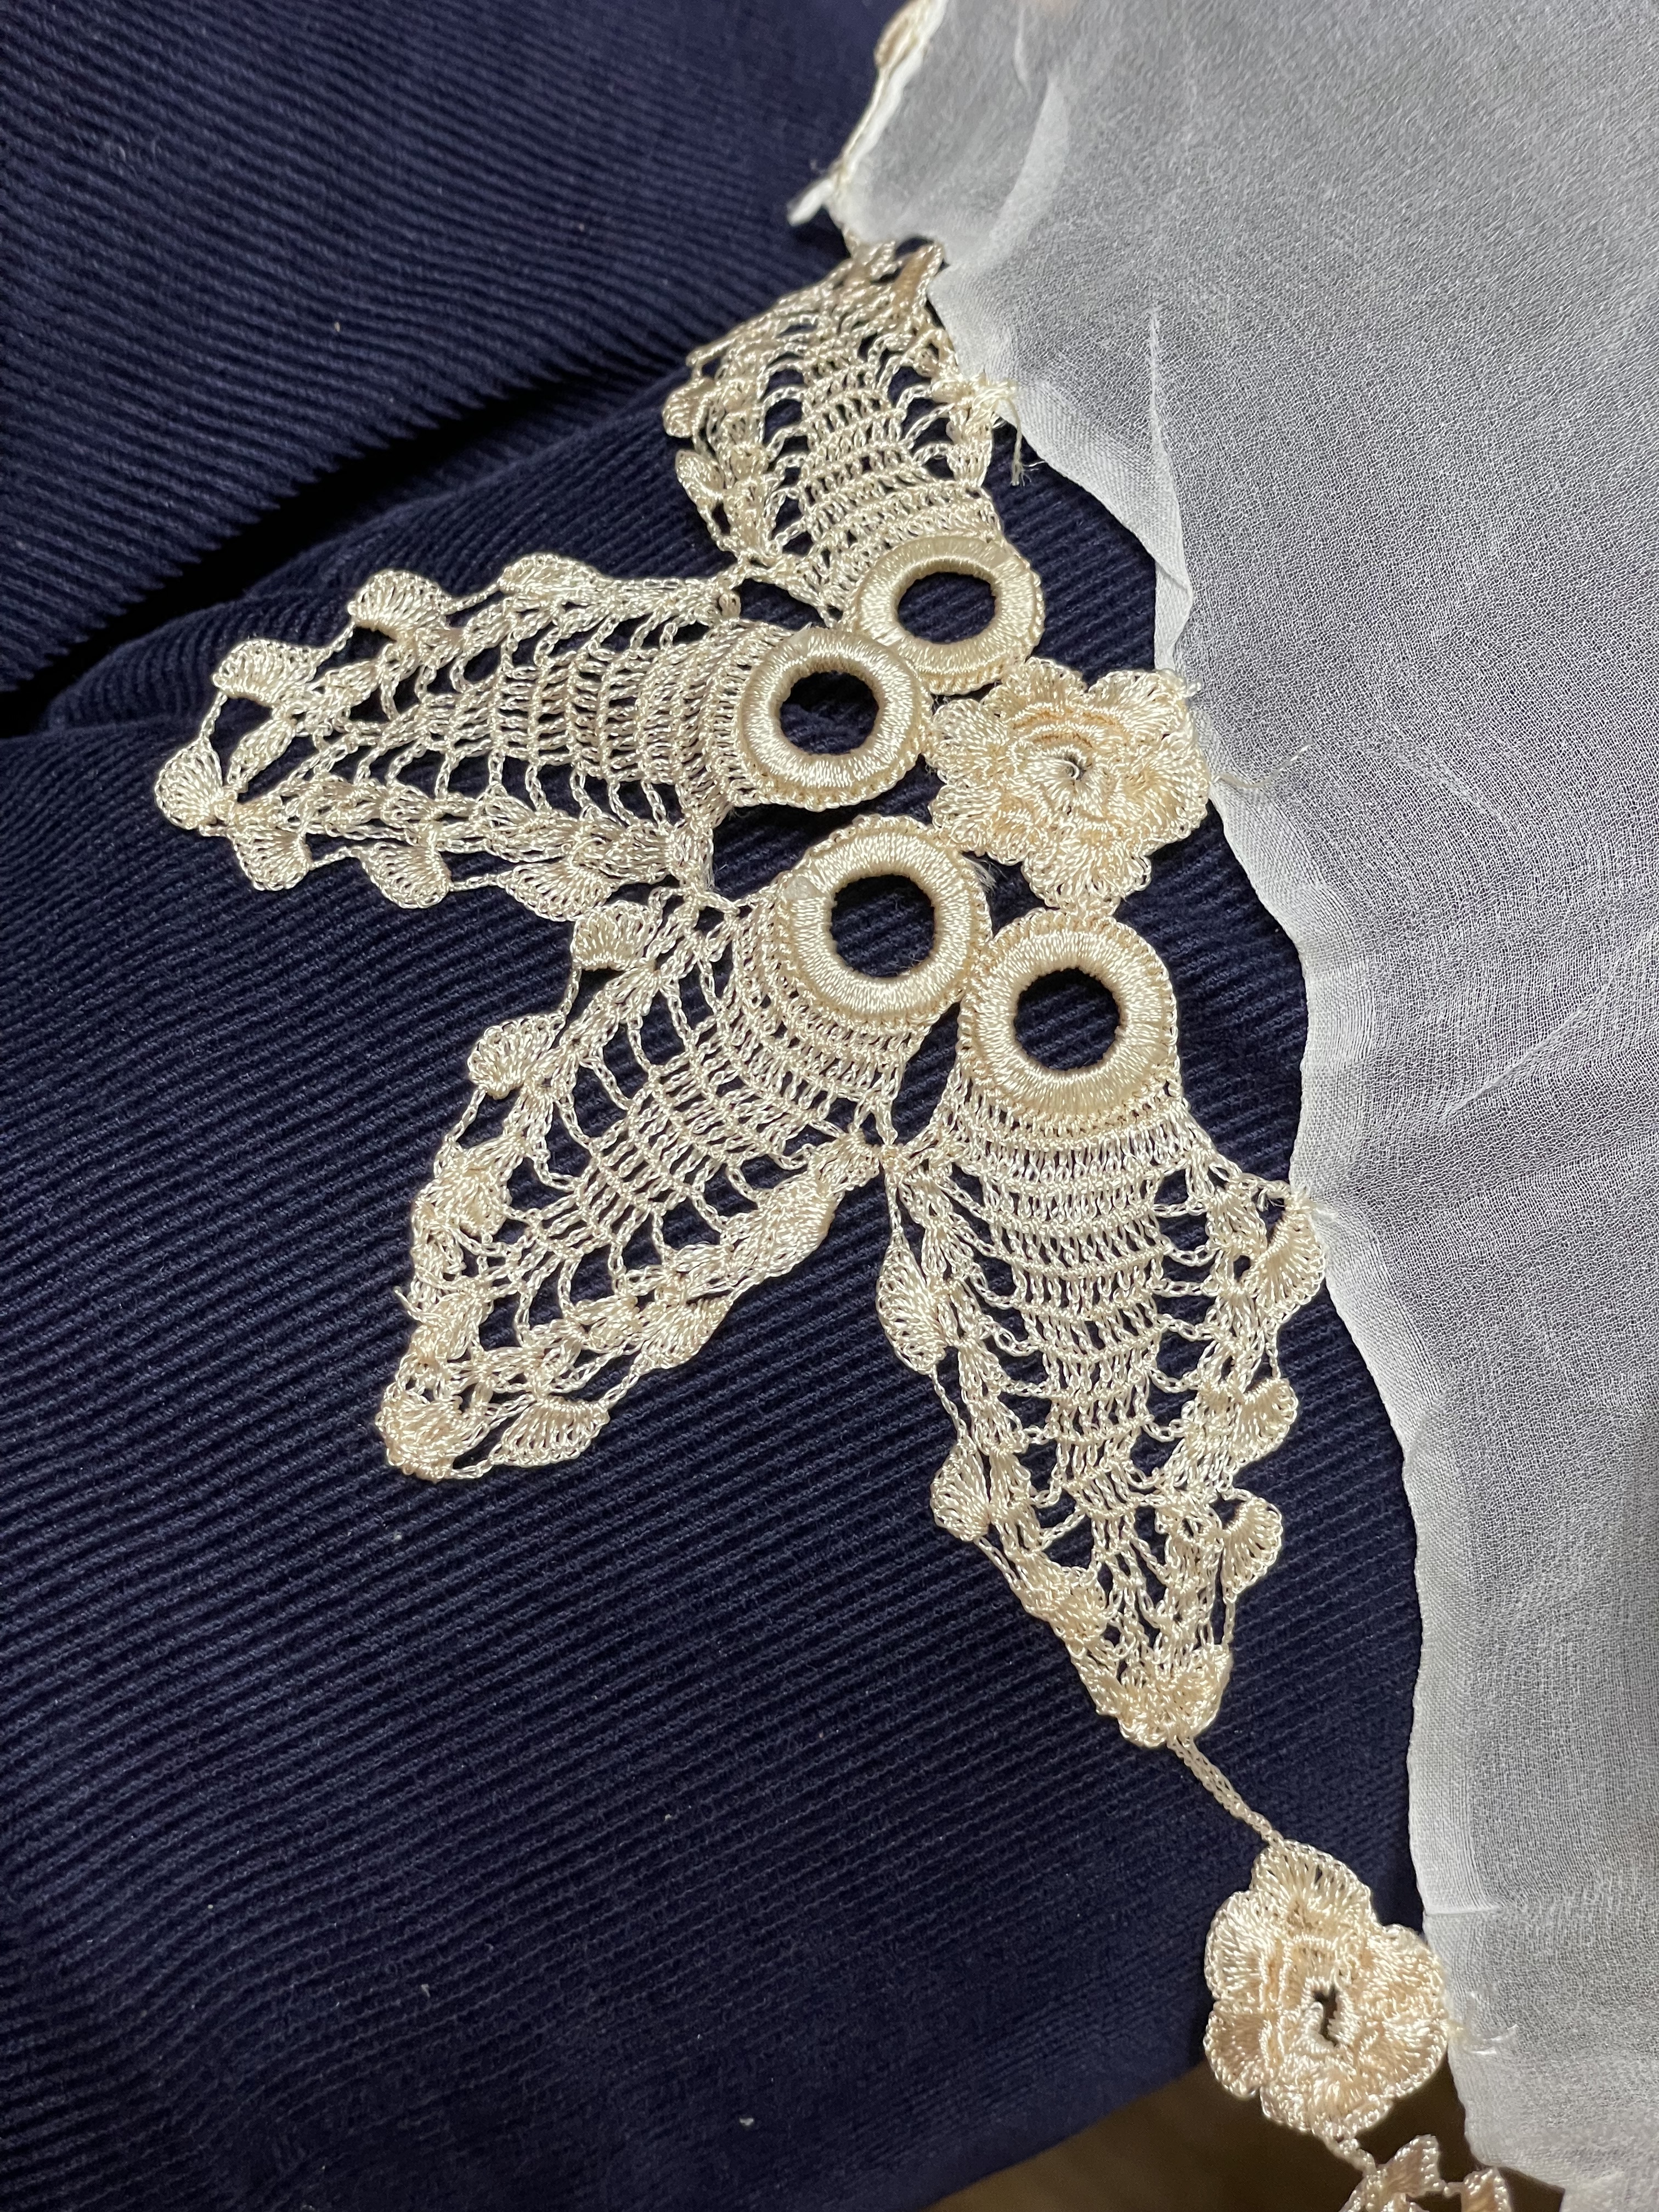
I was visiting Jawad and Shukria a couple of weeks ago. Shukria had just received a parcel from her sisters with hand embroidered and crocheted garments. The crochet embellished the edges of some head scarves; the embroidery enhanced the hem of some pants. Jawad had a tunic done by someone in his family who had taken three months to embroidery the front of it for him – obviously something to wear at a special occasion!
Last night I asked if I could photograph the hand work. What I forgot to do was place a coin on it to show the scale of the work – it’s extremely fine, both the crochet and the embroidery. Incredible precision! Not a hope in hell I’d be able to work with such fine thread (crochet or embroidery) and control it as magnificently as this work. The fabric is also a very fine, closely woven, either a lightweight cotton or a silk. It’s breathtaking!
I’m getting nowhere on the quilt project – I know I’m not going to be happy with the finished outcome and that what I’ll end up doing is making a quilt, then cutting it up to construct a jacket of some sort. So I keep walking away from the strips of fabric sitting at one of my machines.
My avoidance project today, after having put strings of lights on my driftwood sculpture and along my balcony railing, was to make a new iPhone case!
The Old iPhone CaseThe New iPhone Case
As you an see, my old iPhone case which I made over a year ago has become very shabby. The lambskin (which I bought locally) was very soft and didn’t wear well. I’ve been meaning to make a new iPhone case but haven’t made time to do it. It’s not a big project, I can make one in under two hours. It’s just getting to it. Today was the day.
I used some leather I had bought in New York City in the spring of 2012 at the Leather Skins warehouse. (Check out the lambskins! Yummy! Irresistable! Not outrageously expensive!)
Leather Skins Warehouse
The place was small, on the 11th floor, Suite 1101, 261 W 35th St. The walls were filled with skins from ceiling to floor, sorted by kind, not so much by colour! I was taken with the lamb skins – I bought one in a purple-ish blue. There were actually six matching skins enough to make a jacket and pants – I only took a single skin. I also bought a printed leather skin (rather inexpensive – because a piece had been cut from one end – didn’t matter to me because I was intending to use it used for trim and there was a lot of leather in what remained of the skin). I’ve used small bits and pieces of that printed leather from time to time but most of the skin was still intact. Today I decided to cut a 5 1/4″ strip to make the iPhone case!
Didn’t take long to put the iPhone case together. I grabbed some zipper tape and slides. I dug through my zippered bag fabrics and found one to use for the linings, cut the three pieces I needed for the small pockets, the side pocket and the phone pocket. I looked through my parachute cord stash and picked out one. Finally I cut a small amount of velcro, and chose a button to decorate the closure tab.
I made this bag just a bit wider than the old one – to make room for the credit cards and the cash and the few items I carry in the side pocket. In under two hours I was finished. It’ll be interesting to see how long this one will last. I’m expecting the painted surface will rub off, but the skin is a bit sturdier than the blue leather was so the case may hold up somewhat longer.
In case you’re interested, you can find my instructions for this version of the iPhone case here.
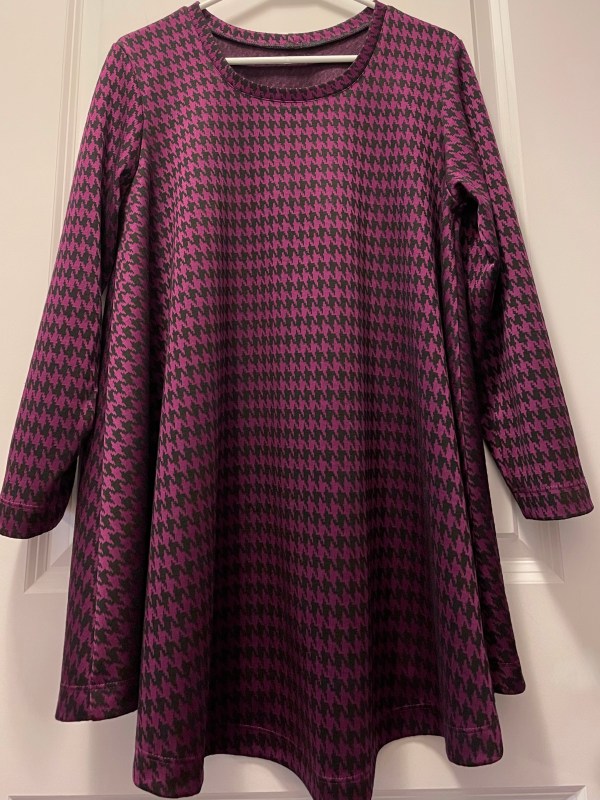
I’ve finished garment making for now. I just completed (maybe – more about that in a moment) a black and white Ebony T-Shirt top. I took out some of the flare (I could take out more – might do that if I make another one) and widened the sleeves, dropped the arm hole a small amount to relax the sleeves – it worked. Although I lengthened the 3/4 sleeves, I didn’t lengthen them enough! I’m not doing anything about that right now (I have enough fabric to add cuffs, for example) – I’ll wear it a couple of times before deciding whether to change the sleeve length or not.
Black/White Flared Top
I like the weight of the fabric, a knit, but with more heft than a t-shirt fabric. I have no idea how well it will wear – I have a hunch I will be dealing with pilling. It wasn’t a cheap fabric (even though it’s a synthetic without any natural fibre in it) so I won’t be surprised if I have to shave it after wearing it; whereas the fabric in the burgundy top has a slightly polished surface and it shouldn’t pill at all.
No doubt about it, the quality of fabric, even “good” fabric, is not the same as say 25 years ago. The integrity of the weave, the stability of the fibres, have deteriorated. When I make or buy something I want it to last a good while. I hate garments that make it through one season and then look shabby and need to be thrown out.
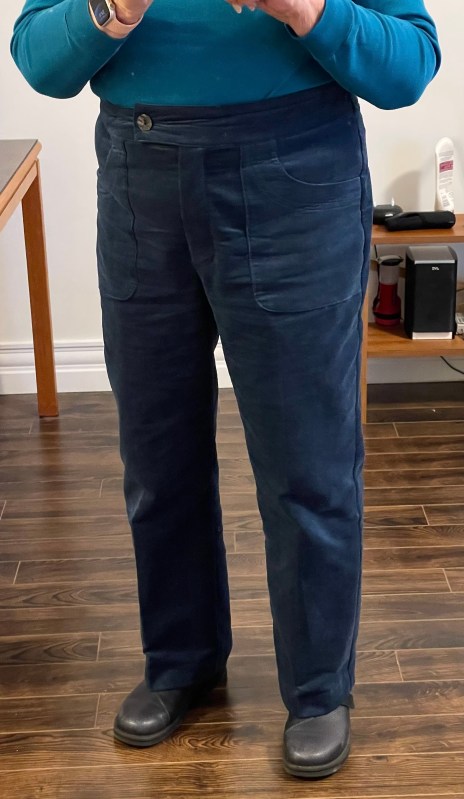
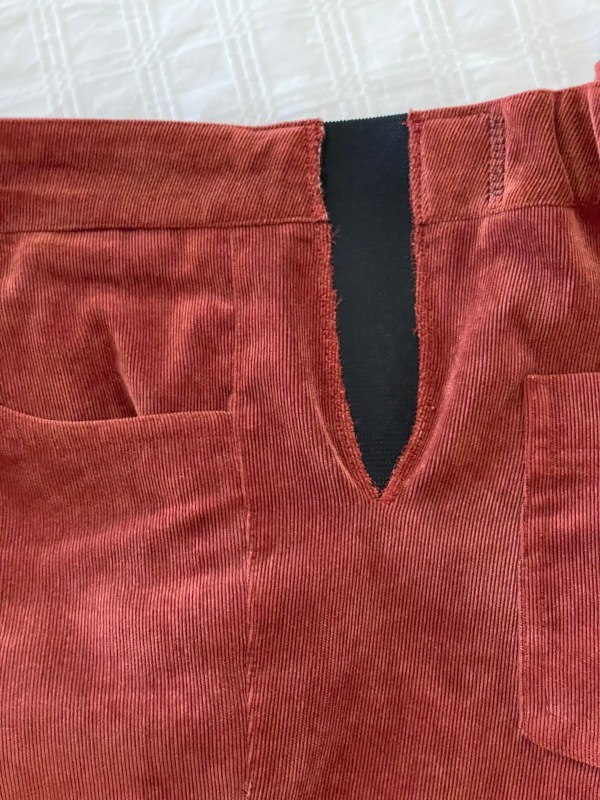
I finished the burgundy corduroy pants last week. I adjusted the crotch depth (I removed 3/4″ from the back panel which seems to have eliminated the fold that occured on the teal pants).
Burgundy PantsTeal Pants
The reality is, even if I’ve made the pattern before (sometimes many times), each new garment is still a muslin! There are always adjustments to be made. The fabrics hang a wee bit differently. There’s more or less stretch in one fabric which changes the fit. Good thing what draws me to making clothes for myself is the challenge each new garment offers!
In the pants I just finished I incorporated a FTA in the traced pattern. It has resulted in a good fit at the waist, nicely draping coverage across my tummy, with no pulling when I do up the front fly zipper.
I followed the instructions in Jenny Rushmore’s “Ahead Of The Curve”. I started by putting on an unadjusted pair of pants/jeans, buttoning the waistband but leaving the zipper gaping so I could measure how much I needed to add to make the tummy fit work. Then I drafted the changes she laid out – a horizontal cut connected to a diagonal cut, with a cut from top to horizontal cut to open the waistband.
Full Tummy Adjustment – FTA
I made those adjustments on my pattern (outlined in red – sort of). You can see I needed to open the top close to 3/4″ at the centre front, 1/4″ at the waistband, giving another 1/4″ (a shade under) at the centre front to make the fly flap straight.
My Adjustments
That gave me a nicely fitting front for the pants:
I wore them all day yesterday; I have them on again today. They stay snugly at my waist, they don’t pull down when I sit, and there’s no strain across the tummy. Comfortable. I’m making these same adjustments on the burgundy pair of pants I’m just about to cut out!
Dark Teal Corduroy Pants/JeansCloset Case – Ebony T-Shirt/Dress
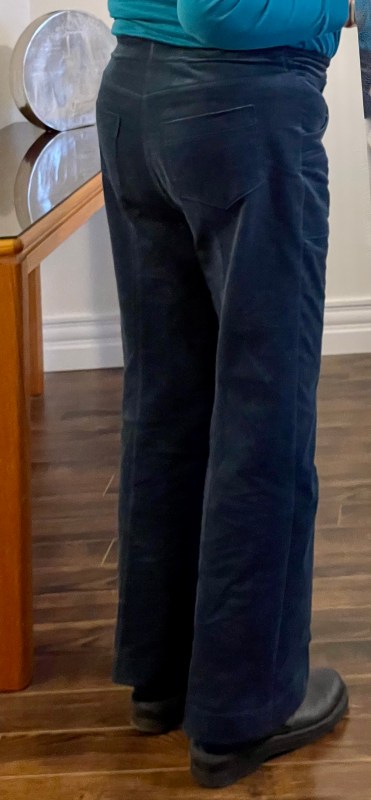
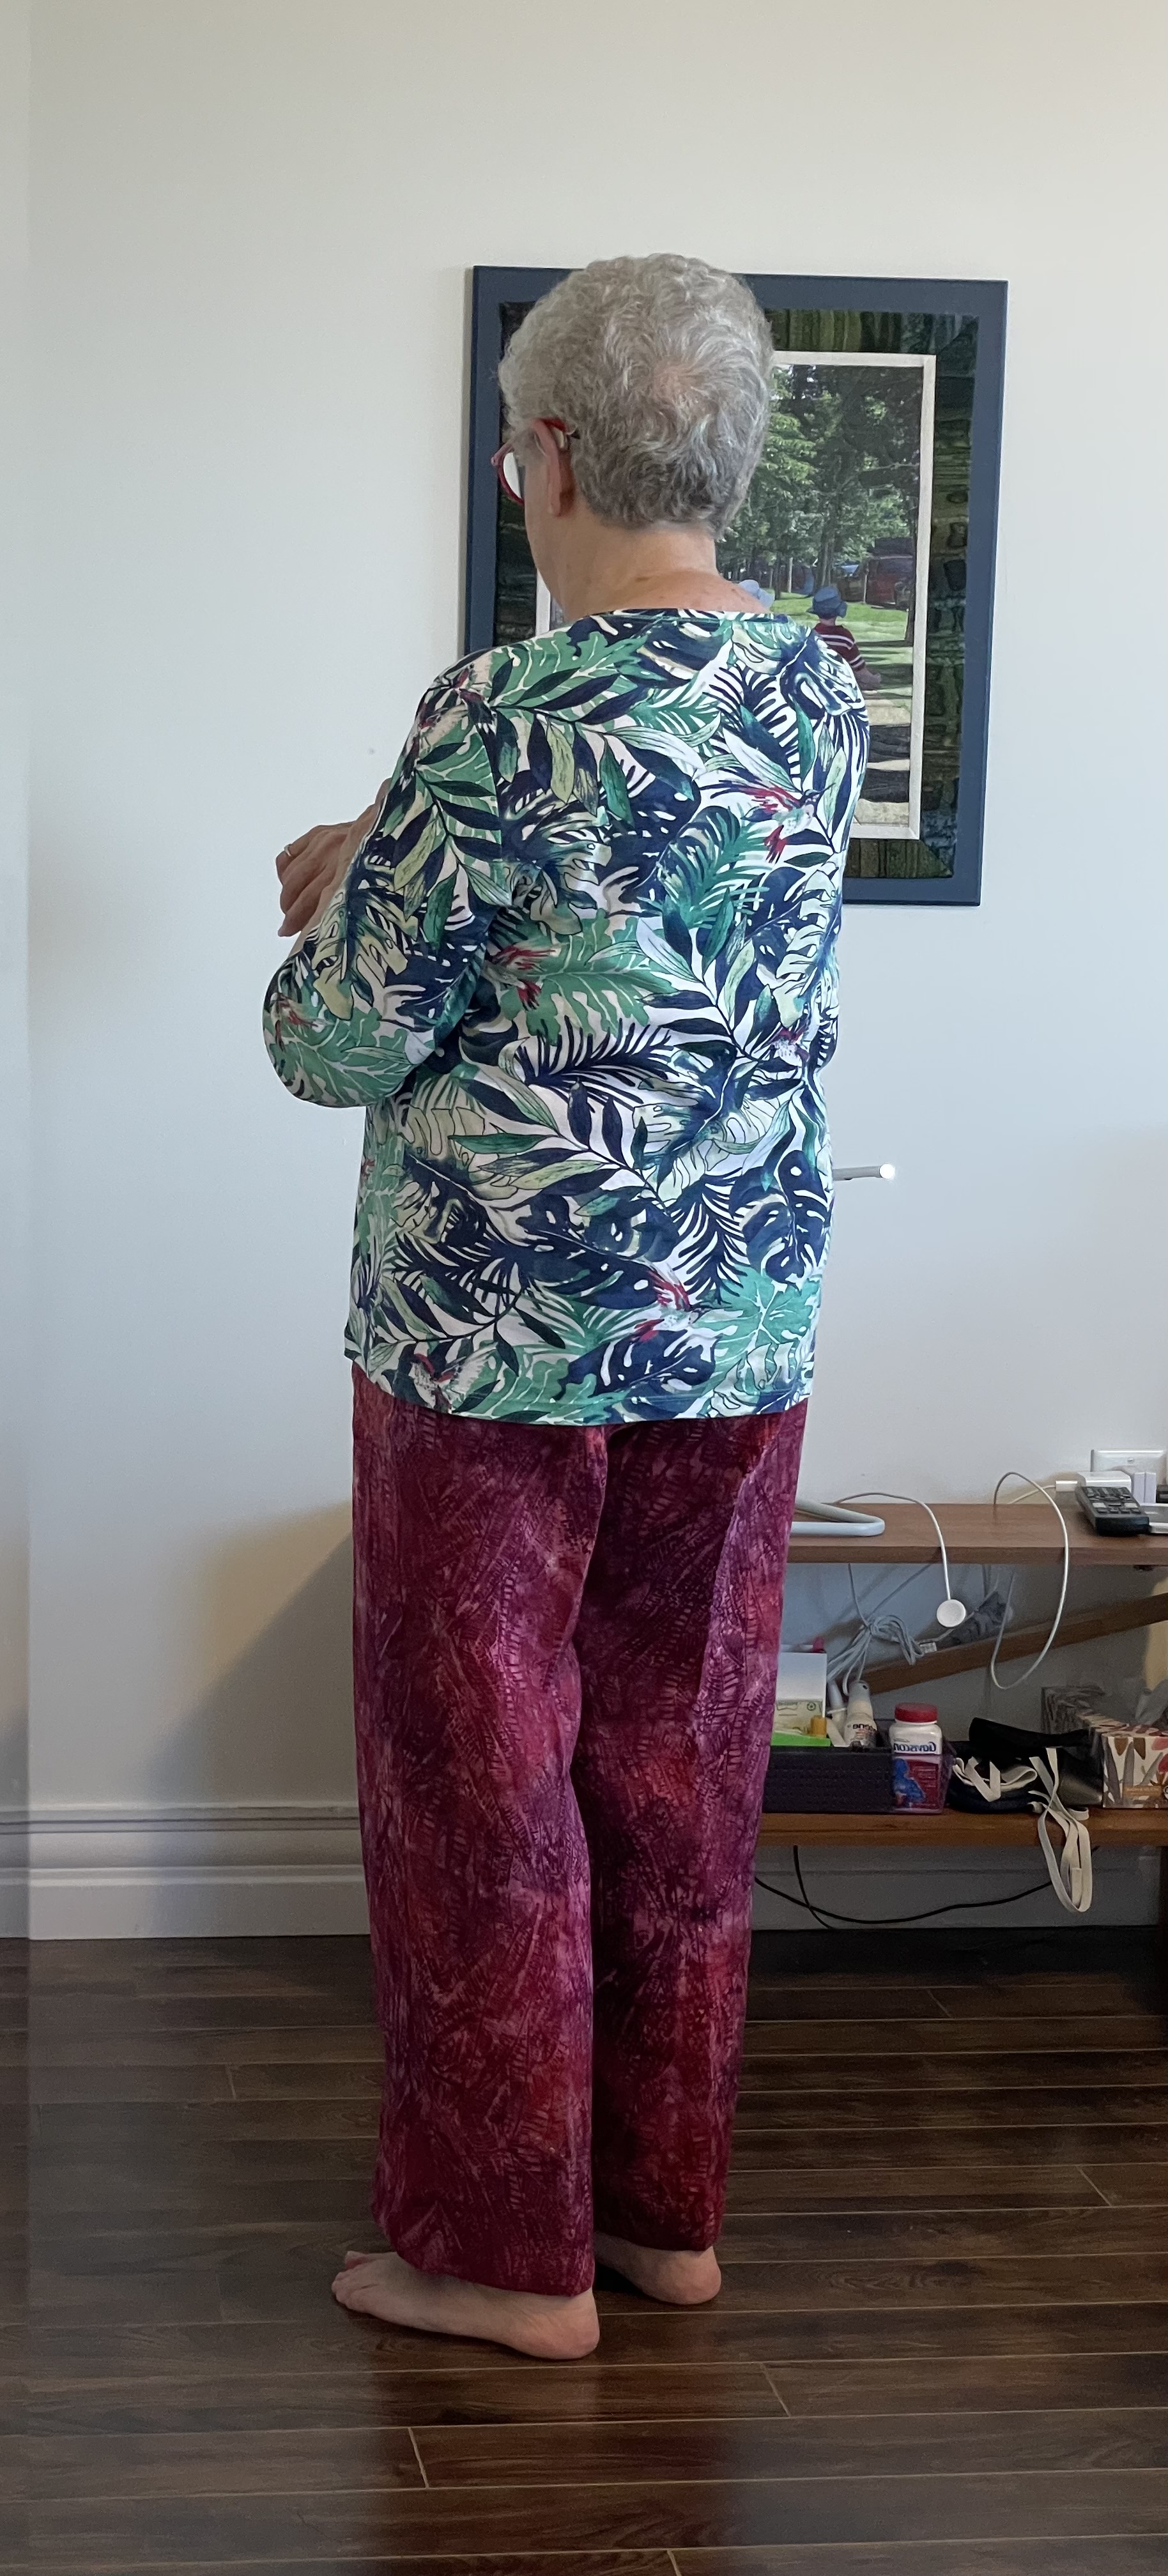
I’ve been busy sewing. Yesterday made this pair of corduroy pants/jeans (which I’ve been wearing all day – they’re very comfortable with a waist that’s large enough but just snug enough with the help of a bit of elastic in the back, they aren’t pulling down which means the crotch depth is good). As you an see I used a fly front which let me shape the sides just a bit (can’t shape them much because I don’t have hips and my waist is almost the same measurement as my hips). I no longer bother with inside pockets – the top pockets work just as well and look OK. There are also two back jeans pockets and as always, the dart down the centre back to give the legs/bum a bit of shape.
Back View
There’s a jeans back yoke to shape the top hip area which works quite well. There is still some bagginess just below the bum which I suspect I could get rid of if I brought in the back crotch about an inch – I’m not going to do that on these pants. The fullness doesn’t show when I wear a tunic length top. However, I will try that with the next pair – a dark maroon to go with the Ebony T-shirt.
Today, I cut out and zipped up the flowing tunic top. Simple to make – stitch the shoulders, add the neck facing, sew in the sleeves, stitch the underarm and side seams, finally hem sleeves and bottom. Two-three hours work. I lengthened the tunic by 2″ adding an extra 1 1/2″ to the front. In previous iterations of the tunic I found it tended to hang shorter in the front than the back – this time I have managed to even it up.
I love having a dedicated coverstitch machine – it makes hemming garments (and other projects) a snap. That precise double row of stitching which covers the hem edge on the inside gives the garment that commercial finished look and it’s so easy to do. My advice to people who do a reasonable amount of garment sewing is to buy a good mechanical serger without a lot of bells and whistles, and invest in a separate coverstitch machine as well, rather than an expensive serger with coverstitch which takes an annoying amount of time to convert from serging to coverstitch and back again! The two machines will likelky cost lest than that fancy serger. My covertitch machine just needs threading (which is very simple) and it’s always ready to go.
Tomorrow I will cut out the magenta corduroy pants and get those whipped together over the next few days.
I’ve got a collection of face masks hanging on the door handle of my apartment, more on the coat closet doorknob, a couple in my car. They’ve been dormant for the summer and early fall but I’m putting them on again when I’m going into populated places, or medical appointments (because I’m usually asked to), and sometimes when I join the cribbage group on Monday evening. I’m wearing one more and more; I washed six yesterday when I did the laundry.
This past week one of the card women mentioned wanting a couple of new masks; my naturopath said the same thing to me on Friday. I’d been thinking about making a few new ones anyway. I happened to see a suitable fabric at Sew With Vision last week – I bought a half metre, I found another half metre of a fabric that went with it in my stash (you can just see the red peeking out in the lower mask).
Today I cut out two masks, made them up. I was using a pattern by SeeKateSew and while I didn’t follow her directions, I did use her template. The last time I made a batch of face masks I made her Adult M; this time I made Adult L – a better fit from nose to chin for me (and I’m guessing for other people, too). After finishing the two masks for myself, I cut out six more to sew and give away. (My wrist is still bothering me, rotary cutting is painful, but I put up with the pain to get this done.) I’ll get them sewn together in the next couple of days!
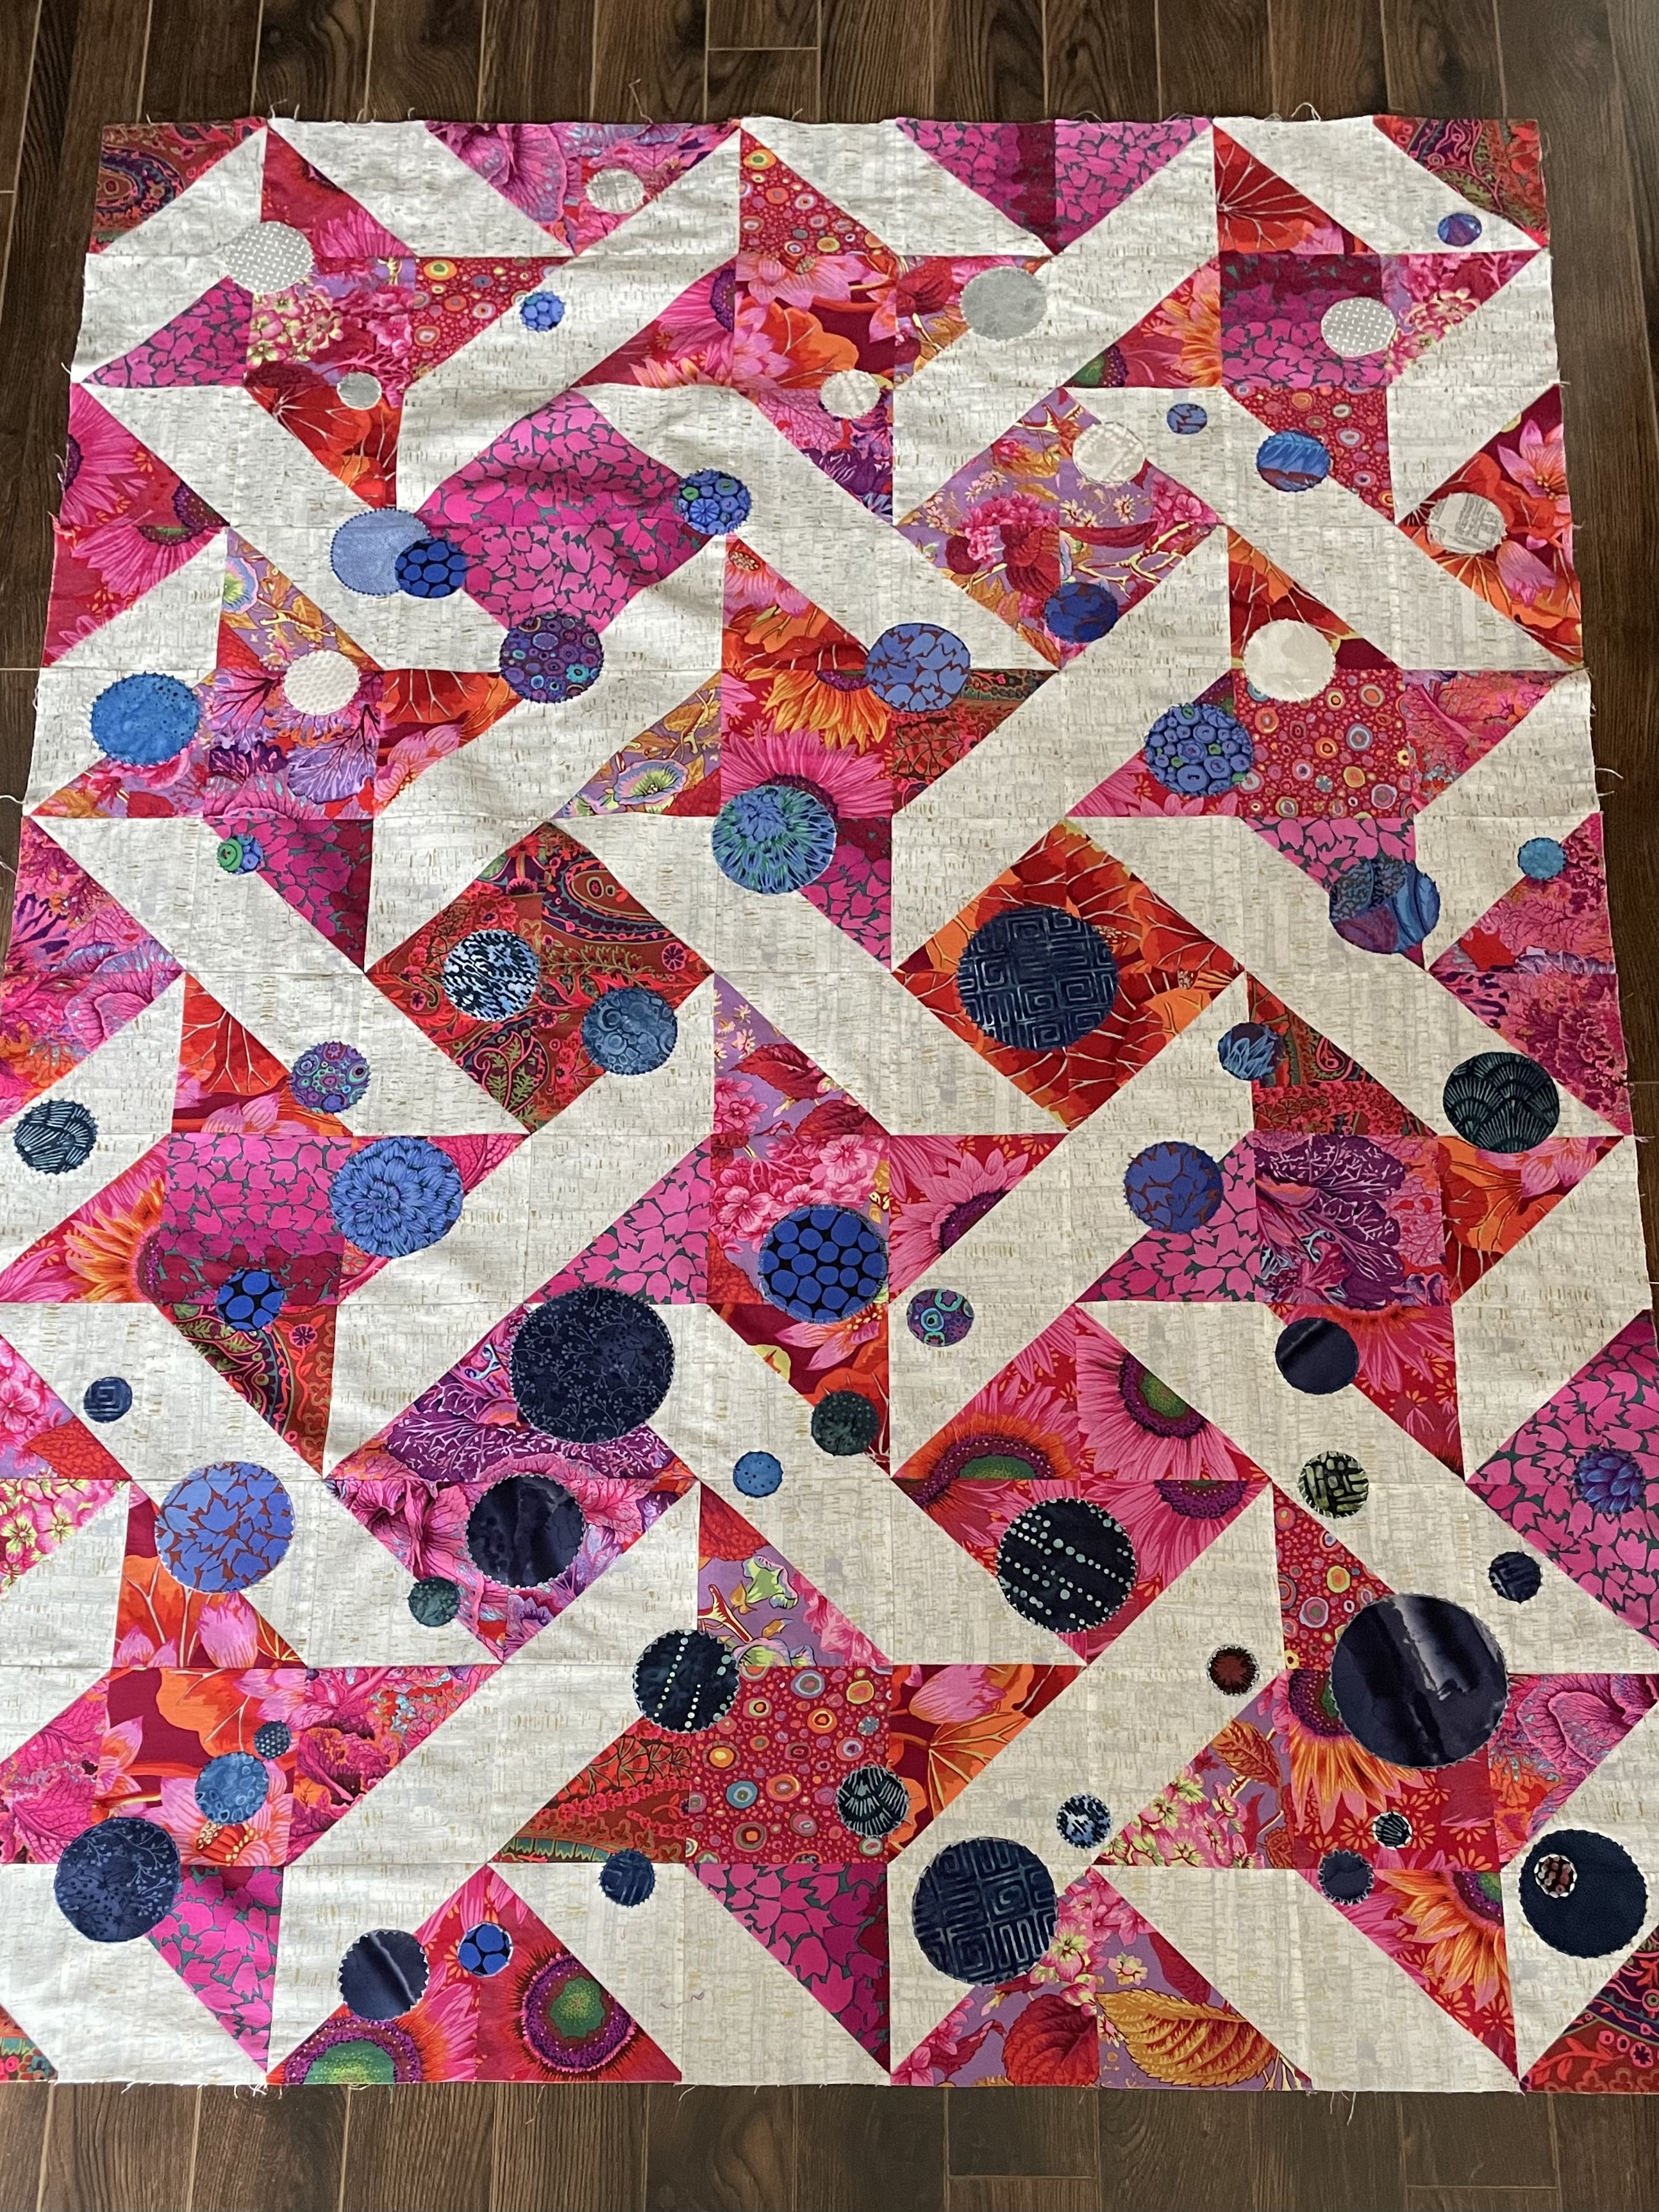
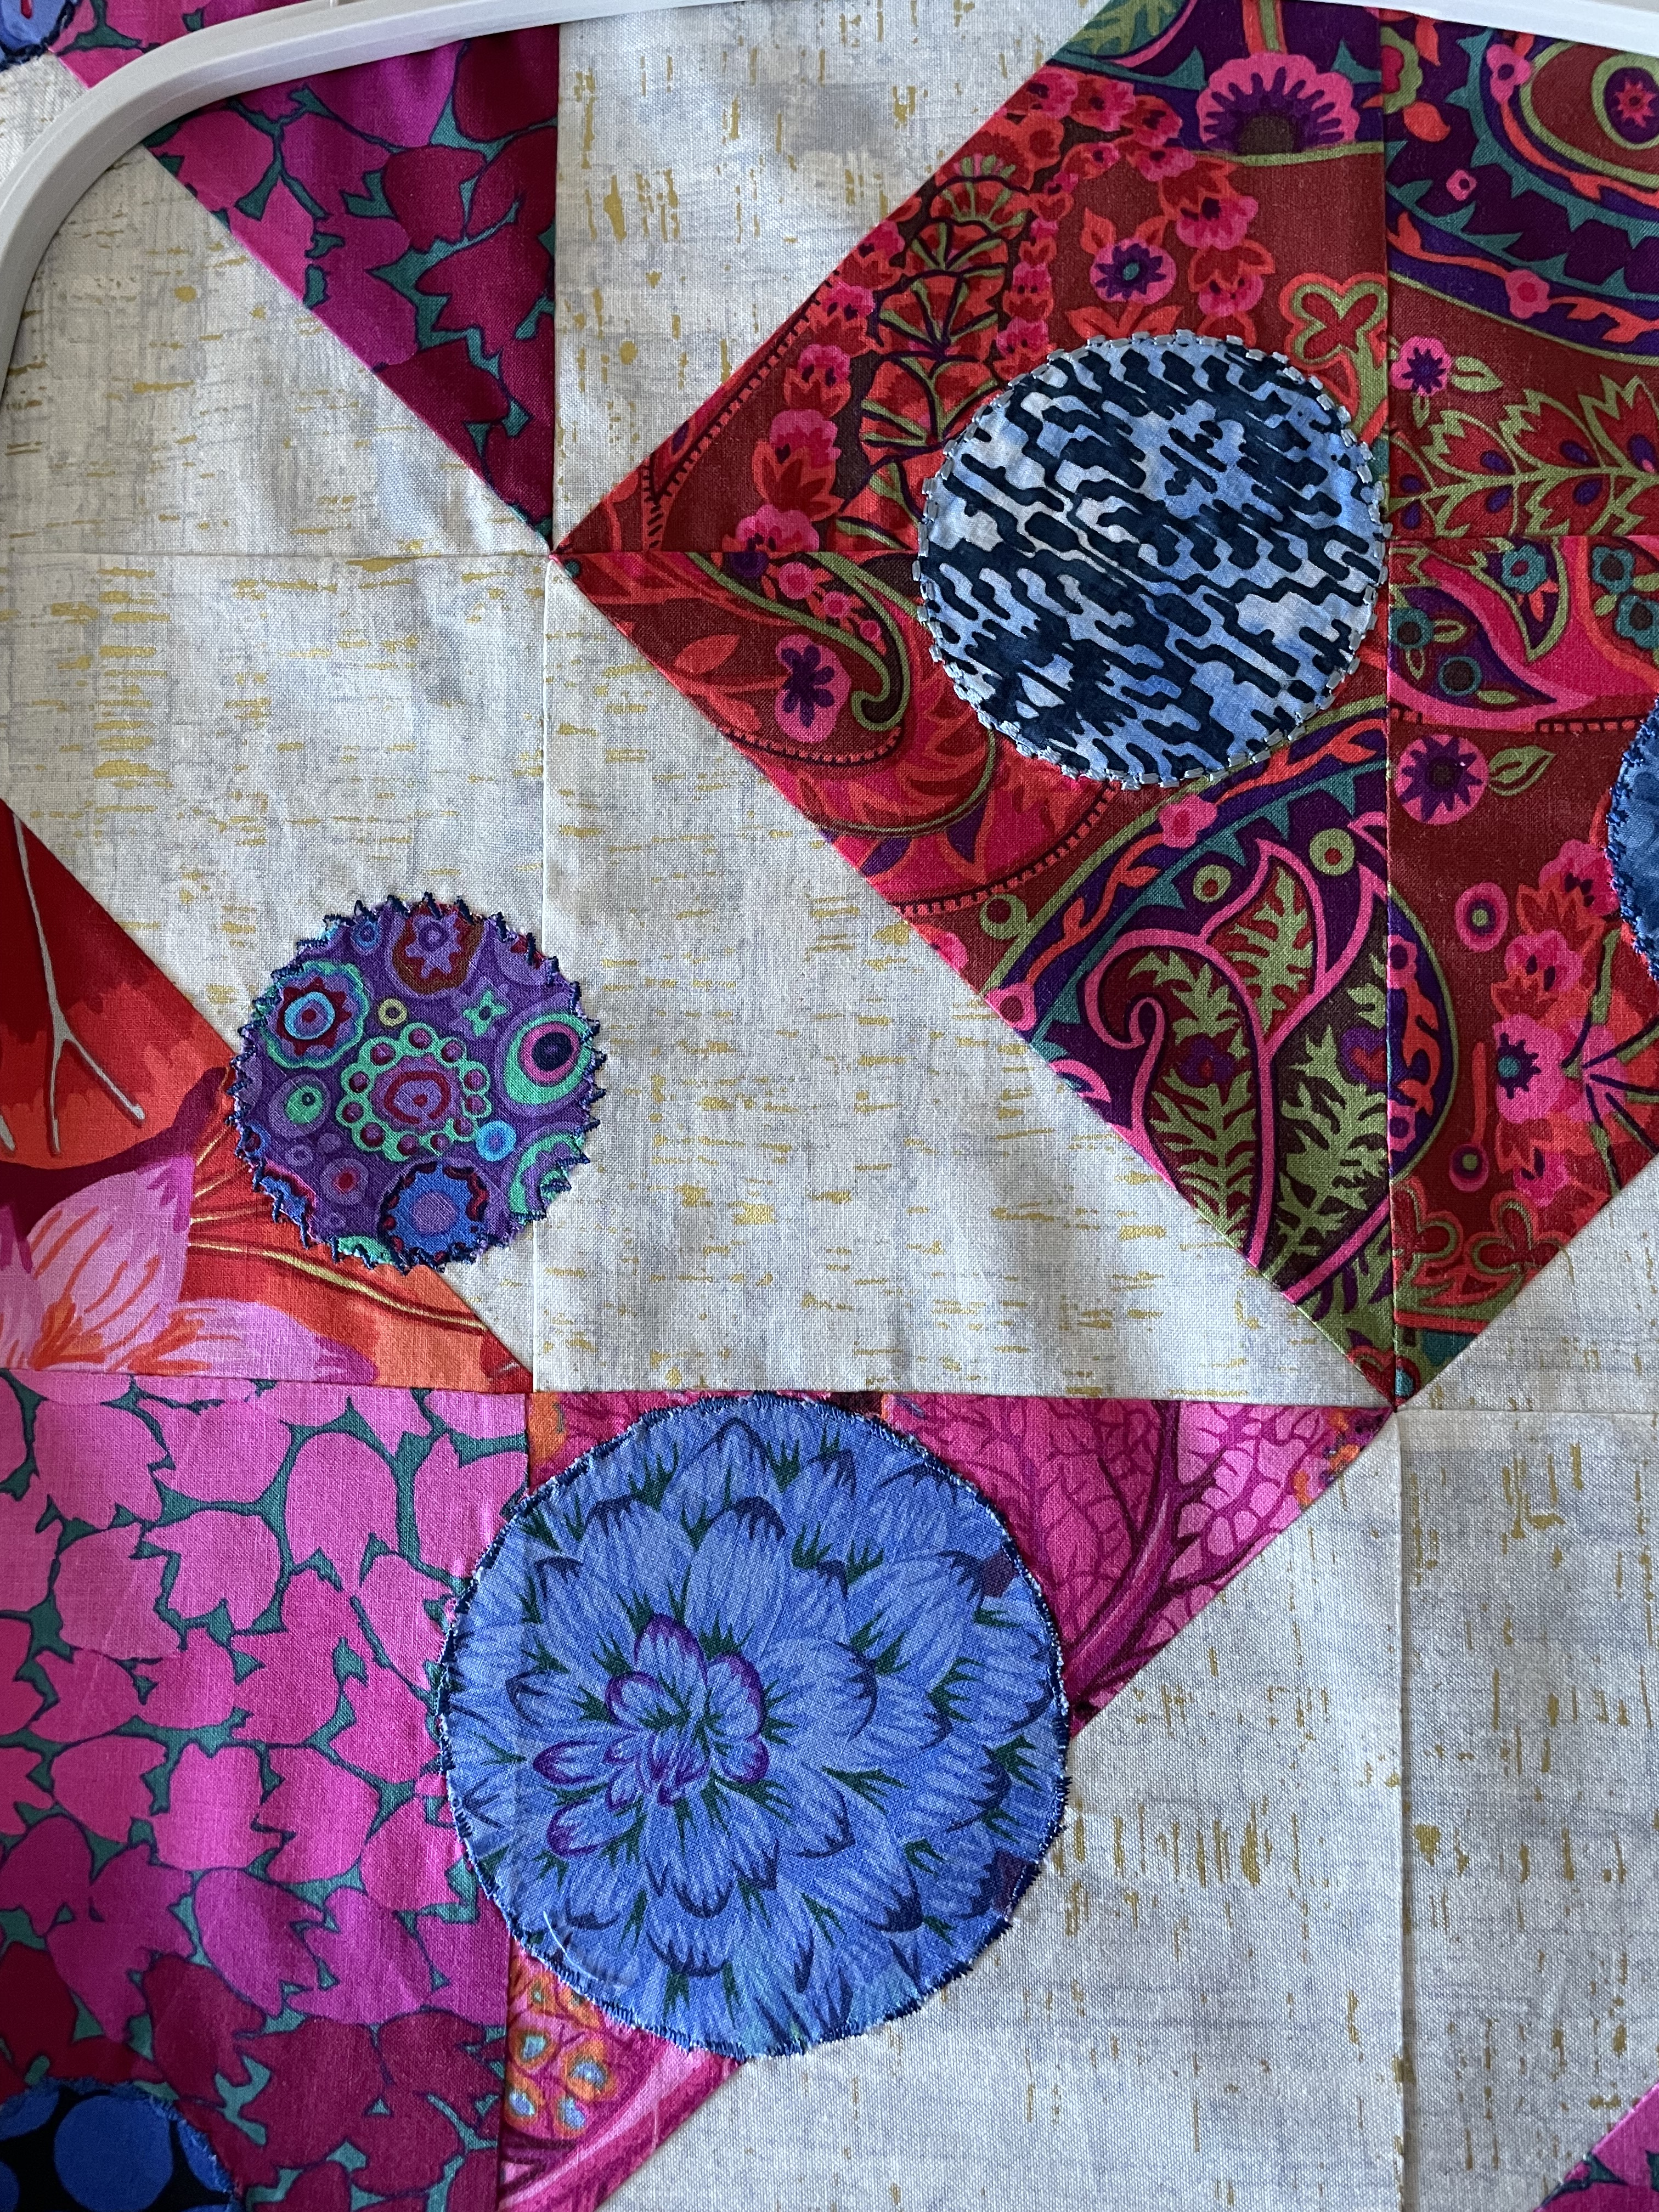
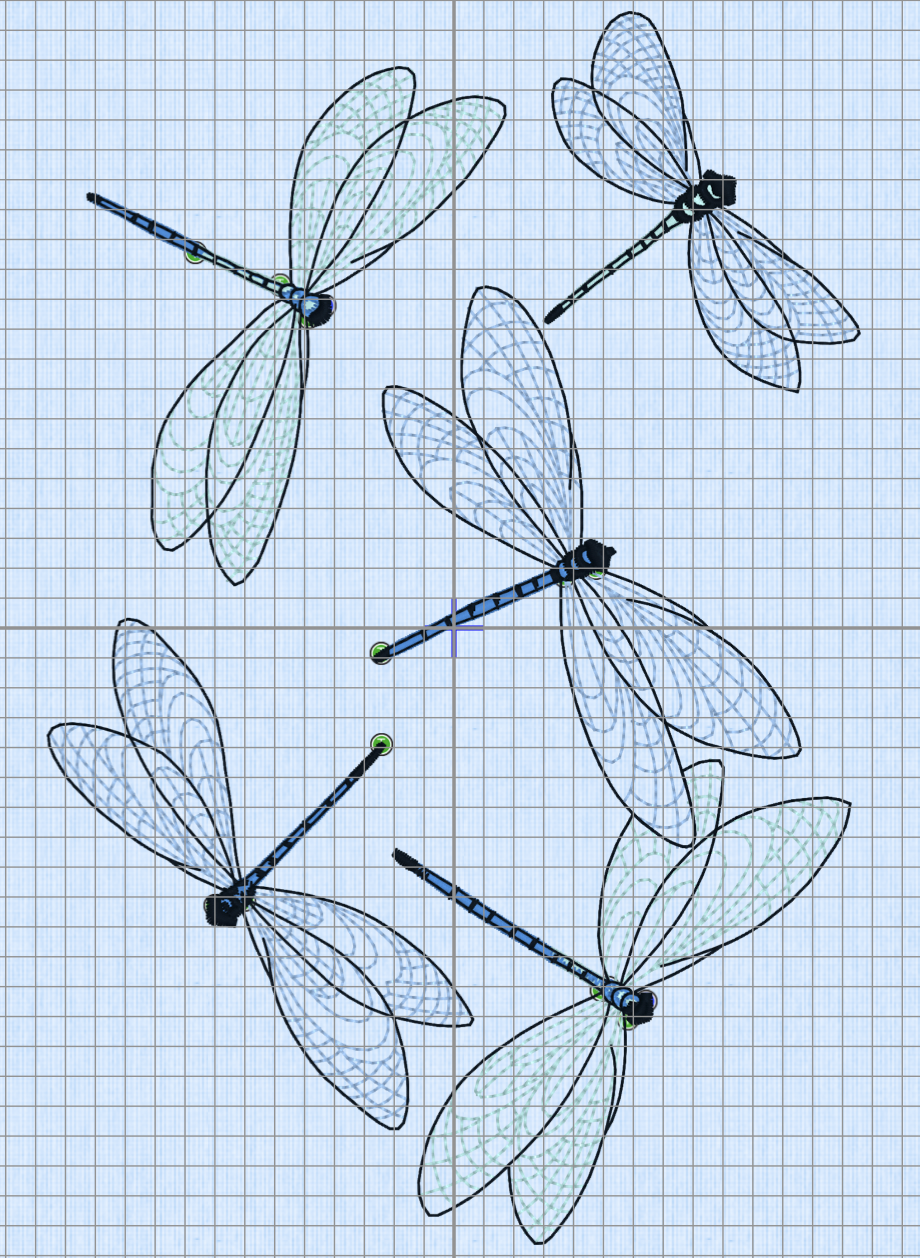
It took two days, but I did get all 87 circles edge-stitched. What with changing thread colour, selecting and modifying different stitches the process was tedious. The large circles are relatively easy because I can keep the raw edge aligned with the centre mark on the open-toe foot I prefer to use; but the smaller the circle, the harder it is to keep the stitching precisely on the edge. On the whole I did a reasonable job although I did unpick the stitching on two of the circles – in the first instance I didn’t like the stitch I had chosen, in the second I wasn’t as accurate as I wanted to be; both undoing operations took considerable time.
Now my challenge is to decide whether to add some embroidery or not:
With 260×260 embroidery hoop as guide
The largest embroidery I can do easily would be using the 260×260 hoop – to go larger would involve the Grand Dream hoop (360×350) which I have to rotate in order to embroider a complete design (always a risky move because the two halves don’t always align precisely).
Here’s the problem – so I embroider a design partly over one or more circles using a placement like I’ve shown – not too dense a design so that it overtakes what I’ve done so far. I think I’d even add the batting at this point to give the embroidery some substance. However, I still need to embroider the whole quilt surface, including over the top of any embroidery and that, I know would make the whole effort muddy. I could add small clusters of dragonflies in a few strategic spots:
They’re not too dense, and might add an interesting bit of detail, although I’m not sure they’d show up against the darker print fabrics!
I’m probably better off leaving the top as it is, setting up the quilt sandwich and just quilting the whole thing!
At the moment the top is sitting on my cutting table while I ponder what to do now.
Yesterday, to do something productive while thinking about where to go next with the quilt, I took three pair of corduroy pants I made at least 10 years ago (which I’d put at the back of my closet last winter because they were too small at the waist and I was too lazy to do anything with them), and added long elastic gussets to each side.
The gussets had to be deep and wide enough to allow the fly front zipper to close. I serged the edges of the 6″ elastic inserts, then overlock-stitched the raw corduroy edges to the elastic using one of the overlock stitches on my embroidery machine. The whole process – removing the elastic I’d previously inserted into just the waistband, extending the cut 2″ below the front pocket opening, serging the elastic inserts, and stitching them in place – took about 20 minutes for each pair of pants. I’m wearing one of them today!
What amazes me is that my pants continue to fit everywhere except at the waist and belly. As my large “tummy” gets larger, I need to extend the top 6″ or so of my pants but the rest continues to fit reasonably well. It might be useful to revisit that original pattern (if I can figure out which version it might be – I usually date each modification) and try it out again using a “full tummy adjustment“. Let you know how that goes!
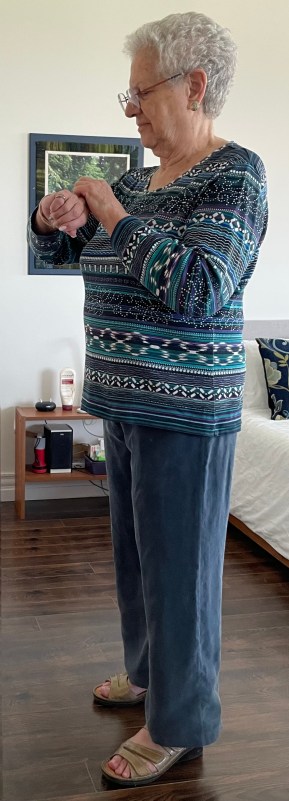
Here is the latest pants iteration – pull-on pants in a rayon batik I bought in Bali in 2014!
I redrafted the pattern again – adding 1/2″ to each side seam (front and back) which has given me a bit more room to sit down in. The crotch is also a bit wider in the back and extends closer to the knee which gives me slightly more fullness on the inner thigh which is helping the fabric fall straight from my bum and the inseam hang correctly.
I had intended to create a fly front on these pants but this fabric is soft and drapey so I folded the fly addition back and cut along the centre seam to make a straight front seam. I did want to shape the sides a bit but the waist on pull-on pants has to be as wide as the hips, so an elastic waist it is.
I made more work for myself with these pants – I basted the four panels together so I could try them on and assess the fit. I set up the waistband, then fit the pants to the waistband and it seemed I was probably close to the fit I wanted. Then I took apart the side seams so I could properly add the front and back pockets to the flat panels, basted them back together, and finally serged everything – in the order I would normally use for constructing pants. Just took longer.
Next time I’m not going to need to do the basting – this pattern is pretty close. For winter pants I am going to want the back to be shaped under the bum somewhat so the back dart will return, as will a fly front opening (which will allow me to taper the sides at the top).
I have to say, after all these years chasing a pattern and strategies for making pants that fit – I think starting with the straight monpei rectangles, building in the crotch triangles, adding a waistband, has got me closer than anything I’ve done before. I no longer have a “shapely” body – I’m straight, and flat, and dumpy! The peasant pants, based on two rectangles, gives me pant shapes on the grain of the fabric, with enough fabric where I need it and that hang straight from the fullness of my bum (given what little of it that I have).
I’ve actually learned more about making pants, particularly pants for myself, from this series of experiments, than I have for the past 30 years. I’ve drafted a pant sloper in the past, but the part that was missing, that I didn’t see, was pants are based on two rectangles based on a hip measurement and garment length from waist to hem (with seam allowances and hem added)! By adding a crotch based on the crotch depth measurement to one side of the rectangle, you get the curved shape around the hips, bum, and between the legs you need. You can add further shaping, if necessary, by removing fabric from beneath the bum with a dart down the back of the leg. You can remove fabric from the centre back and the top of the side seams if you have to to accommodate a curvy body shape. But you start with your hip measurement and crotch depth, which sets you up to draft the rectangular shapes that are the basis of the garment! Didn’t know that before.
My next attempt will be in corduroy (which has a small amount of stretch) – for fall.
I decided to take the Monpei idea further and create a “pants” pattern from it – two rectangles – one each for the leg front and leg back. Instead of the triangular gusset I grafted the crotch triangles onto the rectangles (10 1/2″ x 40″), curved the crotch additions using a French curve, raised the centre back by 1″, took the centre back in by 1 1/4″. I also added “jeans” pockets. The waist I finished with a facing and elastic at the top.
At some point in the past I had bought this Sandwashed Cupro Blend fabric online from Blackbird Fabrics.
Cupro is a ‘regenerated cellulose’ fabric made from cotton waste. It is made using the teeny tiny silky cotton fibres, known as linter, that stick out of the cottonseed and are too small to spin. The linter is dissolved into a cuprammonium solution, which is a mixture of copper and ammonium, dropped into caustic soda, then spun into fibre. Much like Tencel and Modal, cupro is a plant-based material that is chemically processed to produce the resulting fabric.
Cupro is said to have all the positive qualities of silk: it’s silky-smooth and drapes just like the luxurious material.
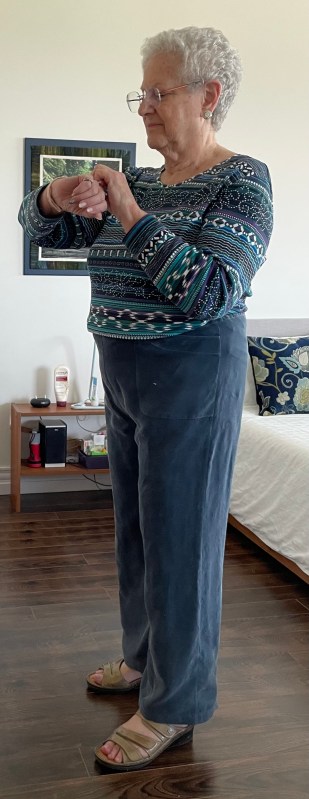
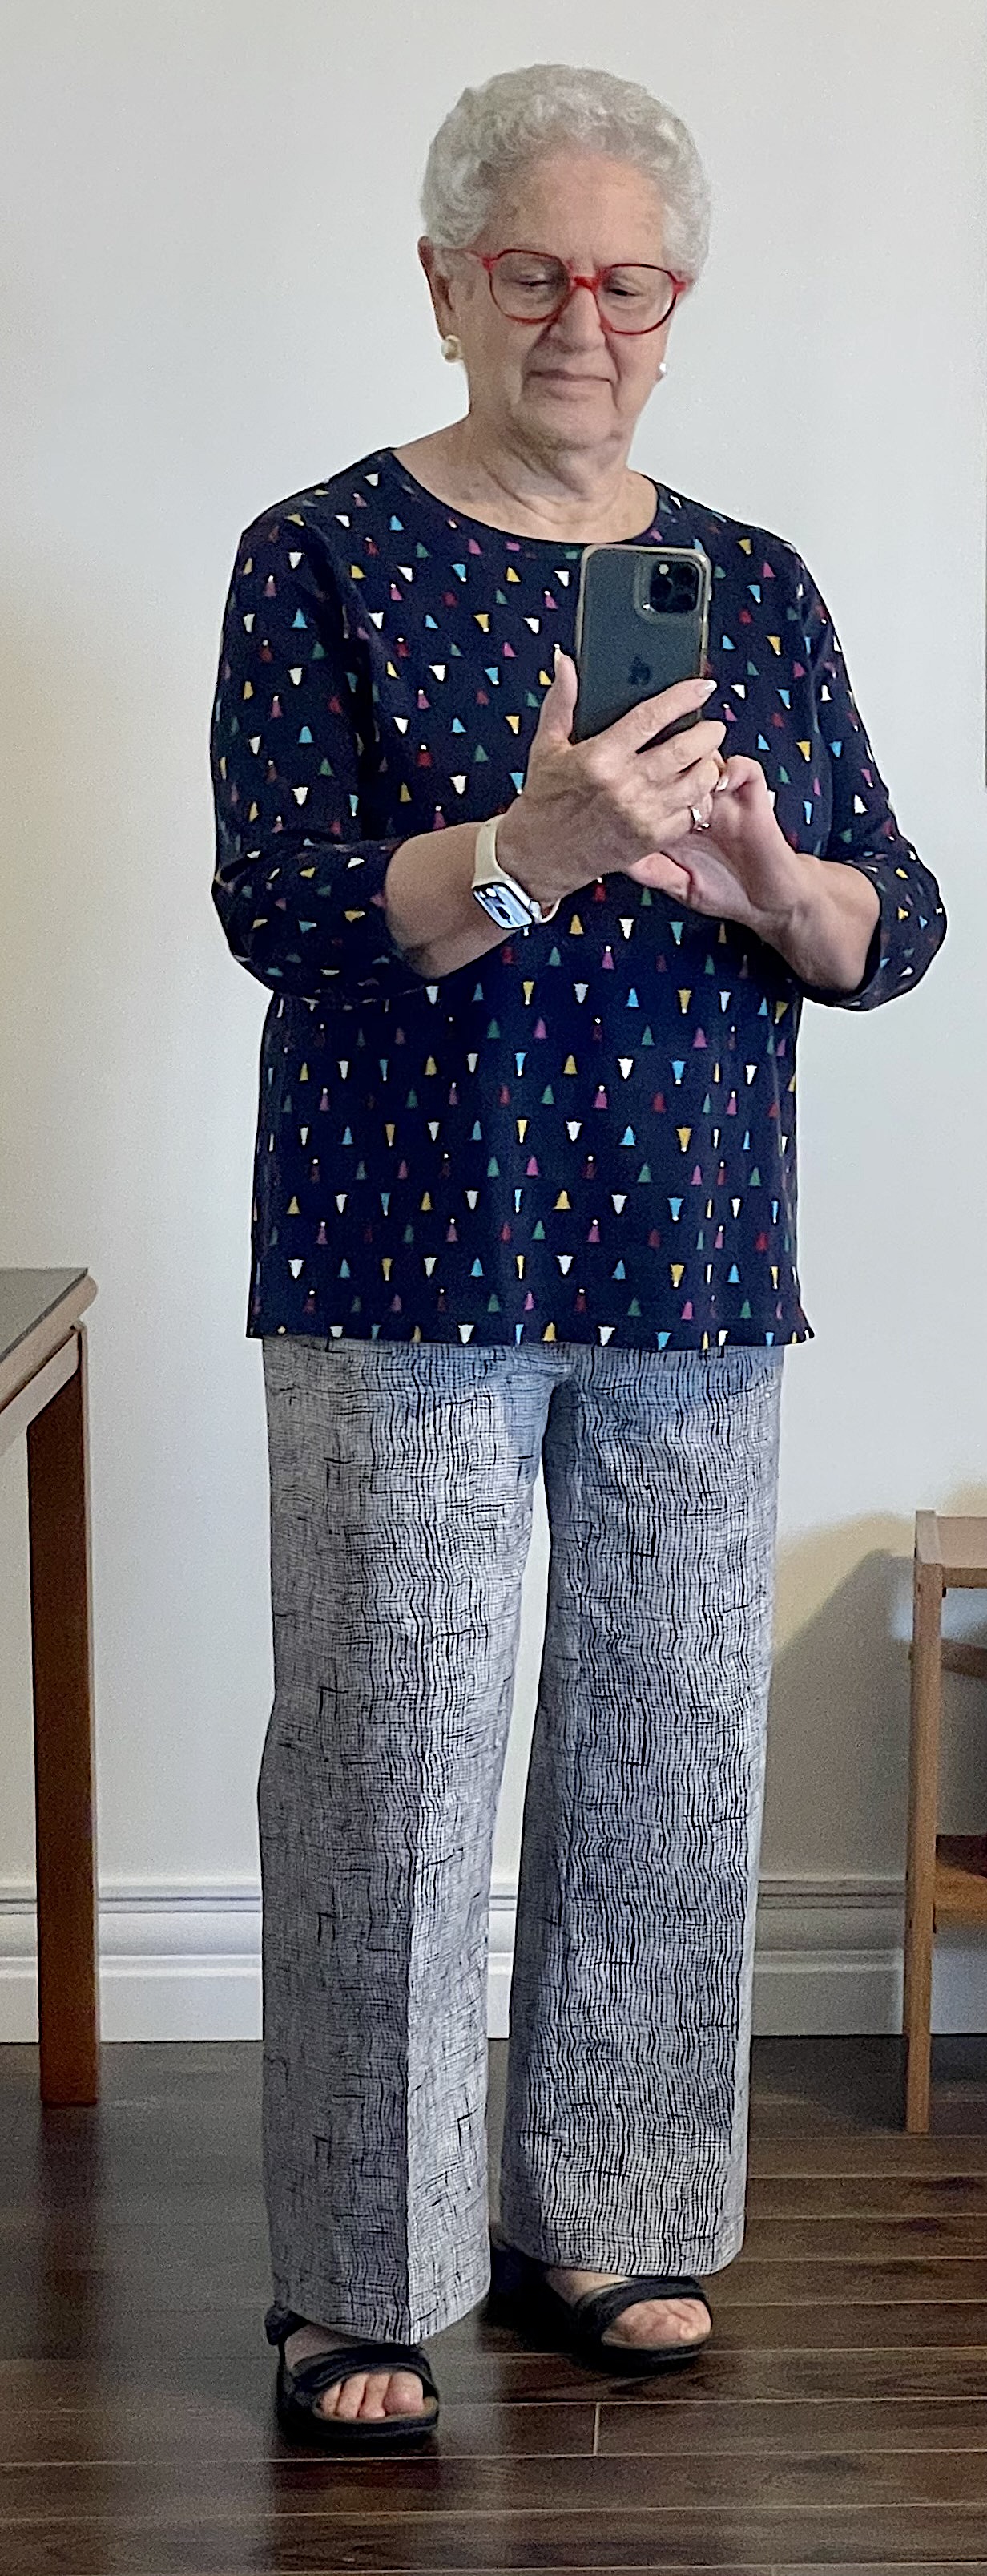
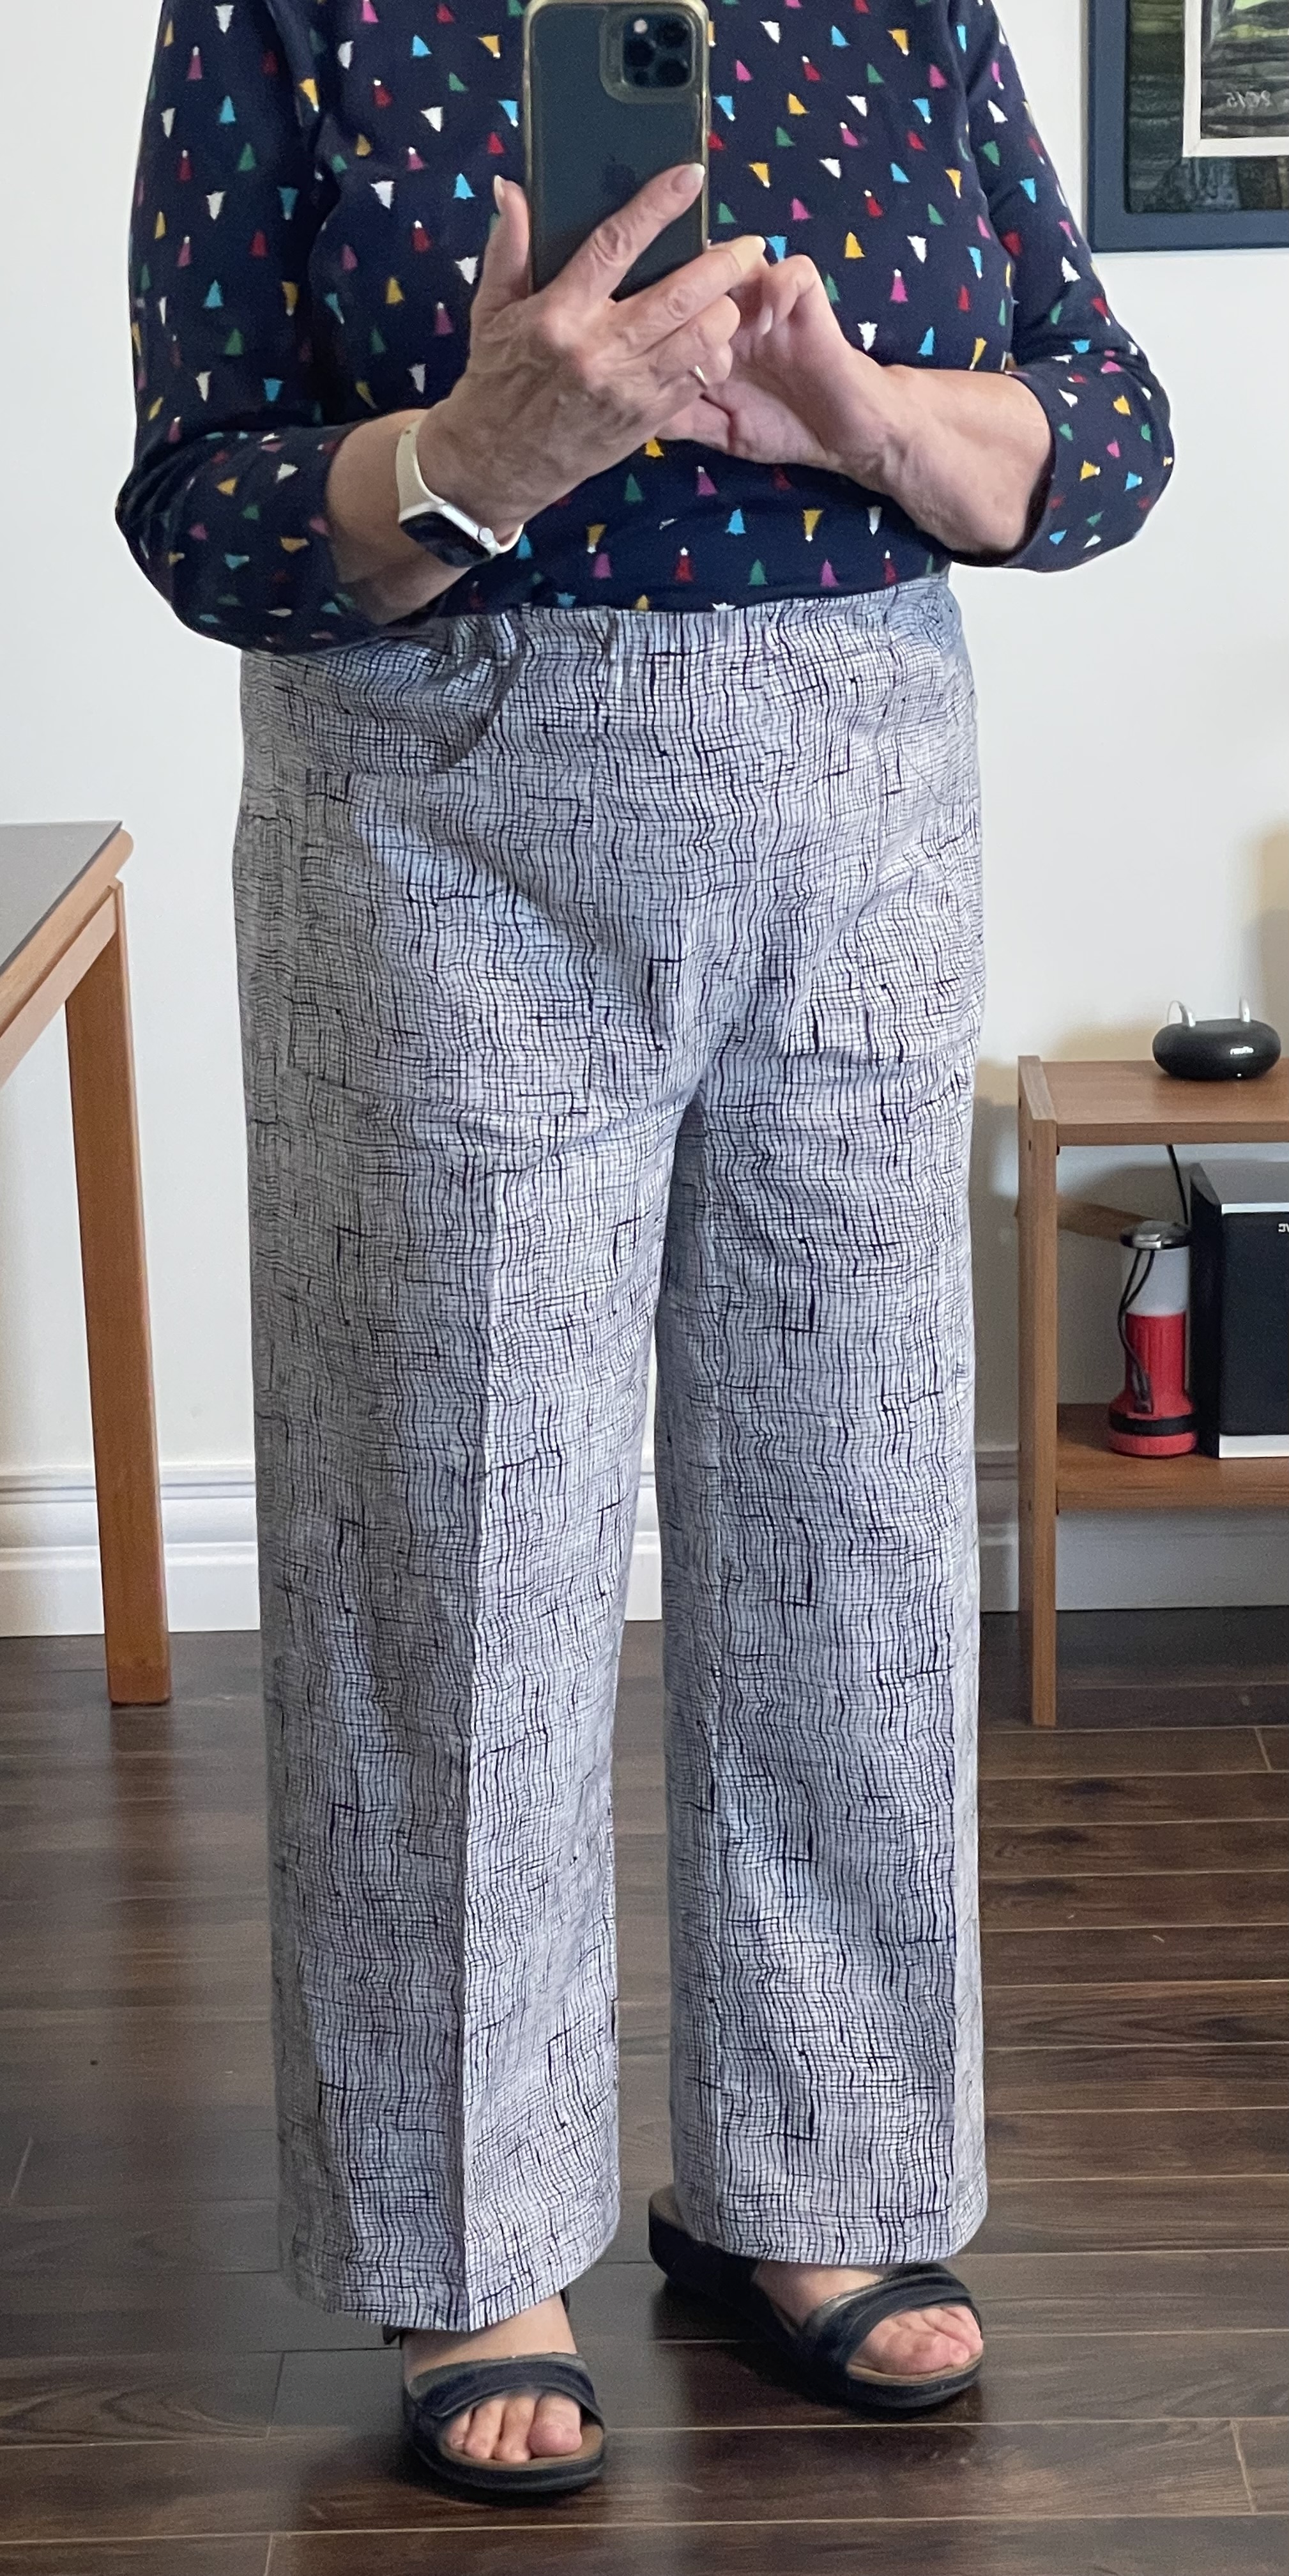
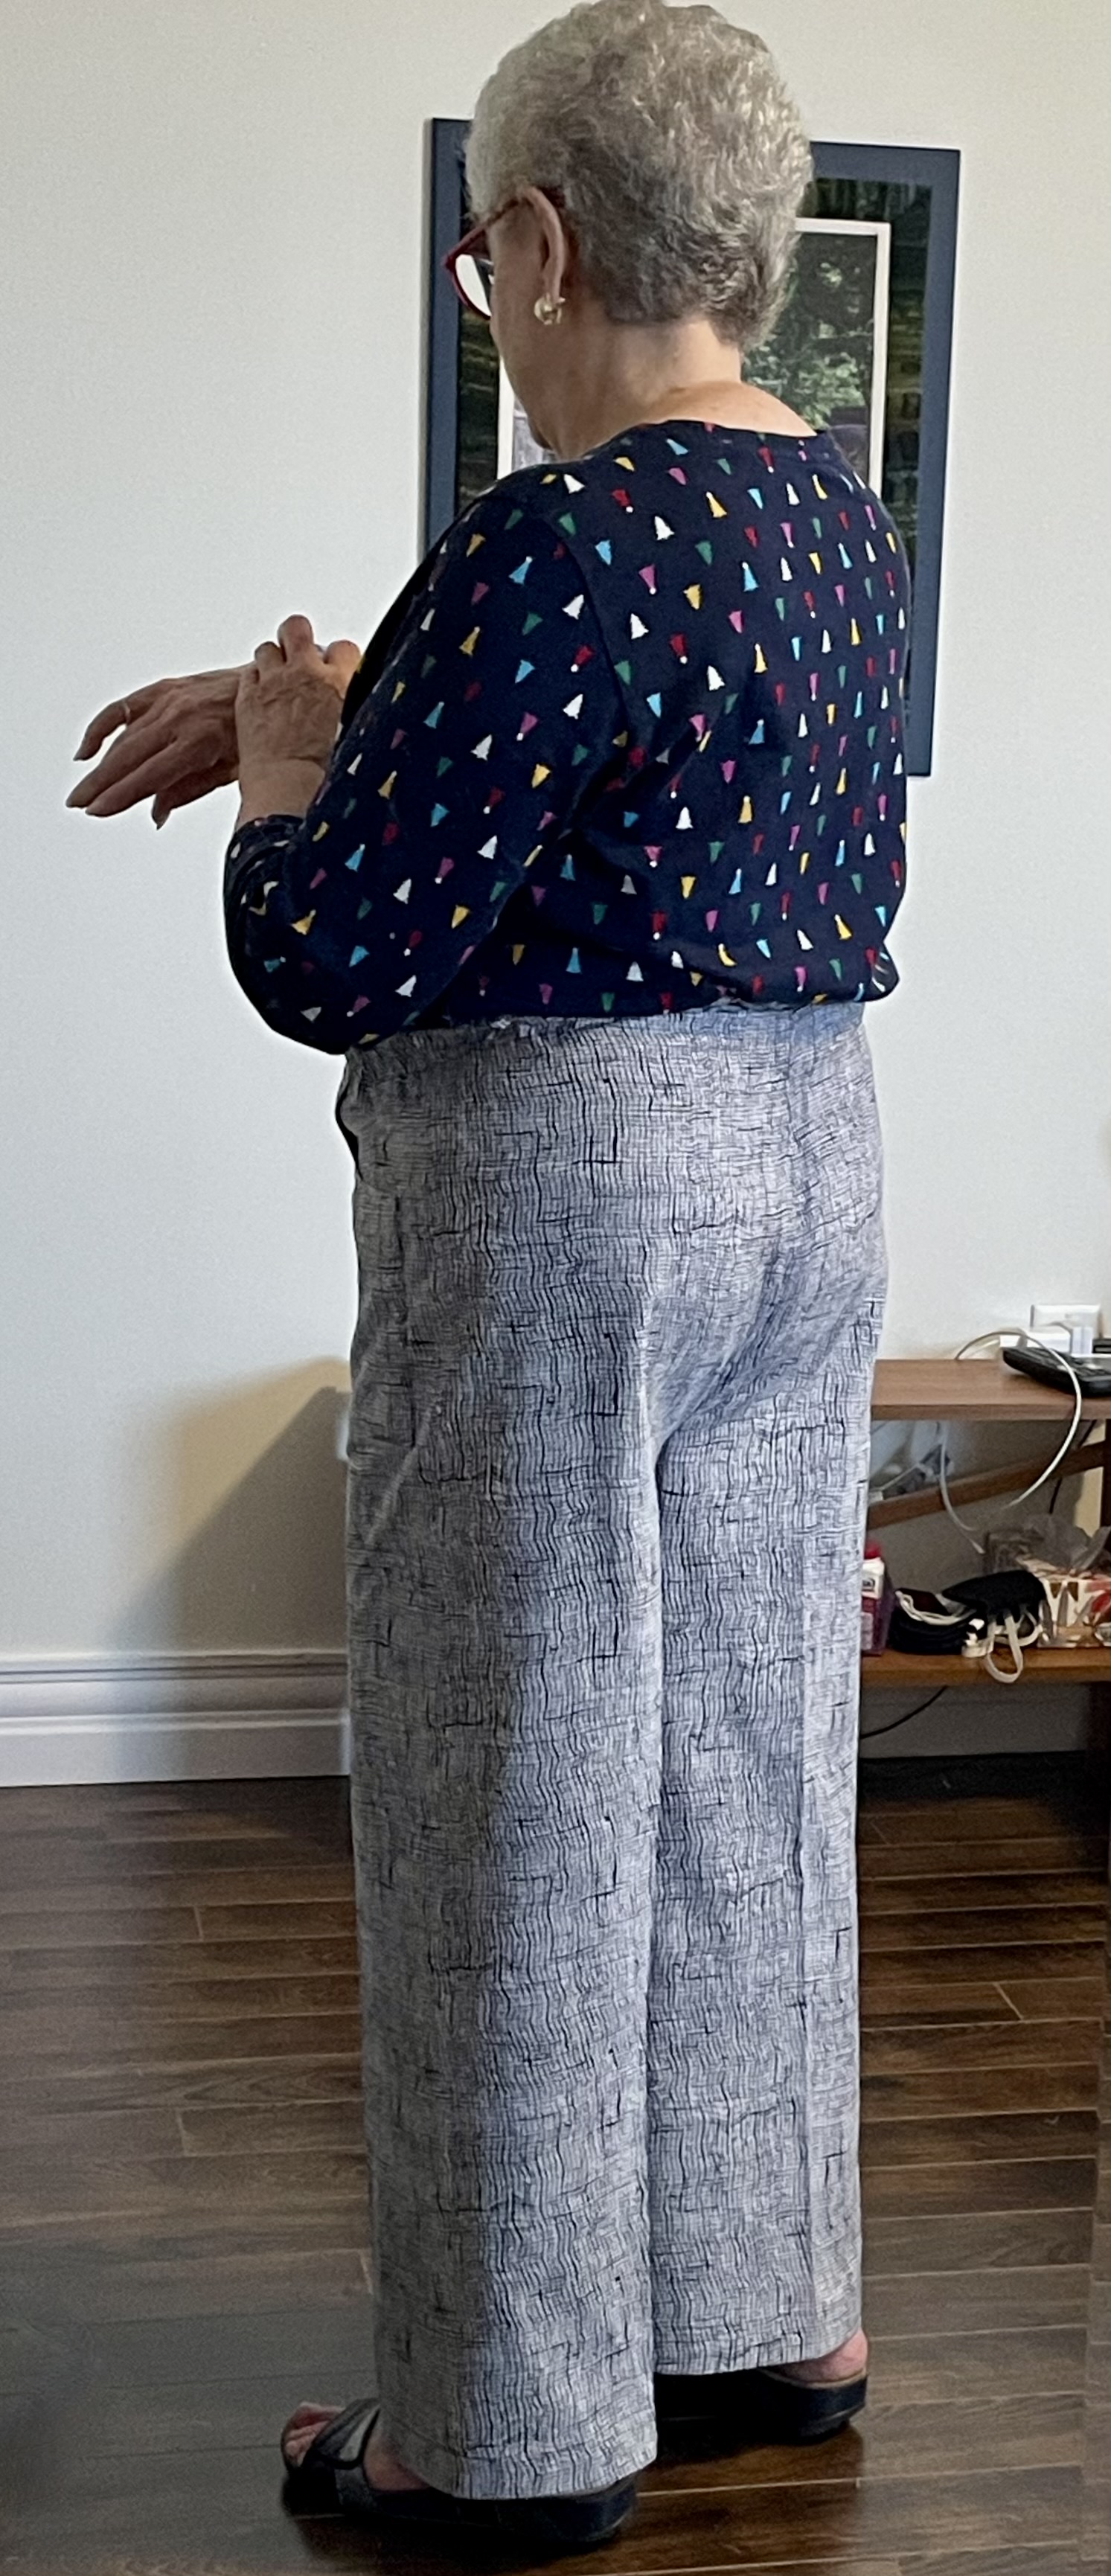
Not the most flattering photo but I wanted to show more of the top of the pants and how they fit – I tucked in the t-Shirt. The pants fit rather well both front and back.
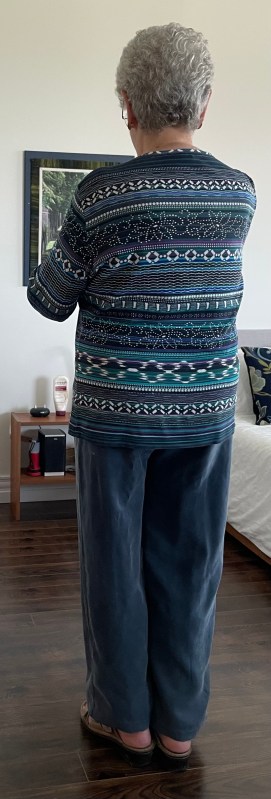
FrontSideBack
The finished pants hang/drape quite well – no pulling at the front crotch, the side seam is straight, the back hangs nicely from the bum. I purposely hadn’t pressed the centre front/centre back to allow the drapey fabric to fall where it wanted. However, it turns out there is absolutely no give to the cupro fabric so when I sat in the pants they pulled tightly across my lap and wrinkled a lot.
This is, after all, just another experiment – I’ve ended up with a wearable muslin (although I can only wear the pants one day then they have to be washed – pressing alone doesn’t eliminate the wrinkles).
So how do I change the pattern to reduce that amount of wrinkling? Obviously by adding a bit of fabric across the front. That’s what I plan on doing next – I will add 3/4″ to the body portion of each side seam, along with a fly front as well as shaping the side seams so the top fits without elastic (although I may still want/need elastic in the back).
I’ve already pulled from my stash a piece of rayon I bought in Bali in 2014. It’s another drapey fabric which should result in a comfortable loose-ish garment. What I’m aiming to accomplish is a reasonable fit so I can make corduroy and wool (yes I have several gorgeous lengths of flannel I bought at Britex in San Francisco in 2015!) pants for winter.
Just finished the pants. Simple to make, and I can tell these are going to be VERY comfortable!
I was careful to make the crotch gusset long enough that the inseam is straight. The pants are cut from two rectangles; two triangles (which become the crotch gusset) are cut from the top/sides – I couldn’t do that because my waist is the same as my hips. So I cut the two rectangles (leaving them as is) – I merged the front and back leg into a single panel – so no side seam – but making sure the centre of the panel was on the straight of the grain. I also merged the two crotch triangles into a single long triangle with the vertical of the triangle on the straight of grain so I end up attaching a single gusset, rather than two triangles (a narrow one on the front inseam and a wider one on the back). The widest part of the gusset triangle is positioned at the crotch depth position in my case 12″ at the back/11″ at the front. [Click here for full instructions on how to make a montpei. (Click here for the original instructions.)]
When I tried on the basted panels (with crotch gusset sewn in) I could tell the centre back was going to be too short (I could have adjusted it by dropping the crotch gusset but instead I added a back yoke (2″ at the centre back grading out to the sides); I left the front crotch depth as it was. (I also took in the waist 2″ at the centre back – I didn’t need the extra fabric to pull the pants on.)
Because I wanted to add front pockets to the top of the panels I added them at this point; however they should have been sewn on while the panels were flat – to stitch them I measured 3 1/2″ from the centre crotch line marked it with a Frixion pen, turned the pants inside out so I could stitch the pockets with the panel “relatively” flat. Because the monpei have no side seam, I stitched down the side that would have been included in a side seam.
I created a facing for the waistband, attached it, strung elastic through the sleeve that created. I finished by top stitching the doubled over hem.
Done.
Here are the pants with my shirt tucked in so you can see how the top fits and the pocket detail which is hidden when the top is on the outside.
Although these pants have an unfitted straight leg, they fall nicely from my bum. The wider leg is easier to sit in, and the hip, while snug, is plenty wide enough to permit bending over.
BTW, I finally figured out how to get a reasonable photo of myself – I have a tripod which I set up so I didn’t have to focus the camera on my phone, I just had to press the shutter button on my watch – letting the camera remain focused and steady! (Duh… Don’t know why I didn’t occur to me to use the tripod before. Makes getting side and back pictures much easier!)
Because these montpei fit so well, I’m going to take the time to draft a sloper with the two crotch gusset triangles integrated into the inseam thereby eliminating the gusset (as they are on a regular pants pattern). I will adjust the centre back taking it in at the waist and extending the back crotch depth. My inseam seems to be about 26″ in these pants. I will set leg length at 26″ + 1″ for the hem. I’m curious to see how these would turn out in something like a light weight corduroy.
The finished fit is definitely the best I’ve encountered so far! This may be the starting point for any pants I want to make for fall!