Sandra Betzina’s Flat Fly Front

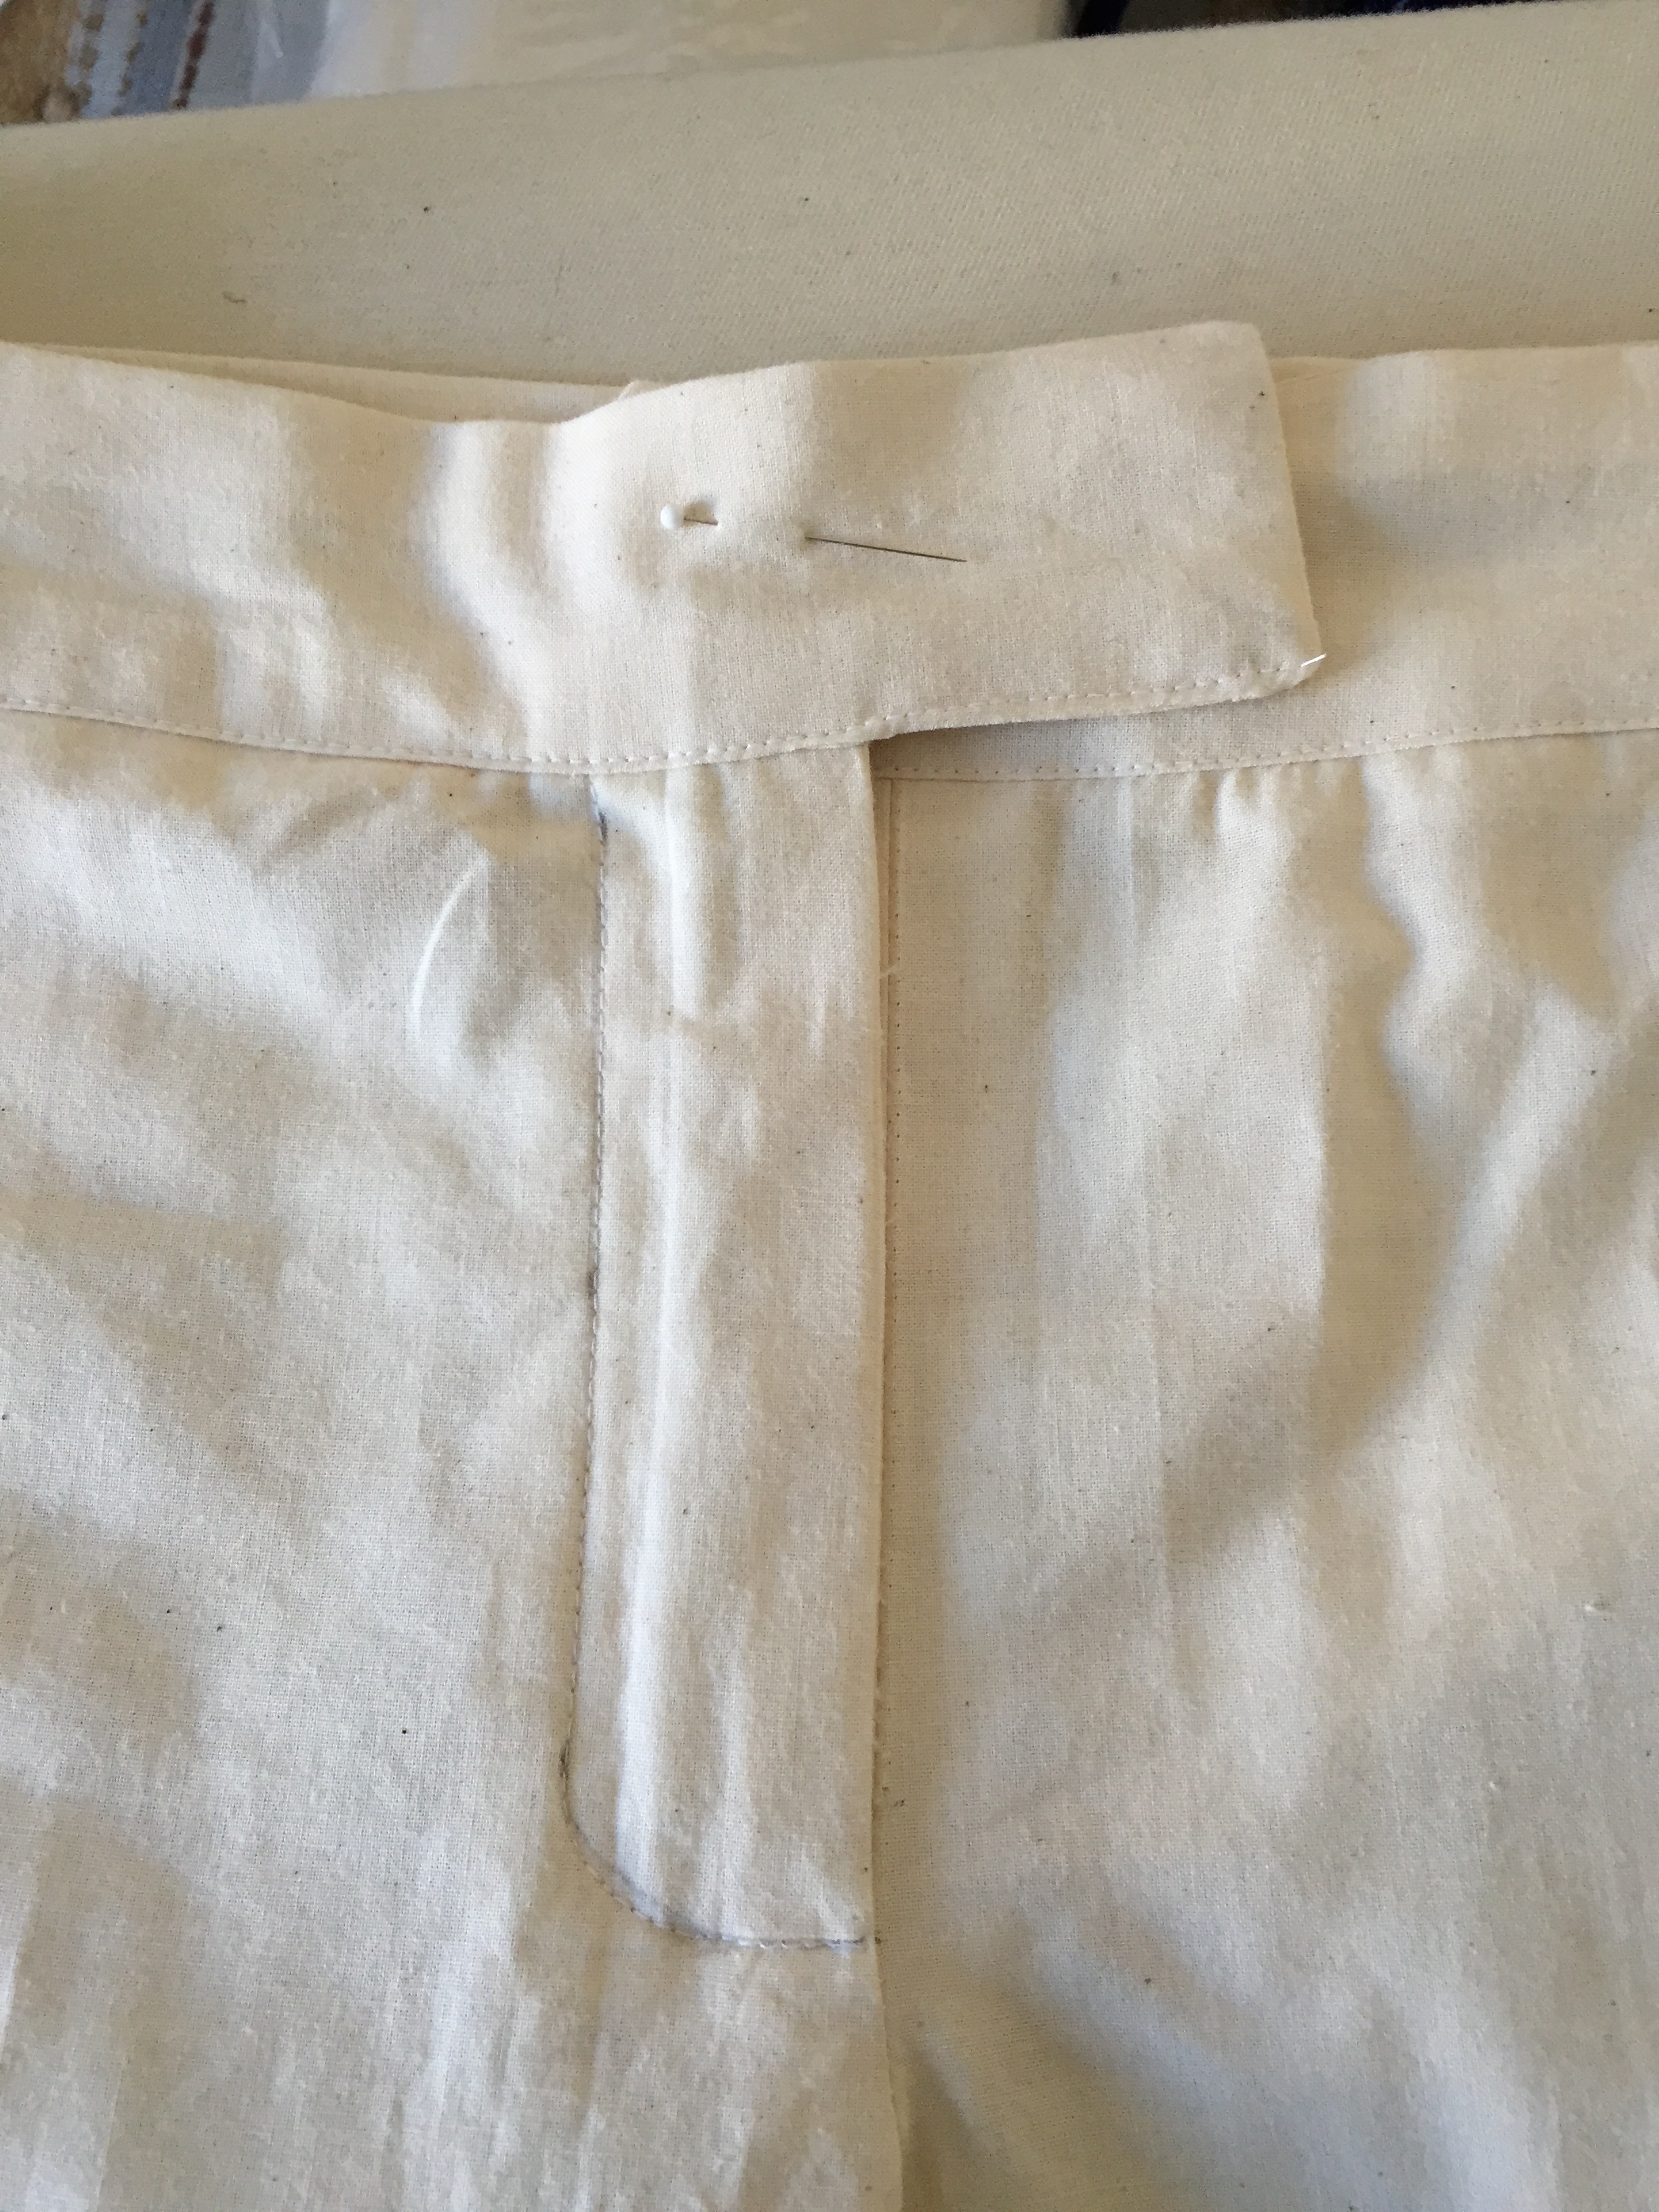
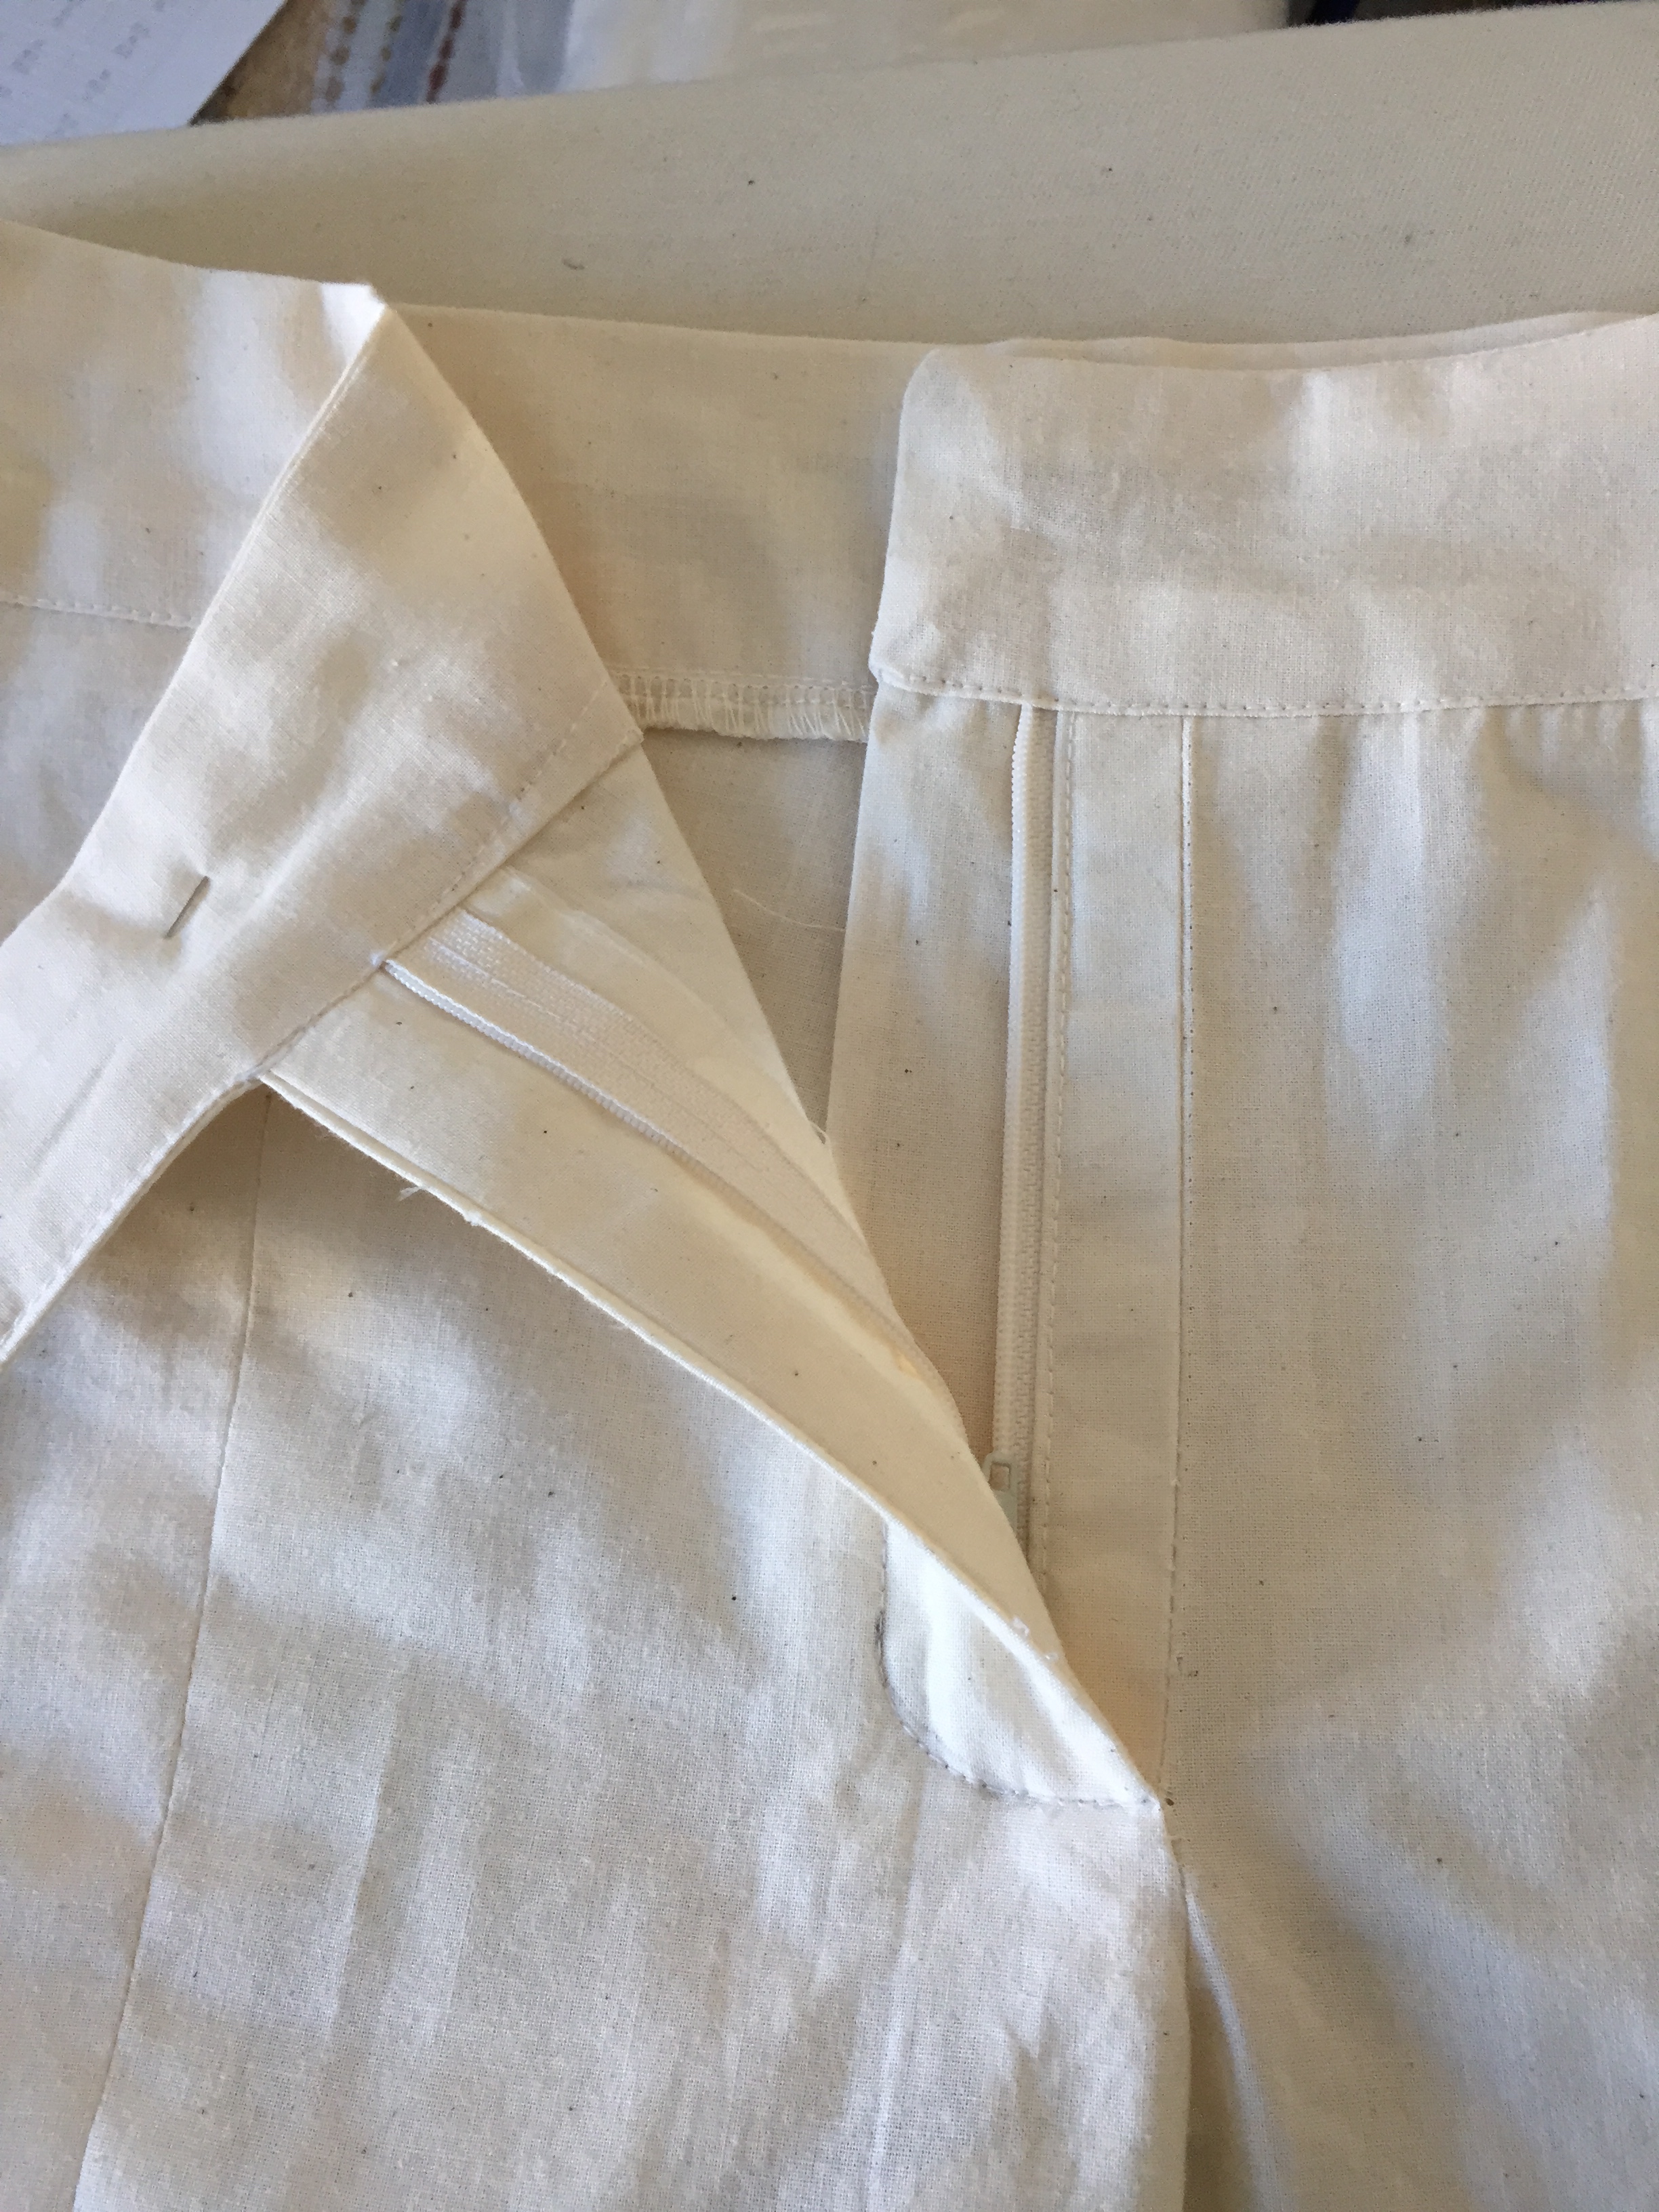
After watching the video of how Sandra Betzina does the flat fly front, I tried it on my muslin #2 (in search of the perfectly-fitted pair of pants). It was easy to do and it worked out perfectly.

I drew the top stitching line in pencil since this was a muslin and it didn’t matter – obviously I’d use chalk or some other erasable marker to draw in that line on a real pair of pants.

IMG_4200

You see the centre line because I had to attach “fly” flaps to the centre seam in order to execute the technique but on my next muslin I will incorporate the fly flaps into the front pattern pieces as you can see on Sandra’s video,

IMG_4201

Because my memory is not as good as it once was, I thought it would be a good idea to create a set of written instructions for doing this instead of having to watch the video each time I wanted to sew a fly front. So I took a series of screen captures from the video and created myself an instruction sheet.

Here is a link to the video: http://www.threadsmagazine.com/item/3831/video-an-easy-flat-fly-front-zipper)

Here is a link to the instruction sheet I set up for myself.

The Quilt Challenge 1

Each year Craftsy offers a BOM (Block of the Month) quilt. I got an email letting me know the 2015 quilt was now available so I took a look at it.

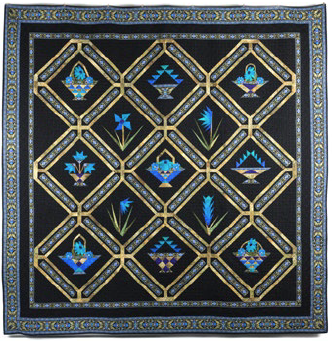
Screen Shot 2015-01-15 at 1.41.44 PM

Can’t say I was particularly taken by the dark background but the block elements were interesting and I’m sure would present a challenge. In any case, I did register (it’s for free) and downloaded the January block but didn’t think I’d do anything with this – until yesterday.

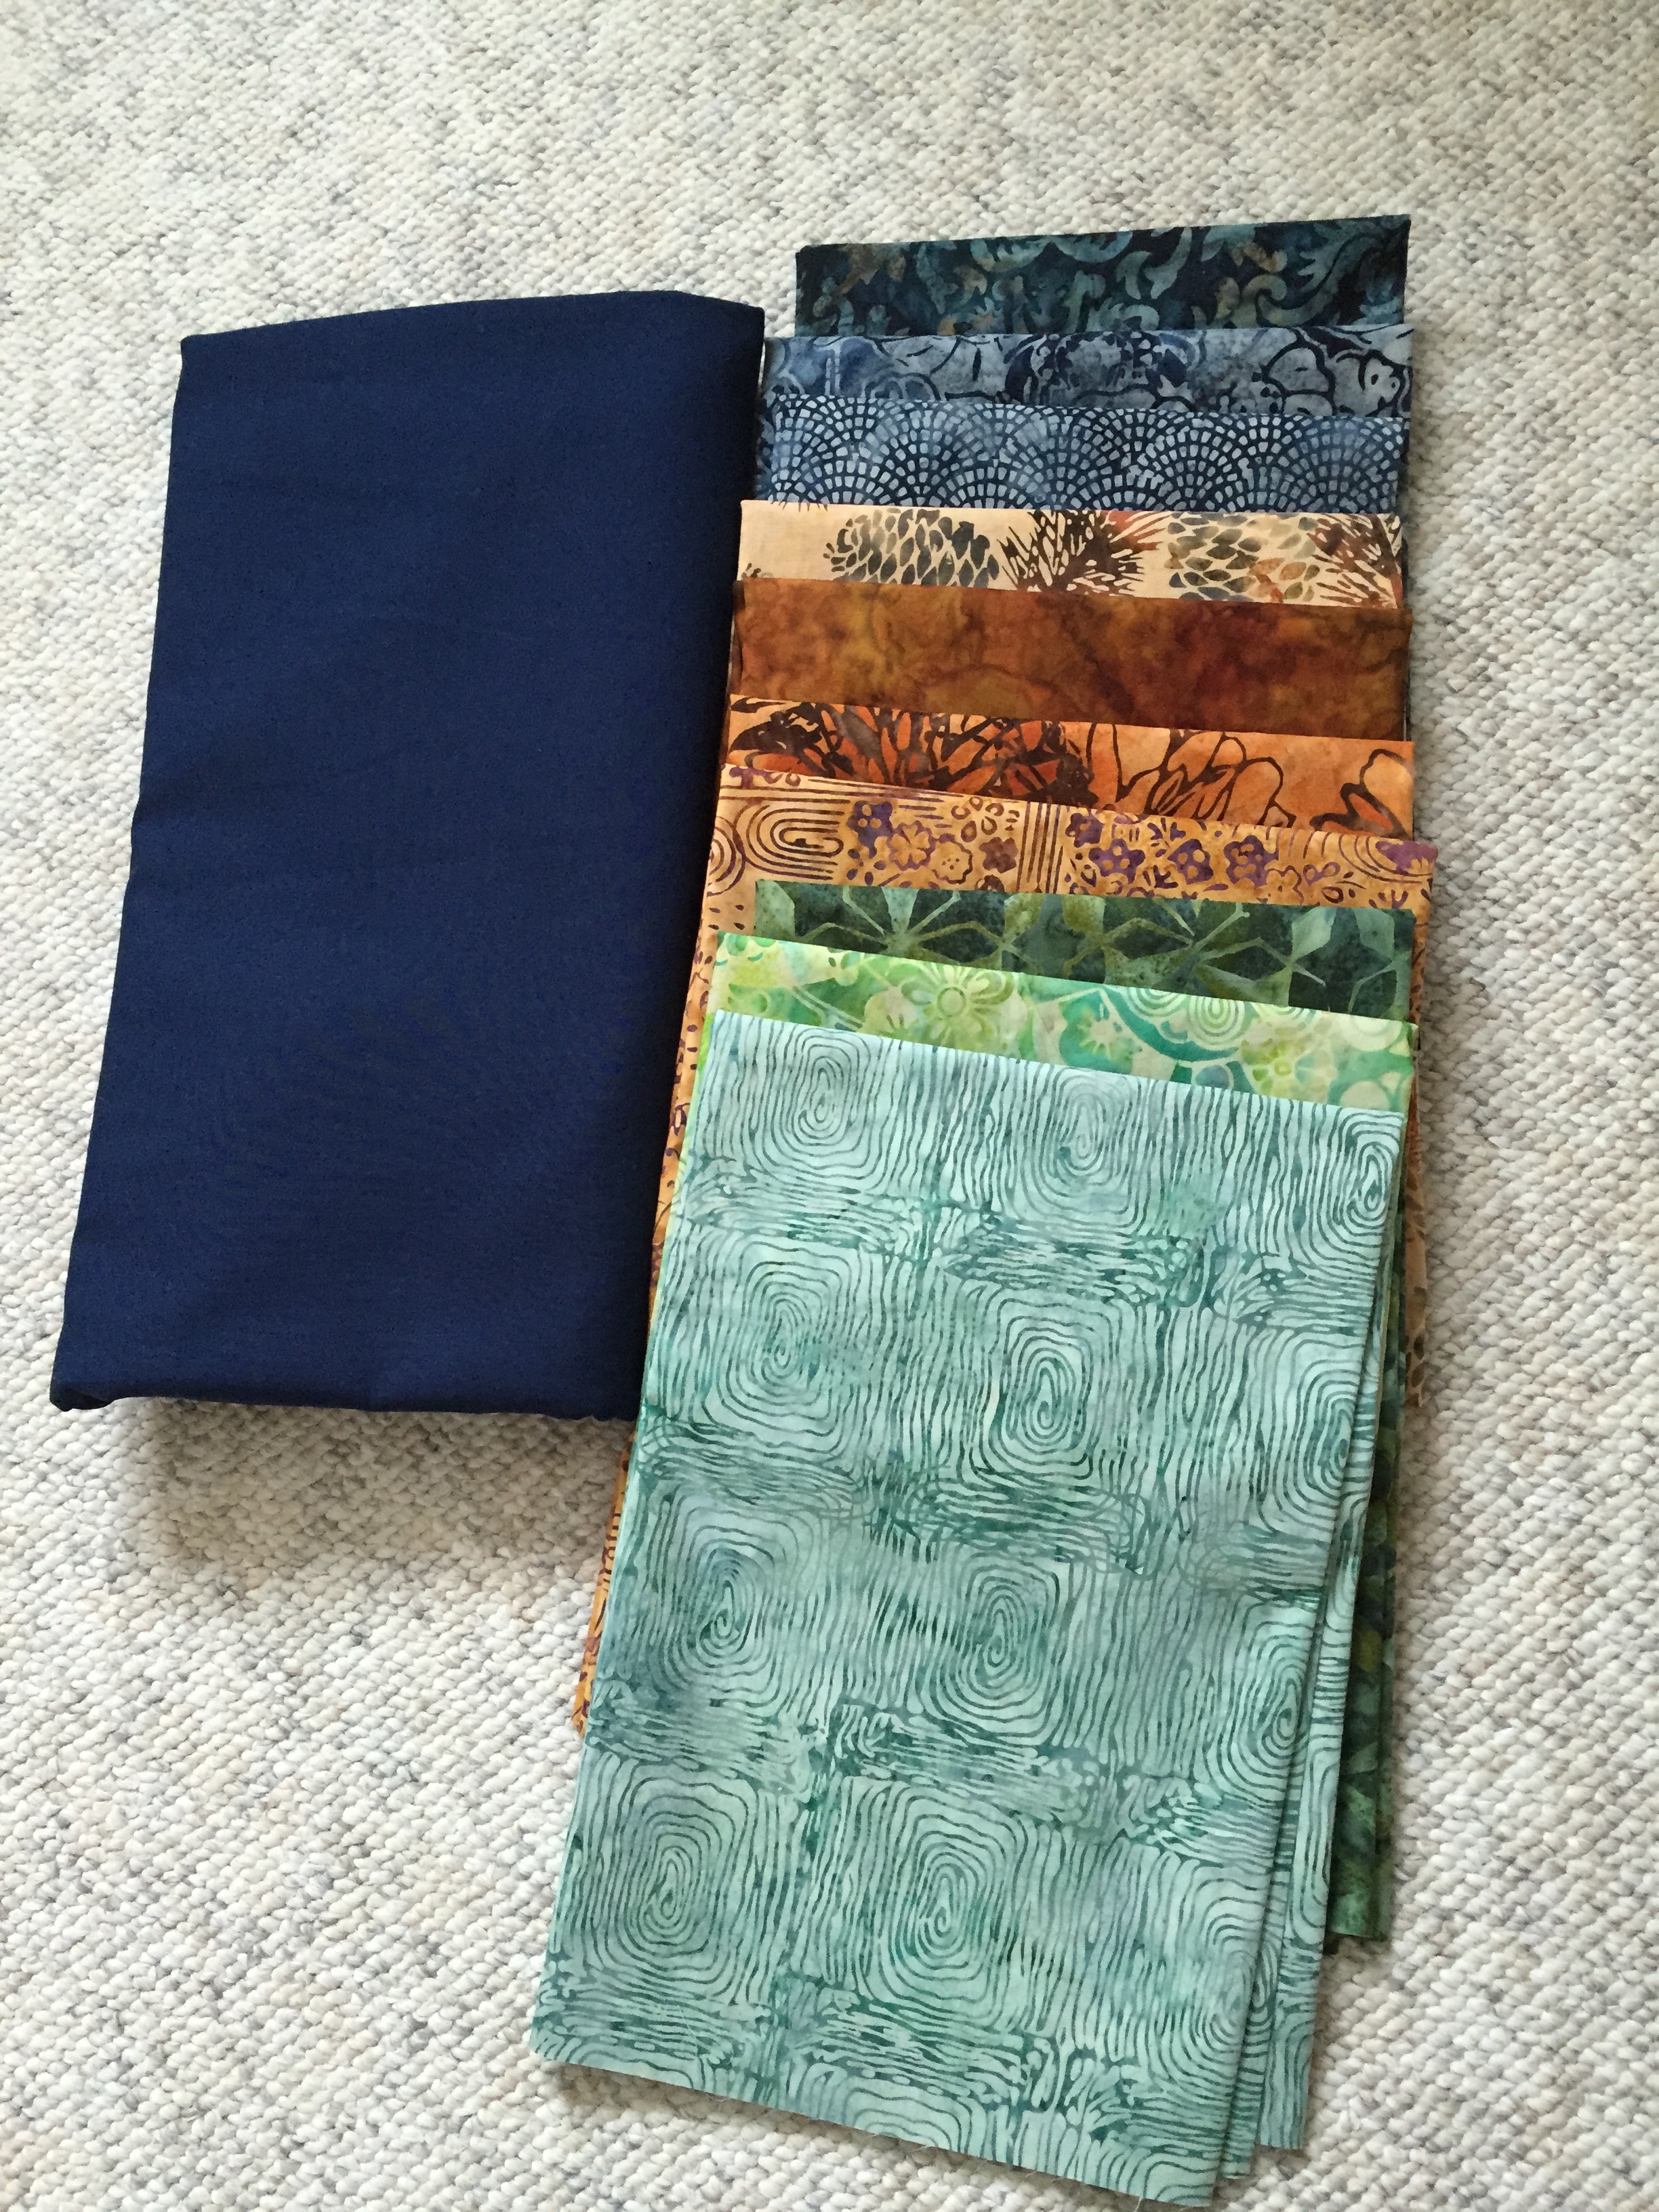
Yesterday, I was at Sew With Vision, doing an afternoon session about my trip to Bali with a surprisingly large group of women (to share a lunch of Balinese chicken curry on rice and to show off the fabrics I brought home). When I arrived Nancy, one of the gals who works at the shop asked me if I’d seen the 2015 BOM quilt – she had decided to try it, not using the quilt kit offered by Craftsy, but using her own chosen fabrics. She was picking fabric bolts from the shelves and I found myself involved in the selection process. When Nancy began cutting 1/2 m pieces I thought, what the hell, I’ll have a go at this, too, so I asked her to cut me a set of the same fabrics, which she did.

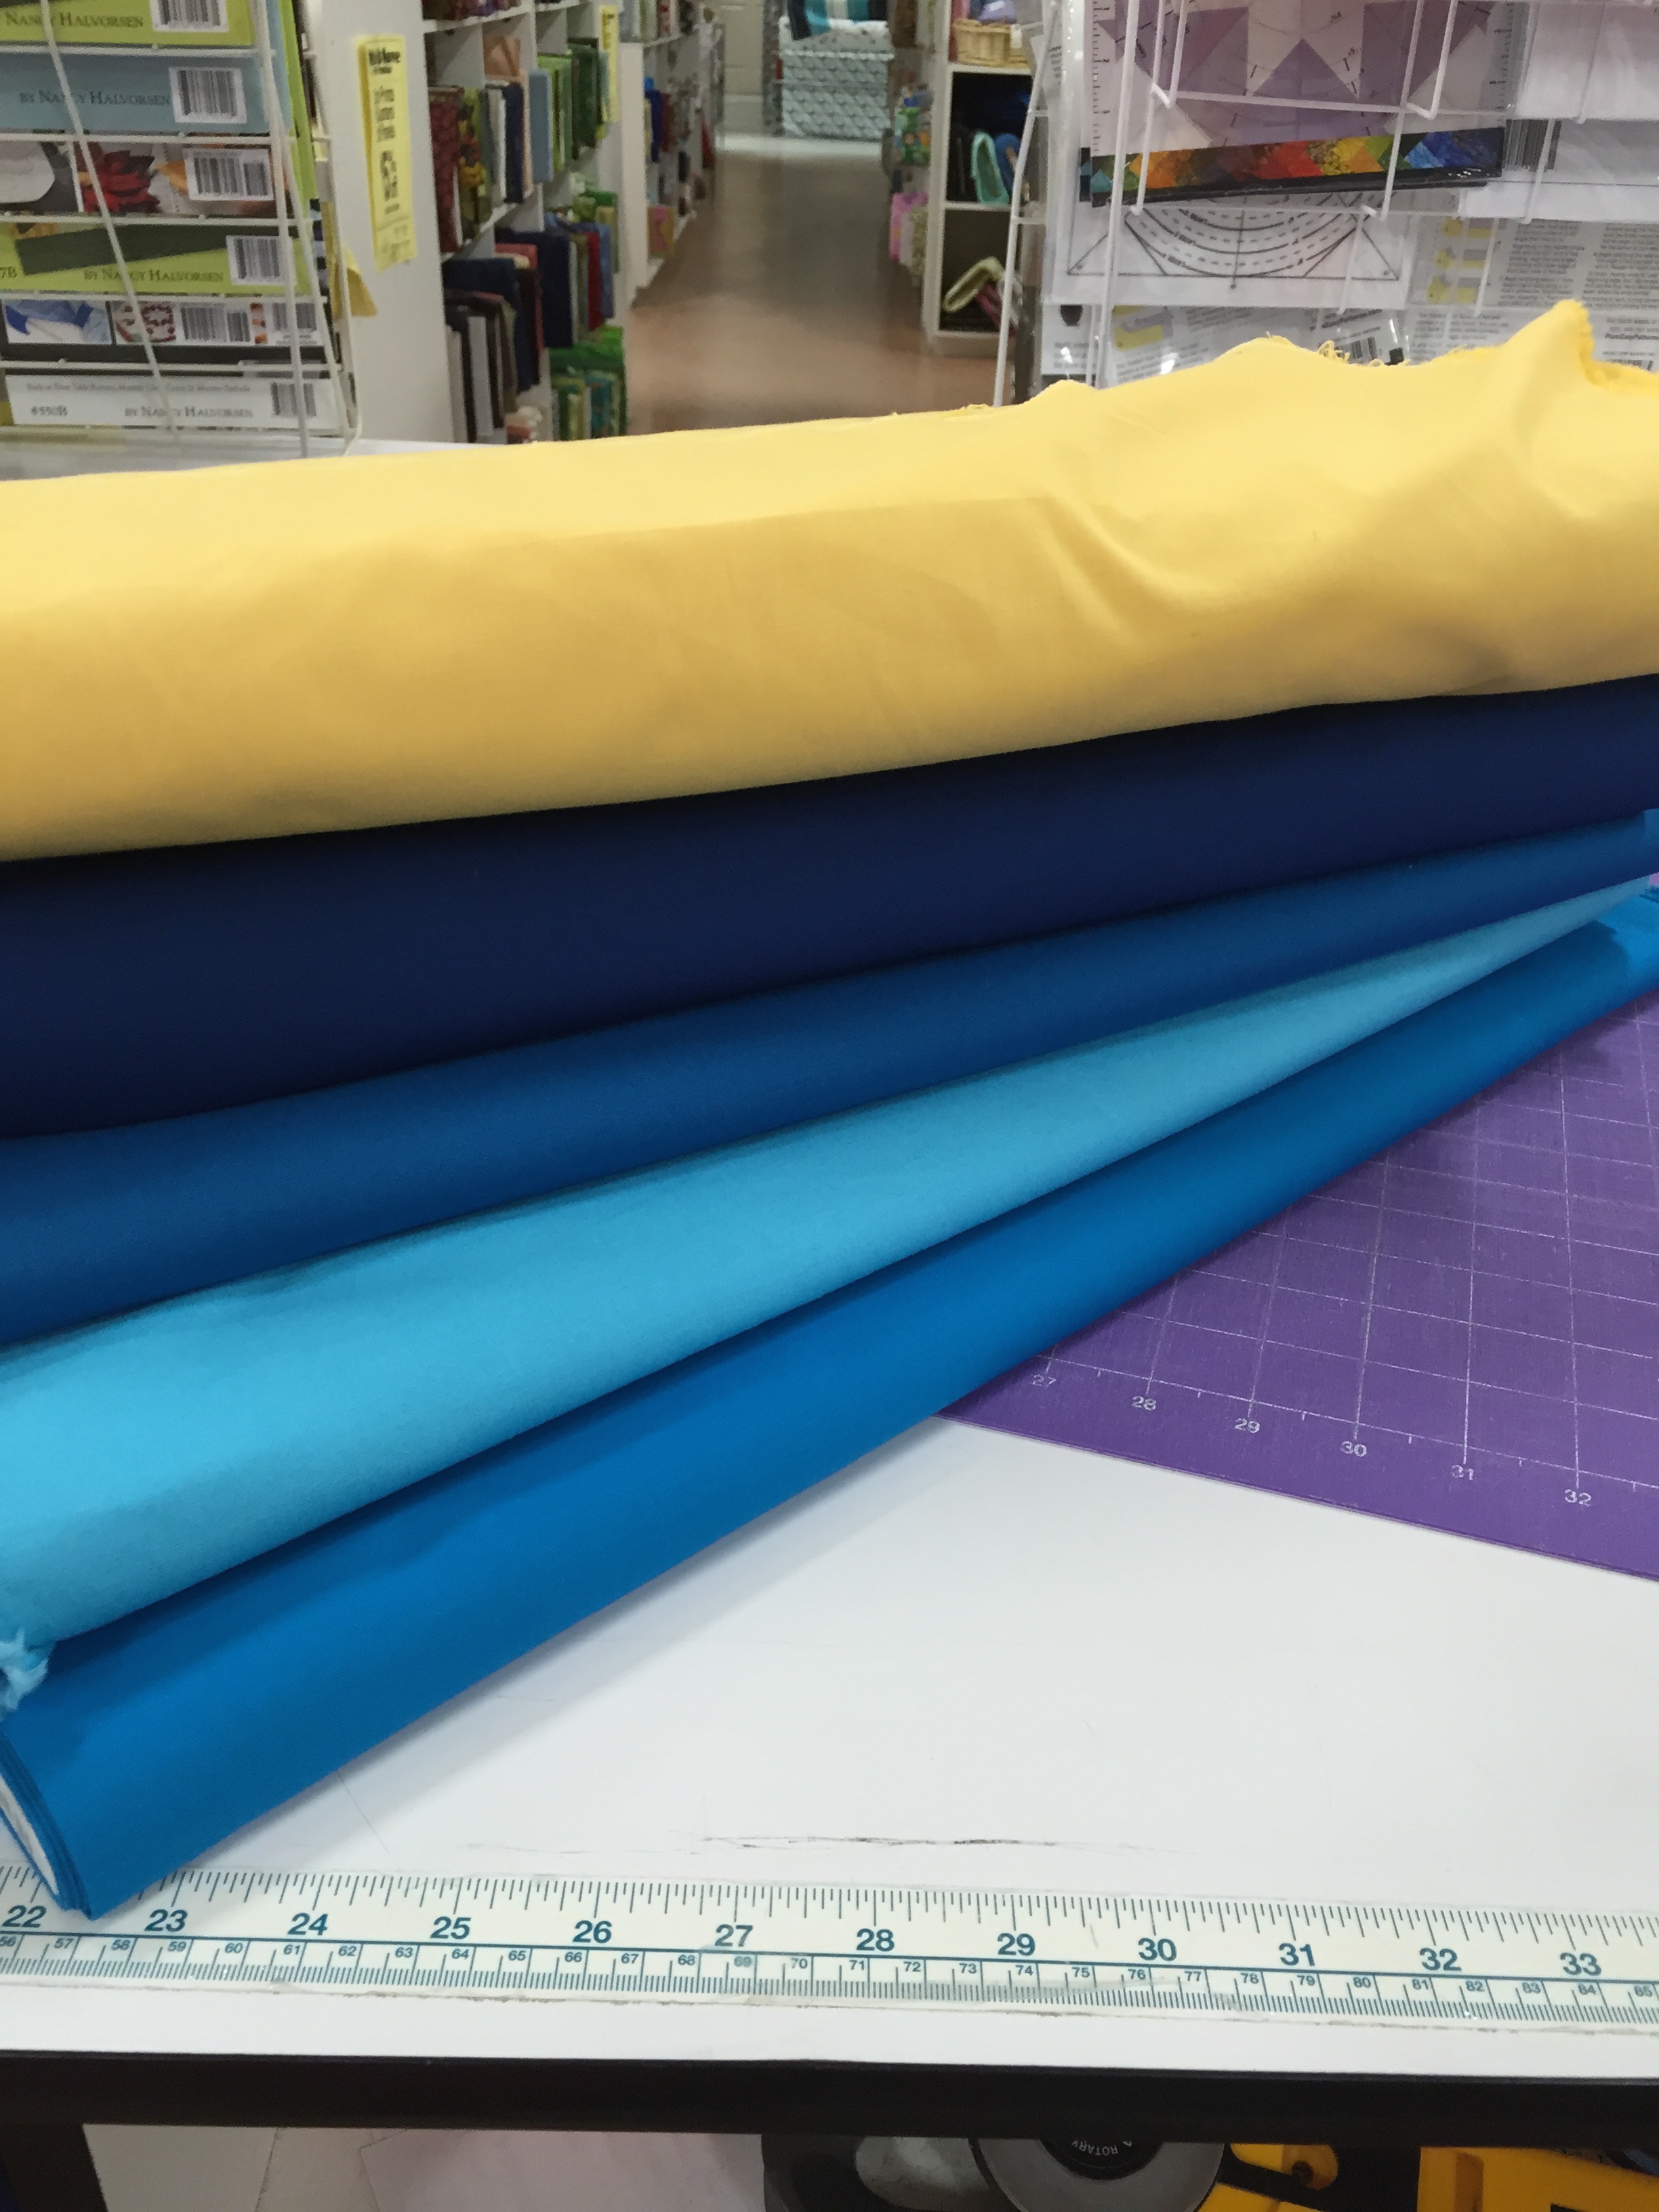
Today I went to Atlantic Fabrics to see if I could come up with a solid fabric (or something with a minimal pattern) to use as background. I started at the Kona cotton collection of solids, pulled out an egg-yolk yellow, then a dark blue/teal, then a slightly lighter blue/teal, then some turquoise. I took all 6 bolts to a cutting table, laid them in an array, then auditioned my batik fabrics on the selections.

IMG_4193

Wasn’t difficult to see that the darkest of the colours I’d chosen would work best with the batiks.

IMG_4198So now to watch the videos on the January block and get something under construction.

That’s the challenge – it’s a personal challenge between Nancy and me to create a quilt based on this 2015 BOM design. Right off the bat, I know I’m not going to make the 90″ x 90″ (queen size) quilt that’s intended. I’ll probably make something smaller like maybe a 60″ x 60″ lap quilt. That will mean adjusting all of the blocks down 1/3 in size. Or I might do a more conventional lap quilt size – 48″ x 64″ which will mean changing the layout of the quilt blocks as well. Not a big deal – I need to get out a pencil, ruler, graph paper (and calculator) and get to work. Once I’ve decided what kind of quilt I want to make, I’ll start drafting the January block and see how it turns out.


My Quest for Perfectly-fitted Pants -1

I’ve been on a quest for a well-fitting pair of pants for about 10 years – really. I can’t buy pants, haven’t been able to for a long time – why? Because I am a size 8 in the bum, but a size 14 in the waist! The best I can manage is to buy size 8 pants, then slash the sides and insert elastic gussets. I got the idea for this kluge from Kathy Ruddy and while she’s putting in the elastic as she constructs the pants from scratch, I usually put the elastic inserts into ready made wear. So a new pair of pants already looks well used before I even get to wear them.

Instead I decided to make pants for myself. Started by having a body scan done by Unique Patterns – that wasn’t successful. For some reason I can’t fathom, the scan didn’t accurately capture my flat ass and skinny legs and so while I can turn out a pair of pants that fit nicely in the front, the back has never quite been right.

Recently, I signed up for Sandra Betzina’s Craftsy class: Pants Fitting Techniques. I’ve been watching the videos and working my way through the pattern adjustments on the pants pattern that comes with the course:
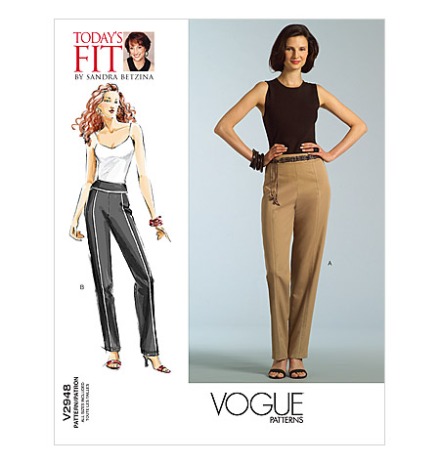
V2948

You start by taking your measurements: waist, high hip, hip, crotch rise, side length…. Did all of that. Next I took the pattern pieces and found the size corresponding to my waist measurement: size E, and my hip measurement: size C, marked out my pattern with marker smoothing the transition from the waist to hip, traced the pattern onto tracing paper, cut it out, cut out a muslin and sewed it together. (I should mention that the waistband in the pattern was way to shaped for my waist – so I took a piece of medium-weight interfacing and cut a rectangle the length of my hip measurement (with enough overlap for a fly front), then took in several small darts in the side back and side front until the top fit my waist – that is the waistband I used for the muslin.)

Guess what – way too large! I have no idea how much ease is in the pattern but more than I needed. I took in all the seams until I got a comfortable waist and a relatively close fit through the hips. Oh, I changed one thing in the pattern – I converted a side zipper to a fly front. When the muslin was adjusted, the front fit quite well, but the back still had a baggy bum (ugh) and I tried various fixes: opening the crotch and reducing the back crotch (still somewhat baggy), taking in a horizontal dart below the bum to remove some of the bagginess (still baggy and now there’s a bit of a pull from the side!).
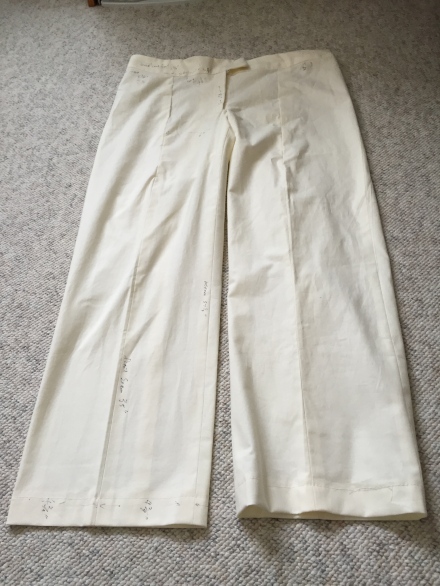
IMG_4199

Muslin #1

As you can see I next measured all the dimensions between seams and marked the measurements on the muslin so I could made a second draft of the pattern taking into account the adjustments I made on Muslin #1.

I went back to the original pattern, using a different colour marker I drafted a new pattern a size C/D waist and a size B hip, traced it, then cut a second muslin. That’s as far as I’ve got – I’ll report on my progress in a day or so when I’ve got the second muslin sewn together.

Also this time I’m going to use Sandra Betzina’s Easy Fly Front Instructions for inserting a fly front zipper. I haven’t  done this before but it definitely looks a lot less fussy than the 3-piece fly front I’ve been using.
Making a Flat Knot in a Scarf

IMG_4176

My friend Kathleen was wearing a colourful scarf at lunch today. She just had it wrapped around her neck but it was a perfect scarf for tying a new knot that I learned recently. So I showed her how to do it.

Here’s how:

1. Make a loop in the middle of the scarf

Photo on 2015-01-12 at 5.07 PM

2. Put the loop over your head

Photo on 2015-01-12 at 5.07 PM #2

3. Make a second small loop at the front

Photo on 2015-01-12 at 5.07 PM #3

4. Pull one of the long ends through from behind the loop

Photo on 2015-01-12 at 5.08 PM

5. Push the second end down from the front of the loop

Photo on 2015-01-12 at 5.08 PM #2  6. There you have it – a nice flat knot that stays in place!

Photo on 2015-01-12 at 5.08 PM #3

Kaffe Fassett/Philip Jacobs Quilt – Finished

2015/01/img_4167.jpg
Just finished the Kaffe Fassett/Philip Jacobs quilt this afternoon. Got the in-hoop quilting done yesterday, along with the border. Today I added binding and a label.

I’m pleased with how the quilt turned out. No name on it yet. For now it will live in the collection.

The back of the quilt includes a strip pieced from scraps – again to make the backing fabric wide enough so a single length would be enough. And I like the added detail on the backs – makes the quilts more interesting!
2015/01/img_4169.jpg

Purple/Turquoise Socks

2015/01/img_4165.jpg
Because I like a longish leg on my socks, I generally knit 80-85 rows after the cuff. When I’m using 100 gm. balls there’s no problem having enough patterned yarn for the foot. But, with a 50 gm. ball it’s a different story. A pair of socks takes 100 gm. of yarn (often with enough left over for a pair of legs). A 50 gm. ball, plus another 50 gm. ball of a contrasting solid gives me a pair of socks, but it takes some fiddling to extend the pattern yarn well into the foot.

First of all, I unwind the ball, find the centre, cut, then roll up 2 smaller balls. That way I know precisely how much I have to play with for one sock. With this pair I didn’t get as far into the instep as I wanted so I extended the pattern yarn by alternating rows with the contrasting solid. I had no patterned yarn left when these socks were done!

I still prefer working with 50 gm. balls of patterned yarn when I can get them ( they’re getting harder and harder to come by) because a finished pair costs considerably less than the larger balls (even counting the second set of legs I get from them).

New Socks

/home/wpcom/public_html/wp-content/blogs.dir/87a/20189250/files/2015/01/img_4162.jpg
Finished last evening. They’re for someone who wears a size 10 woman’s shoe so they’re longer in the foot than my usual socks.

I liked working with this Opal yarn – the pattern held my interest even through the second sock so the work seemed to go quickly. There’s enough yarn left (6 repeats) to do two sock legs so I have to come up with an idea for using a complementary yarn.

Tipsy Squares

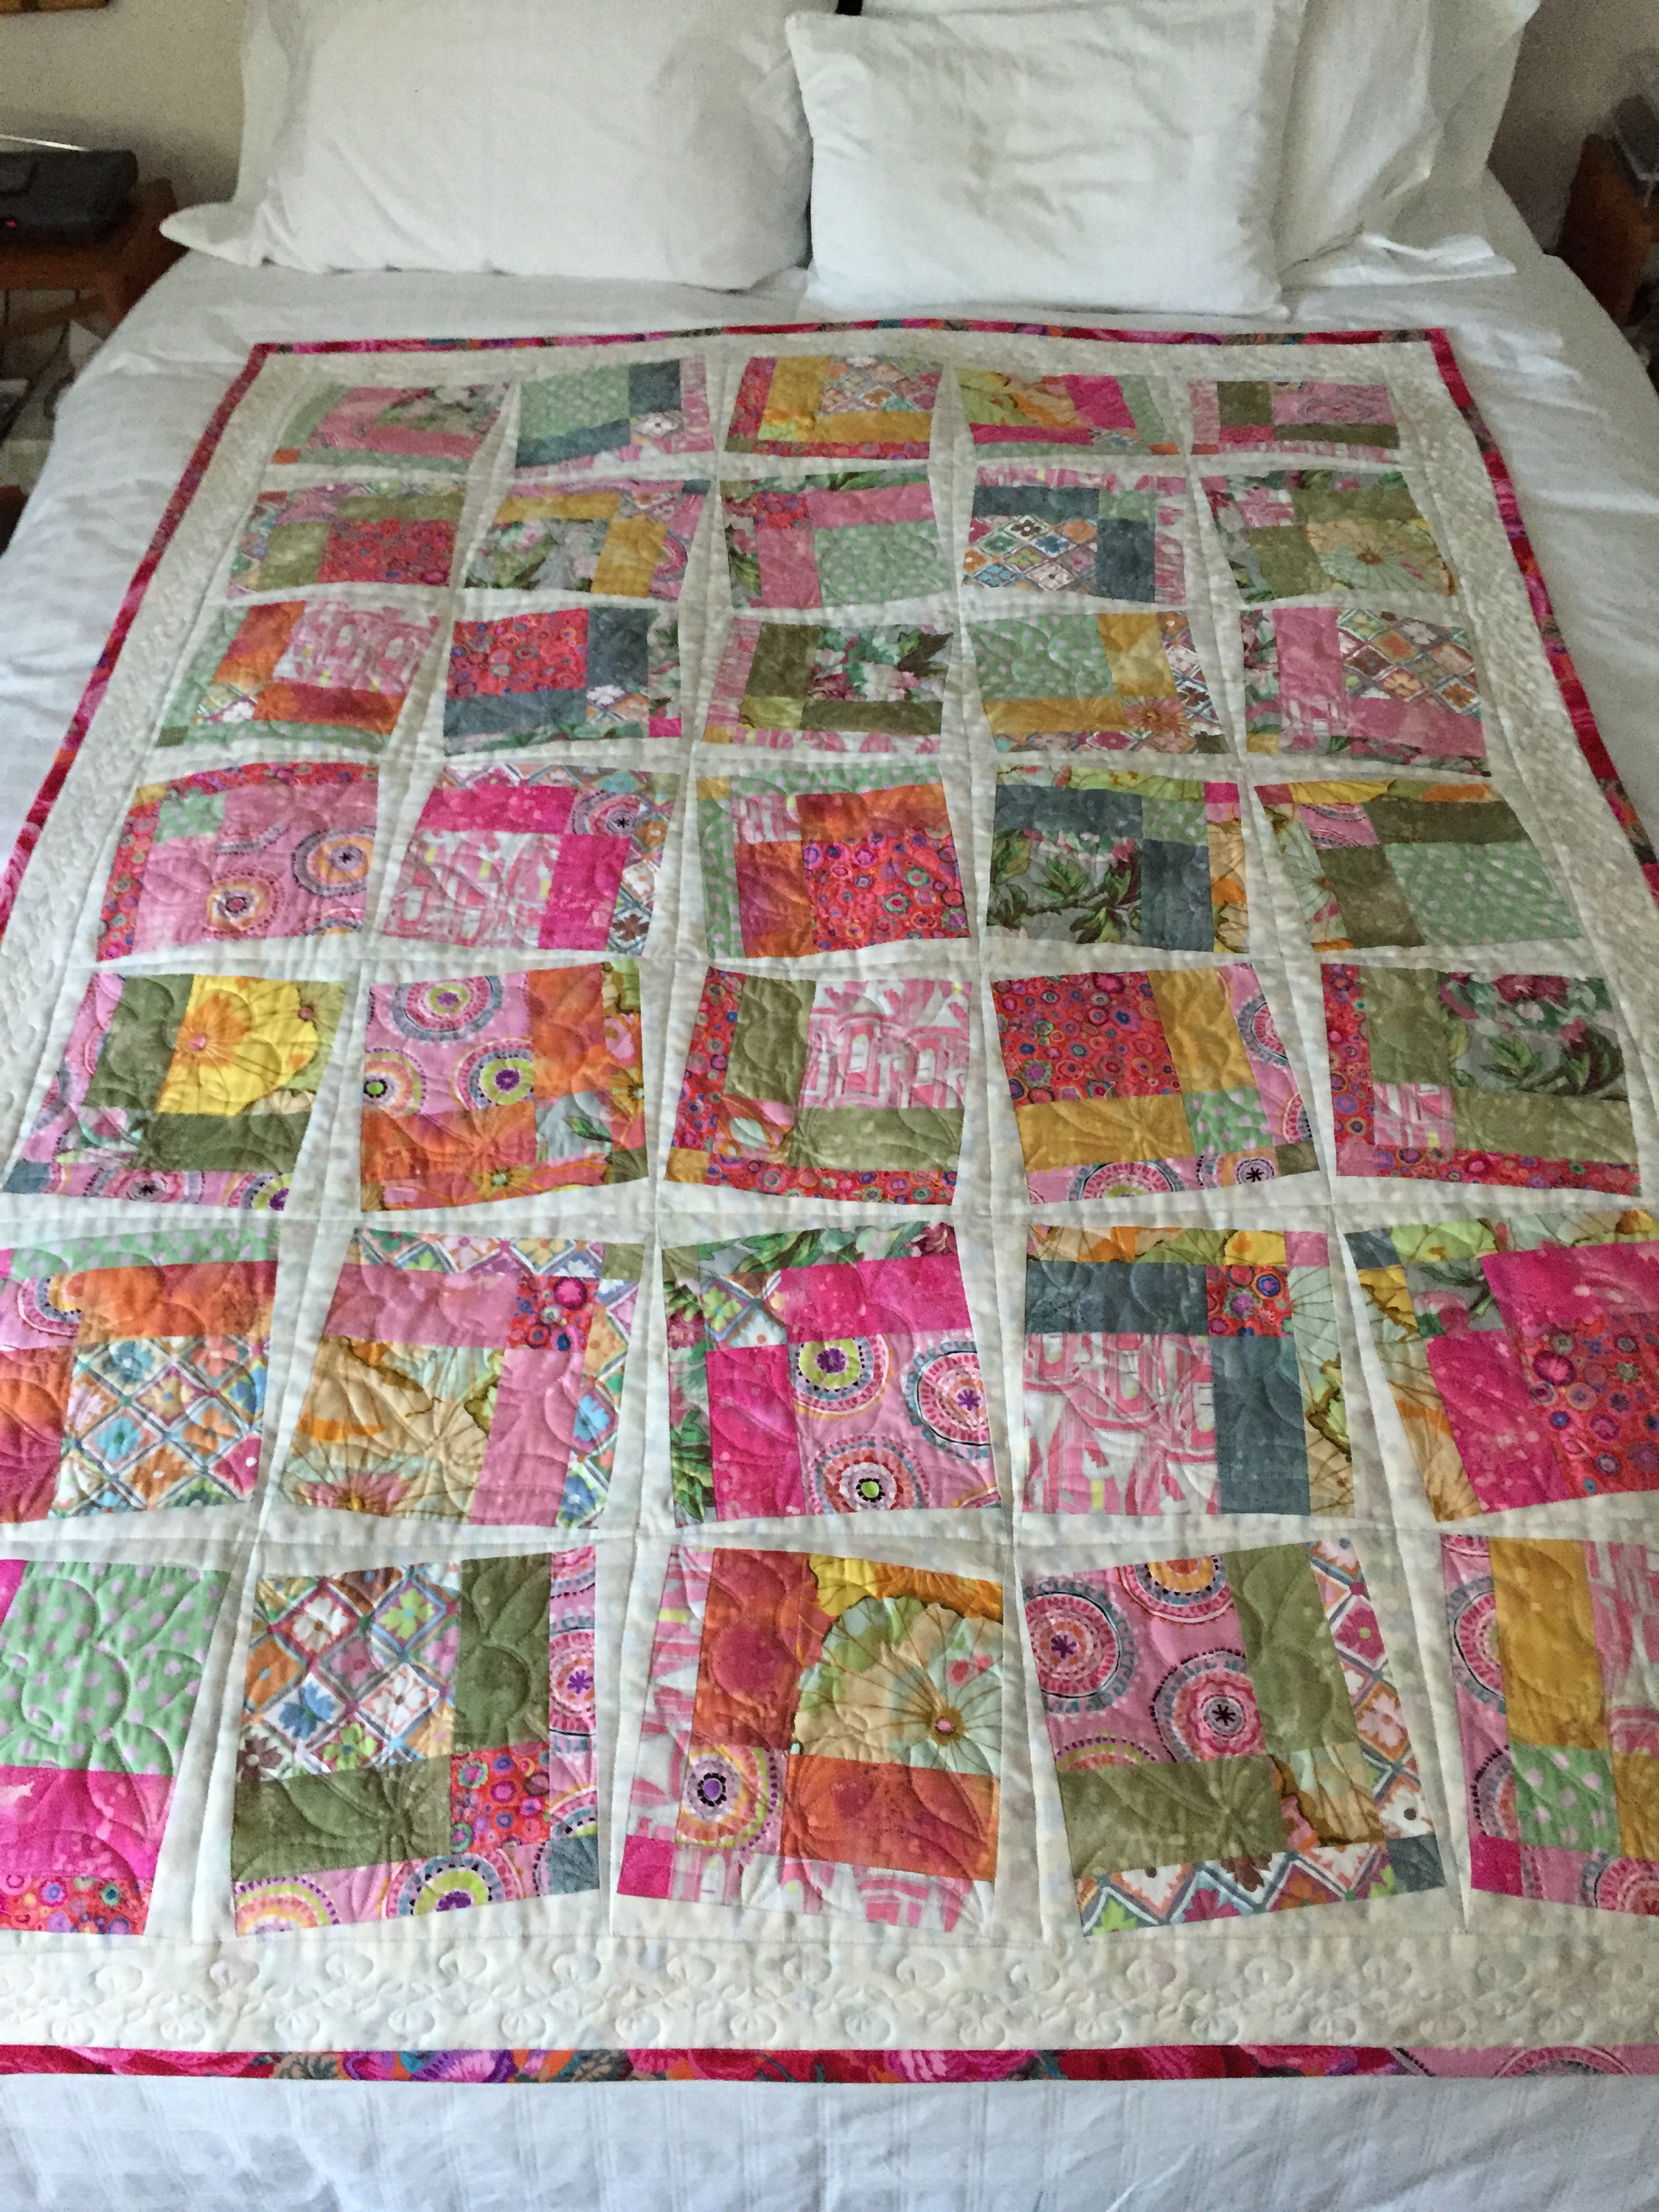
Finally done. I’ve been working on this quilt for a couple of weeks now. It started out as an unequal 4-patch based on an idea for a charm pack (5 X 5 squares). I used the fabrics I bought at the Kaffe Fassett lecture in the spring.

I cut and sewed the 4-patch blocks but they were too small for a 5 x 7 quilt – I needed to add fabric so I added another layer on the edge. BUT I cut the strips too narrow – the blocks were still too small for the final dimensions I was after. So I decided, rather than just add sashing, to add triangles around each block which resulted in a “tilted” block. Seventeen blocks tilt in one direction, eighteen tilt in the other. So I had to lay out the blocks in the order I wanted them and add the correct triangles to each so that the layout I was after would be in the finished quilt top. Finally I added a 3″ border around the outside. The finished lap quilt will be 48″ x 65″.

IMG_4158I worked out the triangles by trial and error – I wanted the tilted block to end up 8.5″ wide – in the end that meant I needed a triangle cut on the diagonal of a 2 1/4″ x 9 3/5″ rectangle. Applying the triangles is tricky – can’t chain the sewing – each block has to be done individually – the first strip is partially sewn on, then the other three sides are added, and then the first side is stitched to the end – that’s necessary to get all the triangles sewn in place equally. In the end, it wasn’t applying the triangles that was difficult, it was sewing the blocks together – I didn’t quite manage to get all the points to align perfectly. But once the top is stitched in the ditch and quilted that isn’t going to show – only a very experienced quilter is going to notice that detail!

These are the blocks before triangles (just the block in the upper left has triangles added).

IMG_4148

Sugar & Dairy-free Chocolate!

/home/wpcom/public_html/wp-content/blogs.dir/87a/20189250/files/2014/12/img_4145.jpg
I’m trying hard to reduce my sugar intake – have been for the last month – but my chocolate cravings have been hard to resist.

I saw the naturopath last week. She sent me a small collection of recipes for dairy, soy & cane sugar- free recipes. Before I left her office she mentioned the chocolate recipe.

I have to share it because it is so satisfying! My only caveat is that you have to prefer dark chocolate; this has a very dark chocolate taste.

1/2 c. Cocoa powder
1/2 c. Carob powder (I didn’t have any on hand so I substituted finely ground cocoa nibs which I ground in my coffee grinder)
1 c. Extra virgin coconut oil
2 tsp. Honey – I used maple syrup
1/4 tsp. natural sweetener (stevia, xylitol…) (I don’t bother)
1 tbsp. vanilla or almond extract (check your vanilla ingredients it may contain sugar – I have some I made from the vanilla beans I brought home from Bali by sticking three of them in an 8 oz. bottle of good vodka!)
Raisins, other dried fruit, crystallized ginger, chopped nuts (not sure about the ginger that has to have been made with sugar!).

Warm the oil gently
Pour into a food processor or blender
Add remaining ingredients and blend well
Add nuts/raisins after blending
Pour into a parchment-lined cake pan or cookie sheet
Refrigerate for at least 30 minutes to set
Remove from pan/cookie sheet when firm
Remove the paper
Break or cut into pieces
Store in a sealed container in the fridge

The chocolate is very definitely more-ish!

Holiday Scarf for Hillary

/home/wpcom/public_html/wp-content/blogs.dir/87a/20189250/files/2014/12/img_4144.jpg
I’m having Christmas dinner with a long-time friend and I had nothing for her granddaughter. Last year and the year before I sewed gifts for Hillary (now going on twelve). But I didn’t get around to making anything this year.

I was tidying up my knitting basket beside the chair in my bedroom where I watch TV and knit and saw the ball of scarf yarn I bought two years ago to make a scarf for myself. I decided to use it for a simple scarf for Hillary.

So six hours later here is a warm scarf, long enough to be tied outside her jacket, should she wish it. And one more ball of yarn is out of my stash!