Luggage Tags

IMG_3037

IMG_3038


The women on the Bali trip have been talking about how to recognize one another in the Denpasar airport when we arrive. We’re coming from both the east and west coasts and from locations in between. Some travelling west, I’m traveling east. Several of us are arriving at about the same time in Denpasar. Since most of us don’t know anyone else on the trip, the suggestion was made to create luggage tags in a lime green so we can identify another trip member at the luggage pick up.

Seemed like a good idea. So yesterday I whipped up a couple of luggage tags – one for my suitcase, and one for my backpack (which I will be wearing). Very easy to do.

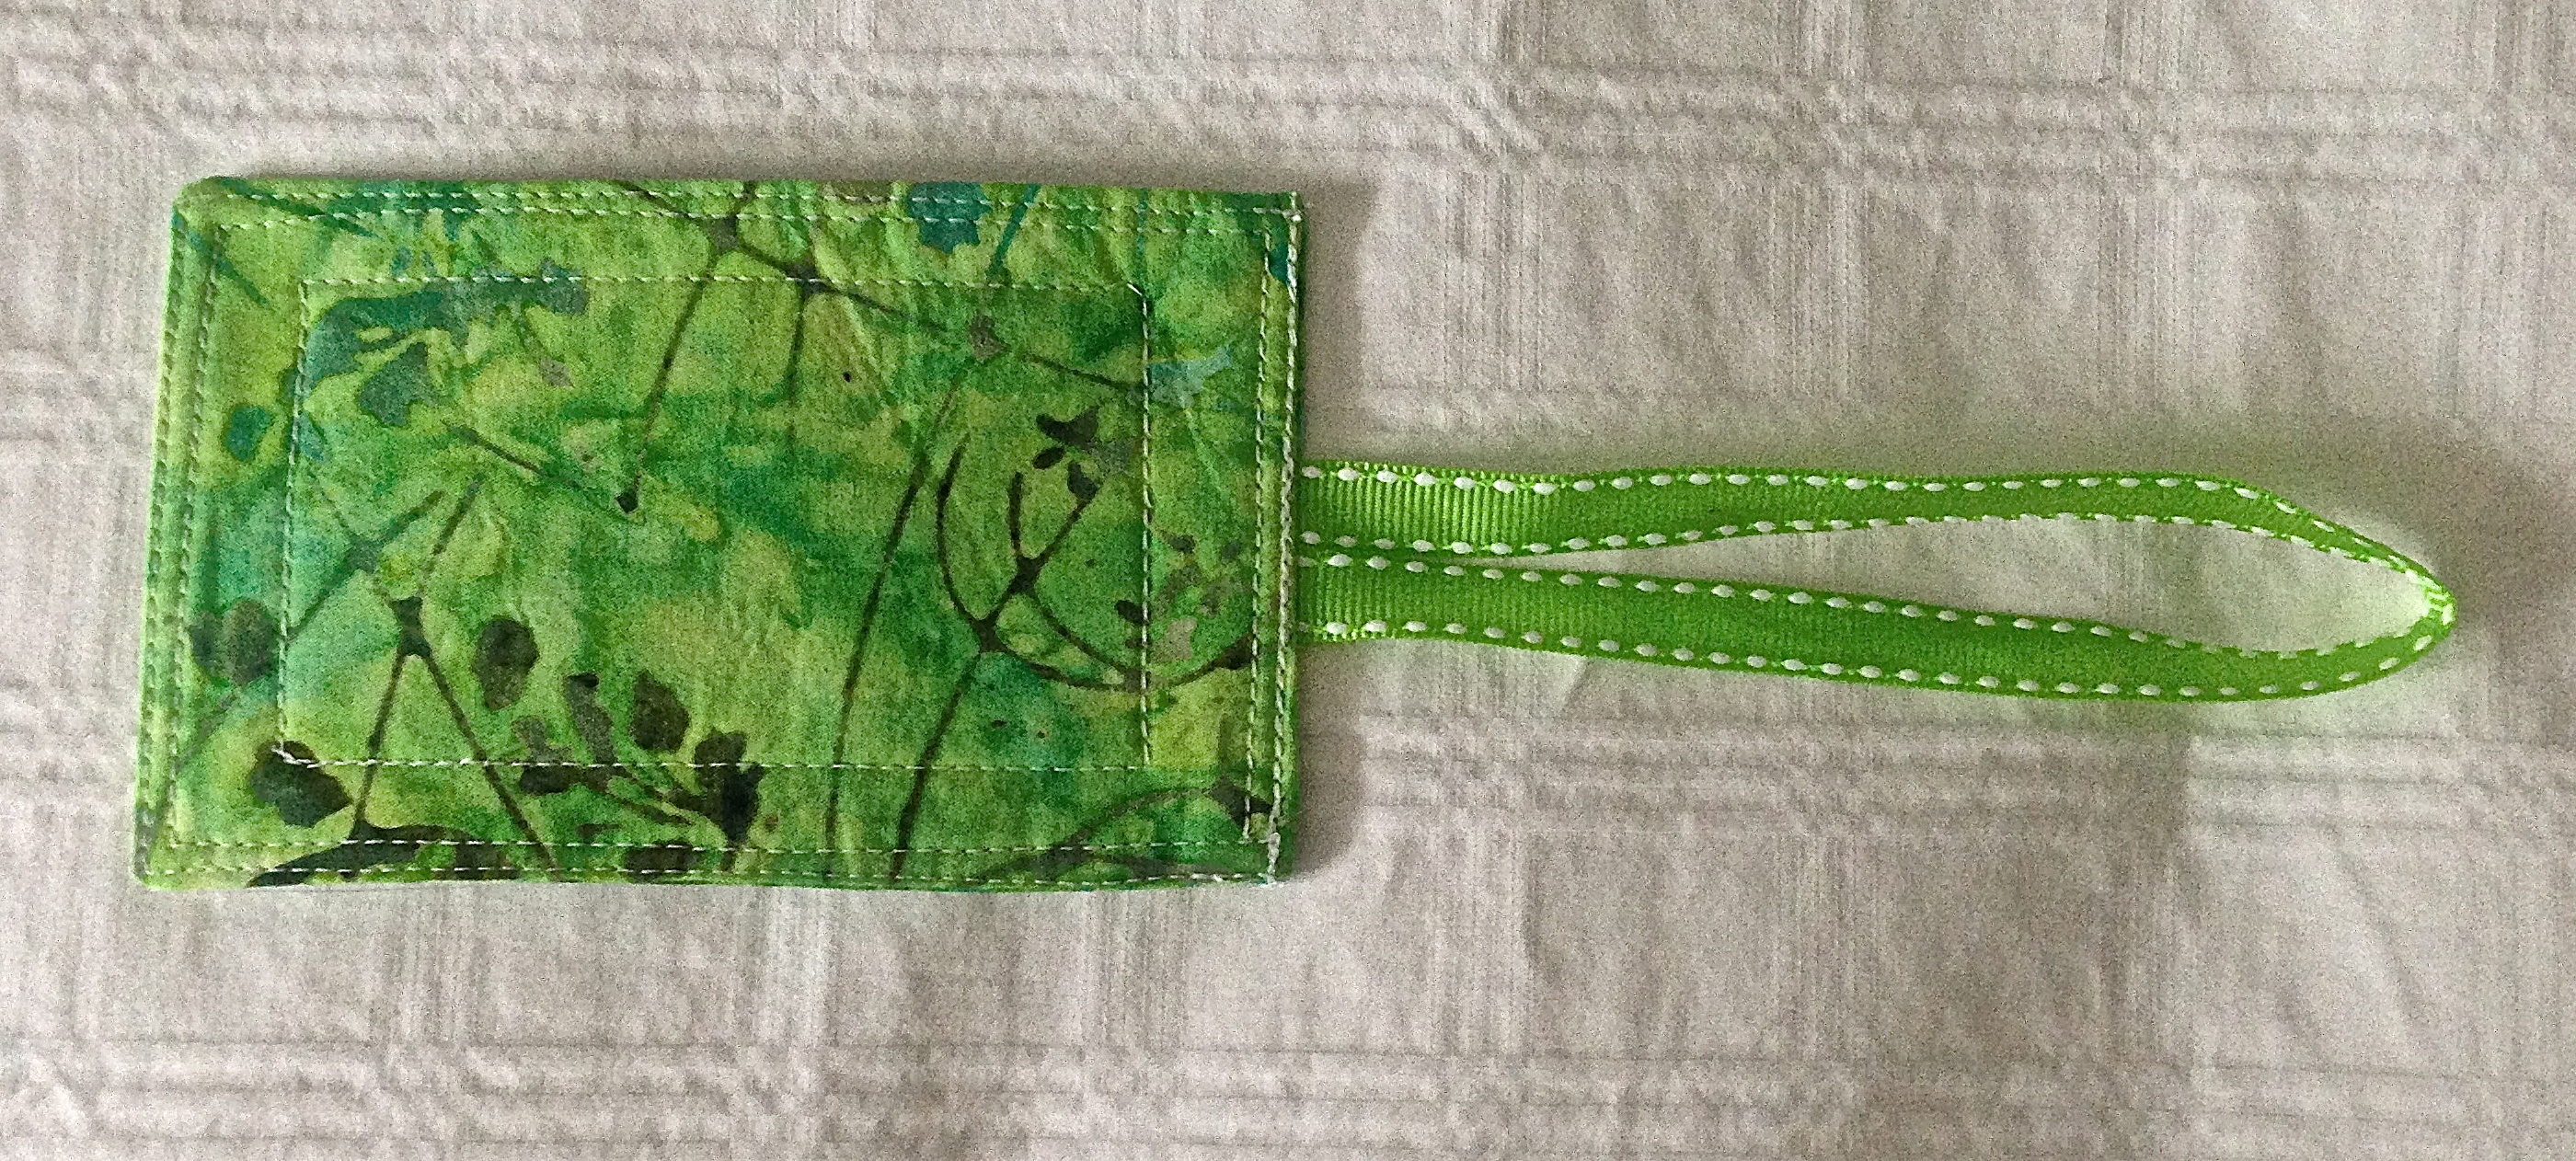
  • Cut 4 pieces of 3.5″ x 5″ fabric as well as 2 pieces of 3.5″ x 5″ heavy weight interfacing, two 6″ lengths of grosgrain ribbon and two  3.5″ x 5″ pieces of plastic.
  • Fuse the interfacing to two of the pieces of fabric.
  • Place the other two pieces of fabric on the right side of the fabric/interfacing piece and sew on three sides.
  • Turn inside out, press.
  • Insert the folded grosgrain ribbon (cut ends) into the open end which has been folded  inward. Stitch the open end closed.
  • Take a business card (or a card with your ID on it) and lay it in the middle of one side. Place the plastic piece on top and stitch around the outside, then stitch around the edge of the card. Trim the plastic as close to the seam as possible.

And there you have it – a personal luggage tag – won’t look like anybody else’s!

Elegant Attire

I got my invitation to my great-nephew Ben’s Bar Mitzvah last week. The invitation says: “elegant attire”. I wrote my niece asking her what that meant and she sent me back a photo of her new dress for the affair. The Bar Mitzvah is end of August, in Toronto, certain to be a hot evening. I went through my wardrobe looking for “elegant attire” — I have outfits but everything is more suitable for winter, too hot to wear on a late August evening.

I hate shopping for clothes, I prefer making stuff — it’s as much about the making as it is the wearing. So I went through my fabric stash. I have a lovely piece of blue and white stripe silk which I bought in Portland OR last spring, and I might just have been able to squeak out a dress from it but I didn’t want to cut the fabric and find I didn’t really have enough, that the dress ended up too short. That fabric will get saved for another garment of some kind.

Instead, I went to the local fabric shop and picked up 2 m. of a Japanese katagami stencilled indigo dyed cotton fabric. There were lots of large bold designs but I thought this one was delicate enough to be considered “elegant”. Yesterday, I cut out a t-shirt dress from the fabric; today I sewed the pieces together. IMG_3029

This is me wearing the completed dress with some large Navaho silver jewellery, green shoes. The dress will certainly be comfortable – it’s loose, and cotton. I think it will also pass muster as “elegant”!IMG_3028

New Back Pack

20140713-220449-79489495.jpg
Just finished this new back pack. I made one like this using faux suede a number of years ago and I use it regularly. It holds quite a lot and sits comfortably into the small of my back. I made a pattern from a Japanese back pack which a friend purchased in Japan. I used one of the pieces of Japanese fabric I’d bought in Portland Oregon a year ago. Took about 5 hours to cut out and assemble.

I made this one to take to Bali at the end is September because the older one is surprisingly heavy. This one was made using lighter fabrics.

Orchids

I was watching the Men’s Double Tennis Match (Wimbledon) when I noticed the orchids on my dresser in my bedroom (which is where my TV is located). All three are in bloom and the flowers are looking wonderful:

DSCF2687

DSCF2691

DSCF2690They’ve been in bloom now for a couple of weeks – I expect them to continue blooming for another couple of months. When they’re finished they go into another room and I bring out some more that are in bloom. So there are always orchids in bloom in my bedroom! Even in the winter.


Socks

IMG_3001

Decided I should begin using up leftovers from other socks before buying more yarn. There was enough yarn in this ball for at least two legs (turned out there was actually a bit more) and I extended what I had with a light pink that blended with the lighter sections of the yarn. I alternated rows for  40 rows in the ankle. This one has been added to the stash – I now have 6 pairs of socks to give away!

New Nightgown for Joan

IMG_3005

It was my neighbour Joan’s birthday on Wednesday. A couple of years ago I made her an heirloom nightgown. Two weeks ago she asked if I could fix a rip in one sleeve. The tear was too large to “fix” so I replaced the sleeve – the gown was like new. At the time I thought, time to make her another gown. I use a white batiste and this time I did a bit of embroidery on the yoke. Used a binding on the neckline, and didn’t bother with a lot of fancy heirloom stitching on the hems. I gave it to her this afternoon.

My Garden


IMG_2996


I have a rhododendron in a pot which is thriving. Lots of blooms this season.

IMG_2992


I have several Sempervivum (Hens and chicks) – this one is just starting to bloom.

IMG_2997

I’ve been nurturing this plant all spring – I just wanted to find out what it was – the foliage suggested strawberry – but then the plant got too tall and the flowers are yellow. Turns out it’s a “rough cinquefoil” or Potentilla norvegica – a local wildflower. I’ll leave it alone for this season but pull it out in the fall. I have one other weed growing in another tub – no idea what it is – I have to wait until it flowers to figure out what species I have.

Celtic Knots Quilt

IMG_2938

Finished this quilt yesterday. I had a jellyroll of a set of batik strips (Moda) which I’ve had in my stash for a while – when I came across a photo of a quilt like this I thought it a good way to use up that roll. Easy to construct, essentially, the small blocks are a variant of a log cabin, the joining sashing includes blocks of the print fabric and then the outer sashing is solid (although I could have added in small blocks to join up the big squares. In any case, the real challenge was what to do about quilting this quilt because the large blocks were 14″ x 14″ and the largest design I can create in my Grand Dream Hoop is 13.5″ x 13.5″. I set up a design that consisted of 4 smaller elements (there are two difficulties using the large turnable hoop – 1. the design shouldn’t cross over the middle, it won’t likely align when the hoop is turned, and 2. because of the size and weight of the quilt there is drag on this large hoop and so the two sides are never perfectly aligned).

Celtic Knots

The left side of the design replicates the right side. I wanted the design to embroider the background center block, not leave it empty. For the sashing I created a design using one of the machine quilting stitches and fit it within the 360 x 200 hoop so that it would fill the length of the sashing pieces, and then a small single-run flower for the corners of the sashing.

Here’s the quilt back:

IMG_2940

A pieced strip using the small amount of leftovers from the strips plus a 2 1/2″ strip of some fabrics that I thought blended with the original fabrics.

The binding used six strips from the original roll.