 Another Pair of socks done!
I customized the yarn a bit here – I eliminated the multicolored band after the first one just to keep the rest of the pattern more subtle.
I have a second ball of this peach color – I’ll get to those socks after a couple in other colors.
Kite Flying
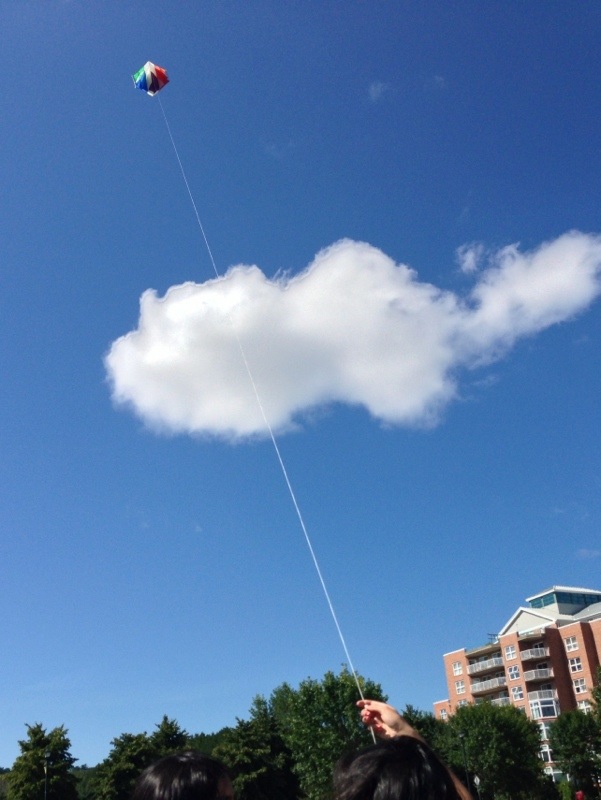
I took my friend Sumitra’s two nieces kite flying yesterday afternoon. I haven’t been flying – must be three years since Ben, Zach and I took a couple of kites out for a spin. The night before I went through my kites to find a couple of “easy” fliers – kites that would fly reliably in light wind which is what the forecast was predicting.
We went to the Bedford waterfront. The wind was light at first but we managed to get kites aloft and we flew for about half an hour before the wind dropped. We were nearly packed up when the wind returned, the direction shifted a bit, with some strength. We got the kites out again and had fun for another 40 minutes or so.
The wind was strong enough to support my large “snowflake” box kite which has a strong pull. There was sufficient wind strength for the kite line to “sing”. The young women, who had never flown kites before, and I had a great time. I have to go again soon!
 The girls took a photo of me putting on my gloves as I was flying the Snowflake…

“Bouquet”

I was thinking about Judy Pfaff’s sculpture “Blue Vase With Nasturtiums” in the MoMA collection and realized I had a jug of “flowers” on my kitchen counter!

Winter Jacket

I have finally cut out the winter jacket. The fabric has been sitting in my dining room (I use the dining room table as my cutting table – with a protective cover, of course) for at least six months! Sunday, I finally cut the pieces for the jacket.
I’m making it in a deep wine corduory with the back panel in a tapestry fabric I’ve had for some time, using that fabric for piping on the front of the jacket. For warmth, I’m using Insul-Bright batting – a polyester heat reflective batting – needle punched mylar on one side – to keep rain out, and heat in. I am in the process of adding the batting to the wrong side of each lining piece. I’ll then assemble the lining and attach it to the assembled outer jacket.
I’m making the long version with the banded bottom, to keep my bum warm in winter! The reason for this particular jacket is that it has a total of 10 pockets – outside and inside, with zippers and without. Using the pockets effectively means I don’t have to carry a purse when I wear the jacket.
The Final t-Shirt

This is the last of the t-Shirts, made from recutting a man’s XL shirt I picked up at Value Village. I constructed it using my serger, but I hadn’t used ball-point needles, just regular universal sharps. On all the other t-Shirts that wasn’t a problem, but it turned out to be on this one! The universal needle, instead of pushing aside the knit stitches of the fabric, cut the cotton fibre – you could see the beginnings of holes along the seams. I had to resew all the seams (less than 1/8th away from the serged seam) on my regular sewing machine using a ball-point needle. The difference in the appearance of the seam is dramatic.
Now the question is, do I want to add embroidered embellishment to some of these t-Shirts?
Intersections Quilt – Finished
I finally finished the Intersections Quilt yesterday. It took two days to do the stitch-in-the-ditch, quilt the blocks and the border, add the binding and label.
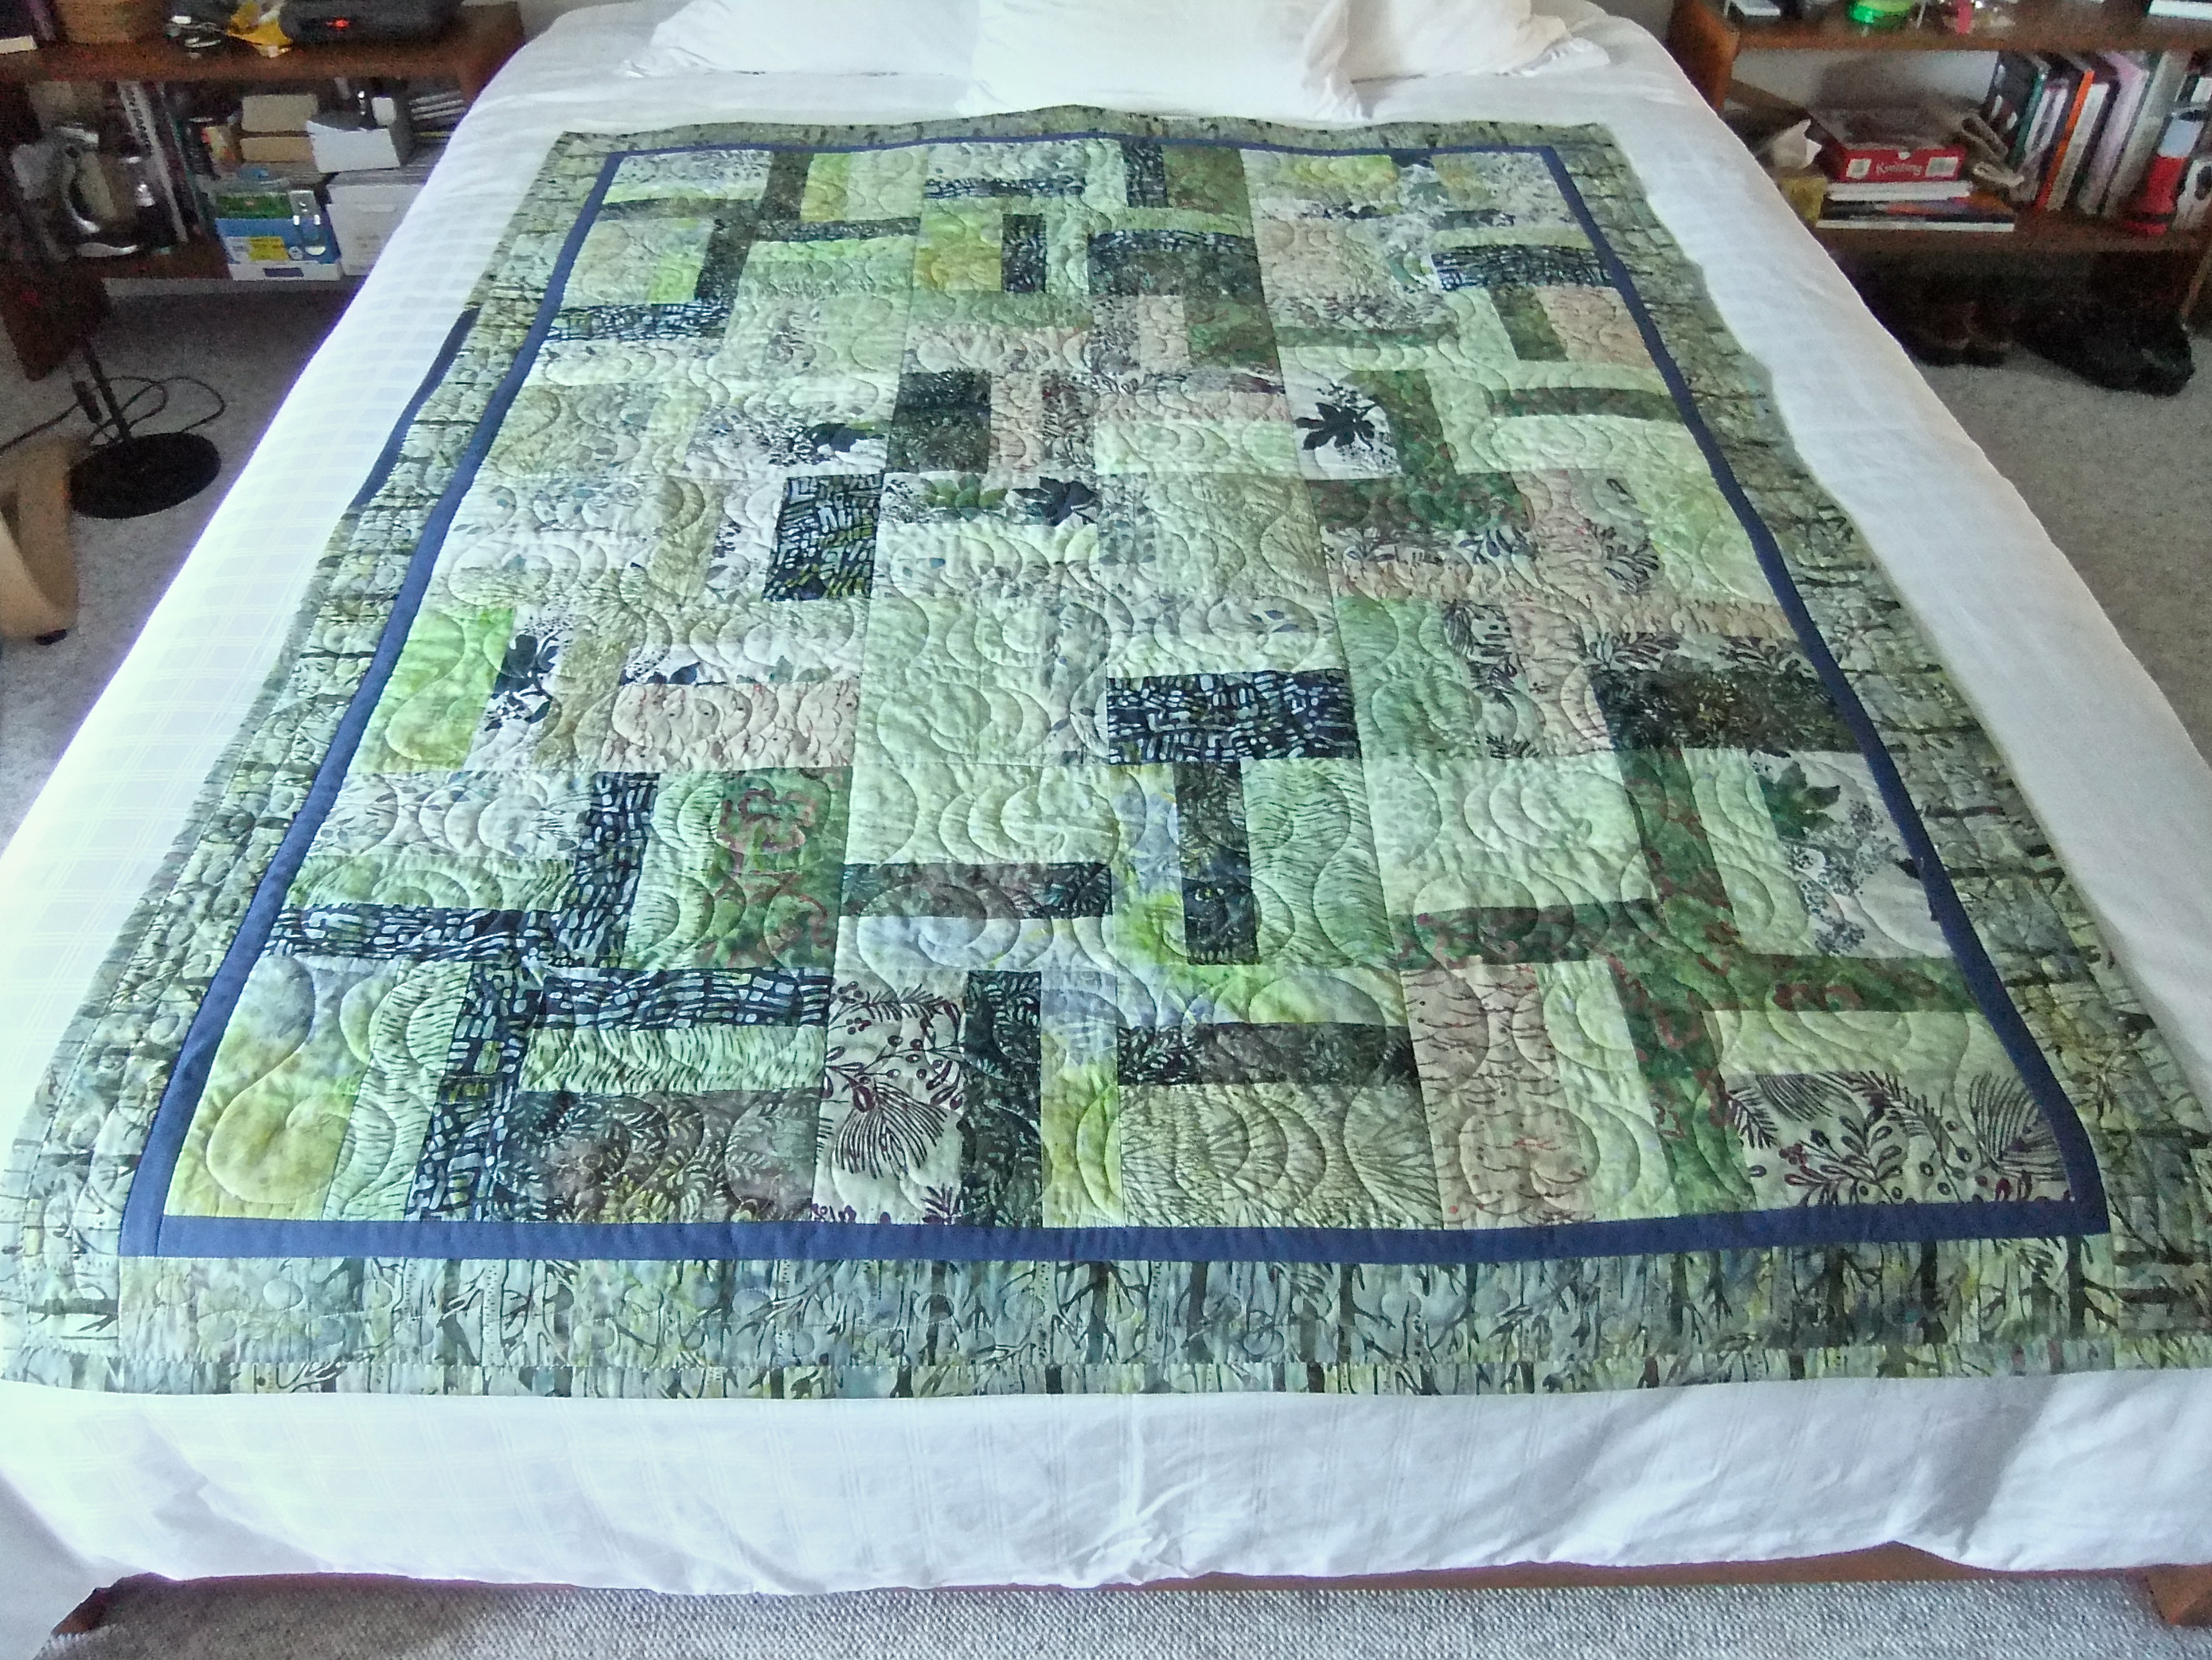
This is the finished quilt top. The design I created to quilt the blocks was done in my 14″ hoop (which requires a turn to complete both sides of the design). I was trying to get the effect of having done the quilting using a long arm quilting machine. Unless you look very closely, you can’t see the design within individual blocks – the quilting does look continuous.
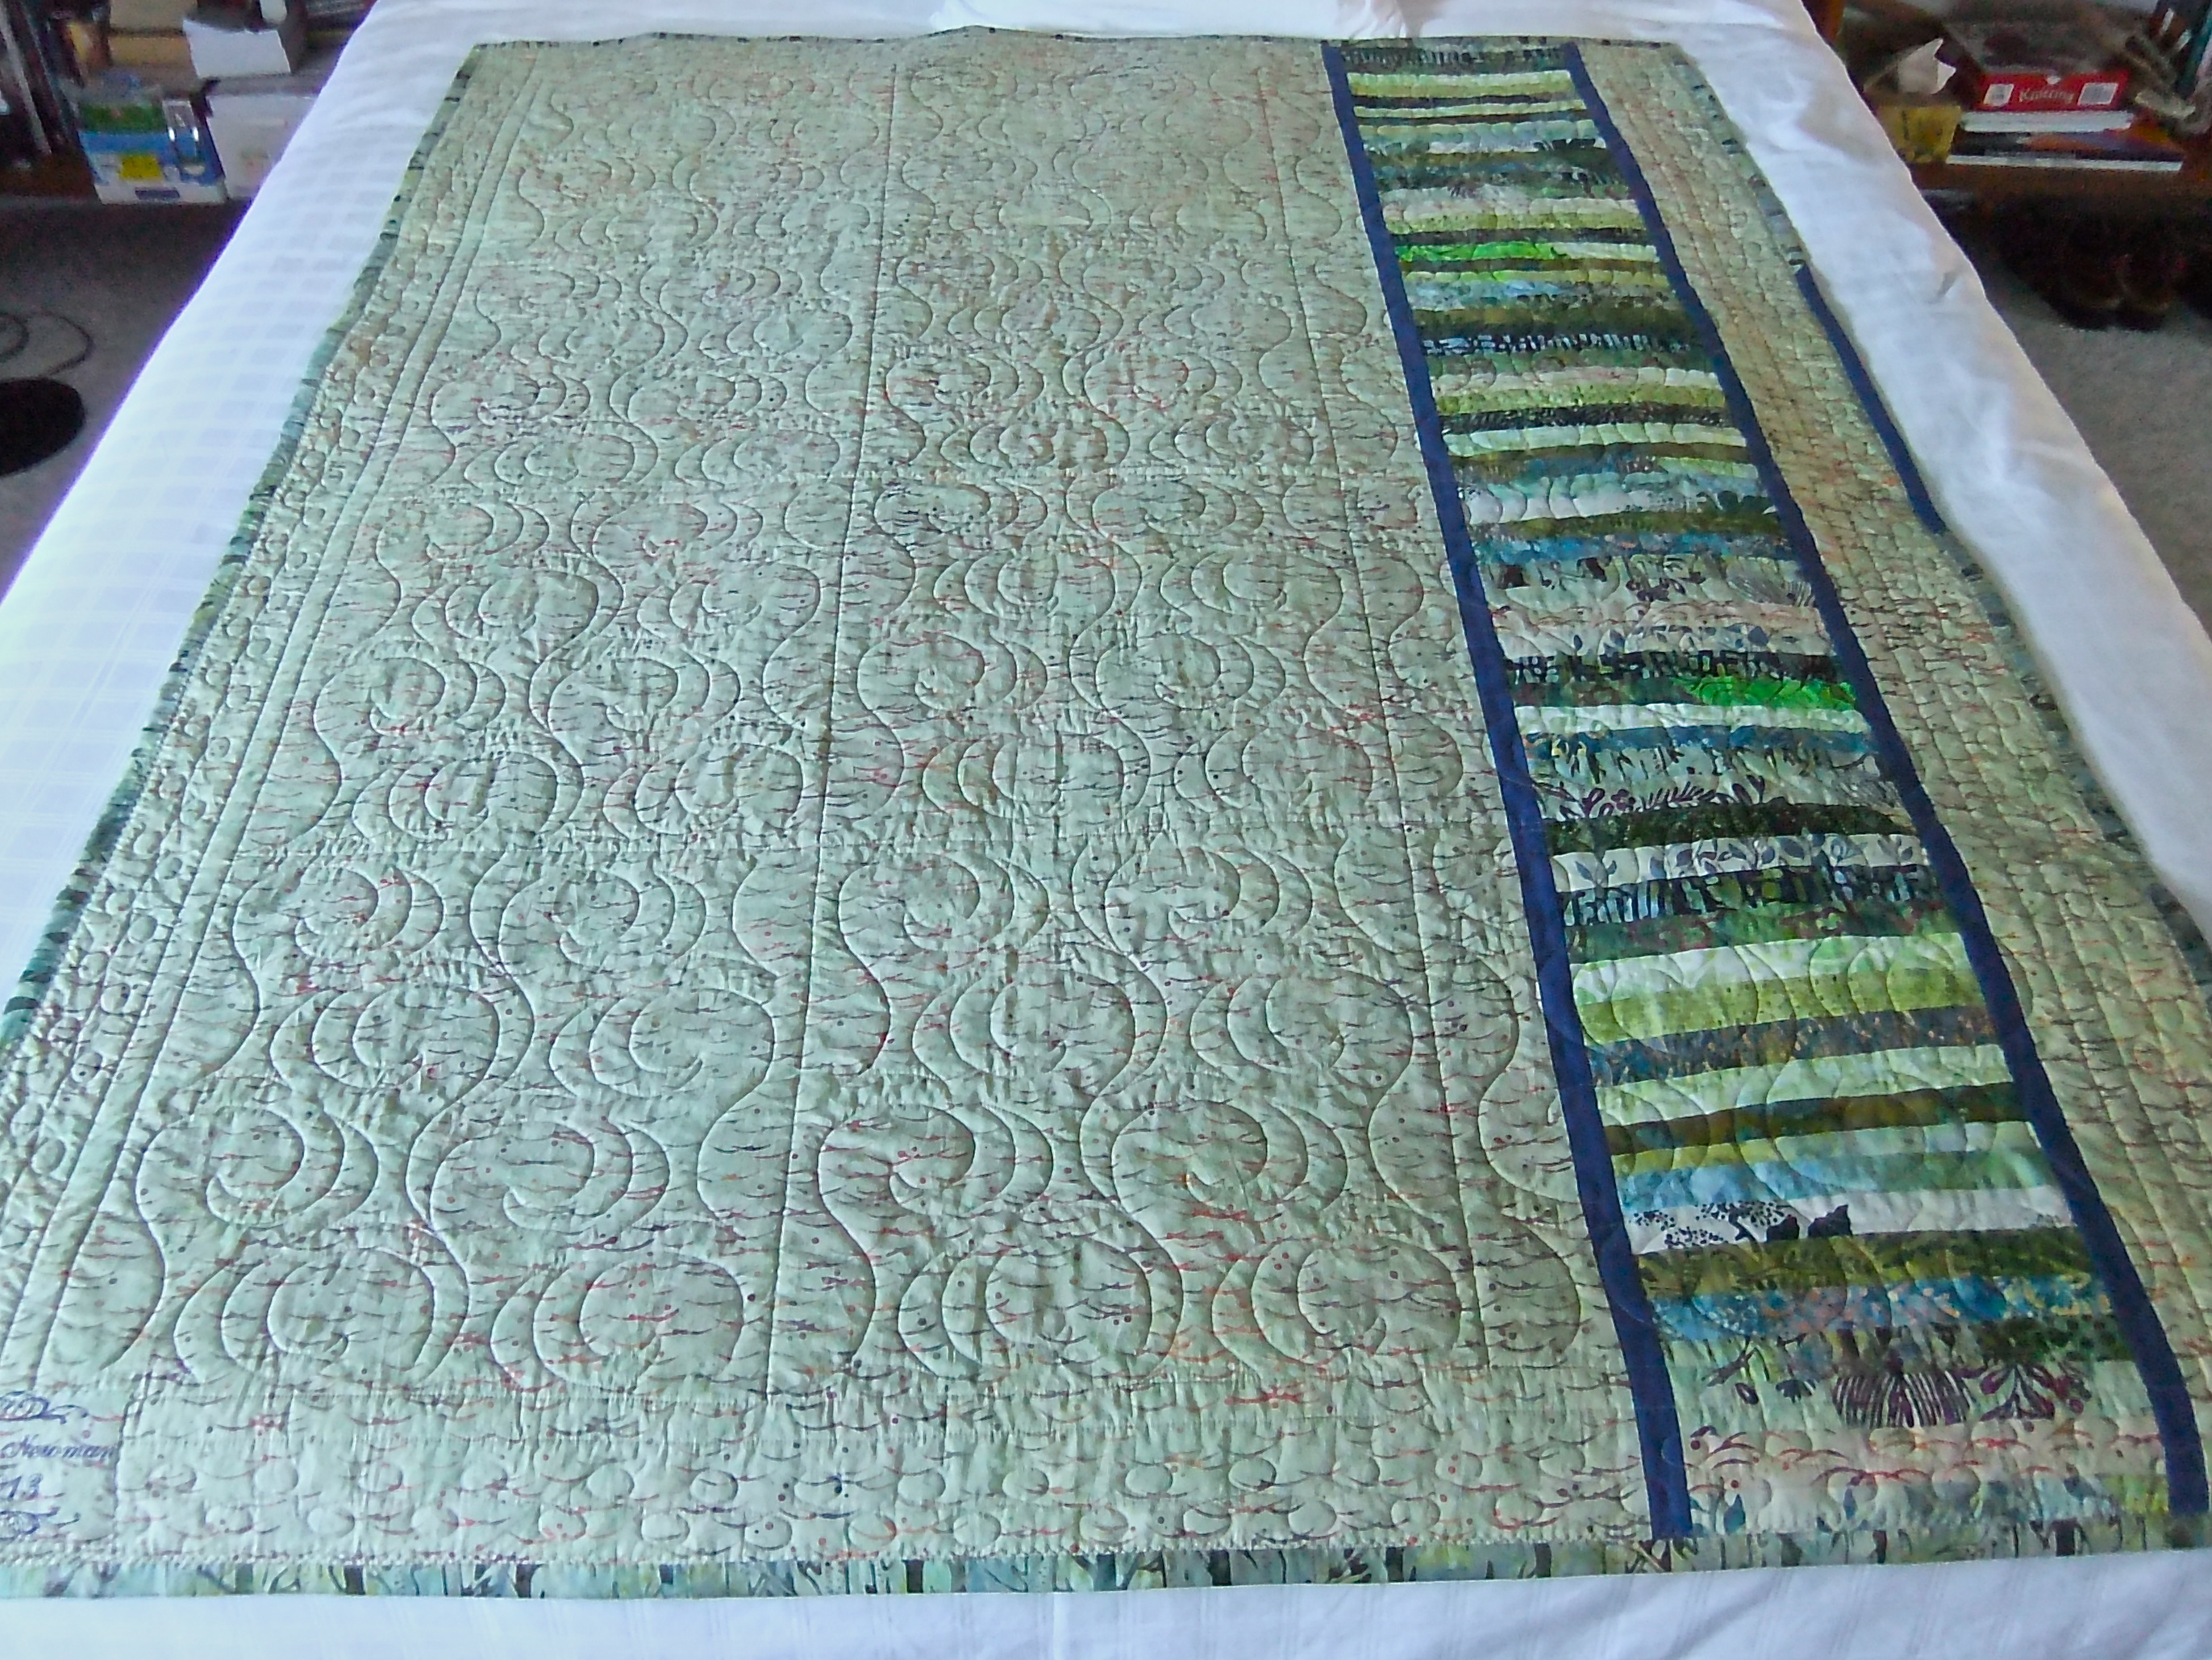
The quilting is more obvious on the back. Again, I inserted a strip of fabrics from the top of the quilt – so I could get away with just a single length of backing fabric. There weren’t quite enough scraps left of the fabrics from the front, so I added others in the green and blue tones from my scrap stash, but you can’t tell – they blend well with those from the top of the quilt. I also quilted the border: this time I didn’t do it free stitching the machine stitch (loops), I created another embroidery to use in the endless hoop – I was surprised how easy it was to align the individual embroideries so that they joined up – unless you look closely you can’t see the joins – I was very pleased with that.

This photo shows the quilting detail and the border quilting,
I’m already thinking about the next quilt.
Heirloom Embroidery
A number of years ago I learned how to do heirloom embroidery – it uses many different decorative stitches on a fine, light-weight fabric, a voile or batiste. The technique is used to decorate night gowns, fancy dresses for little girls, blouses. It involves inserting lace elements, using pin tucks and tucks, cutwork, and other decorative techniques. There are lots of books written about the technique and you can find many videos on YouTube.
Here is my first sample piece – a lace insert joined down the centre with entredeux, then rows of pin tucks, then rows of scallops and other decorative stitching.

Sample 2: Ribbon inserts, again joined with entredeux, then hemstitching, tucks, more hemstitching, pin tucks, some decorative stitches and a final row of hemstitching.
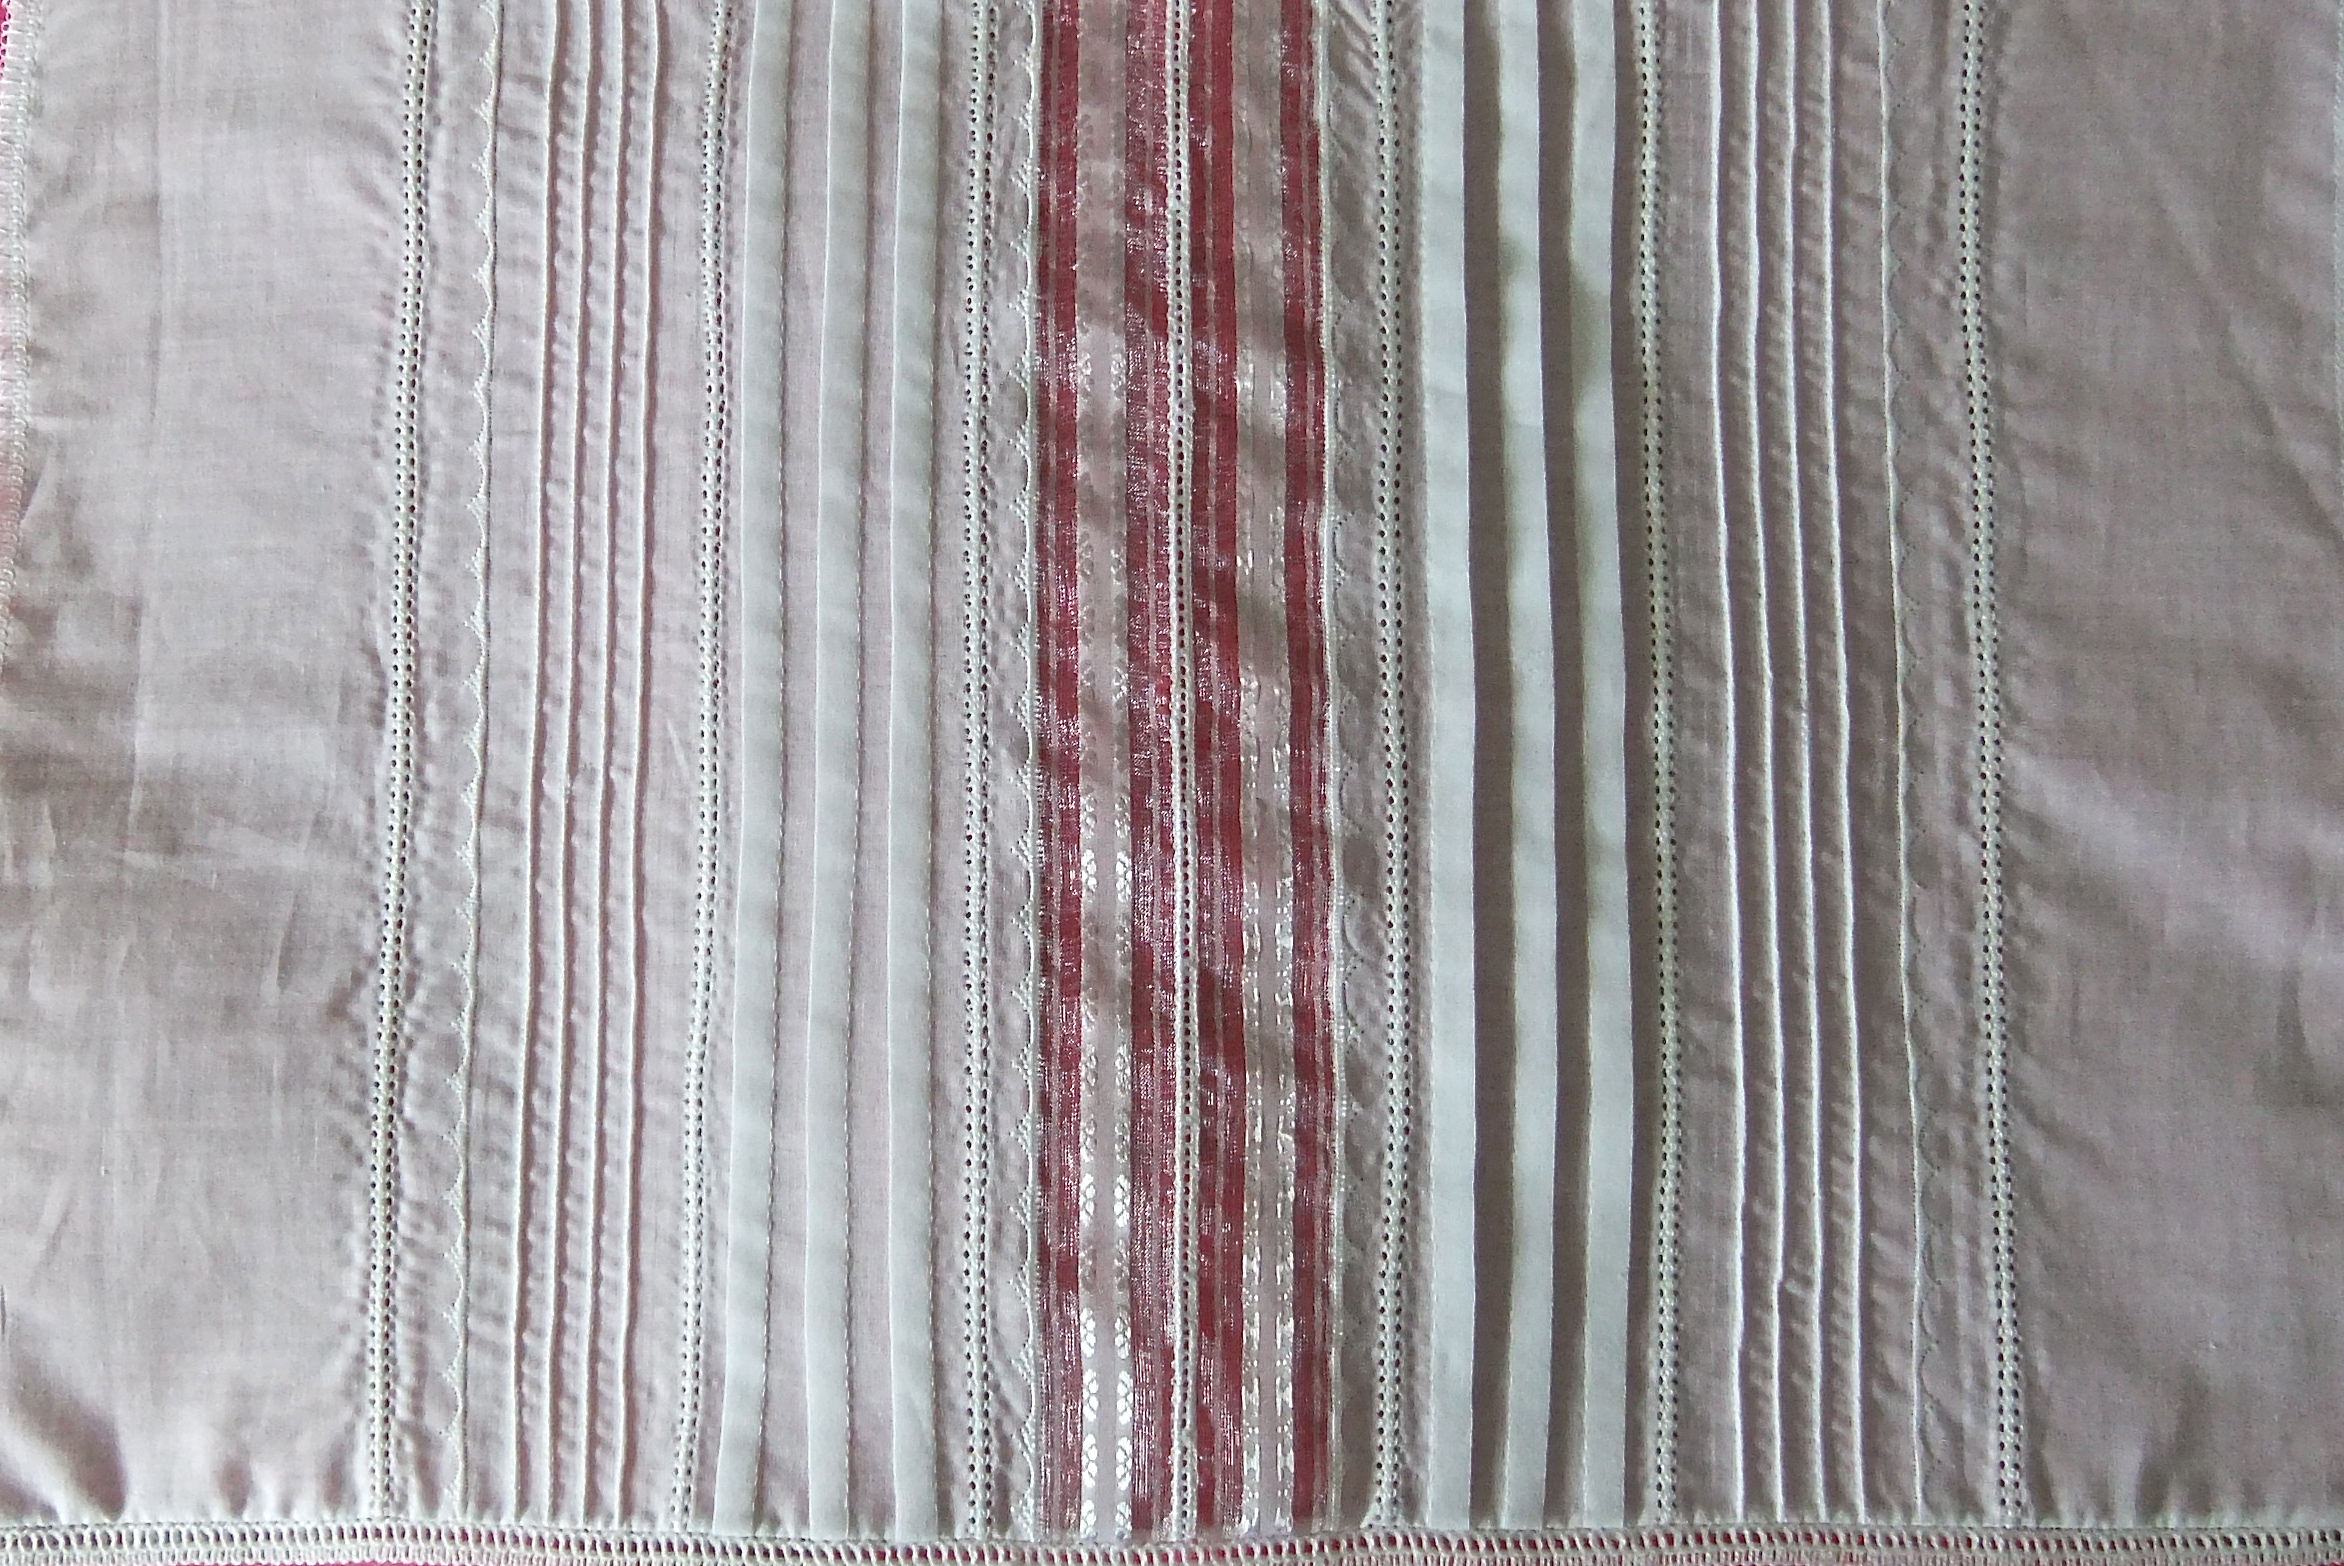
Sample 3: This sample is done as three separate pieces. Again using hemstitching, lace insert, decorative stitches and tucks with some entredeux.

I intend using all three of these as yokes for nightgowns. My current supply of nightgowns is dwindling (made from a delicate cotton, they do wear out). I need to put nightgowns on my “to do” list.
I created these three samples for a class on heirloom embroidery I taught – I had the women create heirloom samplers like these to use in whatever way they wished.
t-Shirt Makeover II

I’ve stepped up the t-shirt makeover a notch. I have been buying men’s t-shirts so I can have longer sleeves than women’s shirts have, but I don’t like the crew neck. So I decided to try renovating a couple of the men’s shirts I bought last year. I cut off the ribbing around the neck and since I didn’t have any knit fabric to use for the neck edge I took a couple of fat quarters from my quilting stash and decided to try a bias strip. It worked! The complementary neck edge looks just fine, and it lays flat. After I tried the shirts on I thought it would also be a good idea to put some shape in the sides – they look better slightly fitted. So these two t-shirts have become keepers.
t-Shirt Makeover

It’s hard finding t-shirt fabric here in Halifax. The color choices are very limited and what’s available is often the wrong weight. So, the other day when I took three large bags of clothing to Value Village (I’d gone through closets and drawers) I took a look at the men’s large t-shirts they had – I found three in solids (red, black, blue). I cut the shirts apart – there was enough fabric there for a t-shirt for me! This is one of them. Final cost – $4. I can’t buy fabric at that price!
New Socks

Finished this pair of socks last evening. I like the pattern created by the yarn but this time there was an interesting variation – the variegation was obviously planned for 68 stitches – that’s what I started out with and you can see the blocks of brown and light colour. When I decreased to 64 mid way down the leg, the blocks of brown turn into stripes. I’ve never had that happen before – the “patterns” have all been more general and so the decrease in stitches hasn’t made much difference to how the overall pattern turned out.
 jmn
jmn 