As Russian invaders have central Kyiv in their sights, Ukraine’s warriors say that they will not submit. To this end, I offer a Ukrainian interpretation of Churchill’s famous clarion call from the last world war:
“We will fight on our streets, we will fight in our villages, we will fight atop the black soil of our fields, we will fight for Kyiv. We will never give up. We will never surrender.” – Yuri Polakiwsky. Lviv, Ukraine (Mar 2 – from the Globe and Mail)
A Ukrainian soldier walks through debris on the west side of Kyiv, on Feb. 26. DANIEL LEAL/AFP/GETTY IMAGES
Here in Canada our “sacrifices” will be miniscule in comparison to those Ukrainians will have to make over the weeks, months, years to come. May they have the fortitude and bravery to sustain the initial loses and the determination to mount a long and sustained insurrection. May those of us living in a “democratic” world have the fortitude and bravery and determination not to forget them and to continue providing the support they will need for a very long time!
Almost two weeks ago a friend in my building died. At 10:45 on Sunday evening she called me – she wasn’t feeling well. I promptly went to her apartment – I was fortunate, Kathleen had been able to get to her door and unlock it so I could get in. I took one look at her, called her son, then called 911.
She was having a heart attack. She hadn’t called her son – she hadn’t wanted to disturb him so late at night. I made it clear he’d better come as quickly as he could. Meanwhile as I was waiting for her son and the paramedics to arrive I found her medications and her health card which I knew the paramedics would want.
I’ve dealt with emergencies before so I was familiar with how paramedics handle the situation. What I wasn’t expecting was the question one paramedic asked her son as they were leaving – “If her heart stops in the ambulance what do you wish us to do?” It turned out Kathleen had a DNR which her son knew about. But I realize I don’t!
I’ve spent the past couple of months getting my will, my power of attorney, my personal delegate documents in order for my niece who has agreed to act on my behalf. I’ve thought about longer range contingencies like having a terminal disease or failing cognitive function and discussed with her the kinds of decisions I am authorizing her to make. I never considered an emergency!
My niece lives in Toronto. I have a sister who lives closer in Halifax. However, were I to be having the kind of emergency I responded to that Sunday, I’d call neither of them. I’d call Deb who lives in my building. My emergency could be such that I can’t get to the door to open it – I have to make sure Deb has a key (that’s on my immediate TO DO list) so she can let herself in.
When we were discussing this she mentioned that in the home where her mother had lived in Manitoba each resident had an ERIK (emergency response information kit) on the side of their fridge. We tracked down the document online but I didn’t like how it was laid out. I went looking for a NS equivalent and came across the VON (Victorian Order of Nurses) version which they call “Vial Of Life” because the emergency information document is handed out in a vial with a bright red sticker on it to be kept in the fridge (between the mustard and ketchup, I presume). The form had precisely the information an emergency responder needs: who to contact, health conditions and medications taken, allergies, where the medications are located, the health card number.
I filled one out for myself and have put it on my fridge along with a signed and witnessed DNR. I made copies of both documents for the gals in the knitting group – none of whom had such documents for themselves. I’ve been passing out the documents to anybody who’s interested.
You don’t have to be an old person to have this information on the side of your fridge – having it in an easily accessible location makes it much easier for somebody else to help you out if you have an emergency.
Take a look. It can’t hurt you to fill in these forms for yourself and for anybody else in your household. It makes dealing with an emergency a lot easier for whoever is the person having to respond on your behalf! Trust me.
“Never take your freedom for granted”, “People in Canada look at freedom with a sense of entitlement…there’s always the danger someone will come take it away”, “You have to fight for your freedom … those principles of liberal democracy … you have to decide whether they’re worth fighting for!”
Ottawa Protest (photo from CTV News)
That’s not a week after the trucker convey people were using the very same words with completely opposite meaning!
I was stunned by the stark contrast Bilak’s words created. His words underlined how juvenile and selfish the people involved in the Ottawa protests actually were/are! Unfortunately Matt Galloway, the host, made no comment about that juxtaposition – was he even aware of it?
I wonder what the truckers have to say about Ukraine – are they prepared to fight FOR democracy, against REAL oppression?
I’m guessing they’d be driving their trucks towards the Russian border.
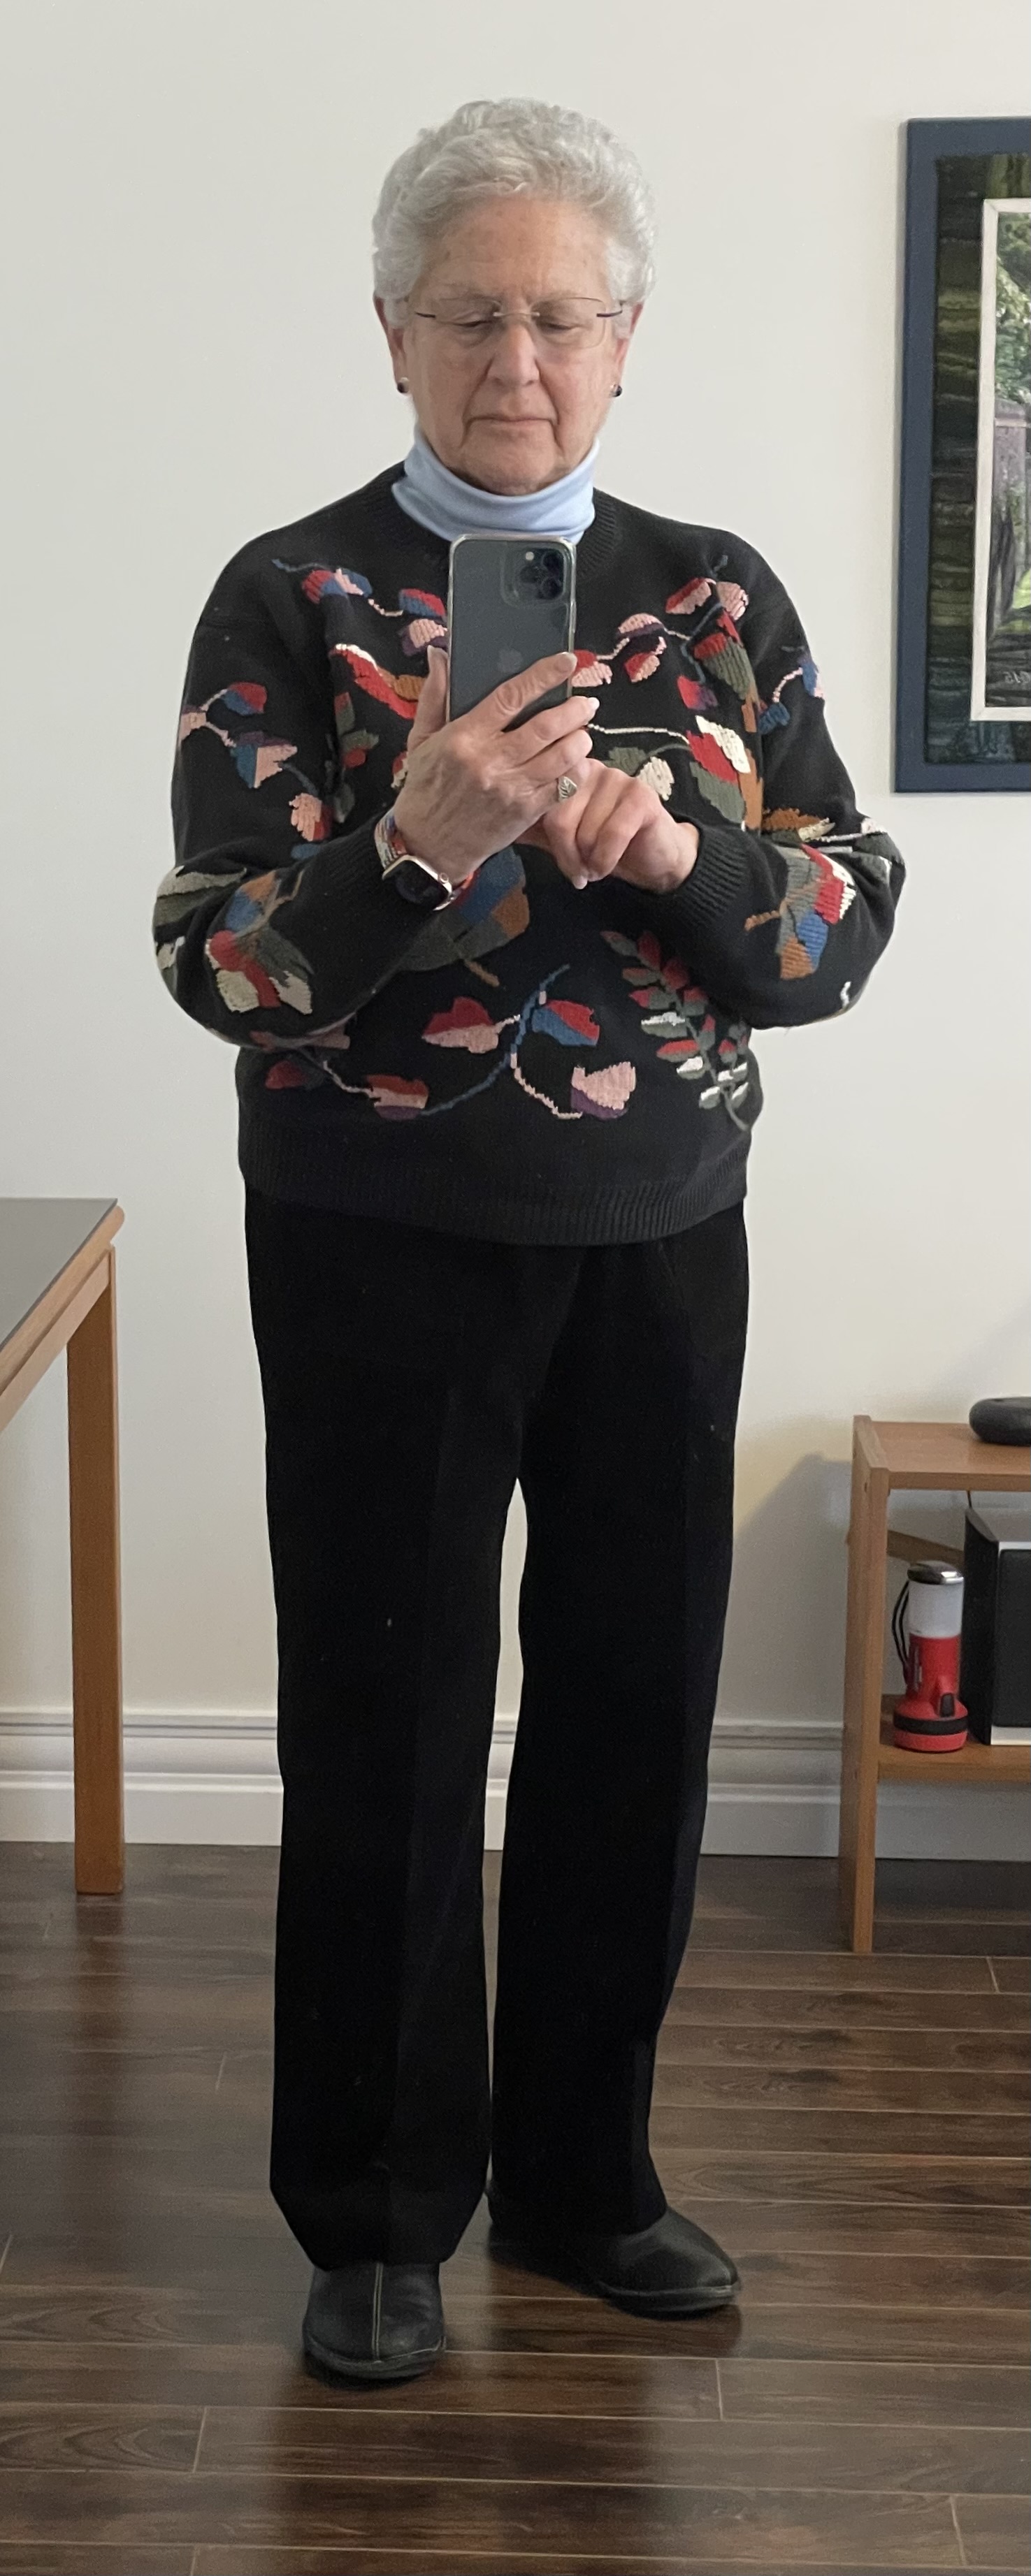
I’ve used the same pattern (Jalie 3243 – Pull-on Pants) I’ve used for several other pairs of pants. My weight and shape have been relatively constant for the past year so once I worked out the details I had a pattern for pants that fit so I just keep making them.
The best part of the project is I can cut out the pants, sew them up, and wear them without any fussing. I know the length of elastic for the waist, the inseam measurement. Gain or lose weight and the measurements will change. However, right now I have a cut/sew pattern that works.
You can’t see the details – two jean-shaped pockets sewn to the front, two back pockets, an elasticized waist. That’s all there is to these pants.
I cut them out on Thursday. Got most of the construction done yesterday morning. Finished them this morning and I’m wearing them this afternoon.
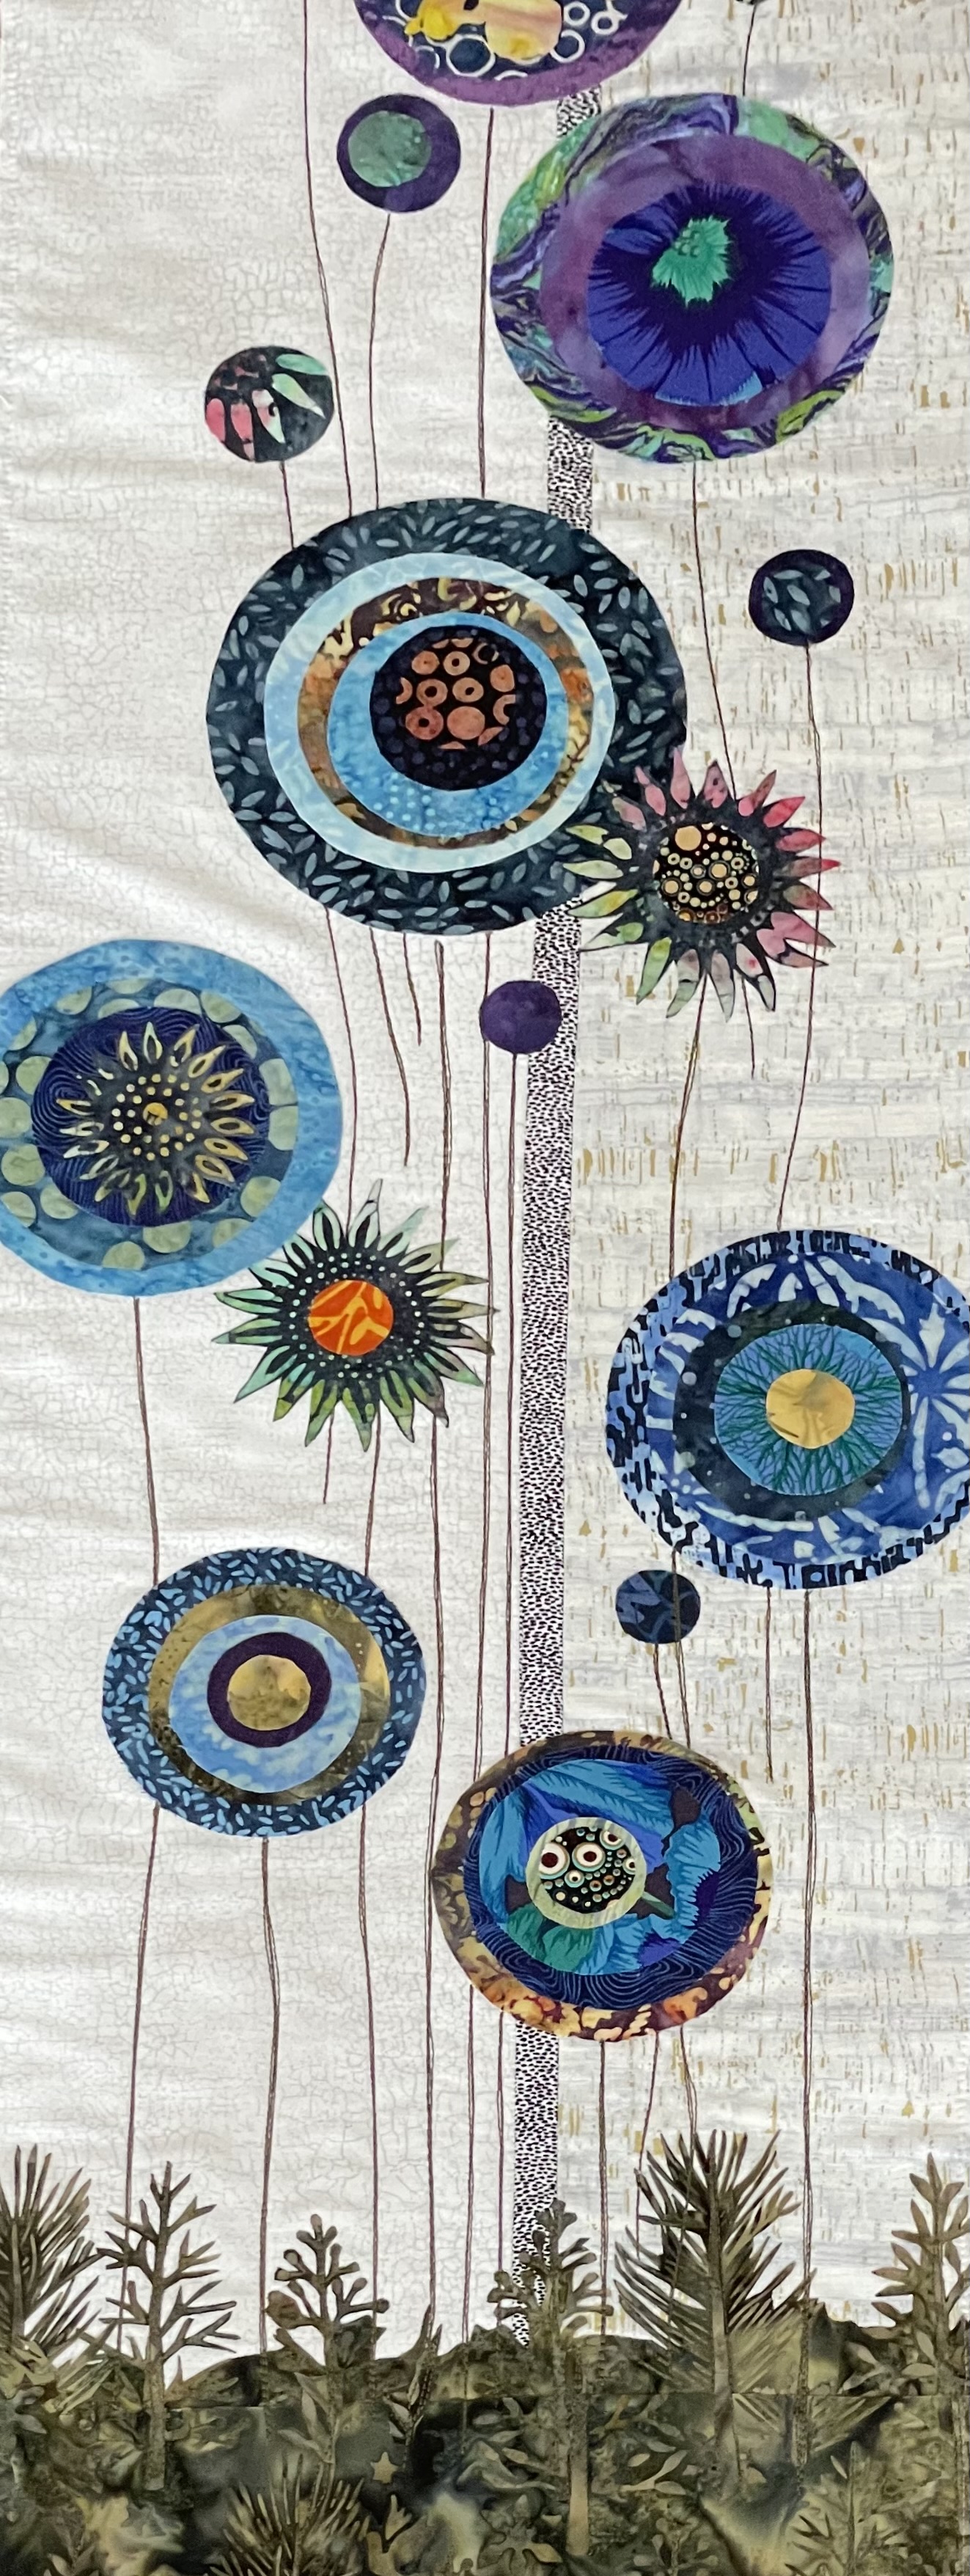
I started this textile wall art piece on Jan 23. I managed to get the basic appliqués in place and then I was stumped. Before I could embellish the raw edge shapes I had to figure out some way of stitching “stems” for the “flowers”. I thought about cutting narrow strips of various green fabrics, using yarn (yarn couching – using decorative stitches to tack the yarn in place), even stitching over very narrow ribbon. The issue was the colours I’d used in the vegetation at the bottom of the piece which limited my options. I spent time sporadically playing around with decorative stitches but nothing seemed to set up the effect I was after. I had no suitable green/brown yarn in my stash. And trying to force ribbon into gentle curves, even if I could come up with a suitable colour, wasn’t going to work, either.
After finishing a pair of black corduroy pants this morning (more about that in another post), I picked up my stitching sampler, played with a few more decorative stitches and then decided I’d just repeat rows of straight stitching! I practiced a bit. I matched thread colours with the fabric at the bottom of the hanging and started in.
Blue Flowers
This is as far as I’ve got at the moment. Those stems need small leaves of some sort – I intend to work those in last. Next will be embellishing the raw edges of each layer of the flowers to permanently attach them to the backing.
You get the idea here. The vegetation at the bottom also needs a lot more embellishing but that, too will come after I’ve worked on the flowers and flower centres.
I thought it was the COVID-19 Rapid Test Kit building that had interfered with my working on this piece. It wasn’t. It was my not knowing how to do the stems/leaves that had me stopped. I feel like I’m being creative again. Finally!
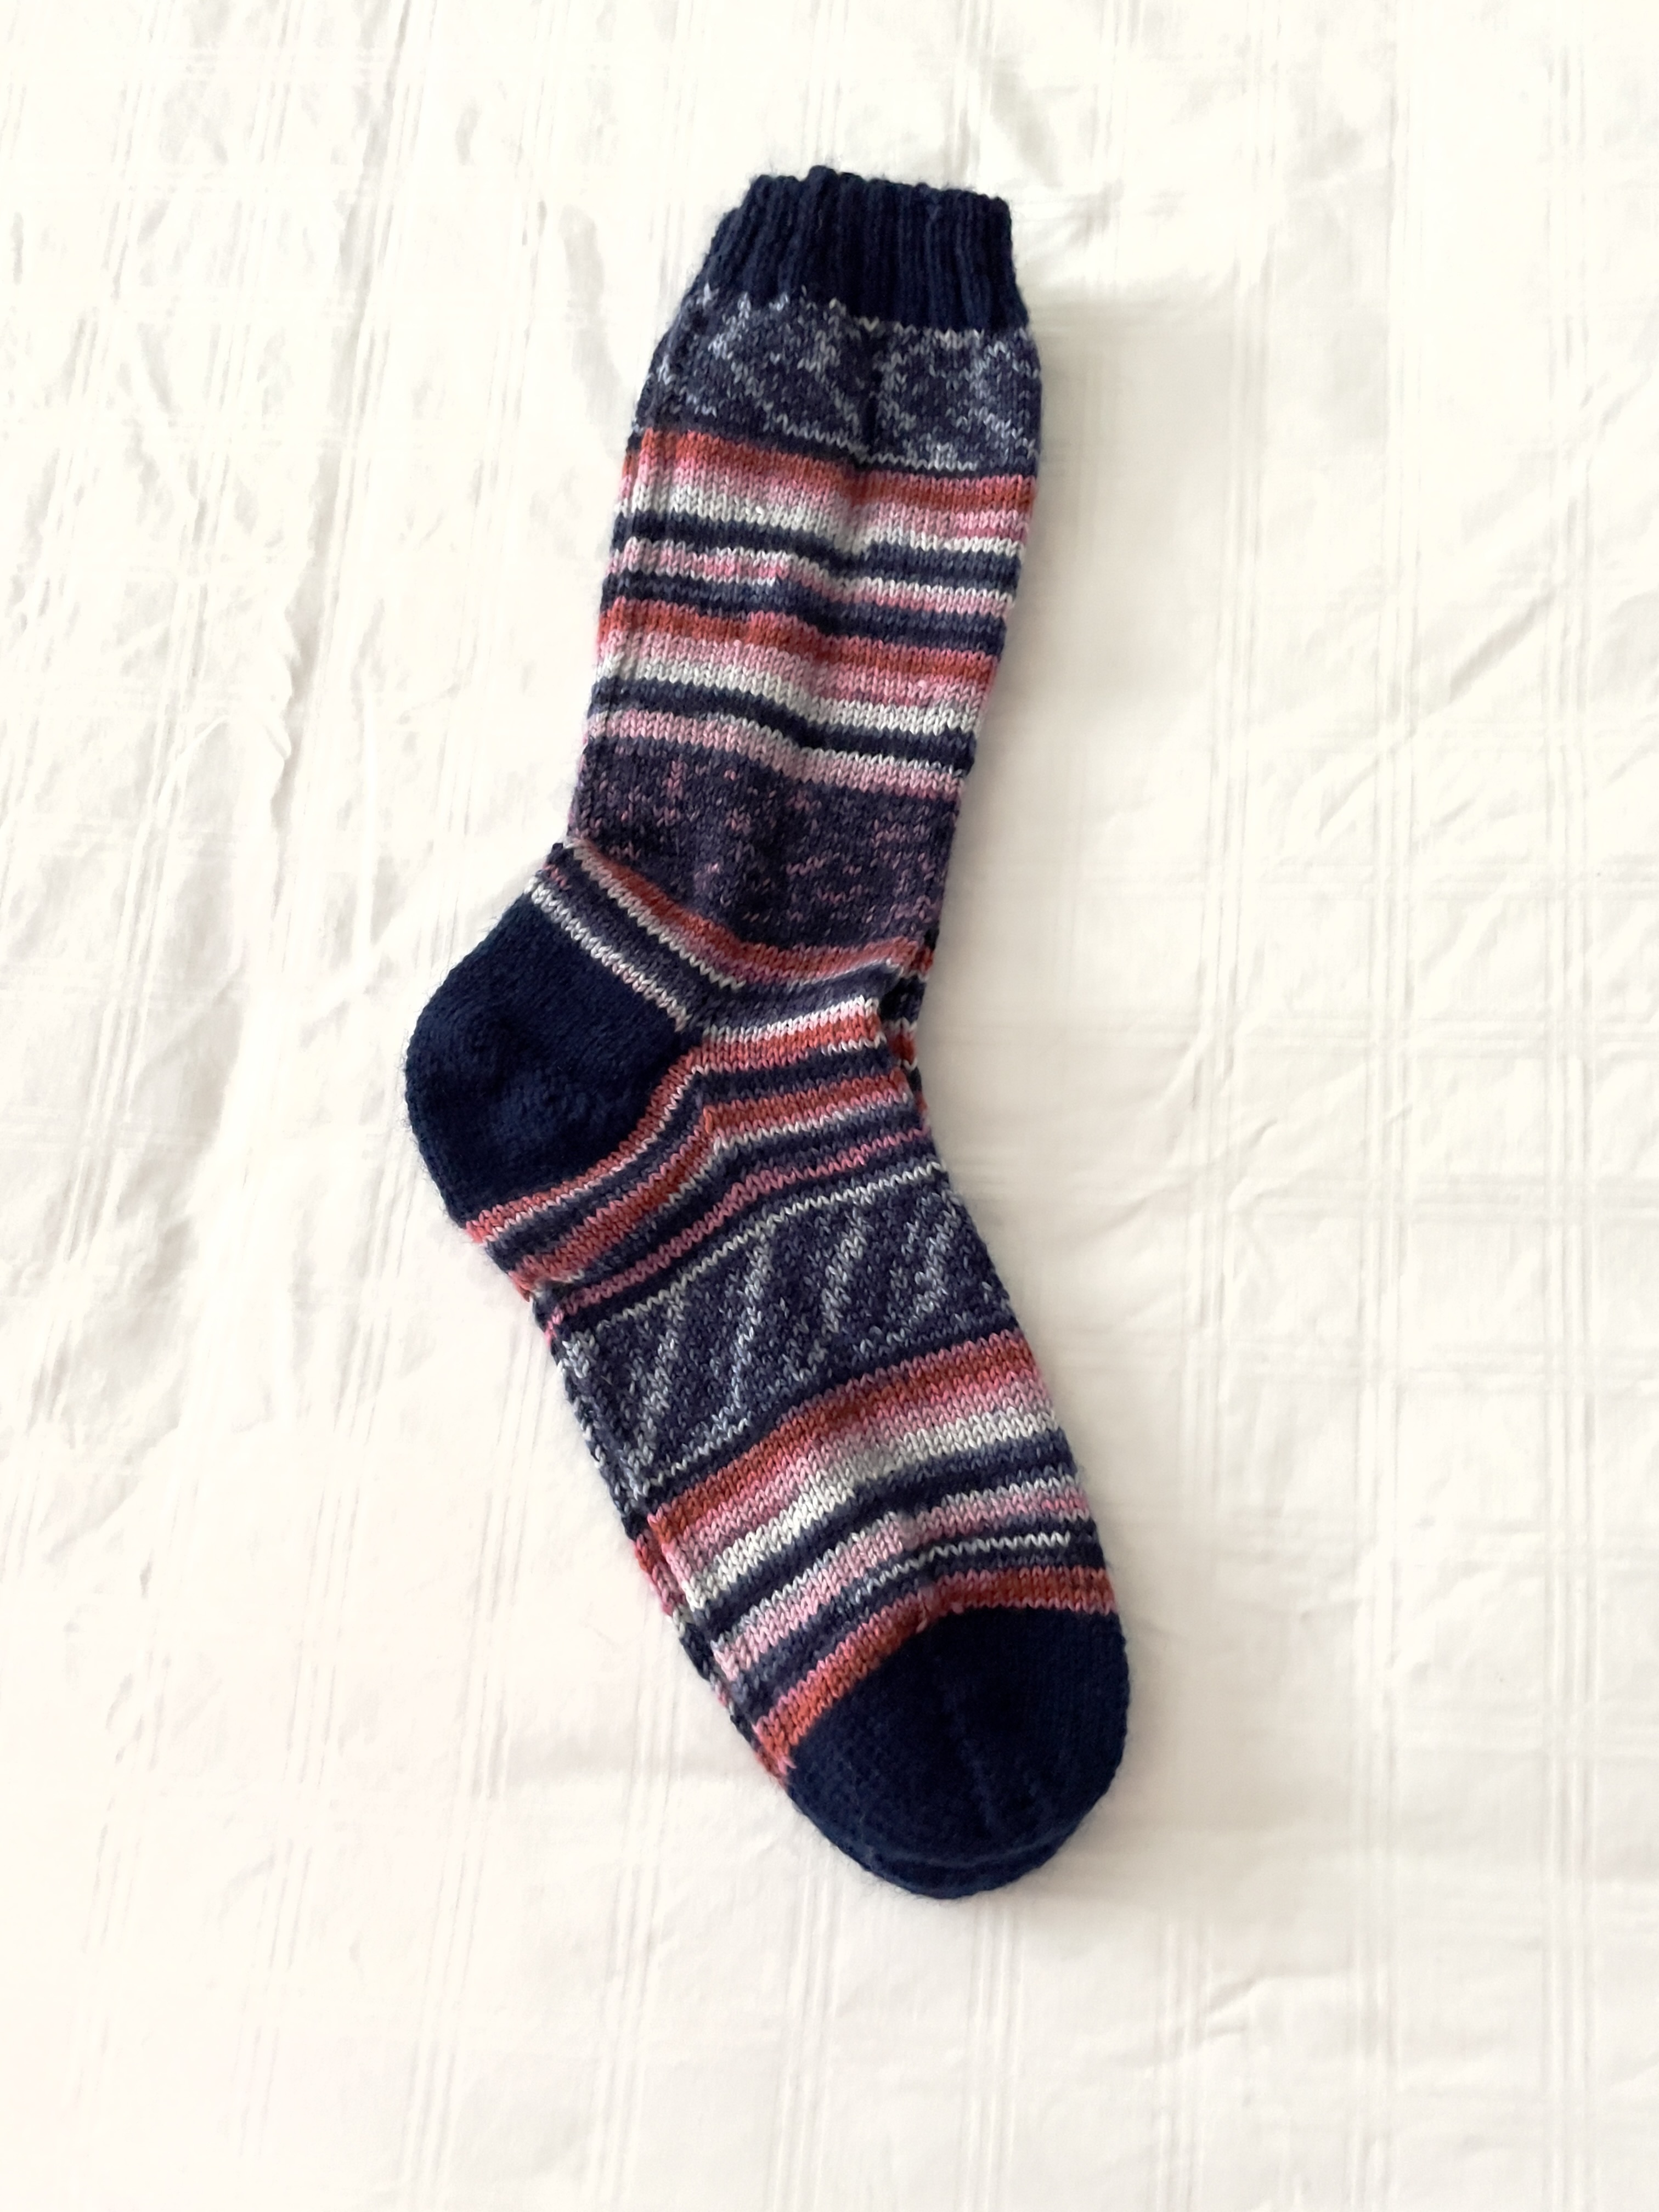
I haven’t done a lot of sewing in the last weeks but I’m still knitting in the evening. Finished these socks two nights ago. I chose the yarn because I thought the contrasts were interesting. The pattern change kept me knitting – with some yarns it’s boring – but in this case it was “I’ll just knit another few rows…”.
These socks will go into the stash – I do have plenty of blue and green socks in my drawer that I don’t need to add these to my collection.
The new pair I started is going to be predominantly yellow – I haven’t knit any yellow socks in a while.
I’m always on the lookout for interesting sock yarn. From time to time the KnitPicks catalogue has shown up at my door. I bought four skeins of the “Static” sock yarn. This one – “Allsorts” has produced an interesting sock. the pattern repeat is very long – it’s deceptive with the second colour block being navy/pink whereas the first one was navy/white.
I have a couple of wound skeins of this yarn still to be made up. I like the feel of it, smooth, slightly finer than some sock weight yarns. Nice colours.
A week ago someone mentioned Wordle to me – I hadn’t come across it on my own. In spite of my reasonable size vocabulary, I’m not great at crossword puzzles. I don’t seem to have unassociated words floating around in my head. I have lots of words in meaning units, but I can’t easily just pull out a word based on an ambiguous clue.
So I was skeptical about Wordle. Nevertheless I gave it a try.
My first go was a disaster – couldn’t even find out how to submit a word! Finally, I discovered the “ENTER” button below the keyboard. Next I discovered I couldn’t think of 5-letter words. Useless. So I did a bit of online searching and came up with some useful tips and handy word lists to start the game.
Screenshot Showing Game Opening (Including Enter Button)
I quickly came across the “opening word” strategy – try to cover as many vowels as possible in a single word – two good words: AUDIO, and ADIEU – you’re almost certain to get at least one vowel, occasionally two. The vowels are likely in the wrong location but you’re on your way. There are a bunch of opening word selections – here’s one with some helpful starting words.
Strategy two: high frequency consonants and consonant clusters. I had to google for lists of 5-letter words with various consonant and vowel combinations – they just wouldn’t pop into my head. Once I had some lists in front of me I started coming up with words on my own. I now have lists of 3-vowel words, 2 vowel words, words using S, L, T, R, N, M, P, H – some of the most commonly used consonants. Then there are consonant clusters: CL, CR, DR, FL, FR, GL, GR, ST, STR, WR, – I’ve probably missed a few here, but you get the drift.
I read somewhere in the last day or two, don’t waste time on a final S – there seem to be no plural words so save your S for other positions in the word. Also, there can be double letters – both consonants and vowels – that can be tricky.
With my word lists at hand, I’m getting better at the game – I’ve even managed to solve it several times in 6 words, a few times in 4 words. Today’s word HUMOR I missed altogether (my 6th word ROUGH had 4 letters R, O, U, H all in the wrong location – I would never have thought of HUMOR because my spelling for the word is HUMOUR! This is an American English game.
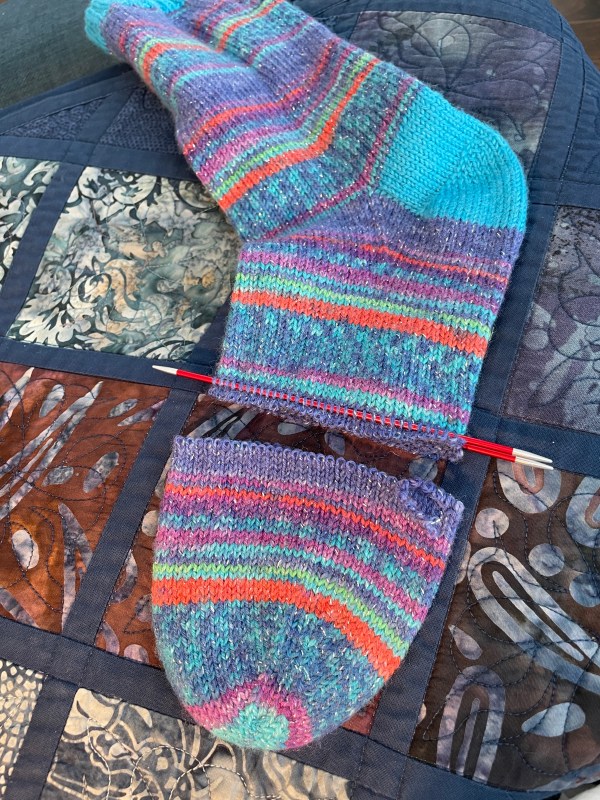
I have no idea why but lately the socks I’ve been knitting have turned out to be a bit too long to fit comfortably into my shoes – the foot is just a bit too long so it bunches at the instep or the heel pulls up instead of sitting comfortably in place. As a result I’ve stopped wearing those socks!
I haven’t changed the needles I’m using, the yarn is sock weight, my tension hasn’t changed noticeably, I’m knitting the same number of rows for the gusset, the foot and the toe. For some reason, however, the sock feet are coming out that bit longer.
The other day I decided either to give those socks away (I put three pairs in the give-away basket – they’re practically unworn) or to shorten the foot. I decided to give shortening the foot a try.
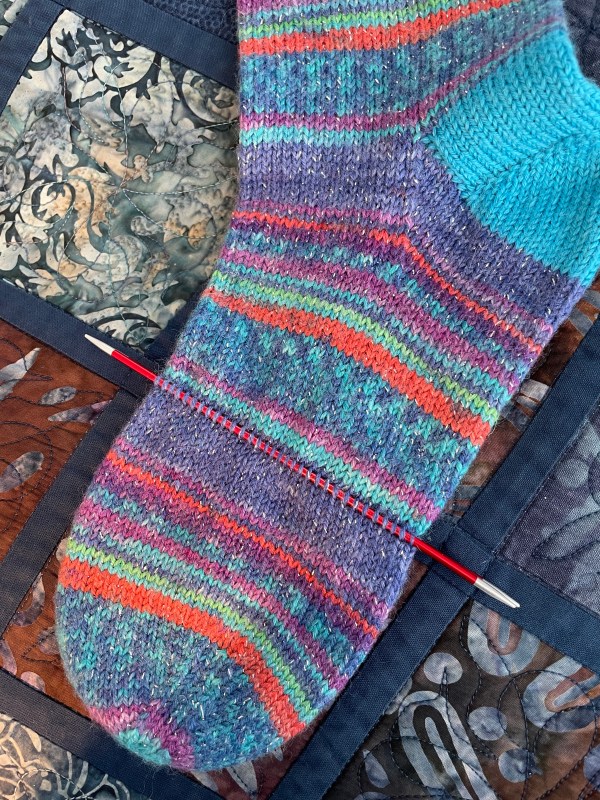
There are two possible ways of doing that – open the toe seam and unravel the toe shaping, then remove 4 rows and reknit the toe; or cut the foot, unravel a couple of rows each side then graft the two parts together using a 3-needle cast-off (also known as the Kitchener Stitch).
I decided to try cutting and grafting.
1. Pick up stitches2. Cut thread and begin unravelling3. Separate toe and foot4. Pick up toe stitches5. Begin grafting6. One half graftedStages in shortening a sock foot
Let me describe how I do this:
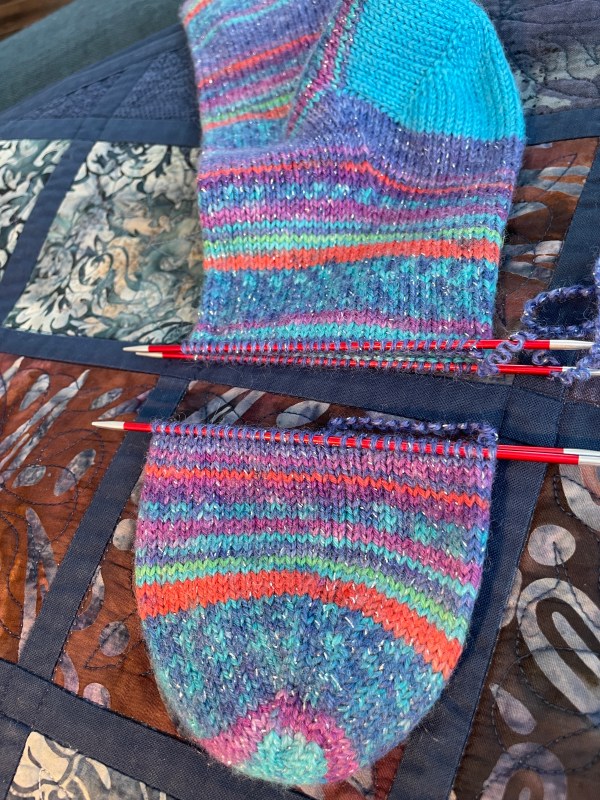
I start by picking up 32 stitches on one side of the foot and the remaining 32 stitches on the second side (being very careful to stay in the same row). I do this across the sides of the foot so I can begin and end the grafting process on the underside of the sock.
Once I have all 64 stitches on two needles I cut a stitch on the instep, and start unravelling that one row one stitch at a time.
I continue unravelling the selected row until I am able to separate the toe and the rest of the sock.
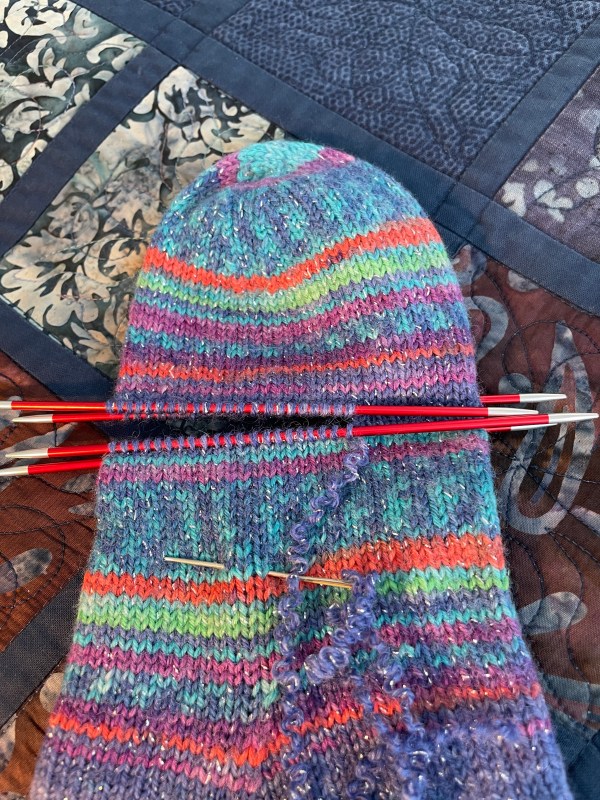
I pick up stitches 2-3 rows from the raw knit edge on both sides of the toe. I unravel back to the needles. Before going further, I shorten the loose end, and weave it in so the first stitch remains taut and the yarn tail is out of my way.
I carefully start grafting the toe to the sock using the Kitchener stitch, making sure I keep the grafting yarn loose. I work about half way across one side, adjust the tension of the grafting stitches; then carry on to the end of that pair of needles (and adjust the grafted stitch tension again).
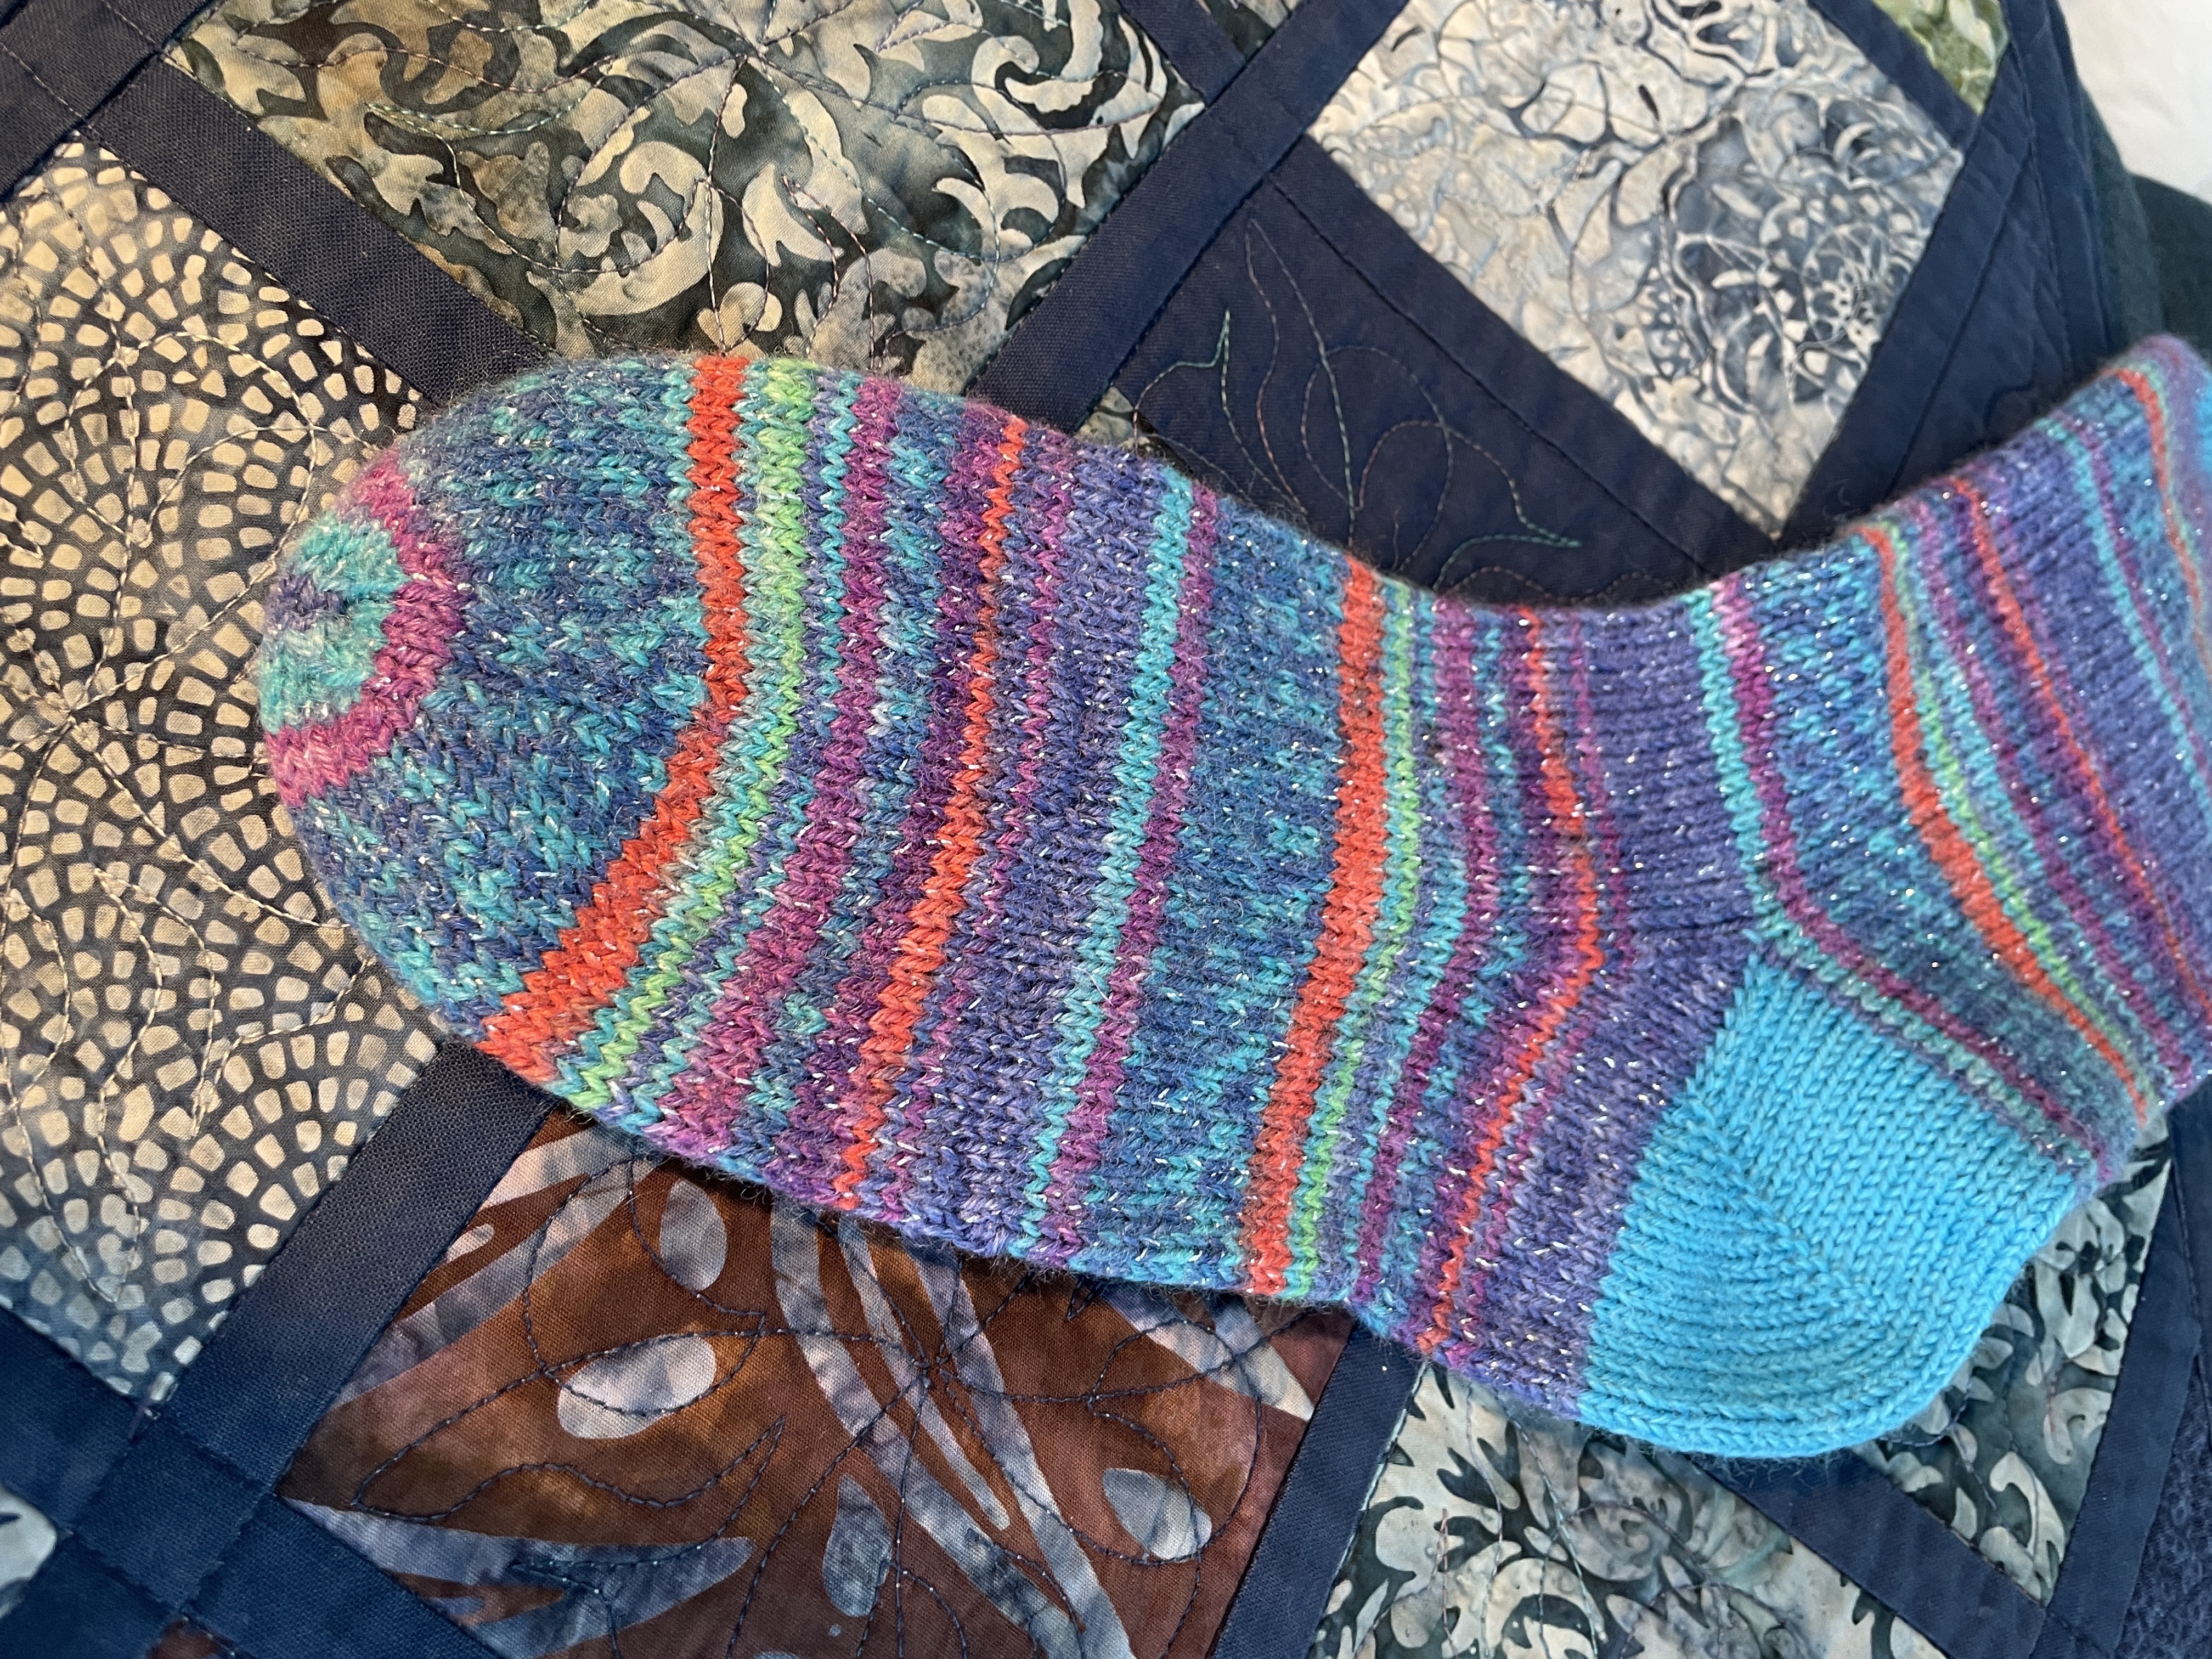
I continue on the second side to finish the graft, adjusting the stitch tension as I go along. I anchor the grafting yarn to the first stitches of the toe and the foot, trim the yarn and weave the loose end in.
I have a finished, shorter, sock!
6. Grafting the second half7. The finished graft
It takes me just under an hour to shorten one sock. Shortening the sock by unravelling the toe, taking out the 4 rows, and reknitting the toe would take at least 2 hours/sock. I’m ahead of the game by using the grafting method.
I’m now on my 4th pair.
To avoid having to do this in future, I’ve been knitting 4 fewer rows in the foot from the end of the gusset to the beginning of the toe-ing off. Although nobody has complained the gifted socks are too long, I know they must be because they’re too long for my size 8 foot! The socks I’m now knitting are 4 rows shorter and should better fit people who wear a size 7 1/2 to 8 shoe. The longer footed socks in my give away stash will be reserved for people who wear size 8 1/2-9.
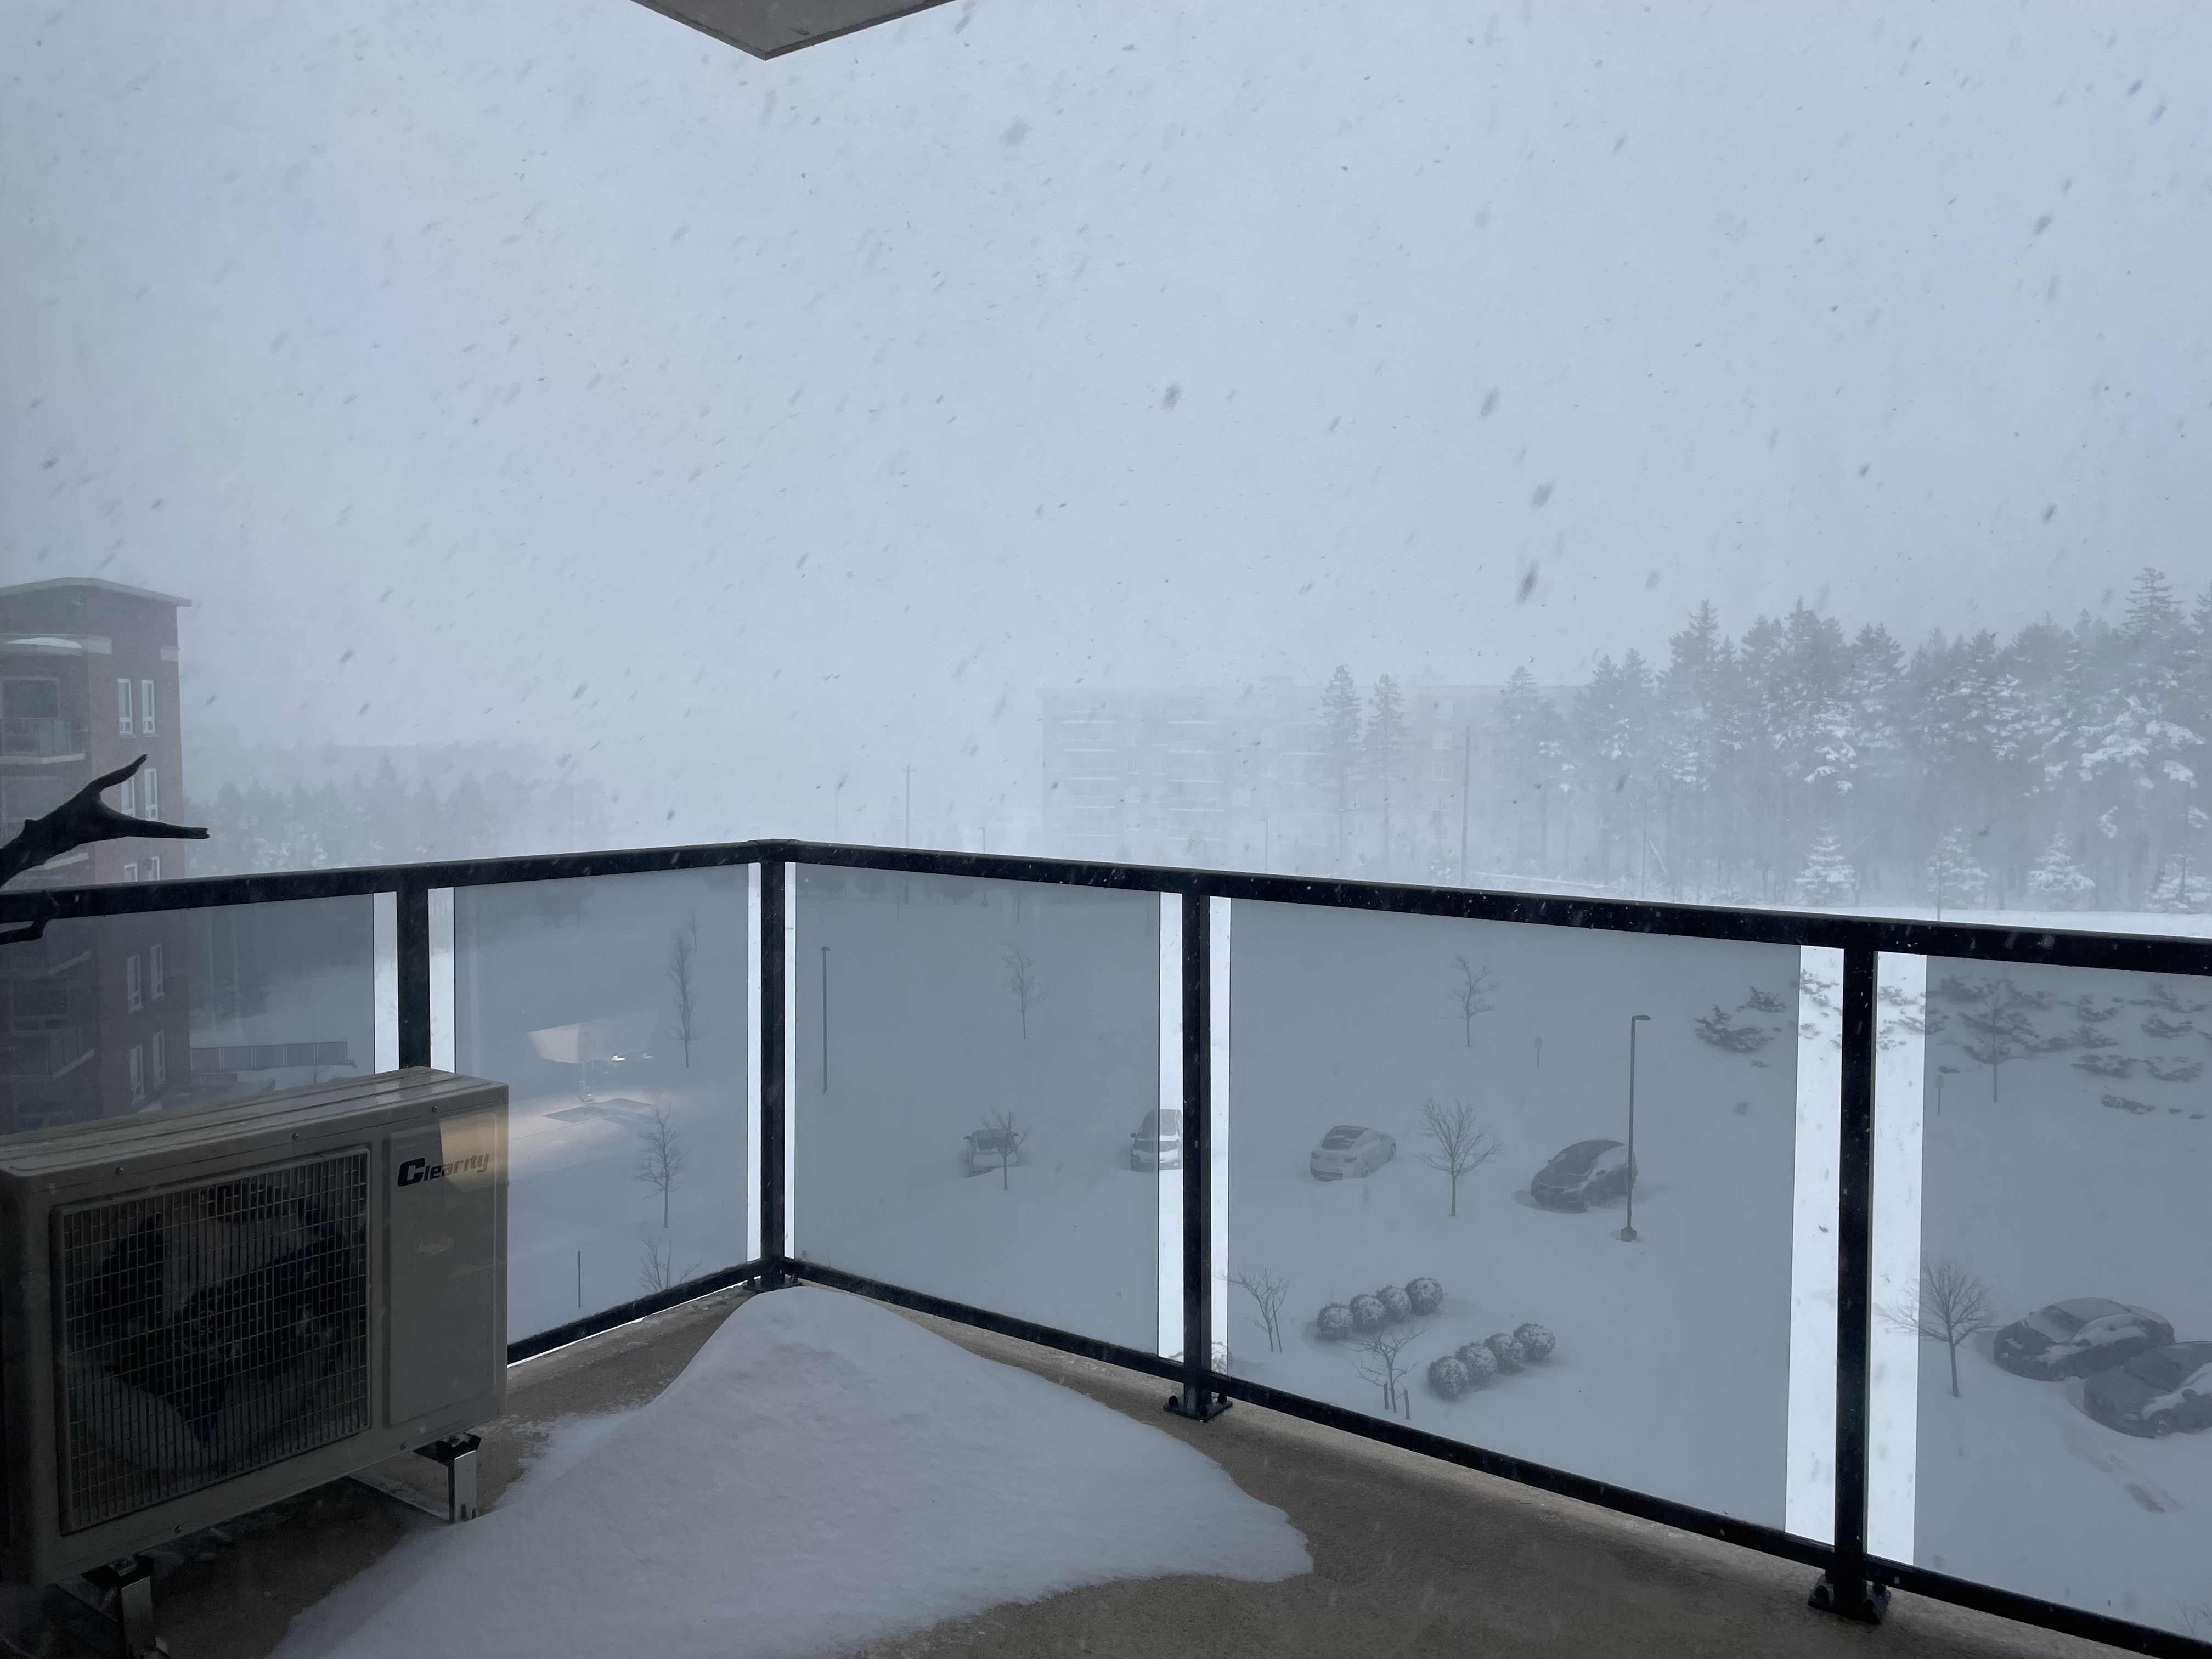
It’s been blizzarding here all day – for much of the morning it was a white-out!
White-Out!
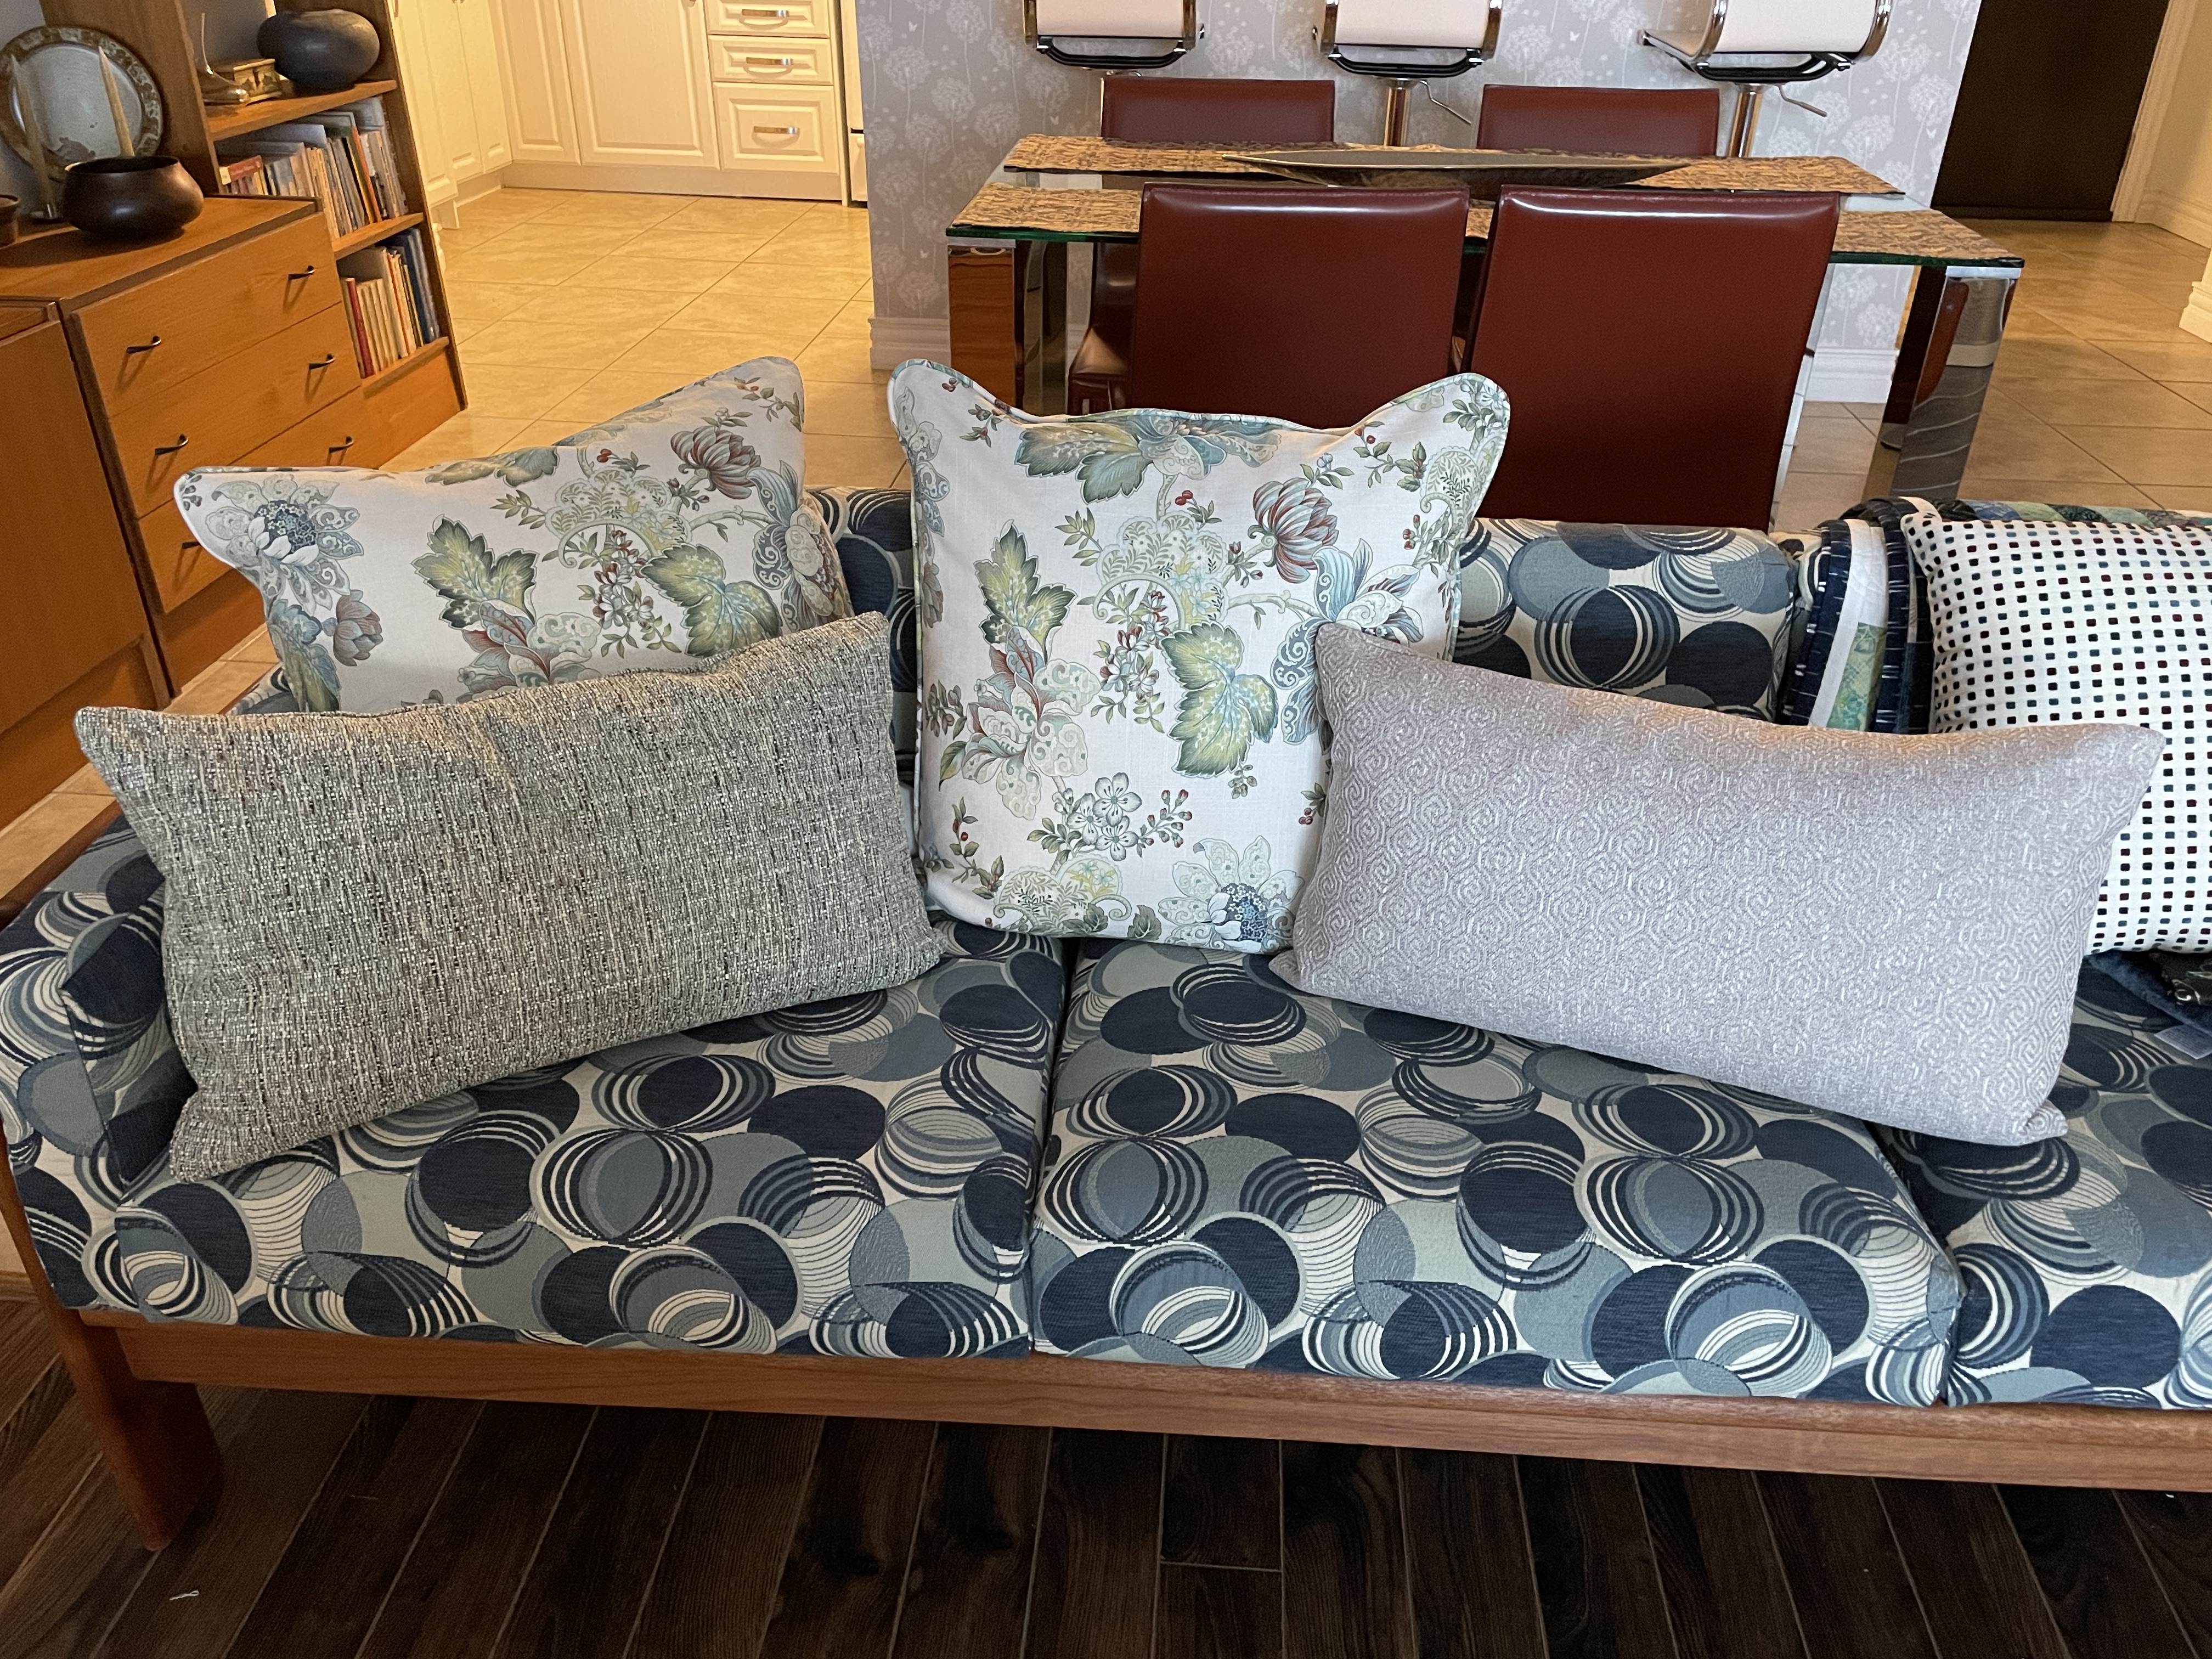
Didn’t matter – I was sewing. Last weekend I agreed to make sofa cushions for a friend – her designer had specified “piping” on several of the pillows. Creating the piping is no big deal, but applying it – that’s another matter. I trimmed the piping so I could align the outer edge with the outside of the pillow fabric but corners are tricky – I discovered it was a good idea to snip the corner and then 1/2″ on either side of that snip in order to bring the piping around the 90°. The second challenge involved joining the piping – I cheated on that on the two large square pillows, I just overlapped the piping and stitched it in place. Next came putting the zipper in against the piping edge on one side. Because the cushion will be sitting on that edge I did the best I could and have left it at that (I could hand stitch that opening closed but I’m guessing nobody but me will ever notice the zipper isn’t put in perfectly evenly).
Sofa Cushions
I’m happy with how the four pillows have turned out (the spotted pillow on the right belongs on my sofa!). They’ll look good on Heather’s new sofa.
She also has a hall bench that wanted a cushion – piped she decided, which makes construction quite a bit more difficult. It’s not just a matter of cutting out a top and bottom piece to fit the cushion form, but piping the top and bottom edges, along with inserting a zipper along the back side.
Bench CushionBack of Cushion
My bench is several inches shorter and wider but this cushion will fit Heather’s bench nicely and when it’s been sat on for a week, nobody will notice the imperfections that I can see. This time I took the time to butt the piping join – I did such a good job you can’t see where I joined the fabric/cord.
One pillow still to go. I don’t have the pillow form although I do have the fabric. This cushion needs to be done with a flange. There are several ways that can be done. I need to google for some instructions to make the job easier. I’ll make up the cushion cover – Heather will buy a queen size bed pillow and we’ll take it apart to make it fit the cover.