This Week’s Work

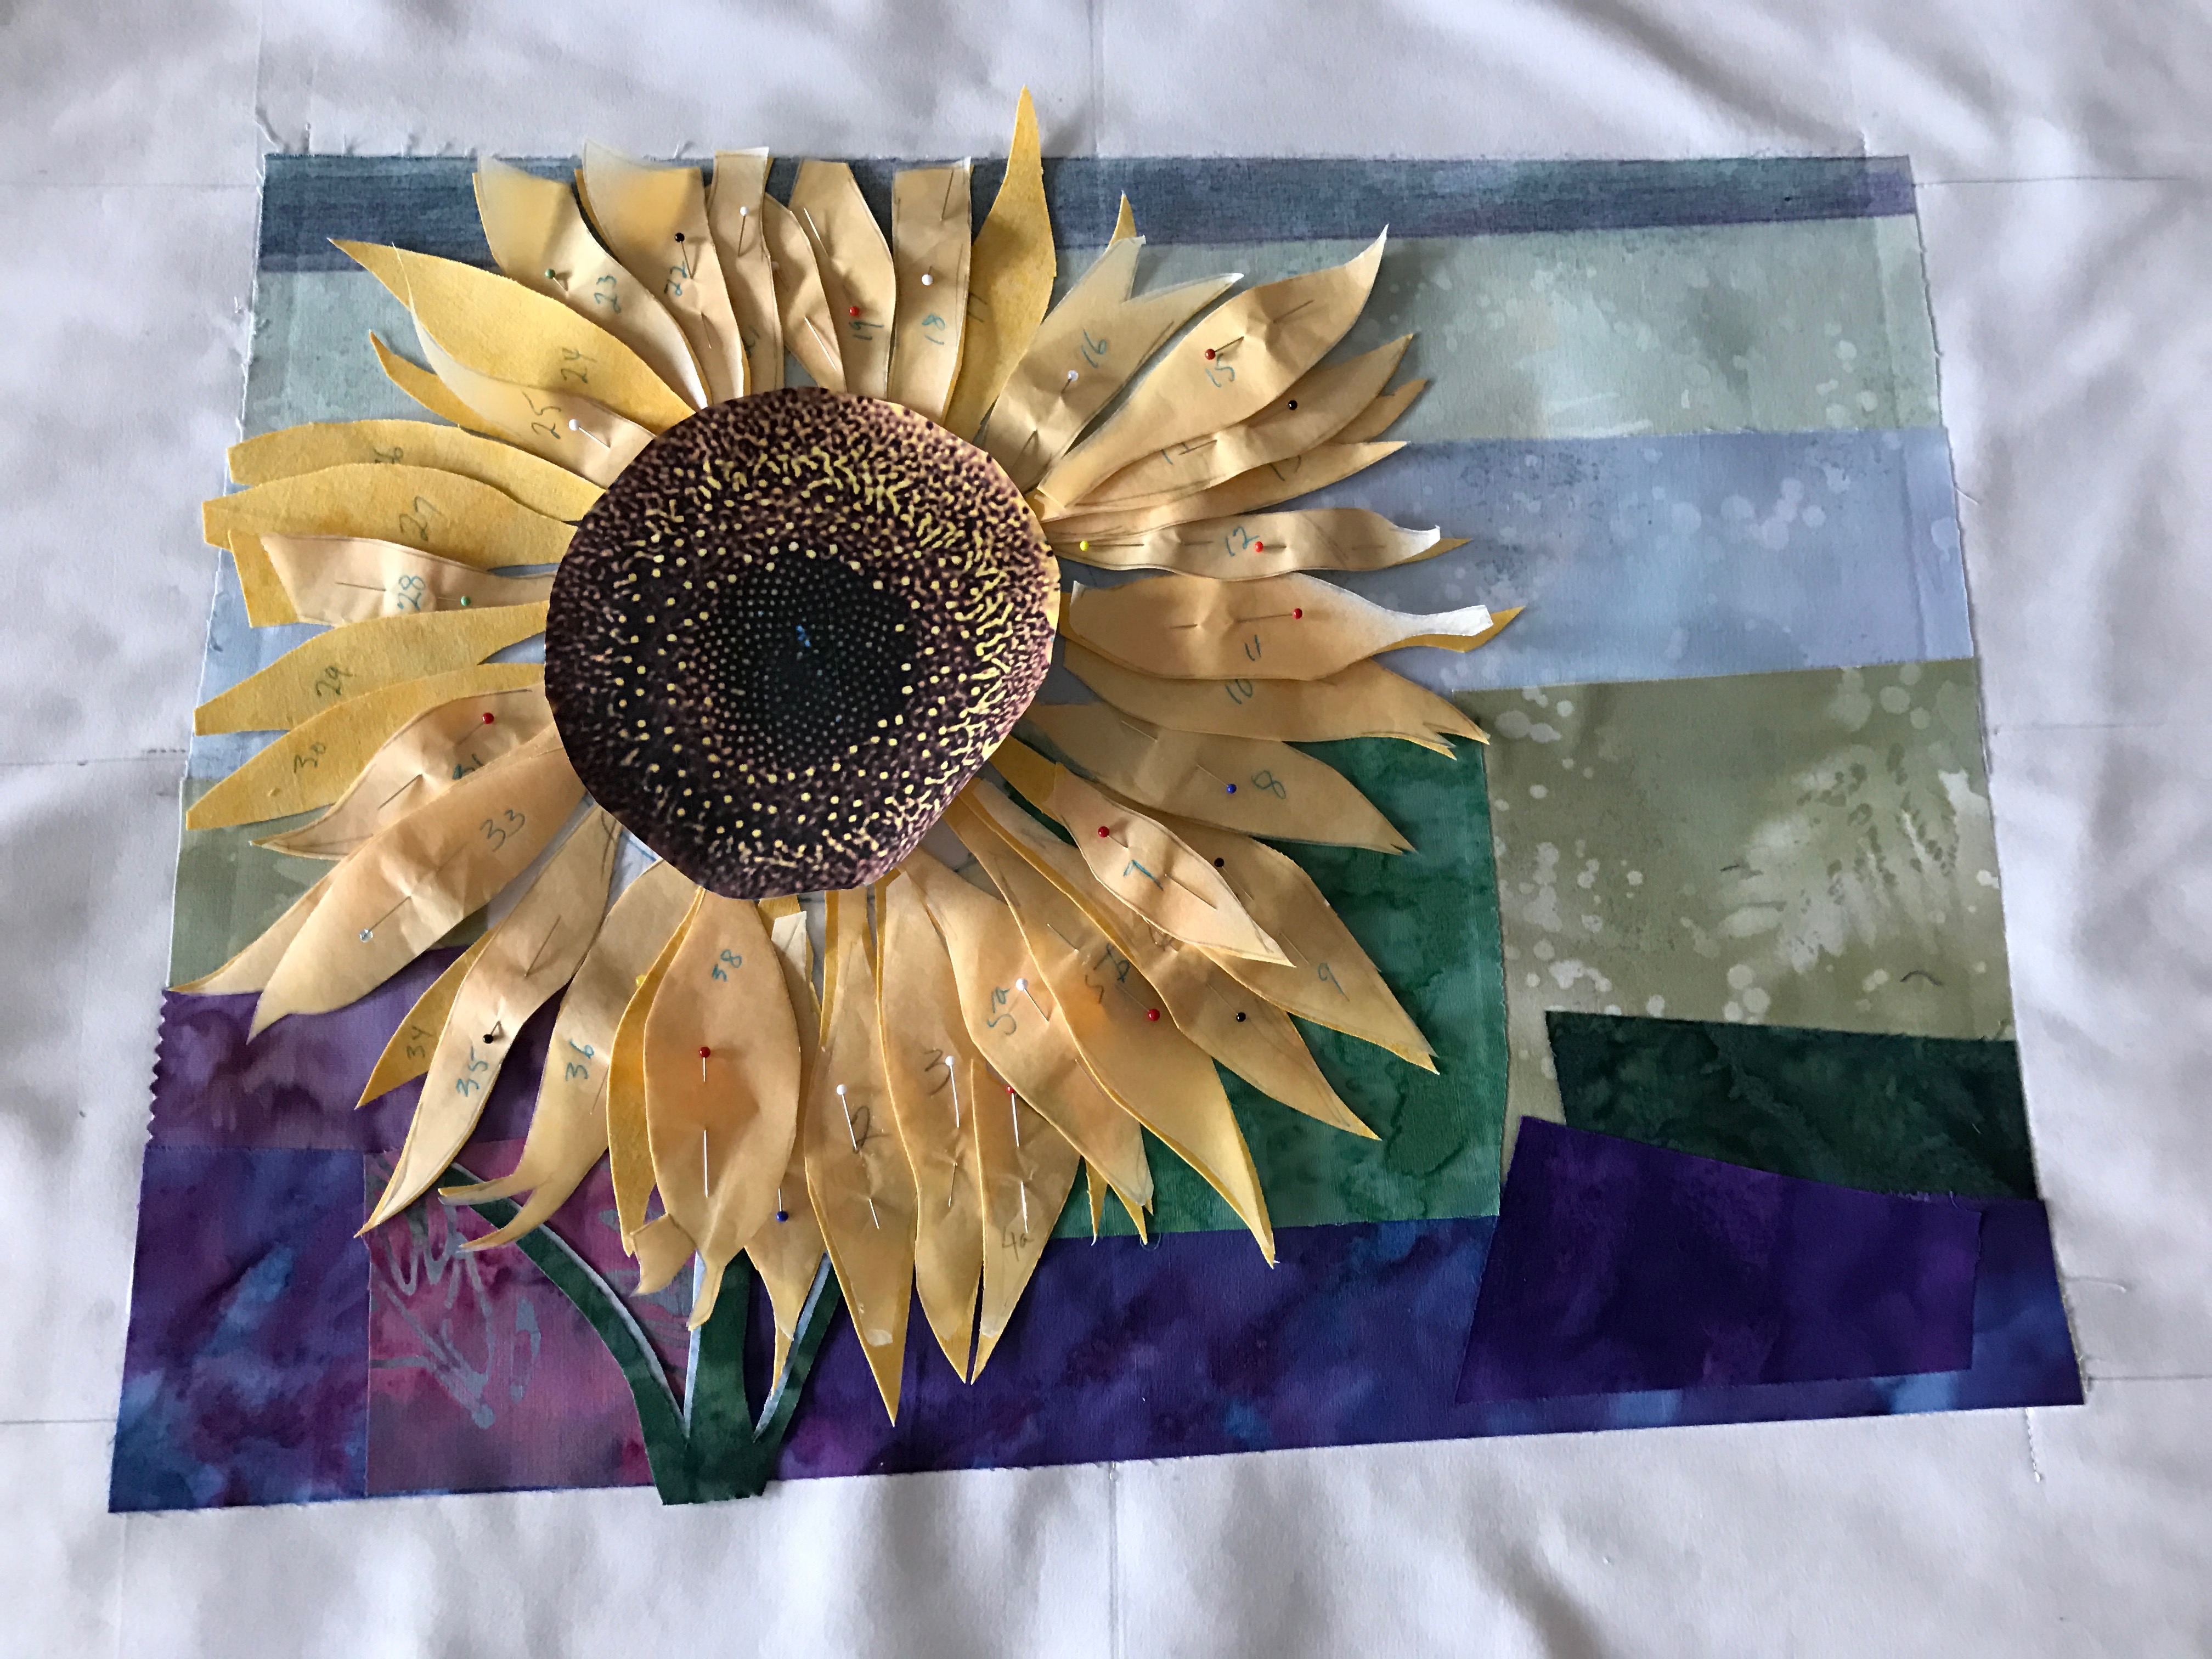
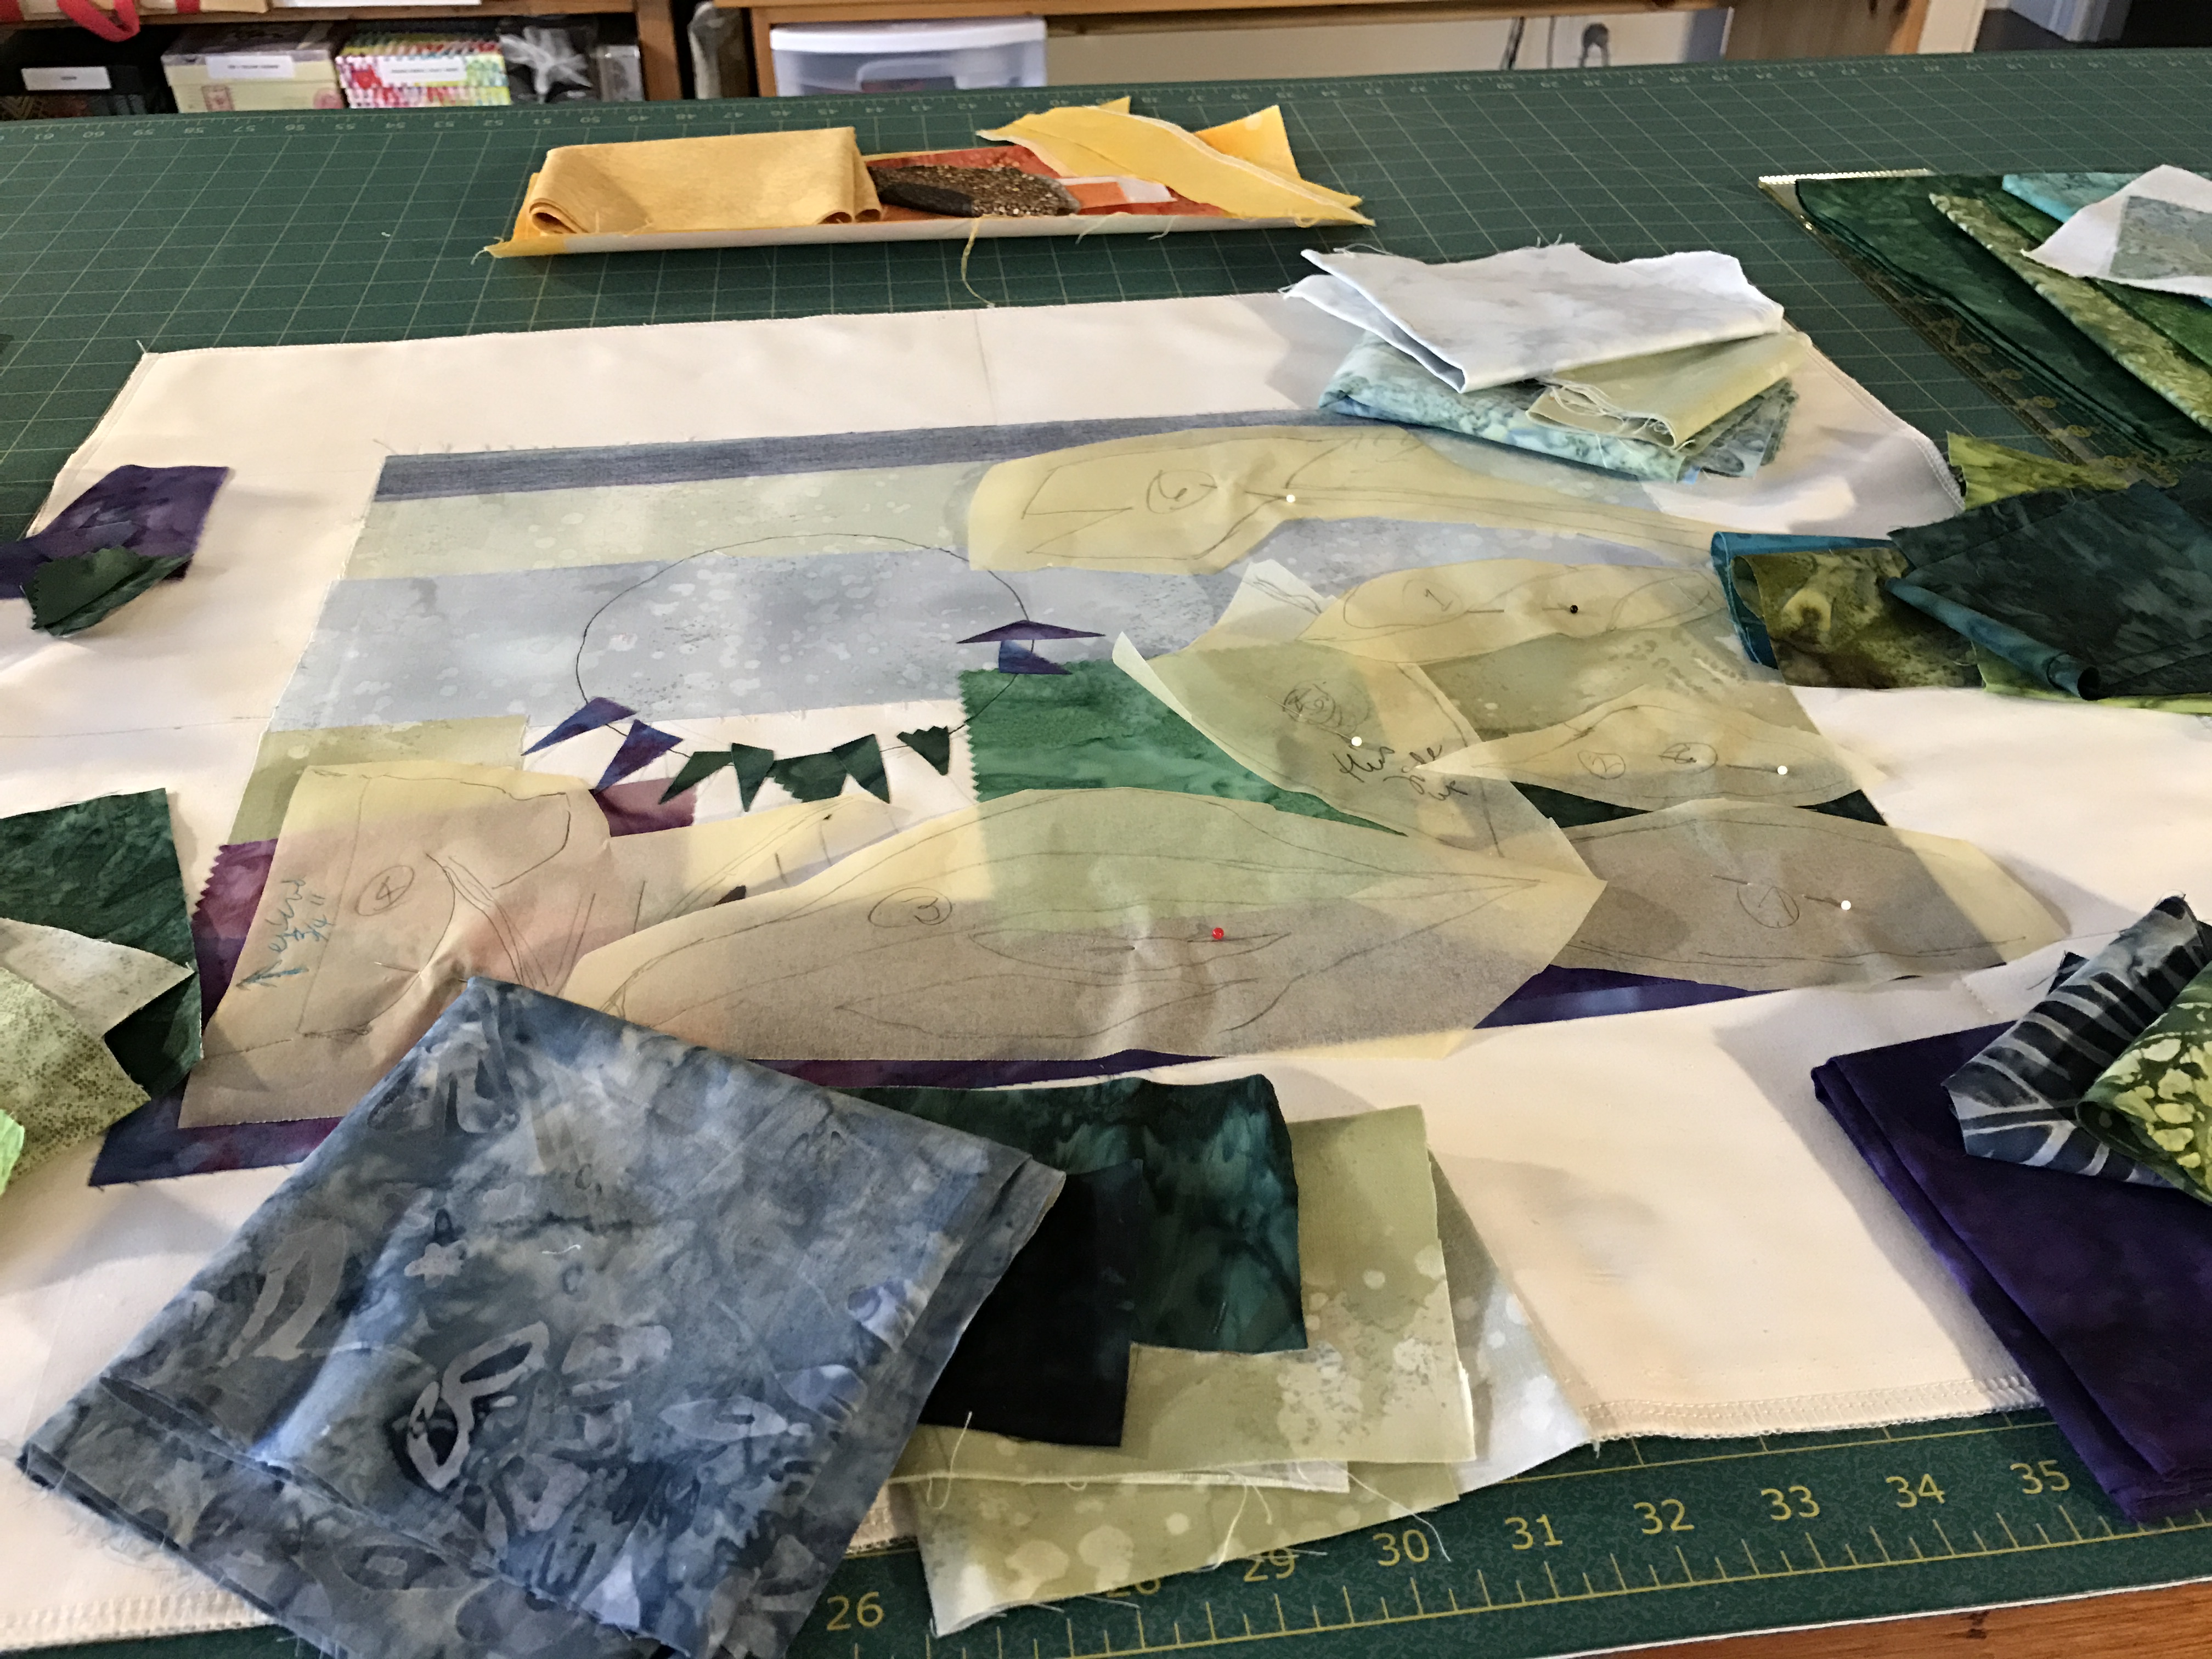
Tuesday is fast approaching and I’m trying to get the last demonstration pieces sorted out for the art/landscape class.

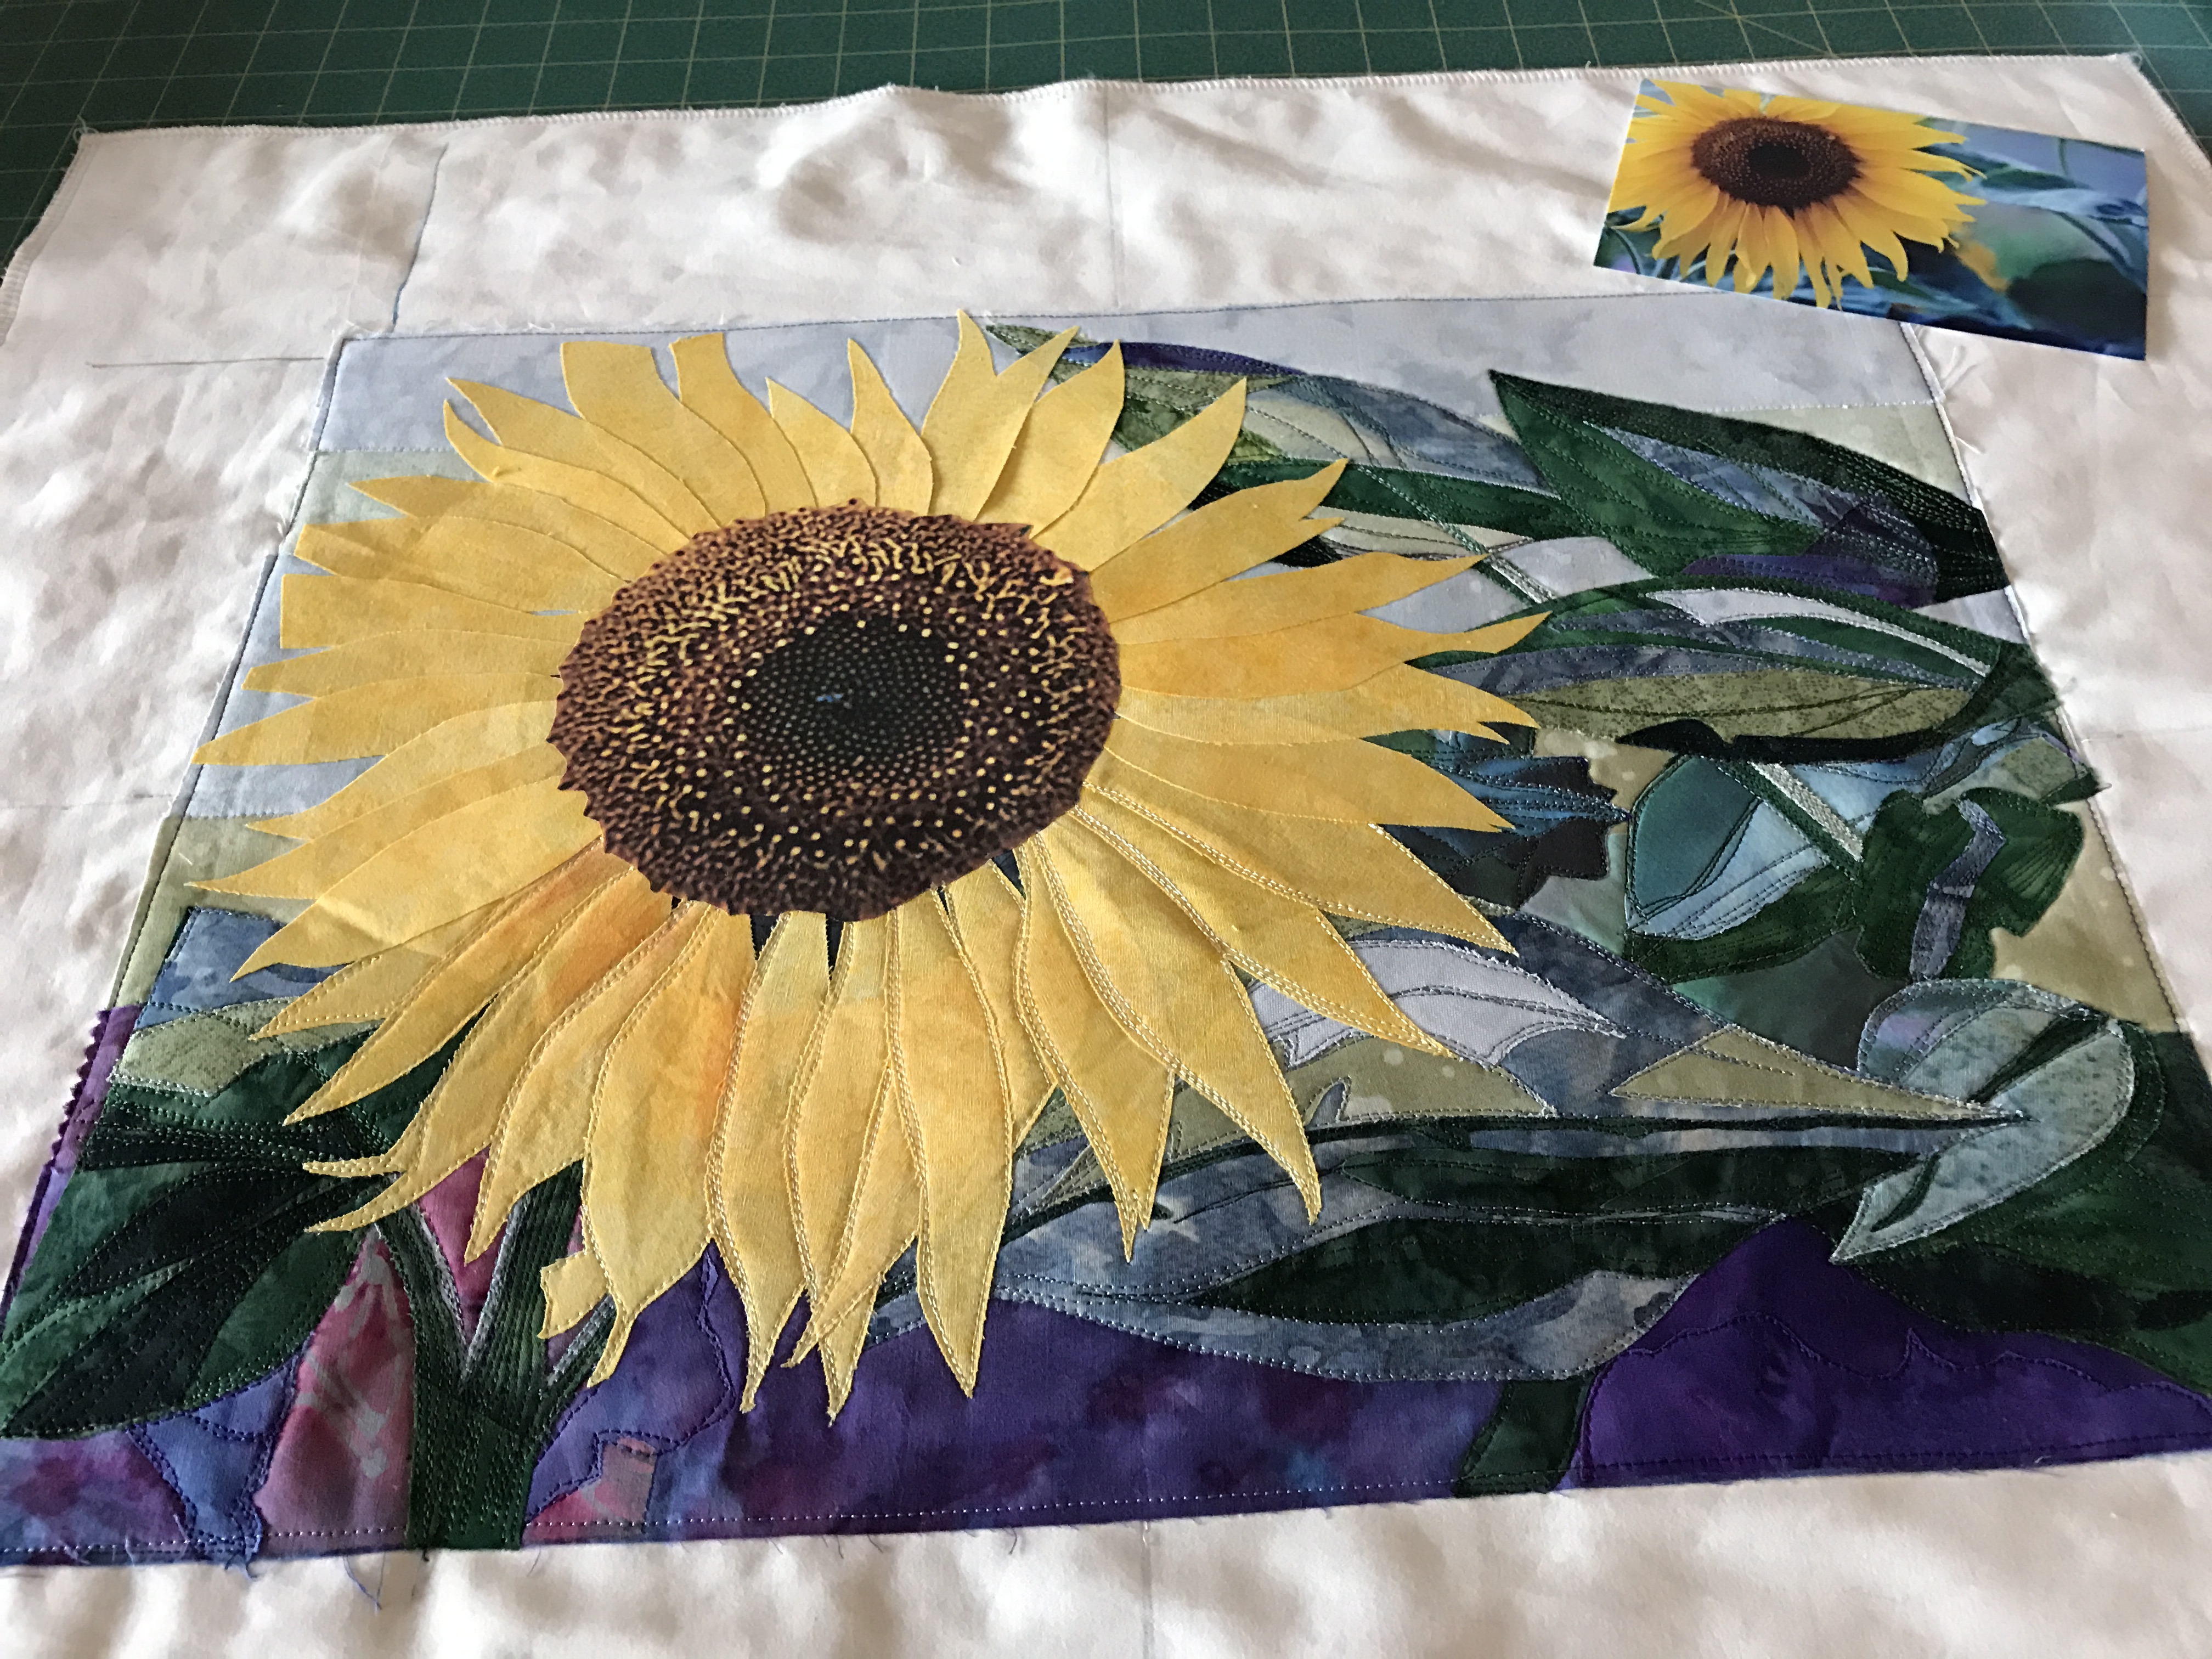
Taking the idea of the “Portrait” piece – assembled from a range of cutouts of skin-tone printed fabrics, I decided to see what I can create based on this “At The Beach” photo:

At The Beach

One of the “secrets” of successful textile art (whether primarily appliqué or thread  painting or a combination of both) is simplicity. The point isn’t to reproduce the detail of the photo but to abstract/simplify it enough that you have a clear background and a subject. In this case, I’m removing dad and the other people and the land on the opposite side of the lake. I just want the nude child and his tentative steps toward to the water:

At The Beach II

So far, I’ve laid down layers of beach sand, set up the water’s edge, and covered the top of the background with fabric for the water. I’m place holding the child with a paper cutout on which I’ve marked the colour blocks – I think I can create him with bits of five fabrics representing the gradations of colour on his body.

The next step is to do a LOT of thread painting to bring out the texture of the sand and to represent the wind on the water. Then I’ll work on putting the child together – I’ve already added fusible web to the back of my flesh-toned fabrics so once I have set up the template pieces, I’ll cut them out and fuse them together.

Finished dimensions of “At The Beach” will be 12″ x 9″ with a hidden binding and no borders/framing.

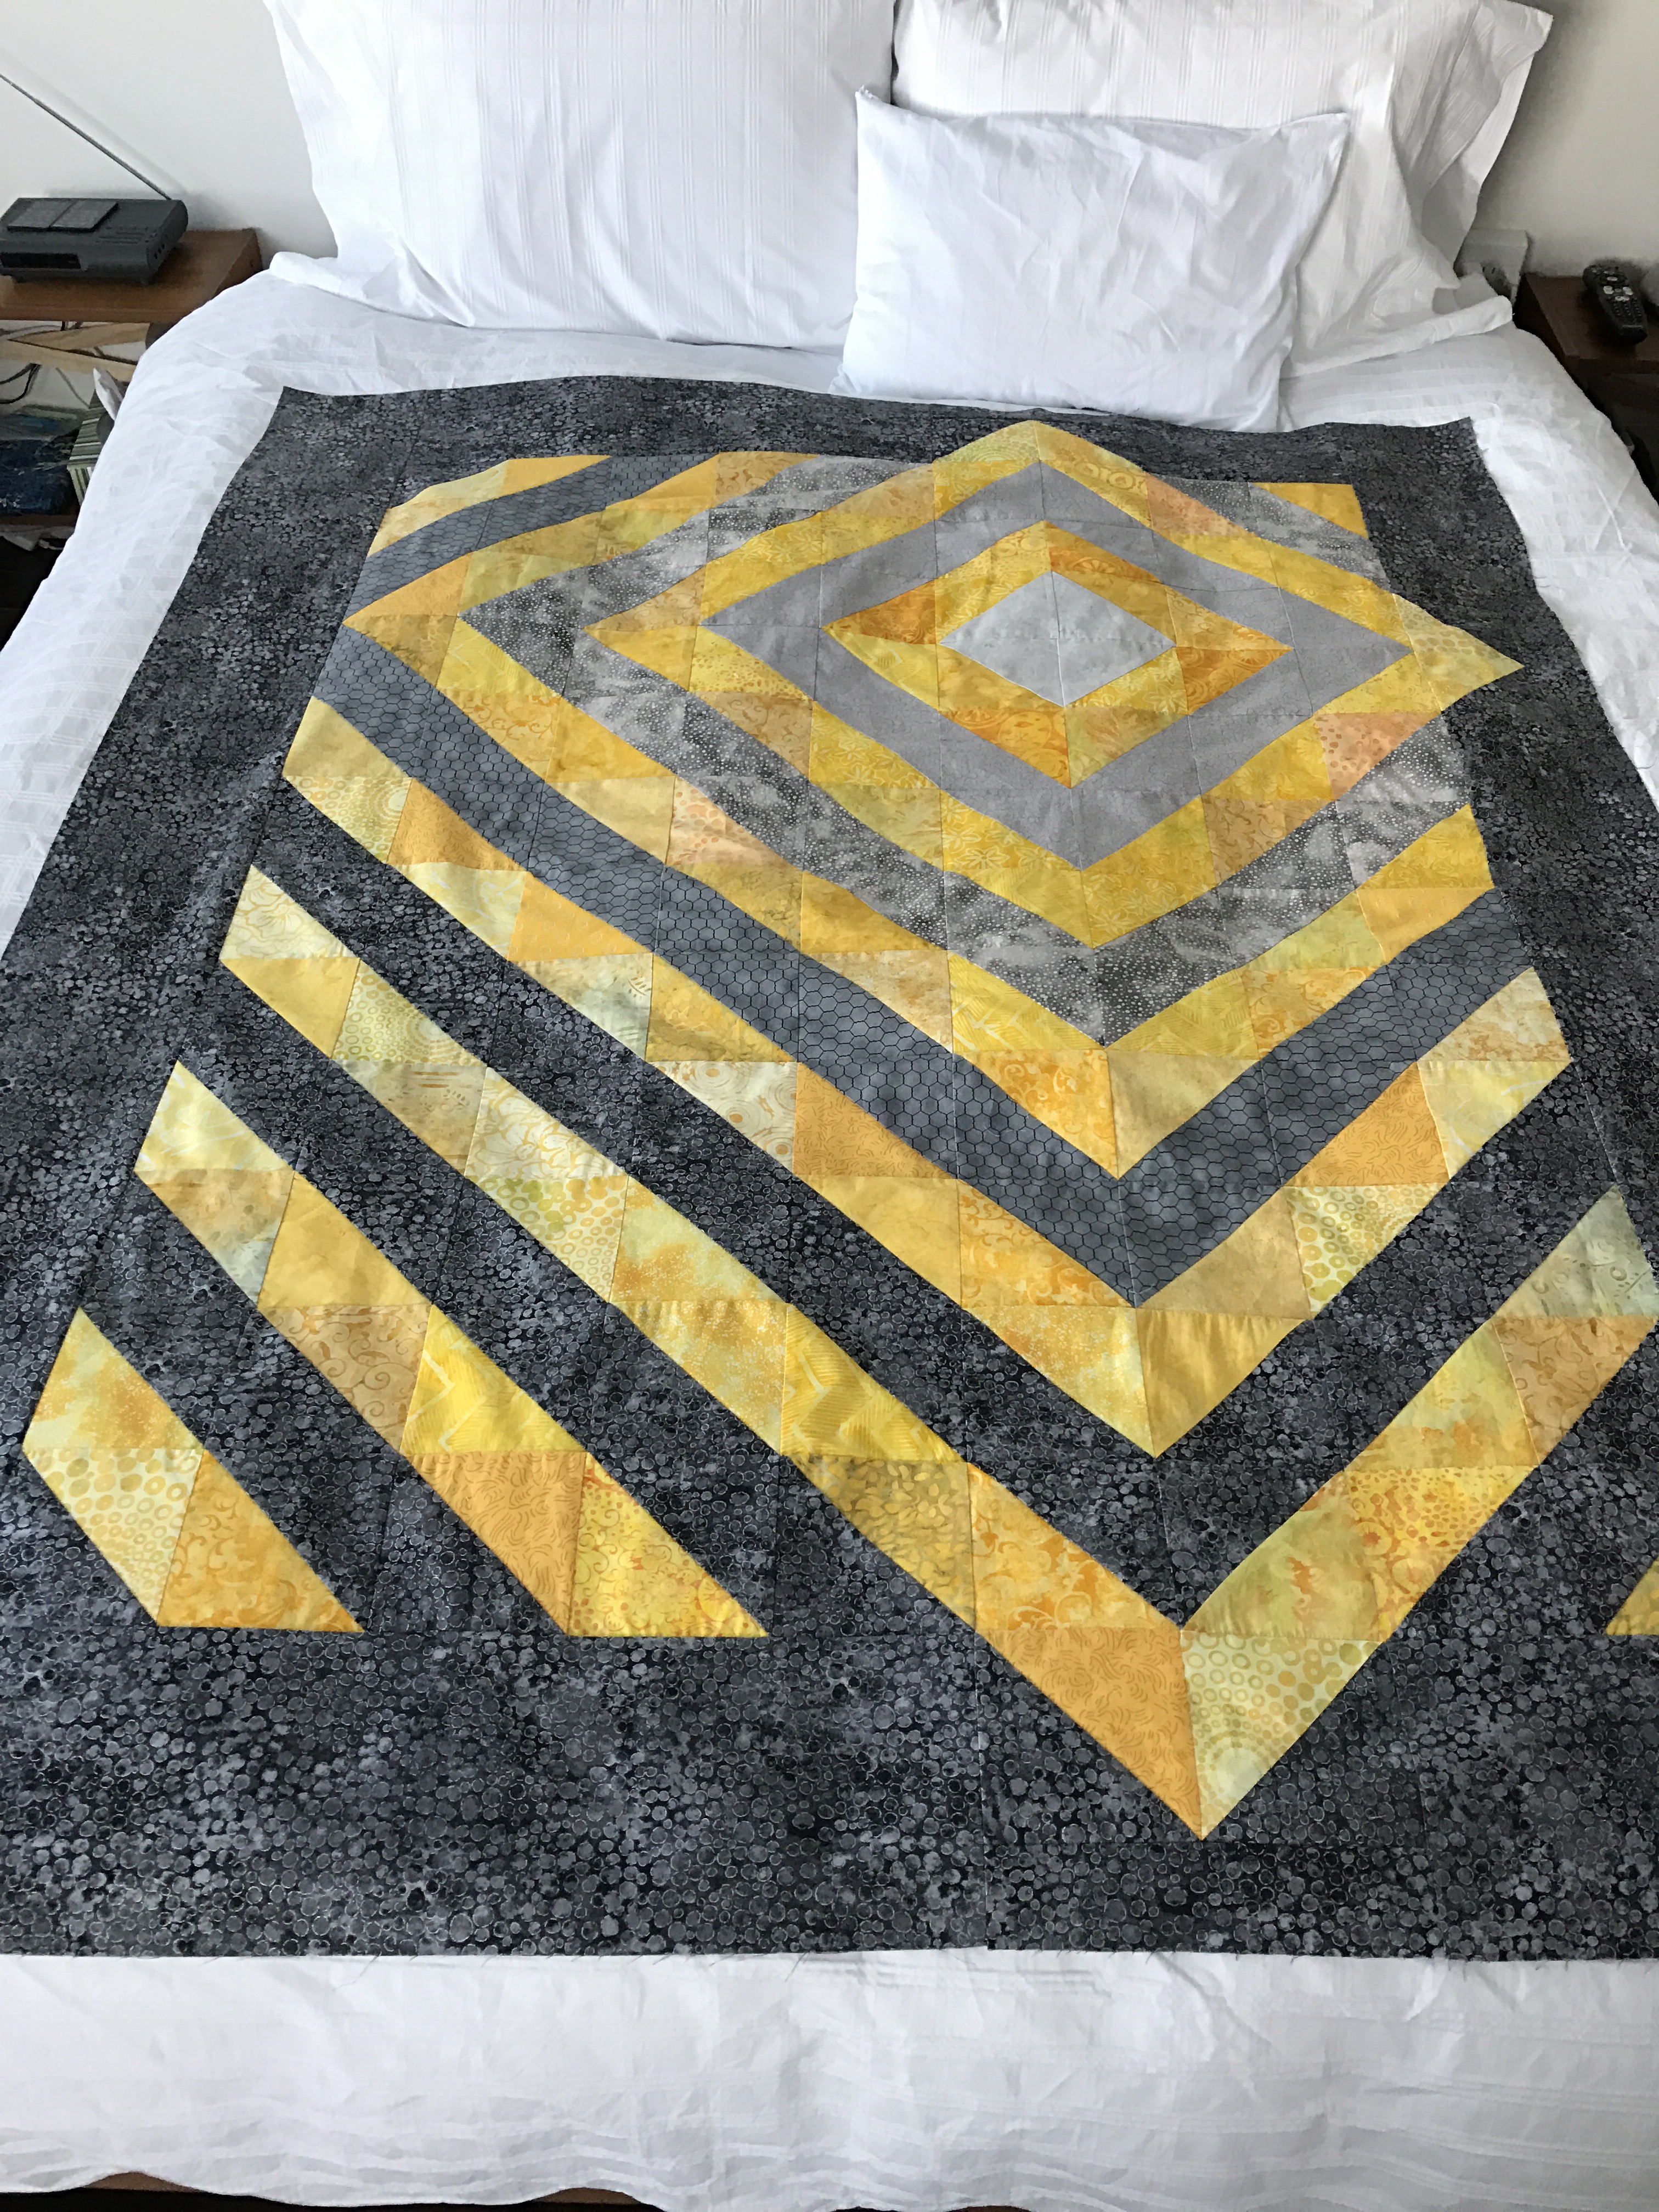
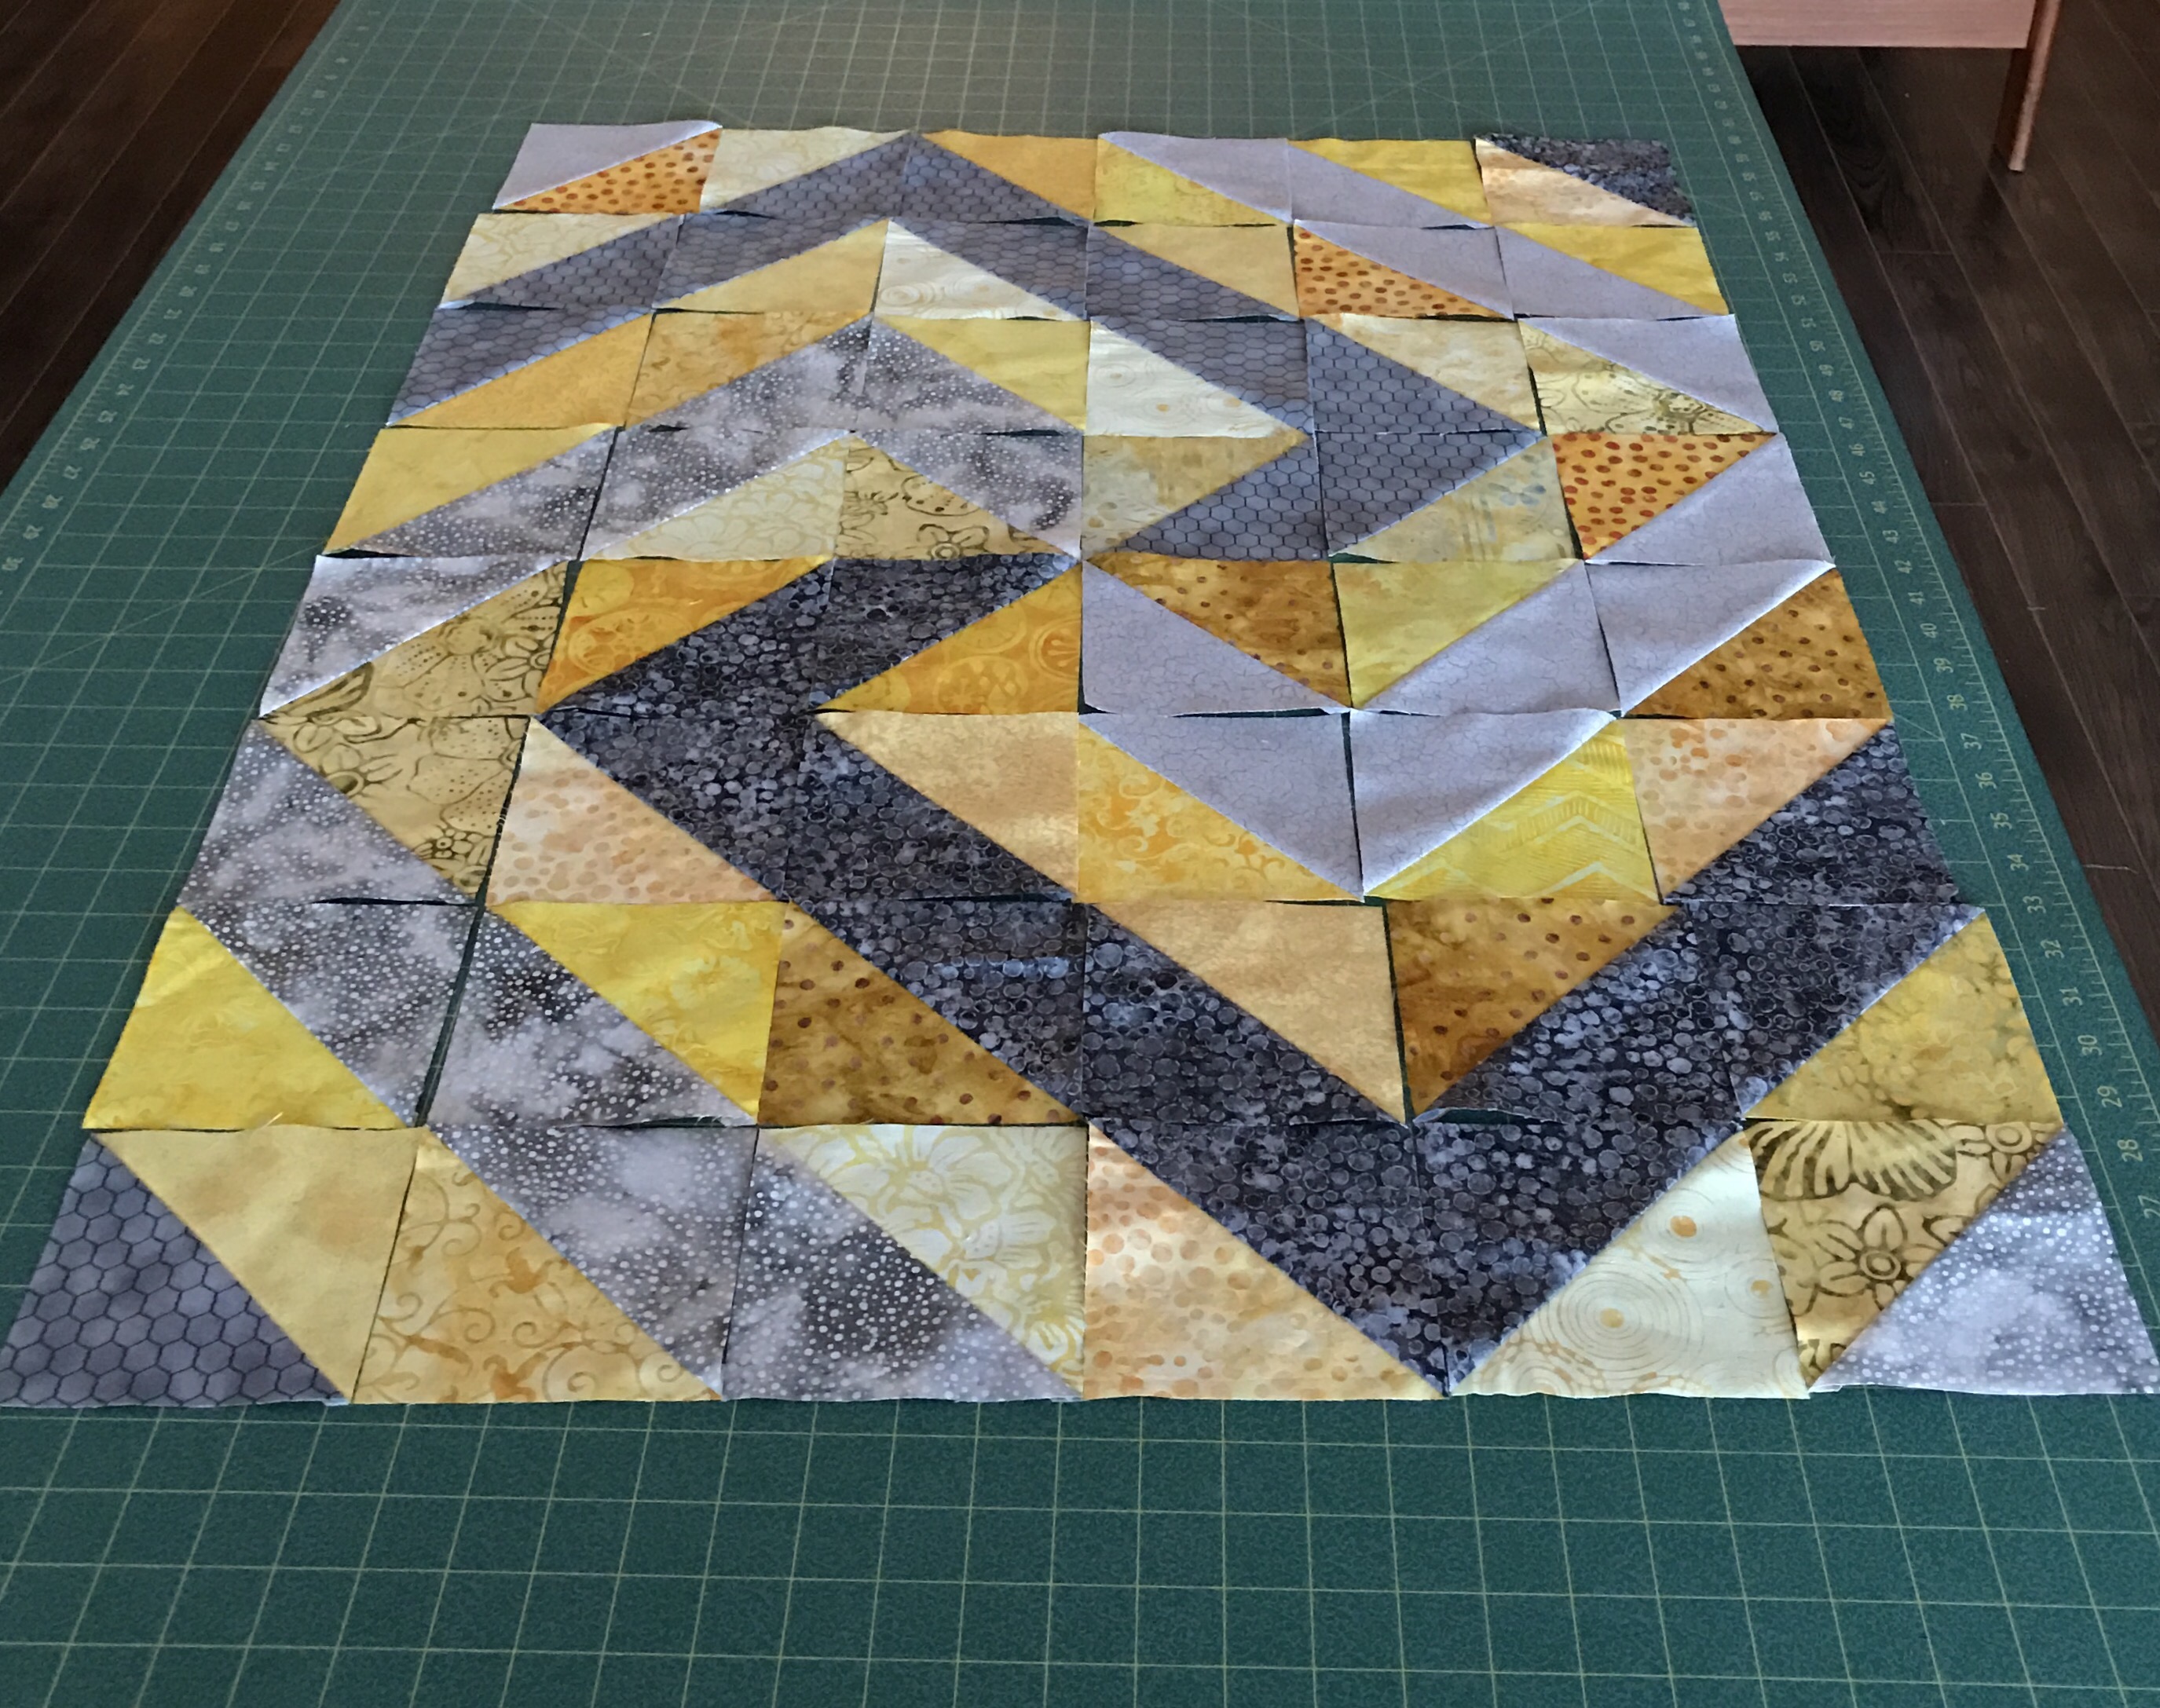
Another sample I wanted to create was a “modern art” piece of the kind Melody Johnson does:

Banana Boulevard

Her pieces are often small (12″ x 12″), constructed from geometric shapes cut from either solids or hand painted fabric – pieced and appliquéd, usually with a hidden binding.

I just wanted to illustrate the technique – since I don’t use much in the way of solids I decided to dig out whatever prints/batiks I had in my “strips” box. This is what I came up with:
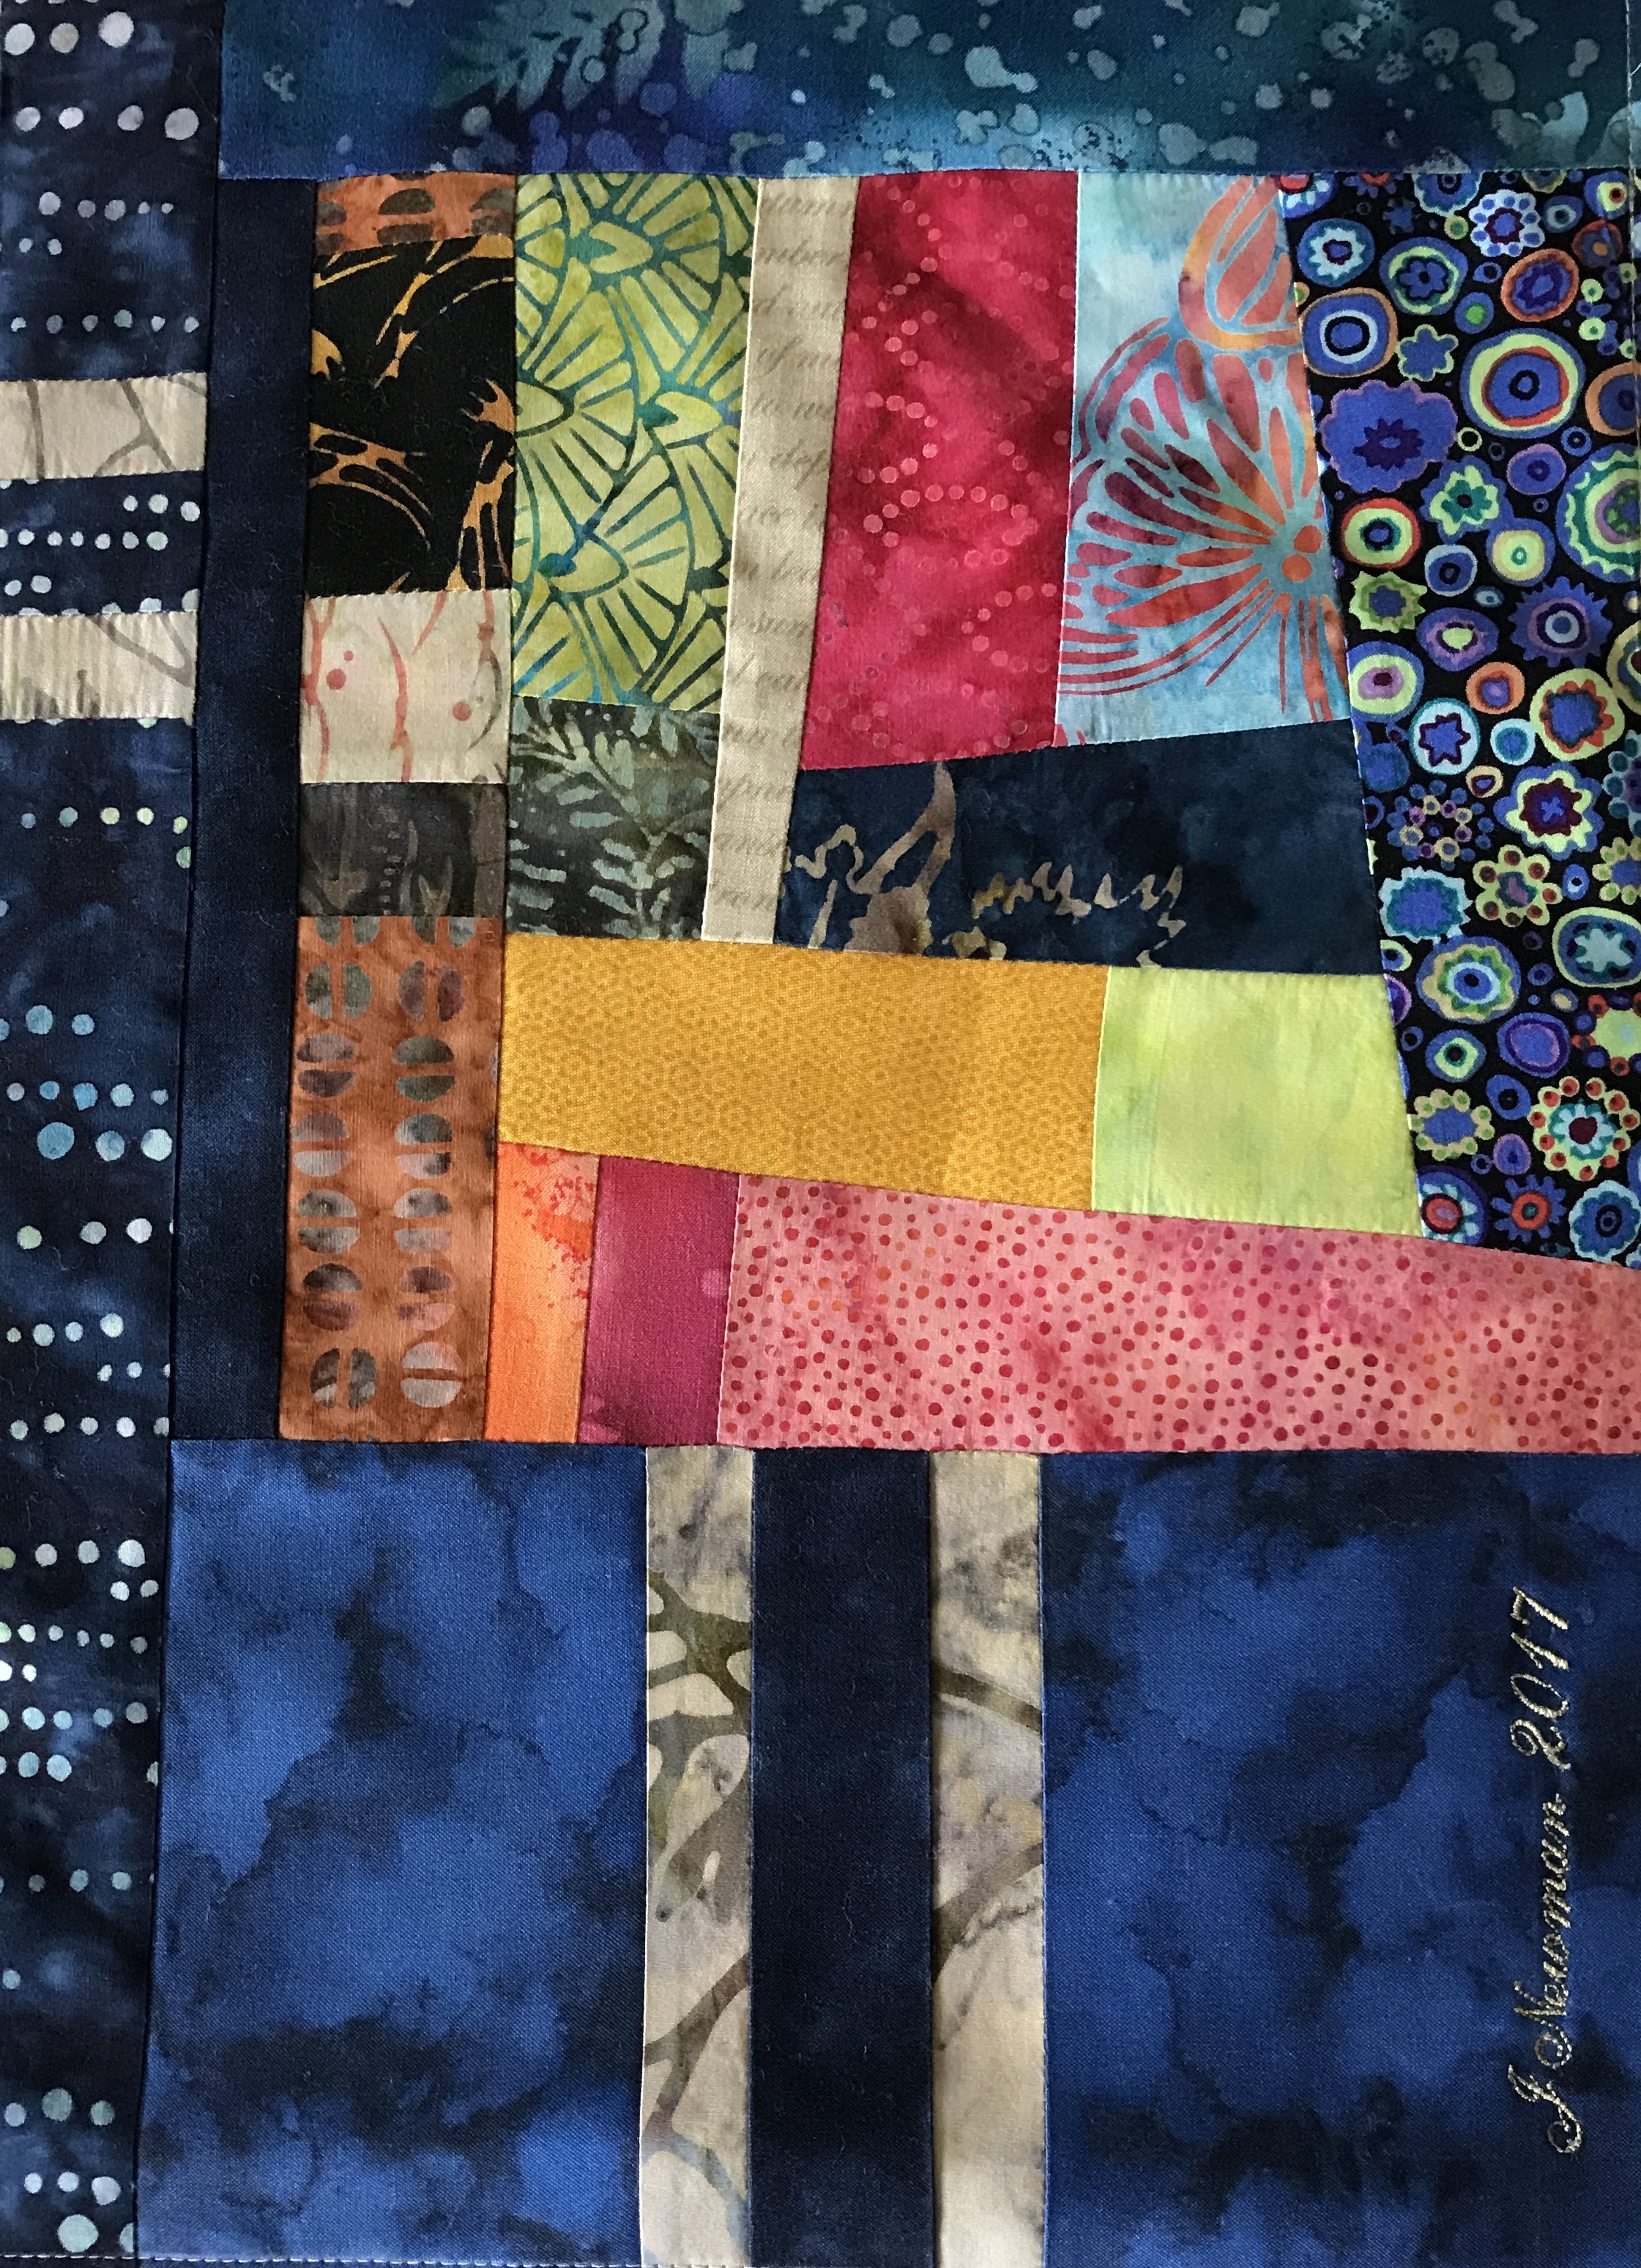
Dots

I still have to quilt the piece – I’m thinking I’ll quilt this starting with stitching in the ditch, then add more straight lines of stitching to fill the space; I’ll see once I’ve done the stitching along the seam lines.

Grey-Yellow III

Damn!

Just finished the top borders only to see in the photo that I’ve switched out two blocks and have then in the wrong place. So gotta carefully unstitch that area, and reposition those two blocks – not today. Maybe tomorrow.

Top Finished

Top Finished

Other than that, I’m pleased with the finished top. The grey-black gradation has worked; the yellow doesn’t shift the way I was visualizing it but it’s still effective, more or less. I certainly can live with that. I’m pleased with the points integrated into the border – that worked out nicely.

So now to come up with something for the back. I have a lot of yellow/grey blocks left over – I’m going to have to play with them on the floor to see what I can come up with.

Here’s where the blocks are reversed so the greys are in the wrong place:

OK, I couldn’t stay away from the sewing – I fixed the blocks:


Then I went on to the back – remaining blocks – a spiral:

I’ll fill in around it with the backing fabric – this large 8 x 6 block will get positioned offset toward one of the quadrants.

Sunflower – Completed

img_8309

“Sunflower”

Just finished!

I started working on this piece two weeks ago. I began with the original photo – cropped it, enlarged it, then printed out sections, taped them together, traced individual petals using tissue paper, planned out the background and traced the shapes…

img_8310

“Sunflower” – paper template to enlarged size

Next I collected fabrics from my stash, bought some new pieces, started building the background, cut out the petals and arranged them in place,

img_8298

“Sunflower” – the elements cut out and positioned

then started stitching: I laid down four horizontal strips of fabric from top to bottom, stitched them in place. Then added the leaf elements, edged stitched them – I didn’t “free motion” because I wanted more precision so, instead, I slowly freely stitched with my feed dogs in place – that allowed me to stitch very close to the edge of the appliquéd pieces. Next, I added a bit of detail and fill.

img_8300

“Sunflower” – background stitched

Once the background was completed, I laid out the flower petals, fused them in position, then began carefully stitching them, first using a light thread at the edges, then more golden/orange threads for the centre of each petal. Finally I stitched the centre of the flower – my goal was to bring out the spiral pattern of the florets (the centre of the flower was printed on fabric to retain the natural detail of the floret arrangement, as well as the few small bursts of blue – too small to add using cut bits of fabric).

To finish the piece, I added a 3/8″ inner border of raw silk, mitred at the corners, then a purple piping, and finally a 3″ batik frame also mitred at the corners.

Version 2

“Sunflower” – stitching detail

The whole piece I backed with muslin, including a sleeve for hanging at the top.

Now I’m walking around the apartment trying to find a place to hang it – there doesn’t seem to be one, without taking something else down! I’m really going to have to think about where to display it.

"Sunflower" without frame

“Sunflower” without frame

Sunflower I

I’ve been working on the “Sunflower” art quilt for the past few days. I pencilled in the layout on the prepared muslin backed with batting, traced the flower petals from a photo enlargement on to tissue paper then placed tracing paper beneath to retrace onto the muslin, fused some Heat ‘n Bond to the back of a piece of subtly printed bright yellow fabric, cut out all 38 petals and have so far put them aside because before I can fuse them in place I need to do all the work on the background! For the moment, I’m placeholding the centre of the flower with a paper printout to scale.

img_8291

Petals Pinned In Place

I decided to create the background working from the original photo because the detail was sharper and showed the elements in the background more clearly. I fused a pale green printed fabric to the top of the image area on the muslin (having darkened the top edge using fabric pastels – very little of that band will show when the piece is finished). Below that a soft blue. I laid in a purple/blue/pinkish batik strip as background at the bottom of the piece – leaves will be overlaid on that fabric and very little of it will be visible. I filled in most of the remaining background with pieces of greens and purples. These, too, will be mostly covered. Again, I’m using tissue paper for my templates so I can see through it to the photo enlargement, and when cut out I can see the fabric pieces beneath. I want to cover all the raw edges of the background with the foliage so that only a sense of colour peeps through.

sunflower3

Original Sunflower photo taken in 2002

Once I sorted out what fabrics I wanted to use for the foliage, I returned to working from the cropped enlargement to help me retain proportions.

Version 2

Enlarged, Cropped Image

I traced the leaves and have pinned the tracings in place on the piece. I’ve selected mostly batiks here because the colour variation in it will help with the subtlety of shading I’m trying to create. In the photo, the leaves are predominantly a very light colour reflecting the sunlight. The challenge will be achieving a realistic look to the piecing of the foliage. If, in the end I don’t like what I’ve got, I may print the foliage on fabric, fussy cut the leaves and stems, fuse that printed fabric in place and thread paint it.

Planning Out Leaves and Stems

Planning Out Leaves and Stems

I’m calling it quits for today – tomorrow I’ll begin crafting the leaves and stems hoping they will turn out as I imagine them.

Art Quilts: Flowers

Danny Amazonas is a Taiwanese textile artist who makes amazing art works (many of them quite large!) by sketching an image on blank fabric then using bits of fabric (with fusible interfacing on the back) as if it were brush and paint. I can see how the work is constructed from the background up. What I can’t tell is whether he top stitches any of the elements (although I’ve seen photos of him sewing on a large piece so perhaps he does some stitching). Here’s a recent video interview of Amazonas in Tokyo where he’s describing his art quilts.

The reason for my interest in Amazonas’ work is I’d like to try it on a piece of my own. I’ve been scouring my photo collection for images of flowers that a might make a strong visual image when constructed from many bits of fabric.

Version 2

Sunflower

I took this photo of a sunflower it’s gotta be 15 years ago – I have a copy of the photo hanging in my apartment. But I’d love to enlarge it somewhat and have a go at piecing the image. I love the detail of the flower, but I also love the soft green/mauve background which sets off the yellow of the flower.

Other artists piece their work but also clearly top stitch/thread paint their creations:

black-eyed-susan

Kate Themel – Rudbeckia

zinnia950

Barbara Olson – Zinnias

zinniadetail1

Zinnias Detail

I have a couple of other images that would work as floral panels as well – I guess I could always do a series of hangings:

phael3

Phaelanopsis

img_2072

Strelitzia reginae

both of which would make spectacular images. I’d crop both to make the bloom more prominent. If I were to try panels 14″ x 10,” a series of three would be interesting.

In any case, my next step is to cut a piece of muslin about 20″ x 20″ (to give me lots of area to work with), sketch out elements of the sunflower, go through my stash pulling every bit of yellow/orange/brown I have (small scraps are going to be useful), collect some blues/greens/pale mauves/ for the background. I will need to add fusible interfacing to pieces of fabric then start cutting, placing and pressing…

It’s like facing a blank canvas with some paint on my palette, taking a deep breath and just starting.

Wind Waiting – Done!

img_8272

Wind Waiting, 2017

Just finished! (Click on photo to see the enlarged photo – the panel is laying on my bed which accounts for the receding top)

This morning, I trimmed some threads, added a bit more stitching to the guys. Then off to the fabric store to see what I might find in the way of fabric for the border. Neither fabric store near me had anything better than the three possibilities I’d pulled from my stash. In the end, after consulting with the gals at Sew With Vision, I decided on the “mid” colour intensity option. One of the gals had a good suggestion – what about adding piping between the inner and outer borders?

Great idea! Sew With Vision didn’t have any solid fabrics that worked, so I went down the street to Atlantic Fabrics. They had a dark grey/brown Kona cotton which matched the browns in the border fabric perfectly. I auditioned various shades of blue, some greens. I even tried a black, but the best choice was definitely the brown.

img_8273

Piping detail

I knew before I started I’d have to make the piping – actually it’s not a difficult job when you’re using a piping foot – I turned out four strips of piping very quickly. The secret to applying the piping is to do it in two steps – attach piping first, then border fabric on top of that. I measured 1/2″ from the inner edge of the inner border, marked it with a heat erasable pen, lined the inner edge of the piping against my line and stitched it in place. I trimmed the excess piping as close to each corner as I dared, then marked 1/4″ on the piping fabric, aligned an edge of the border fabric (2 1/2″ strips) and stitched a second time. I ended with a very neat, narrow piping with the border fabric abutted directly against it.

Then I added a muslin backing. I trimmed my muslin to the same dimensions as the panel, pinned it, and stitched the layers with the muslin on the bottom so it would not shift position. I added a sleeve for a dowel/curtain rod at the top, incorporating it into the top seam. Finally, I turned the panel right side out, pushed out the corners, pressed it flat, hand stitched the opening in the panel bottom as well as the bottom edge of the rod sleeve at the top. When the wall hanging was turned right side out, the muslin backing was a wee bit larger than than the panel, so using a zipper foot, I carefully pulled back the piping from the inner border and stitched all layers as close to the piping as I could so it wouldn’t show. That seam was successful – the muslin doesn’t peep out along the bottom edge of the panel.

Now to find a place to hang it!

img_8276

On the wall

The Solution…

img_8167

Stitched Foreground

Michael Fuller wrote me yesterday

Go with the detail and time consuming fussiness. It’ll be superior to the photo copy model….”

‘OK,’ I though to myself, ‘I’ll give it a try.”

That’s where I started today – I began by printing out the black and white outlined image of Brian, the figure on the left, on some Heat ‘n Bond printing paper in order to use the outlines as templates for the fabric – BUT, here’s a glitch: the technique requires a ton of cutting with small fine scissors and for the last six weeks my arthritic right thumb isn’t working – the muscles to “open” the scissors are too weak to let me cut with any precision.

I decided to try fighting through that problem but a second issue presented itself: I cut out the entire jacket in a light fabric intending to use that as the base and building toward the darker tonal qualities until I had the jacket assembled. I fused some Heat ‘n Bond to the wrong side of my lightest fabric, cut out the overall jacket shape – that worked out OK, but when I started to build the left sleeve it became immediately obvious the slight differences in weight of fabric (although all quilting cottons) was going to create an imbalance and because each tiny piece of the puzzle is so small I would be left with a  slightly fraying “raw” edge in spite of the fact that I’ve fused some Heat ‘n Bond to the wrong side of each small piece before cutting it out.

pilots-detail

Detail of Figures

The final thing that was obvious was how “lifeless” the construction would be. The very subtle differences in shade intensity wasn’t achievable with the fabrics I have.

I gave up after about an hour of finicky cutting and fusing and decided to use the fabric photo images after all and fused them to the background.

What I will do tomorrow is begin the process of edge stitching each figure and then stitching in the colour/shading boundaries. That is also fussy work but my wonky right hand doesn’t interfere with being able to do careful machine stitching.

Here’s The Question…

Pilots: Printed on Fabric

Pilots: Printed on fabric, laid on background

Here’s the question – I’ve been looking at the art piece and wondering how might it look if I printed the figures on fabric, fussy cut them and fused them to the scene instead of trying to create them (shadows and all) from different fabrics?

pilots-detail

Here’s the detail, right? Lots of little pieces to be very fussy cut and fused to a base fabric – very time consuming. Doing the appliqué work will also be time consuming because I will want to stitch in all those colour demarcations, but what I get is a more realistic look to the figures which are the focus of the piece.

All I’ve done so far is print each pilot on EQ Printables Fusible Fabric and carefully cut each. I haven’t yet fused them to the background. The way we see the sun on their clothing gives the viewer a sense of the light – some brightness but not full sunshine. I can’t achieve that through piecing, even if I’m extremely careful with fabric selection.

I guess what I have to do is try one of the guys and see how he turns out – maybe Brian (the one on the left). Whichever way I do this, I think it makes sense to refrain from filling in the grasses/shrubs until after I’ve got the figures in place, that way I can build up the grass around their shoes as I go along and not as an afterthought.

In case you hadn’t noticed – this fabric wall art requires a gazillion decisions and unlike oil/acrylic painting there’s no going back – you have to live with whatever decision you choose to execute.

Wind Waiting II

IMG_1685.JPG

Wind Waiting – Foreground, Sea, Sky…

This morning I painted the fabric for sea, land across the bay and sky. I will accentuate the grey tone using a pale grey thread for the thread painting. The sky has come out a hazy, cloudy day. The sea is also greyish. The foreground is likely too wide, will have to try masking an inch or two to see how that looks. It will get thread painted with golden, brown threads in short vertical stitching to simulate the grass at the top of the bank.

Still using my paper cutouts of the three men.

Next step is to set a fusible stabilizer to the four background pieces and fuse them in turn on the muslin. Once that is done, I will work at the thread painting – it will take a couple of days, I’m sure.

To paint the fabric I used a mixture of a small amount of medium blue, pale yellow and strong red acrylic paint to create a muddy grey, added white to lighten it, then a bit of a darker blue to bring the mixture to a bluer grey. I wet the turquoise/white fabric for the sea then spread the paint on it using horizontal strokes with a wide sponge brush. Next I wet the solid white fabric and applied a very diluted wash of the same paint I used for the sea. The coast across the bay is a thin strip of grey fabric with a subtle print (crackle) – I used a bit of the same wash as the sea to end up with subtle hint of blue to help it blend with the sea and sky.

I laid the wet pieces of fabric on a layer of newsprint topped with paper towel to get rid of the excess paint, then hung them to dry using pants hangers in my laundry room. Turned on the fan I keep in that room and the painted fabric was dried within a short while. I press it and then laid each piece on the muslin. I’ve played with proportions trying to keep the horizon off the center line and have moved the men around so the central figure will also be slightly off the vertical midline. In my original photo the men are standing equidistant but I’m going to position the two figures on the right a bit closer together with the one on the left just a bit further to the left – that will affect the vertical positioning and draw the eye away from the center line.

So on to the next step – fusing the background fabrics to the muslin. Actually, I will first have to fuse the muslin to a stiff, heavyish stabilizer just so I have some heft to work with when I go to thread paint.

img_7264

Background Fabrics Fused in Place

Now to the thread painting.

Wind Waiting

I’ve begun my next project – this is a photo I took at least a dozen years ago when I was still paragliding. Retired, I had time to spend in Parrsboro (a two hour drive from Halifax) hanging out wind watching with these three paragliding pilots.

On this particular fall day we’re at Fox River (I think it was) on the Bay of Fundy across from the Valley Coast (able to see from Blomidon to Cape Split) feeling the strong wind whipping up the waves and inflating our jackets. It wasn’t a flying day! Wind much too strong.

Paragliding pilots are patient people – we spend a lot of time chasing wind which is either too light or too blustery. We hung around this location for quite a while before deciding to try further down the shore where we might find conditions a bit calmer.

What I love about this image is the three guys on the edge of the bank (about 100′ above the beach which is where we’d have landed had we been able to launch), patiently and calmly contemplating the weather. They’ve been here before with weather like this. Brian, the one on the left hasn’t even bothered to take out his wind gauge to check windspeed.

pilots1-2

Wind Watching

So this fabric wall art piece will consist of the background of white-capped waves with the bank in the foreground extended downward a bit further than it is in the photo. And then there are the guys. A week or so ago, I isolated each pilot and enlarged him. Last evening, I converted each image to black/white so I could see the contrasts more clearly. Last evening I outlined each photo so I could get an idea of how many different fabrics I might be looking for to construct this image – a lot of bits of closely related colours are going to be needed. This will necessitate a careful going through my scrap boxes and pulling out everything I think might work.

pilots-detail

Pilots rendered in black/white and outlined

I will have to print these images and outline them a second time – to give myself a copy I can cut apart, using the bits as templates for fabric pieces. The men are close to 11″ tall – they’re going to be quite large. I’m going to have to use that height to calculate the dimensions of the finished piece – I haven’t done that yet.

I’ve had the original printed photo at the right side of my desk for the past two months. I’m beginning to actually work on it. Next choosing fabrics, then bringing out my half sheet of styrofoam insulation to use as a pinning board.

This project is definitely underway. I expect it will take a couple of months to complete.