Pink Boiled Wool Jacket

It’s been ten days since I posted anything but that doesn’t mean I haven’t been working away at stuff.

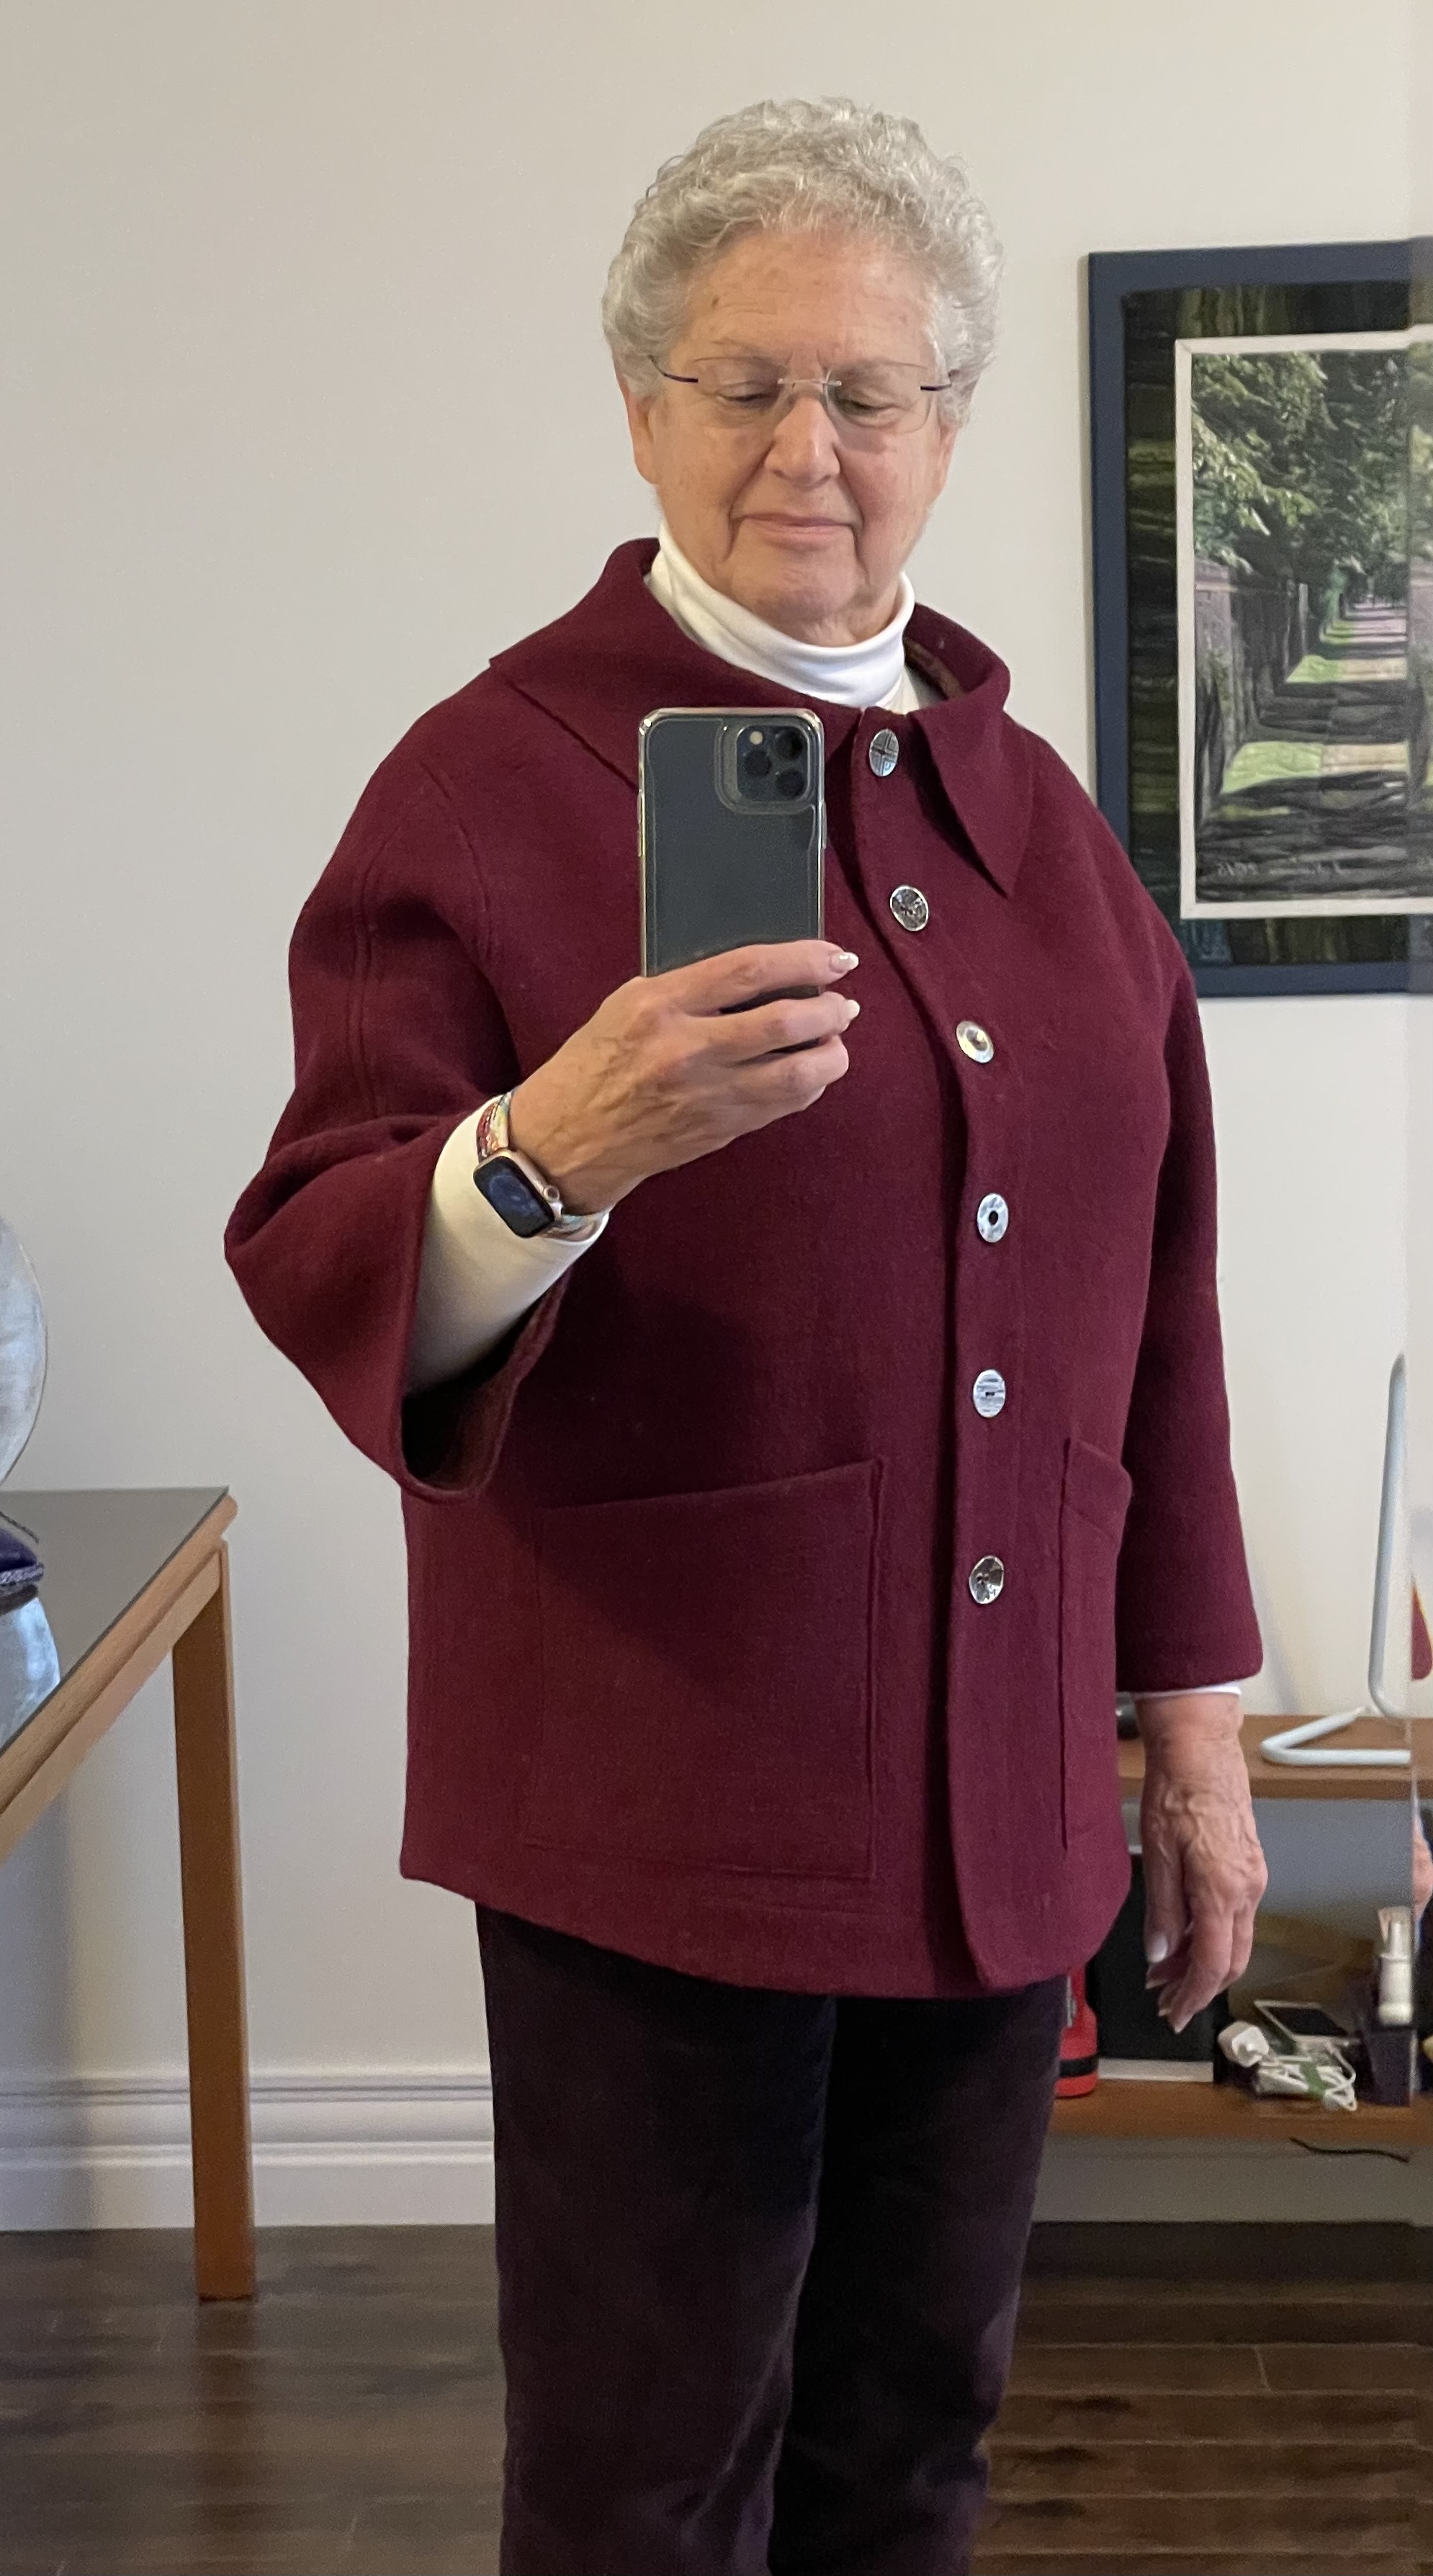
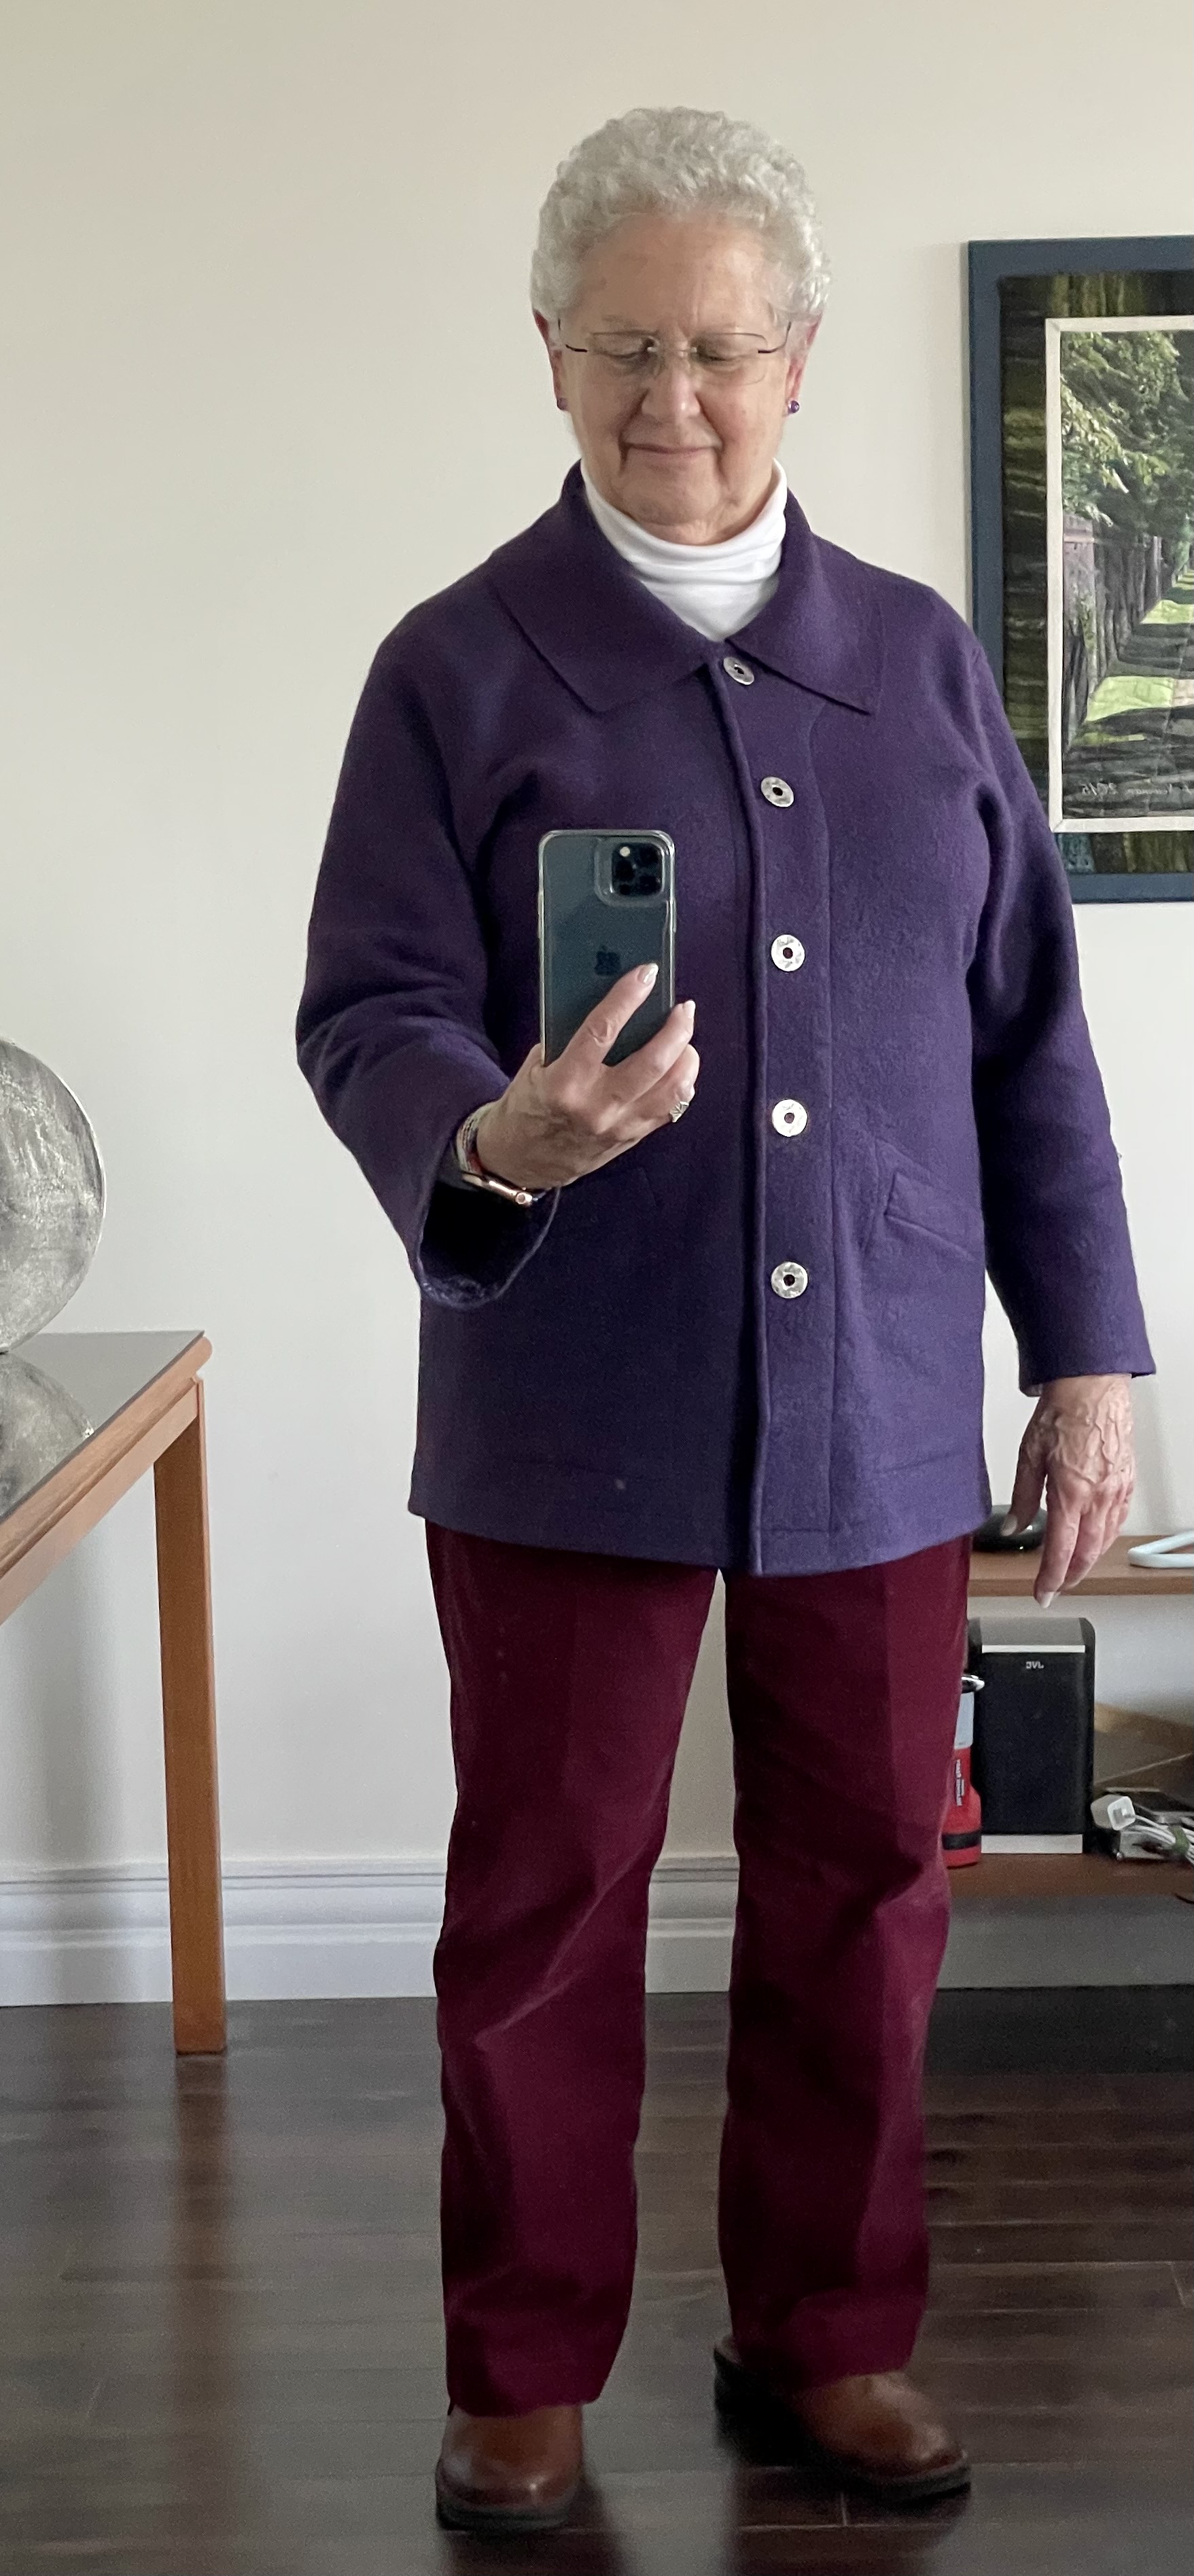
Here’s the pink boiled wool jacket.

Ruby expressed interest in having a boiled wool jacket when she saw mine. So we went shopping and I talked her into this pink poly/wool blend boiled wool fabric – heavier than the 100% wool I’d used but likely warmer.

The challenge was Ruby has a high waist measurement of 52″! How was I going to expand the pattern to cover her in the middle and still make it a flattering garment for her. The solution was to start with the XXL size in the pattern then pivot the centre fronts about 15° from the neckline. I left the back just about as it was so that it would hang flat.

I traced the adjusted pattern onto Swedish tracing paper (a sew-able light weight non-woven “fabric” for tracing patterns). I pin fit the pattern on her – initially it looked like I should drop the neckline both front and back; instead I raised the shoulder which enlarged the neckline. I made a few other adjustments then basted the parts together and tried the half-jacket on again. Much closer this time.

To control the bulk in the seams I sewed each 3/8″ seam, pressed using steam and a wood clapper, then top stitched 1/4″ from the seam using a stitch-in-the-ditch foot to ensure a 1/4″ seam; I pressed again on the right side using a press cloth. That gave me nice flat seams.

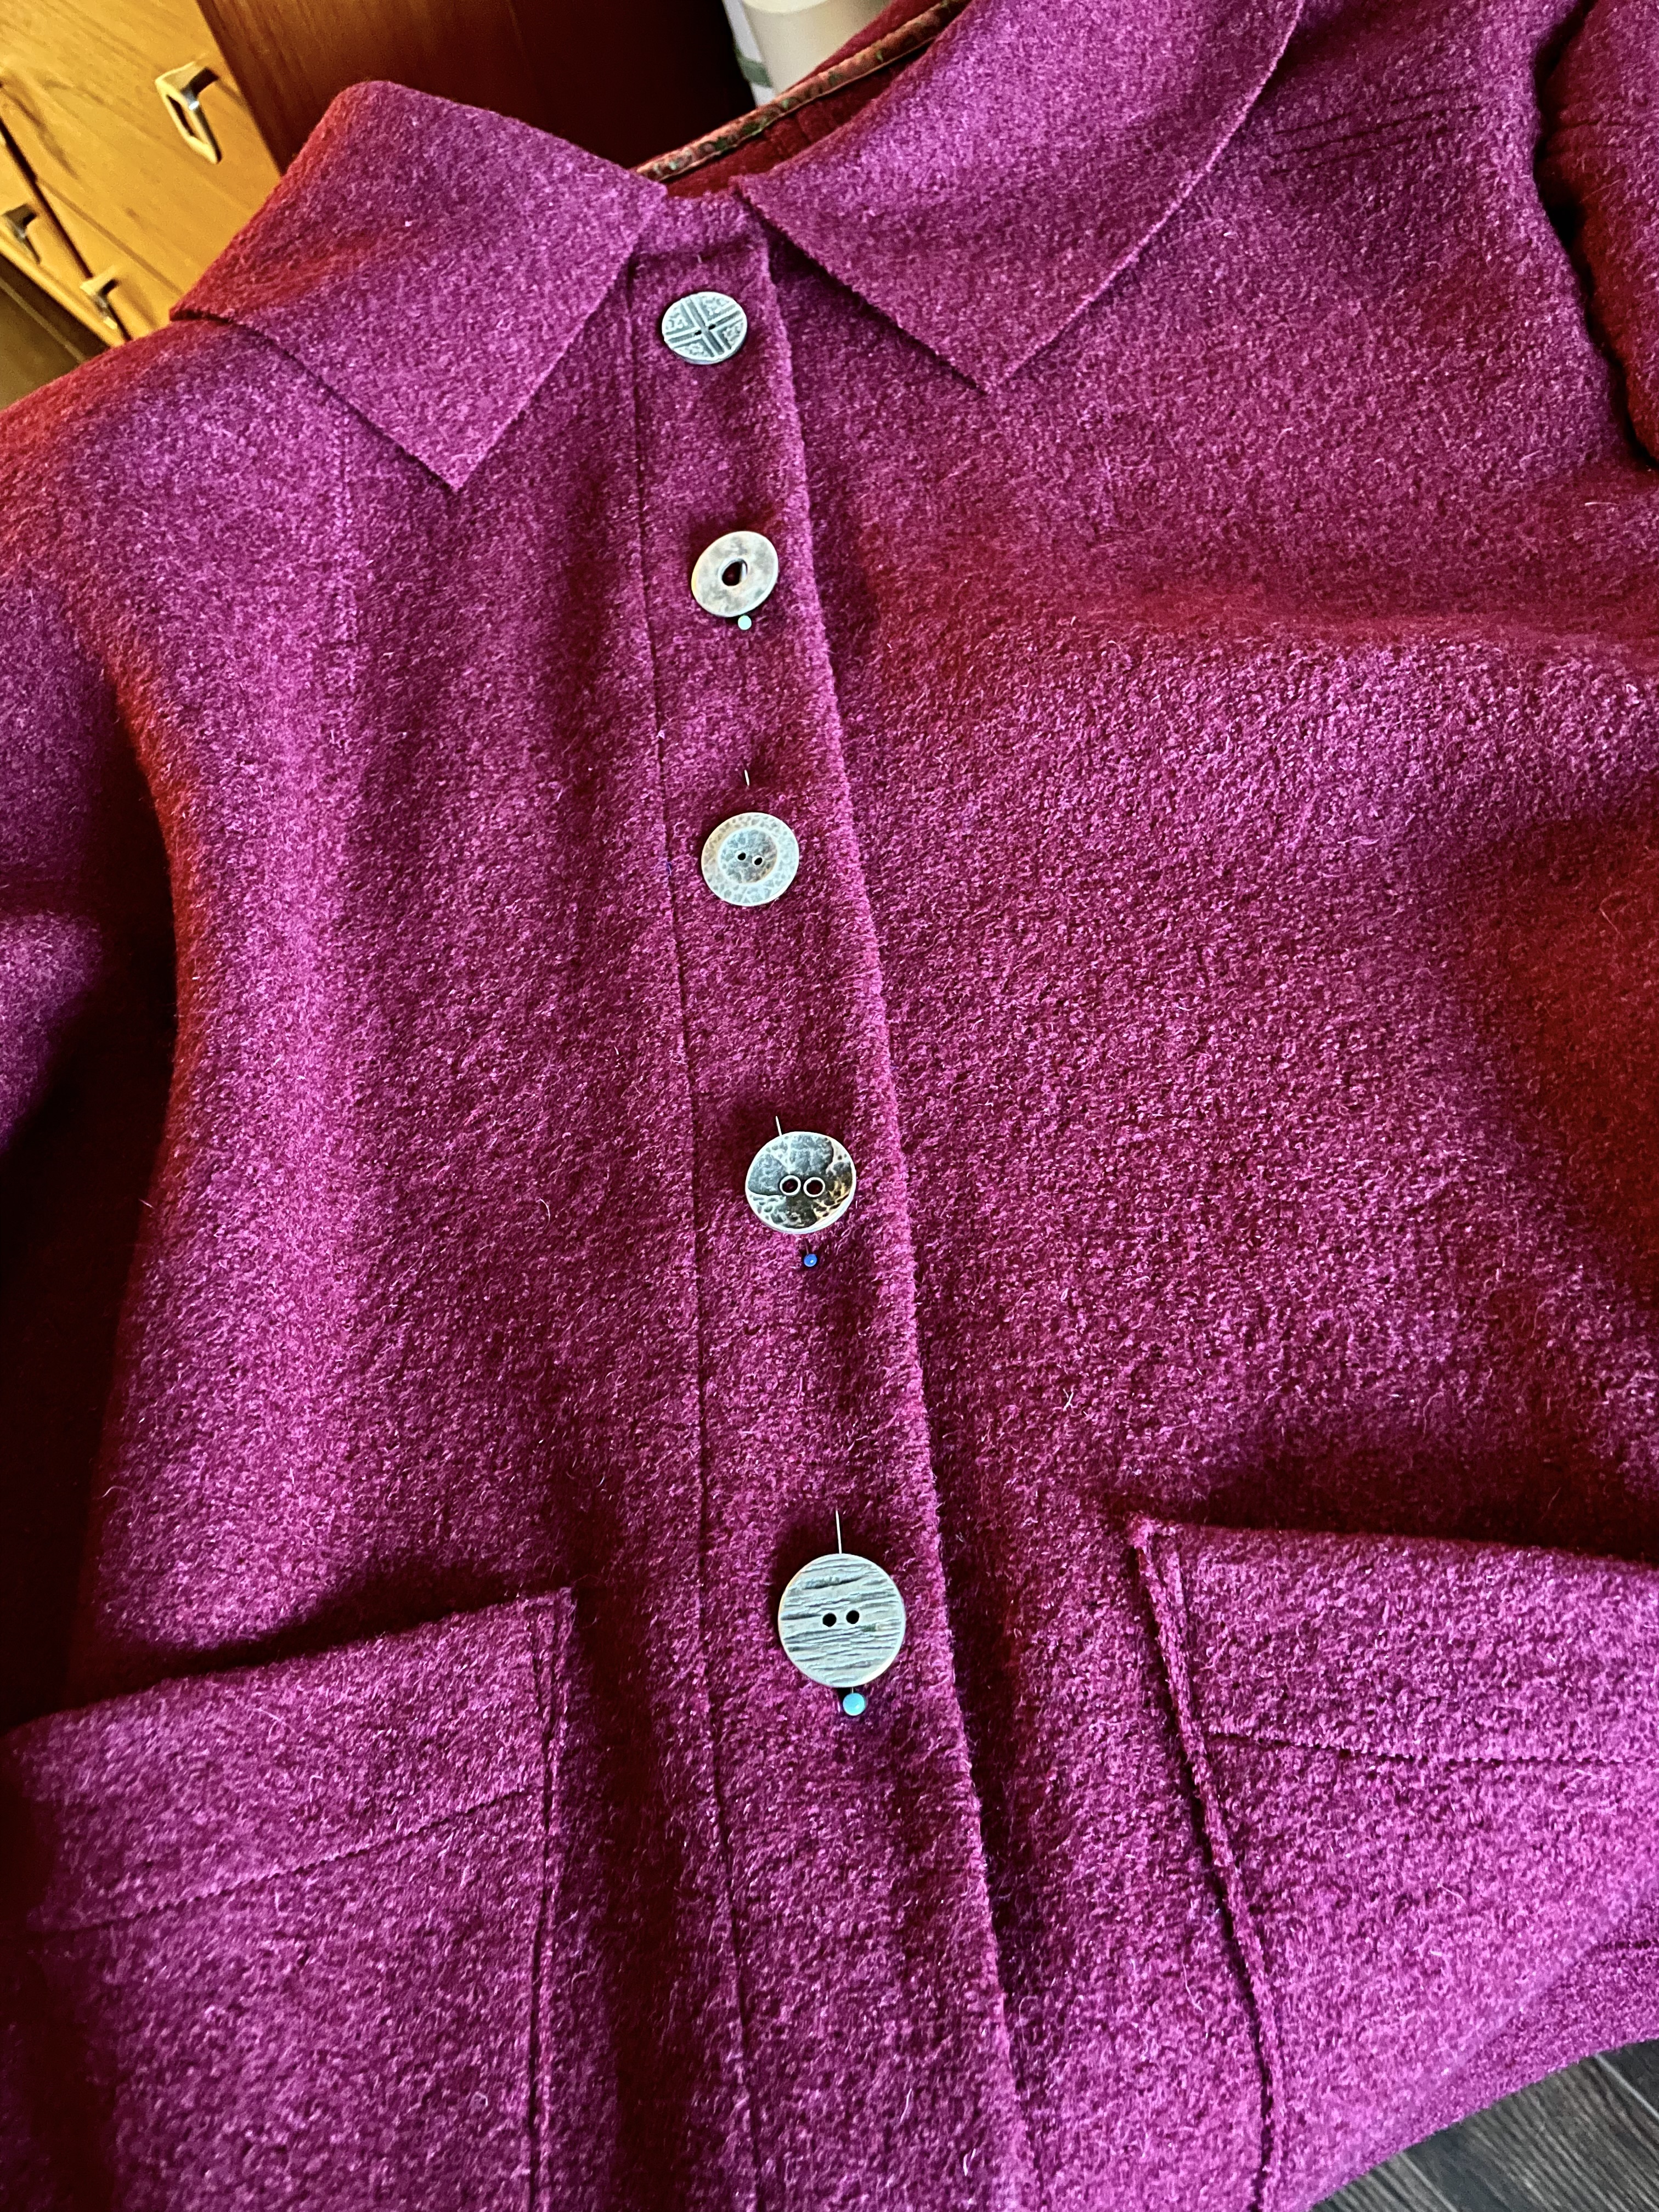
I finished the front and neck edges, sleeve hems and bottom hem with batik facings (I interfaced the front edge with a mid-weight woven fusible interfacing for a bit more body), edge stitching each facing so the turning would be flat.

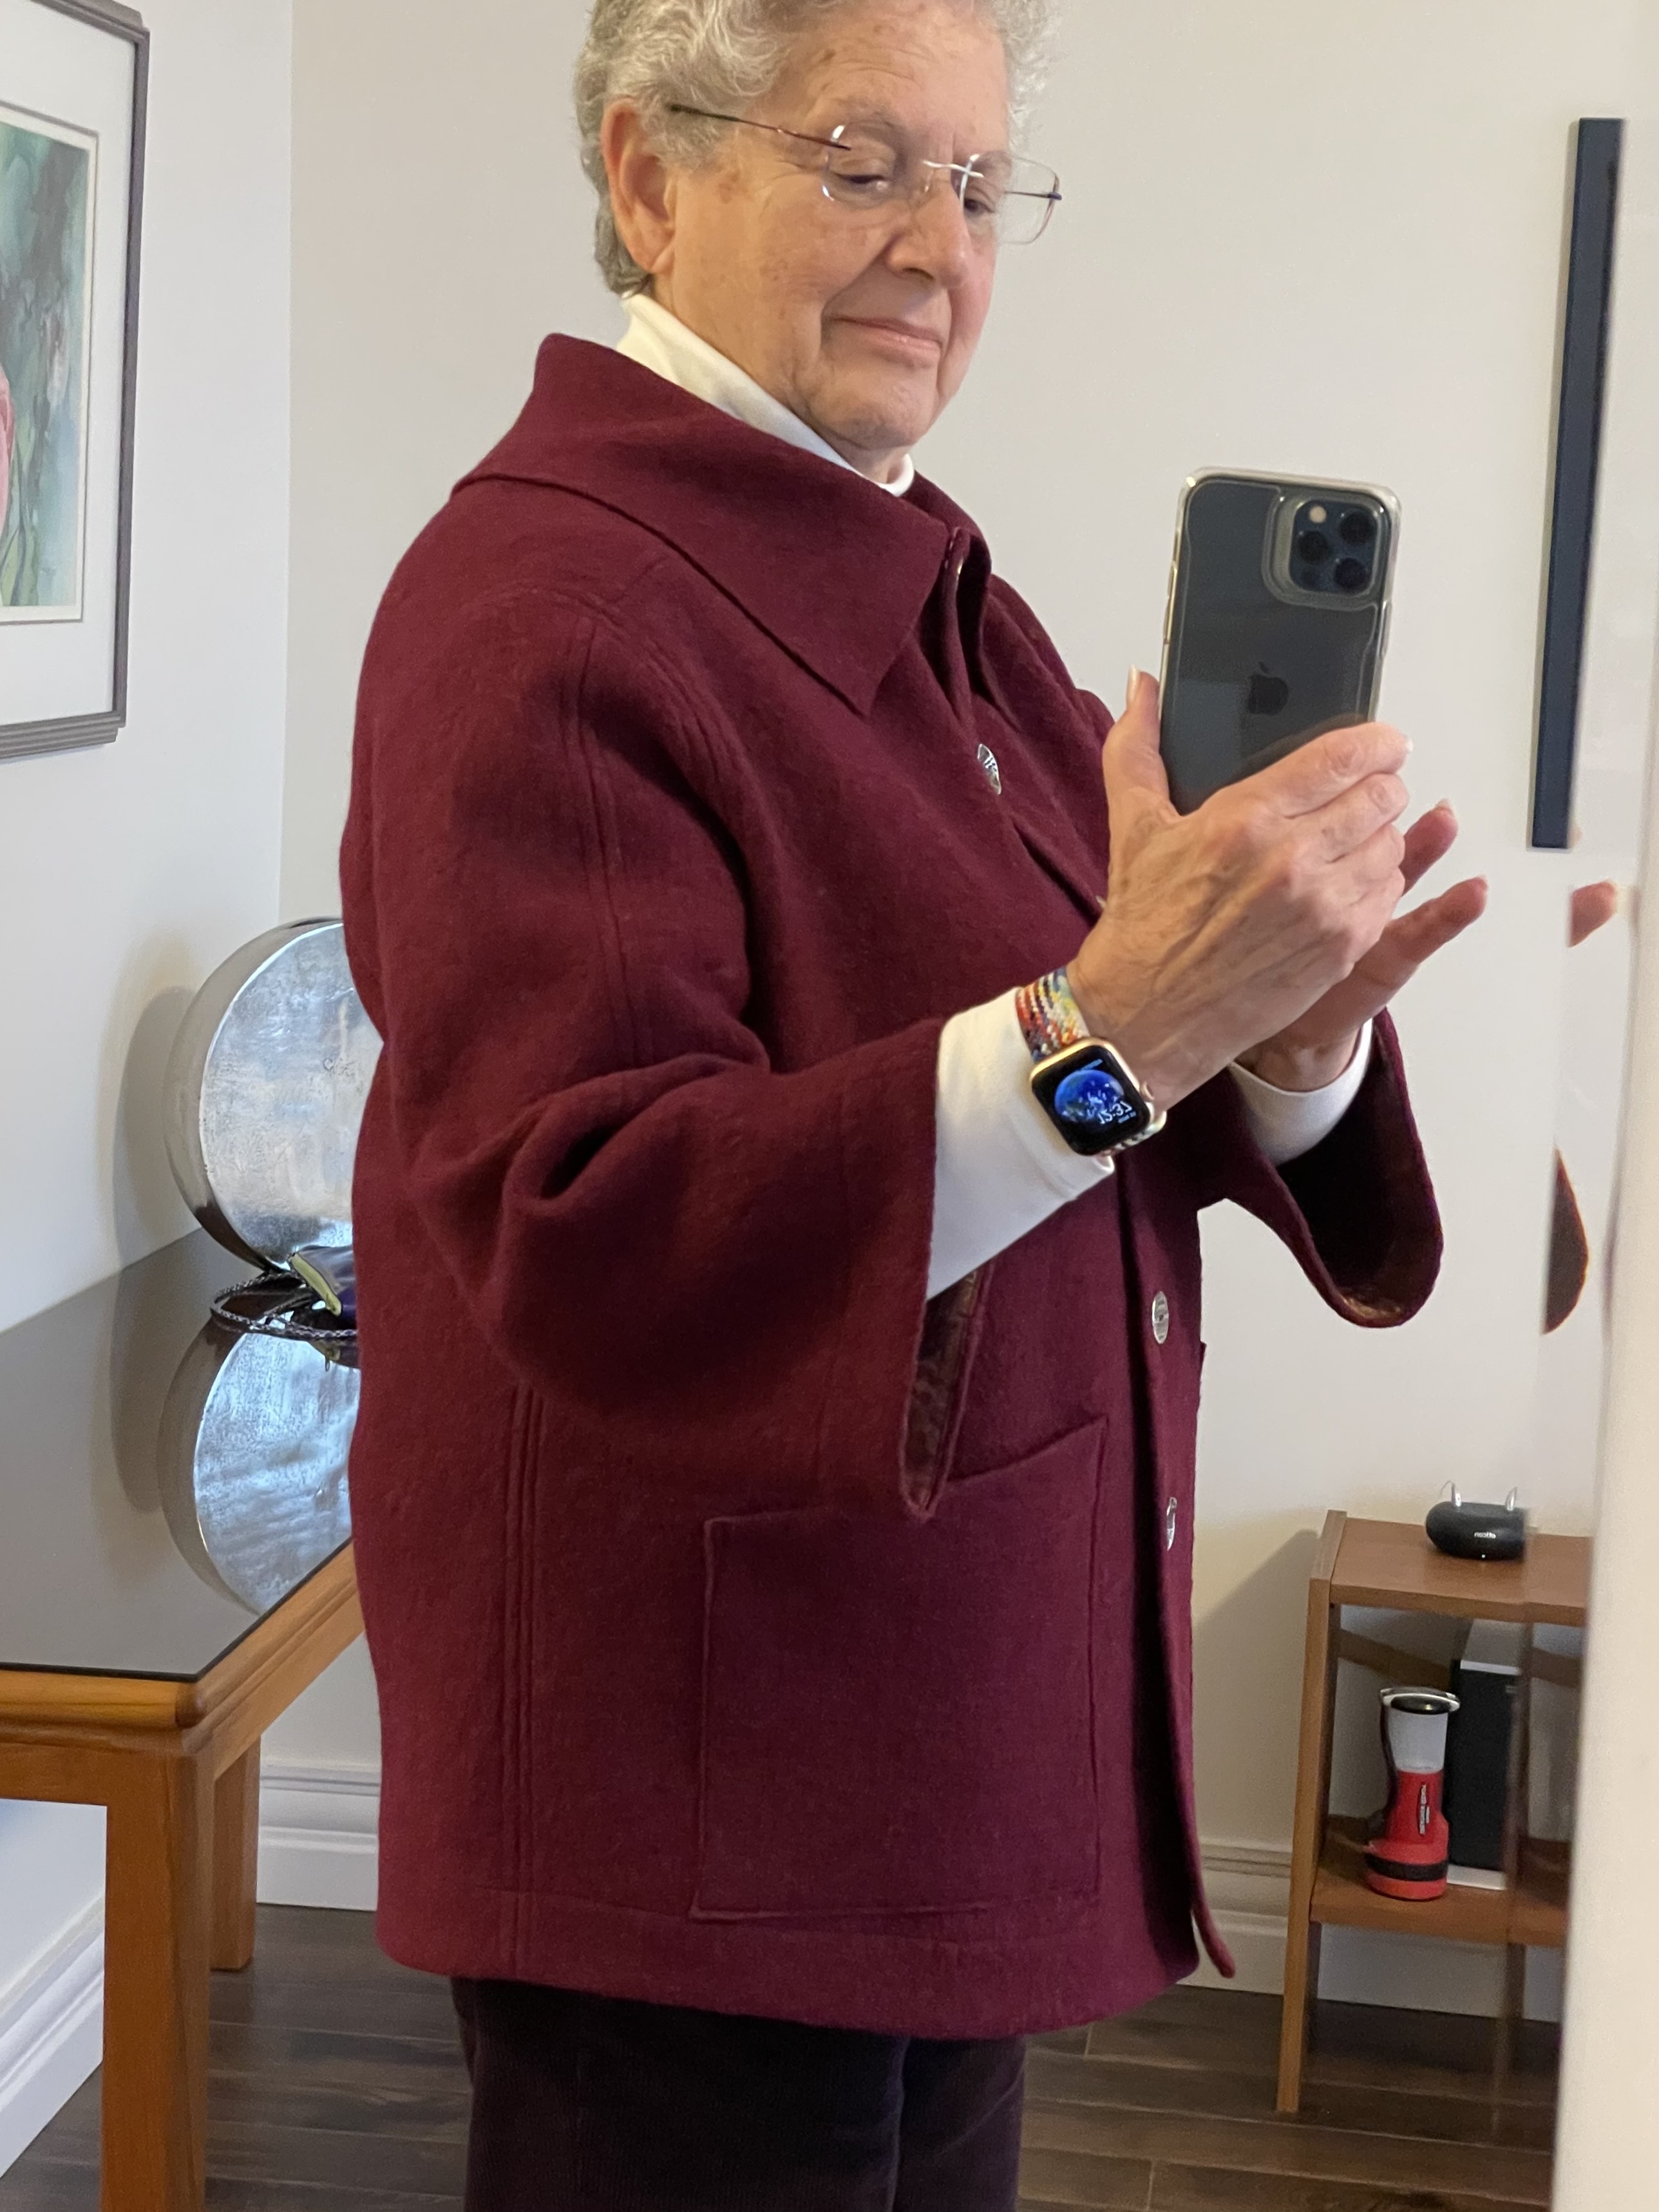
I added patch pockets (raw edge on three sides, top edge interfaced and faced with the same batik) to the front. I left the collar with a raw edge, as well.

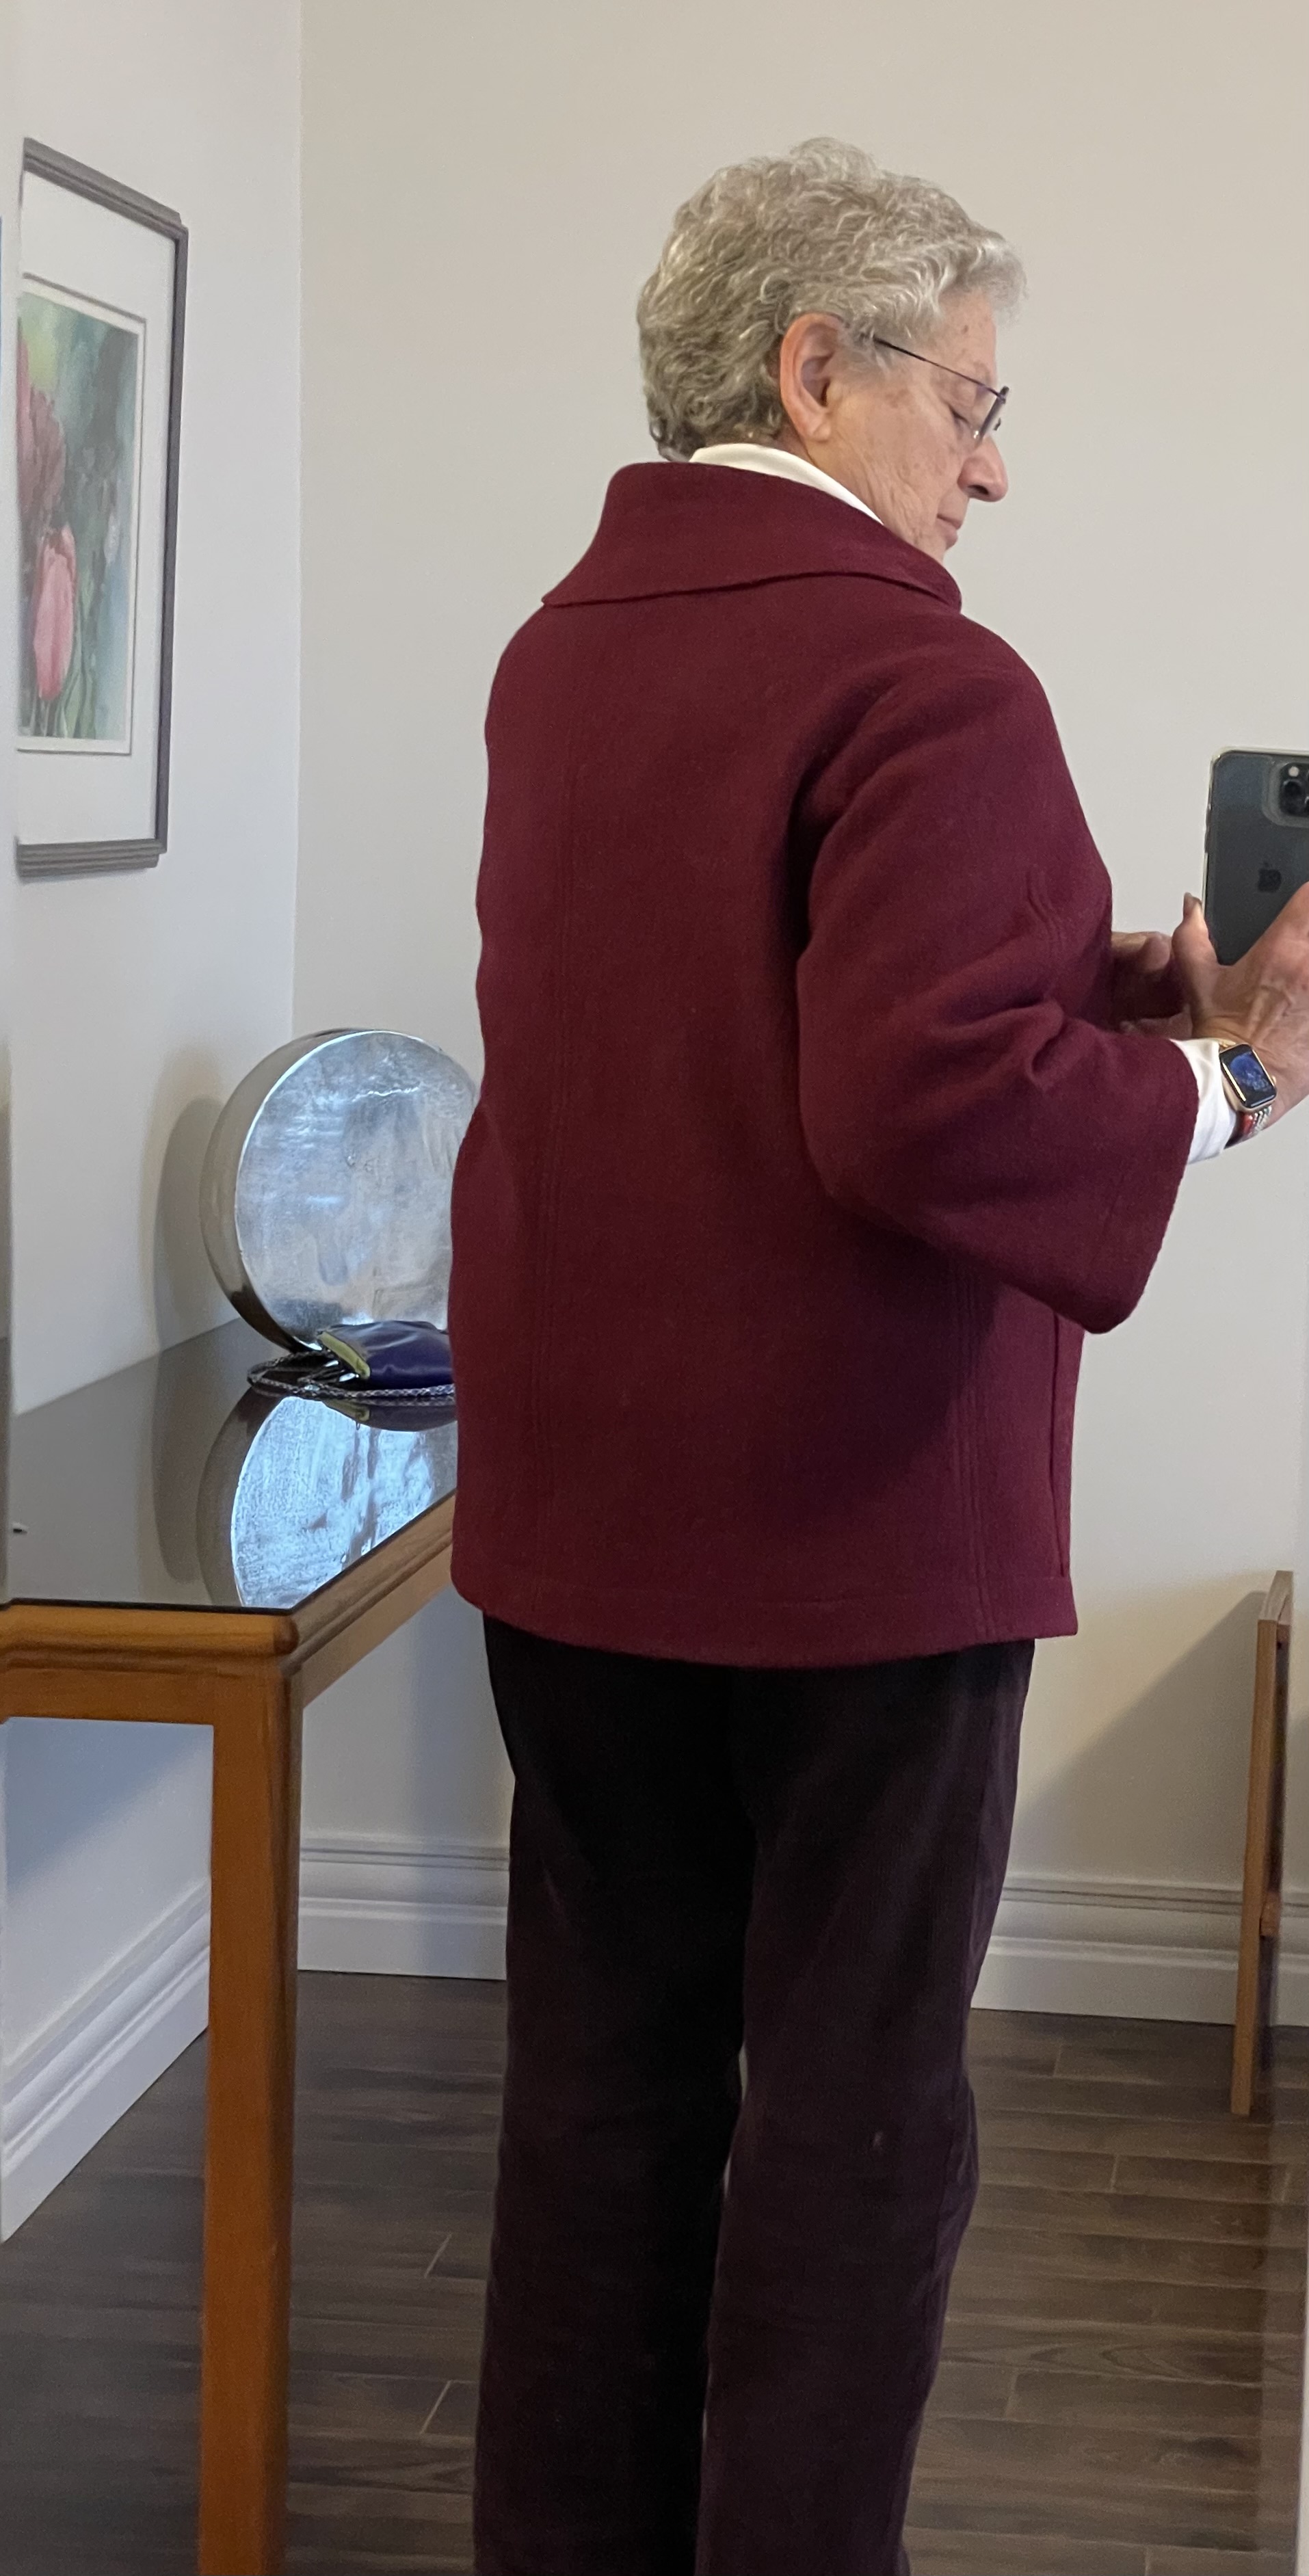
The jacket is a good length on her. I like how it drapes in the front and hangs straight in the back. The “boat-neck” sits solidly on her shoulders although it’s too open to wear without a scarf. I scoured my scarf collection and decided a navy print mobius scarf I made several years ago would fill in the neck nicely.

Ruby was happy with her new jacket. Me, too.

Magenta Jacket Finished

I finished the jacket this morning. I’m very happy with it! The back fits nicely. The dropped shoulders are smooth. There’s a dart in the front shoulder area that works very well – I didn’t close it with a seam; instead, I butted the two sides together and use a decorative stitch to hold the dart closed – you can’t see it – however it flattens the front shoulder area and shapes toward the bust in a lovely way. I added 6″ to the length of the front and back pattern pieces – that was a good decision. I knew the sleeves would end up short (the pattern says “bracelet” length – I could always add a cuff to lengthen the sleeve but I’m leaving it as it is, for now.

I didn’t think I’d like the neck, but I’ve been wearing the jacket all afternoon and it’s comfortable buttoned. As an outdoor jacket it calls for a silk scarf. I’ll try that the next time I put it on.

There are a couple of interesting seams – the back was constructed from two pieces with a centre back seam. The shoulder seam drops quite a bit toward the front. The sleeves are made from two pieces – the seam aligns with the dropped shoulder seam. Were I to make this jacket again, I’d attach the front sleeve to the front arm opening, the back sleeve to the back arm opening and sew the shoulder and sleeve seam as a single seam. I made those details stand out by pressing the seam allowance open, and stitching 1/4″ away from the seam itself on each side.That makes the seams lay flat, takes the bulk from them.

The facings all work well, too. I bound the neck seam with a Hong Kong finish using the same batik I used for the facings. I created a front facing, sleeve facings, and a bottom edge facing – all 1 1/2″ finished width.

I started with five buttons/buttonholes but when I put the jacket on I thought it could use one more so I added the sixth. The front falls straighter with it added.

The patch pockets are unobtrusive but handy for carrying keys (or anything else that’s relatively small). They are also finished with a batik facing at the top.

For a “muslin,” this garment definitely turned out very well. Oh, and this is close to the real colour of the boiled wool.

Dark Magenta Jacket

I happened across some beautiful actual wool boiled-wool at Fabricville about ten days ago. Just couldn’t resist it and bought enough to make a second jacket – heavier than the purple jacket I just finished.

I had bought and downloaded a pattern from an Australian company, Mary Ann printed it on an industrial printer. I traced it and laid the pattern pieces on the fabric but I wasn’t sure about the loose fit of the jacket.

I knew the purple boiled wool jacket turned out particularly well so I was tempted to reuse that pattern and get on with the project but I was also still flirting with the possible Verona Jacket from Tessuti. I superimposed the purple jacket pattern on the Tessuti one and they were close – close enough to take a risk and try the pattern. There were differences – the back came over the shoulder to become part of the front neckline. It has a definite drop shoulder and a shorter sleeve. It is also a short/cropped jacket. I wanted it much longer.

In the end I cut out the Verona jacket and crossed my fingers – this, after all, is a “muslin” – I’ve not done a test run – so I’m hoping whatever adjustments need to be made, can be made as I put the jacket together. The pattern does not have facings, I’m adding them. The pattern uses overlapped edges to create the seams which look unfinished. I decided to sew the seams, steam press them flat (using the clapper to flatten them) and then edge stitch the seam allowance 1/4″ from the seam itself. I decided to bind the collar/neck seam with a batik and to use the same batik for facings – front, sleeve edges and jacket bottom. I also added raw edge patch pockets on the front where the Verona jacket had none. What kind of jacket doesn’t have pockets? Needs pockets.

I’ve been working all afternoon at the project. I’ve got the fronts, backs, sleeves all constructed – the sleeves are now pinned in. Tomorrow I’ll sew them and top stitch them, and stitch and top stitch the underarm/side seams. Then finish the sleeves and jacket bottom with batik facings.

It’s the buttons that are now the big decision:

Jacket Buttons

I had originally thought to use just three buttons but I have a hunch the front isn’t going to fall as straight as I want it to so I think I may want five buttons instead. I’d bought four of the flower buttons (second from the bottom) – not enough if I’m going to use five. I had two choices – buy another two buttons like the four I have, or to pick up two more different buttons and make all five buttons different. So I went through my button collection found two more the same size (7/8″), one left over from the purple jacket, and another in my button collection. Still needed two more buttons. It’s closing in on 4:30 – Fabricville closes at 5! I made a mad dash – got there in 15 minutes, picked out two more buttons. Here they are laid out on the jacket.

I think I like having five different buttons! I think that’s what I’ll use to finish the garment tomorrow!

BTW the pinkish/purplish colour of the jacket is just wrong. The boiled wool is a real deep wine/magenta colour! My camera insisted on using “night” settings and no amount of editing got me anywhere close to the actual jacket colour. That is going to have to wait for daylight tomorrow.

Here’s a link to a stunning Meiko Mintz A-line jacket. The price is US $$. Add 25% to that to convert to Canadian funds. But it is a gorgeous jacket. Love the balance between the inside and outside fabrics (her jackets are reversible – one aren’t). Wouldn’t it be lovely to wear.

Purple Boiled Wool Jacket

I had approximately 1/2m of boiled wool fabric left over from my original jacket (made in 2018), not enough to do much with so I went online to see what I could find to go with it. Mood Fabrics in NYC had what looked very close to that original boiled wool so I purchased 1 1/2 yards, and guess what? The fabric content was the same and the colour almost an exact match.

In the end I didn’t need to use any of the original fabric – I had enough to make the jacket. The challenge was what kind of jacket to make. I’d sent the original to Mission Mart – I didn’t like the way the neckline/collar fit (although I was happy with the rest of the jacket). I didn’t want to reuse the Marcie Tilton pattern. I’d bought another boiled wool pattern, this one with a collar, but I was afraid the jacket was too loose fitting for this light weight boiled wool so I decided to reuse the pattern I’d used for the Kantha jackets, but to substitute the collar from the Verona Jacket pattern.

This is the finished jacket – I finished the bottom and sleeve edges with a batik facing to give the edges some stability. I’d used boiled wool backed with a mid-weight fusible interfacing for the front facings. I made single welt pockets, creating the pocket with a fabric piece sewn behind rather than a pocket bag because the jacket is unlined.

I left the collar with the raw-edge because it doesn’t get wear.

The jacket looks a bit wrinkled because I’ve been wearing it all day! It’s warm and cozy – just what I was hoping it would be. (And the two front edges are the same length, yeah!)