Bargello Table Runner II

Years ago I did some wool on canvas bargello embroidery creating seat covers for several chairs.

Bargello done with wool and canvas

Bargello is done by stitching across a set humber of canvas threads – in this case I’d guess 4 threads – with adjacent stitches stepping down two threads. Also there are different numbers of stitches at different points – three consecutive stitches over the same threads, two, two, one, one, one, one… It’s the changing number of repeat stitches at any level that creates the interesting curved lines characteristic of bargello work.

It’s similar with creating bargello using fabric. Set up a panel from coloured strips, cut new strips of different widths from the panel, sew these strips together systematically staggering the colours to set up a bargello pattern.

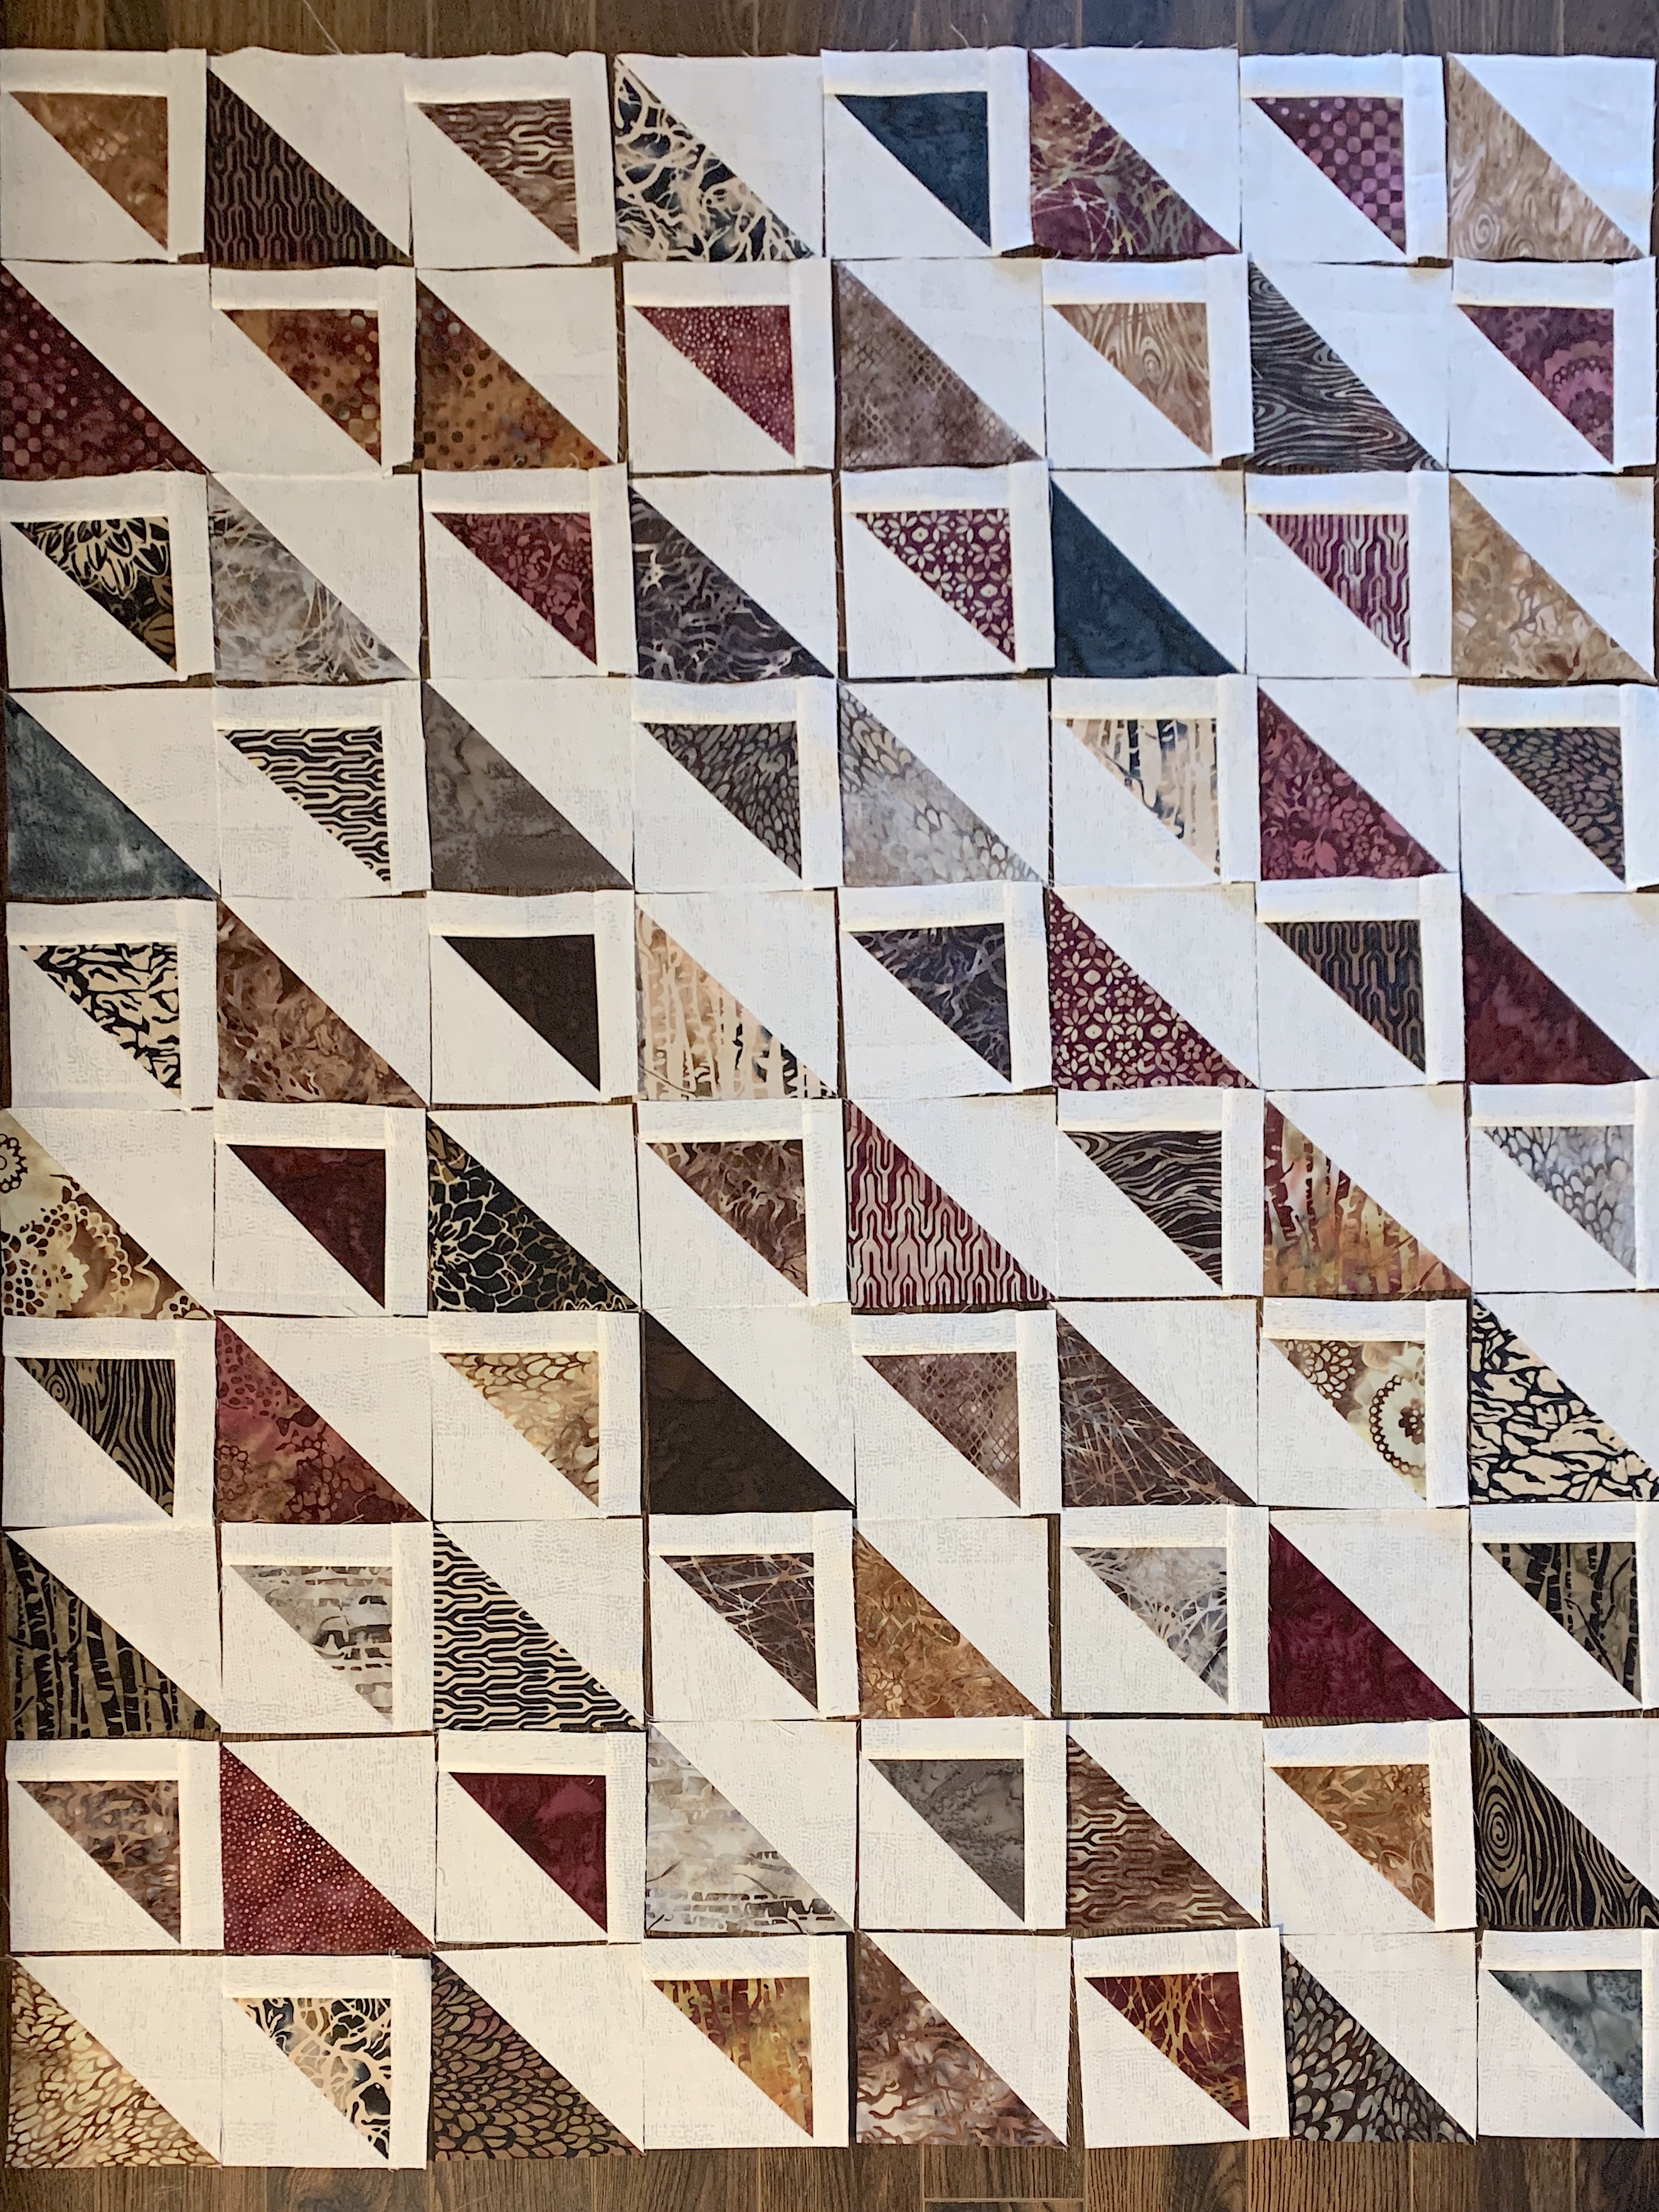
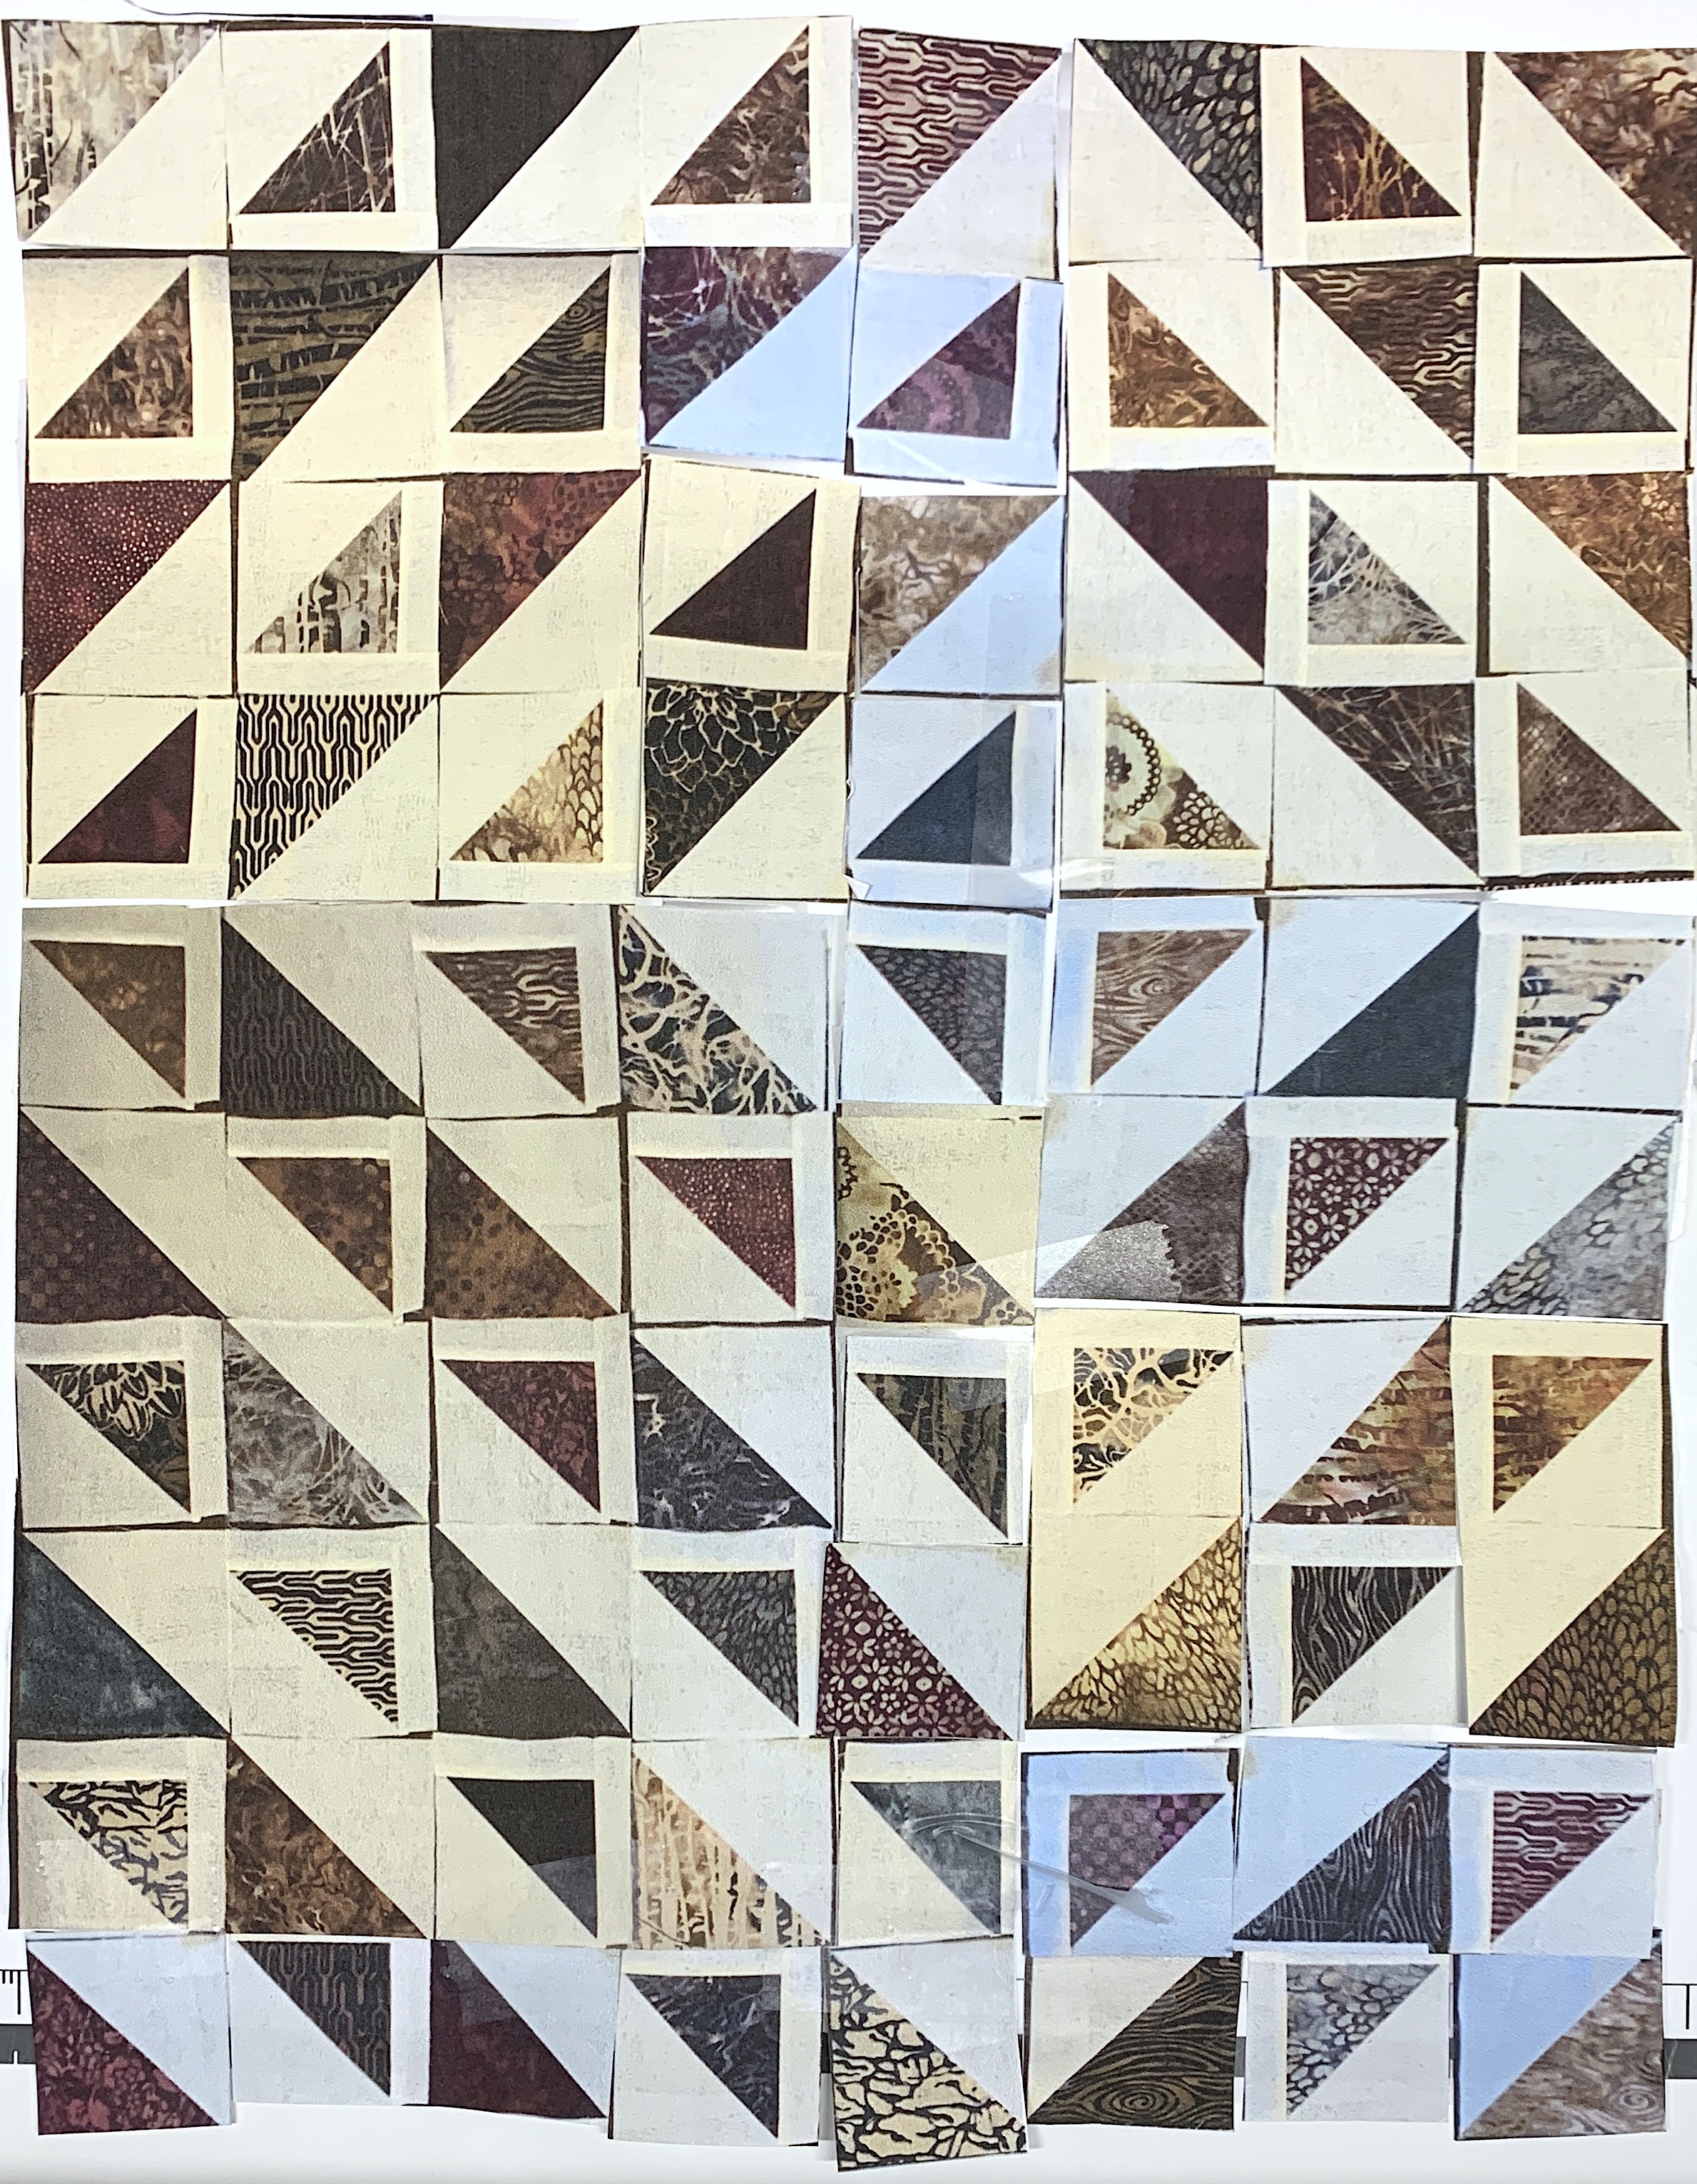
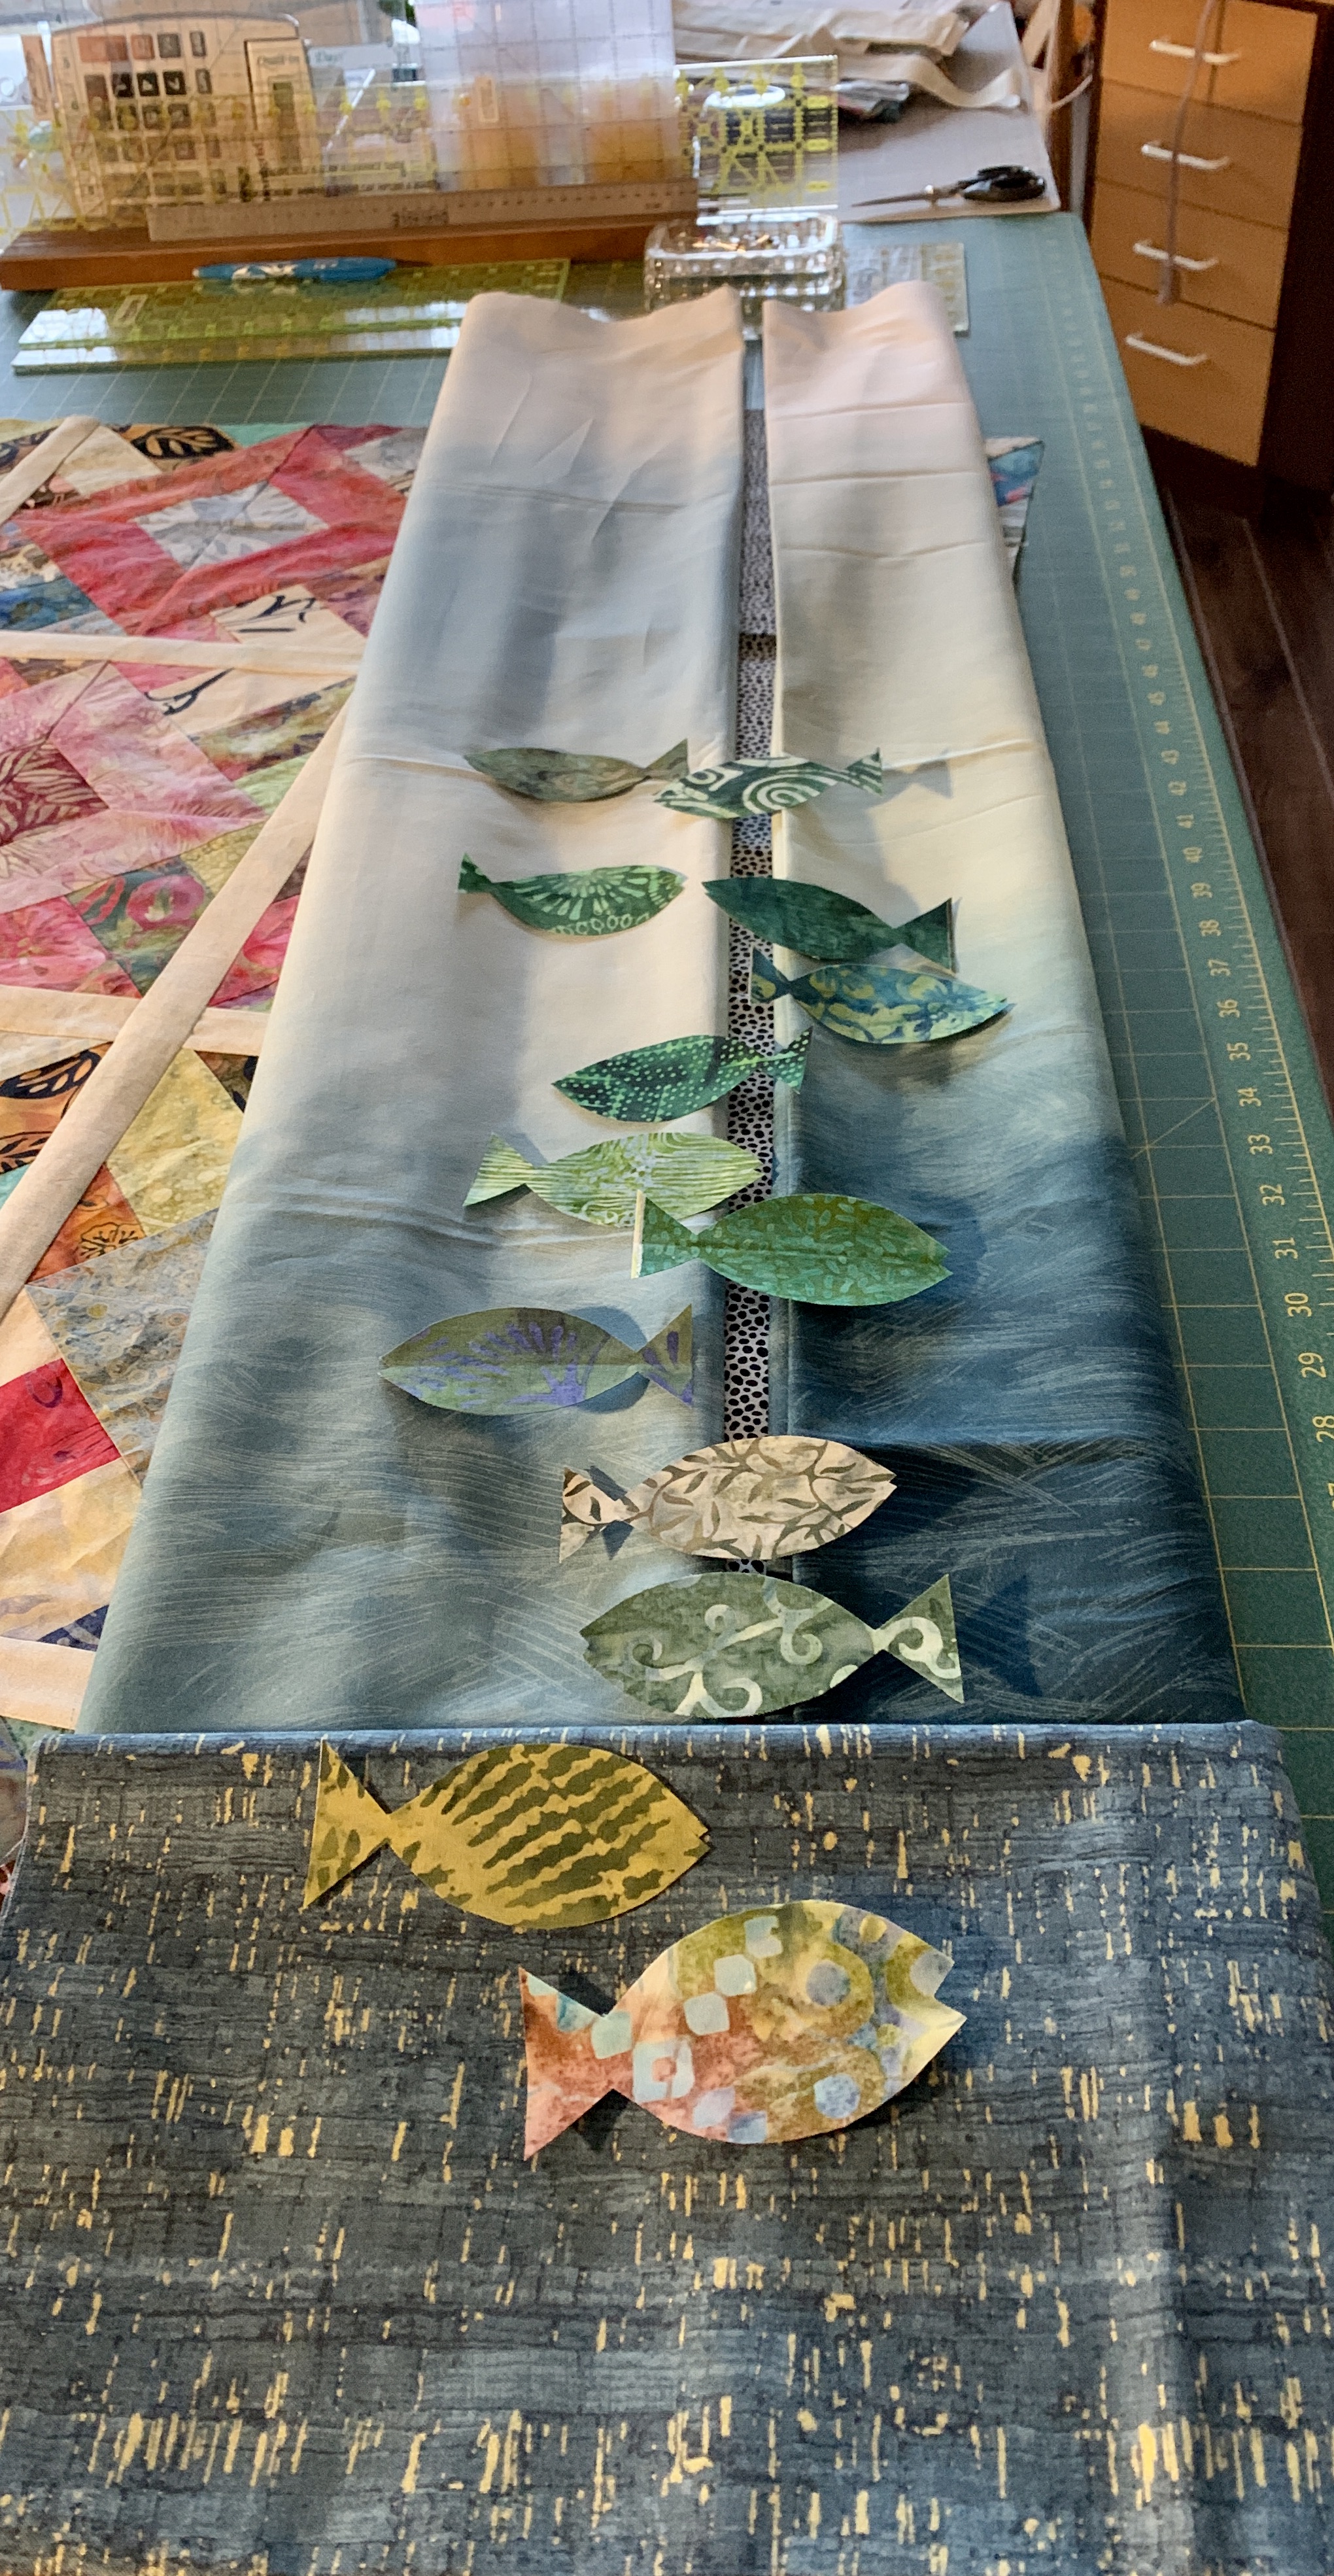
Beginning to Lay Out The Pattern

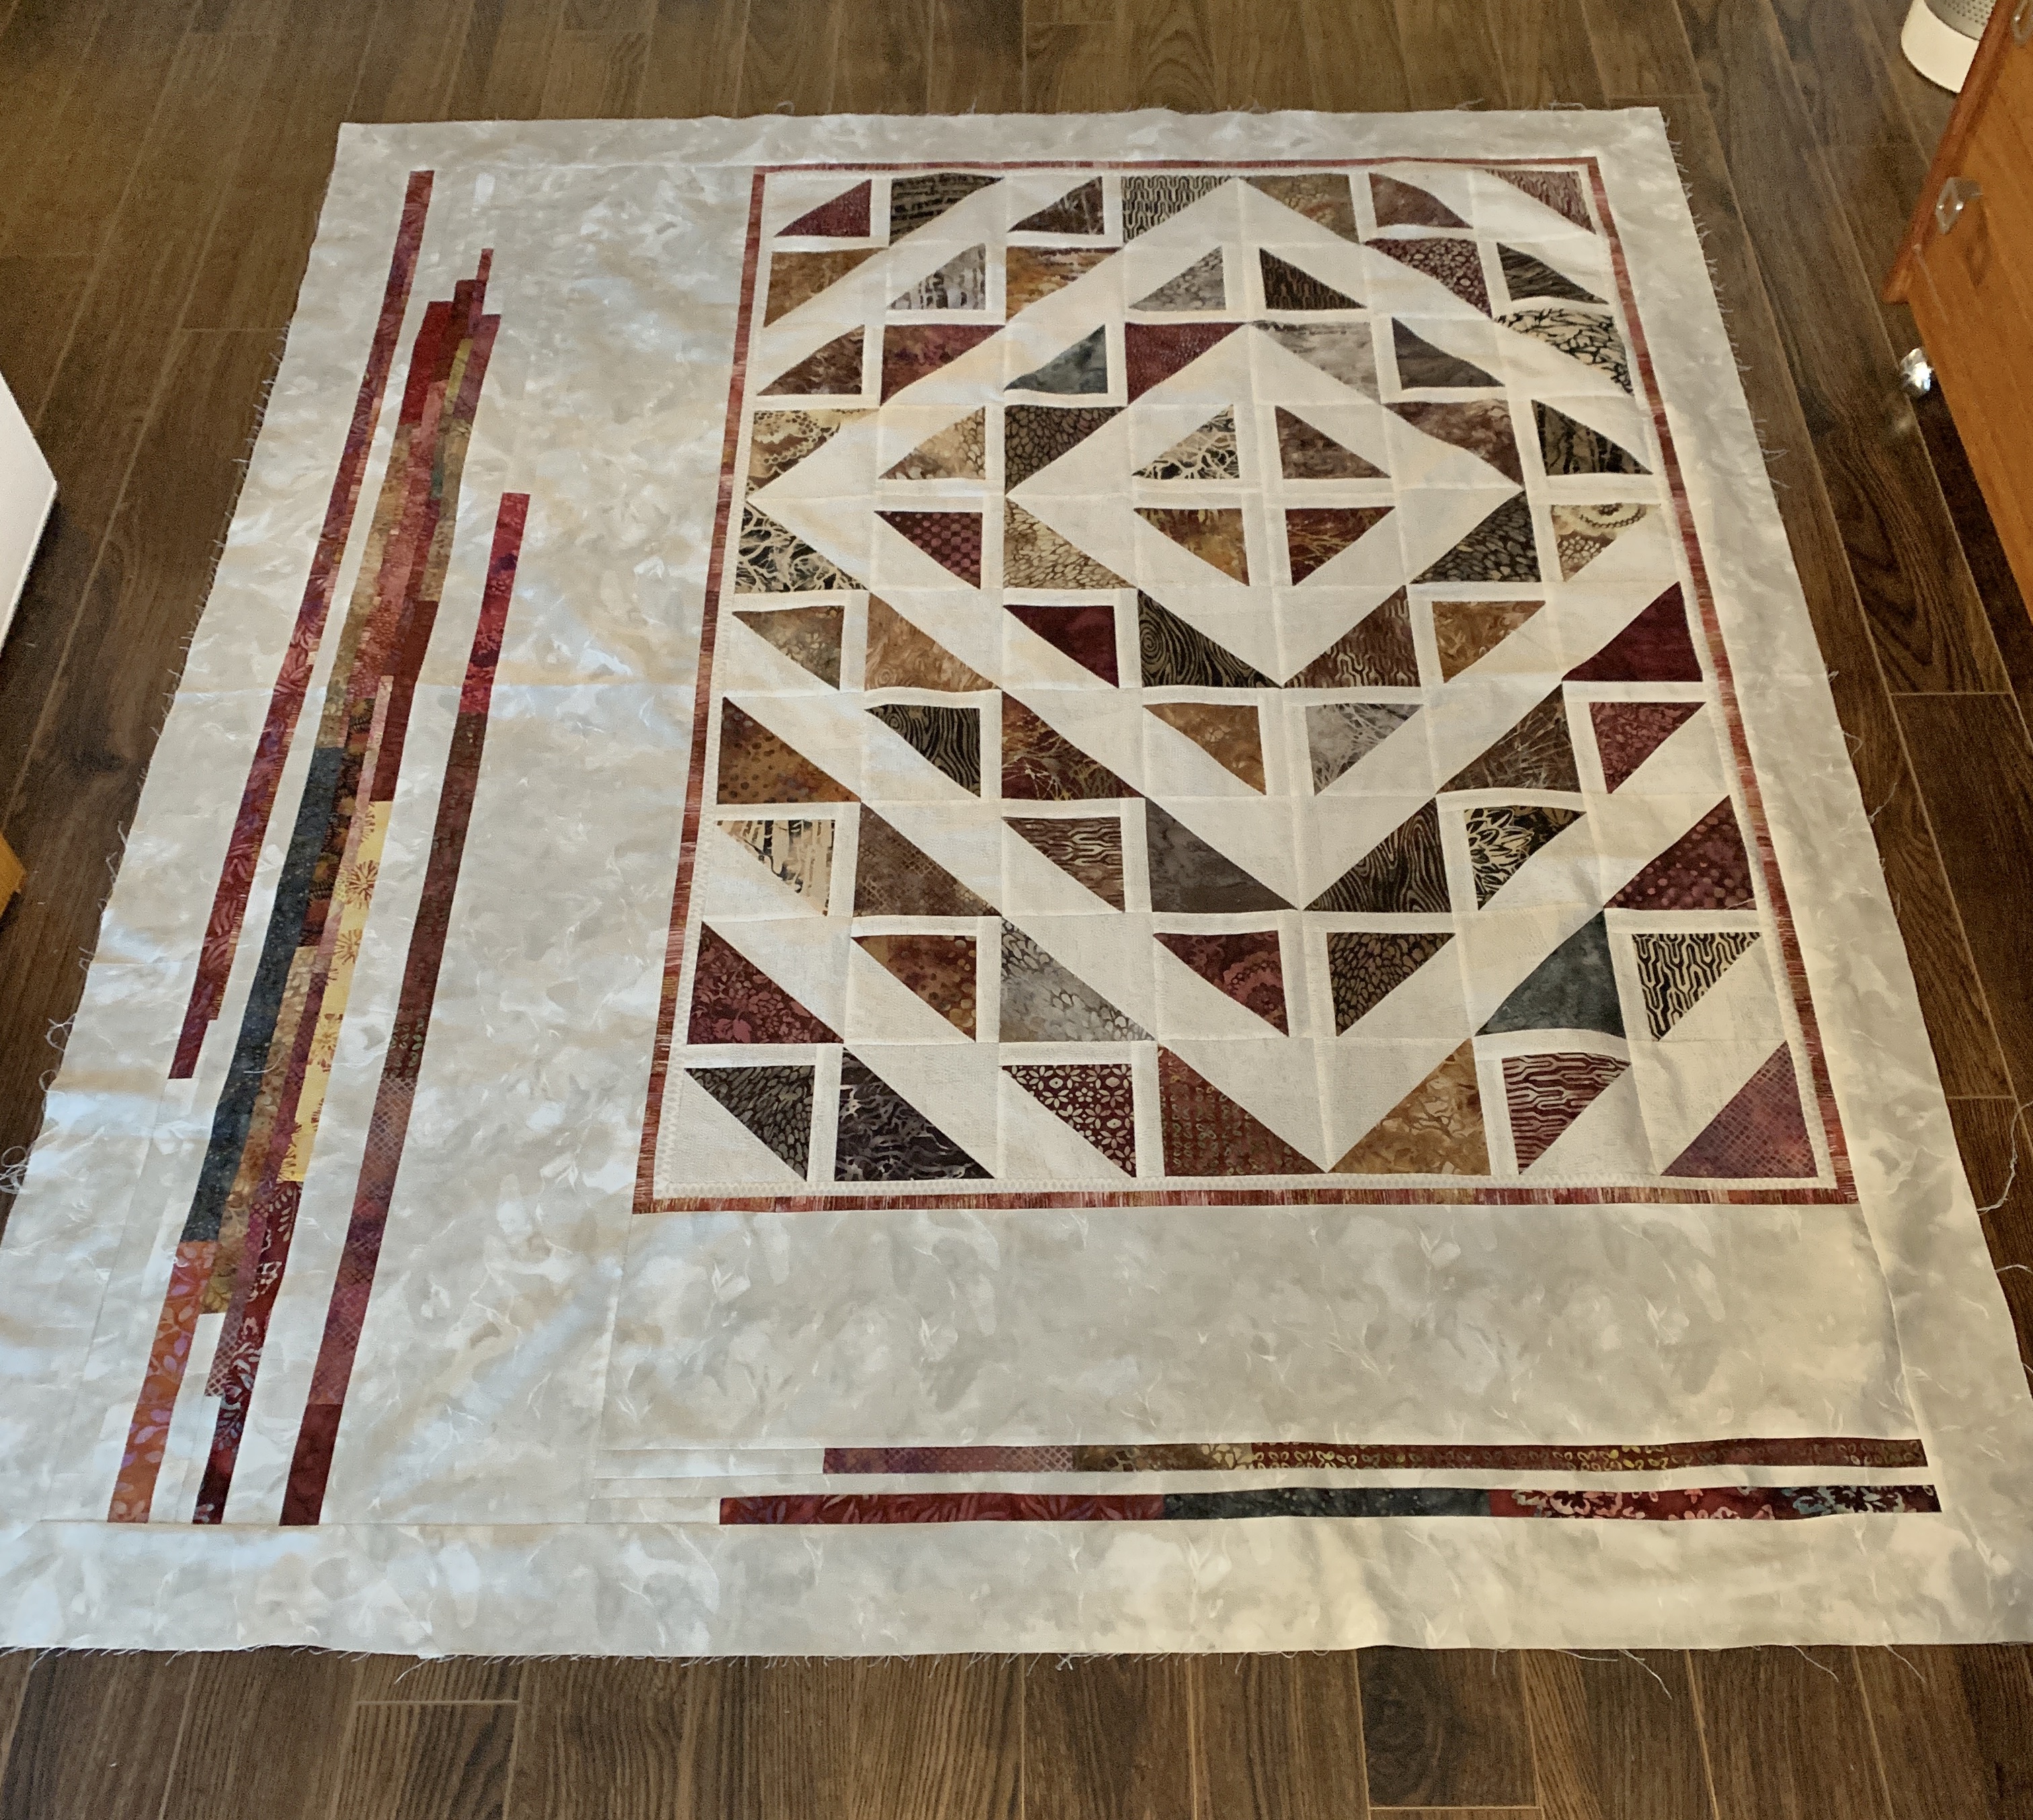
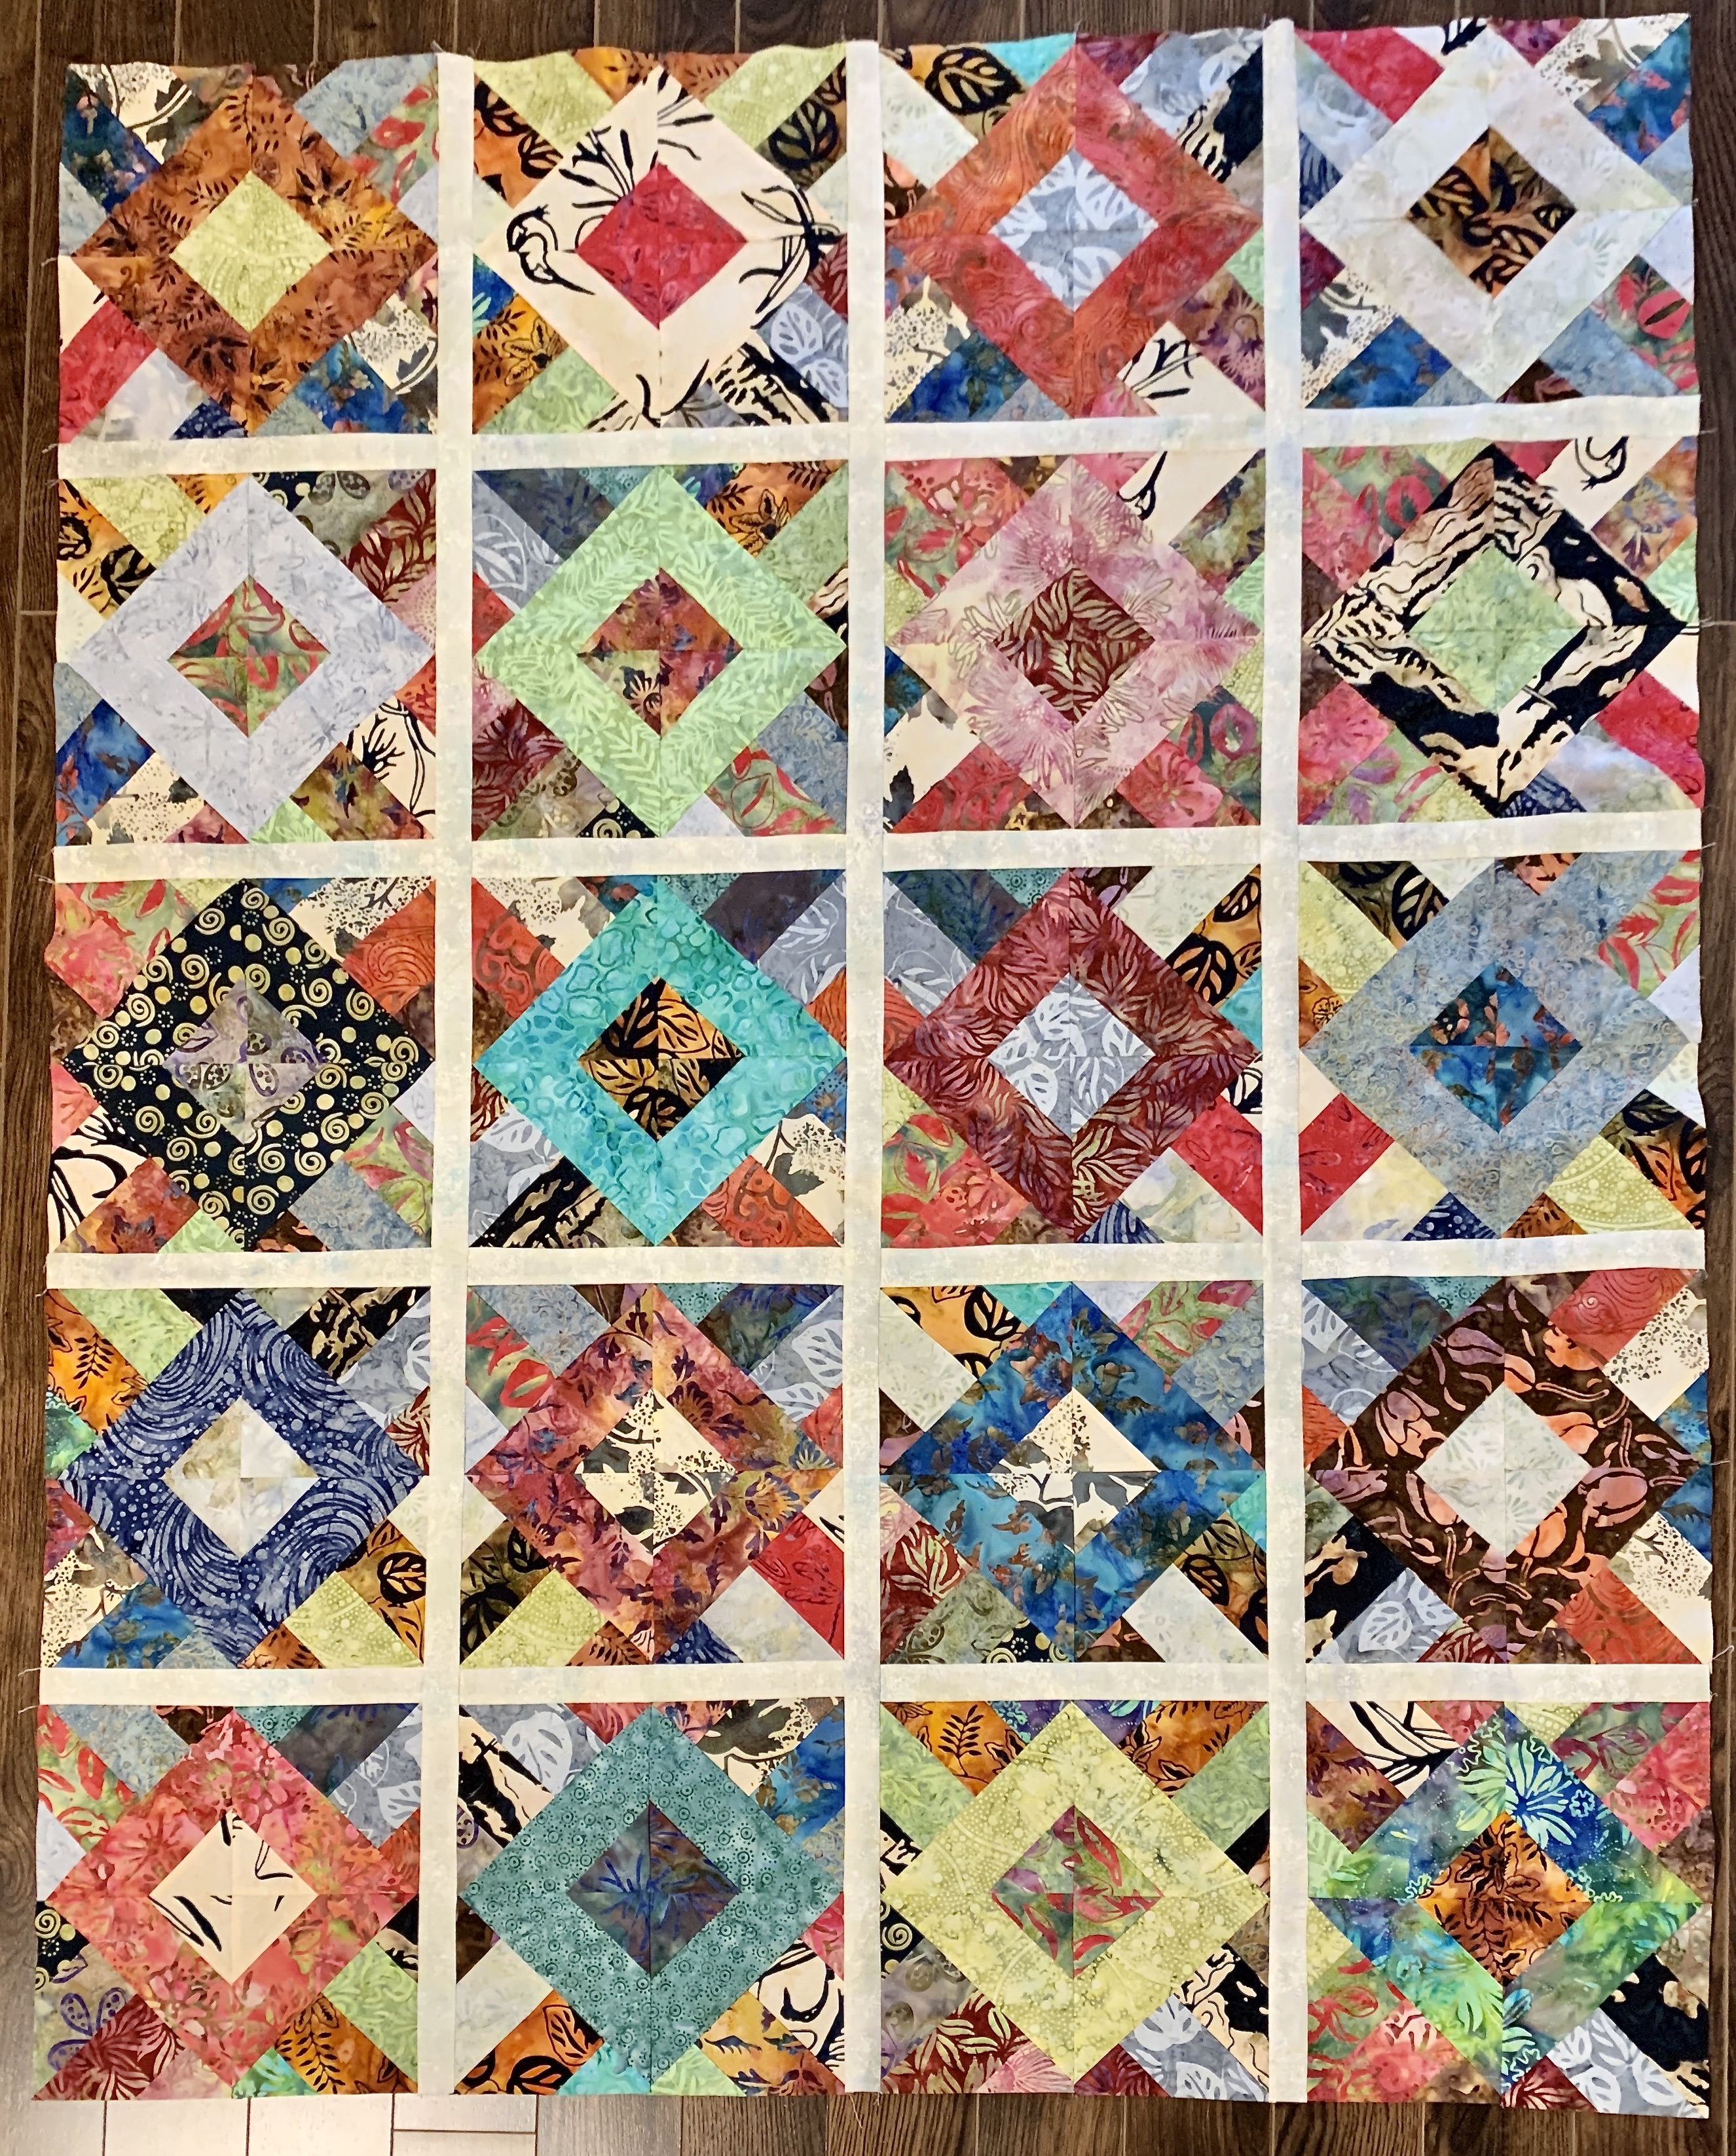
Here is my completed bargello block:

Bargello “block”

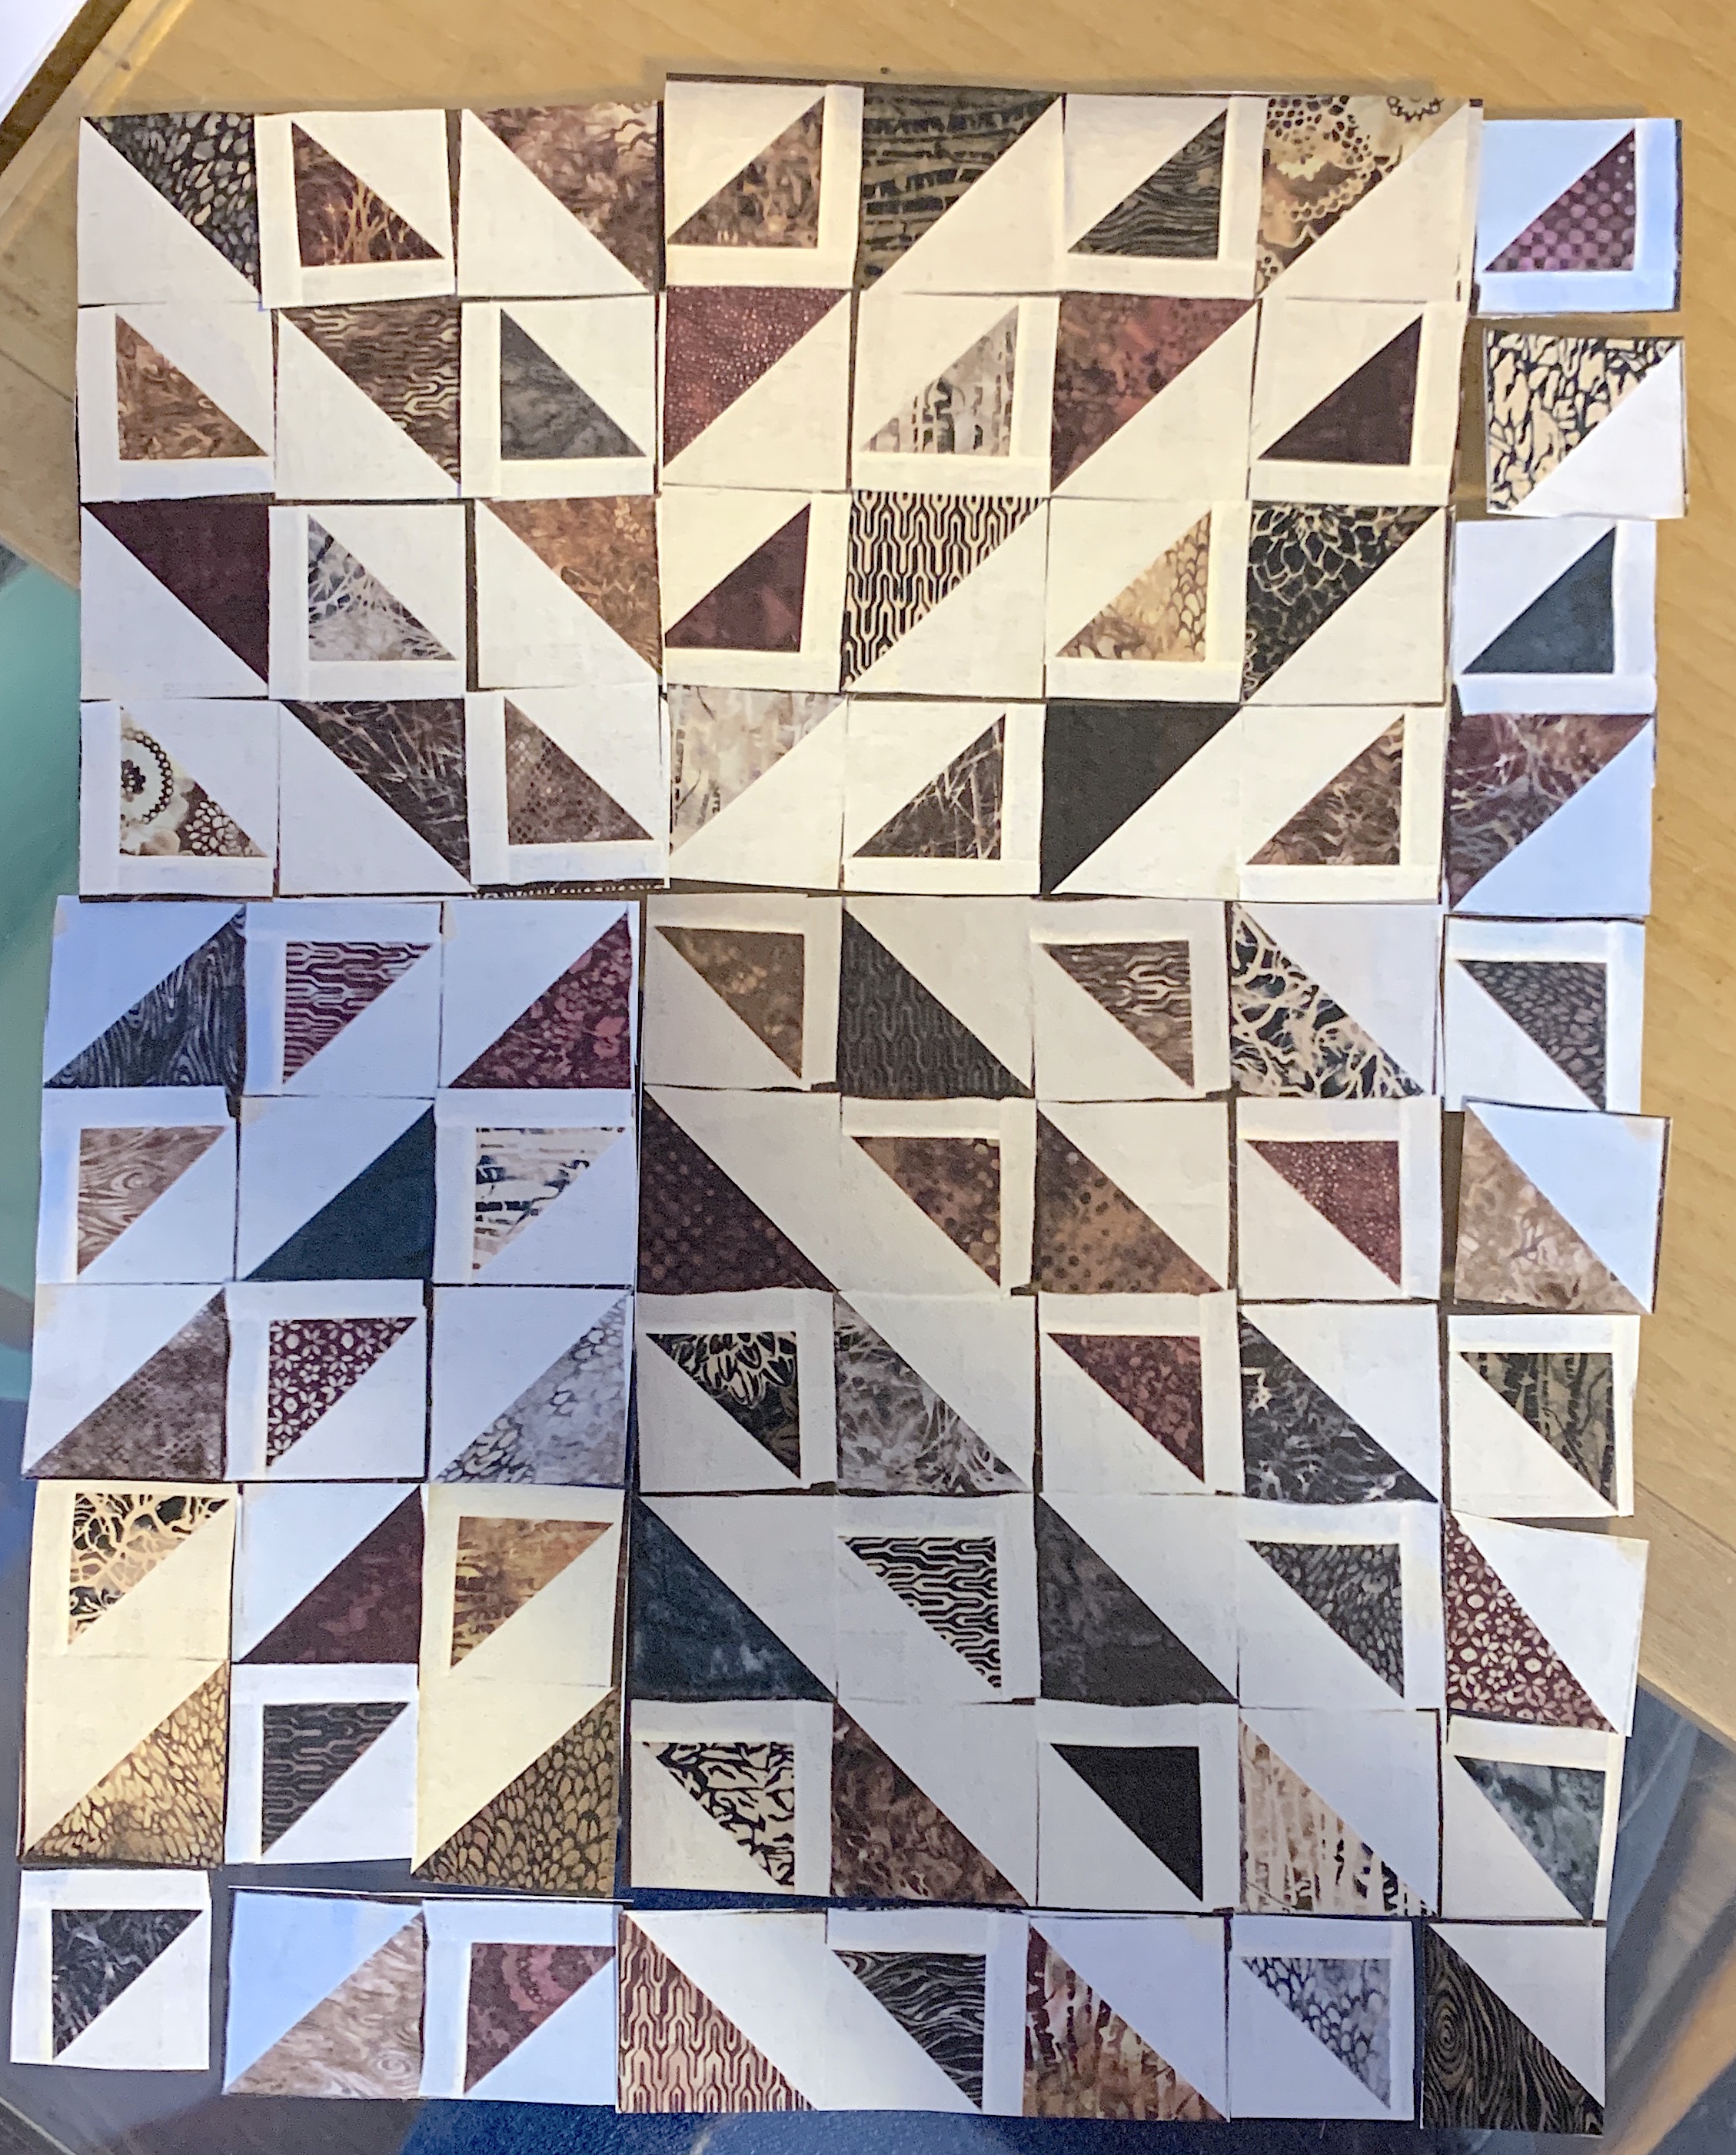
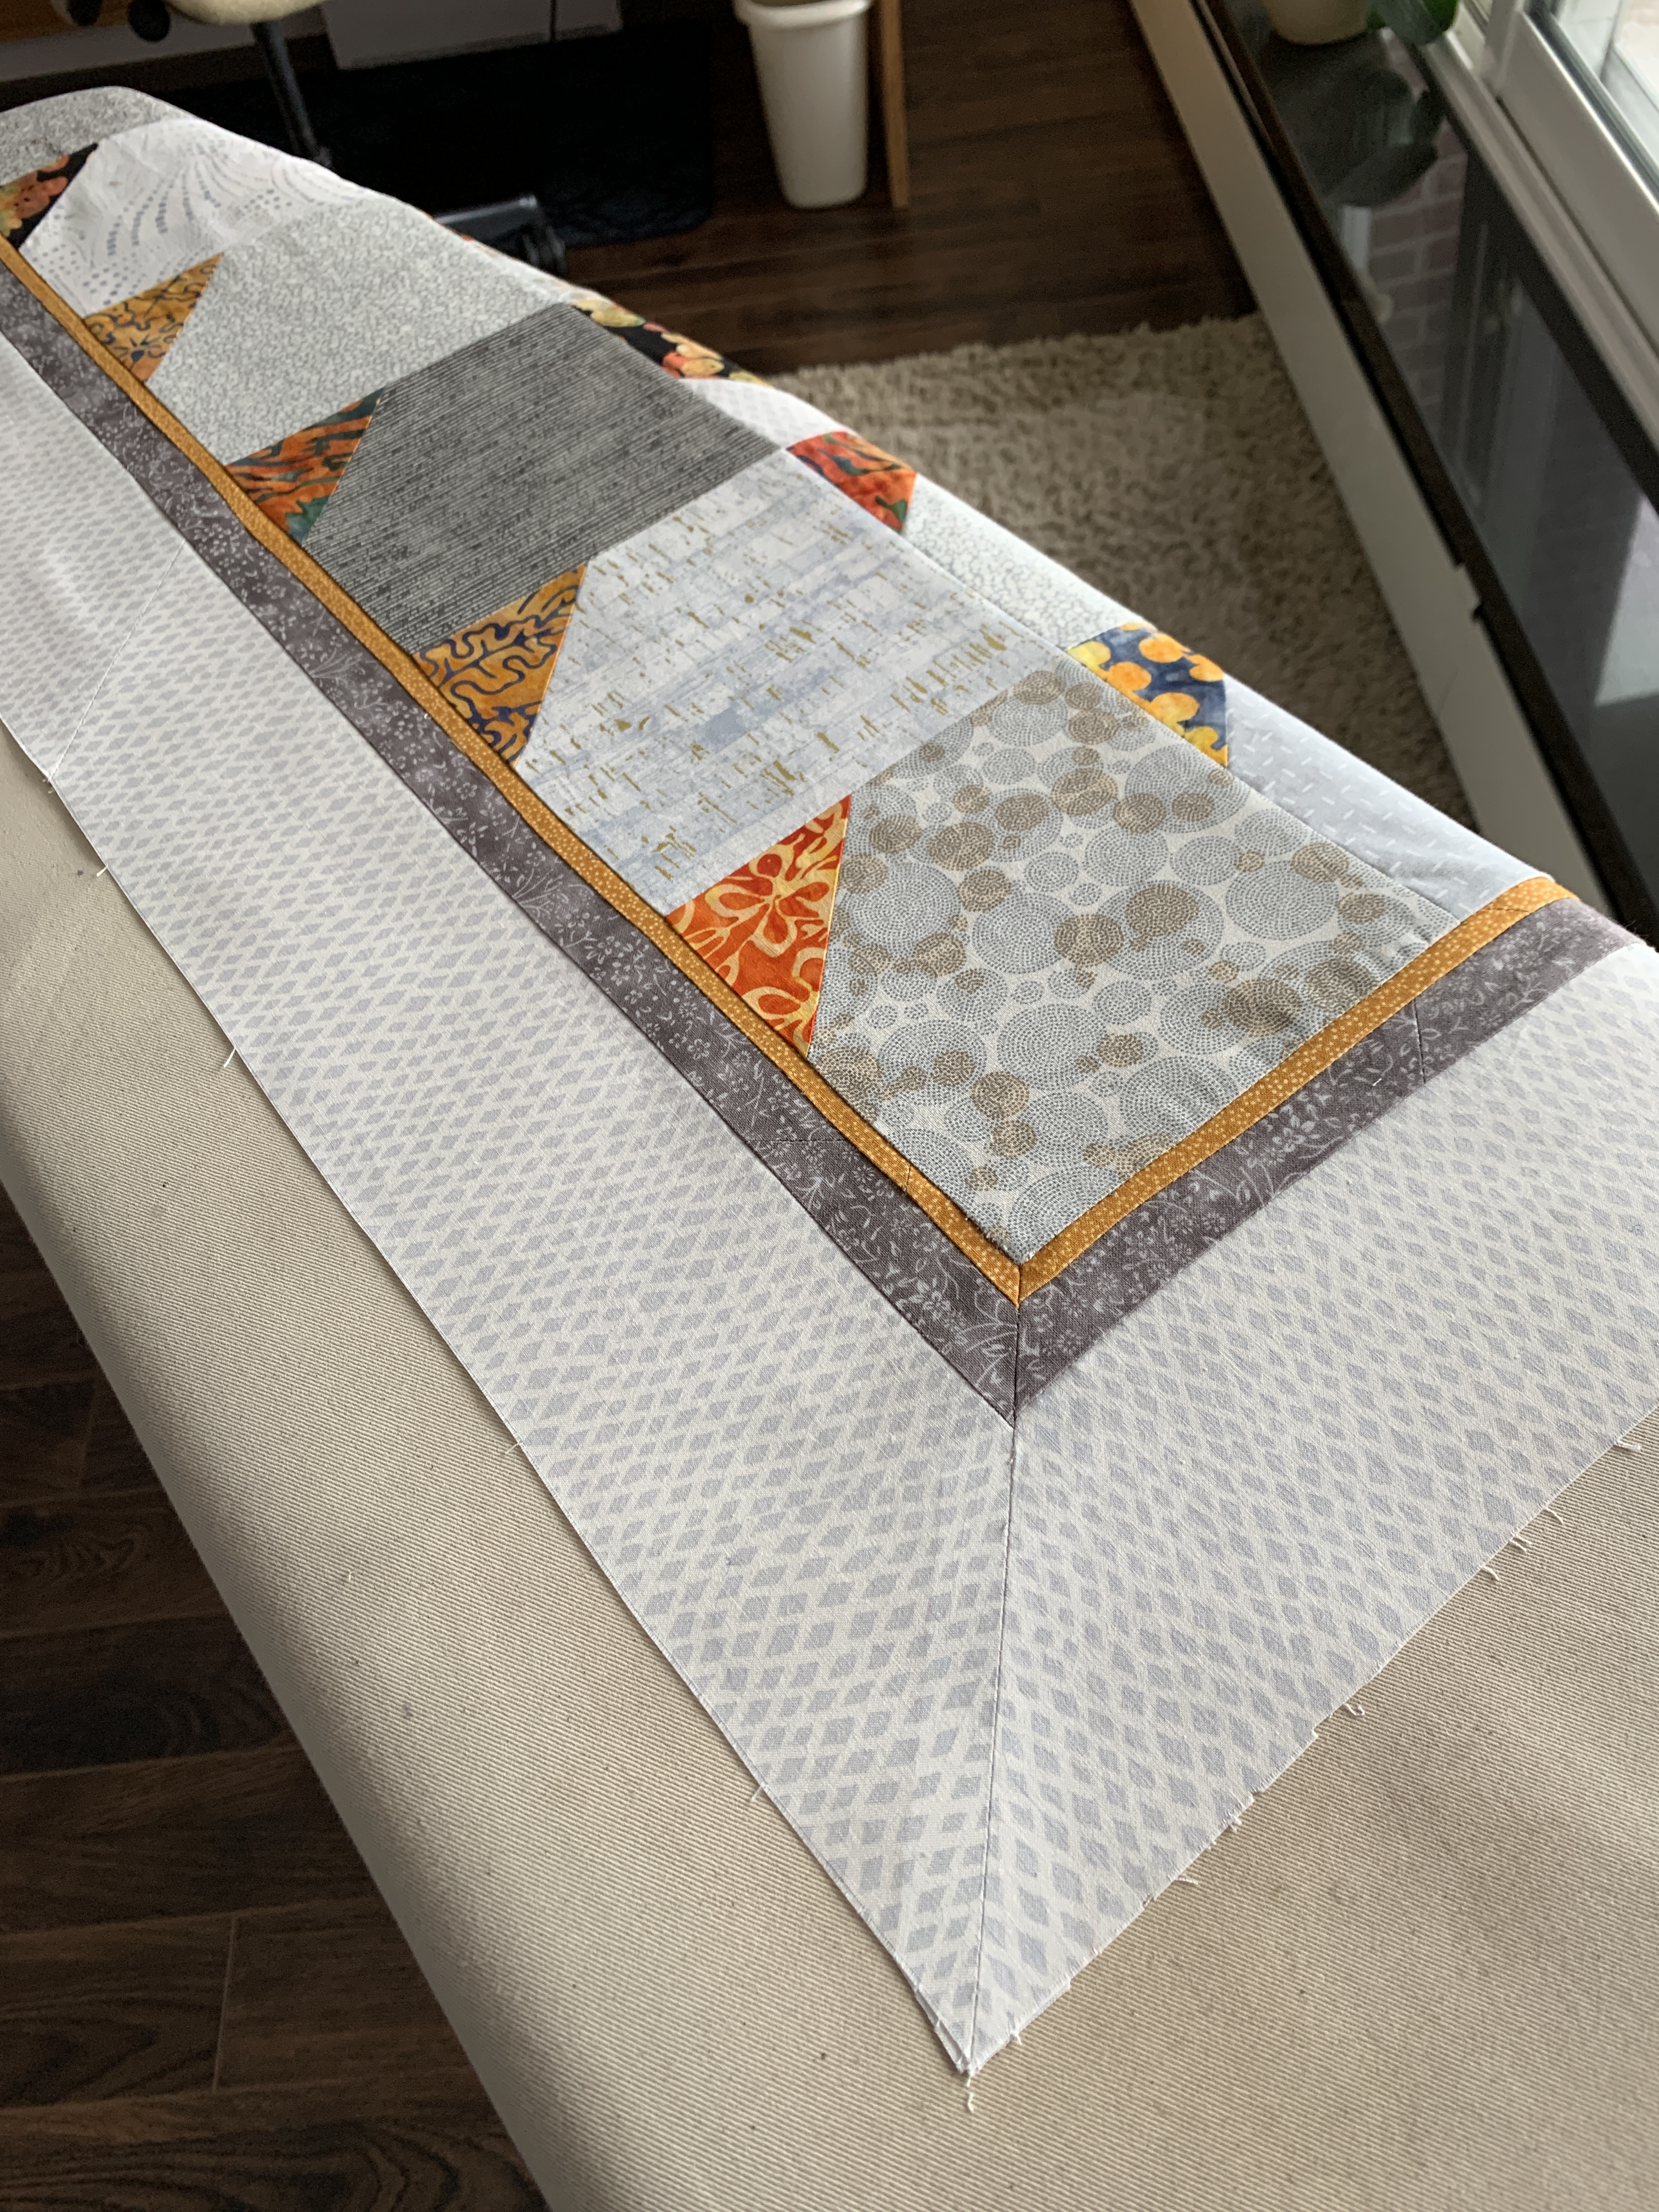
Here are two blocks sewn together to make a curved diamond.

Bargello Double Block

Yesterday when I created a test block I wasn’t quite careful enough with my cutting, and my 1/4″ seam allowances weren’t perfect, so the finished panel was just a bit slanted. Instead of doing the same block using my second set of strips, I started a new layout and this time I made sure my ruler didn’t slip while cutting the initial strips, that I matched up my edges precisely when sewing them together, was particularly careful when cutting the panel into different width strips and nested the seam joins when sewing those strips together. My two blocks turned out pretty much the same dimensions (and although the photo doesn’t demonstrate it, this panel is straight).

The other thing I did this time was to add a 10th very dark strip next to my contrast colour. I ran into difficulty nesting the joins yesterday and that was because I had used just 9 strips initially – taking care to press my seams in alternate directions – but when I added in the contrast strip and joined it to the first (creating a tube) I ended up with a pressed seam not paired to another and as a result I was changing nesting direction for just about each join/point while assembling the block. With 10 initial strips I had the right number of seams that when pressed in opposite directions matched up.

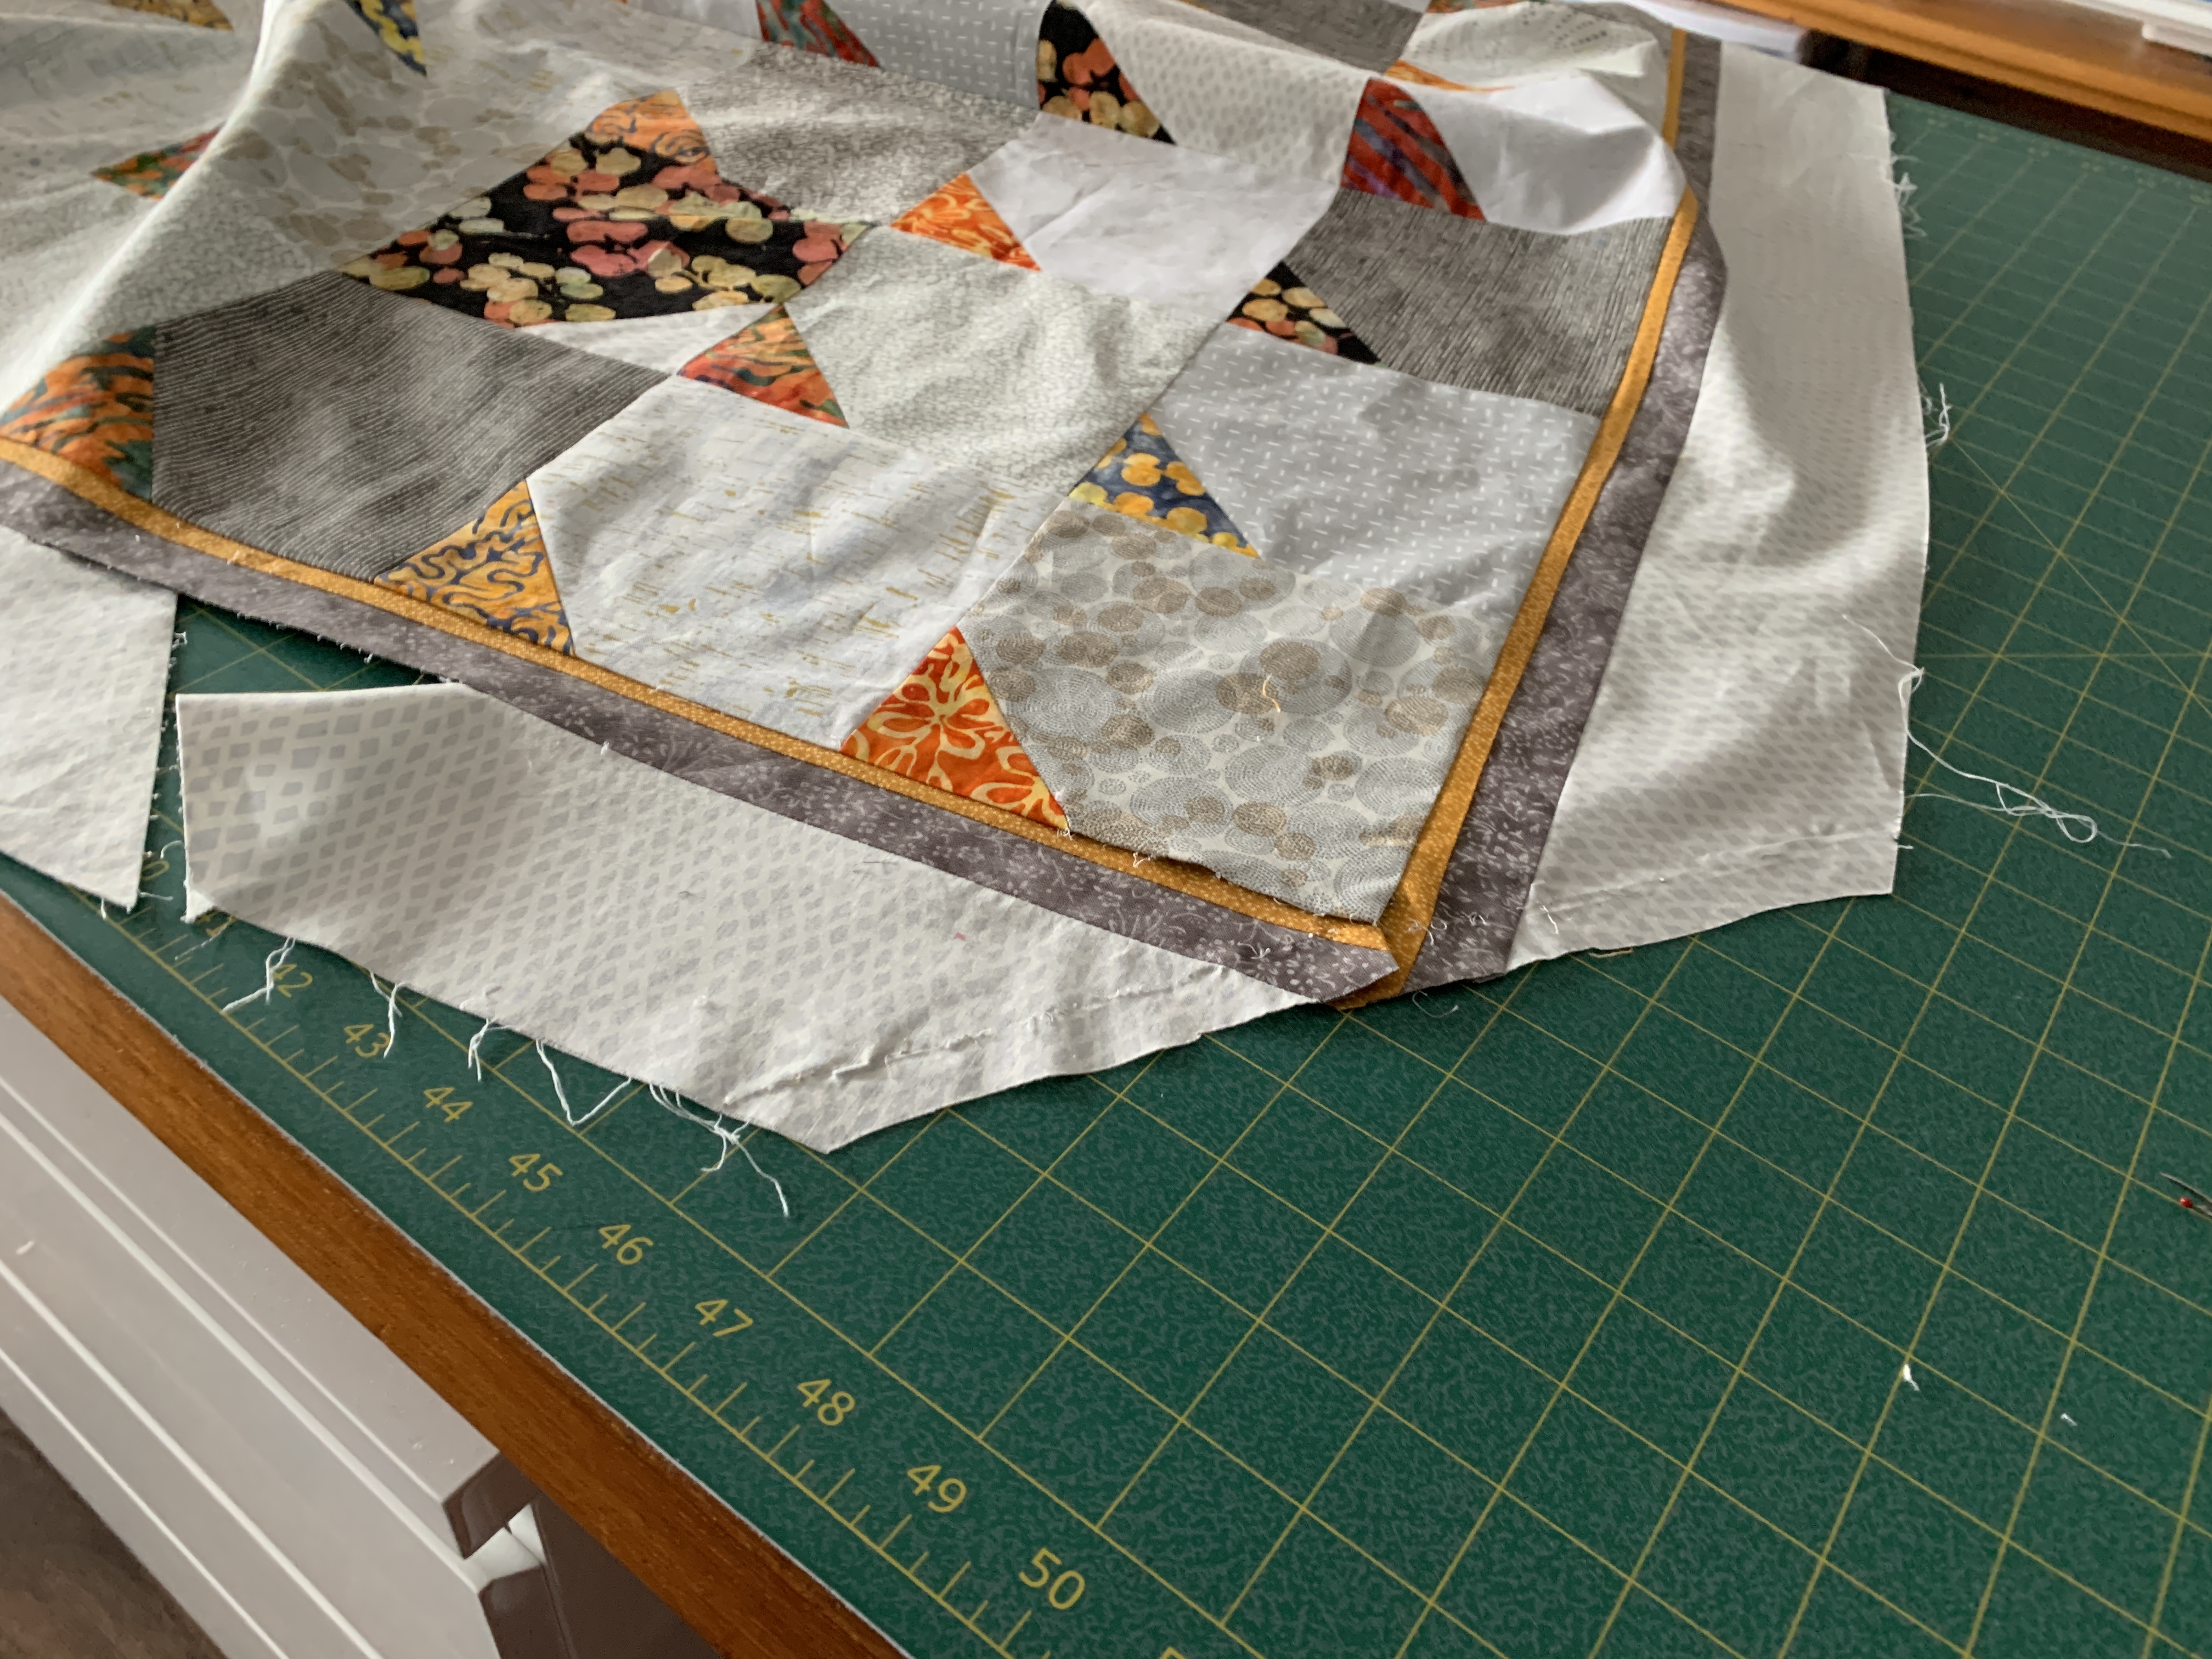
Seams pressed in opposite directions

Sewing the different width staggered strips together was nearly effortless – the nestings were all just about exact. So in spite of some directions I’d found online calling for an odd number of strips to form the bargello layout, it turns out an even number of initial differently coloured strips makes the later sewing much easier.

Charm Quilt Top II

I spent a couple of days looking at the finished quilt top and decided it wasn’t finished after all – it needed something in the border below the panel to mirror the stripes in the left border.

Revised Quilt Top

So, I carefully unstitched the border below the panel, created two strips from scraps, inserted them into the border, trimmed the border (praying I was getting the size exact so it would fit back into the original space and lie flat).

It did.

The quilt top now has balance which it didn’t have before.

The quilt back is also done. I incorporated the column of HST I removed from the panel, added a border on the right, then two sets of pieced sashing on either side. I slit the backing fabric leaving 12″ to the right and inserted the strip.

Charm Quilt Back

The quilt sandwich is now pinned and ready to be quilted in the hoop. I extended the blocks into the borders by marking them using a Frixion pen (heat erasable). I’d planned the borders to equal multiples of the original 4.5″ quilt block so the quilting should work out relatively easily. That will get underway this weekend – I will do a few blocks to show how I do the quilting for my class on Wednesday.

Quilt Sandwich

Charm Quilt Top

In the end I went with an on-point square layout set off-centre.

7 x 10 HST Panel

However, the finished panel was too small, even with 3.5″ borders, to be a good size throw quilt. So what to do with it…

I had used all of the white/grey background fabric I had, I had no batik charms left. I also thought the 8 x 10 array wasn’t rectangular enough, so I removed one of the columns – set it aside to use in the quilt back.

Next, I decided to use the panel offset to one corner and create narrow pieced stripes in the wide border to the left of the panel as an accent for the HST array.

Completed Quilt Top

To build out the quilt, I added 9″ of backing fabric (a different pale grey/white fabric which blended with the original fabric) to the bottom of the panel so I knew the length of the  side panel. Then I began building pieced strips from everything I could find in my stash which blended, or implied, burgundy – the focal colour of the batik charms. I offset the strips by varying amounts from either the top or the bottom of the side piece by inserting appropriate amounts of backing fabric into the piecing. I completed the wide side border with a wide strip cut from the length of backing fabric to avoid a large, obvious mitre across the middle of it.

Finally I added a 3.5″ mitred outer border.

Now I’m ready to construct the backing. I bought a darker grey/white printed fabric for backing. I have a 4.5″ strip of HST I removed from the panel. I haven’t measured the panel width but I’m guessing it’s close to 54″ wide. So my insert panel will need to be at least 12″ wide.

No idea yet how the back will shape up. That’s for tomorrow.

Another HST Quilt

Two weeks ago at class one of the gals gave me a batik charm pack in exchange for the materials I’d given her. The batiks – five related colours – all felt “burgundy”. I thought they’d work with a light background. I decided to create unequal half-square triangles.

I raided my stash of larger fabric pieces and found a remnant of a white with grey fabric from the Zen Chic Fragile Collection.  I measured it carefully – thought I had enough for 40 5″ squares, plus sashing pieces; I started cutting. Turns out I was close, but I had to hunt through boxes of scraps hoping to find a wee bit more – luckily I found exactly enough to scrounge 8 more 4 1/2″ sashing pieces. That was it – there are no scraps of any kind left! This fabric collection, this colour in particular, were popular and are nowhere to be found. Trust me, I looked for hours online.

Stitching Unequal HST

To construct the unequal HST I marked the diagonal, then another parallel line 1/2″ to one side. I chain stitched the diagonals, cut the blocks apart, chain stitched the second line, cut them apart. Then cut between the two lines of stitching. After pressing the blocks open, I added a 1″ sashing to two sides of the smaller triangles.

I’ve interleaved larger and smaller triangles and this is the 8 x 10 array I currently have on my floor. Kinda interesting….

Current Layout On The Floor

I decided to see what other arrays are possible. I took a photo, then cut the paper into sections so I could try other arrangements:

Pinwheel Array

The pinwheel is off centre (centre is at position 4/3). While the centre should provide focus, it doesn’t seem to in this case – what’s there is too busy.

Next layout:

Chevrons

The chevrons work better – the white lines draw your eye in toward the offset centre. However, this layout requires two smaller triangles which I don’t have. I have two of the larger triangles but not a single scrap of fabric to convert them into smaller triangles – no fabric to construct sashing!

I’ll probably stick with the array I currently have on the floor – I need to leave it there for a day or so to make sure I’m happy with the colour distribution.

I didn’t say the reason I’m doing this quilt is so I can demonstrate for a class in early February how to “quilt-in-the-hoop“. I need both a quilt top and back to do this. Stitched, this array is going to be on the small side (but with no more burgundy batik squares and no more backing fabric to extend the size by a row/column or two, I will enlarge the panel with an inner sashing and a wide outer border so the finished size lands somewhere between 40″-45″ x ~55″- 60”.

I have a piece of complementary burgundy fabric large enough for sashing; and the other day I bought a metre of soft grey which should work for the border. I’m thinking a hidden binding from the main backing fabric might be in order because I don’t think I want to define the outer edge of the quilt with another strong colour.

First to assemble the blocks into a panel. I’ll work on that tomorrow.


Another possible layout:

Diamond

This one works – and I’d complete the diamond on the right in the border (including a narrow sashing all around up to, but not including, that point…).

Hmmmm.

[BTW – I’ve been doing these different layouts by cutting a paper printout of the layout currently on my floor and holding it together with tape – no need to spend time on the floor arranging and rearranging blocks! The reason for placing my layout on the floor – my cutting table is too narrow to hold the width of the panel and I don’t have a space where I can hang a flannel design wall. I suppose I could set up a flannel panel and use weights to hold it in place on the floor – that could help keep the blocks from sliding around – but I’d still have to be on my knees to work with it.]

Nine Shades Of Grey – Completed

Finished this quilt a couple of days ago, now. Although a very simple quilt, I find it’s simplicity appealing and I’m happy with how it turned out. I particularly like how the two narrow borders frame the inner panel bringing out the darker greys and highlighting the golden colours in the batik fabrics.

Nine Shades Of Grey

I’m happy with the back as well. Finding a way to use the small half-square triangles along with the cornered blocks was satisfying.

NIne Shades Of Grey – Quilt Back

I elected to bind the quilt in the same fabric as the wide outer border so the binding would be relatively invisible. I also didn’t use a decorative stitch to apply the front of the binding – I just straight stitched it down – harder to do accurately than working with the decorative stitch which is more forgiving! But I didn’t want to introduce any distracting detail into the overall simplicity of the quilt.

Magic Squares Quilt IV – Finished

I finished the quilt on Thursday – quilted the last four squares and the border, then added the binding and label.

Magic Squares IV – Quilt Top

Final Size: 51.5″ x 62.5″ – largish for a throw but useful to keep at the bottom of a bed to use when it’s cold.

The quilt back:

Magic Squares IV – Back

I had four blocks left over which I bordered and inserted into the backing fabric. I was pleased with how the backing echoes the dark teal feel of the quilt top and the inserted rectangle stands out nicely.

People ask “How long does it take to make a quilt like this?” It’s not an easy question to answer particularly since in this case I was working on another quilt, making a gazillion zippered bags and sewing other things.

I started this quilt somewhere around Nov 10 when I started sewing jelly roll strips together, cutting the panels into squares in preparation for the sewing retreat (Nov 14-17) where I assembled the “magic squares” blocks. I got to laying out the squares on Dec 2. On Dec 5, I created the top panel by adding the sashing. On Dec 6, I added the outer border. Sometime during the next several days (while I made more bags, finished knitting a pair of men’s socks, worked on and finished the second “fish” skinny quilt got some baking done), I created the quilt back. I began quilting it a week ago – the quilting took three days finished on Dec 25. Binding the quilt took a morning; I added the label that evening – Dec 26.

So you could say I worked on the quilt for 6-7 weeks, but the actual working time was much less – probably not more than 10-12 days.

And now I’m quilting “Nine Shades Of Grey” which is going quite quickly. My goal is to have this second quilt finished before Dec 31. I think I will make it.

Magic Squares Quilt IV – 3

Top done! I finished the sashing early this afternoon and just this minute finished the border with mitres all done properly the first time! And you can see from the photo that I managed to get the sashing to intersect well – that’s tricky on a quilt like this because all of the block outer edges are on the bias and therefore stretchy. To make sure I’d come close on size I carefully cut all the sashing pieces the same length and then eased the quilt block edges into place. The quilt top is square.

Sashed And Bordered!

It’s too bad really that I can’t capture the vibrance of the batiks with my iPhone camera – the quilt top is a lot brighter than it looks here. I’m much happier with the final panel than I thought I’d be – the light sashing toned down the 4-strip block corners and the border ties the many colours together, making the panel overall less red/green and more turquoise.

Now I need to construct two quilt backs – one for this quilt (I have lots of leftover half-square triangles with which to work), and another for the grey/gold quilt (and I have leftover blocks there as well).

So marching along with both projects at the same time.


Magic Squares Quilt IV – 2

I completed the panel sashing this afternoon. The light fabric tones down this “quilt of many colours” somewhat. Now I need to add a narrow border using the sashing fabric to frame the panel. (Here’s what it looks like without the sashing.)

Quilt Of Many Colours

Then a border – I found this batik fabric in my stash a couple of days ago – it wasn’t the fabric I was originally planning to use to frame this panel but I think a 2 1/2″ border of this dark teal might just bring the colour hodgepodge together – fingers crossed.

Possible Outer Border

I plan on looking again through my stash – there may yet be another largish piece of fabric that works with the panel although I don’t see any in my mind’s-eye. I may even take the panel shopping to see if there is a fabric that says “take me.”

Yesterday, I gave away my “Fish” banner to a friend. Last evening, I dug out my remaining fish and this afternoon, I found some ombre fabric that might work well with them to create another skinny quilt/banner. It’s a quick and easy project to fill in my wall art collection for this year’s showing in Parrsboro. I lost close to three months of sewing/quilting time this summer with my fractured wrist. I’m trying to catch up so I have enough new creations to show.

Fish II

And while I’m at it, I will have a go at another couple of these skinny quilts – however, not until the two throw quilts I’m working on are finished – I try to complete one piece at a time before starting something else – that way I don’t have unfinished projects sitting around. I don’t know how other quilters live with a closet full of UFOs – I need closure.

So I will get the Magic Squares Quilt IV top done in the next day or two, then set up backs for both the grey/gold and this quilt and get both of them quilted – I’m aiming for end of December.

Magic Square Quilt IV

I thought this would be a relatively quick quilt top – simple enough to work on at the sewing retreat a week ago. I began with leftover jellyroll strips – sewed them in groups of four – that yielded a width of 8.5″ – I cut those 4-strip panels into 8.5″ squares. That’s what I took with me to the retreat. While there I arranged two blocks right sides together with the stripes in the two blocks at right angles, stitched around the edge, then cut in four along the diagonals – that gave me blocks with a diagonal – two strips of fabric on one half-square triangle, four strips on the other.

Although the four-strip pieces were colour coordinated, what I didn’t bargain for was the lack of colour coherence in my blocks. I tried several random placements but nothing worked.

I came across a layout that nested bordered squares giving me three sides of a block butted agains three sides of another block – but the layout was just a jumble. There was no obvious colour flow at all.

Layout #1

Several attempts later, I decided to group four blocks into larger blocks with an internal square on-point that would stand out. That organized the colour somewhat but overall the top was still a jumble.

Layout #2

This afternoon I stopped at the fabric store to pick up fabric for backing the grey/batik quilt and came across a Northcott Stonehenge fabric: Monogram-Lichen

Stonehenge Northcott – Monogram: Lichen Marble 21246 71

Perfect for creating sashing between the blocks. The sashing will lighten the whole, mute the strips outside the on-point square at the centre of each block, highlighting the central square.

I’ve cut out the sashing pieces – now to sew the whole thing together. Can’t wait to see how it will turn out.

The way I quilt I’m never sure how anything will look until I see it emerging. I may start with a known quilting technique – in this case half-square triangles created from 2.5″ strips sewn four together then cut to form 8.5″ blocks….

In this quilt top I let colour rule itself with unanticipated consequences. However, I think I’ve found a way to tame the assembly. We’ll see once I get the sashing sewn to the blocks and the large top panel put together in another couple of days.

I Can’t Believe I Did That!

Even experienced quilters from time to time make fatal mistakes – I made one two days ago. I’d finished assembling the blocks for the grey/batik quilt top and had found fabric for the borders. I set up the borders by sewing a narrow gold strip (.25″) to a grey strip (.75″)and both to a wider (3.5″) outer pale grey strip. My plan was to mitre the corner, not by doing each strip separately but by doing them in one mitre.

I added my compiled border to the sides – no problem. I added the border to one end, successfully executed the corner on the bottom left side and then began working on the right bottom corner mitre.

Mitred Bottom Left Corner

My mistake wasn’t in sewing the mitre – although I drew the 45° angle line in the wrong direction and stitched it along the line. No that wasn’t my fatal mistake. My fatal mistake was trimming the seam before opening the corner to confirm I had it laying flat!

How stupid was that.

So when I went to press the mitre I discovered it curled over the quilt corner rather than lying flat.

Screwed Up Mitre – Bottom Right

I unstitched the seam and thought about reattaching the cut….

Useless Fix

There was absolutely no way to fix this mess except by going back to the original fabric joins, rebuilding the binding on two sides and creating a new mitre. Which is what I did – the next day!

Fixed Bottom Right Mitre

I correctly executed the remaining two mitres – checking each when I pressed them BEFORE trimming the mitred seam.

Finished Quilt Top

The lesson – check and press, before trimming a mitred corner – I can always take a seam out, press it flat and stitch it in the other direction if I haven’t cut off the excess.