Skyline #2

So here goes…

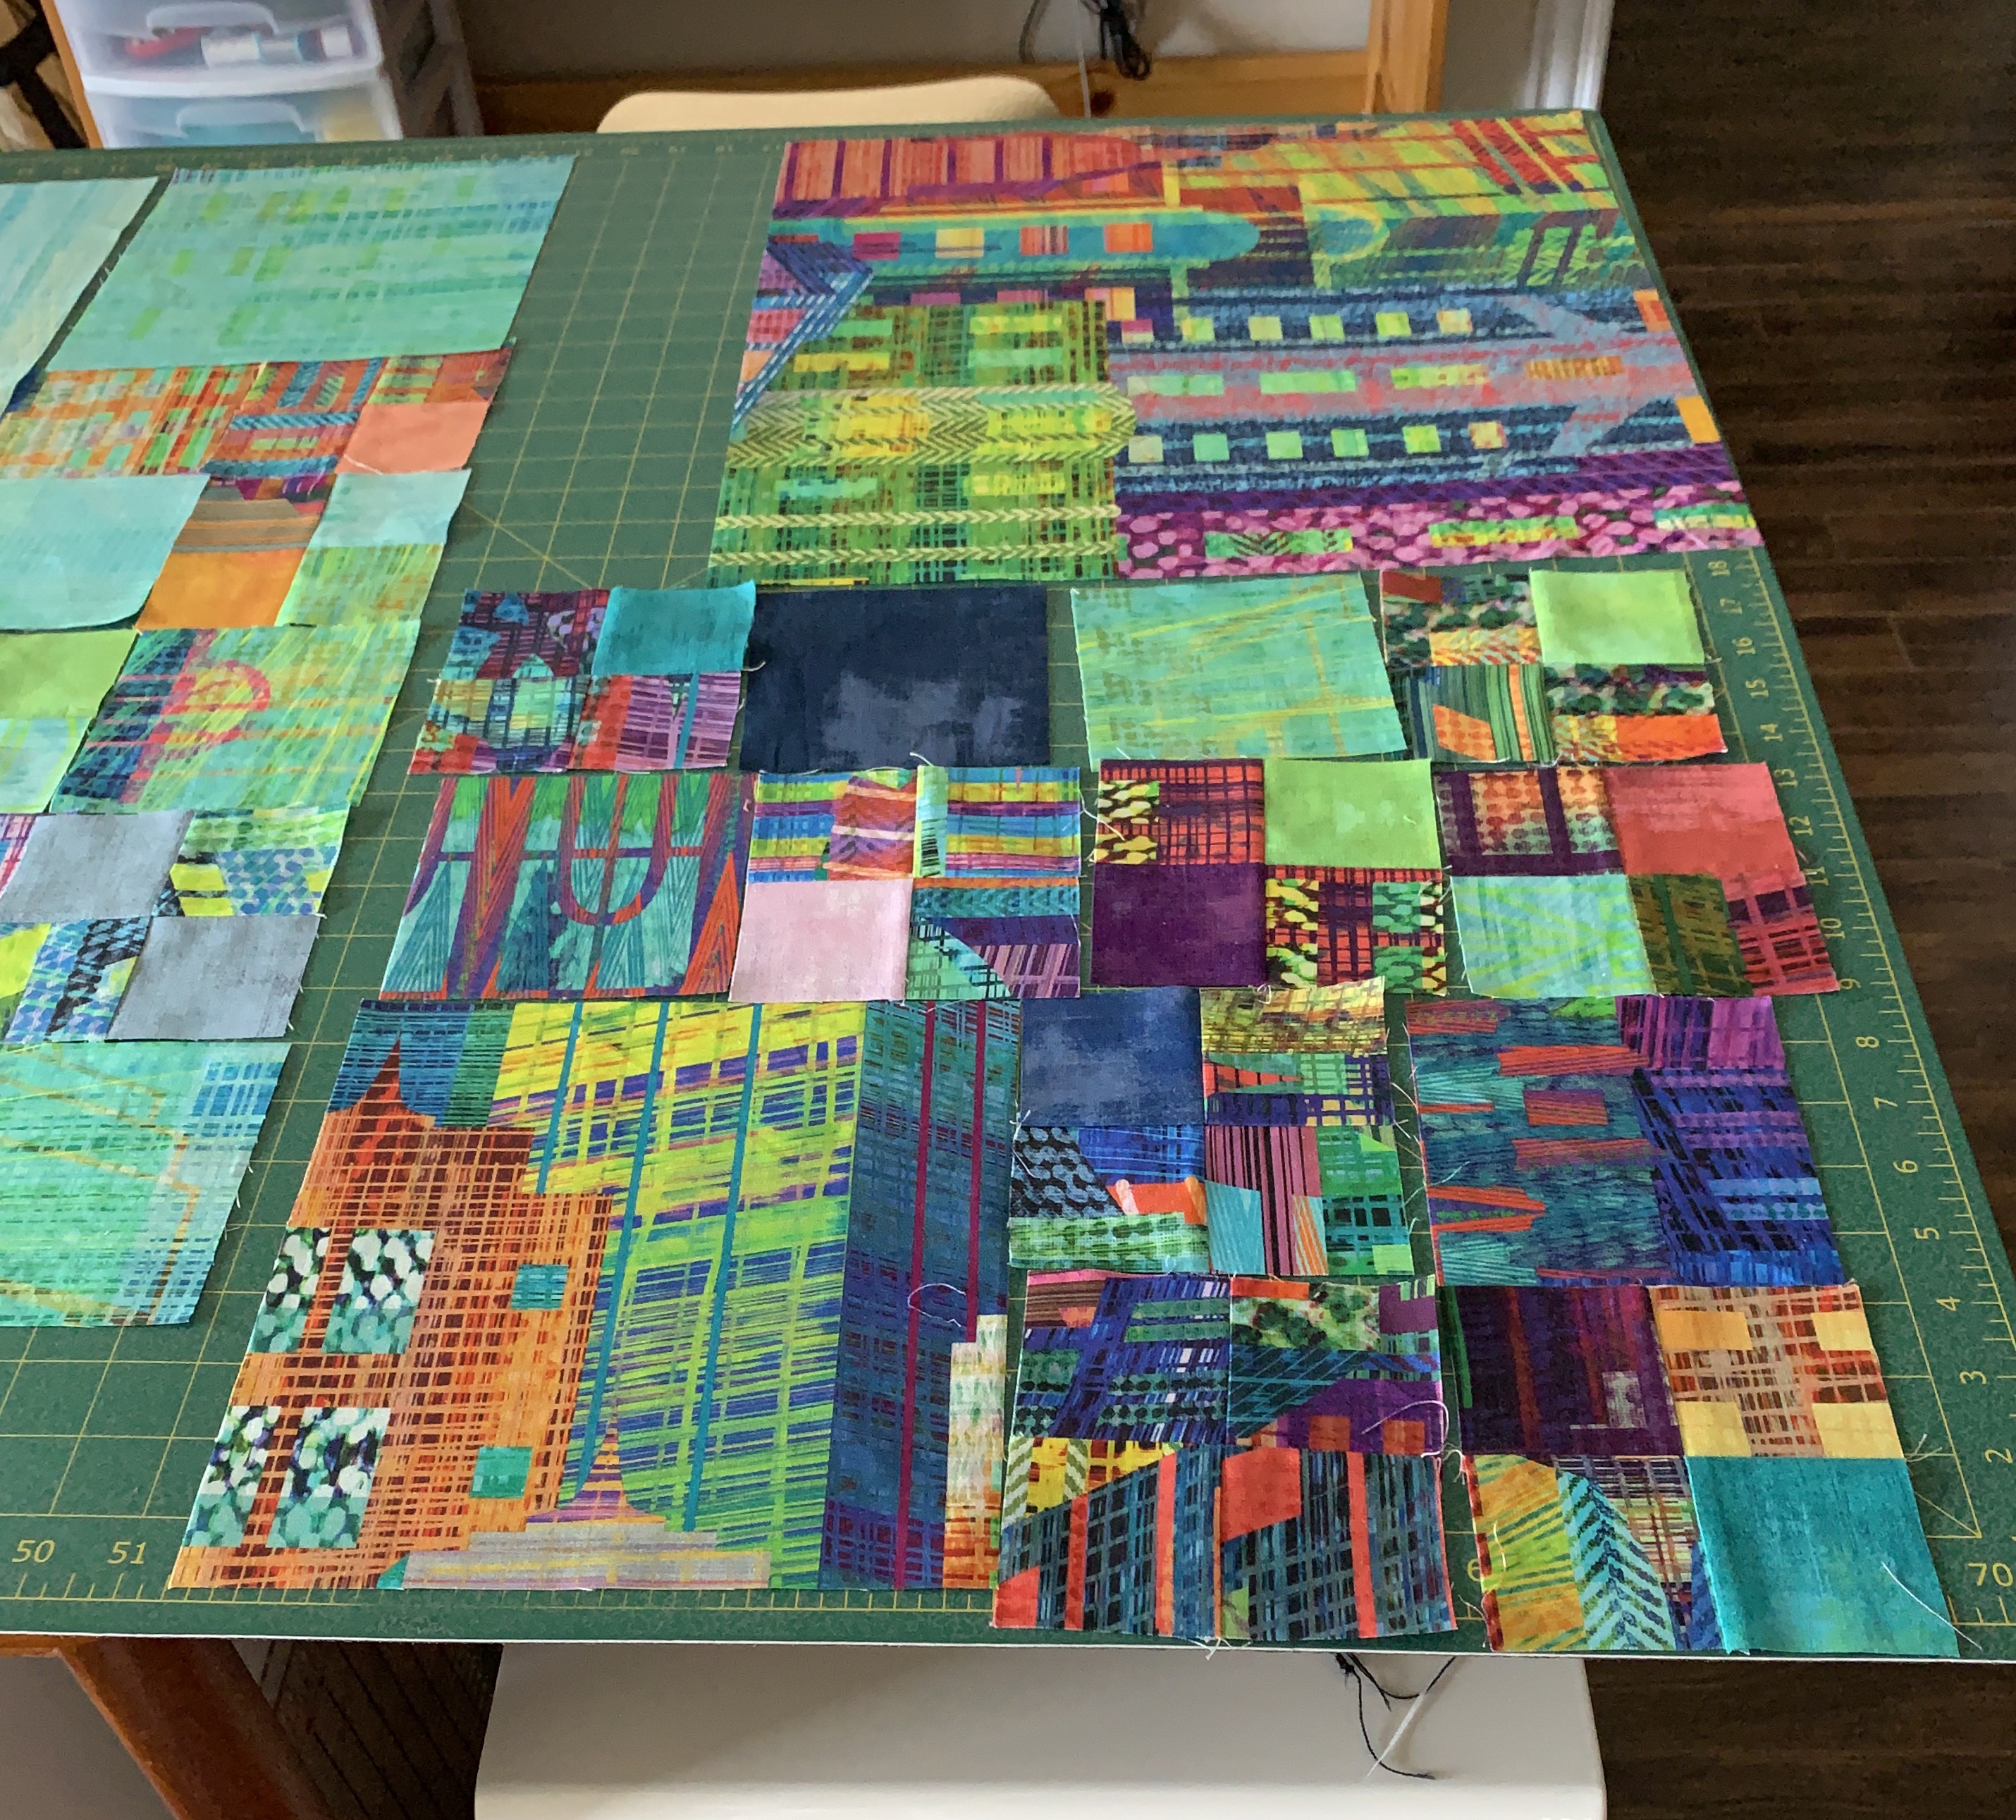
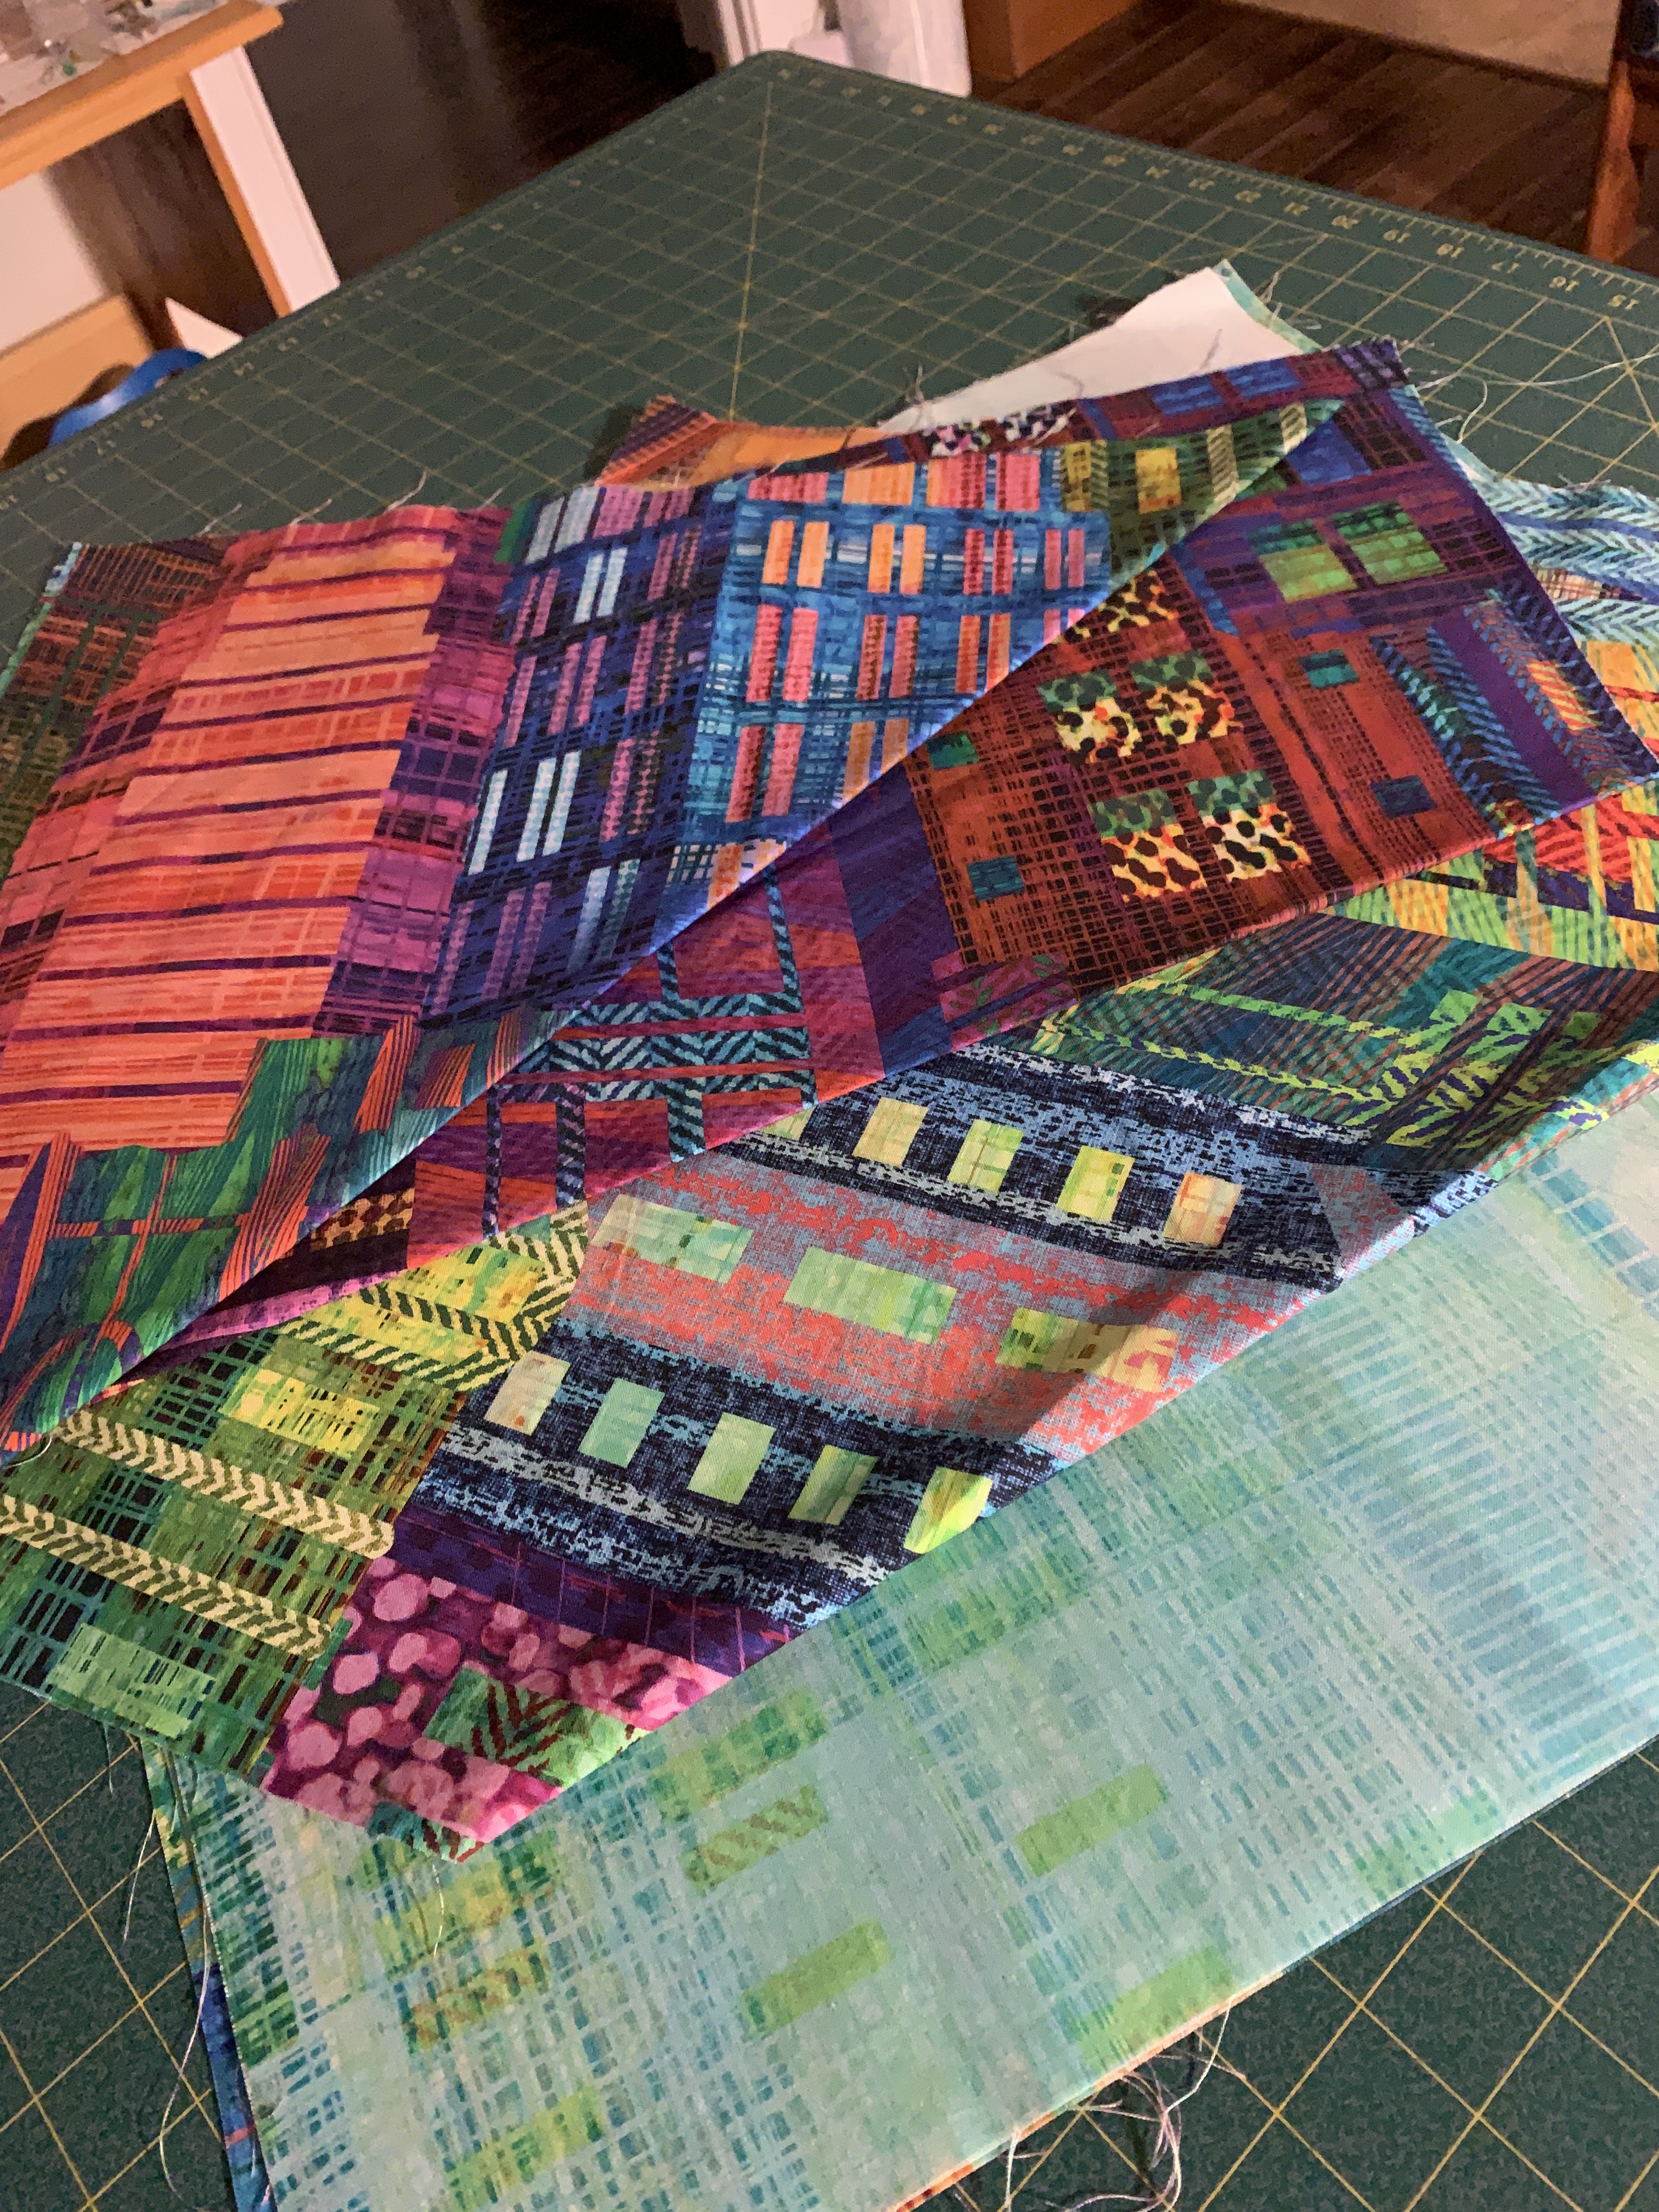
I took my second panel of the Hoffman “Skyline” fabric and cut it into wedges – some narrower than others.

I laid them out on my floor in alternating directions, spreading the array a bit wider than 50″ – close to the width I’d like to end up with (allowing me room to trim after I’ve assembled the panel).
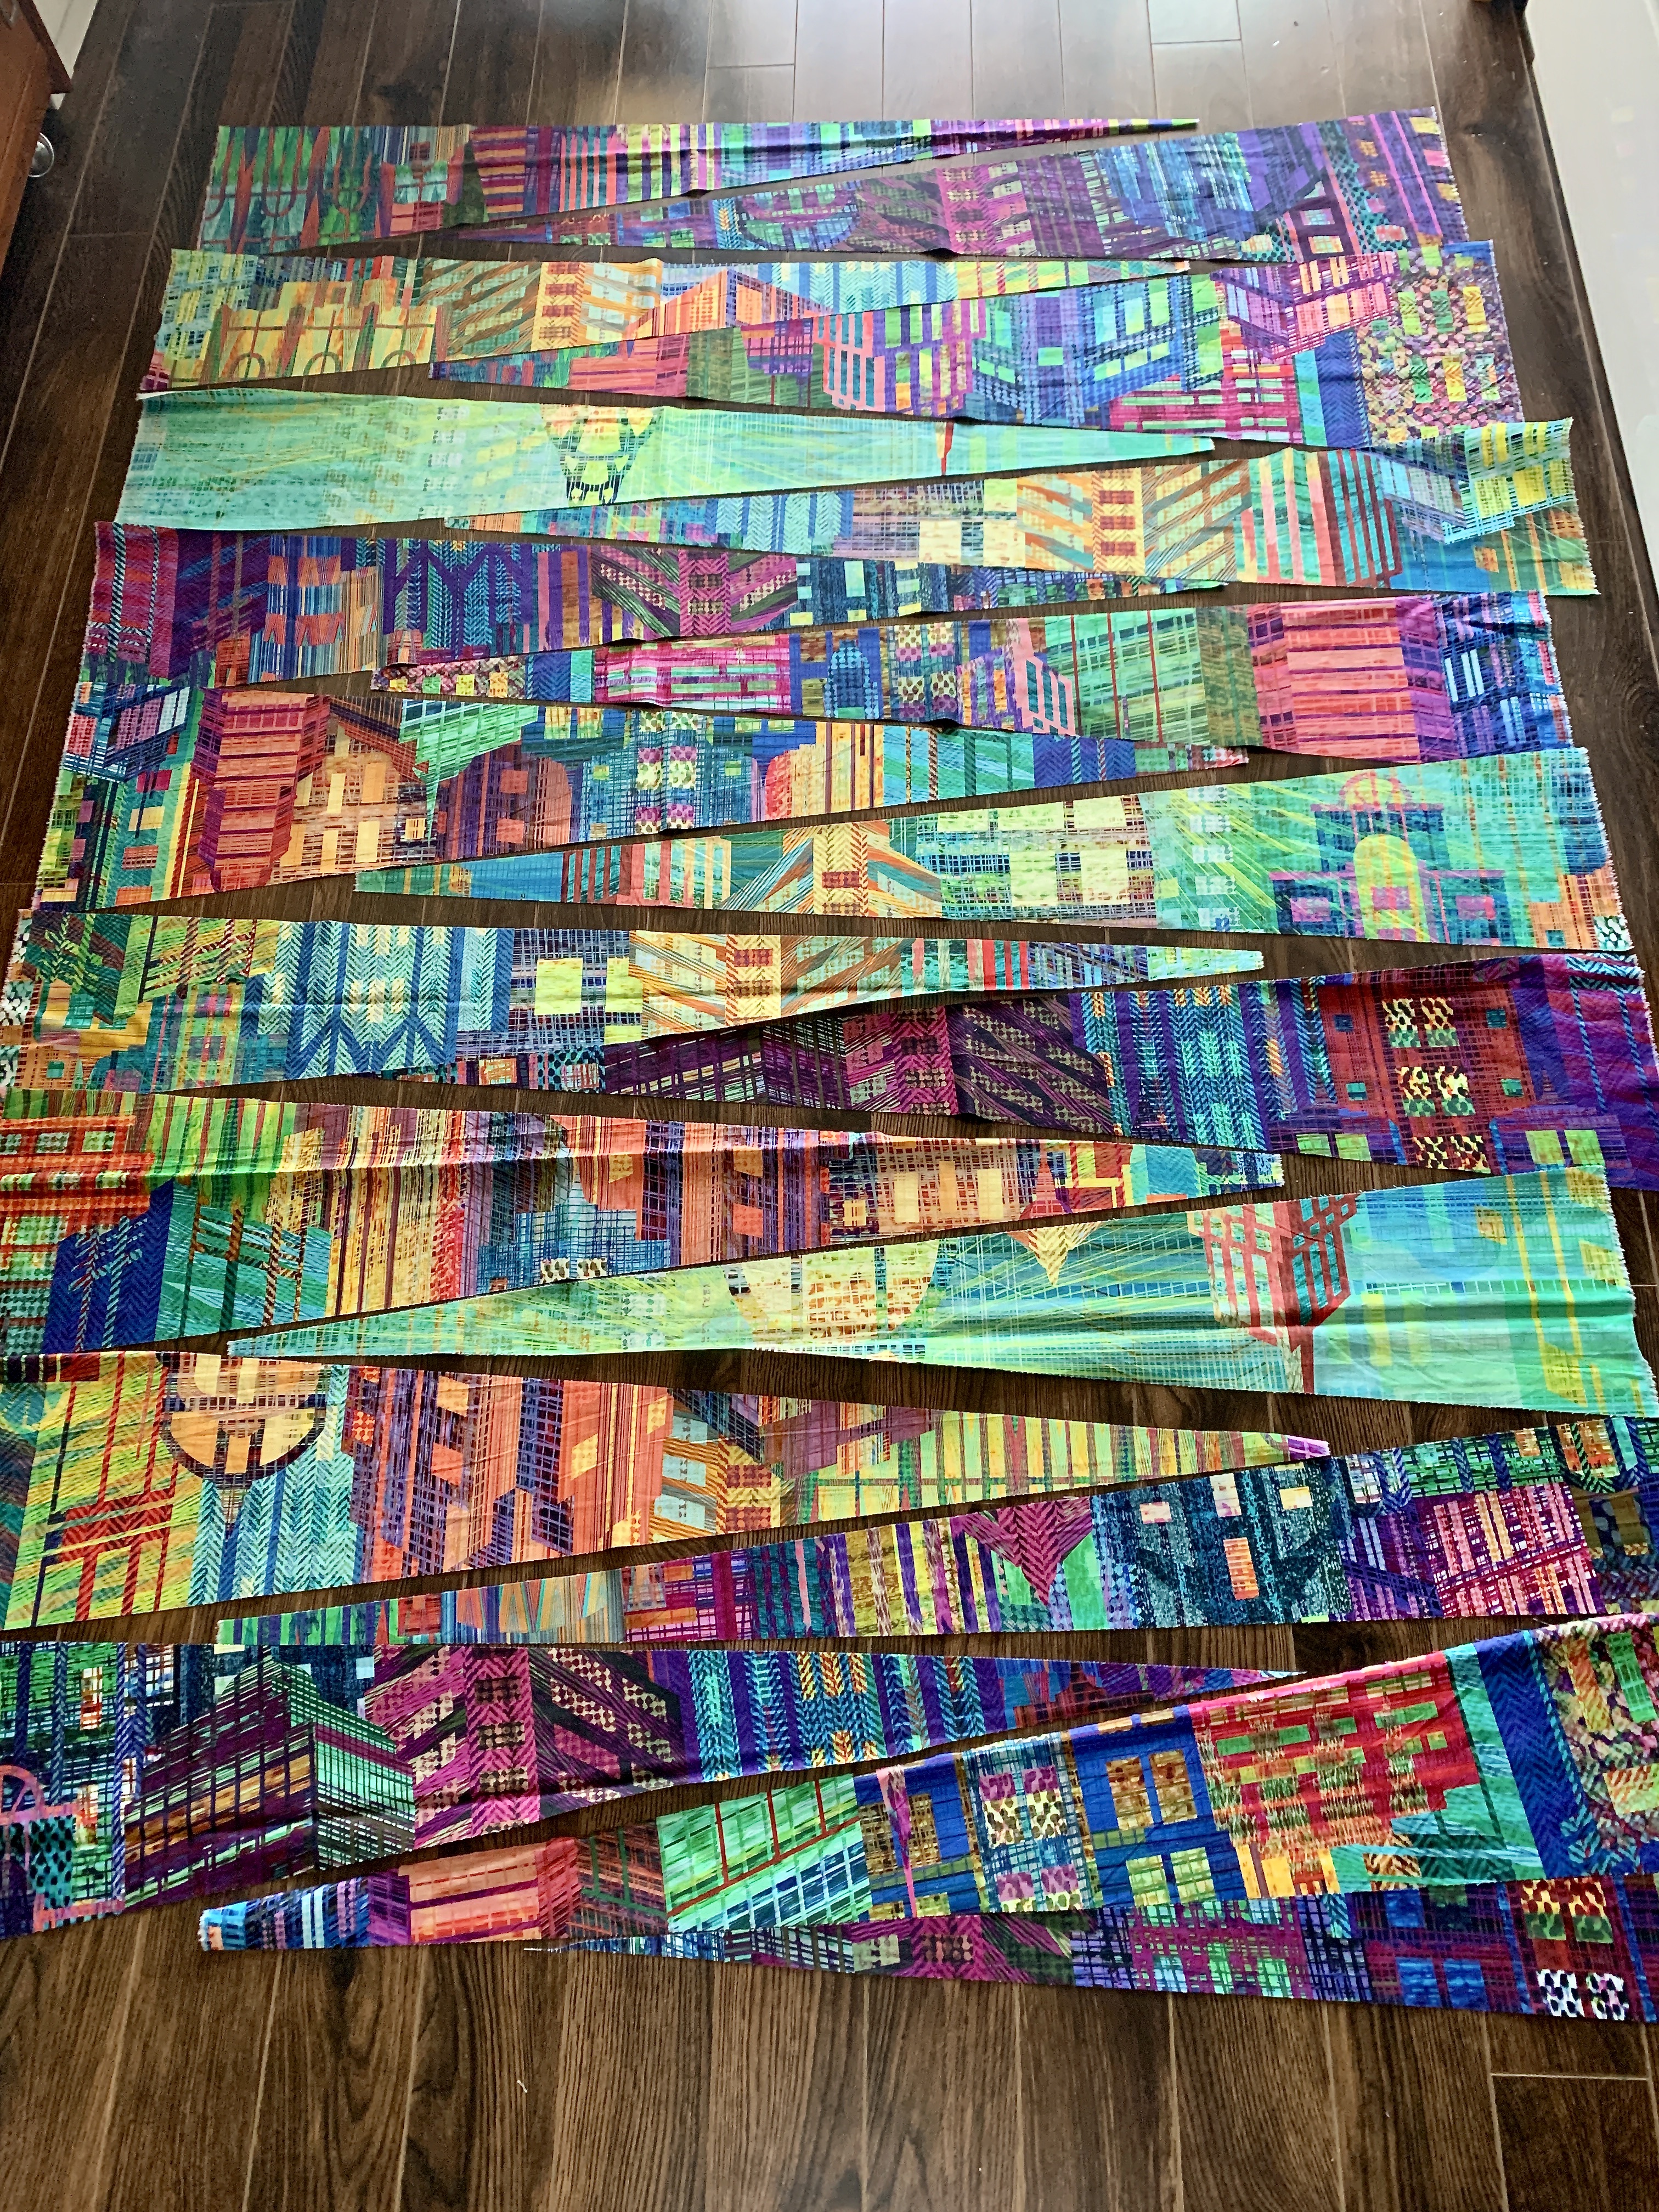
Skyline #2

I didn’t cut the lightest end of the fabric and I see now I may want to include at least one very light wedge in the array. I’ll leave this fabric on the floor and move wedges around over the next couple of days trying to decide on colour flow.

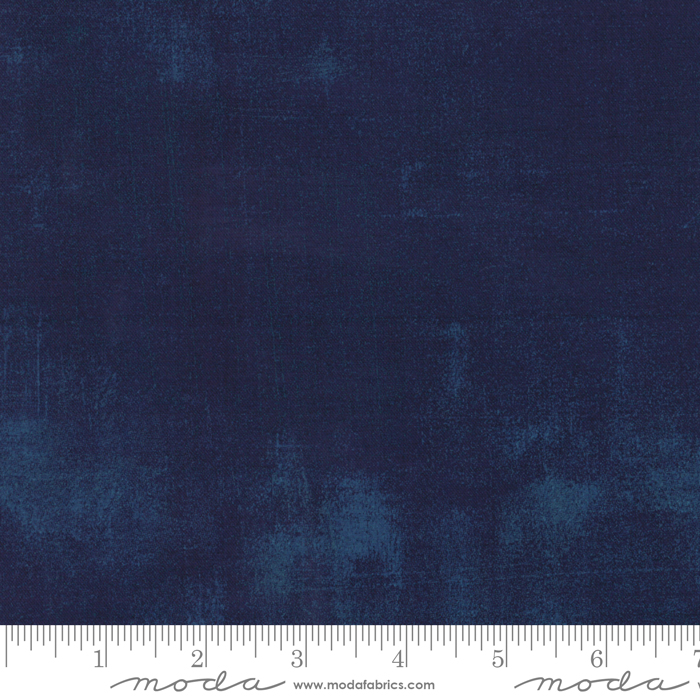
My next step is to cut my dark navy grunge fabric into strips (slightly wedge shaped, maybe) and attach those pieces to one edge of the coloured wedges. That will set up a stronger colour contrast and make the print colours brighter.

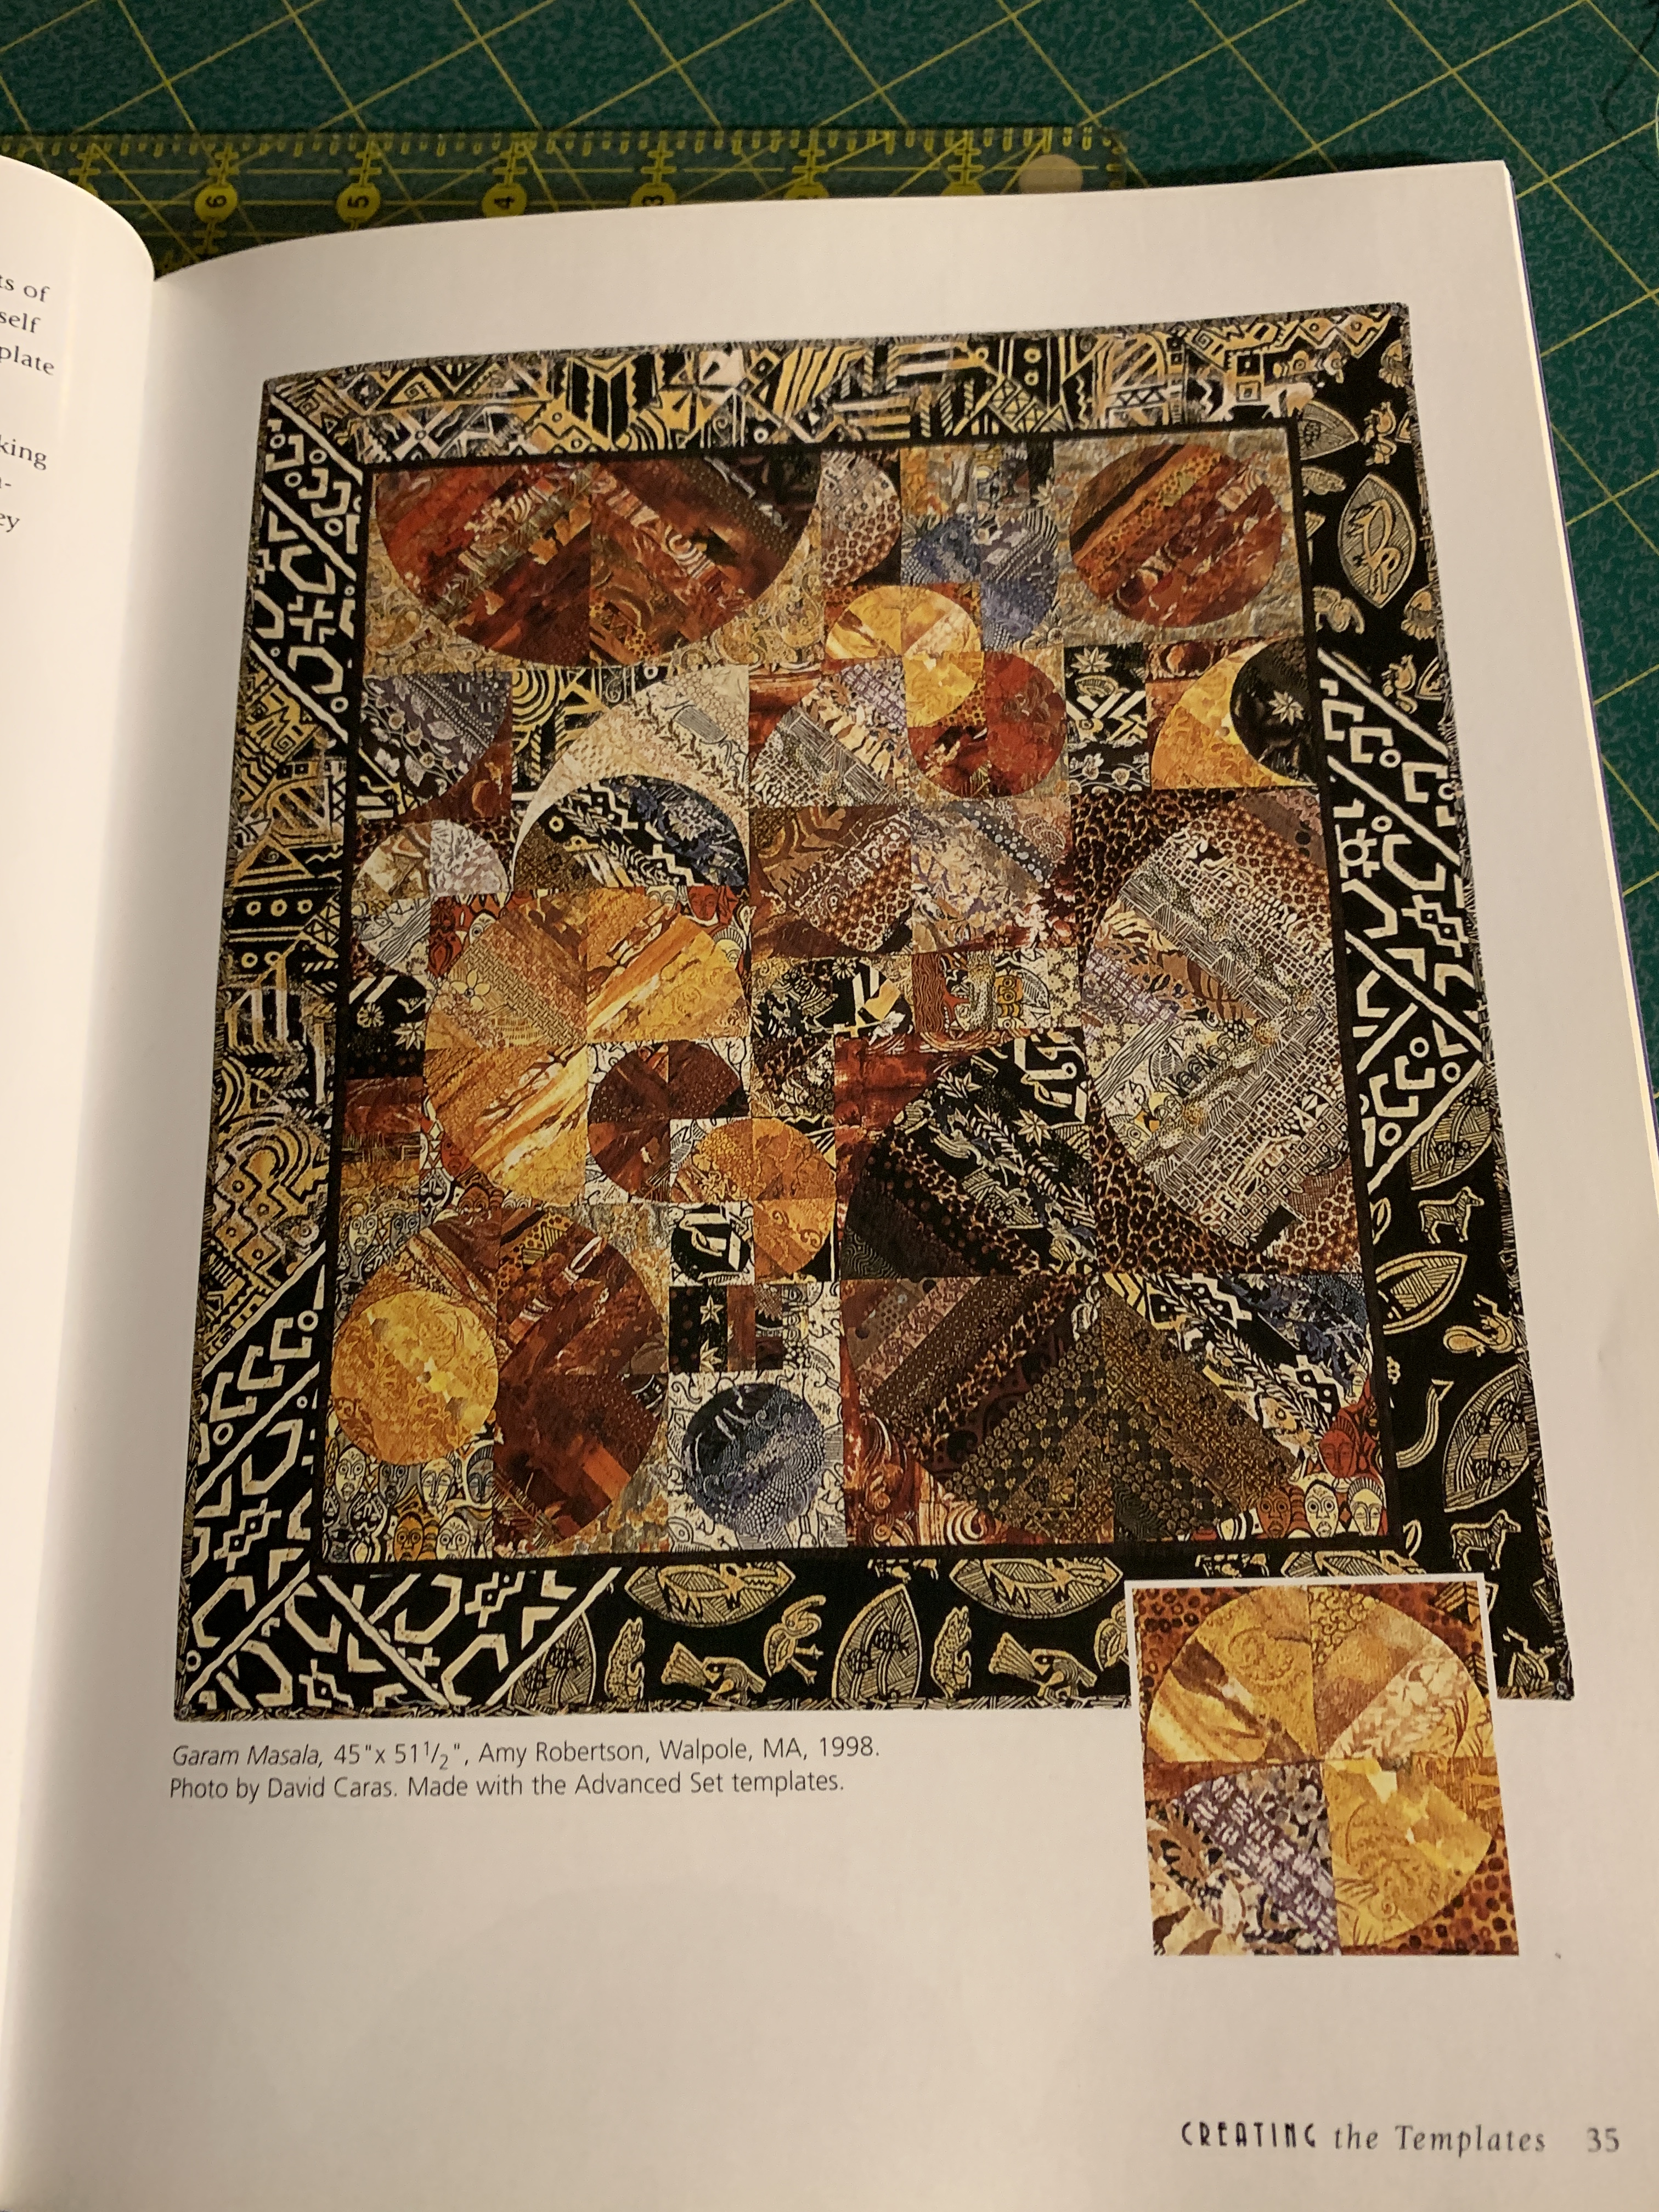
The inspiration for this project comes from Debbie Jeske’s 10″ block “Loosely Connected

Loosely Connected by Debbie Jeske

I’d come across the image on Pinterest after I’d bought the Skyline fabric and thought it was an interesting idea – I wouldn’t need to piece the wedges – just use the colour flow within the print. I’m not planning on solid end pieces, but who knows – once I have a panel assembled I might decide to include a grunge contrast at the ends, even along the sides.

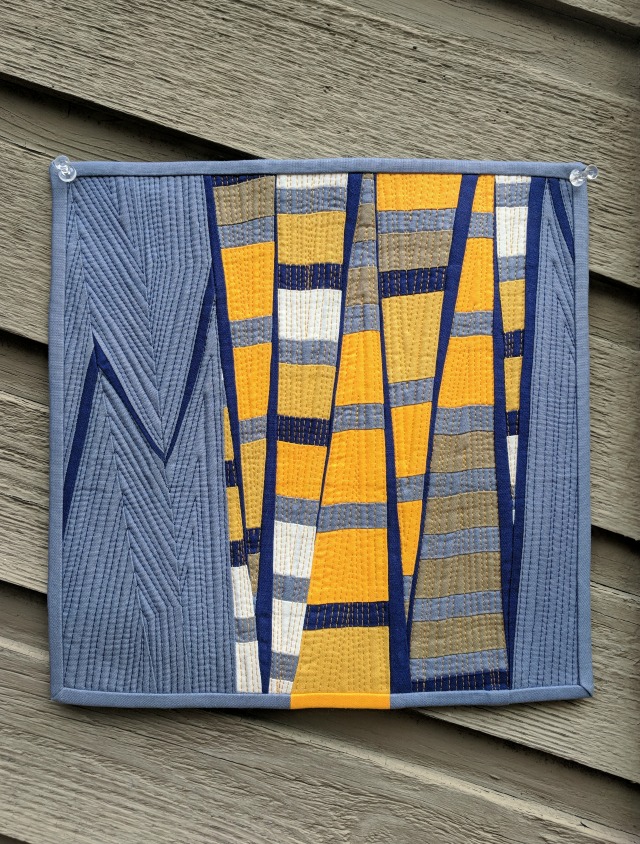
I’m aiming for a finished panel about this same size as “Skylines #1” – 48″ x 64″.

So now to cut the dark blue grunge strips and begin adding them to the wedges….

Skyline #1 – Completed

Here it is. Finished. I just hand-stitched the hidden binding and the label in place.

Skyline #1

I’m quite pleased with how this piece turned out. Final dimensions: 48″ x 64″ – not a bad size for a throw quilt and still reasonable to be hung on a wall should anyone be interested.

I used three different colours of variegated Aurifil (50wt) to quilt the project – on top a darkish purple (with mauve) in the purple corner, a medium turquoise (with light turquoise) in the lighter sections, and a red blend in the peach sections. You really have to look hard to see the differences but it was necessary – a occasional dark purple segment in the turquoise or peach sections would have stuck out; same with a turquoise or red in the dark purple on the bottom right. I used a green variegated thread for the back throughout. That worked well.

I was fortunate, that when I trimmed the backing/batting off, I had enough backing fabric from the four sides that I was able to use the offcuts to bind the quilt. So the hidden binding matches the quilt back!

Skyline #1 – Back

This is the third quilt I’ve used a hidden binding on. I elected to do that here because I felt a regular binding would “frame” the quilt top and I wanted it to be open, without limits. Same with the back, the hidden binding brings the elements to the quilt edge nicely.

Now on to the second in this series.

Skyline #1 – Piecing Completed

The piecing of the quilt top is finished. I’m happy with the colour flow.

Skylines #1 – Piecing Complete

Now to assemble the back, set up the quilt sandwich, and quilt it.

That’s it for today. Gotta catch a bit of the lovely weather – you can feel a hint of fall in the air – it’s been there for over a week now. It won’t be long before fall will begin showing itself.

Skyline #1

On July 9, I mentioned the Hoffman’s “Skyline” panel I’d bought – I was thinking about how I might play again with “Let The Trumpet’s Sound” drunkard’s path motif using this multi-coloured fabric.

Hoffman Skylines – Multi

I finally got going on on Aug 10, when I cut my 1m wide panel into 10 different 21″ squares. Then I walked around the fabric for another week!

I took a deep breath on Aug 17 and cut the 21″ blocks into smaller sizes:

  • 3 x 16.6″ – a dark, a medium, a light
  • 14 x 8.5″
  • 36 x 4.5″ and
  • 120 x 2.5″ blocks.

I also cut 32 x  2.5″ blocks from several complementary shades of “Grunge” fabric from my fat quarter stash. I more or less sorted everything by colour, I stitched many of the 2.5″ blocks into 4-patch elements, then I began laying out blocks on my cutting table:

Skylines #1 – First Corner

The large pale block, two 8.5″ blocks, then filled in with a combination of 4-patch and 4.5″ blocks….

Skylines #1 – Medium Tones

Next, I grouped more blocks into medium-toned groupings until I had no more space available on my cutting table, at which point I very carefully moved everything to the floor.

Skylines #1 – Incomplete Layout

I laid out all the blocks I had cut – I still needed the equivalent of approximately 15 x 4.5″ spaces – the few remaining scraps I had left of the “Skylines” were too small so I turned again to my collection of “Grunge” fat quarters, selected a dozen I thought would coordinate well with my layout.

As I was filling in spaces, I moved blocks around until I had a more coordinated colour flow:

Skylines #1 – Completed Layout

Now I had a clear alignment of lights, darks, and medium colours – with a grouping of peach tones in the lower left corner.

Looking at the layout with a friend that evening, the small pale mauve “Grunge” blocks were stand-outs – they had to go; I replaced them with other colours which blended better. And then I began assembling the quilt top into 12 x 16.5″ blocks:

Skylines #1 – Partially Assembled

The top row, the second row, and the bottom row are now sewn together. The layout in the middle two rows used a couple of the 8.5″ blocks staggered across two rows – hence the jog in the second row. The third row is laid out on my cutting board ready to be assembled:

Skylines #1 – Third Row Ready to Assemble

That’s this morning’s work. Once I have all four rows done I’ll put them together. Leaving them separate at this point lets me lay them out, check for colour flow, and replace any “eye-sore” spots more easily – taking apart the smaller strips is much less complicated then replacing blocks in the middle of a large panel!

Oh, and I picked up another metre of the “Skylines” fabric – bringing my total, now, to four panels. I’ve decided to insert an 8″ – 10″ strip in the back of each of the “Skylines” quilts. Did I say I have plans for doing THREE quilts using this fabric? I intend to call the series “Skylines Triptych.”

Another Pair of Socks And Other Stuff

On August 3, I finished yet another pair of socks:

Turquoise Socks

I kinda liked working on them. It was a long repeat so the pattern kept being interesting to work on. They’ve gone into the give-away stash (which is getting large).

Then I worked on a t-Shirt I’ve been meaning to make for over a year using one of the three gorgeous pieces of Marcy Tilton digital printed French cotton knit I had in my garment making stash.

New t-Shirt

I finished making it yesterday then I wore it – but it was too big (makes me look dumpier than I actually am) – I’d made a pattern from a Talbot’s t-Shirt I’d purchased last year which fits nicely, but the pattern didn’t quite translate to the stretchiness of the fabric. Today, I took 5/8″ off each side and it looks less sloppy. I may still shorten the sleeves as well. I’m happy with the fit of the neck and the shoulders are OK. When I’m satisfied with how this one fits, I’ll make the other two.

Today I had what I think are the last three blooms on my Datura plant. The pot is in the sunniest corner of my balcony but already the shorter day length is affecting the plant. I have no more buds coming along and leaves are yellowing and dropping off.

The Last Of The Datura Flowers

Tomorrow these three flowers will be drooping then in a couple of days they’ll fall off. At that point I’m probably going to get rid of the plant. I’ve enjoyed watching these spectacular flowers unfold. I just wish I had a sunnier spot for it. In the right conditions it would bloom till well into the fall. It’s an annual so there’s no point in trying to salvage it.

On July 9, I mentioned the Hoffman Skylines fabric I had bought.

Hoffman – Skylines Fabric

I’ve been walking around it since then. Last week I finally cut one of the two panels I have into 21″ square blocks. Now you no longer see the print as skyscraper buildings – now the colours pop out. I think I am going to try something with drunkard’s path.

A friend loaned me Louisa Smith’s book “Strips ‘n Curves” – she creates strip pieced fabrics from which she creates a wide range of drunkard’s path blocks. With my multi-coloured Hoffman fabric I don’t have to do any strip piecing, I can use it as it is. So now I have to figure out a  large block size to make the first drunkard’s path block, then scale down from there to work out smaller versions which will fit into an array. I was going to add more solid colours but the jumble of colour in the photo from the book makes me think I may just build my blocks from contrasting portions of the Skyline fabric and let the colour do the talking.

I’ve been dithering about this for a couple of weeks. I think I may be ready to cut the fabric now.