I’m moving along, slowly but surely, thread painting of the tropical flowers on the wall art piece. It both takes both more and less time than expected – a colour fills in rather quickly but while I’m working on an element it seems to be taking forever!
Except for a bit of white at the edge of the flower this anthurium is close to finished (it will still need some yellow down the middle of the pistil).
Anthurium 1 Almost Done
The second anthurium is about half done – my shoulders got tight so I stopped sewing – I still have the second side of the flower to stitch, bits of white and yellow to add in – then this flower, too, will be completed.
Anthurium 2 Part Way
Yesterday, I while I had the darker red thread on the machine I stitched in the stamen filaments on the epiphyllum – the anthers will be last thing I do on the flower. I’m planning on filling in the grey elements with shades of soft pink to bring out more colour in the flower. A bit each day and it’s s-l-o-w-l-y getting done.
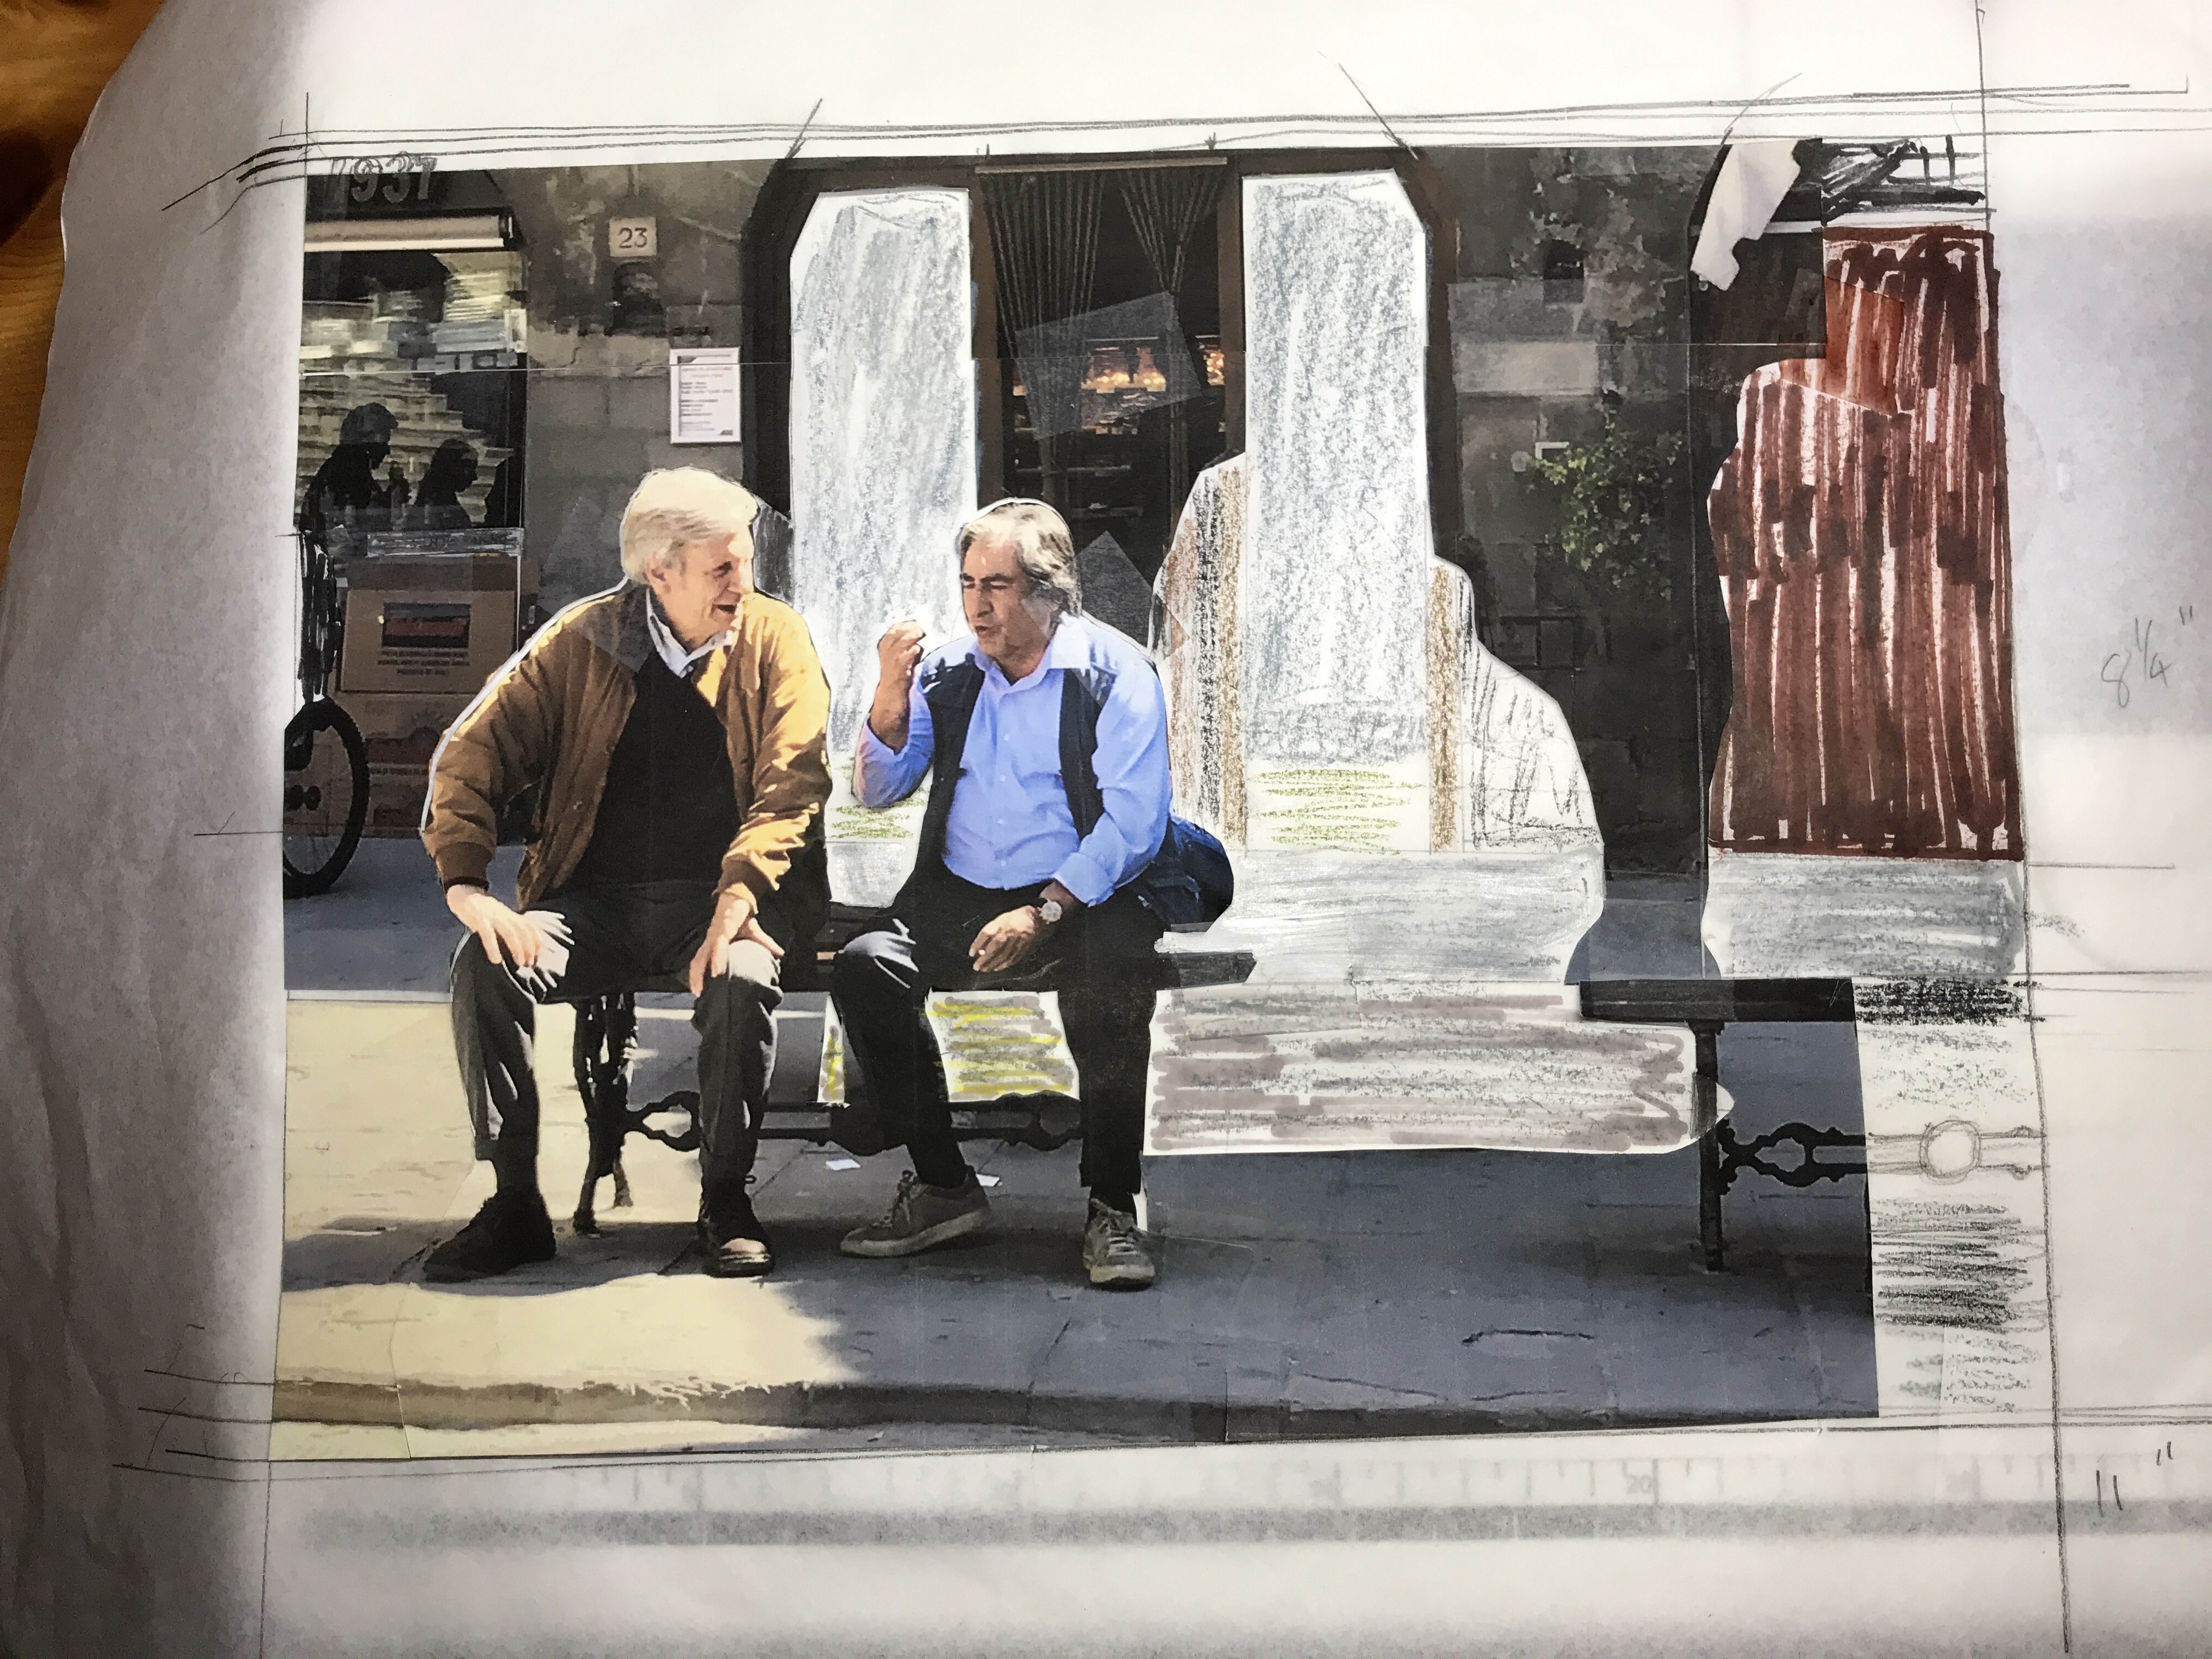
I took this photo in the main square in Cortona, Tuscany in April. We were visiting the city and enjoying the food and the shops and just wandering around – these two men deeply engrossed in conversation caught my attention. I’ve known from the outset this would become the basis of a wall art project.
Enjoying The Morning Sun
I started playing with the image yesterday – first I wanted to remove the other people, to isolate the companions. The blue-shirted gentleman is making a classical Italian gesture – thumb pressed to first and second fingers moving his wrist back and forth; in his other hand he has a cigarette. I want to bring the viewer’s eye to this man.
Morning Sun – Initial Steps
With the other people removed and just the shops behind, the men now stand out – I removed the advertising from the supermarket windows – I will do them in the same dark colours you can see through the open shop door. I intend to keep the partial bench on the right (having taken away the woman who is reading and smoking).
Looking at this image now, I think I want the men to be on the right side – it’s got something to do with the speaker being stronger in that position. I’m about to try cutting off the building on the right and repositioning it on the left, reversing the bench so it is cut off at the left edge – that will also allow me to strengthen the greenery growing on the stones of the facade behind.
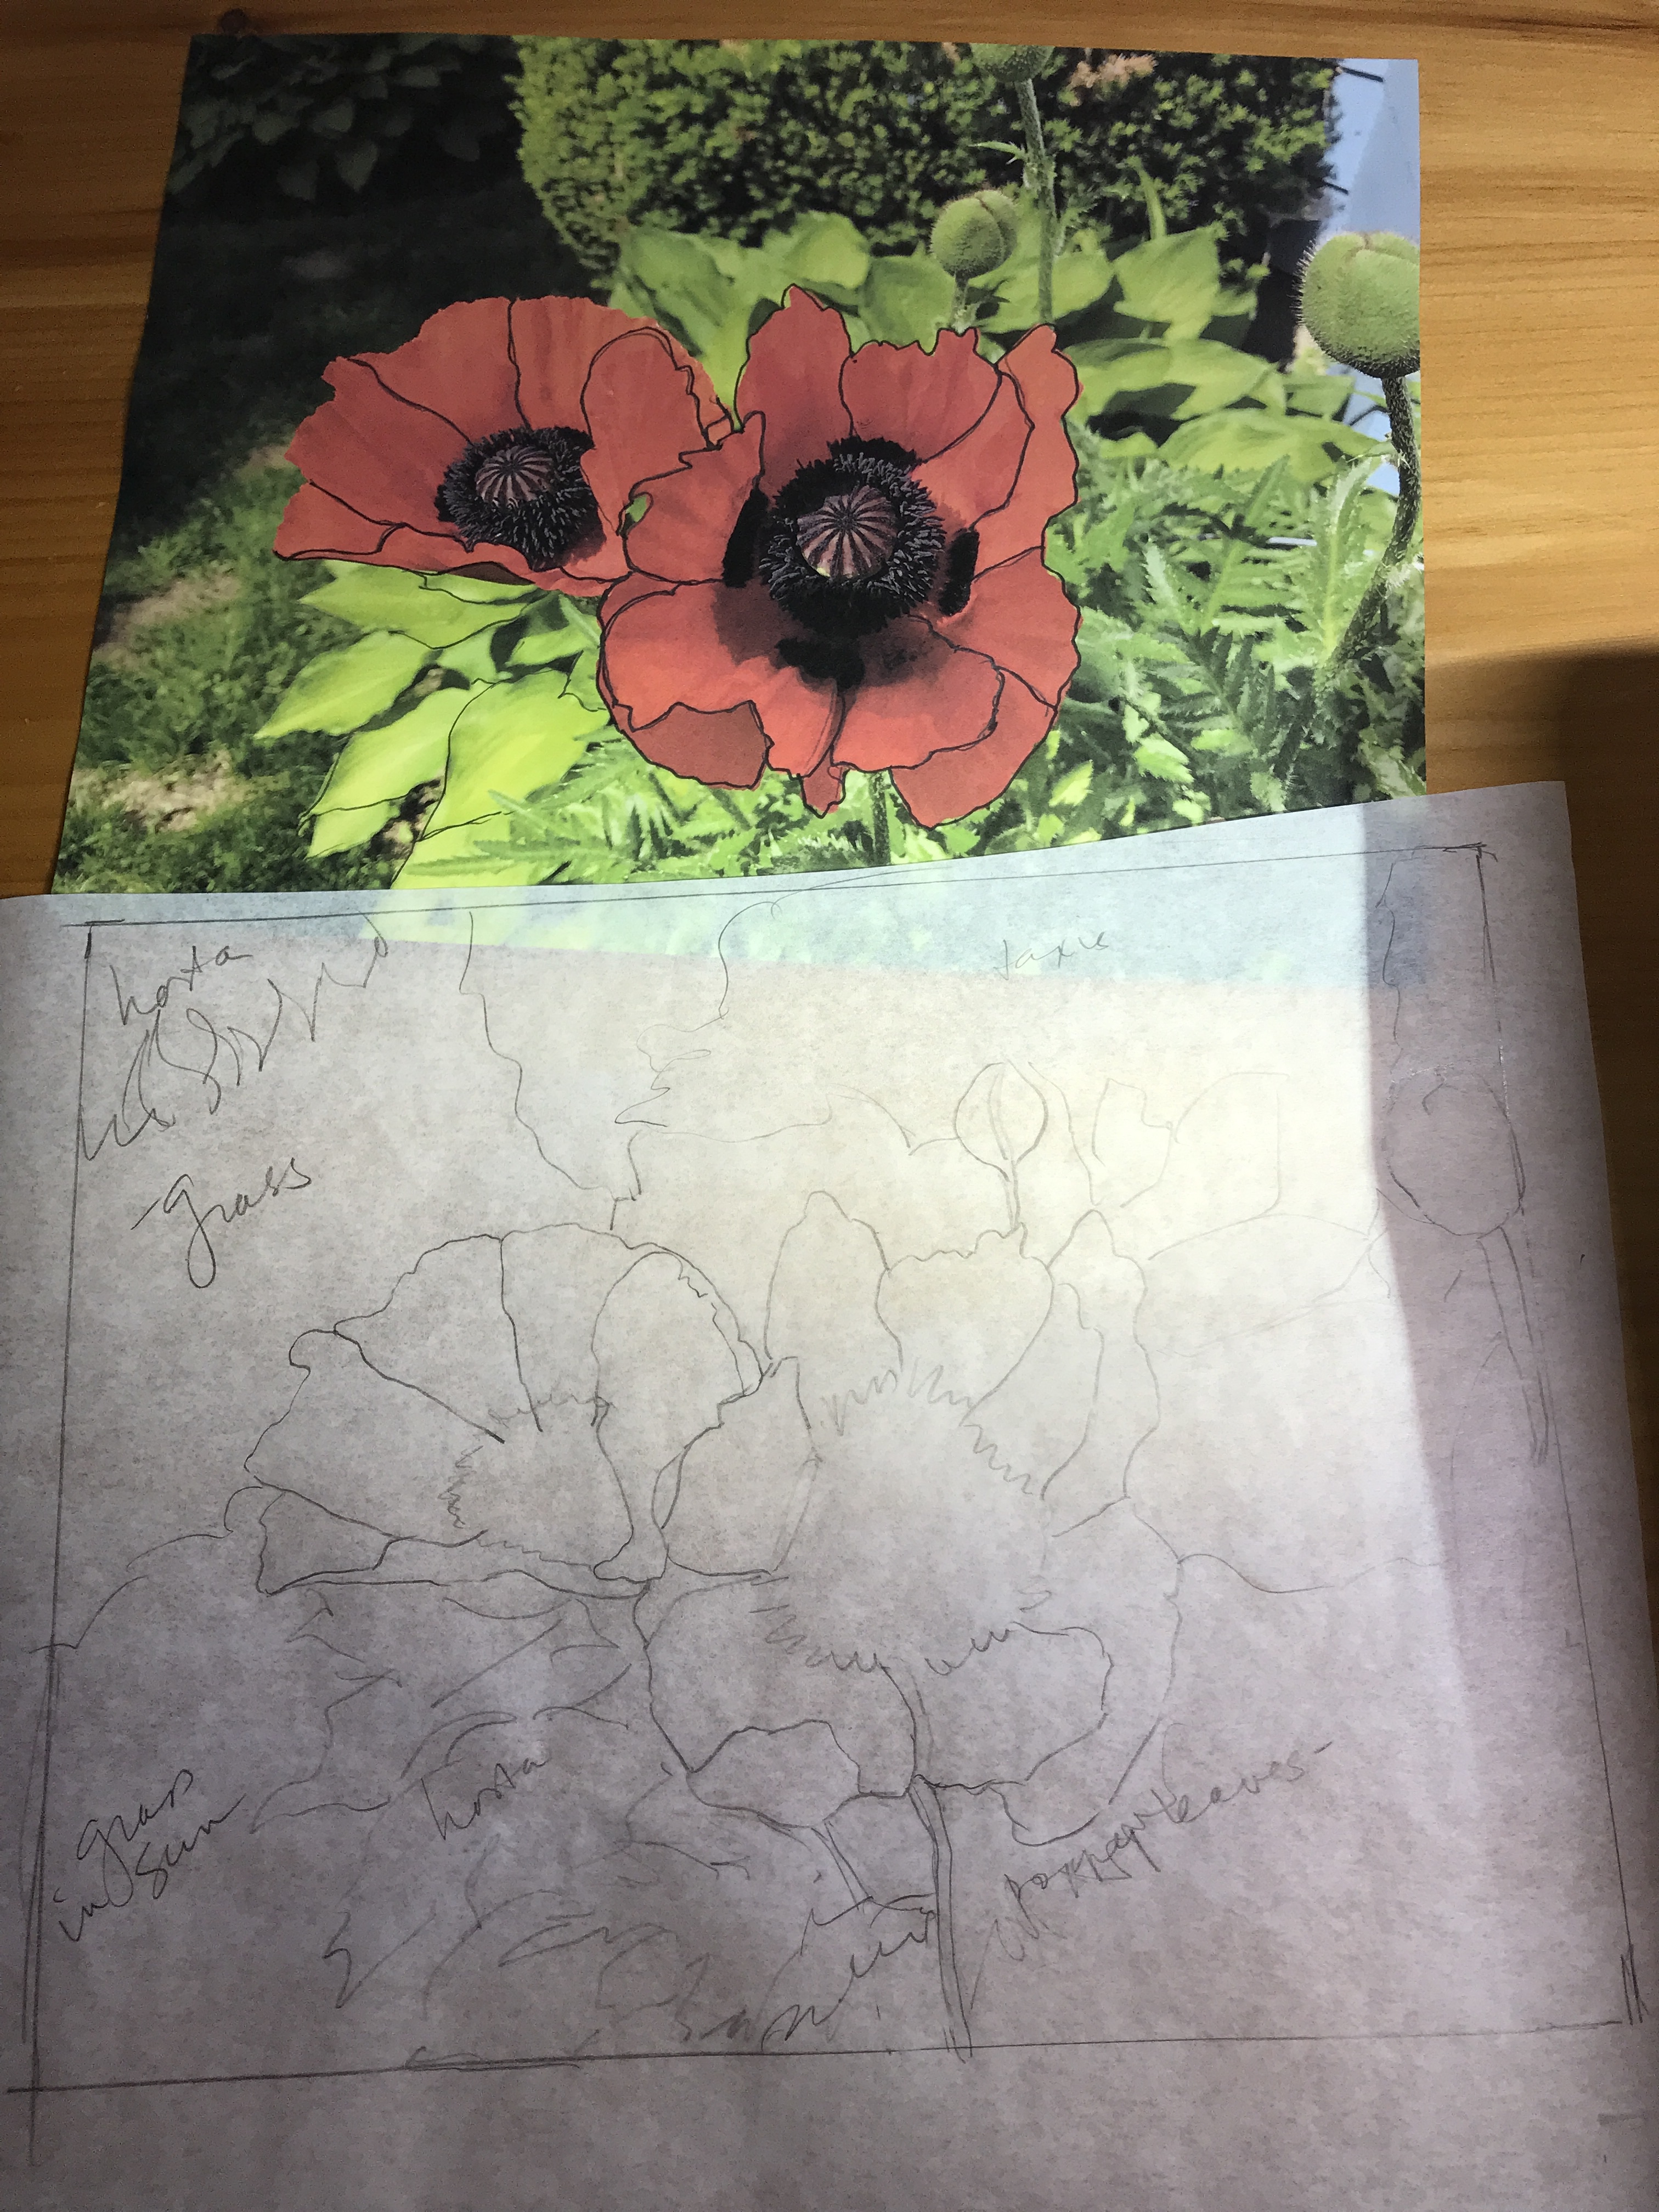
It’s not enough that I’m taking on this project, I’m also working on a second. I took photos of some poppies in Marlene’s front garden this summer and these two oriental poppies are striking. I started by outlining the petals so I could do a tracing which I’ll use for cutting out red fabrics. They’re growing beside a light green hosta, with a taxus shrub behind and a darker hosta in the top left corner.
Oriental Poppies
Tomorrow I will start looking for fabrics I can use to construct both these images. Generally I work on one piece at a time. For some reason both have been insistent I begin work on each of them.
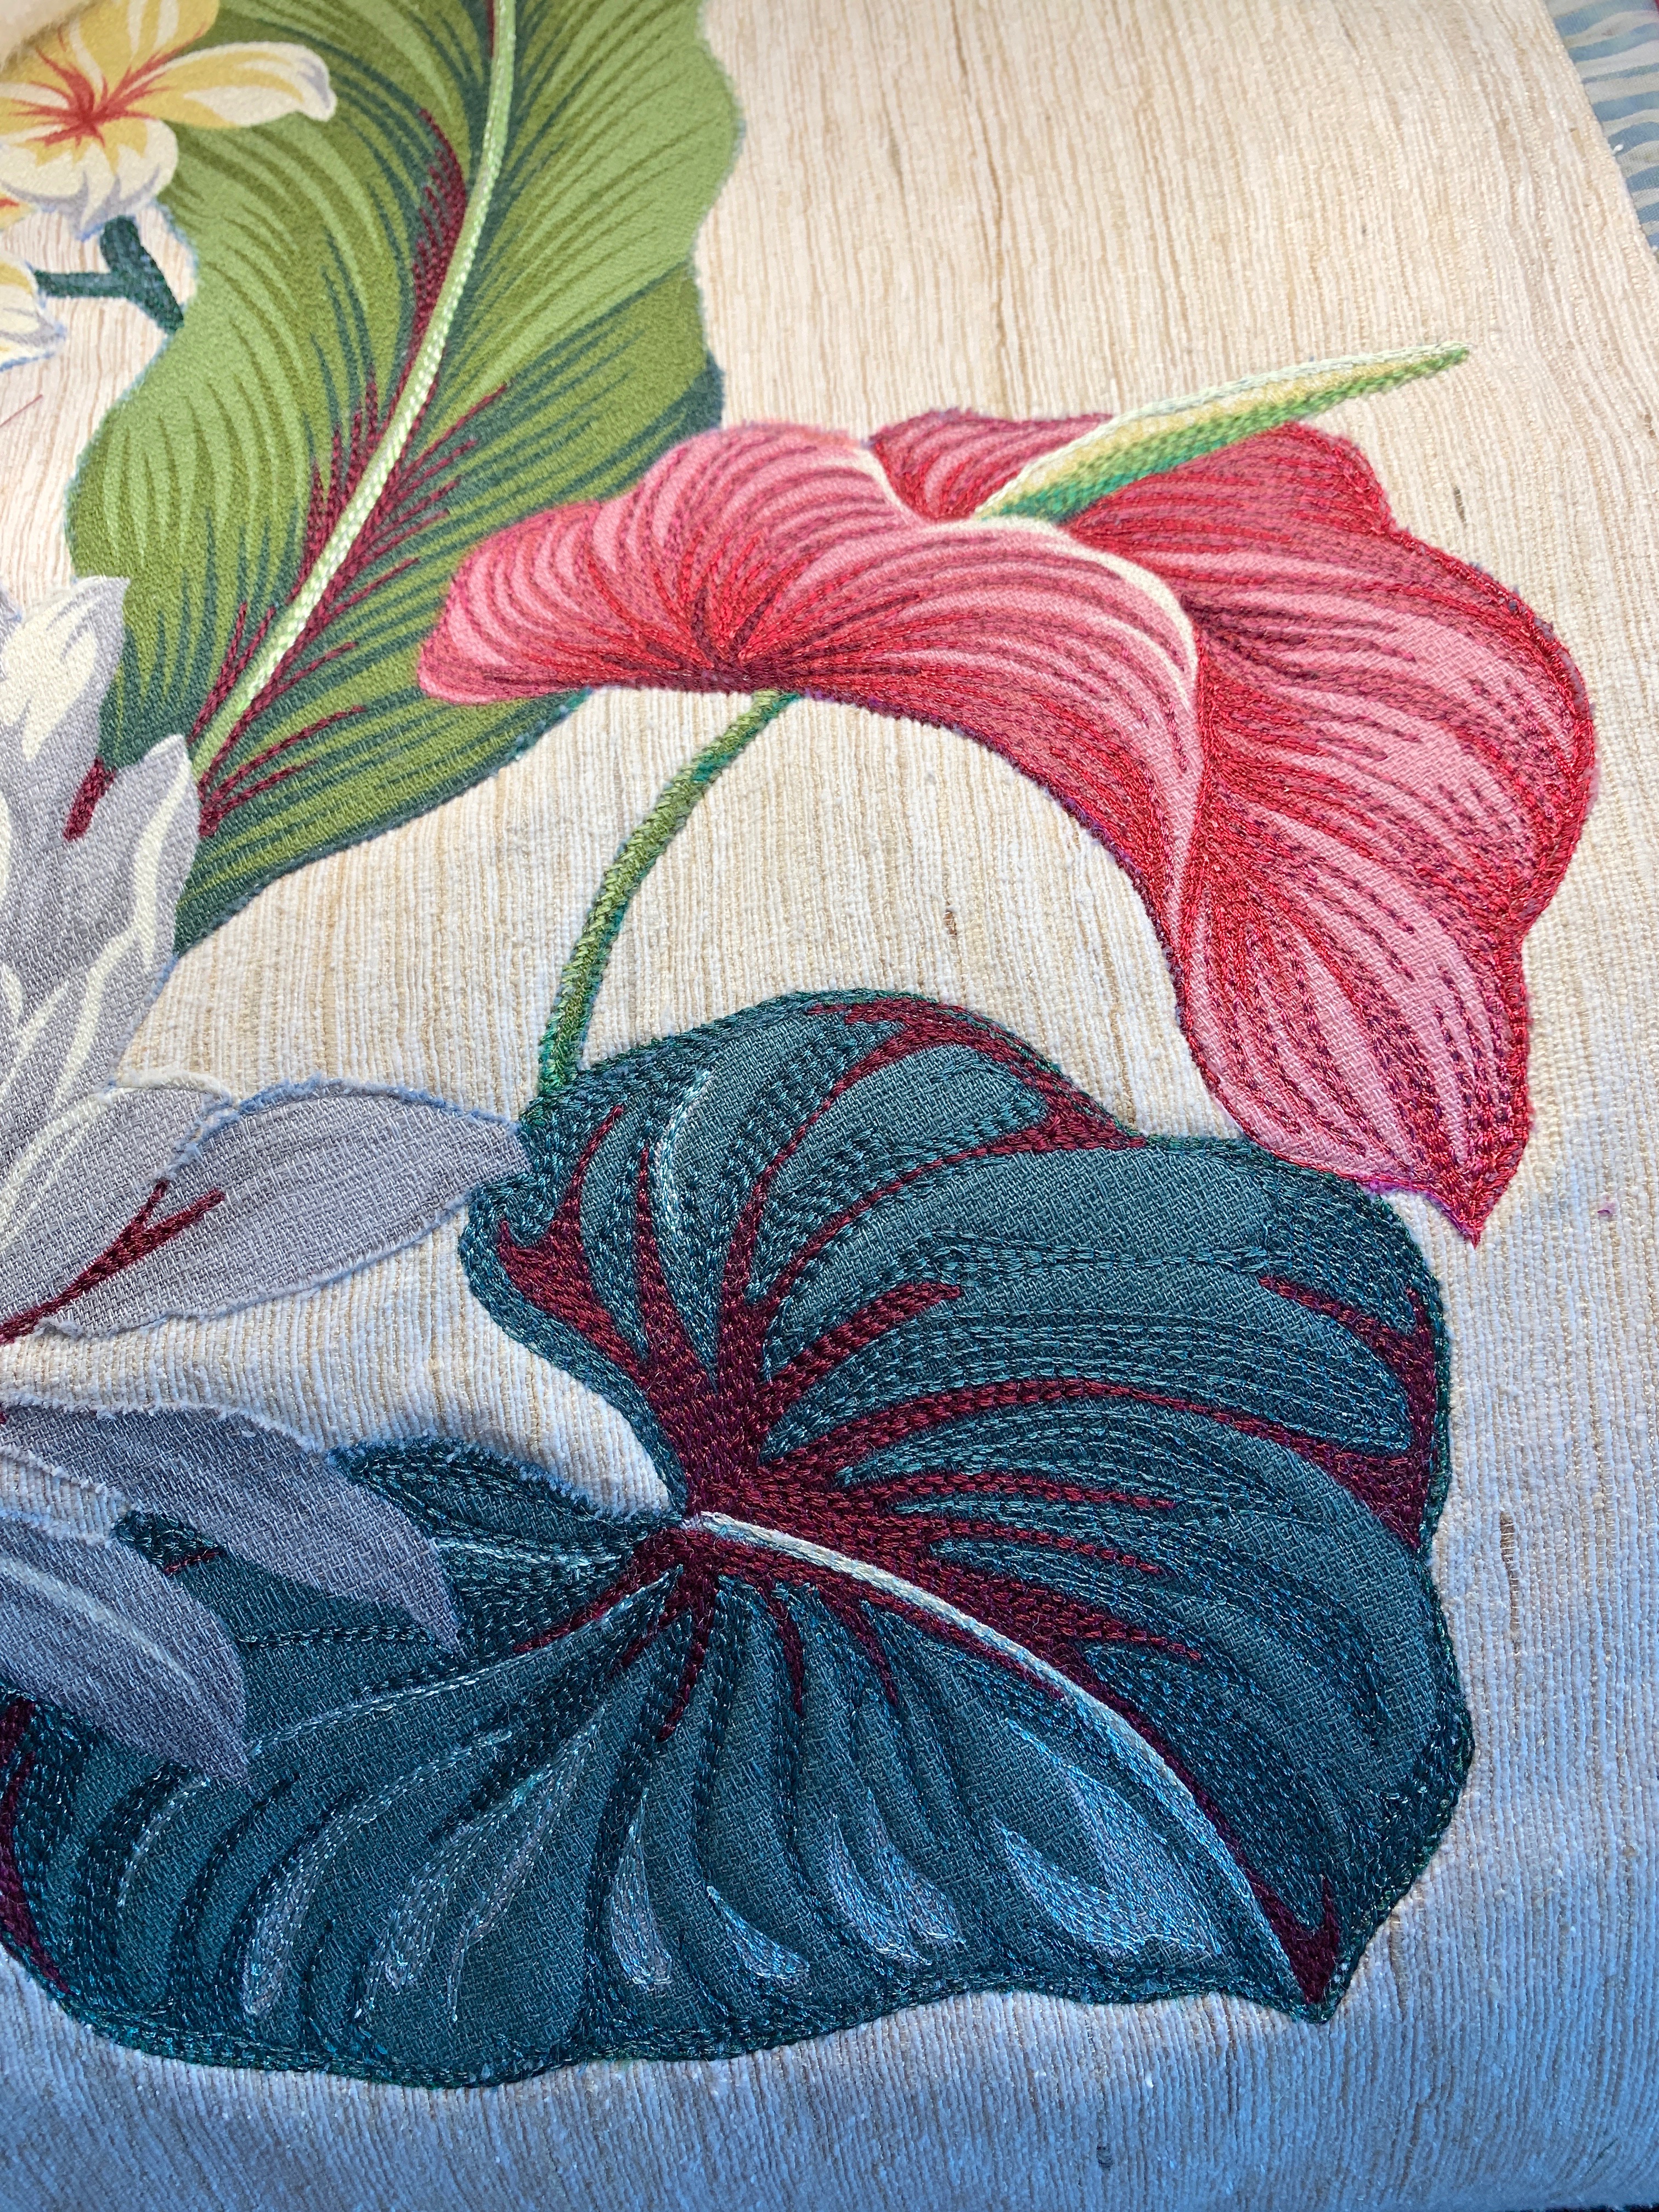
Yesterday I finished a second leaf. For the moment I’ve left the medium teal unstitched and I think I like how it looks. I’ve covered the grey with the light teal thread and the dark areas are stitched but I like the texture leaving the medium coloured area as is, for now, at least.
Second Leaf
Next I will tackle the red/pink anthuriums – they will actually be a bit easier to work on because the colour moves in a way that will make the stitching flow. Probably not today, though. This morning I went back to the double convergence quilt top.
One leaf done – a second underway and weeks of work left to do.
One Leaf Done; Weeks Of Work To Do
The question is why bother? Why didn’t I just fussy cut the flowers, fuse and edge-stitch them in place and leave it at that? Good question. The thread painting, in spite of the large amount of work involved, adds interesting texture and dimension to the fabric turning it into a piece of wall art. I probably should have thought more about the size of the piece before I began, choosing fewer elements, but this panel does make an interesting art object. So I committed myself to the work. In addition, the fabric raw edges are inclined to fray because the bark cloth is loosely woven – thread painting lets me densely edge stitch creating a sharper outline for the flowers and leaves.
Tropical Flowers – Bark Cloth
I started with printed bark cloth given me by a friend – 4 one metre pieces with different coloured backgrounds. I chose the blue to work with here but you can see from the black piece just how clearly printed the flowers are. The fabric provides a lovely foundation for doing thread painting.
Tropical Flowers – A Selection
The first step is to choose a few flowers/leaves and cut them out. Next I apply a fusible web to the back of the fabric, pressing the whole thing flat, then fussy cutting before removing the paper backing from the fused web – the paper makes cutting out much sharper. Once the flowers are fused to a background fabric, thread painting can begin.
So that’s where I am in the process. It will take many hours to fill in the colour gradation of the leaves and flowers – I’m working to eliminate the grey using light values of the adjacent colours so “grey” won’t mean grey when I’ve done thread painting – there will be pale green, or pale teal, or pale pink where grey currently is found.
The flowers/leaves on the black backed fabric don’t have grey, instead the fabric has appropriate light shades for each element, making the decision-making process somewhat easier. But now, back to the teal leaf which I began yesterday….
You’d think because this piece has borders and piping that I’ve done all the thread painting – wrong! I started adding borders on the weekend because I was having the second session for the thread painting workshop and I needed to be able to show the gals how I finish a piece. I’d carefully marked (using a heat removable Frixion pen) a centre vertical line, used that to set up the inner border line. I kept all the markings visible as I partially bordered the piece. (Here are instructions for how I do borders with piping: creating borders). I marked locations and created a signature to show how I position the signature embroidery, as well.
Then I began thread painting – this is going to take several weeks – there’s a lot of fabric to cover – I did enough on the leaf on the bottom left to give an idea of how I shade the colours using two different but similar rayon threads through my needle eye. This provides a bit more texture than using just a single thread and lets me fill in spaces more quickly.
Thread Painting Underway On A Leaf
My plan is to eliminate the grey on leaves and flowers using other shades to in-fill spaces. In this leaf, I’ve used pale greens/yellow greens to stitch in the grey areas. I also did pistils on the anthuriums, flower stems, and leaf central veins while I had a specific thread combination on the machine. This is not my usual way of working but in order to share technique with the gals I did a lot of skipping around.
Now I need to settle in to resume thread painting; this weekend I plan on finishing this leaf and move on to the darker green one above. I also need to baste the edge of the outer border to the batting so I can more easily move the piece around while threading painting.
Finally finished this convergence quilt yesterday. Got the binding done and label sewn on. Two sets of mistakes that went together – totally unexpected and unplanned. It definitely worked out quite well.
Finished Quilt Top
I’m happy I took out the narrow vertical turquoise stripe – it disrupted the left-right movement of the convergence flow. Replacing it with the narrow turquoise border was a good decision. I didn’t have enough grey crackle fabric to complete the binding so I incorporated a turquoise piece I trimmed from the backing after I’d finished quilting. I ran out of binding as I was coming to the join and inserted another small piece of turquoise to complete it. I like where that insert landed.
Fiished Quilt Back
To create the quilt back I set up a “jellyroll race” using leftover bits of fabric from the top, with a narrow strip inserted and two unequal sashing strips. Using the turquoise for the backing sets up an interesting flow from top of quilt to the back. There’s enough turquoise in the top that when you flip the quilt over you retain the connection between top and bottom.
The ombre fabric I ordered online arrived Friday so I will now work on completing the double conversion quilt featuring the ombre fabric.
But before I can get to that, I’m have to work on the thread painting wall hanging.
Detail – Thread Painting Floral Wall Art
I started the thread painting last Tuesday as part of a class I’m teaching (I stitched the dark green parts of this and another leaf although you can’t really see what I’ve done in the photo). We meet again coming Tuesday and I have made no progress on the stitching work. Nevertheless I need to move on to framing the piece so I’ve trimmed it, I’m in the process of adding a bit more batting to the edges to allow enough background to balance the floral arrangement and provide support for the borders. Then I have to set up the marking (using Friction heat erasable pens) so I can apply the borders – have to get that process well underway before Tuesday – not completed, but started so I can demonstrate how I add borders. The framing of the piece won’t hinder the massive amount of thread painting I will still have to do.
I started thread painting the bark cloth cutout flowers and leaves the other day. It goes surprisingly quickly and yet it seems to take a lot of time. The first thing I did was stitch the edges of the fused cutout using a modified blanket stitch (w: 1.5mm) with a smoke coloured monofilament thread in the needle (a white rayon embroidery thread in the bobbin). As I’m thread painting, I’m stitching over the cutout edges with embroidery thread to obscure the loose warp/weft threads that are peeking out.
One leaf is done, parts of the larger leaf begun and the dark thread on the anthurium has been stitched – lots more to go. Next will be the brighter green elements on the larger leaf and the “grey” elements will be some shades of bright green, not sure what precisely, yet.
Thread Painting The Bark Cloth Flowers & Leaves
I’m using the embroidery thread doubled – two close shades – both threads through the single needle eye. It’s working well, I’m not having any tension difficulty. I’m not trying to cover the fabric with stitching – just enough to provide some texture and sheen.
Here’s where my collection of fine permanent markers is proving handy – I filled in the grey on the dark leaf with a bright green which livens up the whole. I will do the same on the larger leaf.
Thread Painting – Detail
This piece is a test run for the larger one with the natural raw silk background. The graceful movement of the printed design is making the thread painting straightforward – the flowing lines are easy to replicate, even though I have both the feed dogs and the Pfaff IDT engaged! (I’m doing that to maintain a consistent stitch length – I don’t come close to an even stitch length with free motion sewing). Using the needle down position, the presser foot lifts a wee bit when I stop which allows me to freely manoeuvre the fabric as I sew. So the long flowing lines are happening without difficulty.
Time to get back to work on the larger leaf.
Second Leaf – Finished
This is the second leaf stitched and tinted using the permanent markers – much more lively colour than original “grey”.
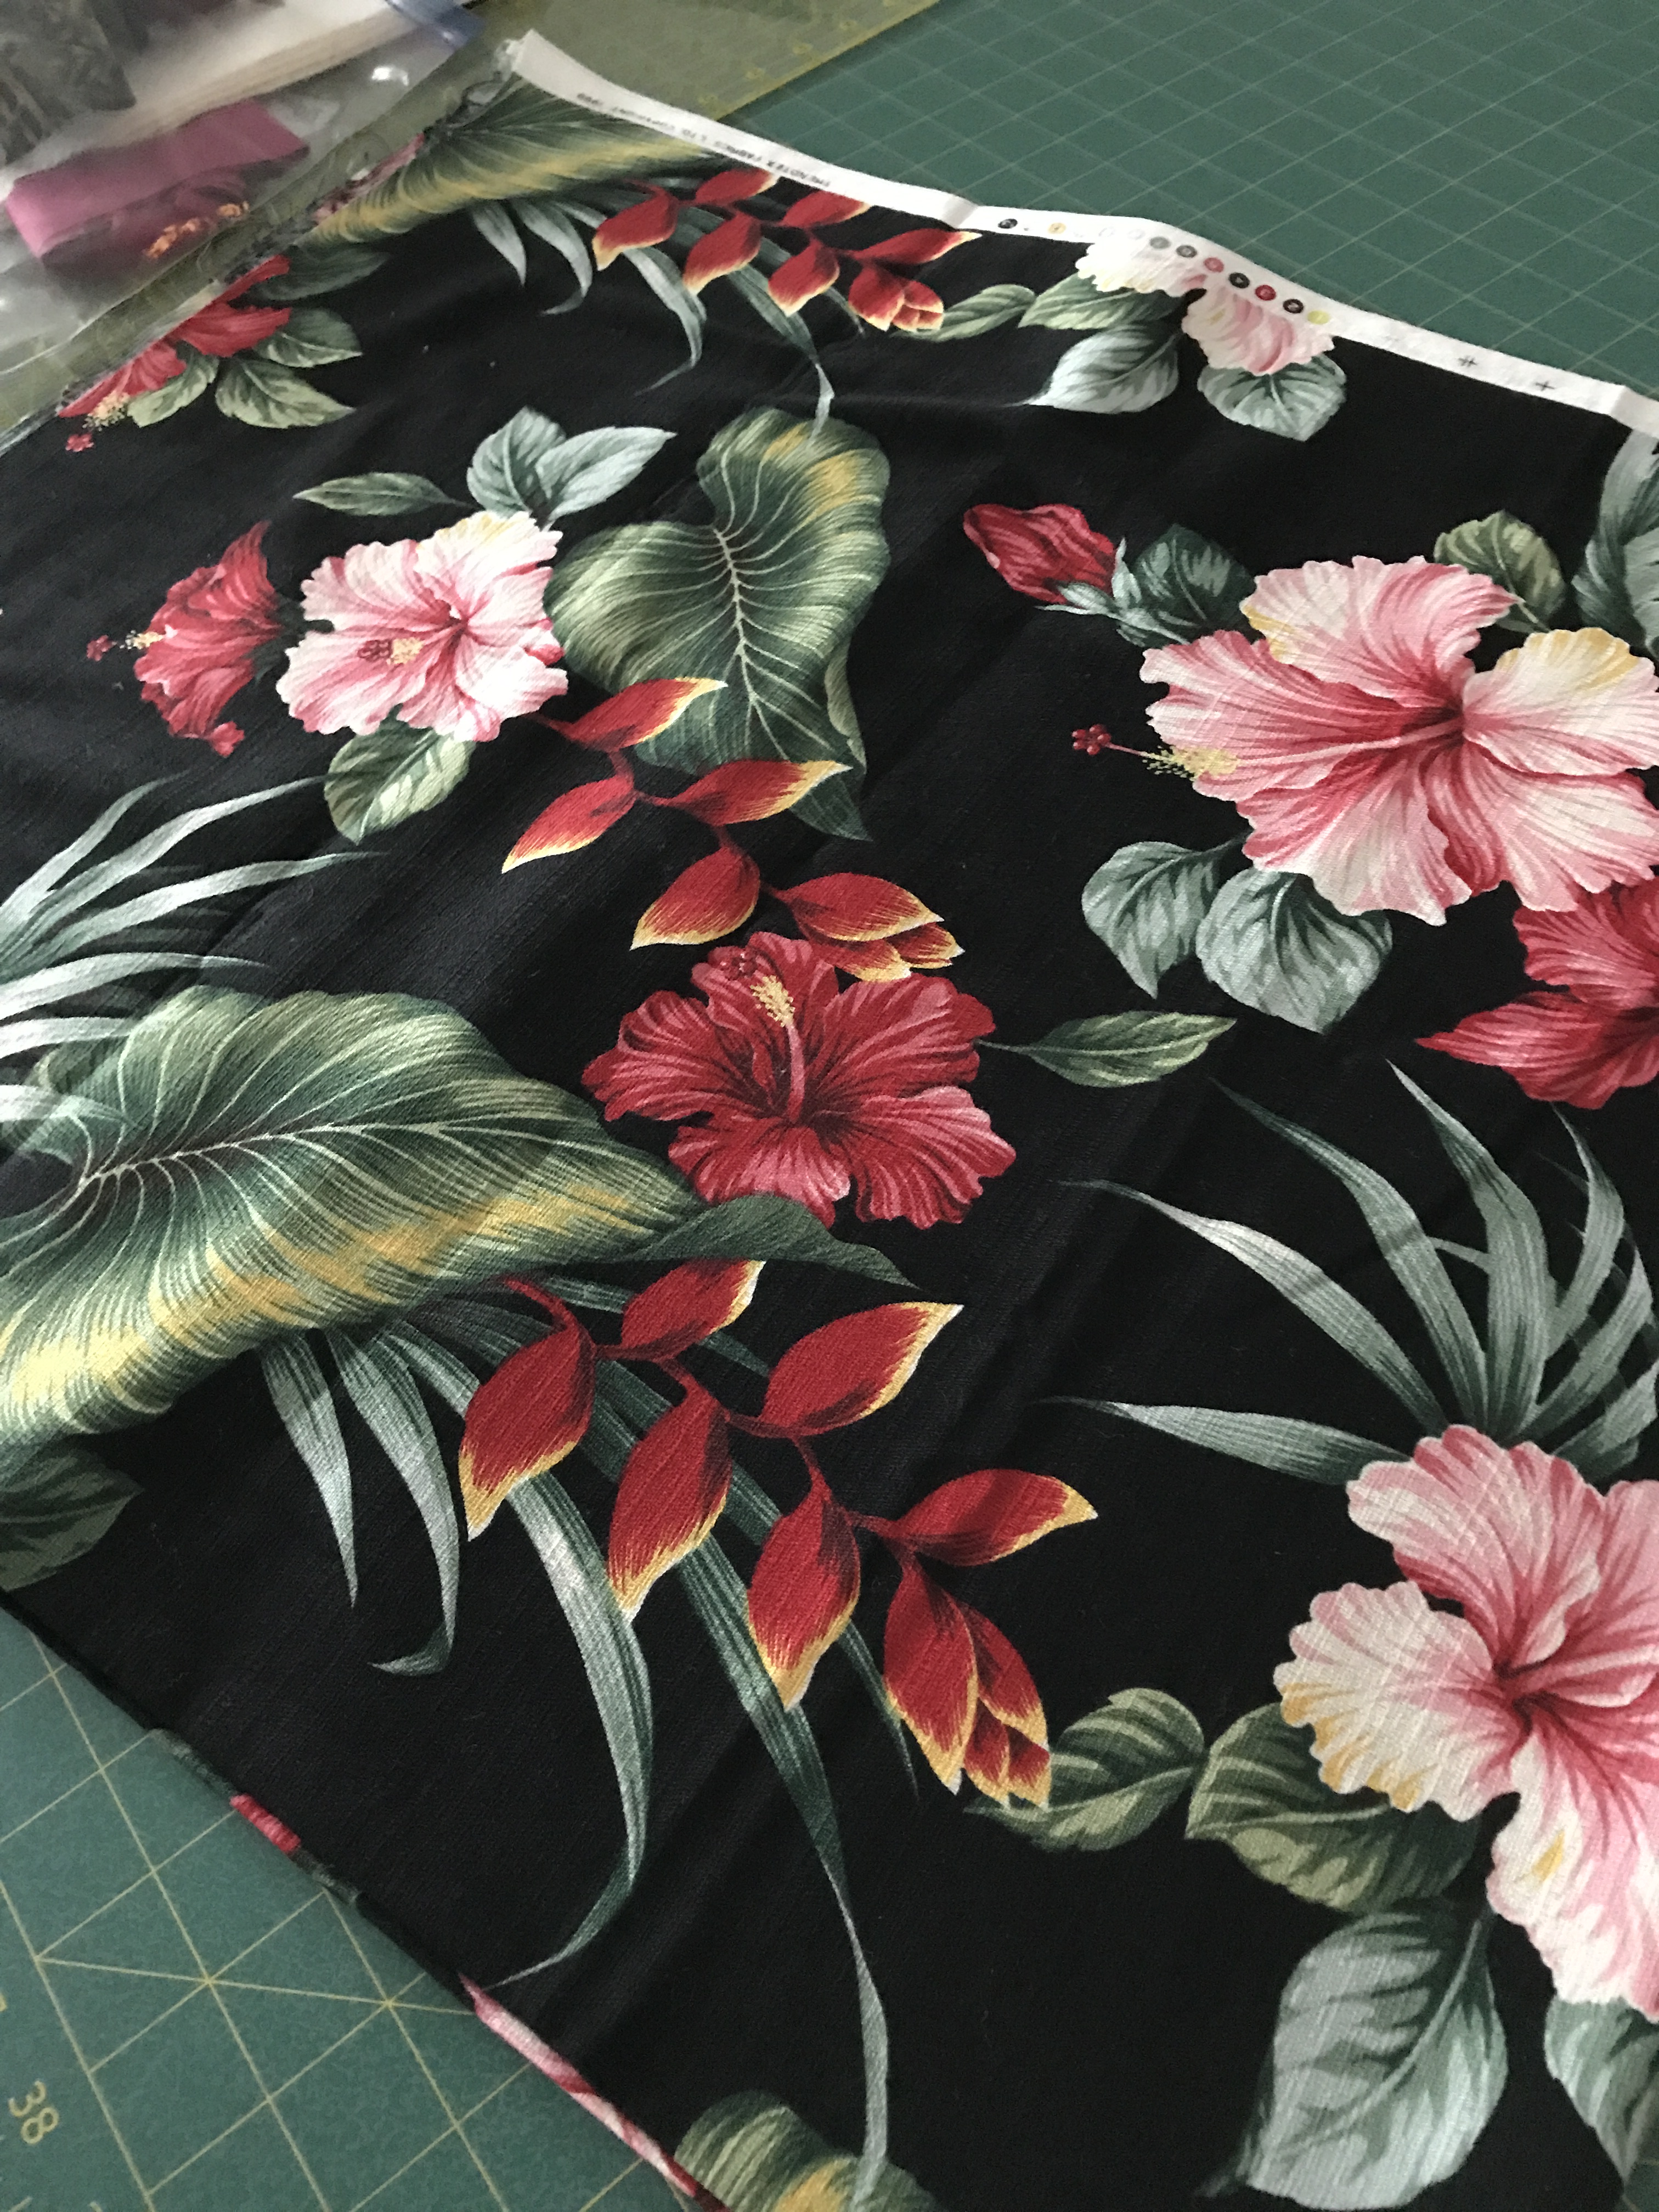
This morning I finally stopped procrastinating on the wall art – I found myself starting on two unexpected projects. Yesterday I was going through fabric in my stash looking for fabric for the Federer piece and came across some Hawaiian bark cloth with large floral patterns which I thought could be turned into an interesting raw-edge appliqué piece on a raw natural silk background fabric:
Raw Edge Appliqué using Hawaiian Bark Cloth Floral Cut-outs
I cut the fabric in thirds, isolating one repeat of the pattern, fused Heat ‘N Bond Featherlite fusible web to the back of the fabric, fussy cut the flower/leaves elements, then fused them to a panel of natural raw silk (backed with Warm ‘n Natural quilt batting).
Now I need to go through my embroidery threads and pick out colours to use for securing and thread painting the raw-edge fabric elements.
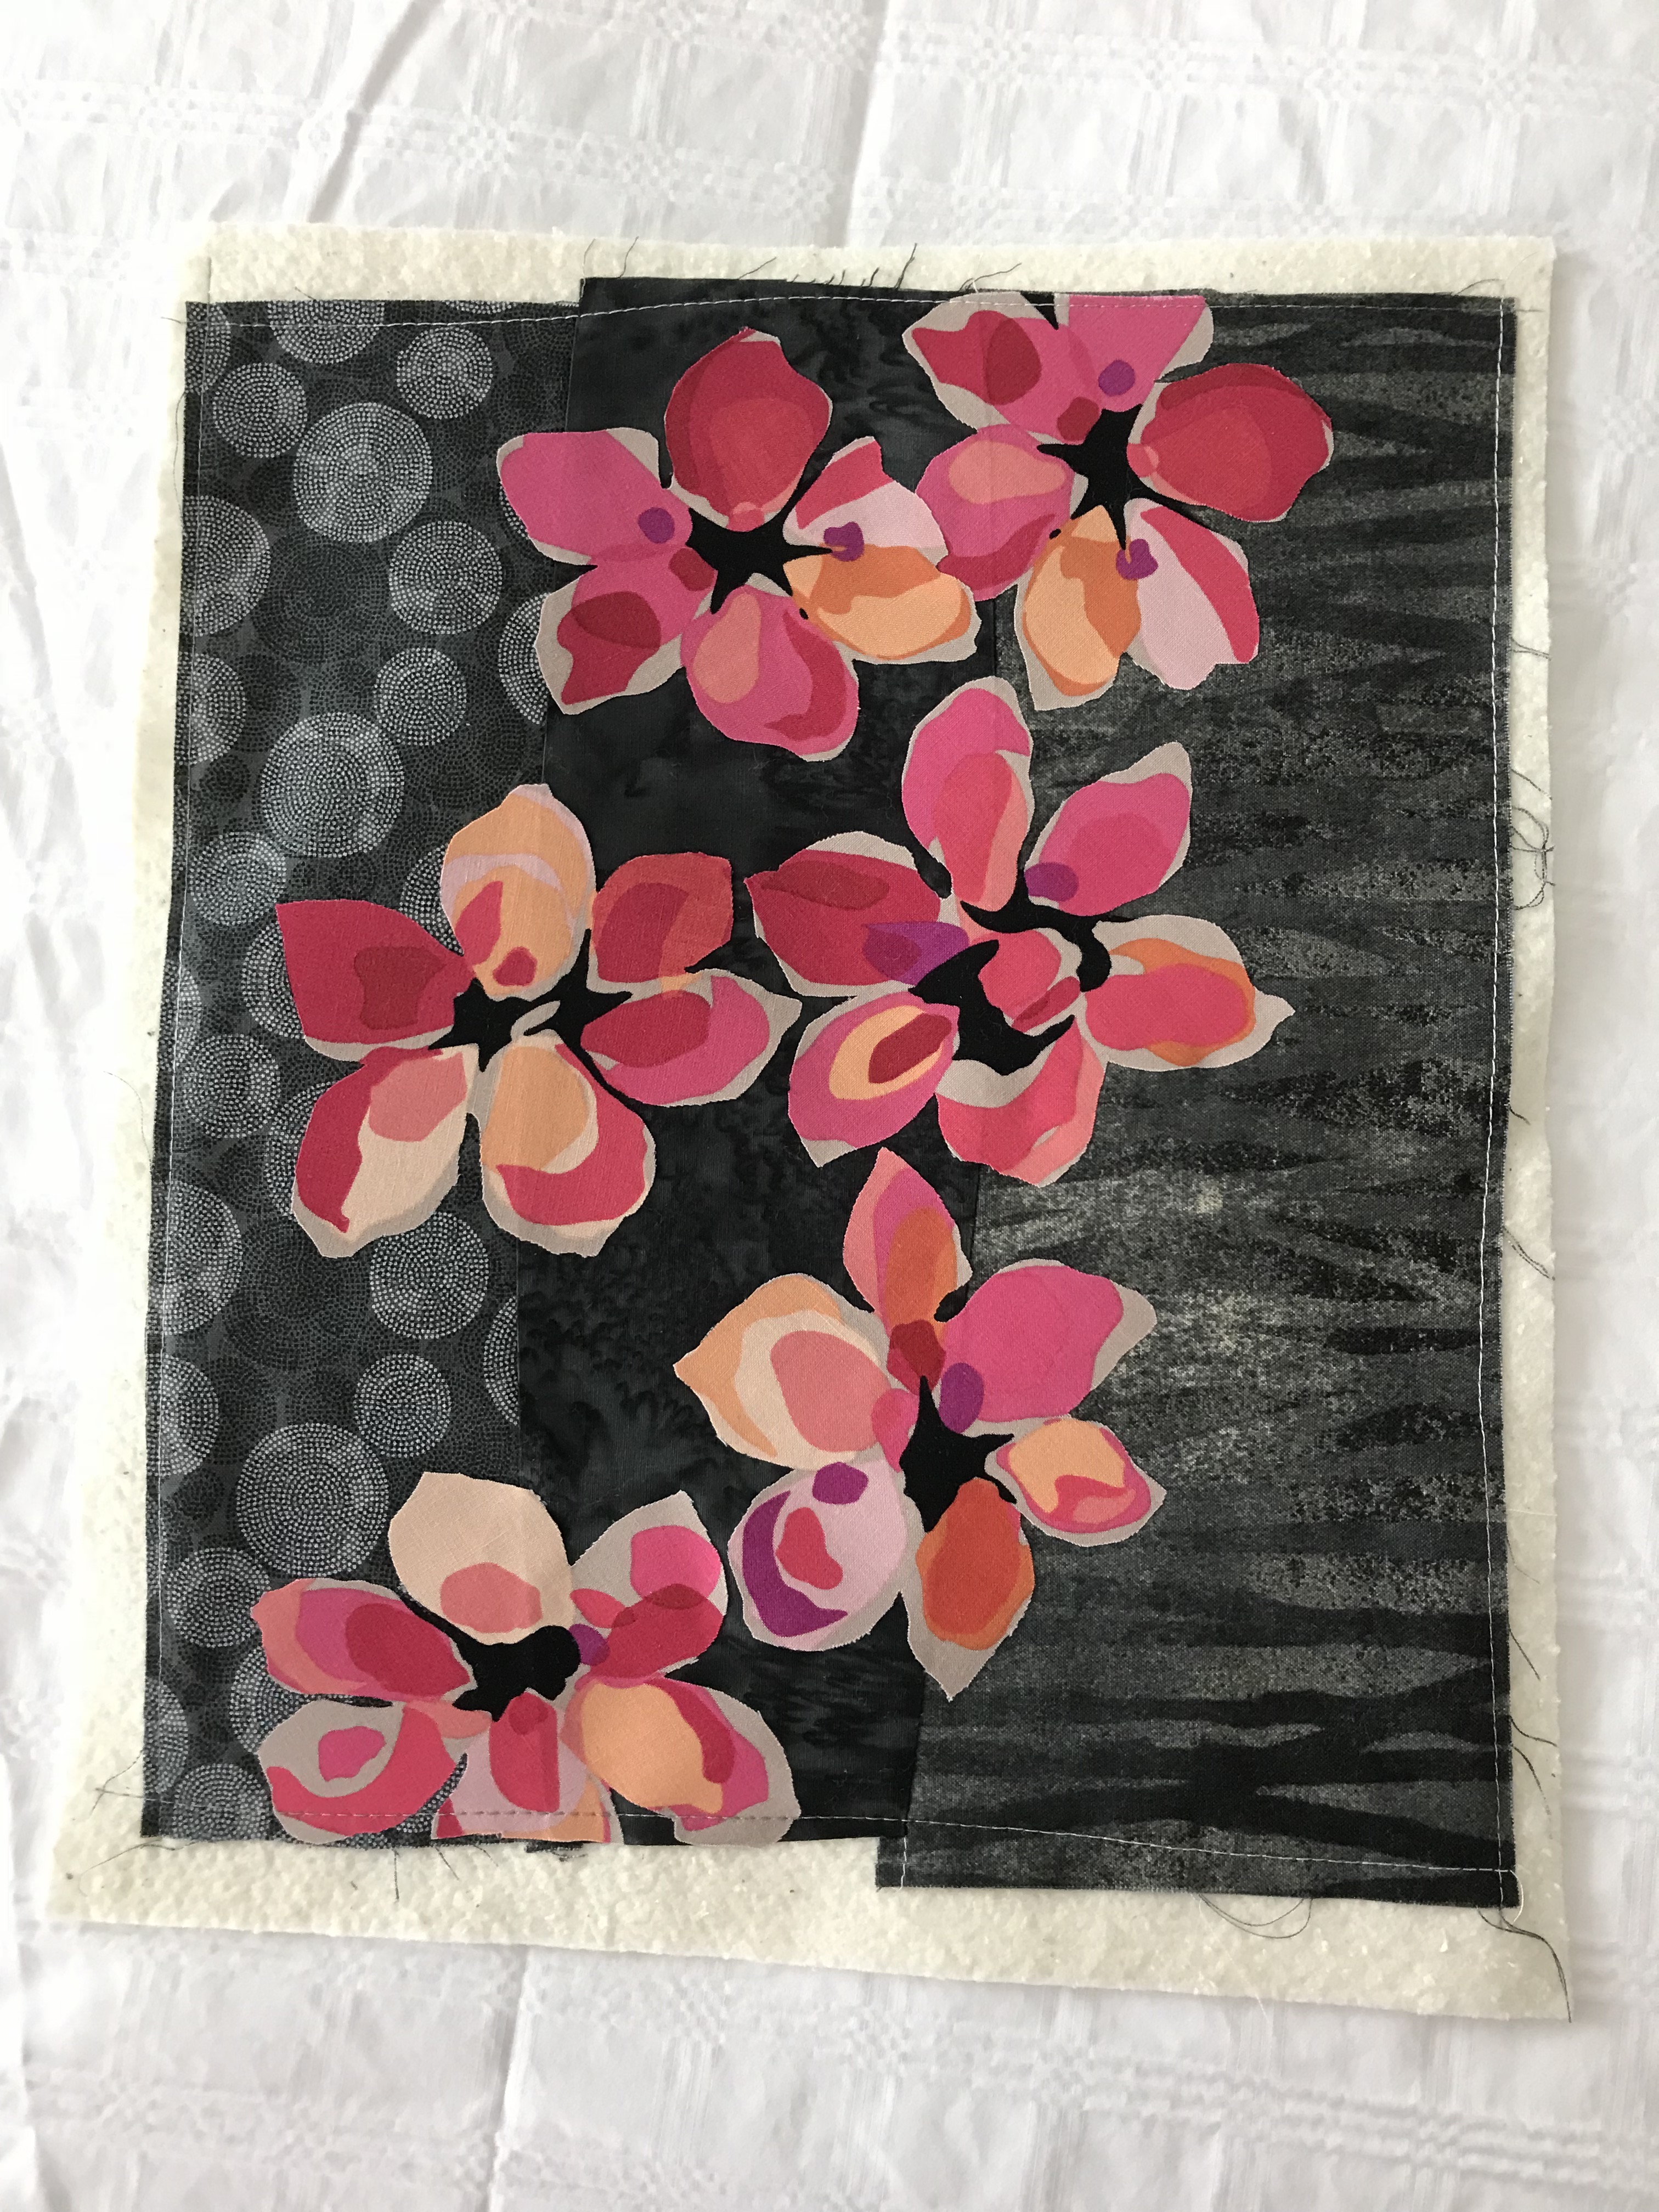
I also got a second piece underway – I had a small leftover scrap of a modern floral which I’d used years ago to make a wide-brimmed summer hat. I thought the cut out flowers, placed randomly on a pieced background, would be an interesting vehicle for thread painting – I started that this afternoon. This piece will finish around 10″ x 12″ – it’s a test run to see where this idea can take me.
Raw Edge Appliqué – Modern Flowers on Pieced Background
So I’ve got two pieces to work on and maybe I’ll make some progress by the end of the weekend!
Wide-brim Summer Hat
[Here are instructions for making this wide-brim hat, if you’re interested.]
 Anthurium 1 Almost Done
 Anthurium 2 Part Way