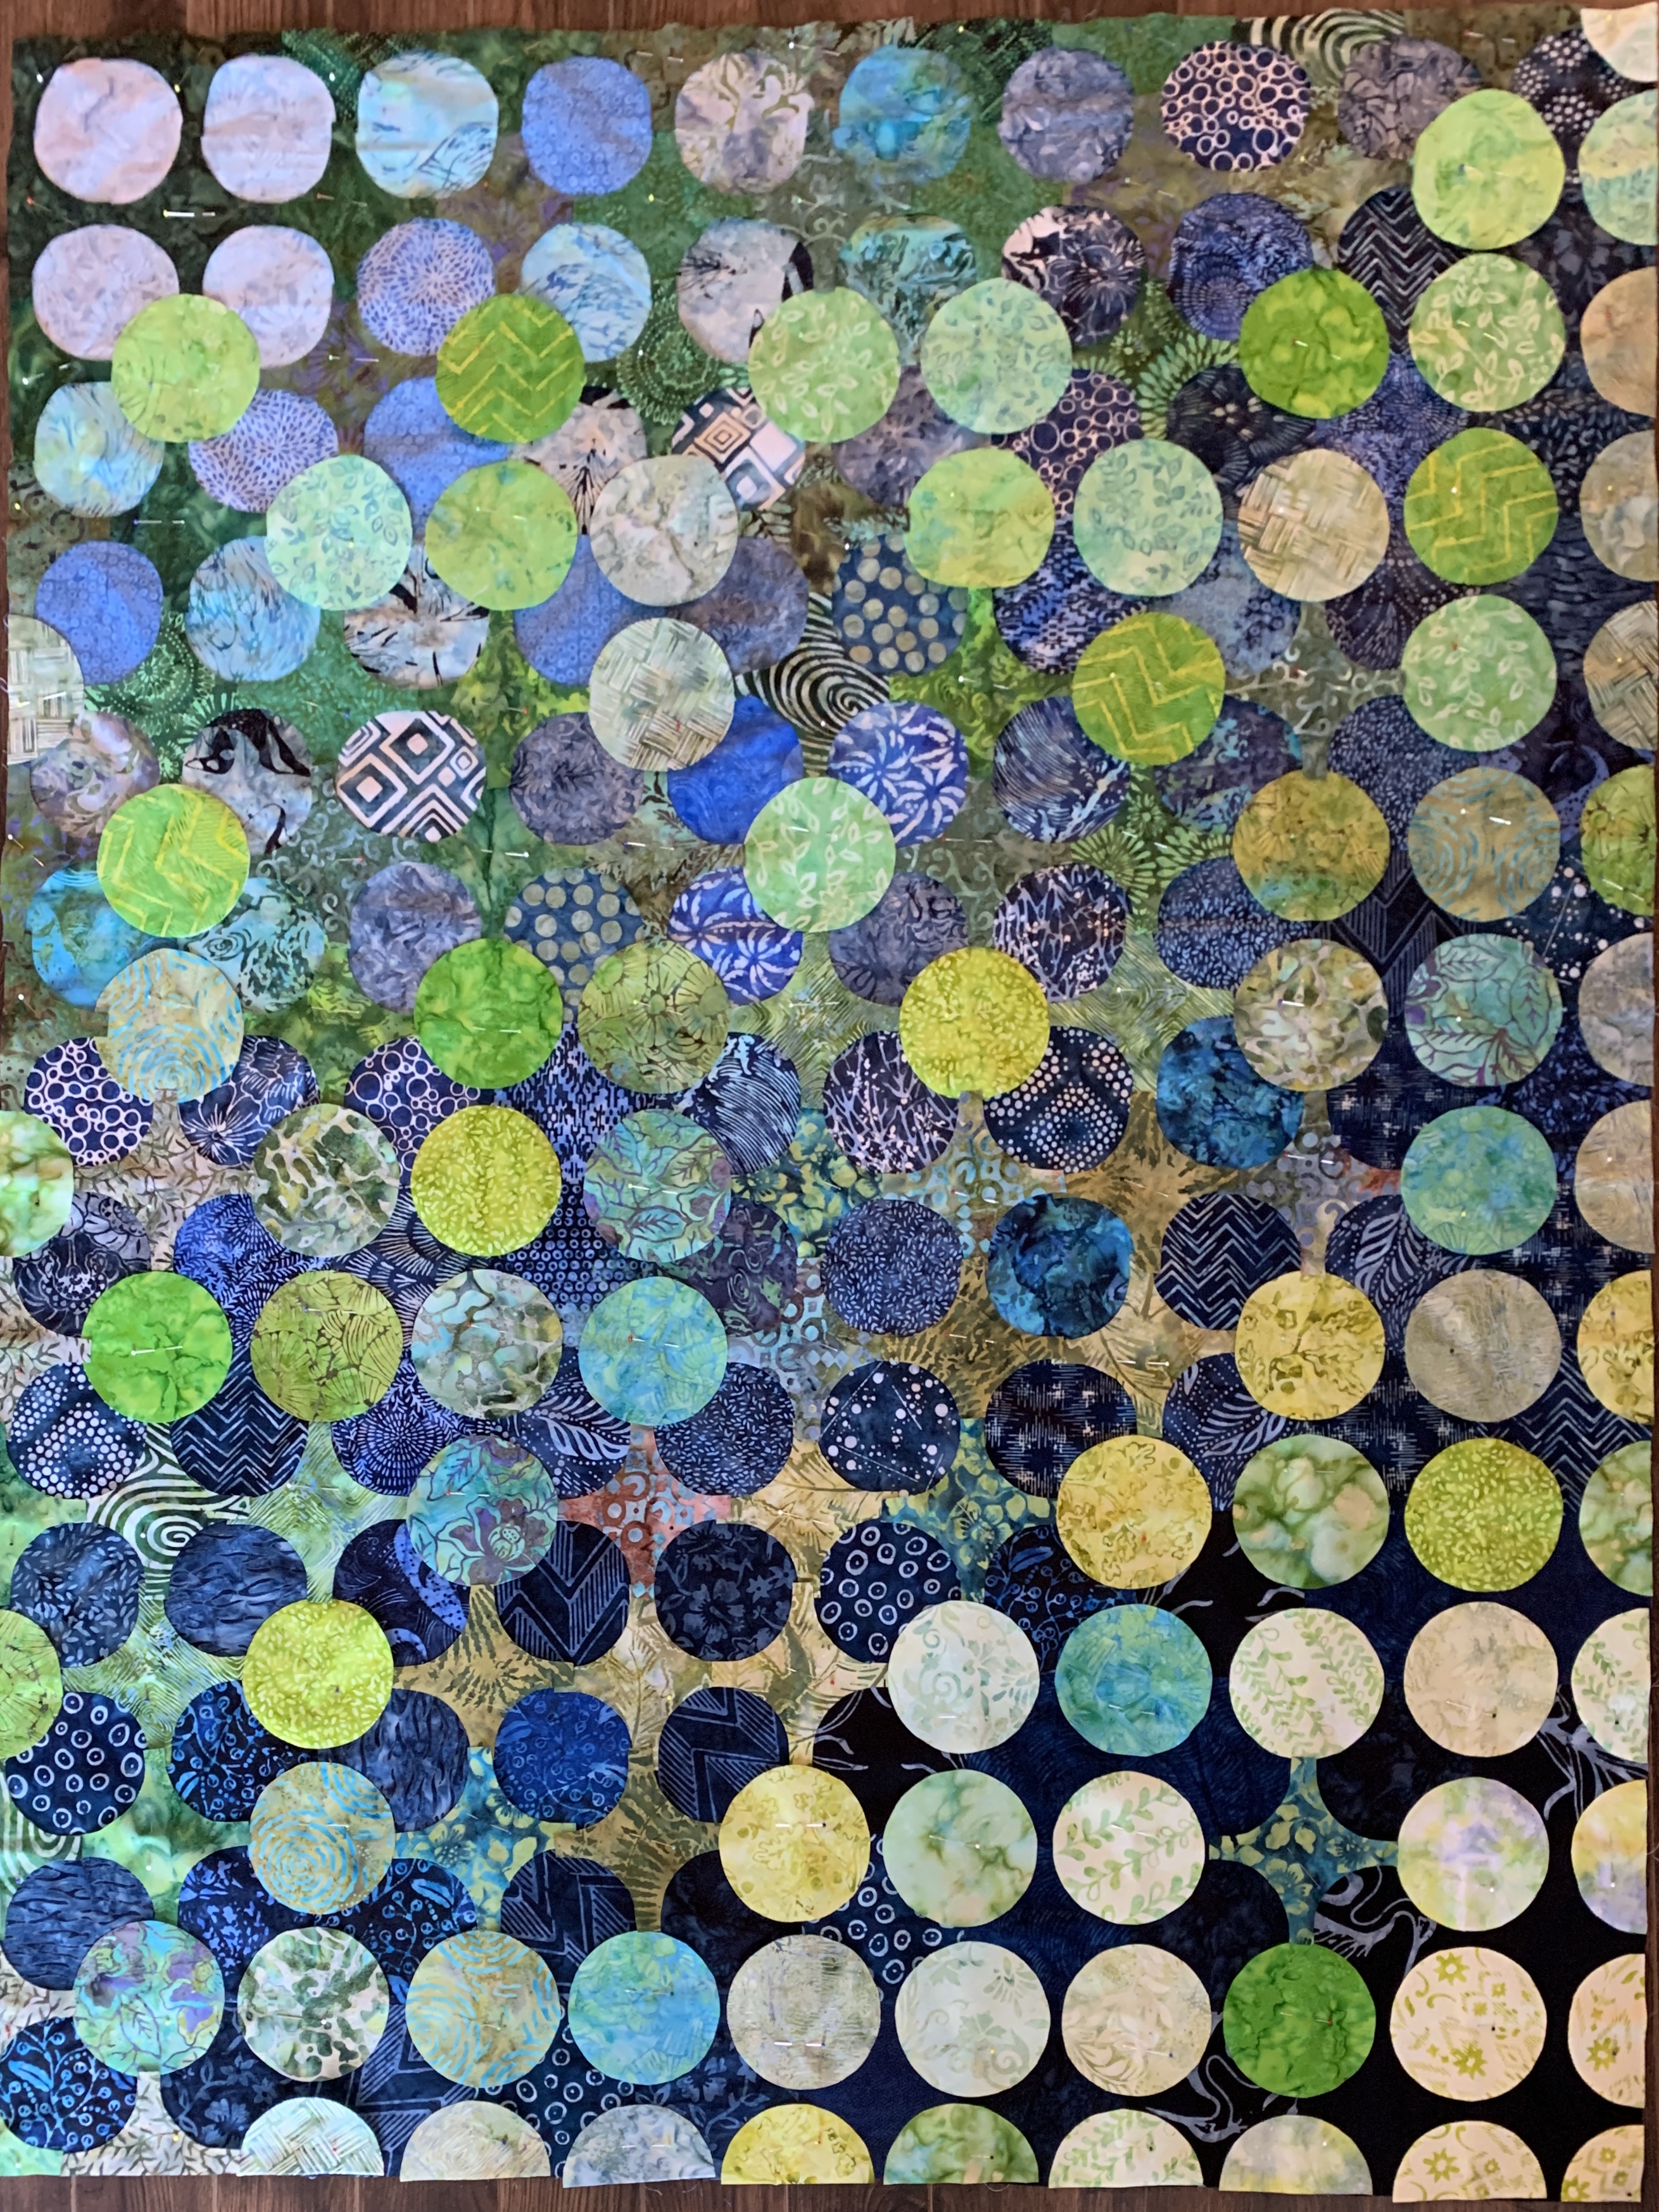
Alright – here are the circles and Xs pinned to the background. The result is the illusion of circles (greens) on circles (blue) which is what I was after.
I laid the panel on the floor and photographed it – the circles that were in the wrong place stood out dramatically – I made a few swaps although that wasn’t so straight forward since I had precisely the right number of circles and crosses to fill the panel with just a couple left over. I thought I was going to have to cut more but I got away with what I had by moving a few around.
Circles / Xs pinned
Now comes the painstaking task of pressing the pieces in place so I can then edge stitch them with a decorative stitch. I’m hoping the Wonder Under holds better than the Heat ‘N Bond I used on a previous quilt – I had to use white glue on some of those circles when they began separating from the backing. It will take me the better part of a week, I’m anticipating, to edge stitch all of these 154 elements.
I still have no idea yet where to go from here – I think I want a navyish small print (a grunge?) for a narrow border, then a wider border in chartreuse – I will have to go shopping with the panel to decide what might work because I haven’t anything in my stash that suits the colour scheme in the panel.
Here’s how the appliqué work is beginning to shape up – I fused Wonder Under (Pellon 805) to the back of 4 1/2″ x 17″ strips of 30+ fabrics ranging in colour from pale yellow/green to a very dark green. I made the decision to cut the circles from the lighter fabrics and the crosses from the darker ones (that may be a limiting decision but I had to start with some kind of order from which to begin).
So far, I’ve cut a bunch of circles and have pinned them on the blue background and I’ve started interspersing crosses – I’ve been placing/pinning as I’ve cut out circle and cross elements – I think at the moment I need to cut out more crosses and see how close I can get to the bottom right edge with them, then fill in the rest with circles.
Circles & Crosses
NOTHING is fused in place! I have to get the space filled with circles and crosses, stand back and look at the whole from a distance, take photographs to see what the whole looks like, before putting an iron to the quilt top. I have a feeling I may have too many light coloured circles in that upper left corner (over the darkest squares of the background panel) – I think I will want to drop a few darker circles in that quadrant – just trying to visualize what that would look like.
I’ve done maybe half of the cutting out of circles and crosses. I need to spend the rest of the afternoon and evening getting the rest cut out before I attempt placing more elements. The crosses when placed side by each create circles from the background panel – I want to bring out more of the blue in the middle of the quilt top so that will mean more crosses in that area.
The good thing is everything is just pinned at this point – I can still change my mind about all of it.
Here I am with a stitched background layer – it took 3-4 hours to assemble the pieces – the difficult part was collecting them from the floor in the order they were placed and keeping the paired squares in the same order while I was sewing them. I did reference yesterday’s photo several times to be sure I hadn’t reversed blocks.
Stitched Background Layer
I began by creating the vertical columns stacking the 13 pairs from bottom to top proceeding to the next column, then the next. I put post-it notes on the top square of each stack to identify the order in which I needed to sew them. I chain stitched the pairs in each column, cut them apart, pressed the seam to alternating sides, then built each column being careful to nest the seams.
Contrast Fabrics
Yesterday I pulled 27 contrast fabrics from my stash from dark green to light green – in the photo there is a lot more turquoise in the selections than I saw when I stacked the fabrics and the light green looks rather peach. I think my pale colours aren’t strong enough to make the elements I plan on cutting out pop. So back to the stash I must go – I’ll see what I have in yellow that might provide a better contrast, or maybe (heaven forbid) I will have to go shopping for more strong bright lime green batik for the appliqués over the dark background blocks.
I’m trying to stay within the stash for this quilt, although I already know I’m probably going to have to shop for some fabric to create a border – that’s because about a third of my blocks came from a charm pack (I have no more of those fabrics) and the other fabrics I used came from my scrap boxes (there is very little left of those as well – not enough to do 4″ borders).
I started by pulling from my stash a double jelly roll of batik fabric (5″ width of strips) with an idea – but beyond opening the package of fabric strips I haven’t been stuck. Nice fabrics but I just can’t find a way to start. Next I pulled out a charm pack of blue batik fabrics (5″ squares) and that seemed to get me underway. 5″ squares are rather small – ending up as 4 1/2″ blocks so I’d need a 10 x 13 array at the least to make a decent size quilt.
Quilt Background
By adding more than twice the number of squares in the charm park using fabric from my stash of fat quarters and scraps I’ve managed to come up with 130 blocks to set up a graduated 10 x 13 array from light to dark which I can see serving as background for an appliqué quilt.
Inverted Array
I’m still not sure what will develop as a layer on top of this background – I will likely use circles somewhat in the way I did the original “Double Vision” quilt which my niece now has.
The question is what colour palette will complement these blues – shades of green ranging from light chartreuse to dark green/blue? I’ll have to see whether I have enough fabrics in my stash to make this work.
More as the work progresses – now to stitch this assembly together. That’s for tomorrow.
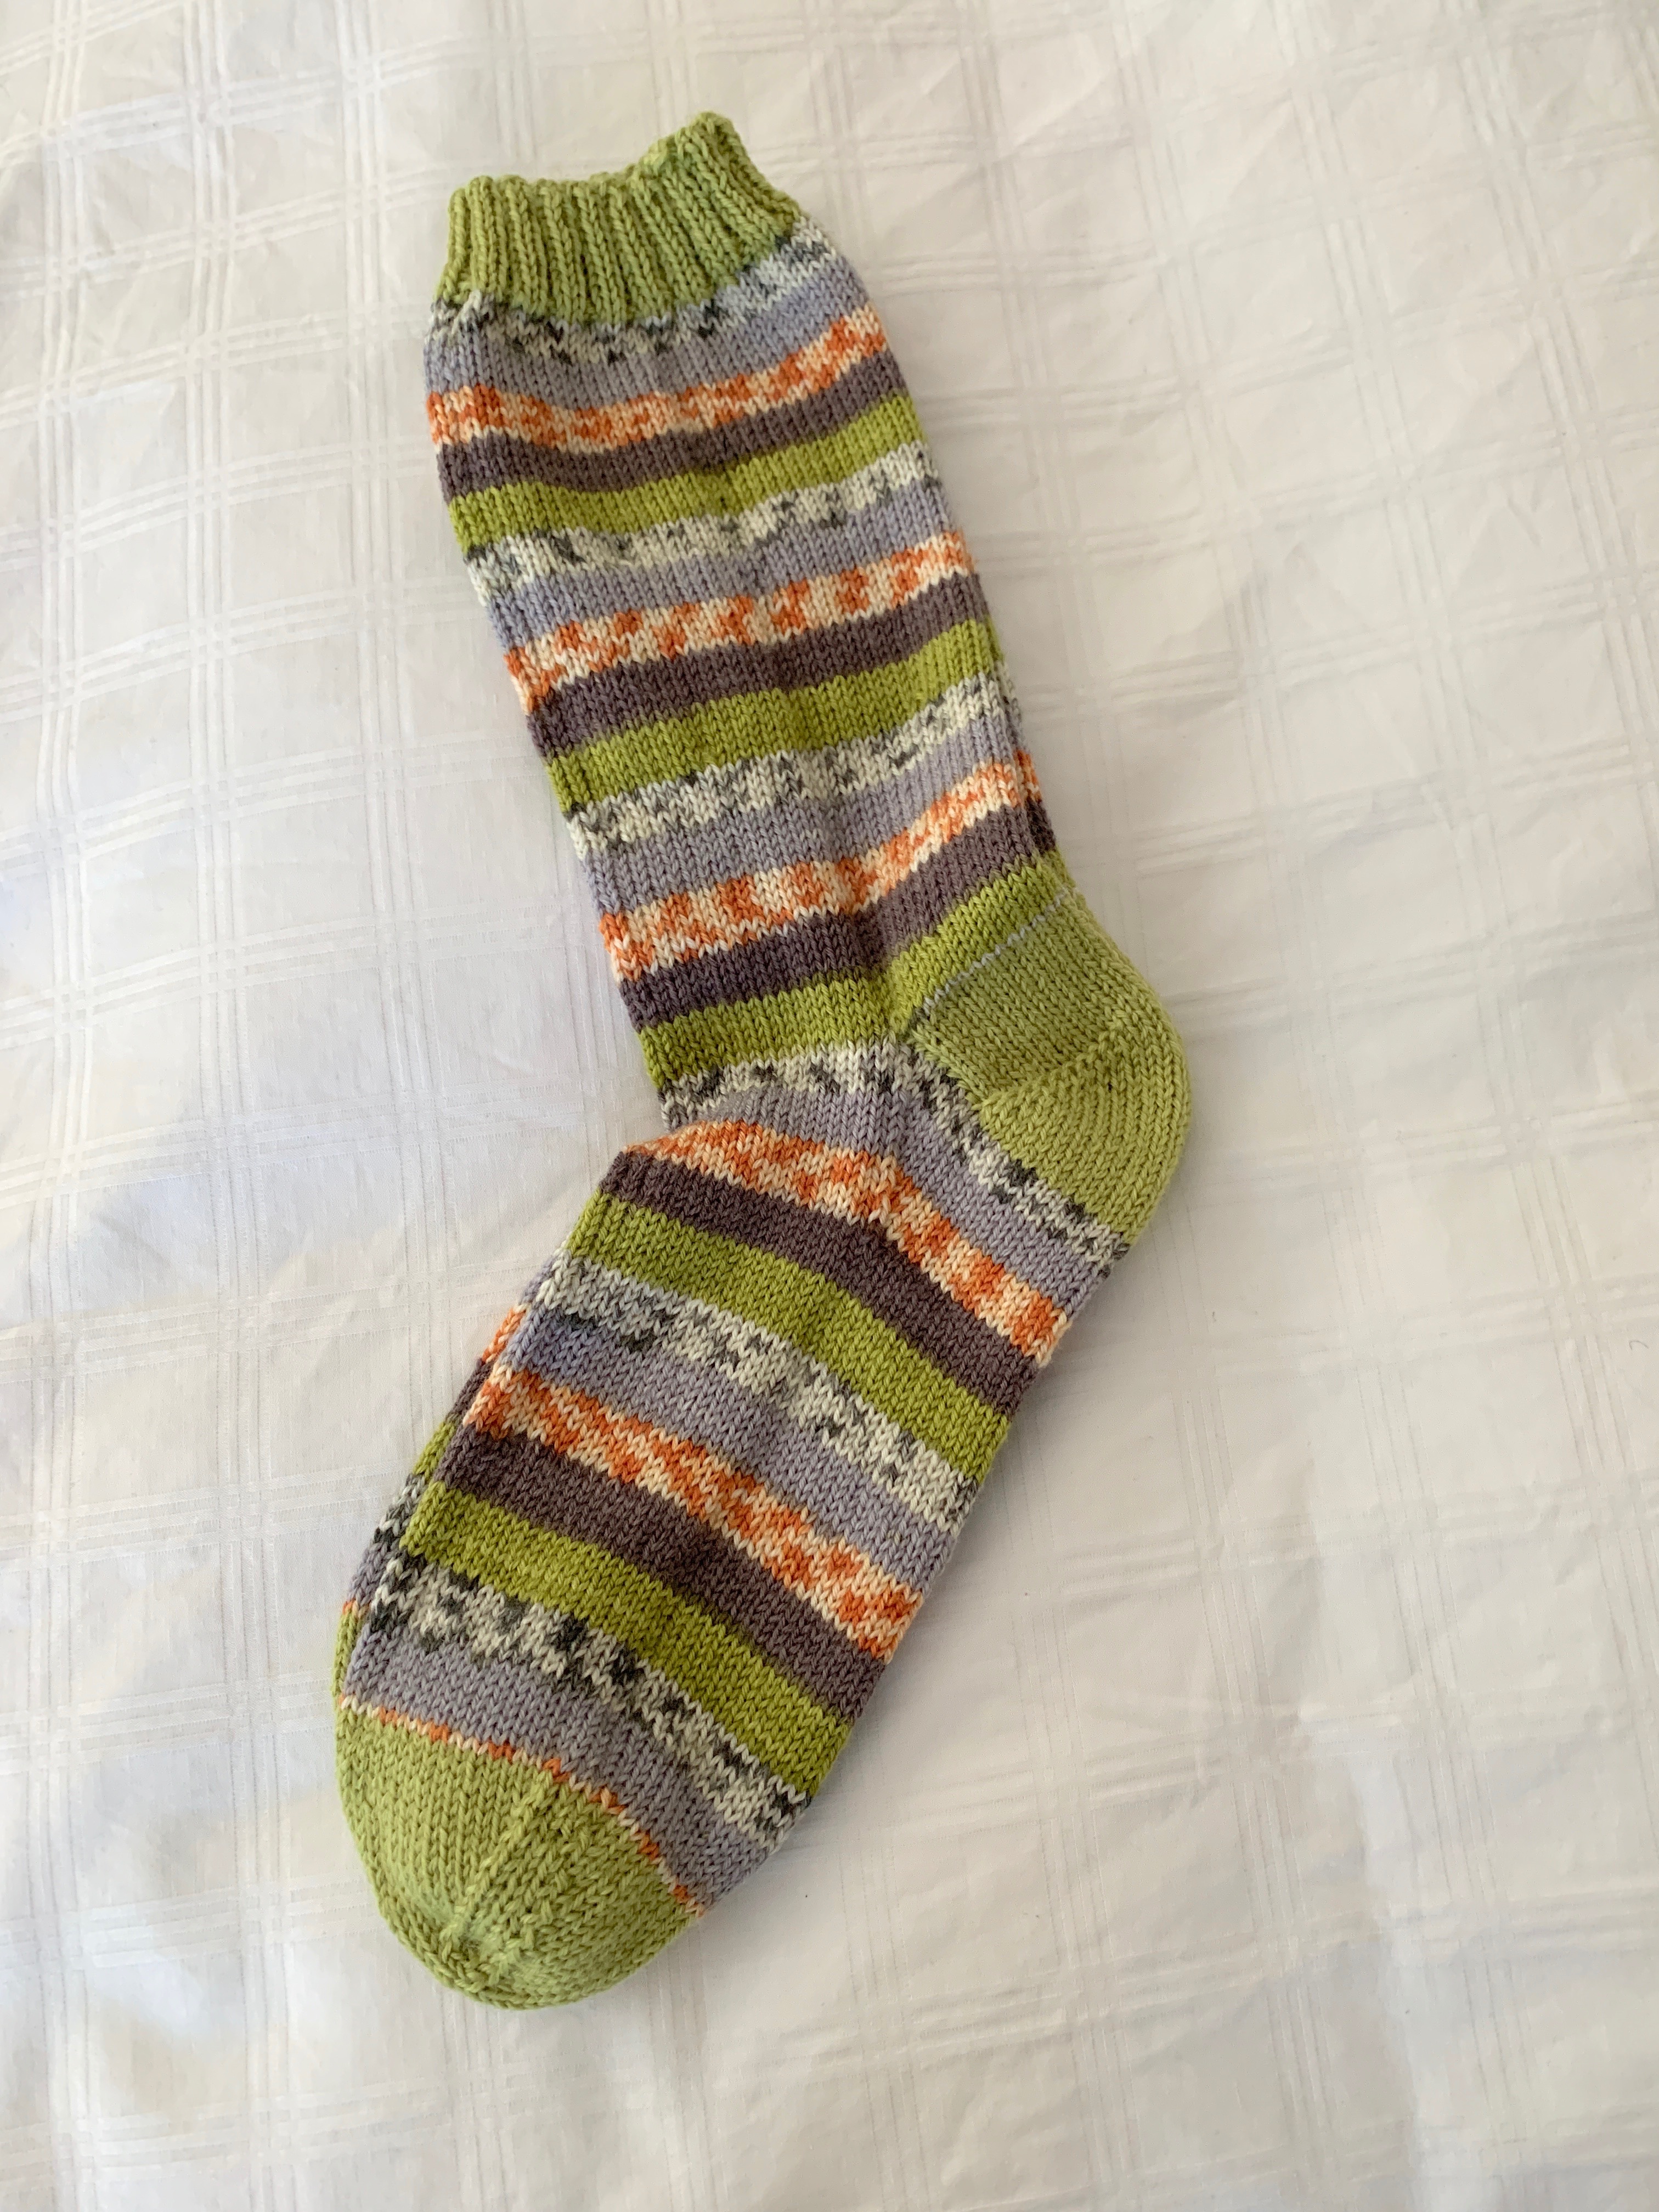
Finally finished this most recent pair – turned out rather differently than I expected from the appearance of the ball of yarn – much more yellow than I had anticipated. The knitting went reasonably quickly but I got side tracked by a week-long trip to Toronto for a family event last week. I took my knitting but didn’t actually get to do much – there was a ton of parties – Thursday night, Friday night, Saturday afternoon and evening, Sunday morning – not much time to work on sock knitting.
Latest Socks
I’m just about to start a next pair – shades of grey/mauve/rose – more subtle.
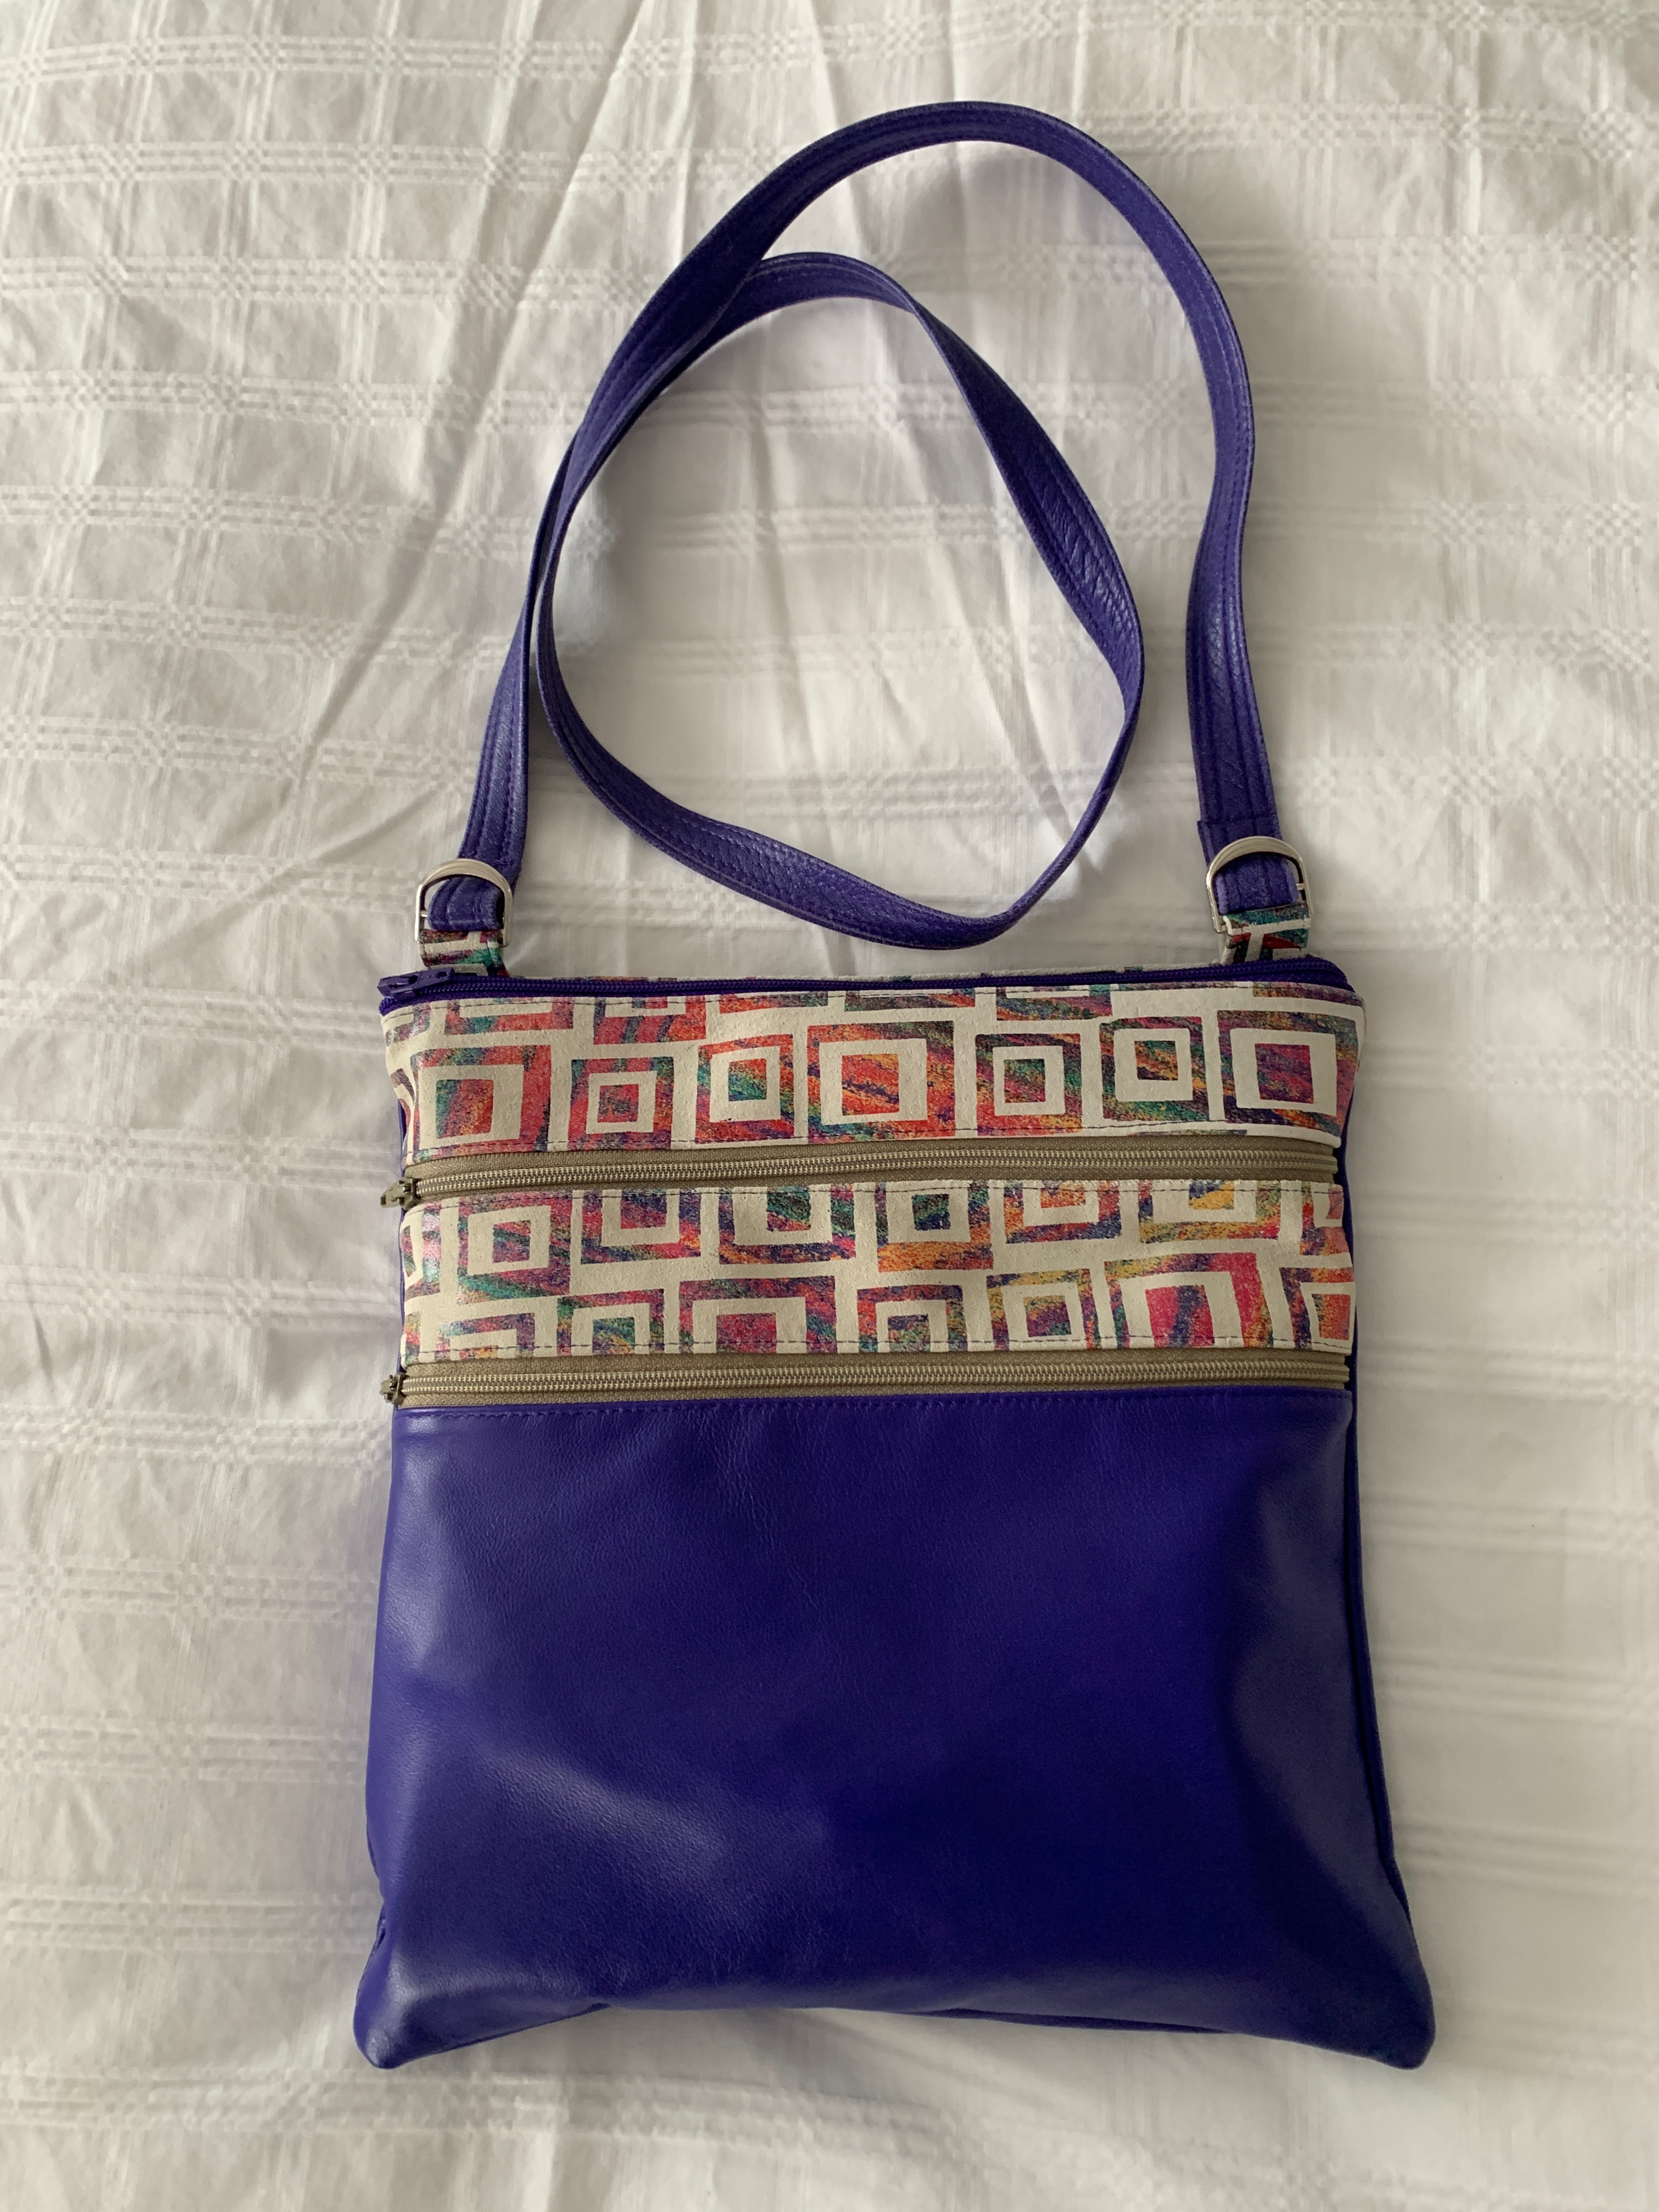
This is the second time I’ve made this bag – made one a number of years ago (~ 2015 as I recall) using the beautiful soft purple kid skin I bought in NYC in 2010. I’ve used the bag a lot – the colour faded and it got scratched. It was time to use the remaining purple kid to make another one.
New Leather Bag
Today was the day. Actually I cut out the leather pieces and the lining pieces yesterday, even dashed off to Fabricville to purchase 14″ zippers (longer than the bag is wide so I didn’t have to worry about the zipper ends when sewing them in). It took me just under three hours this morning to put the bag together. I reused the fittings when attaching the strap.
I made a couple of modifications this time, the two painted leather inserts are narrower making the pockets accessed through the khaki zippers larger and therefore more useful than in the first iteration of the bag. I also used a painted leather insert at the top of the back to make the back long enough to match the front.
Otherwise the internal construction is the same – the major central pocket has two small side pockets built in to each side to hold things like hand sanitizer, nail file, wallet, glasses cleaning cloth, Swiss army knife (credit card style), etc. With stuff stored in the pockets I can find what I’m looking for easily – it’s not all a jumble at the bottom. The other two zippered compartments are simple pockets – one for my check book (yes I still carry a check book although I must admit I haven’t written a cheque in almost a year!), and for stuffing shopping receipts in one place so I can find them.
I could put my phone in the bottom pocket if I wanted to – it’s large enough in this version of the bag. But usually I carry my phone in my right pants pocket.
I’m still procrastinating about starting a quilt! I’ve pulled out some fabric – a double jellyroll (5″ wide strips) to start something – Tomorrow! I’ll get going on something tomorrow, for sure.
I have to say this wasn’t my most favourite pair of socks. I had a difficult time knitting them – I really didn’t enjoy working on those colours/that pattern. I had a solid yarn that blended very closely with the green in the socks but nevertheless knitting them was slow going.
“Ugly” Socks
I’m glad I finally finished them Thursday evening and I was able to move on to another yarn. This pair is in the giveaway pile – people will get these socks for Christmas.
I also went through my basket filled to the brim with balls of leftover patterned yarn. I pulled them out, put them in a bag and gave the remains to one of the knitters in our Friday afternoon group to pass on to her crafting women. There’s enough yarn in those balls to make a pair of socks for a child, or small mittens; or combine them and end up with a Dr. Who scarf. I just wanted that leftover yarn out of my house. I’ve knit nine (or maybe it’s ten) pairs of socks combining some of them. I couldn’t summon any further interest in trying to use up that yarn. And now it’s gone – although there is a new collection starting with the leftover from this pair of socks!
I haven’t posted a lot this past month but that doesn’t mean I haven’t been sewing. I began in earnest as soon as my cast came off on July 31.
In August I made:
Four pair of pants for myself – two in linen, one in a summer weight wool/poly blend, the fourth in a stretch twill. (Now I have to take four pairs of pants out of my closet!)
Wool/poly Pants
I remade a pair of jeans I bought at Costco (I had to lift the back pockets and create a teardrop dart down the centre back of each leg; resew the pockets).
In the end I made 30 sets of seat belt covers! (For the folks who chauffeured me while I couldn’t drive)
I improvised a set of zippered pockets which I attached to a blanket for a friend in a wheel chair. (I forgot to take a photo of the completed project)
I also made a new five-pocket zippered wallet for myself out of ripstop
Five Pocket Wallet
I sewed almost every day. I didn’t get any quilting or wall art started but I’m thinking about it.
I also managed to cut out fabric to make 30 zippered bags – in two sizes. Two weeks ago at our knitting group I noticed the bags I had made a couple of years ago are being well used. I asked the gals whether anyone was interested in having another bag – silly question – you can’t have too many small zippered bags, for heaven’s sake. So I decided to get that organized.
I dug out the bright fabrics I had set aside to make bags and cut it into appropriate sizes (17″ x 6.25; 21″ x 7″). I cut batting scraps into similar sizes as well. Found suitable (dull) fabric in my stash to be lining for the bags. I went through my zipper tape and cut enough lengths to the correct size.
Fabric Prepared for Zippered Bags
To make a bag I need one outer piece (twice the width of the finished bag), one lining piece, a piece of similar size batting, one half of a zipper tape cut to length, a zipper slide, and a short piece of grosgrain ribbon.
Setting Up For A Bag
I make the bags this way because it allows me to create a zipper loop at the closed end which is much neater than trying to stitch over cut zipper ends.
Using Zipper Tape
I’ve made three bags so far – two larger (9.5″ x 6.25″), one smaller (7.5″ x 5.25″).
The First Bags – 2 sizes
Now I need to sew the remaining 27 bags! Each bag doesn’t take long – maybe 15 minutes were I to do each one completely, but I’ll do this factory style – I’ll add zipper tape to the outer fabric and batting, add lining and stitch to zipper on the second side, for all of the bags. Press. Next turn right sides outside and add the zipper pulls. Then turn right sides together with lining and outer fabric/batting separated to stitch the open side (remembering to insert the folded twill tape into the seam close to the zipper on the outer fabric side – fold toward the centre of the bag). The bottom of the outer fabric/batting is sewn next. Now the important thing to remember: open the zipper! If the bottom of the lining is sewn before the zipper is open, you can’t open the bag. Turn the bag right side out, sew the bottom of the lining (wrong sides together) then push it inside the bag.
It sounds complicated – I probably should take photos of each step along the way (I will try to remember to do that when I get started on production). But the process is fast and the finished bags are neat.
You can’t have too many zippered bags! I use them for so many different purposes: for jewelry, to store elastic bands, spare change, specialty threads, sewing machine attachments, flash drives for my embroidery machine…. It looks like it’s going to be bags this Christmas.
I’ve been making seatbelt covers for myself for years – I’m short and especially during the summer when I’m wearing open neck clothing an unprotected seatbelt cuts my neck. I was very aware of the problem whenever I was driven somewhere when I had my cast on and couldn’t drive myself. I decided I needed to make seatbelt covers for quite a few of my friends – I could also use a new pair myself.
Two days ago I bought 2m of batik fabric (it’s more densely woven than quilting cotton and holds up better) – that would work out to 6 pairs of seatbelt covers/m – cost ~$3/pair. I also bought 6m each of black and white velcro (loops and hoops) – each seat belt uses ~10 1/2″” of velcro that gives me 4 covers/m – ~$1.00/pair of covers. I have lots of batting scraps which I planned on using so I didn’t need to buy batting.
Here’s how I make the seatbelt covers:
Folded in half, I cut 7″ strips from the width of fabric – cut in half gives me 2 pieces of fabric 7″ x ~21″. I cut batting 6″ x 21″. Place the batting in the centre of the fabric, fold in one end, fold over the second (selvedge edge on top so I don’t have to fold raw edge under).
Finished underside of seatbelt cover
Next, I sew a double seam across the open edge, turn the cover over, attach the loops and hooks to the length edges of the seatbelt cover by stitching the inner edge of the velcro; turn seatbelt cover over so the under side is up, then fold velcro over, and stitch down, folding in the top and bottom raw edge of fabric.
Finished top of seatbelt cover
Fold the cover in half and seal the velcro
That’s all there is to it. New seatbelt covers – cost: ~$4/pair (that’s because I used batting scraps – had I bought new batting the cost would have been closer to $5.
I have a new pair in my car. I have six pairs done – seven more to go in this batch – a total of 14 pairs of seatbelt covers.
I’m not sure whether I’ll gift these to the women in our knitting group, or whether we’ll take a day and they’ll make their own – they’d find that more satisfying, I’m sure.
I’ve finally finished this pair of socks which I began nine weeks ago just after I broke my wrist. For the next six weeks I knit barely 20 rows. Once my cast came off I was able to resume my typical knitting pace of 30-40 rows each evening.
Socks From Leftovers #9
You have to look closely to see there are two different patterned yarns used in these socks. The leftovers blended quite well. But that’s the end of what seems to want to work. The remaining leftover balls don’t want to play well with each other – so I think I’m going to bag them up today and put them in the pile of stuff to take to Mission Mart – a local used clothing outlet run by the Souls Harbour Mission which runs drop-in centres and shelters for the homeless.
Yesterday I went through my fabric stash, pulling out fabrics I know I’m not ever going to use – cotton twill for pants (I had five 1.5m pieces all washed and ready to be used that have been sitting in a drawer for at least three years), remnants from garments (perhaps 1/2m – enough to use for something for a child), other garment sized pieces that I no longer could see making into whatever it was I intended to make.
I piled them into big bags and took them straight away – the faster they’re out of my house, the happier I am. I want to go through the stash again a second time – I bet there is more I can part with and not miss it. The incentive, of course, is that I have stacks of new linen in pant lengths (which I’ve washed and pressed ready to be used) which I’m not going to get to this season and I need to have somewhere to store them. I had lots of empty drawer space when I moved into the apartment three years ago but those drawers seem to have filled up. I needed to eliminate some of the fabric so I could put away the newest acquisitions.
That’s it for fabric – no more fabric – I can’t buy any more fabric because I have nowhere to put it!
As for socks – I have already picked out yarn for a new pair of socks I’ll start this evening.