Diamonds Quilt – Further Along

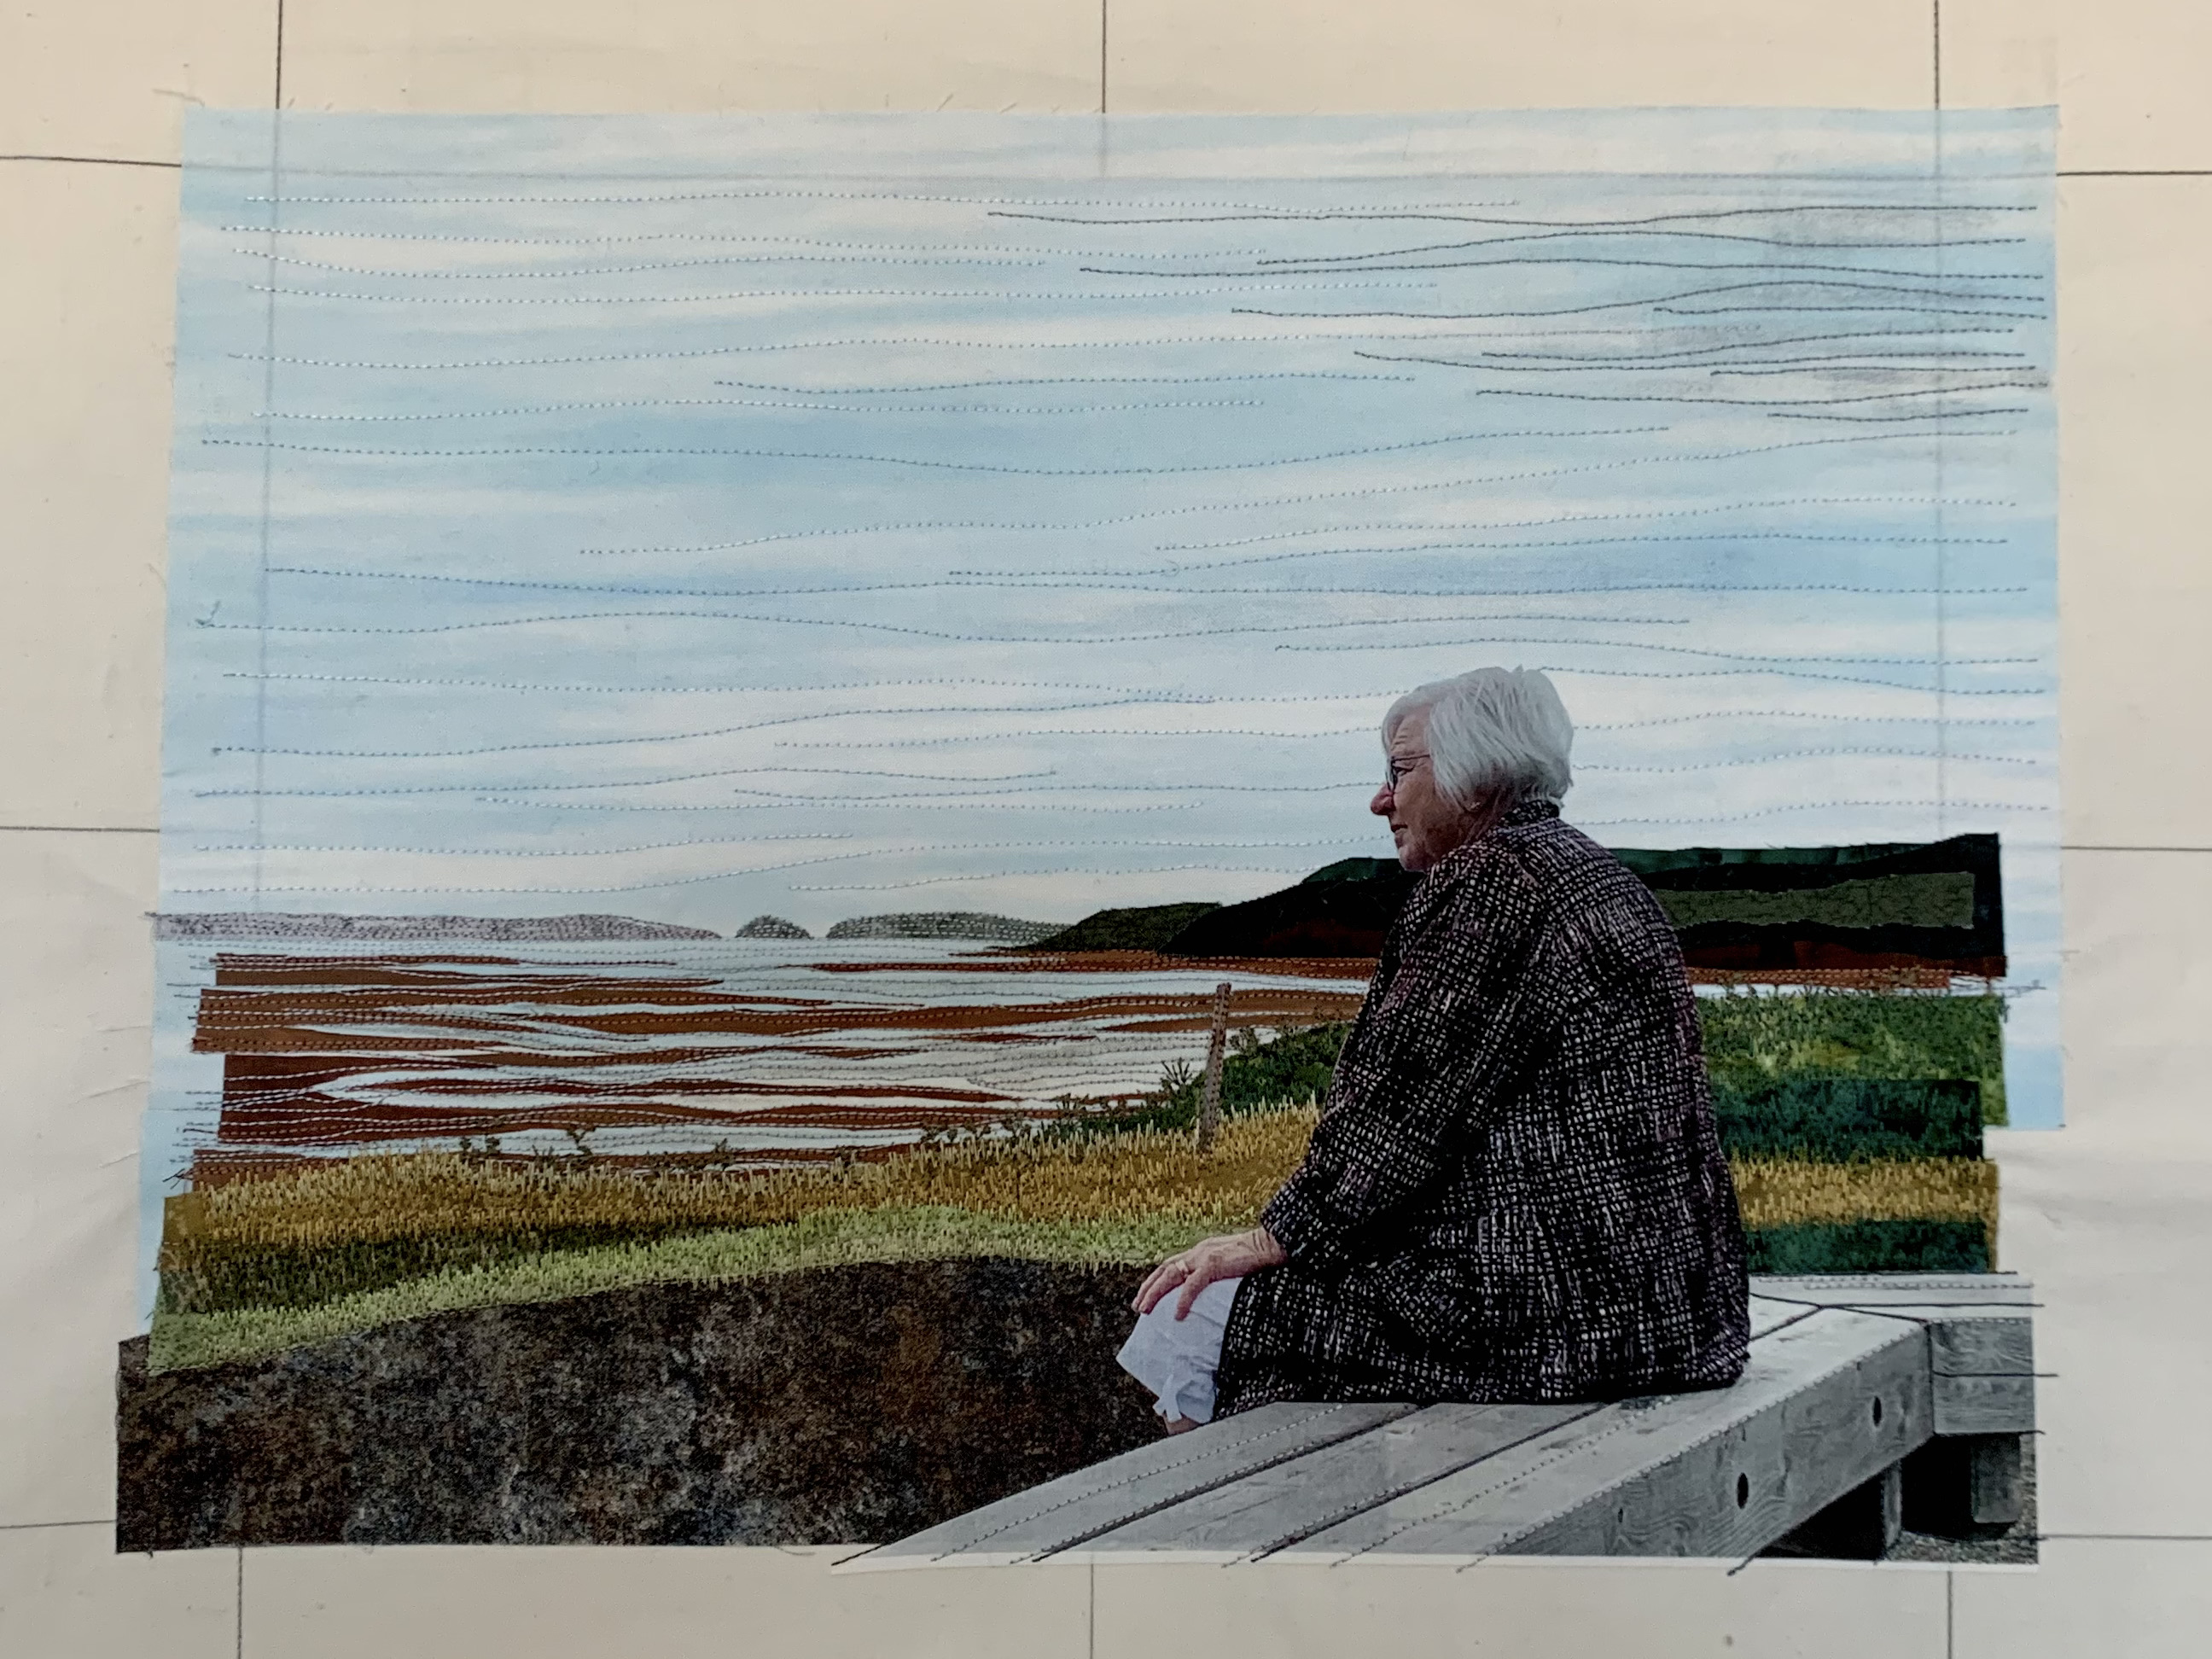
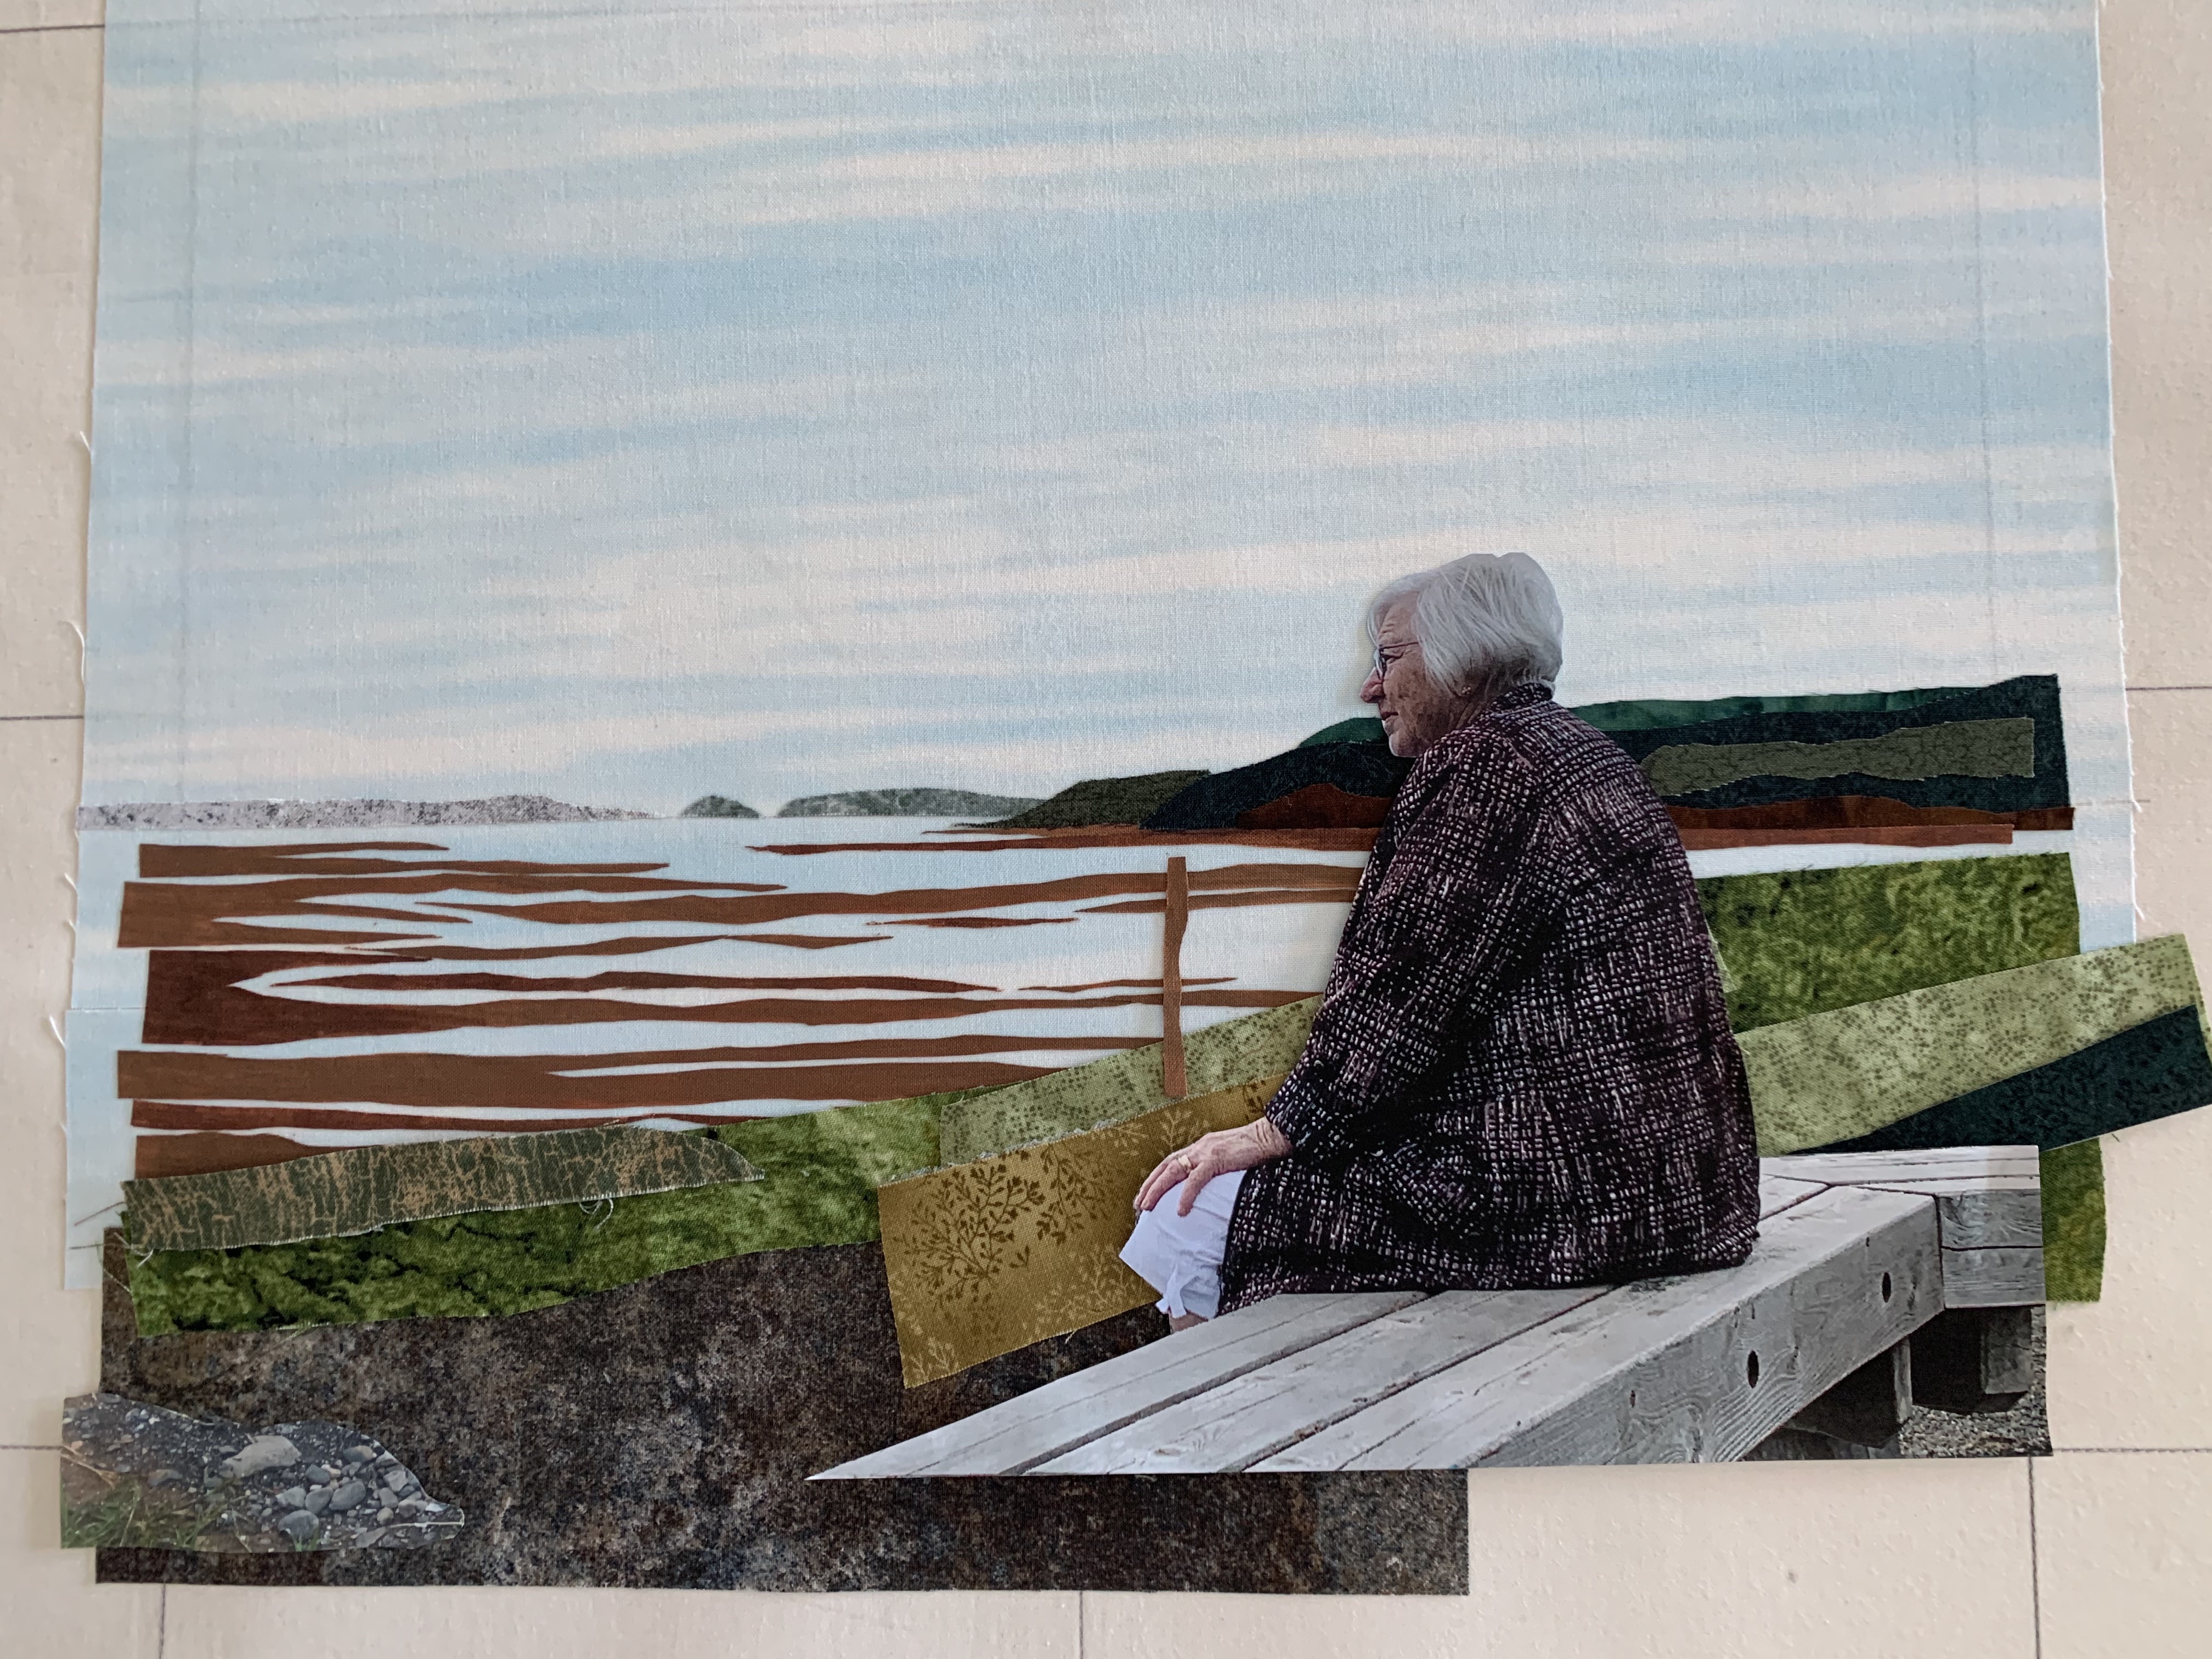
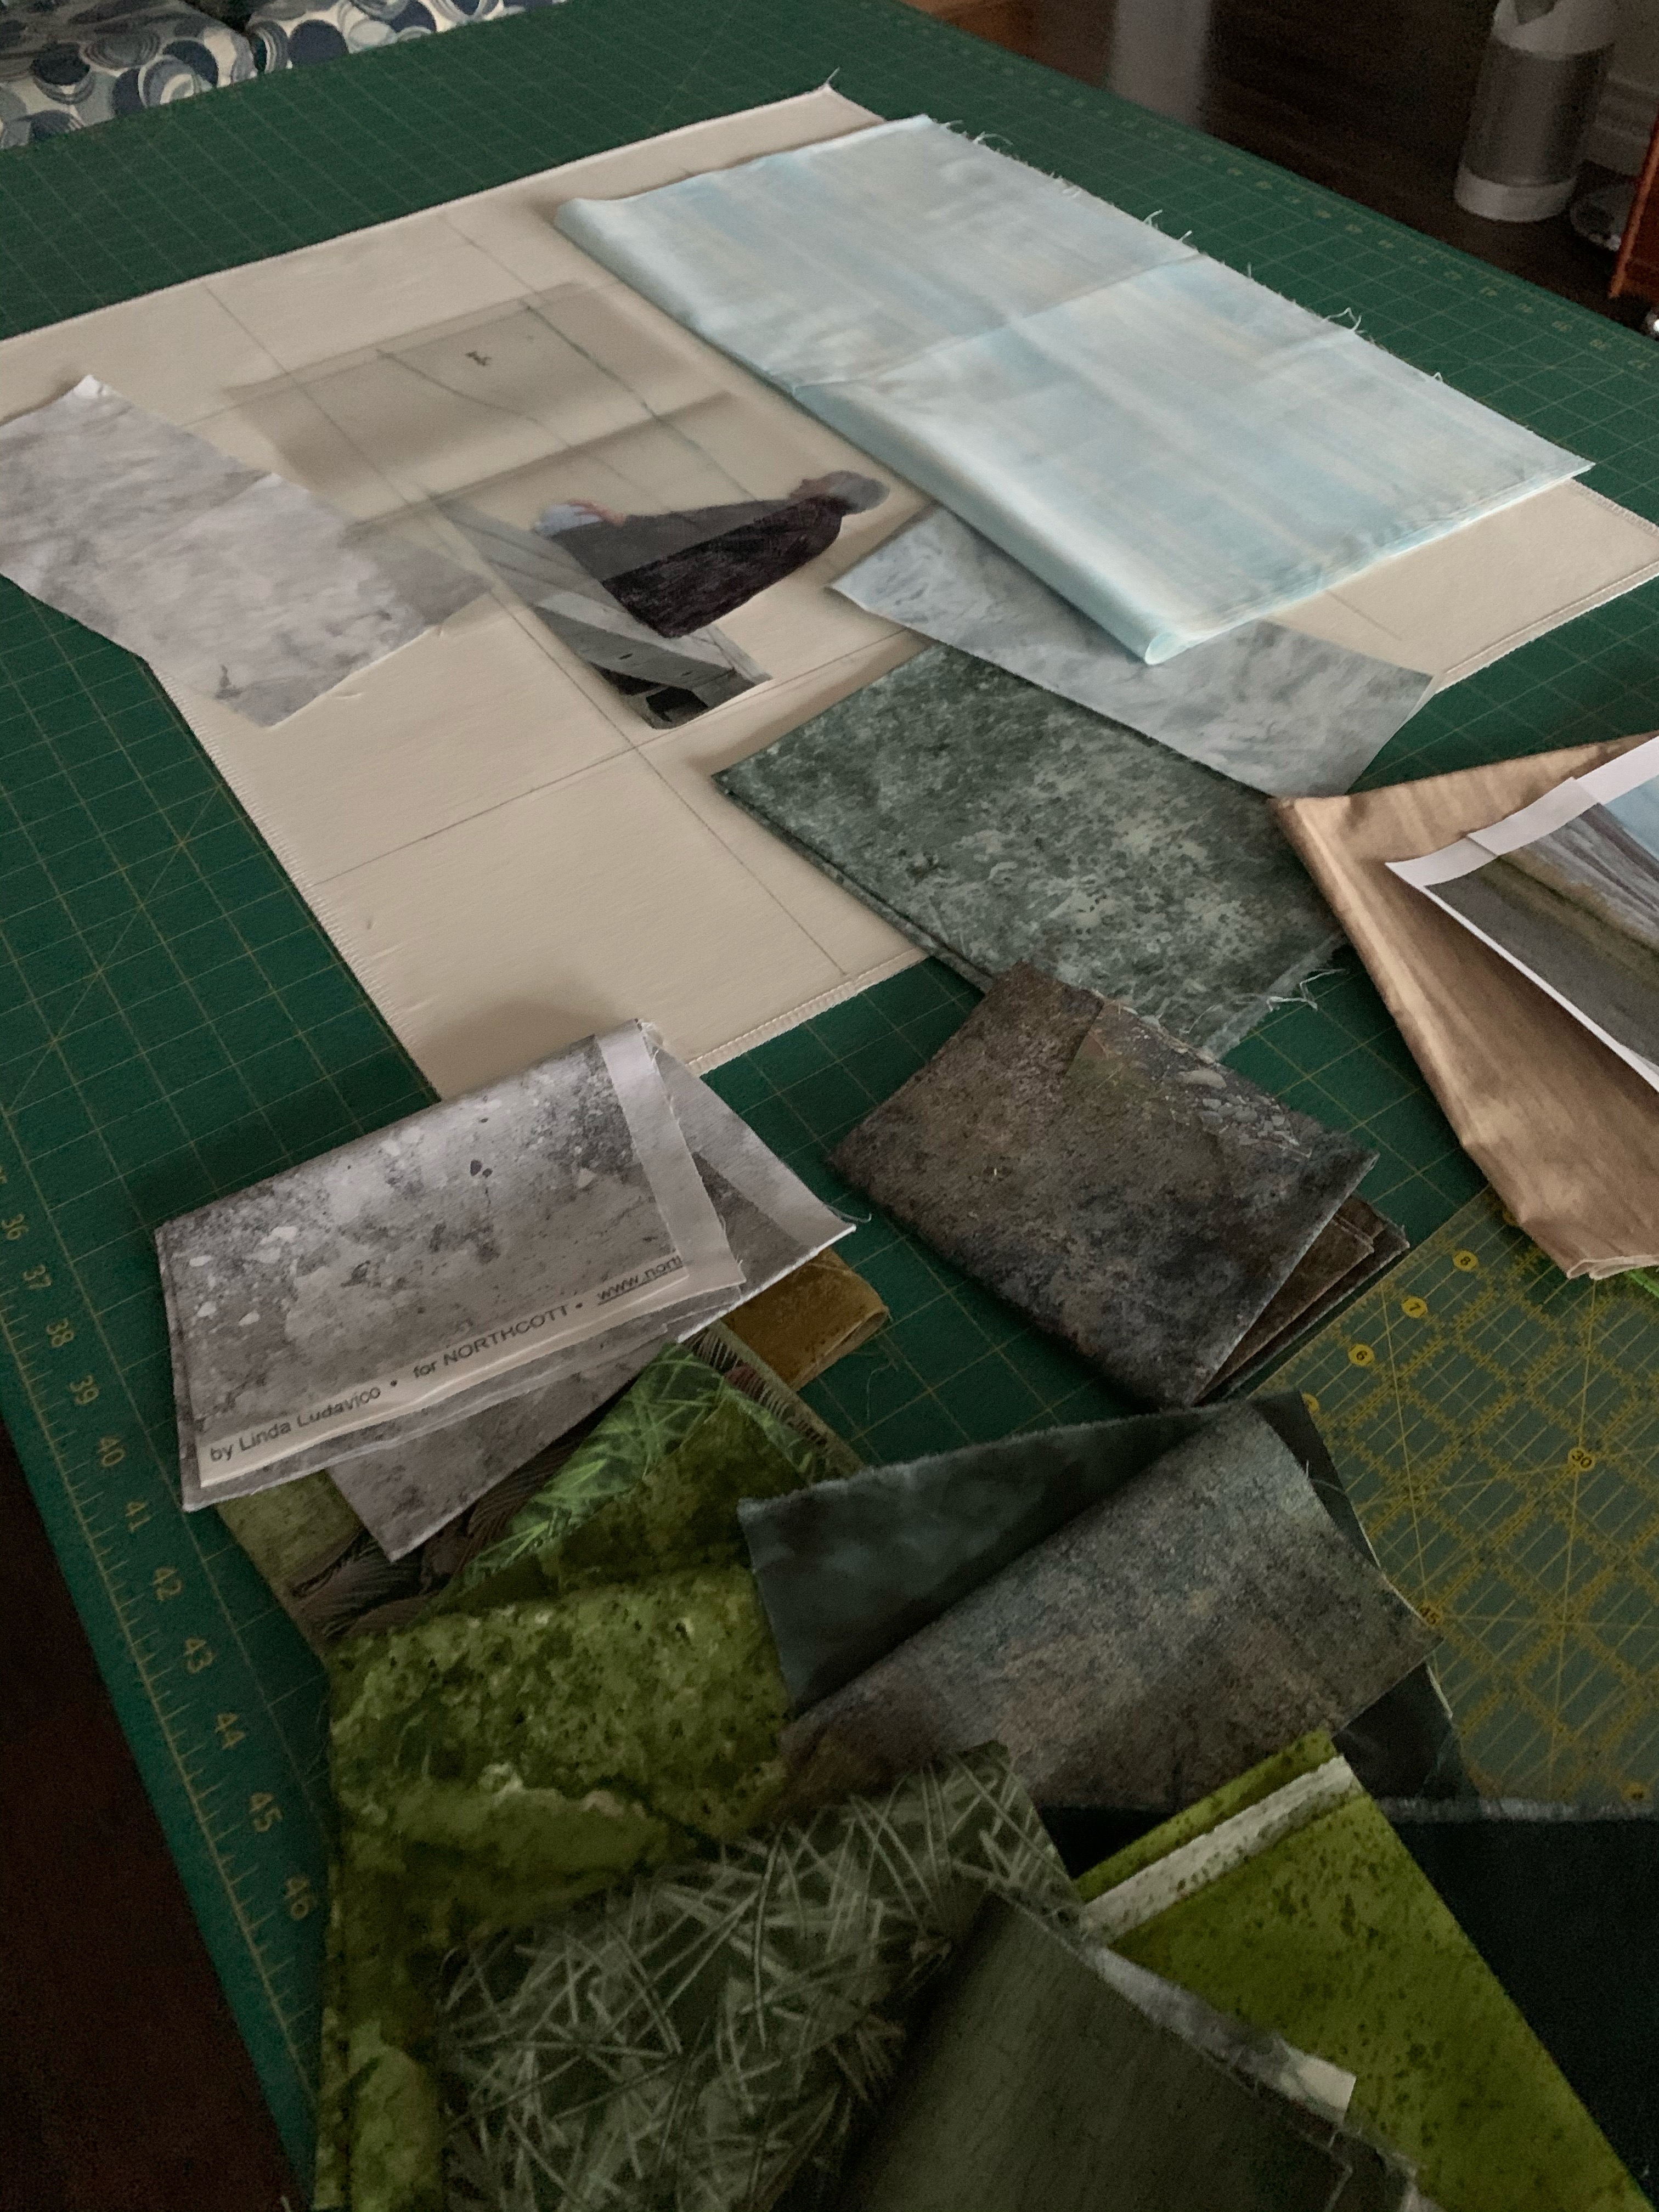
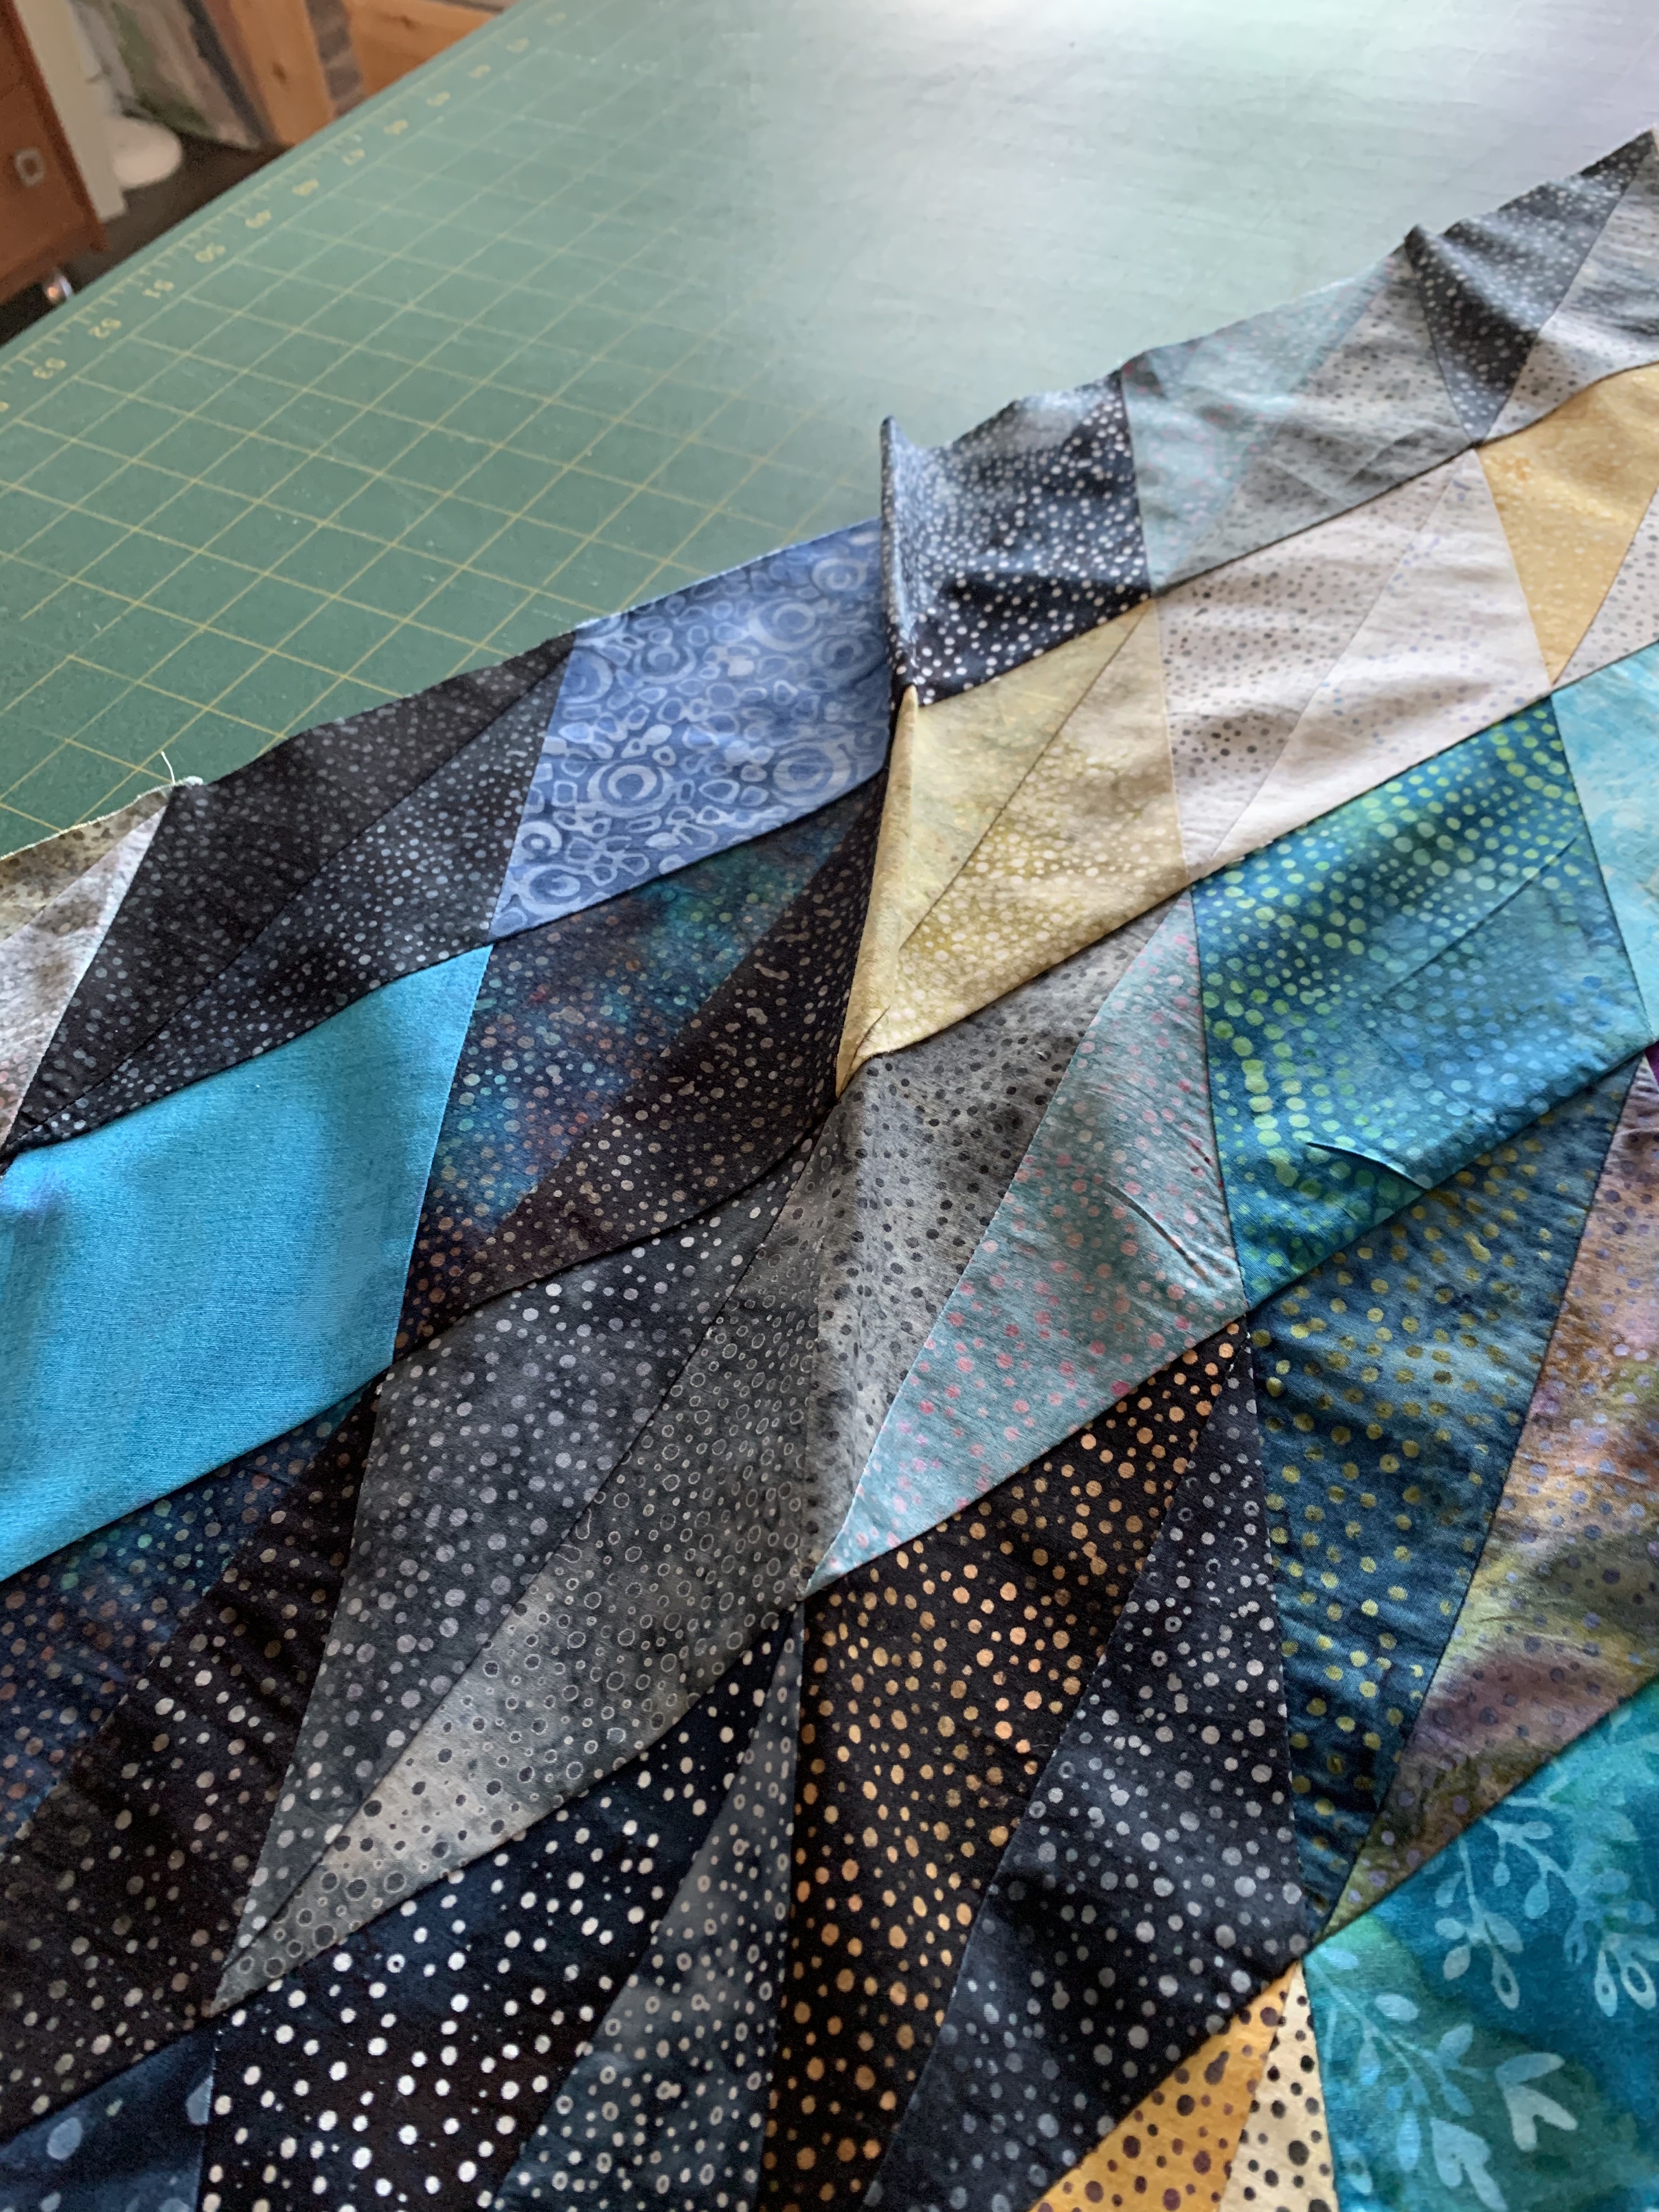
Just about there. I’ve spent the past day and a half moving diamonds around, then moving them some more. When I was more or less happy with the layout, I had to make a decision about how to border the piece.

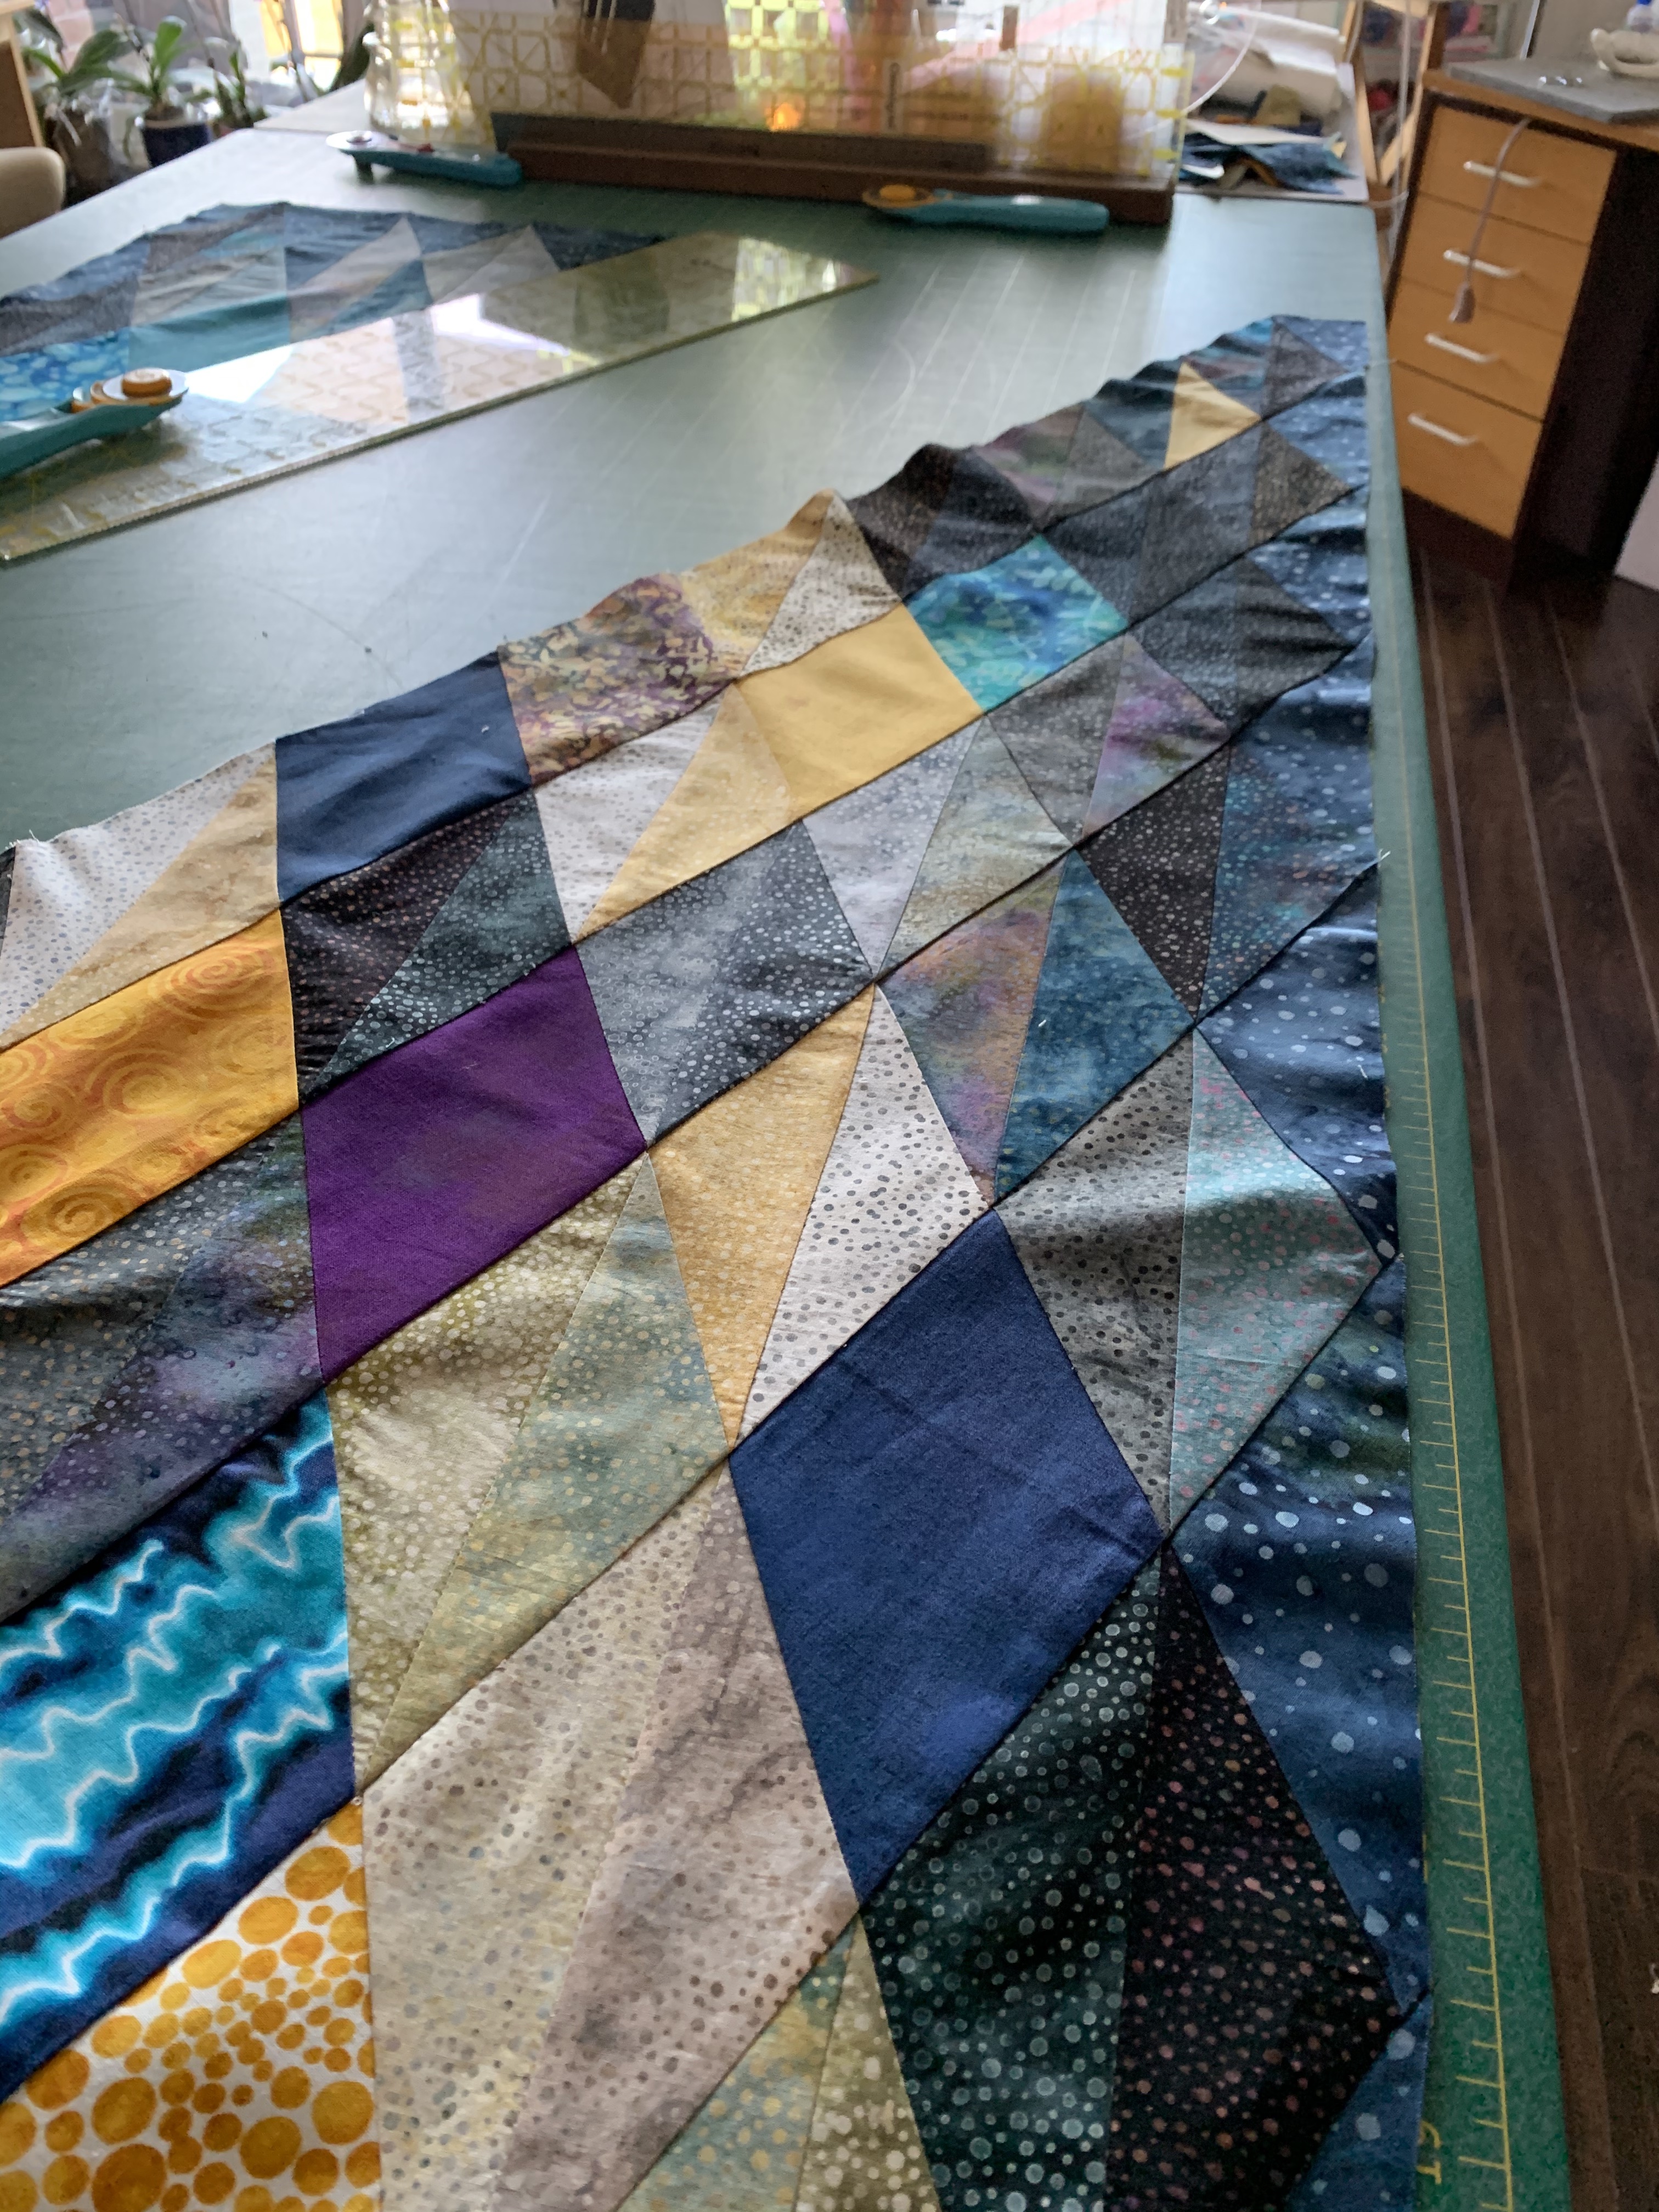
My original thought was to make a uniform half-diamonds border with the dotted dark teal fabric I had planned on using with the original layout,

Border-1

but I wasn’t happy with how the dark edge cut off the colour flow. I positioned the half-diamonds on the darker side:

Border-2

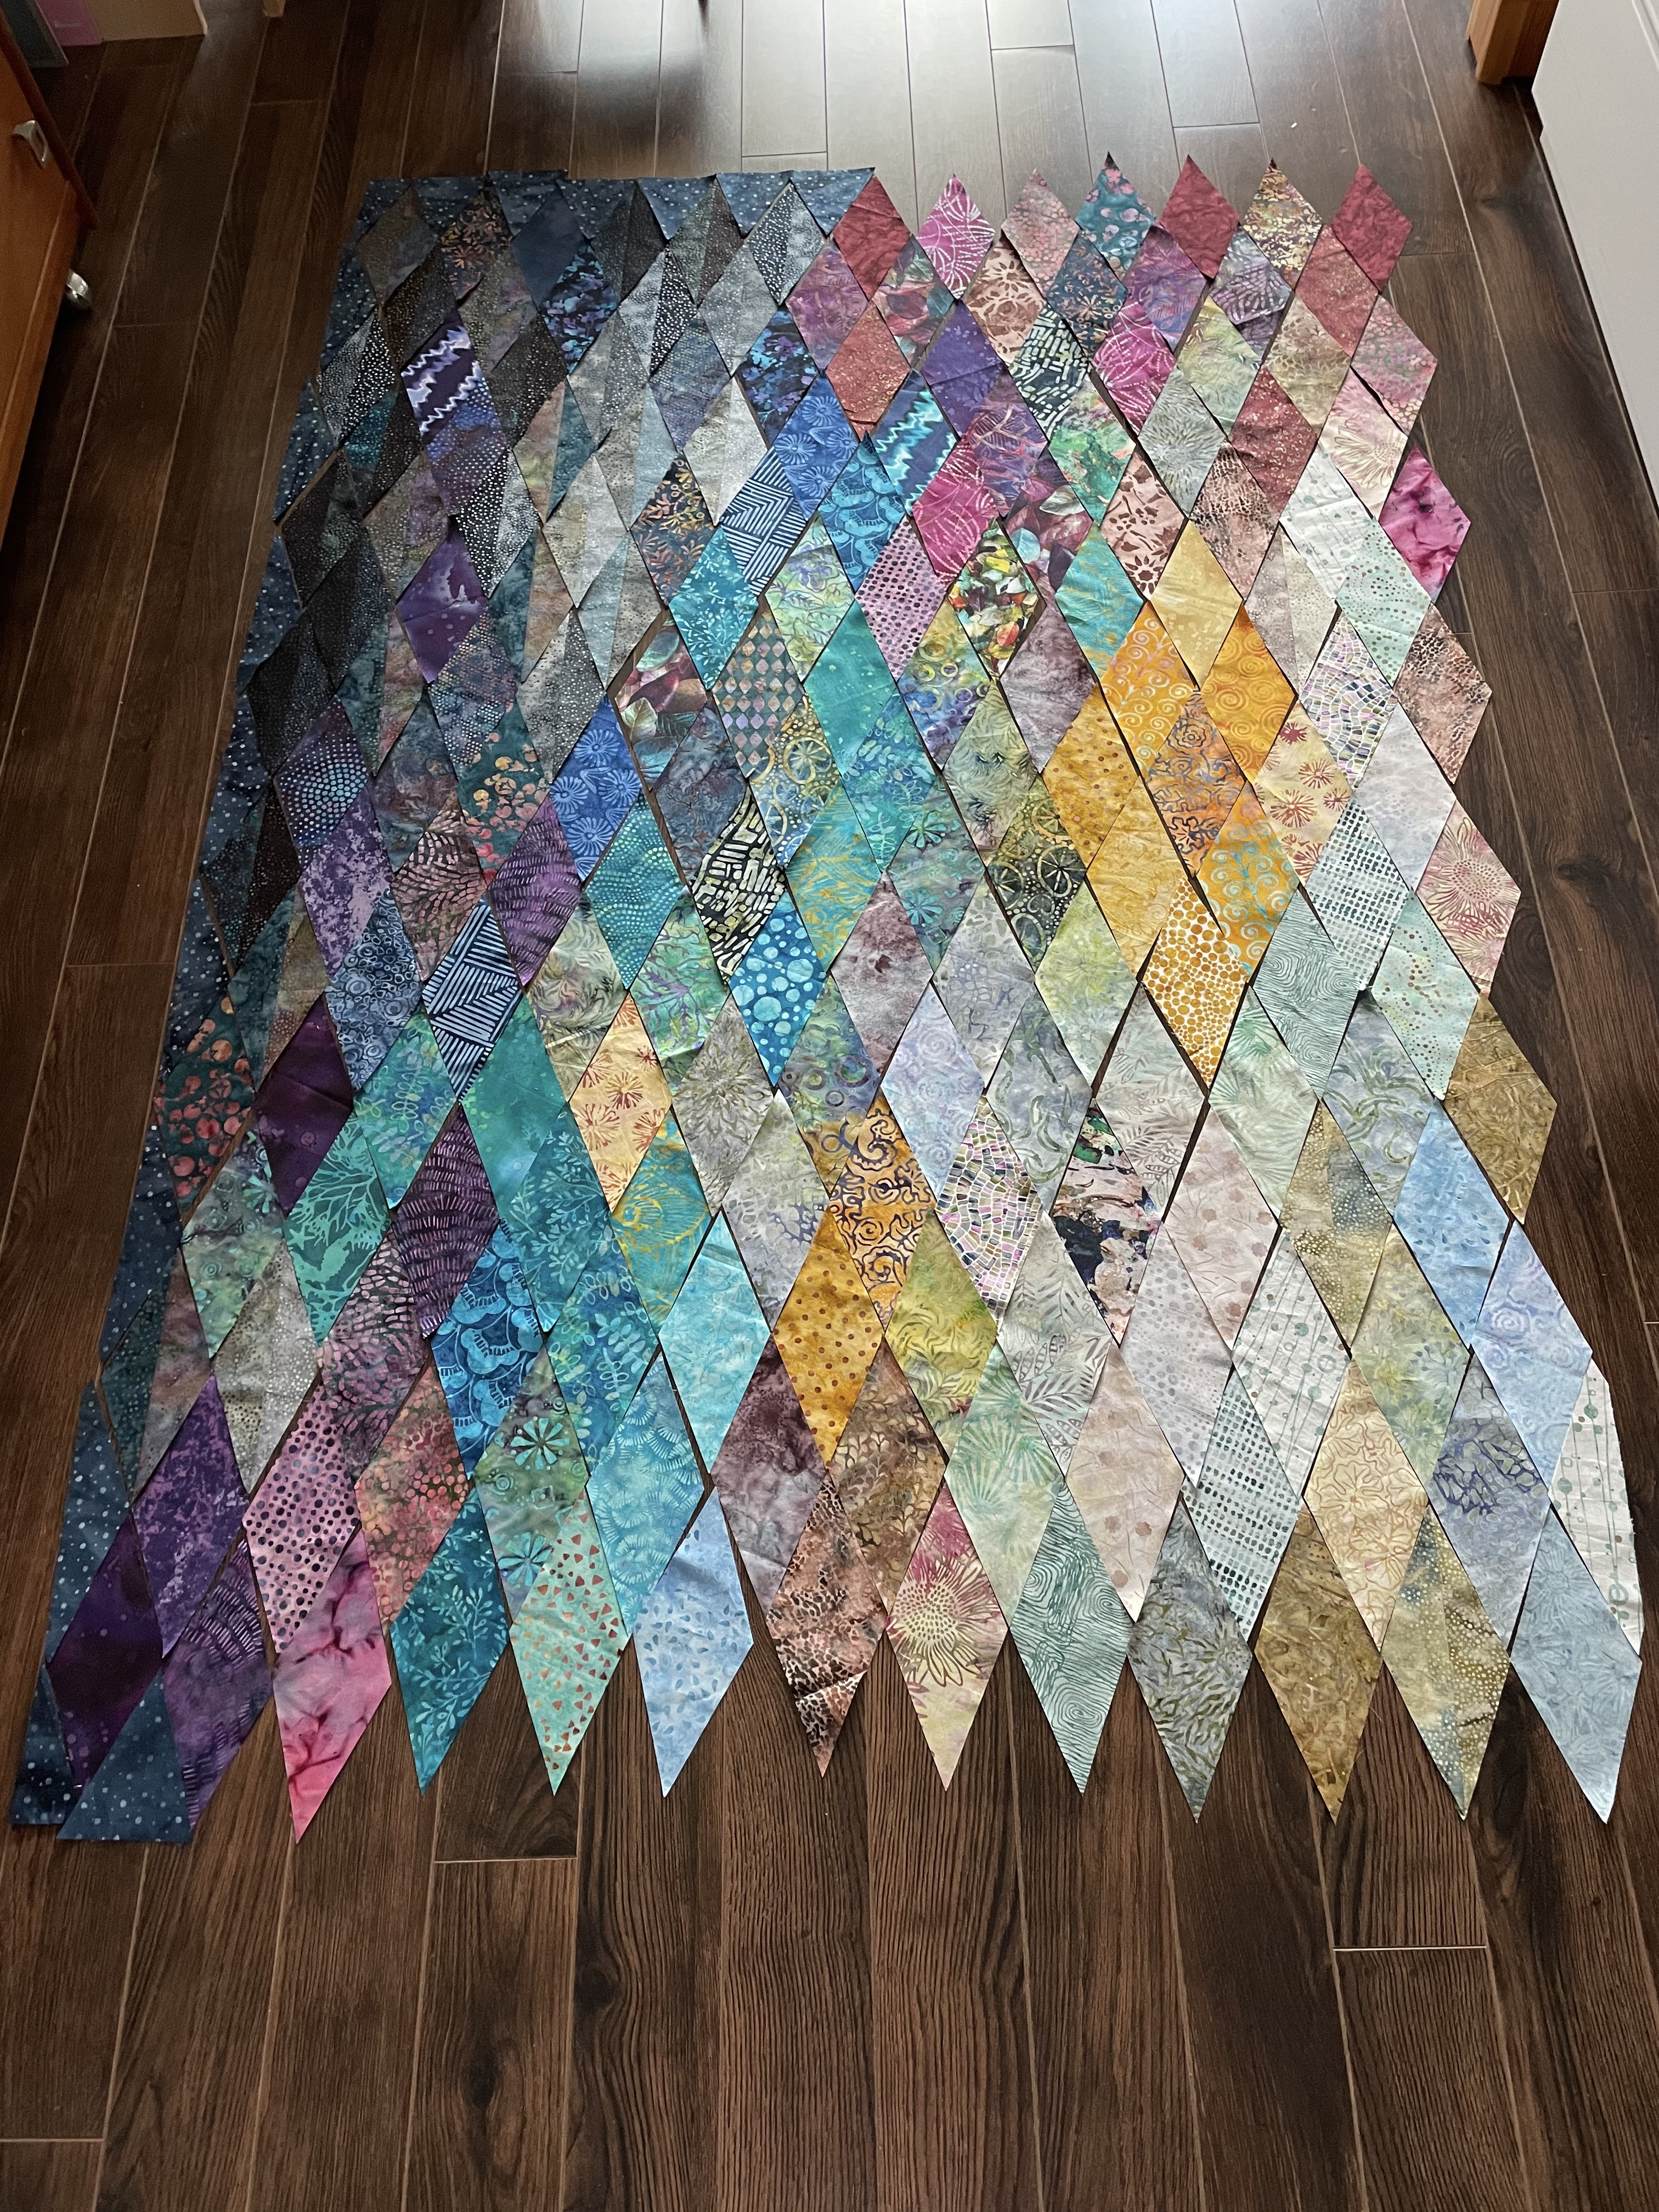
The dotted dark teal blended much better both along that side and the top. I thought about trying to find a single fabric to border the rest but the colour variation is too great (from darker magenta pale blue/turquoise) – I decided to create border elements to extend the colour flow to the edge:

Just About There!

I am much happier with how this feels. I might be just about ready to start sewing the diagonal rows.

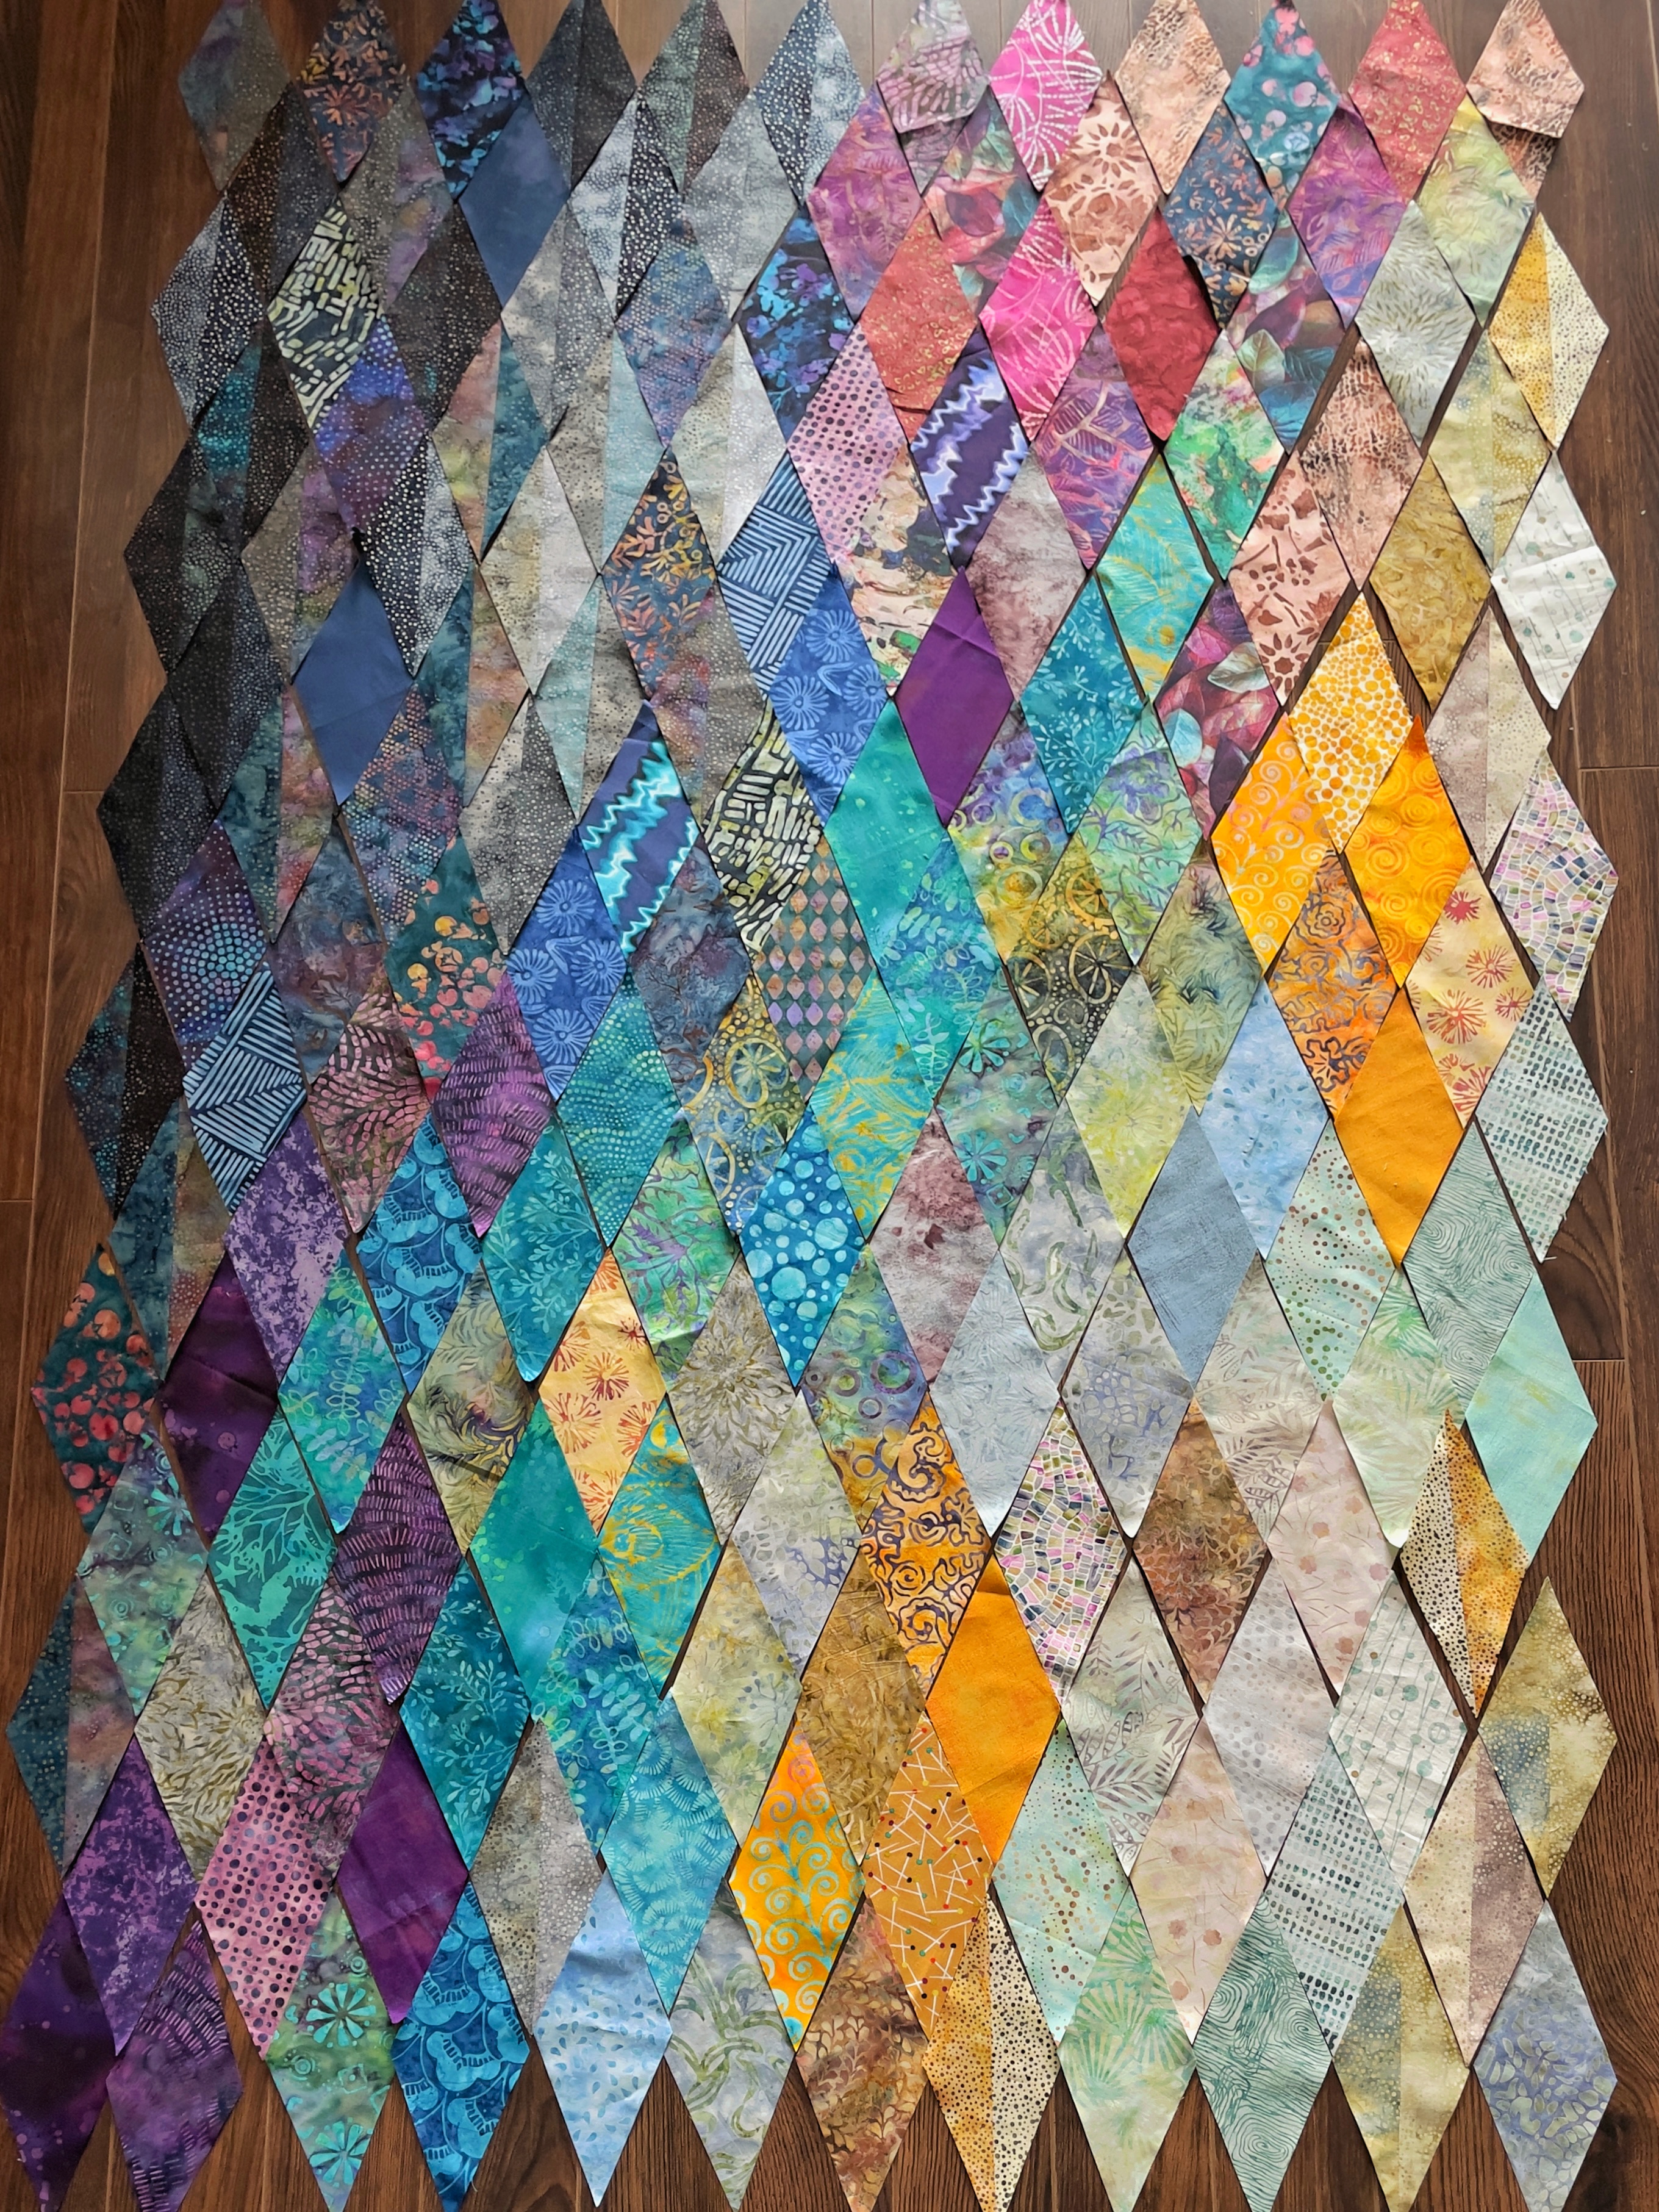
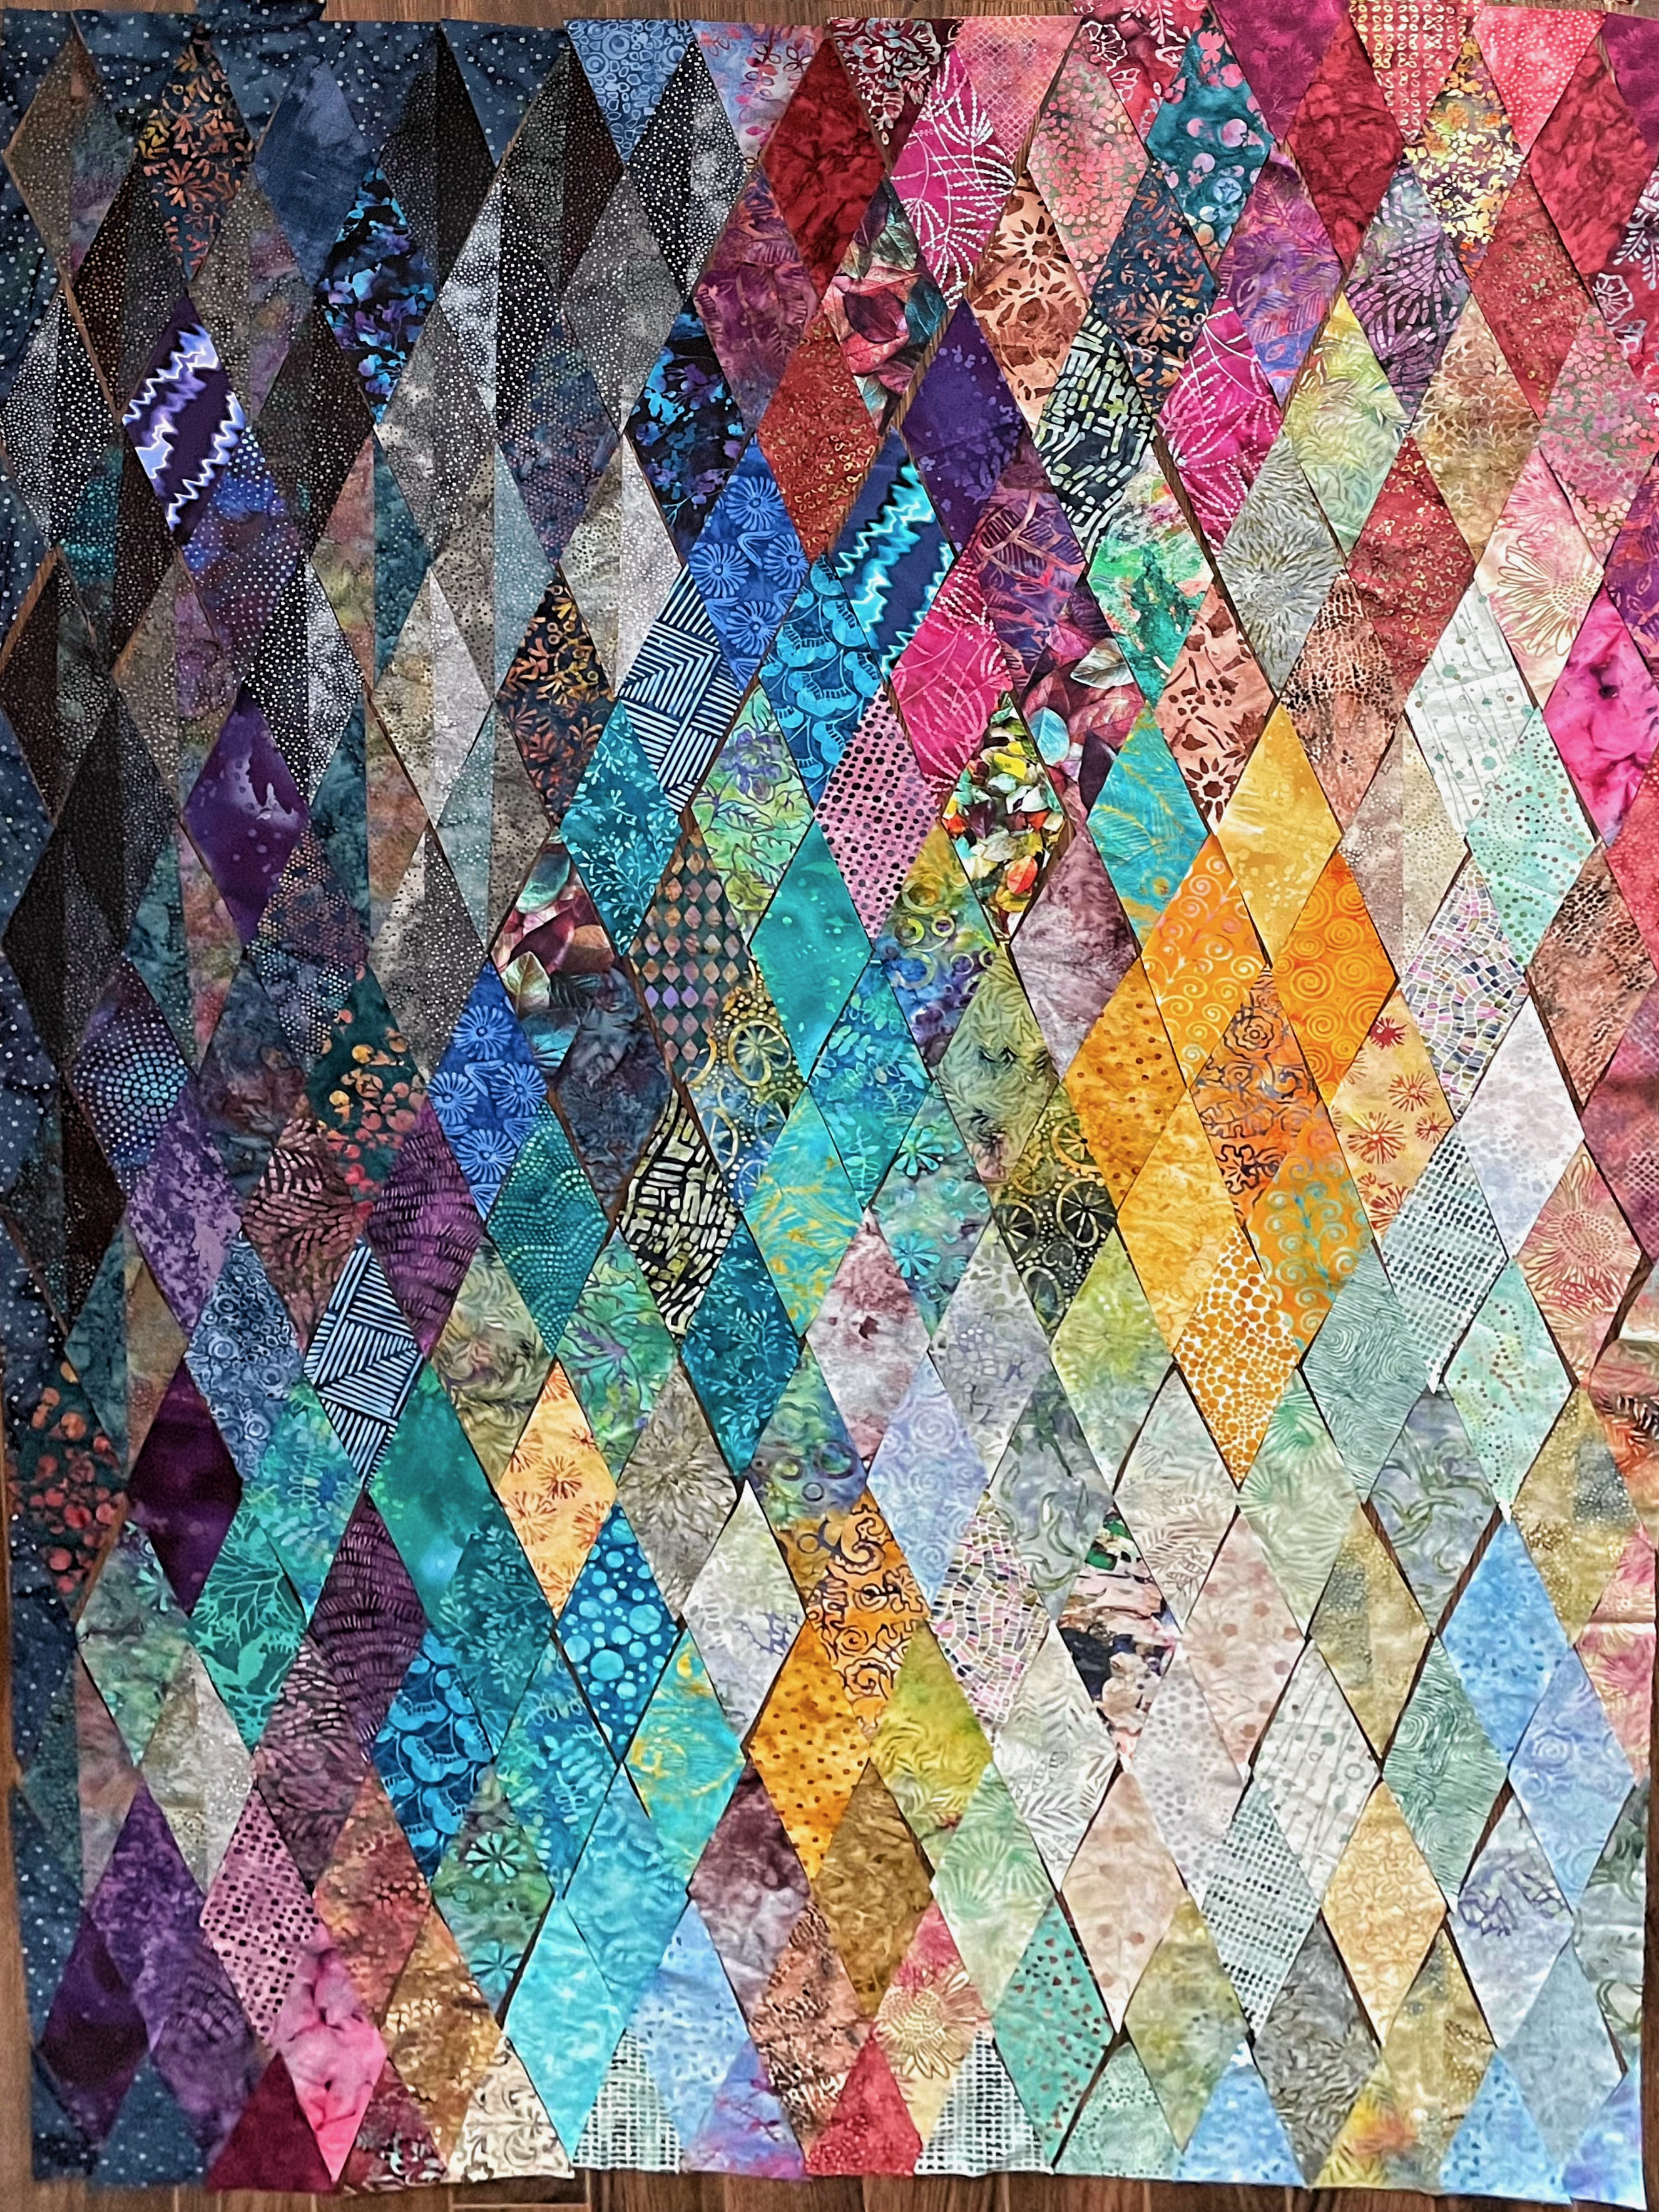
There are 215 pieces in this quilt top; I didn’t count as I was cutting – I must have used 90+ different fabrics, two diamonds for most of them, but I used a few fabrics three times and a few other just once. There’s huge colour variation in each diamond – I’ve positioned those with the highest contrast in strategic positions as I try to move the eye around. The photos don’t do justice to the vibrant colour I now have.

This is a very different piece from the original concept:

Layout With Borders

The challenge still remains: will I be able to sew these diamonds together and still have the panel stay flat!

I’m ready to start sewing….

Diamonds Quilt – Reimagined

Here I am back again. I began with the unused diamonds leftover from my first attempt and recut them – this time making sure I had a 45° angle at the top/bottom apex. The length of the diamonds remained 8 1/2″, the width, however narrowed to 3 1/2″. That gave me 76 diamonds – I needed at least 150 in total, so I had to cut another ~75+ diamonds (turns out I actually needed 173).

I went to my stash – I collected a pile of batiks – more gold, added magenta, and a variety of pale blue, turquoise, and purple fabrics. I also looked through my scrap boxes to scrounge what I could.

I spent the morning cutting diamonds until I had enough. Here they are laid out on the floor:

Diamonds – Restart!

I was aiming for a colour flow from dark in the upper left to light in the bottom right. Now comes the moving around to balance the colour better. With all 173 diamonds laid out I can see what I have and can improve on the flow and establish a couple of accent blocks in strategic spots.

Yesterday I picked up another metre of the “inner border” fabric from which I will cut half diamonds to fill in the outer edges. I may then add a second narrow border in that same fabric (say 1″ or 1 1/2″). I’m sure that won’t be enough for a good sized lap quilt/throw. I will need another outer border but I don’t know what that is at this point or how wide it should be. I have to get these rows sewn together with the end half-triangles; then I can start auditioning fabrics for an outer border. And the quilt back? Not thinking about that yet.

If you look closely you will see what remains of the original half-triangle diamonds from the jelly roll; I wasn’t able to use a lot of them because they weren’t long enough – my original cutting was at issue. This time, however, I tried being very precise – so fingers crossed this version will lay flat after I’ve stitched it together.

I plan on cutting up the previous constructed half panel (where the points matched perfectly) to make a couple of zippered bags!

At Five Islands – Completed

I finally finished the wall art piece yesterday. It took some time to do the careful hand stitching – to tack down the mitred corners, and the hidden binding and hanging sleeve on the back of the piece. It’s now done.

At Five Islands – Completed

The piece turned out to be a bit smaller than I was originally thinking about it: 21.5″ x 18.5″ – but it’s still a good size. Now to find a place to hang it in my place until it goes into the Art Labs exhibition during the summer.

It’s hard to tell from the photo that the grunge blue framing strengthens the blues of the sky and water and brings out the greens of the bank in front of Ruby. If you click on the photo you’ll be able to see the thread painting more clearly.

So this project is now completed. On to something else. Yesterday I brought out the bag with the diamonds pieces and put it on my cutting board. I want to see if I can salvage that project in some way before scrapping it permanently and moving on to something else. I still need to make two more quilts and some other small pieces before July – there’s time, I’m not panicked and if I don’t make my goal, I do have a closet full of finished quilts I can bring back for the show. I’d just like to get more new projects in the works.

Finally Making Headway

I finally started stitching this piece yesterday. I filled in the sky and worked on the mud flat with blues/greys and brown/rusts (to really see what I’ve done, click on the image).

Under Construction

Today I worked on the land in the distance (still have the headland to work on). Then started in on the vegetation on the bank. First I had to modify some elaborate floral stitches on my machine to get the feel of the taller plants on the edge, next the long dried grass; after that the shorter dried grass next to the gravel (which I haven’t done anything to yet).

I’ve begun stitching the dark lines on the sun-bleached bench; I still have more to do there – just not sure which elements to try bringing out.

The gravel will present a bit of a challenge – I’ll probably use wandering straight stitching with a mixture of lighter and darker thread.

The most difficult element will be Ruby herself – I want to bring in the construction elements of her jacket – cuffs, the yoke and pockets, the collar. I think I’m just going to outline her hair, her face, and her hand, and leave the fine facial detail alone!

Maybe a bit more later this afternoon; if not, I’ll work on the piece again tomorrow.

What’s sticking out in the photo is my attempt to bring a bit of grey cloud to the upper right corner of the piece. I’m seriously thinking about taking out the grey thread and replacing it with the paler blue I used for the rest of the sky. The darker stitching seems a distraction. Retracing the stitching will have to be done v-e-r-y slowly so I can reuse the needle holes from the stitching I’ve taken out! Fingers crossed that it’s doable.

Grey Thread Removed From Sky

I did it – took out the grey stitching in the sky. Looks better. Check on the closeup (click on the image) and you’ll see the needle holes I now have to use as I stitch with lighter blue thread!

At Five Islands IV

I wasn’t going to work on the Five Islands piece today but after lunch I found myself at the cutting table tidying up and before I knew it, I was picking up the small scraps of fabric and adding fusible web to each piece, then cutting them into shapes, next fusing them in place. And of course the next step was to peel the plastic backing from the photo printed on fabric, adding fusible web, fussy cutting out Ruby and the bench and pressing them into place.

Appliqué Assembled

I moved on to selecting thread to use for the thread painting. While I was at it, I added a tiny bit of darkening to the sky with fabric pastels and pressing it to set the colours into the fabric. I might add a bit more grey in the upper right corner of the sky but not until I’ve done a bit of stitching, first.

Selecting Thread

The next step is always the challenging moment – up to this point I can always remove a bit of fabric and try something else, but once I start stitching, the fabric selection is set. In addition, I really only get one go at the stitching because after I’ve picked out the thread there are needle holes (subtle but nevertheless visible). So, it’s take a deep breath and gently hit the foot pedal.

I want to do a lot of thread painting on the mud flats – browns into the blue fabric, blues/greys into the browns to obscure the fabric edges (If I can). Actually, I’ll start with the sky and work my way down to the bottom of the piece, including quite a bit on the bench and the gravel it’s sitting on to blend the two together a bit more.

The last element will be a signature in the bottom left corner in a soft blue/grey so it can be seen but doesn’t jump out – that addition always scares me because I can end up ruining the piece after I’ve put in a lot of work. So far I’ve had no disasters signing a piece but you just never know when the embroidery machine won’t quite cooperate!

Tomorrow I have a “Quilting In The Hoop” class at Sew With Vision (a Pfaff/Husqvarna dealership nearby) for most of the day. However, my calendar is completely free Thursday….

At Five Islands III – The Mess

In case you harbour any illusions that I work in a tidy way – I wish to share the chaos on my cutting table!

Creating a textile wall art piece is an exercise in mess! It may start out looking orderly, but it quickly degenerates into piles of tiny scraps of fabric scattered everywhere; some so small I need fine tweezers to pick them up and place them.

The Mess!

Step 1 is to guesstimate the size of the piece of fabric (leaving enough for me to trim my way to the shape I intend), then Step 2 is adding fusible web to the back. I use a silicon sheet when pressing to be sure I’m not sticking fusible web to my ironing board.

Step 3 – I cut out whatever small shape I need and carefully place it on the background (which is already fused to the muslin base). Sometimes to get a shape, I cut that element from the paper printout of the scene – that’s what I’ve done with Ruby – I’m using my paper cutout to help me position all the other elements. Ultimately, I’m going to print the Ruby enlargement (~115%) on an 8 1/2″ x 11″ piece of prepared fabric (for her to fit the size of this piece I’ve had to crop and enlarge various parts of the photo to get the overall magnification right).

After establishing a position for my horizon, I work from distant background to foreground – carefully layering the bits of fabric and pressing the cutouts into place, waiting for them to cool before adding the next bit. At this point, I’m also trying to visualize where I’ll be thread-painting to build texture and detail to the scene – in the case of the mud flat at low tide, the brown bits of fabric will be stitched with light blue thread, the water will be stitched with brown thread to blur the boundaries of water and mud.

I just thought you’d find the mess I work with interesting. I use both course and fine permanent markers to adjust colour, sometimes I’m even able to cut bits from previous projects printed on fabric sheets to provide a bit of added detail. I was looking at the rocky beach from a fabric print-out of Black Rock Beach but the pebbles are too large to be useful for the gravel path in front of the bench at Five Islands Park. I will use a bit of Stonehenge fabric and thread-paint it to get the effect I want.

Now to do more on this project….

At Five Islands II

I’ve just spent the morning working on the distant background – the NS mainland in the far distance, the islands closer to the Parrsboro shore and the nearby headland. Then I started on the mud flats – it’s fiddly and the bits of fabric may be too large but I won’t know that until I get the foreground developed. I can always remove some of the bits of brown and fill in with thread-painting.

Shaping & Fusing Elements

Looking at the photo, Ruby might be just a bit too close to the centre – I may want to position her a smidgen closer to the right edge. But now I’ve got the layout positioned so that her head is above the headland. I also like how the sky has turned out – it’s a piece of fabric I purchased quite a while ago. I will add in some more grey clouds on the right, probably using some organza, but this will thread-paint nicely.

Gotta go do other things now. Back at this tomorrow.

At Five Islands

Immediately after giving up on the Diamonds Quilt, I turned to a new wall art project: At Five Islands.

I’ve written about my visit to the Five Islands Park this past July. While at the park, I managed to capture a photo of my friend Ruby who had been on the trip with me:

At Five Islands

I knew I would turn the photo into a piece of fibre art. I started by enlarging the photo so I could make the panel 15″ x 12″ and have Ruby still be prominent. Next I dug out a bunch of fabrics and scraps from the stash trying to match colour.

At Five Islands – Picking Fabrics

Then I sketched in some features (using a Friction pen which will disappear when I fuse fabric elements in place).

At Five Islands – Sketching The Scene

This morning I started cutting small bits of fabric to “paint” the scene:

At Five Islands – Preliminary Layout

Nothing is fused in place yet. I’m still trying to get the feel of the layout. I can see I need to squash the vertical aspect quite a bit because I want Ruby’s head to be well above the landscape behind her.

The challenge with this piece is getting the feel of the wet mud flat of the Bay of Fundy at low tide. Yesterday I painted a piece of fabric using an acrylic wash but the colour is much too bright for the scene. I need something quite a bit darker; I also need to cut away much more.

St. Margaret’s Bay

I have been studying a couple of my watercolour paintings of the ocean – I’ve spent hours in front of them trying to understand how to set up the mud flat. Because the water reflects the sky it has to be the same colour – it’s the subtle shadowing of the “land” elements that make us read “water”. With watercolour, the water is painted first with the darker land elements added after the water has dried. I need to do the same with my piece – lay down the water fabric then add strips representing “mud” on top. The thread painting will fill in the flow of the remaining surface water on the mud.

Next step is to add fusible interfacing to each of the small fabric pieces, shape them, then fuse them in place.


Diamonds – Time To Quit!

We had a snow storm yesterday – a good day for sewing. I managed to get half of the diamond blocks assembled but then I faced reality – if I aligned the left side and the top square on my cutting board I had a seriously wobbly diagonal that can’t be repaired easily! I’ll explain….

Half Of The Top Panel Assembled

I worked hard at getting precise diamond points and I was successful to a great extent. Laid out on batting the slight irregularities in the diamonds would smooth out as the cotton adhered to the batting.

Closeup Of The Diamonds

However the diagonal edge is about 2 1/2″ – 3″ too long!

The Problem With The Diagonal

I could take the whole assembled panel apart and try shaving small amounts from each diamond but then aligning the points would be very difficult.

Wobbly Diagonal

Even with the “dart” the further diagonal edge is still wobbly.

Second Side Of Panel Started

You can see how the wobble is beginning here on the second side – the problem at this point seems limited to the edge triangles but I suspect were I to replace those elements and continue adding rows I’d find the problem with the diagonal developing as the diagonal gets longer.

This has not been my favourite project – it’s been a fight from the beginning. I think it’s time to call it quits. That means actually throwing out the whole thing, not keeping it around as a U(n) F(finished) O(object). Just forget it.

I was thinking about axing the project at 6:00 am after I’d rolled over to register online for an aquafit class next Wednesday and couldn’t fall back to sleep. I was thinking maybe I should just slice the quilt, cut out the fullness, sew a seam across the diamonds, trim the diagonal, then continue working on the second half, maybe do the same thing there if I needed to.

I have a name for the project – “At War With Itself” – I’m doing fine with regard to COVID-19, the mess in the US has had me transfixed for five years. I think this quilt has been a reflection of that angst – my inner harmony seems lost. Do I want to quickly finish the piece with all it’s ugliness? Or should I simply get rid of it and start afresh? I suppose if I’m going to throw it away I might have a go at the splice and see how awful it looks – maybe awful is OK?

Diamonds – Updating

I’d no sooner posted earlier this morning when my friend Deb texted me “Saw your post and have a few brighter fabrics if you want me to bring them up to audition? ”  “Sure, I said.” and within a few minutes Deb was at my door with a small pile of fabrics she thought might fit into my array.

I choose a couple, then went through my stash again, this time not worrying about “Dots” but just looking for fabrics in shades that might work with the diamonds in my layout.

Layout With Edges

I cut out a number of diamonds in bold colours and dropped them into the layout on my floor. Looking at my pile of unused diamonds it’s obvious I’ve removed most of the very pale diamonds and substituted much stronger colours.

While I was rummaging in the stash, I came across a “dots” fabric I thought would be dark enough to blend with the rest so I cut out half diamonds for the sides, top/bottom, and corners. The dots are much further apart but the pattern is soft enough that it isn’t distracting from the main panel, just framing it. I will need more borders but I’ll deal with that when I have this all assembled (I may have just enough of the dots left for a narrow border and I will add a narrow turquoise border I think; what else, I’m not sure yet).

My layout is complete. I can tell by looking at the photo I should still move a few diamonds but I’m now reasonably happy with what I have.

Assembly Beginning

I began assembling diamonds starting in what will become the bottom right corner (or upper left – I’ll see later which way I think the quilt will work best).

I’ll carry on with setting up the diagonal rows and attaching them to one another – painstaking work, because I want the points to align – that takes careful pinning at the joins before I sew. However, I’ve managed to align the points in these two rows reasonably well, hoping to be able to continue as I go along.

What I’ve realized is my decision to use the tiny dots jellyroll for this diamond project was a problem from the start – the strips were too narrow to make diamonds themselves and stitching them together set up conflicts I wasn’t able to resolve. That kept me stuck, not knowing how to move ahead. Stepping away from the lighter diamonds and deciding to use stronger colours freed me to explore my stash and consider other possibilities.