Skinny Quilts/Banners II, III, IV – Completed

The remaining skinny quilts/banners are finished. I hand stitched the hidden bindings on the back of each hanging and added a sleeve for hanging it.

I’m happy with the combination of background fabrics and the appliqués – a close look shows I managed the edge stitching precisely. I like the quiet background and strong appliqué colours in this panel.

Skinny Quilt II

I wasn’t sure how I felt about the bright colours in this second banner but now that it’s completed I like the profusion of “dots” in the appliqué fabrics, echoed by the two small circles to fill in the space on the right. In the right location this could be an interesting accent piece.

Skinny Quilt III

I’m less happy with this banner – now that it’s finished I can see my idea to increase the spacing while decreasing the circle size didn’t work so well and I didn’t see, until now, that I have an inbuilt curve to the left! I think I chalk this one up to experiment and construct another to take its place.

Skinny Quilt IV

That’s what’s so interesting about improvising – I’m always amazed by how most of the time my experiments turn out well. It’s not that this one didn’t have potential – it’s just that I didn’t see the “flaws” until it was actually finished and hung on the door. It’s a lesson that I need to be a tad more detached and analytical when looking at these pieces at a distance.

Skinny Quilt I – Finished

Skinny Quilt I – Finished

I finished the hand stitching on this skinny quilt/banner last evening. It’s surprising how long it takes to finish the hand sewing in part because the muslin I’ve used to back the panel has a rather dense thread count and it’s difficult to penetrate even with a new hand sewing needle. Needs a thimble or I end up with a hold in both my third finger and my thumb! It’s awkward sewing, is what I’m saying.

I have a second panel ready to hand stitch and two more will get the hidden bindings sewn on this morning and then be ready to hand stitch. I’ll be glad when that part of the process is completed.

Magical Garden – Colourwash Quilt II

This past couple of weeks I’ve been teaching a class on improvising wall art and I’ve been working on four Skinny Quilts/Banners myself as part of that project. The other day when I finished embellishing each panel (although I still have to bind each one), I thought about another project that might interest the gals.

Magical Garden

Last spring I attempted a watercolour quilt – made from many 2″ blocks cut from small print floral fabrics to use the colour in the squares to “paint” a canvas. I have many bags filled with 2″ squares (light, medium, dark) and thought this might be an idea to interest the women.

I laid out an array (9 x 12) creating a colour flow across the surface, stitched the  pieces together and took it to class yesterday to share with the women. Today, I decided to finish the piece with a narrow inner border, a piped border, and a wider dark border.  I’ve added a hidden binding and backing – I just need to do the hand stitching to tack the binding in place.

The photo doesn’t do the panel justice – the prints are all quite sharp and showcase the colour flow rather better than the photo would suggest. Looks like this might be a go for January. The women all thought it would be fun to attempt something like this.

Skinny Quilts/Wall Banners

I’m not sure what to call these wall art pieces – they’re narrow raw-edge appliqué quilts constructed from a simple pieced background with a few fused top elements. It’s the simplicity of them that captured me in the first place and I decided to offer the idea as a class.

The class was yesterday.

To prepare for the class, I set up four skinny quilts as examples. I’d sewn backgrounds using narrowish width of fabric cuts from complementary fabrics and then cut out and arranged on each some shapes (to which I’d already added fusible web).
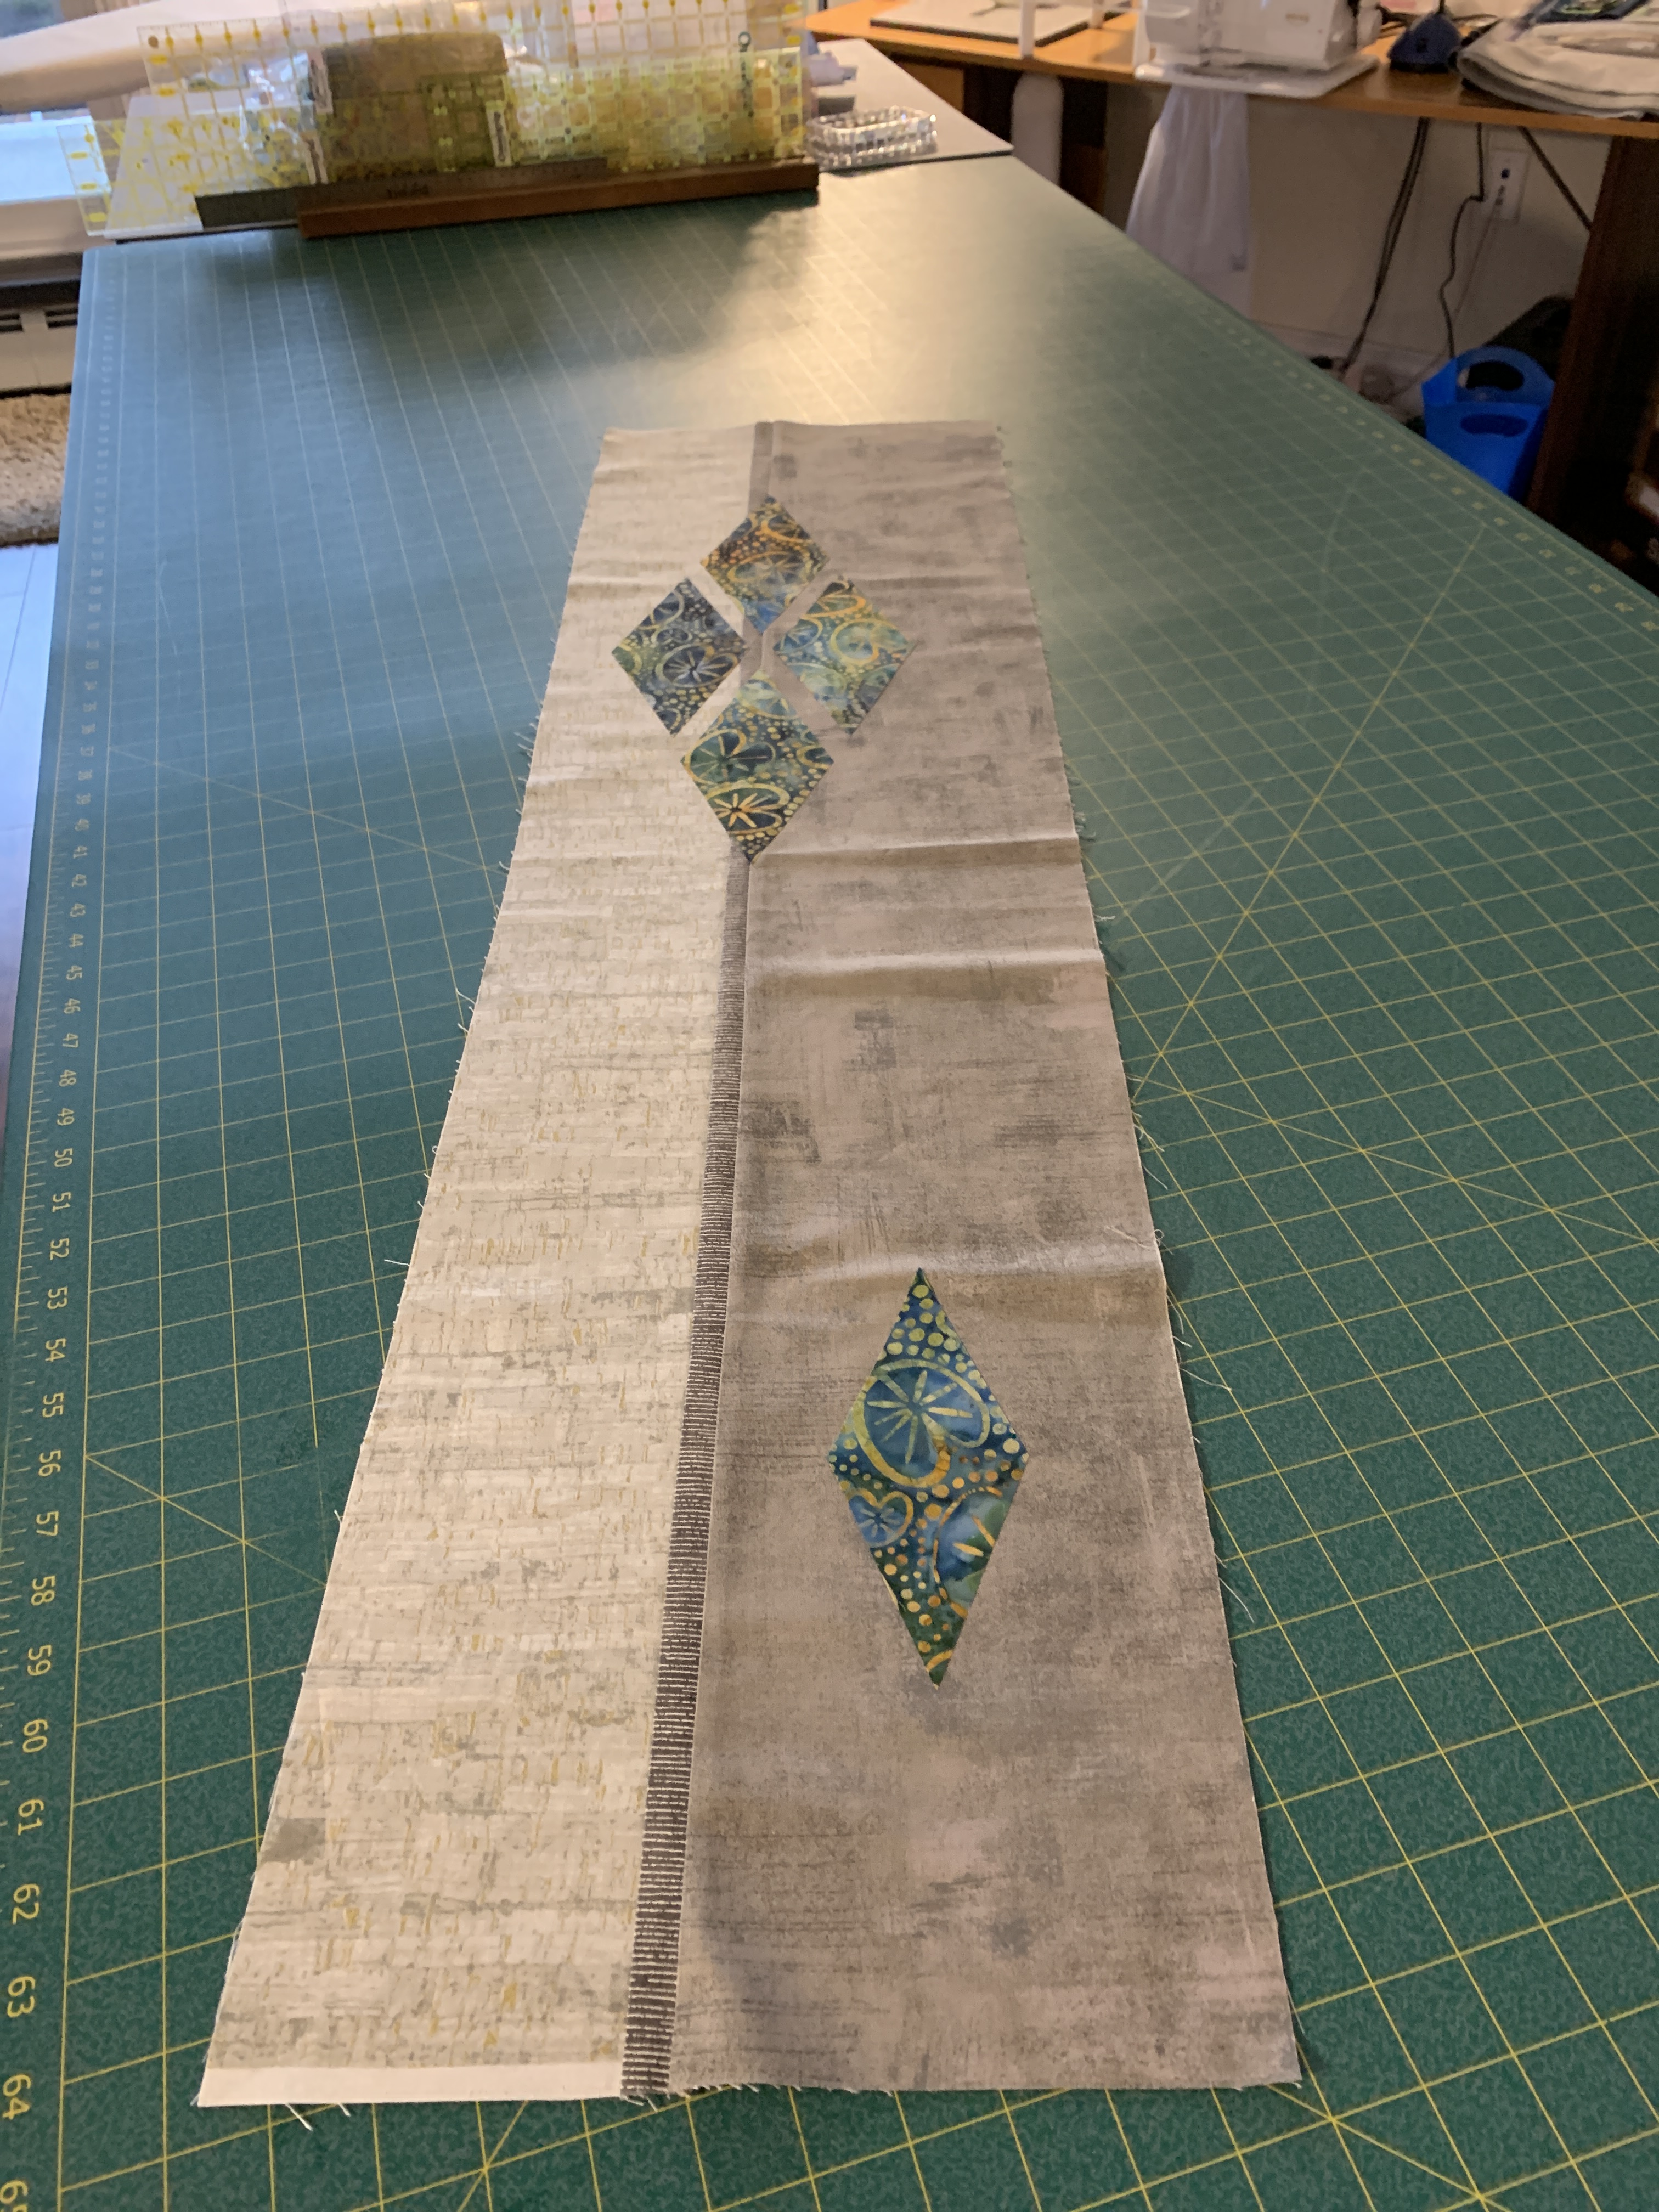
Panel #1: Diamonds.

I’d cut out more diamonds but decided to go with fewer and to bring the viewer’s eye toward the the bottom of the panel I added a single slightly smaller diamond.

Diamonds

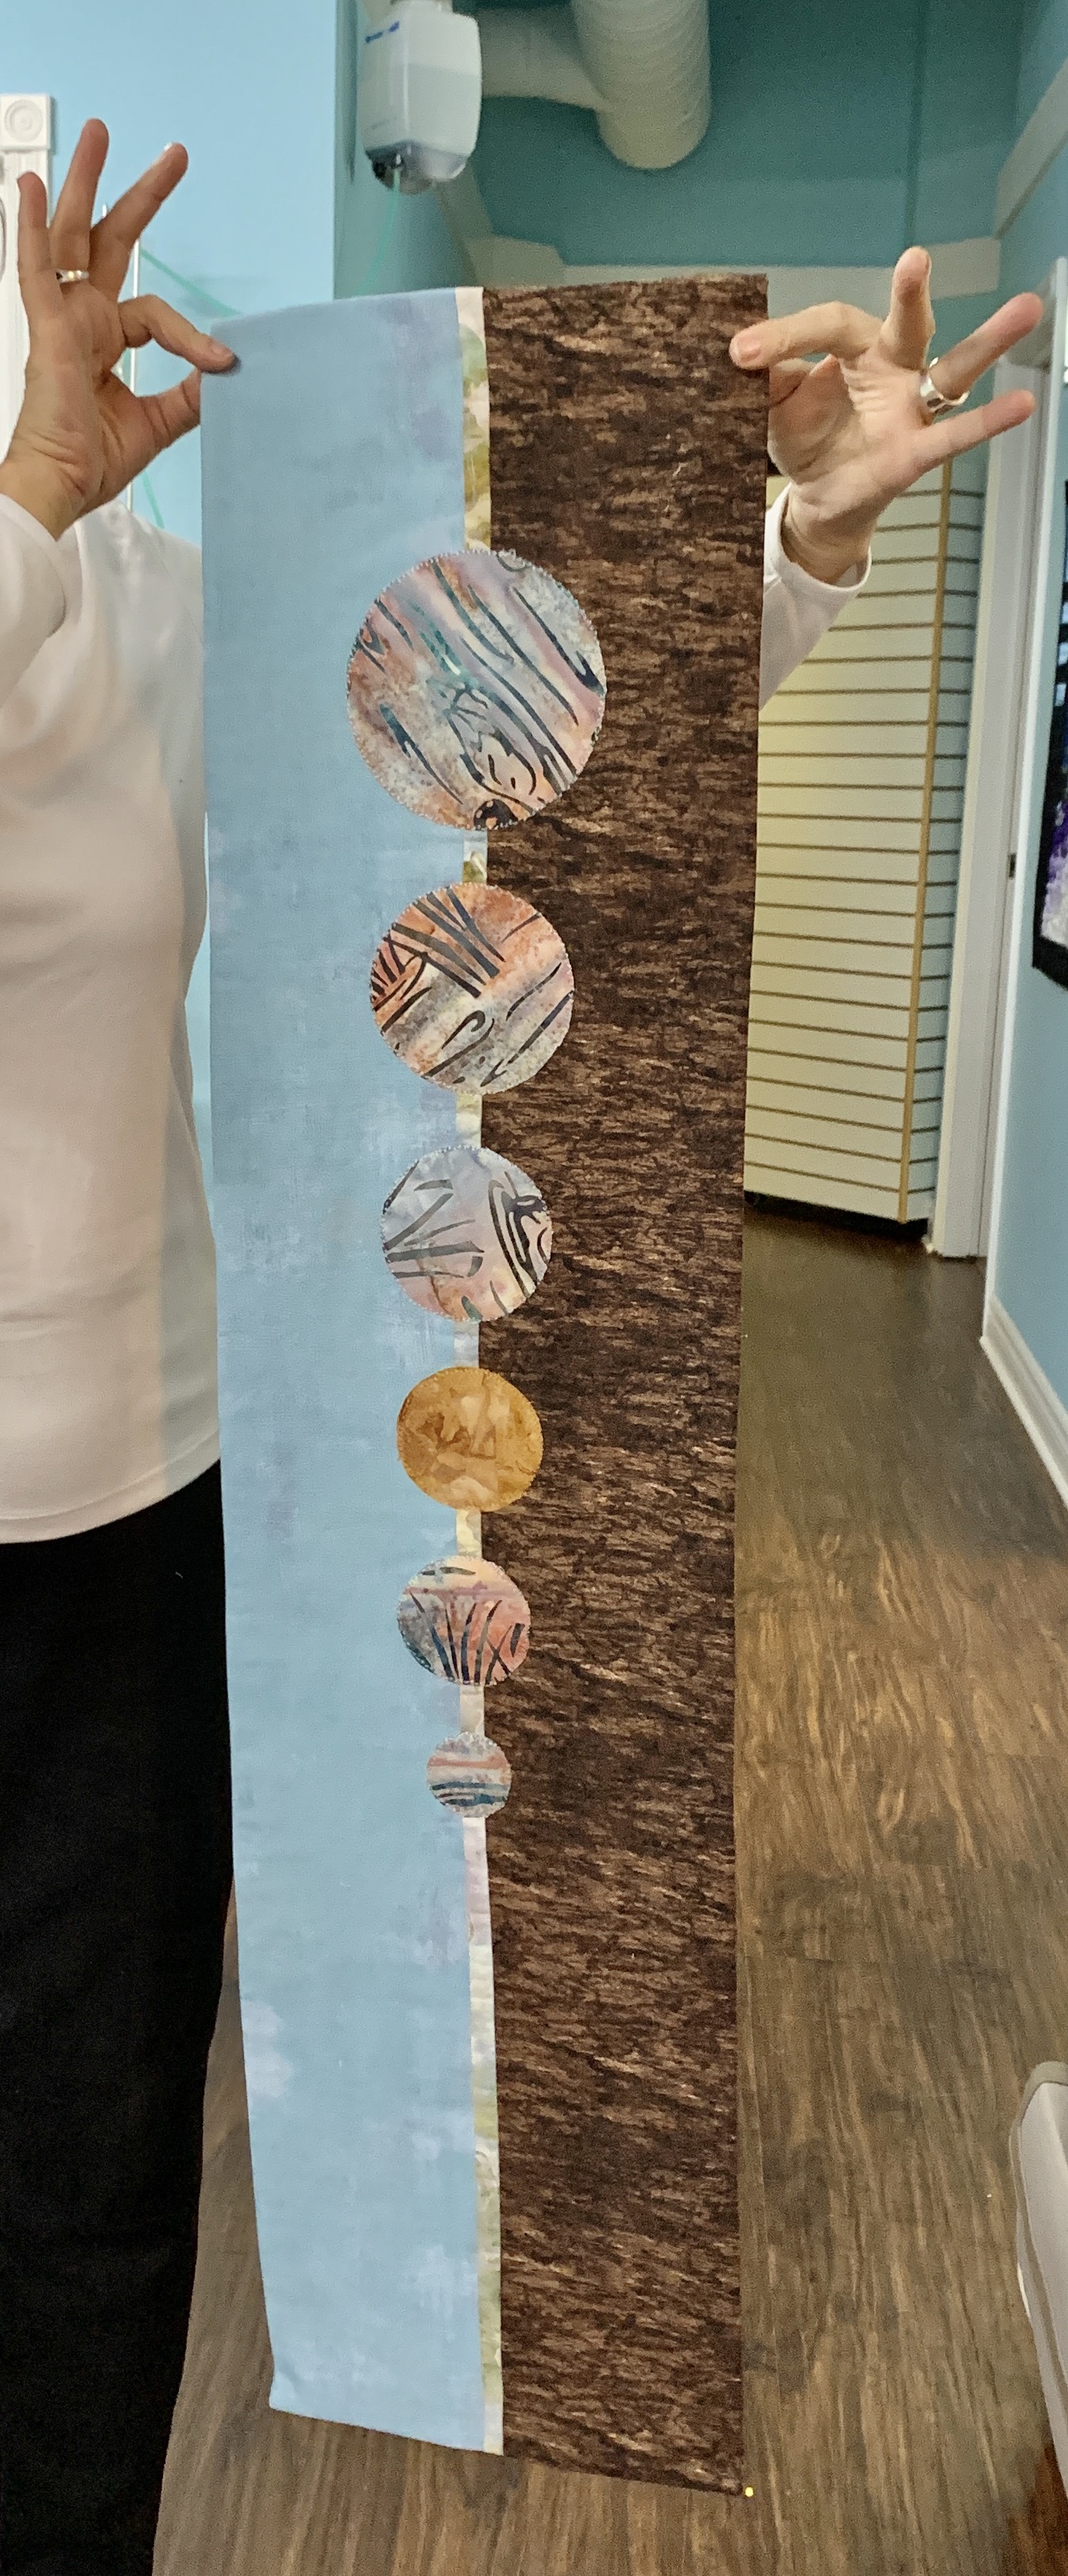
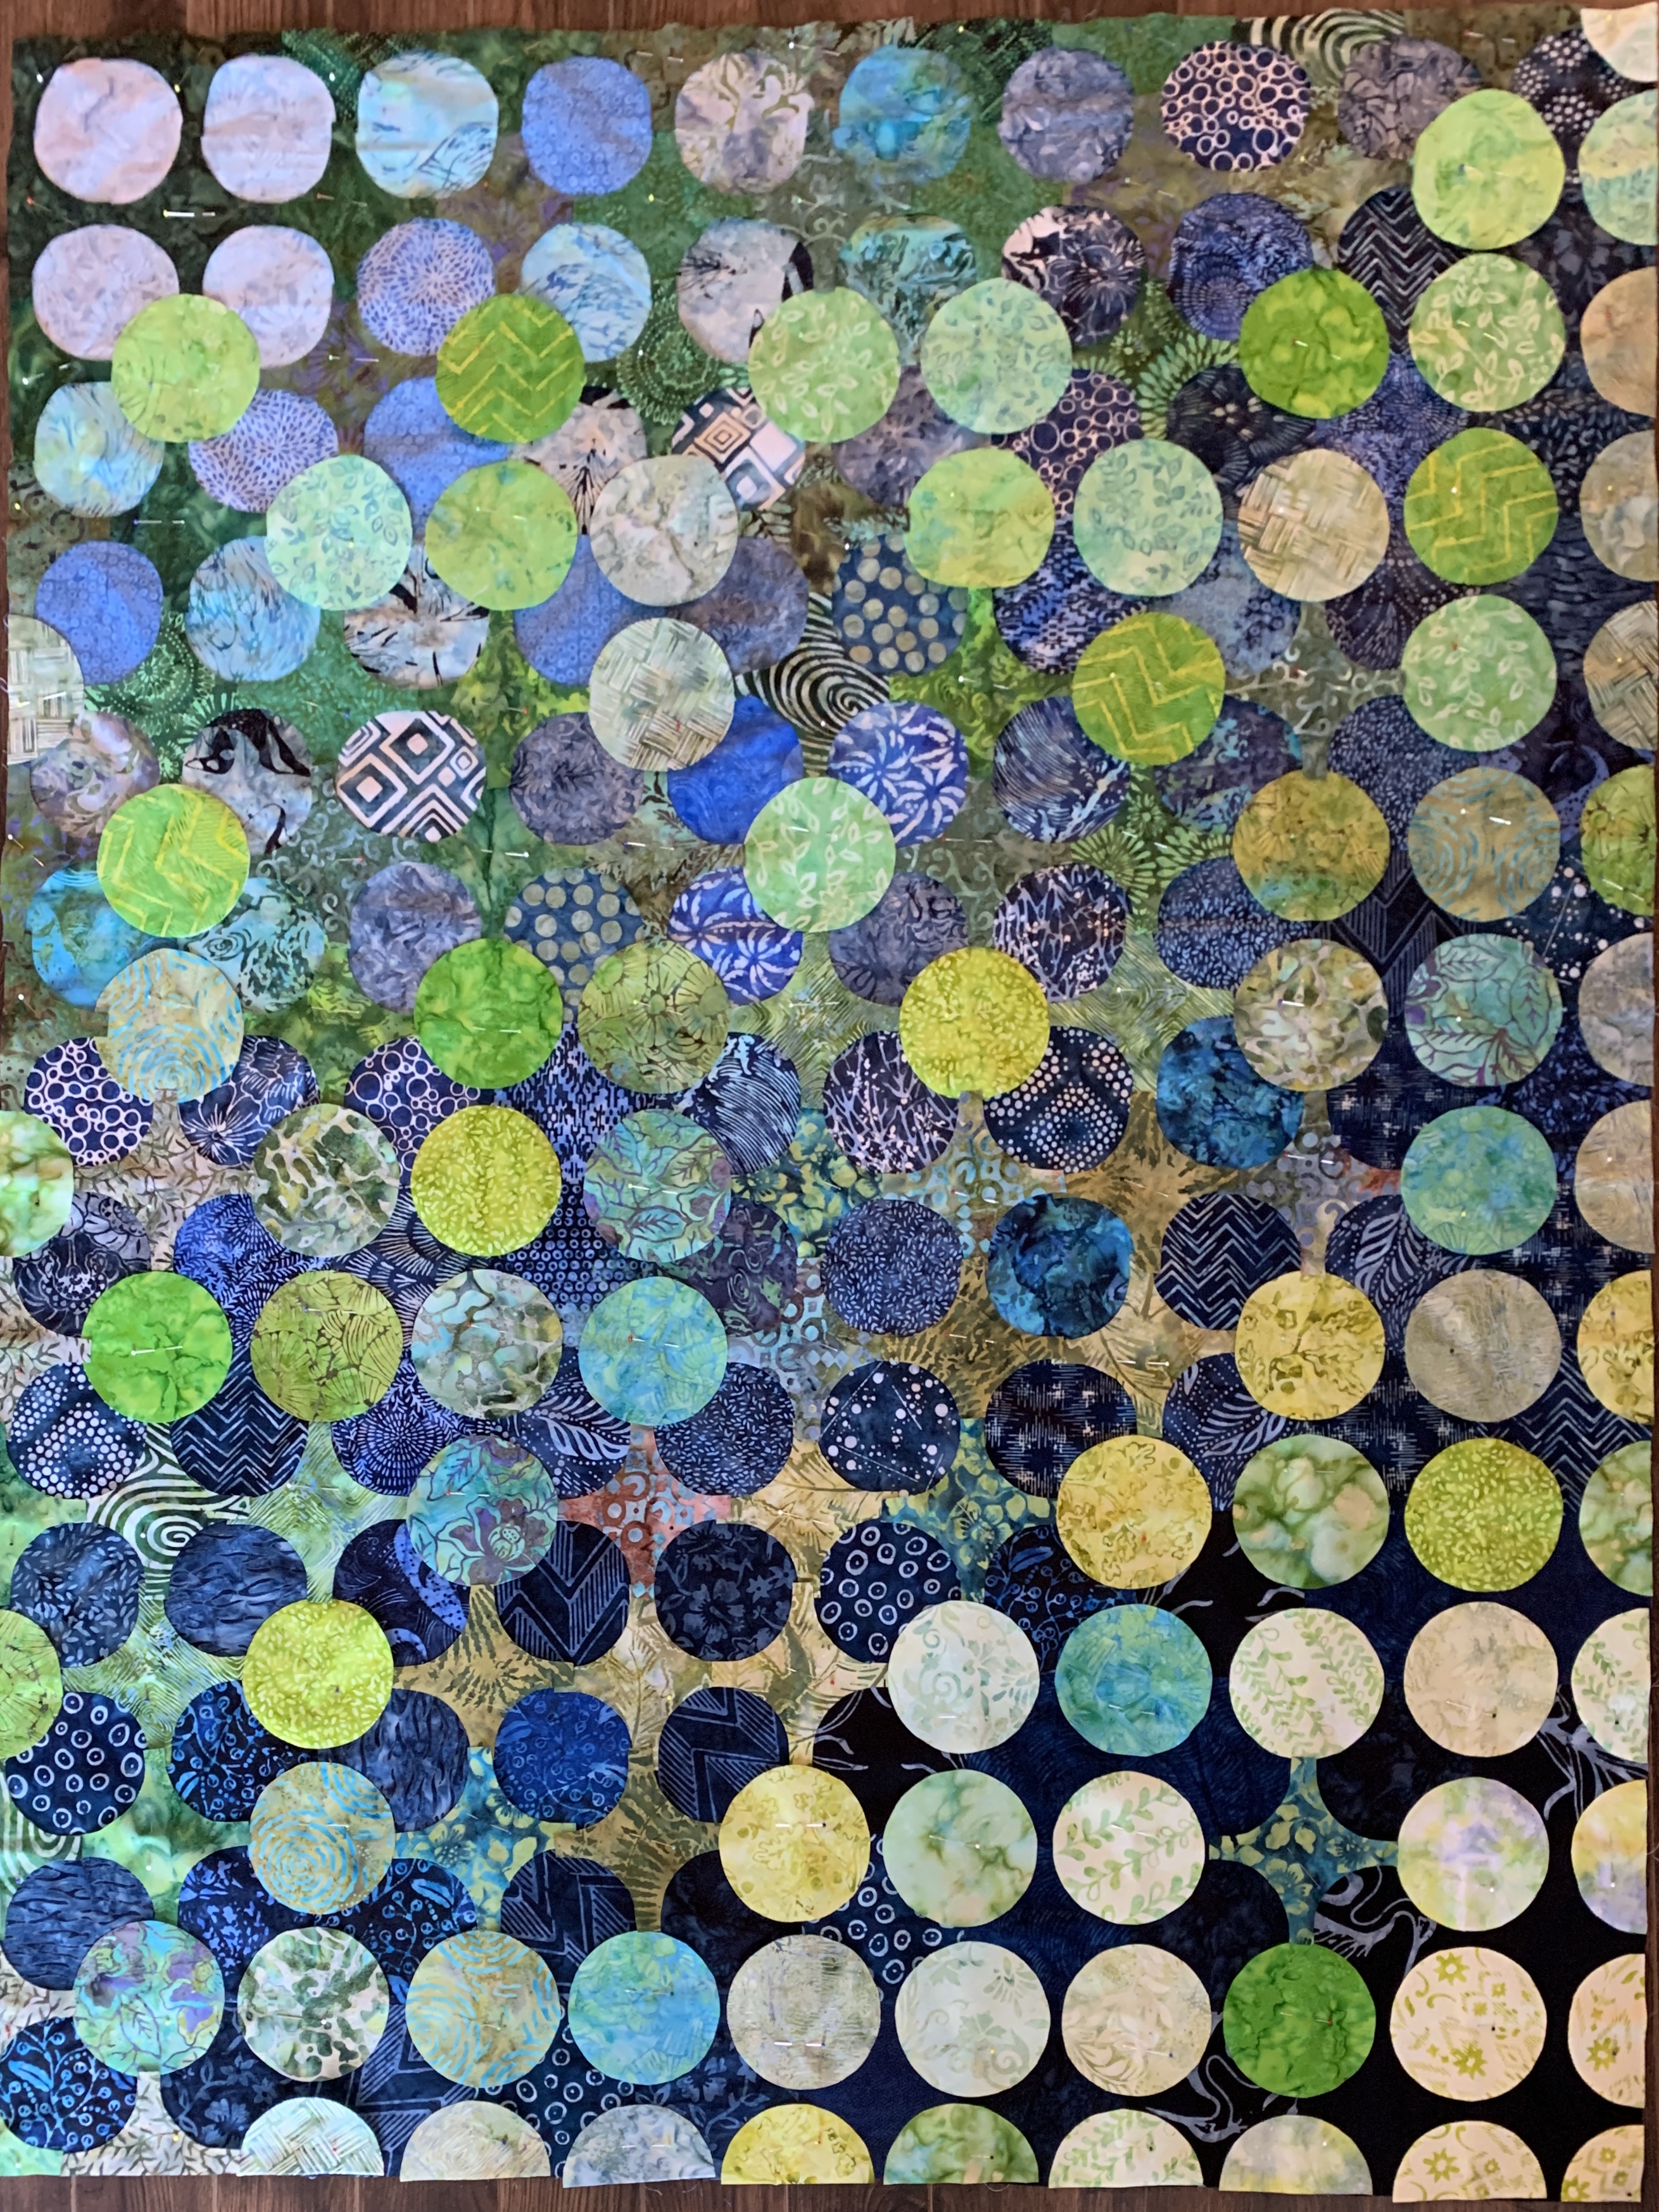
Panel #2: Cascading Circles

From small scraps I cut out colourful circles in decreasing diameter, then fused them on the centre in increasing distance from one another to simulate a cascade.

Cascading Circles

Panel #3: Squares

With this panel I decided to keep the squares the same size, but when I laid out the squares I thought a couple of smaller squares top and bottom would balance the array. Then, as I was fusing the squares in place I decided to fill in the gap near the bottom right of the arrangement with two different small blue circles. I’m still deliberating whether or not to add something nearer the bottom of the panel.

Squares

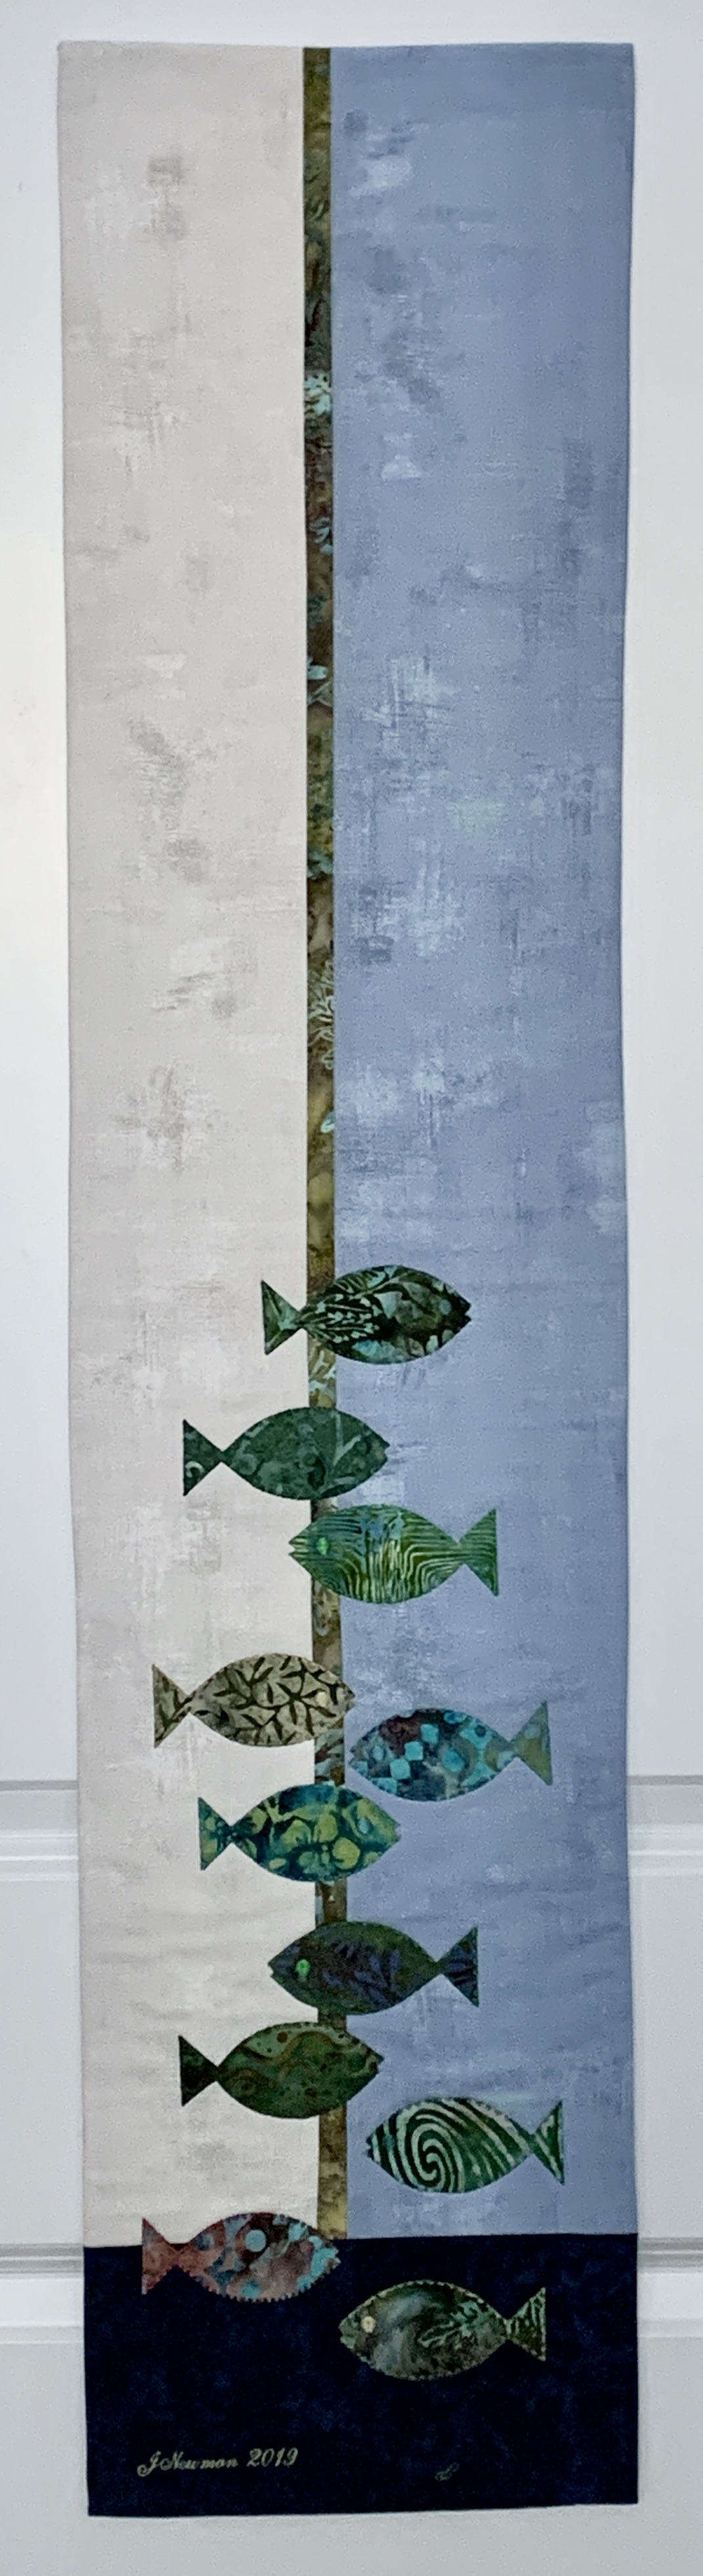
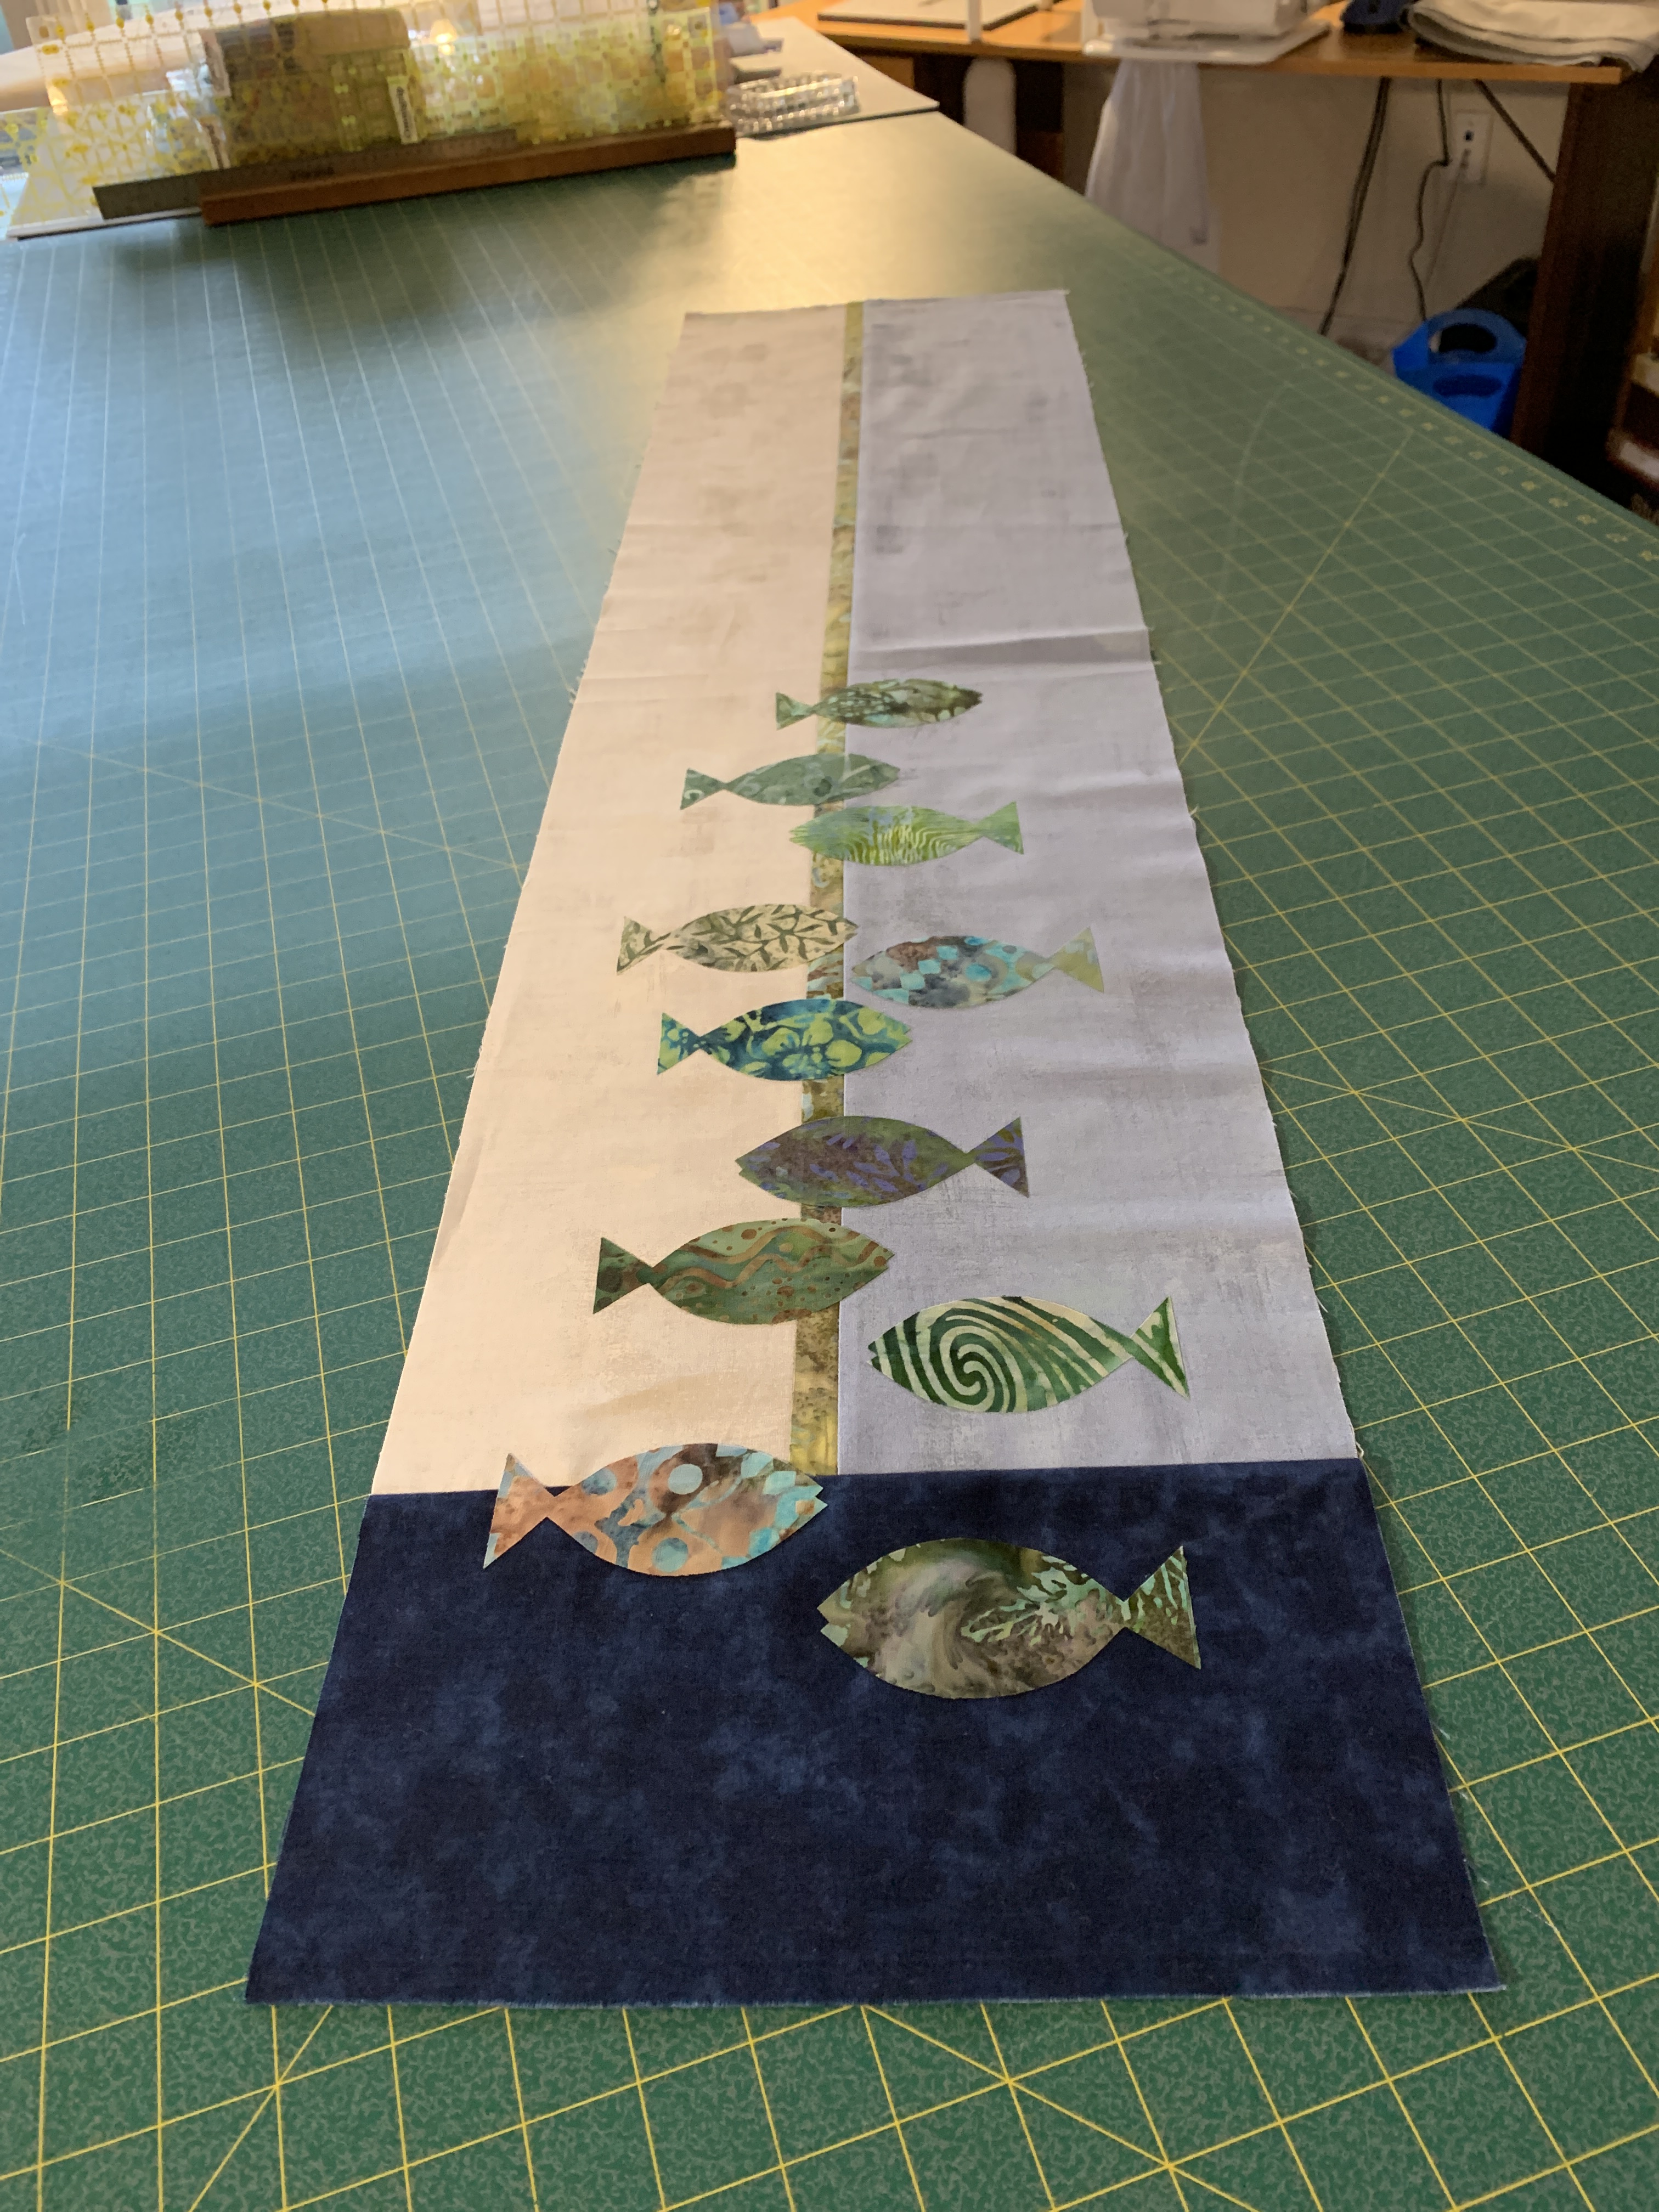
Panel #4: A School Of Fish

The fish were leftover pieces I’d saved from the just finished quilt. As I was cutting out the “X” pieces I realized I was creating “Fish” shapes which I saved thinking I’d find a use for them at some point. It turned out the light coloured fabric was short a few inches from a full width of fabric panel so I added in the dark blue piece (also a leftover from the just finished quilt). The school of fish is swimming at the bottom of the panel.

Fish

The women in the class had a great day – the projects were simple enough for them to create the background panel, decide on some kind of appliqué, edge stitch the fused pieces, add batting and backing fabric, then sew on hidden binding strips on all four sides.

Not everybody got as far as the binding strips (everybody did finish the edge stitching of the appliqué) but Azar managed to complete her panel – she just has to hand stitch the hidden binding on the back and she’s ready to hang it.

Azar’s Skinny Art Quilt

The other women are joining me next Wednesday for a “come and sew” session where I can help them complete their panels. I hate leaving a class with another UFO and no idea how to finish the project.

I didn’t have a “pattern” or set of instructions for making a skinny quilt – the point of the project was to encourage the women to take an idea and improvise on it – to look at the fabrics they have on hand, set up a background, and add something simple, but elegant on top, do a bit of stitching/embroidery, then do an elegant finishing to create a piece of art.

Next week, I may set up one of the high-end embroidery machines in the shop to embroider signatures on each of their pieces – works of art, are after all, signed. I sign and date all of my wall art work!

Quilt On The Go – VI

This is the completely edge-stitched, bordered top panel.

Bordered Panel

The photo doesn’t do this panel justice – I have nowhere to hang it and photograph it in a way that allows me to align it perfectly. I laid it on my bed and adjusted the sides as best as I could with my photo software. But you get the idea here.

The narrow chartreuse inner border was a good idea – it brings out the brighter greens. The wider darker blue grunge border stabilizes the blues in the panel. I’m also happy with the subtle diagonal flow in parts of the piece.

Now to build a back

Fabrics For The Backing

These are the two main fabrics I’m planning on using – I also want to build in a bit of piecing using the blues and greens from the top. That’s a job for tomorrow.

Yesterday I sat down at my iMac to play with my Pfaff TruE3 embroidery software to discover it won’t run on my recently updated operating system!

The first line problem is the dongle driver which is incompatible with Catalina (the new OS 10.15); there may be problems further in I don’t know about and can’t know about until I get past the registering of the dongle.

It infuriates me – I bought the software for a whopping amount of money a year and a half ago and now I can’t use it. I immediately contacted Pfaff TruE3 Embroidery Software support who replied they had no information on whether the dongle manufacturer was planning a dongle driver update! TruE3 was only compatible with Mojave (10.14). No help there, obviously.

So by the weekend I’m in a bind – I can stitch out embroideries I’ve already created but I can’t modify them to any great extent and I can’t create anything new.

I’m going to have to ask around among the women I know who have invested in Premiere+ and see if I can spend a bit of time on their computer creating a design to quilt this new quilt with – that’s if that software will actually run on an updated Mac!

Quilt On The Go – V

I’m making headway – I’ve got all the circles edge stitched and about 2/3 of the Xs – It’s taken me several hours each of the last three days to get this far. Tomorrow afternoon I hope to be able to finish the remaining Xs.

Circles Appliqué Quilt – Edge Stitching

I’m stitching using embroidery rayon (in many different colours to more or less match the fabric I’m stitching – the stitch is a narrow blanket stitch (l: 2mm, w: 1.5mm) making sure I’m using the needle down position so I can pivot the fabric to keep the stitching along the raw edge.

Once I’ve finished the edge stitching, I will add a narrow chartreuse inner border, and a navy/teale grunge outer border to finish the top. I have fabrics for the second side – I will do some piecing as I assemble it so my narrow width of fabric can be extended to fit the width of the quilt.

What I have no idea about is how to quilt the sandwich! The last time I did a quilt like this I simply stitched the underlying block edges as squares through the circles and Xs. However, this time the arrangement of circles and Xs doesn’t lend itself to that. I’ve discussed ideas with several people and heard many suggestions. Were I doing the quilting on a long-arm quilter I’d just do some open curvilinear design but I will be stitching in the hoop so I need to come up with some kind of “block” idea that will fit within my 360mm x 200mm hoop. (I have a large reversible hoop but I’ve learned the hard way that whatever design I create has to not cross the centre line.) I need to let this percolate for the next week or so when I’ll be ready to do the quilting.


Quilt On The Go – IV

Alright – here are the circles and Xs pinned to the background. The result is the illusion of circles (greens) on circles (blue) which is what I was after.

I laid the panel on the floor and photographed it – the circles that were in the wrong place stood out dramatically – I made a few swaps although that wasn’t so straight forward since I had precisely the right number of circles and crosses to fill the panel with just a couple left over. I thought I was going to have to cut more but I got away with what I had by moving a few around.

Circles / Xs pinned

Now comes the painstaking task of pressing the pieces in place so I can then edge stitch them with a decorative stitch. I’m hoping the Wonder Under holds better than the Heat ‘N Bond I used on a previous quilt – I had to use white glue on some of those circles when they began separating from the backing. It will take me the better part of a week, I’m anticipating, to edge stitch all of these 154 elements.

I still have no idea yet where to go from here – I think I want a navyish small print (a grunge?) for a narrow border, then a wider border in chartreuse – I will have to go shopping with the panel to decide what might work because I haven’t anything in my stash that suits the colour scheme in the panel.

Quilt On The Go – III

Here’s how the appliqué work is beginning to shape up – I fused Wonder Under (Pellon 805) to the back of 4 1/2″ x 17″ strips of 30+ fabrics ranging in colour from pale yellow/green to a very dark green. I made the decision to cut the circles from the lighter fabrics and the crosses from the darker ones (that may be a limiting decision but I had to start with some kind of order from which to begin).

So far, I’ve cut a bunch of circles and have pinned them on the blue background and I’ve started interspersing crosses  – I’ve been placing/pinning as I’ve cut out circle and cross elements – I think at the moment I need to cut out more crosses and see how close I can get to the bottom right edge with them, then fill in the rest with circles.

Circles & Crosses

NOTHING is fused in place! I have to get the space filled with circles and crosses, stand back and look at the whole from a distance, take photographs to see what the whole looks like, before putting an iron to the quilt top. I have a feeling I may have too many light coloured circles in that upper left corner (over the darkest squares of the background panel) – I think I will want to drop a few darker circles in that quadrant – just trying to visualize what that would look like.

I’ve done maybe half of the cutting out of circles and crosses. I need to spend the rest of the afternoon and evening getting the rest cut out before I attempt placing more elements. The crosses when placed side by each create circles from the background panel – I want to bring out more of the blue in the middle of the quilt top so that will mean more crosses in that area.

The good thing is everything is just pinned at this point – I can still change my mind about all of it.

Quilt On The Go – II

Here I am with a stitched background layer – it took 3-4 hours to assemble the pieces – the difficult part was collecting them from the floor in the order they were placed and keeping the paired squares in the same order while I was sewing them. I did reference yesterday’s photo several times to be sure I hadn’t reversed blocks.

Stitched Background Layer

I began by creating the vertical columns stacking the 13 pairs from bottom to top proceeding to the next column, then the next. I put post-it notes on the top square of each stack to identify the order in which I needed to sew them. I chain stitched the pairs in each column, cut them apart, pressed the seam to alternating sides, then built each column being careful to nest the seams.

Contrast Fabrics

Yesterday I pulled 27 contrast fabrics from my stash from dark green to light green – in the photo there is a lot more turquoise in the selections than I saw when I stacked the fabrics and the light green looks rather peach. I think my pale colours aren’t strong enough to make the elements I plan on cutting out pop. So back to the stash I must go – I’ll see what I have in yellow that might provide a better contrast, or maybe (heaven forbid) I will have to go shopping for more strong bright lime green batik for the appliqués over the dark background  blocks.

I’m trying to stay within the stash for this quilt, although I already know I’m probably going to have to shop for some fabric to create a border – that’s because about a third of my blocks came from a charm pack (I have no more of those fabrics) and the other fabrics I used came from my scrap boxes (there is very little left of those as well – not enough to do 4″ borders).

Finally – A Quilt On The go

I finally have a quilt on the go.

I started by pulling from my stash a double jelly roll of batik fabric (5″ width of strips) with an idea – but beyond opening the package of fabric strips I haven’t been stuck. Nice fabrics but I just can’t find a way to start. Next I pulled out a charm pack of blue batik fabrics (5″ squares) and that seemed to get me underway. 5″ squares are rather small – ending up as 4 1/2″ blocks so I’d need a 10 x 13 array at the least to make a decent size quilt.

Quilt Background

By adding more than twice the number of squares in the charm park using fabric from my stash of fat quarters and scraps I’ve managed to come up with 130 blocks to set up a graduated 10 x 13 array from light to dark which I can see serving as background for an appliqué quilt.

Inverted Array

I’m still not sure what will develop as a layer on top of this background – I will likely use circles somewhat in the way I did the original “Double Vision” quilt which my niece now has.

The question is what colour palette will complement these blues – shades of green ranging from light chartreuse to dark green/blue? I’ll have to see whether I have enough fabrics in my stash to make this work.

More as the work progresses – now to stitch this assembly together. That’s for tomorrow.