Charm Quilt

One of the things I’ve been teaching in the quilting class is how to deconstruct a quilt design. To this end I’ve shared images of quilts with the gals and helped them break down their construction.

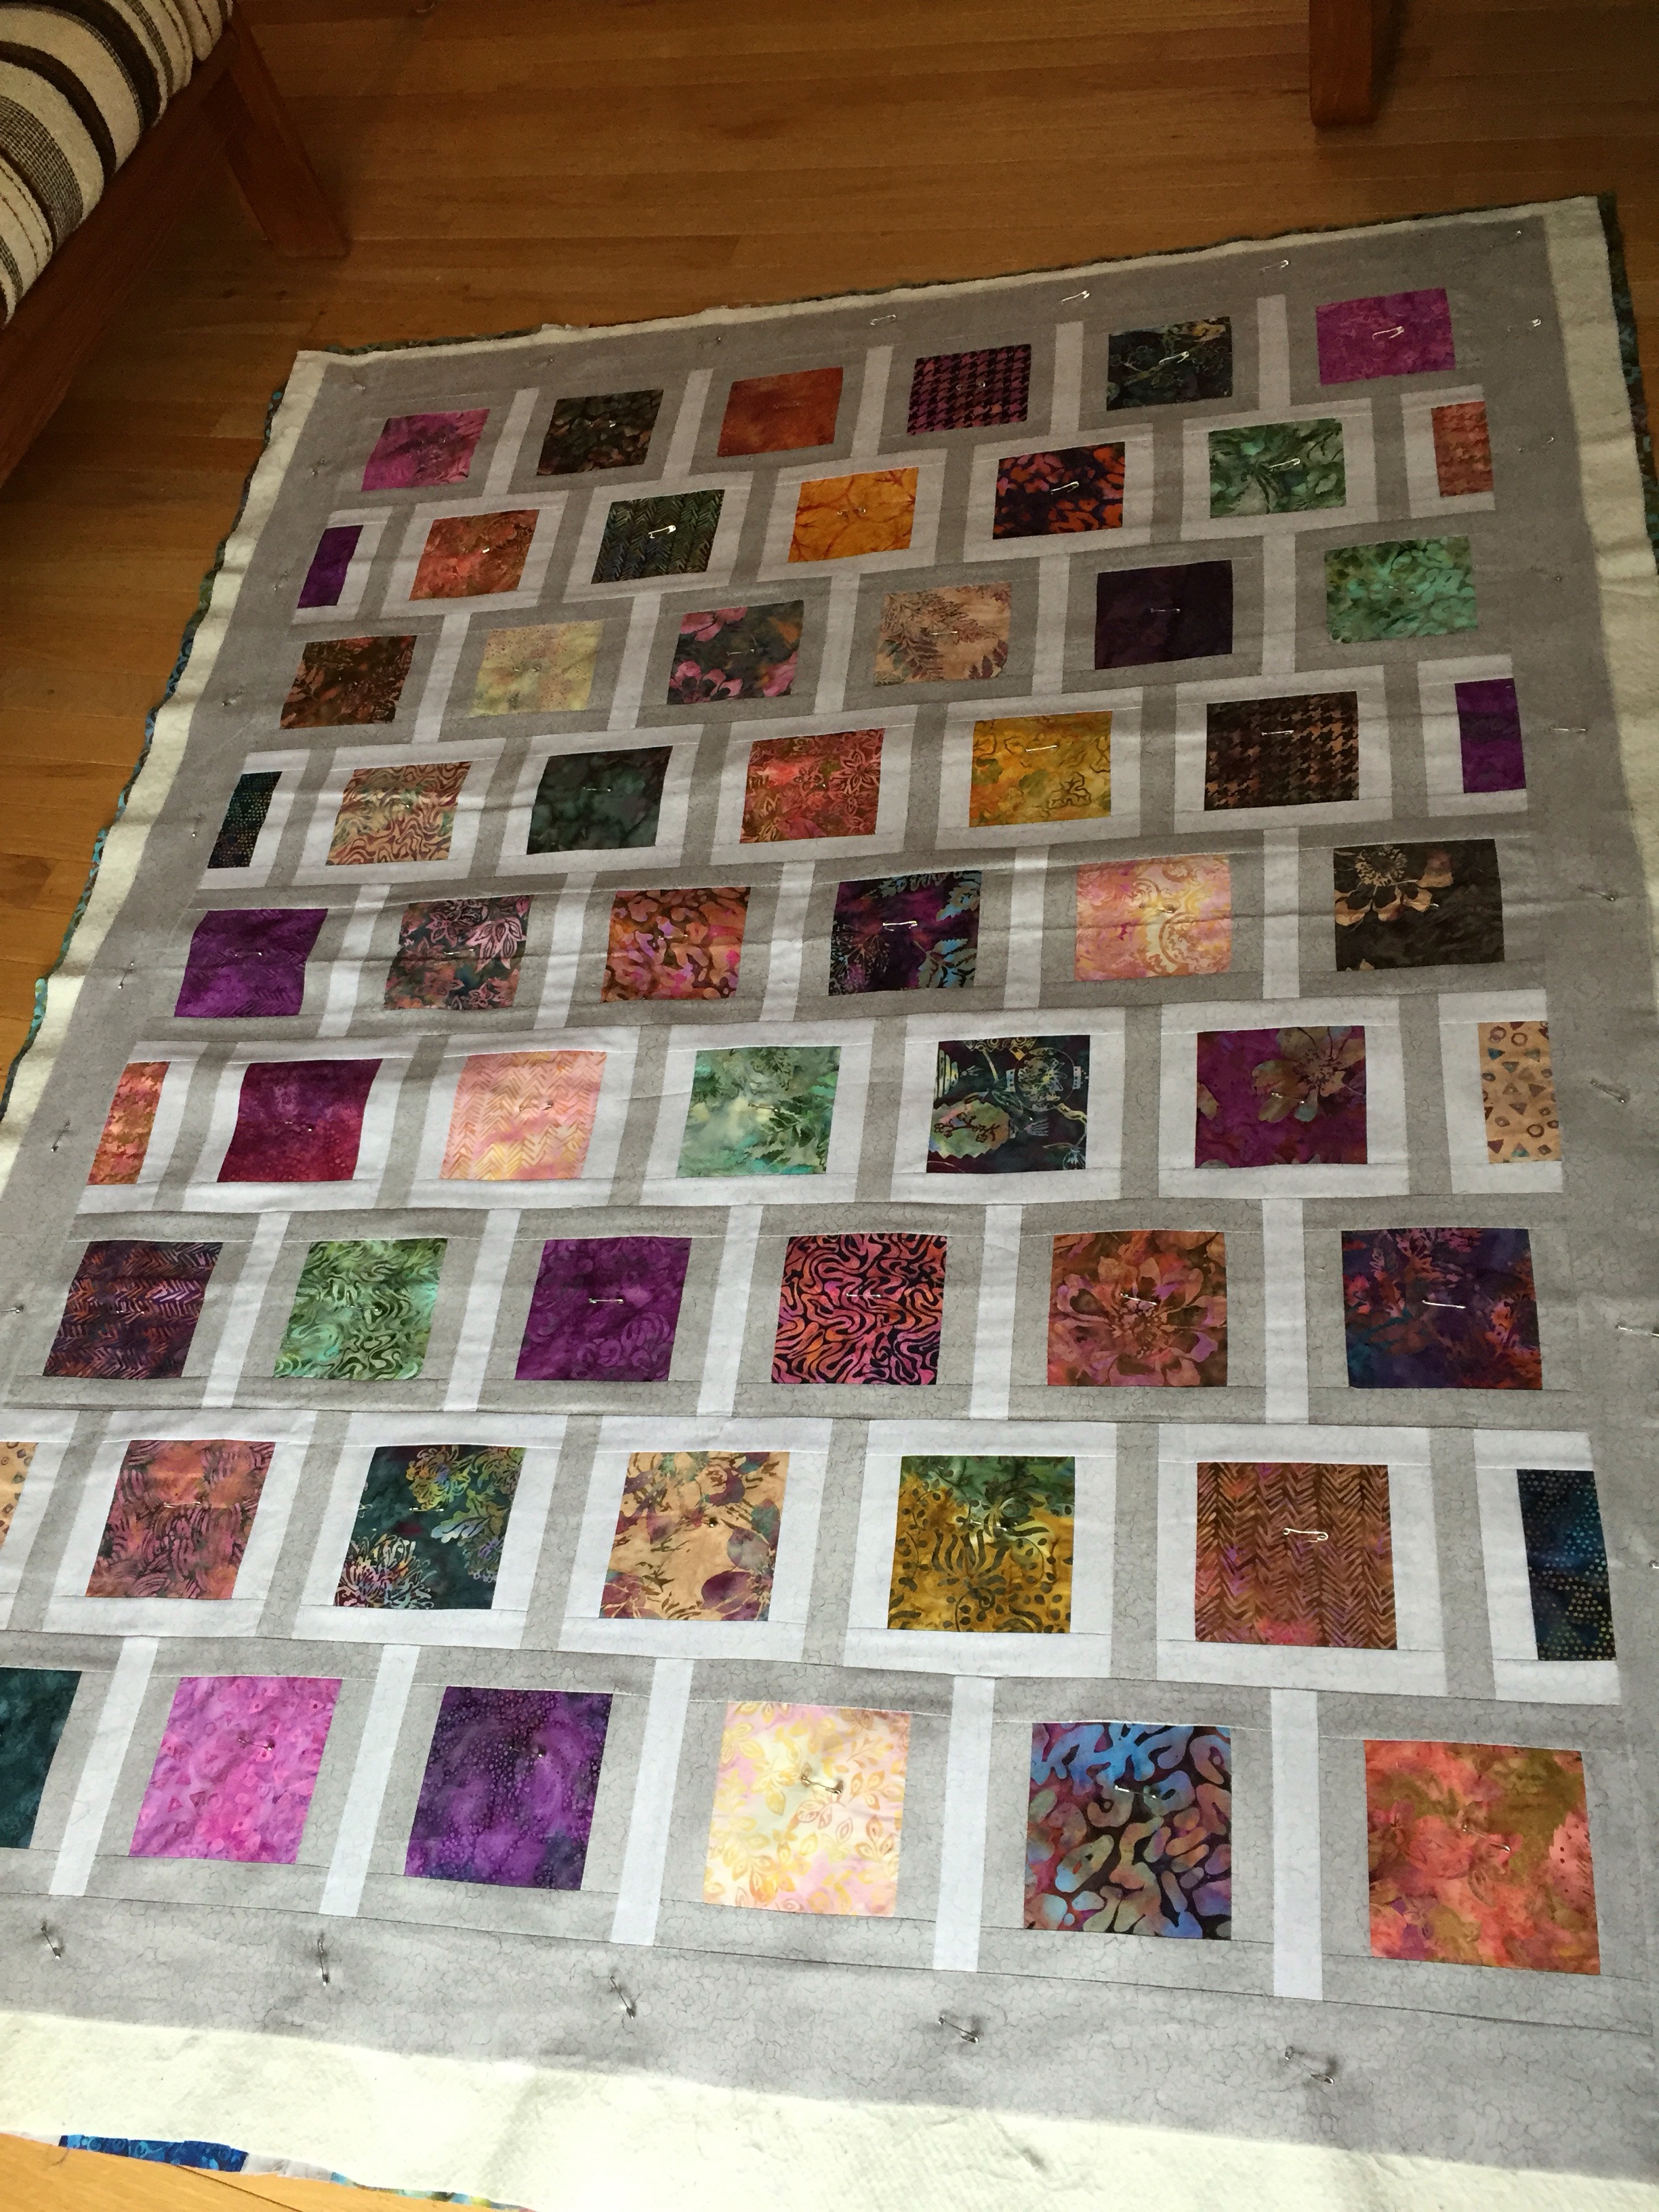
One of the quilts I shared was a photo of a quilt made from “charms” (5″ blocks) bordered in two neutral shades. I’ve had 4 charm packs in my stash for some time and I thought this would be a good way to use them. 

I selected the most interesting blocks from 3 of the charm packs (the rest I put into a scrap pile and a use later pile). I auditioned the chosen blocks, sorted them into rows, then bordered half with the darker fabric, the remaining I bordered with the lighter.

What caught my attention with this quilt was the contrasting sashing linking the blocks vertically.

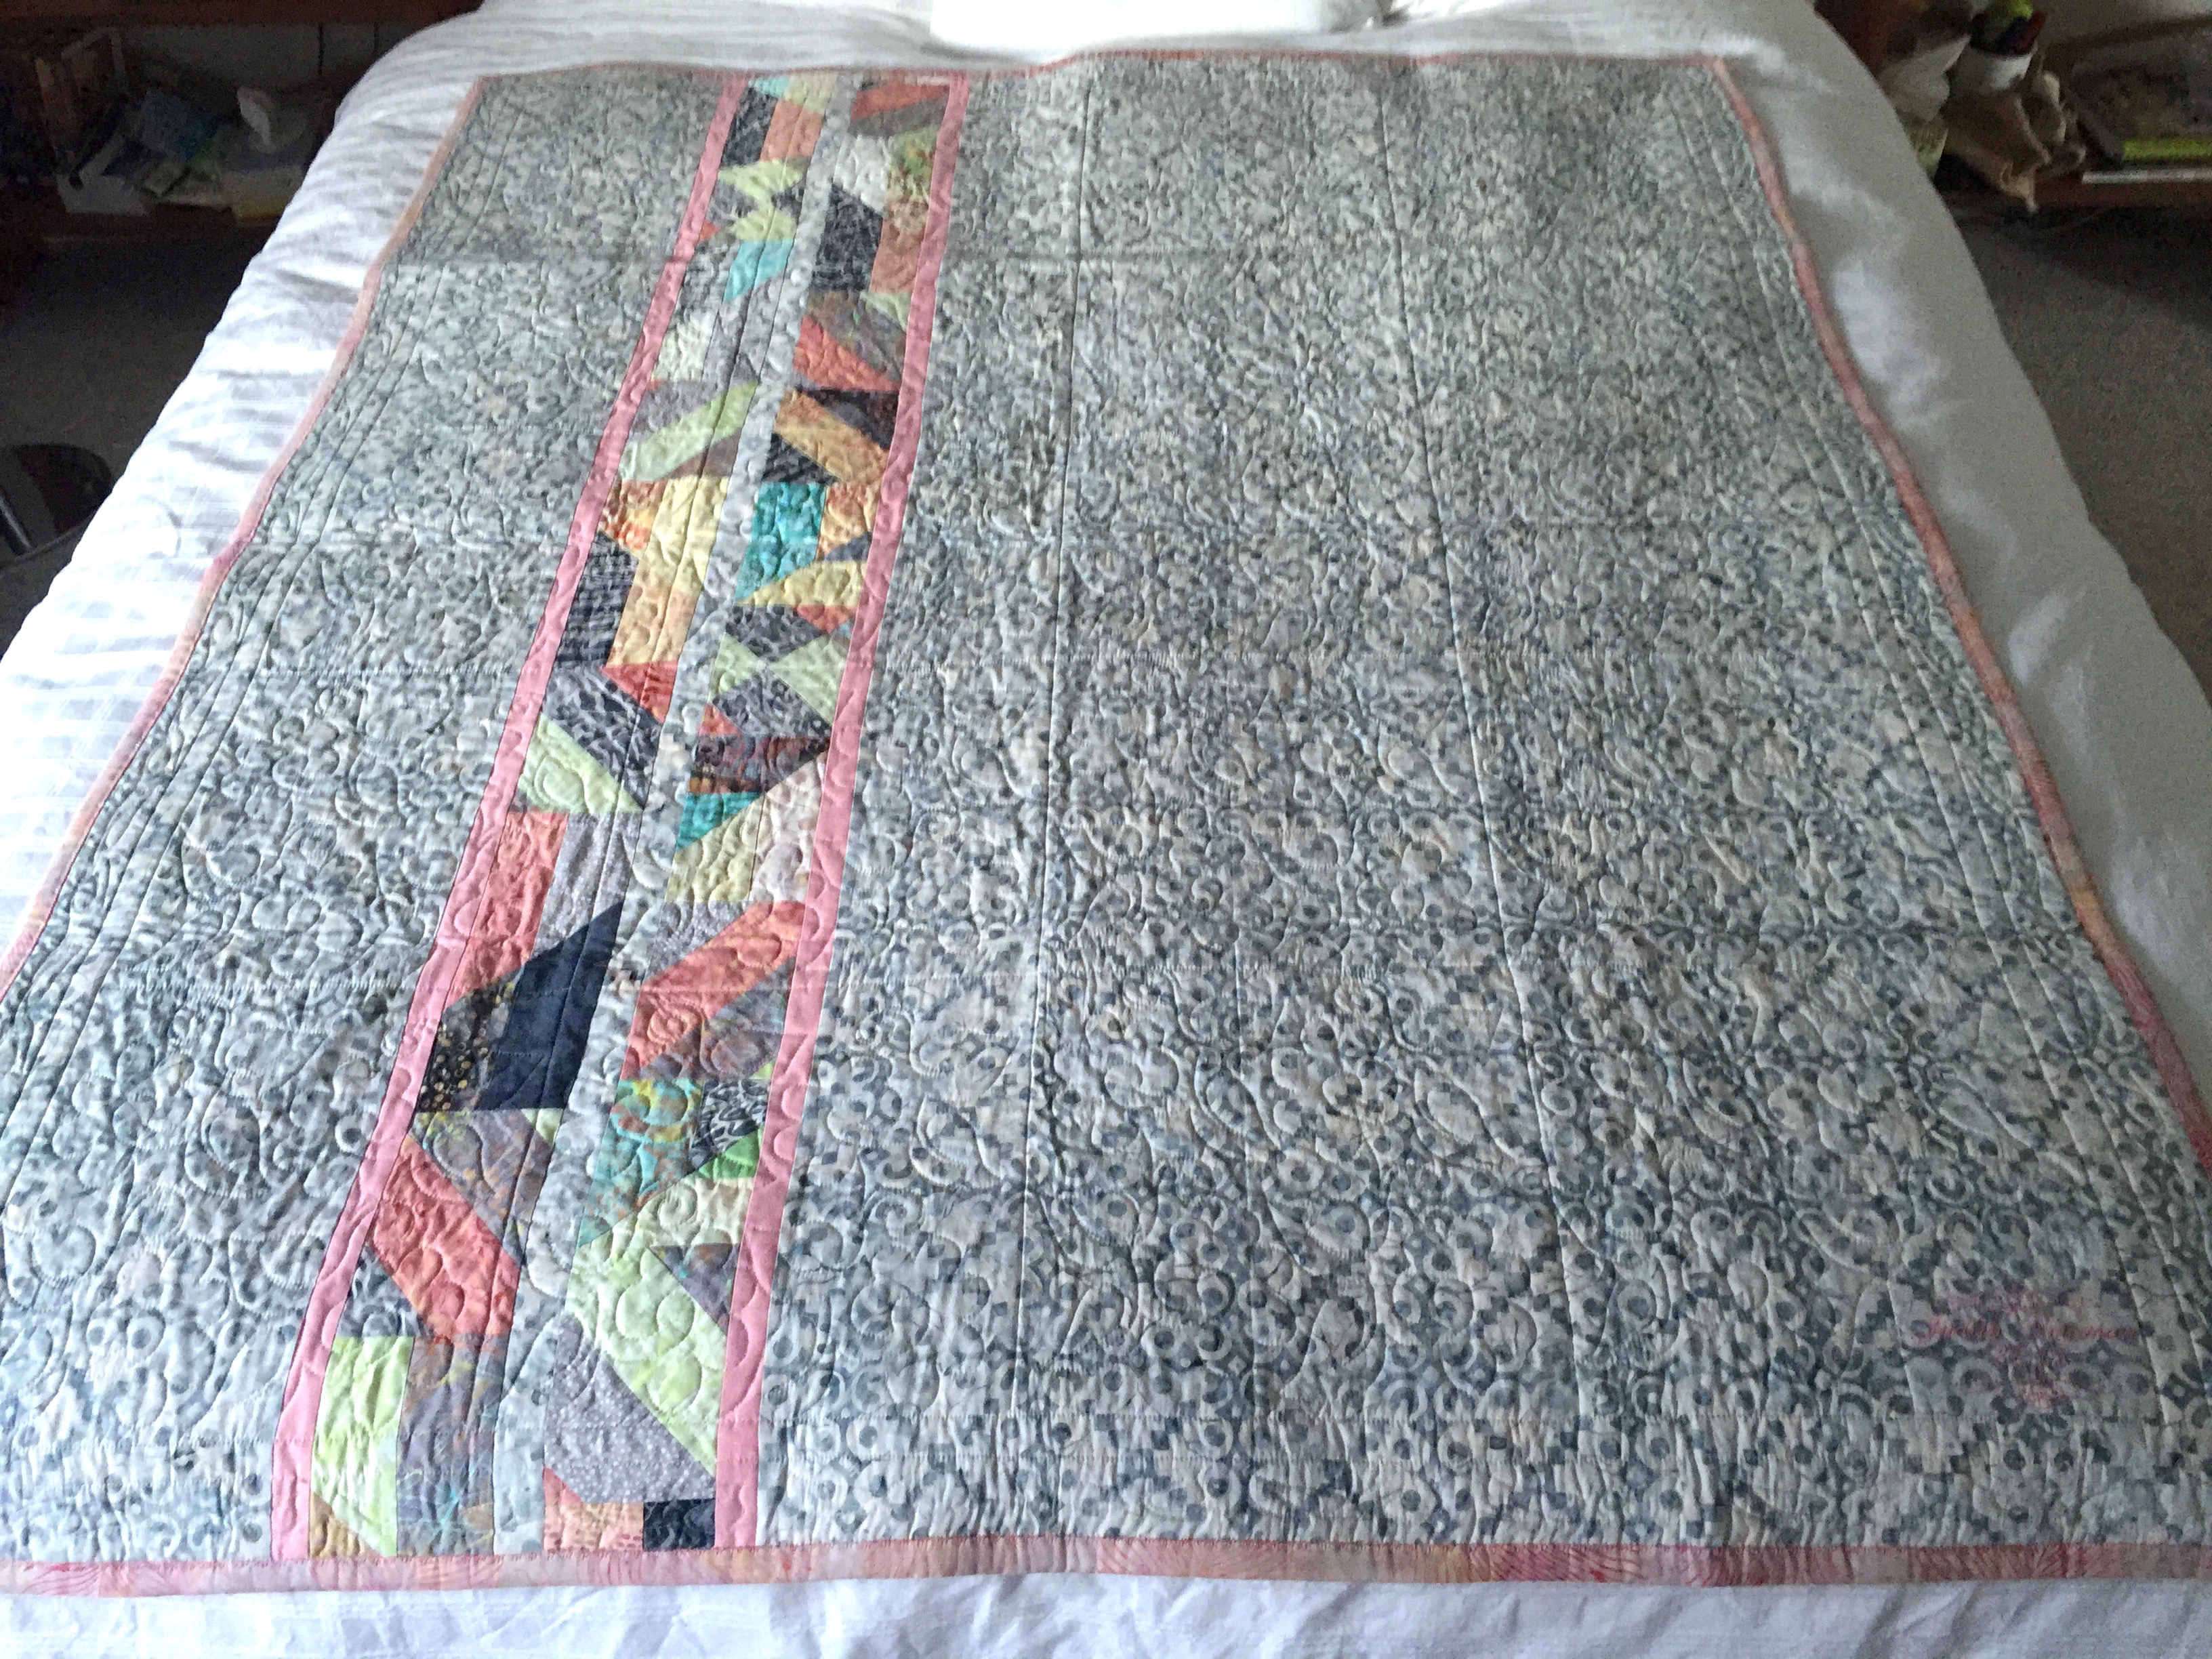
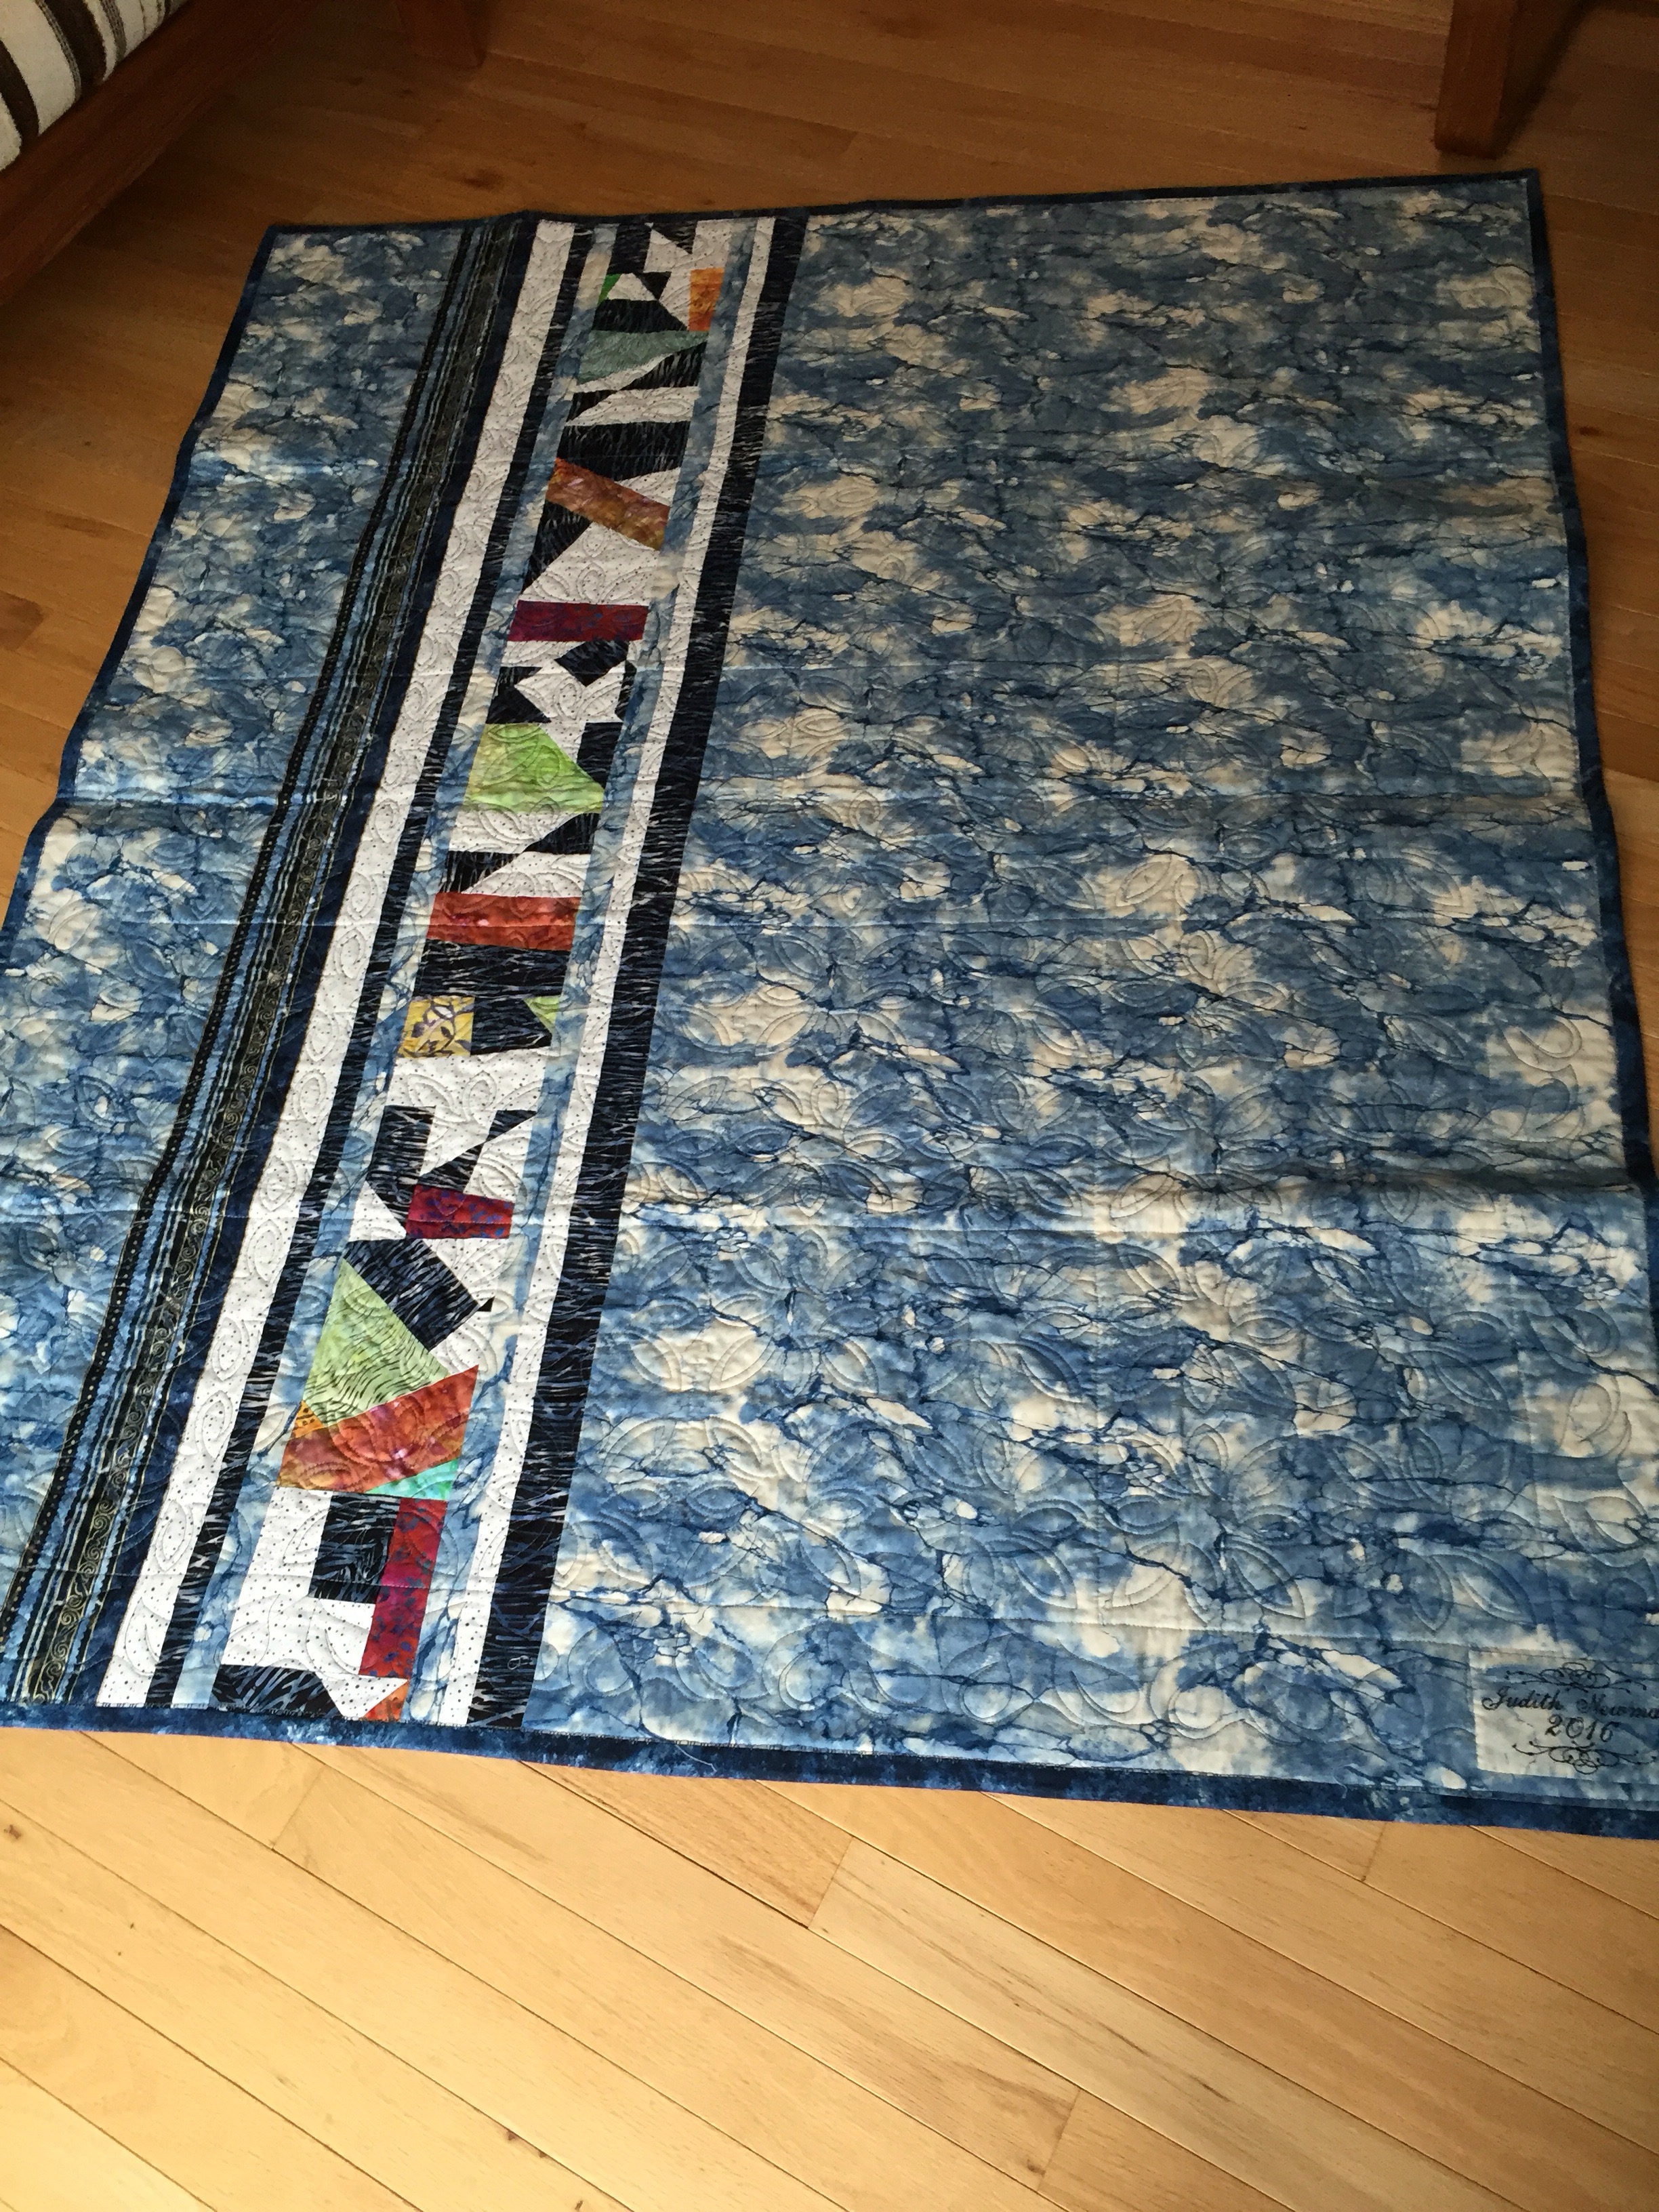
I used some leftover charms for the back keeping the motif intact in the inserted stripe. I thought about backing the quilt with the darker border fabric, but I happened across this batik and thought it would bring a bit of life to the quilt.

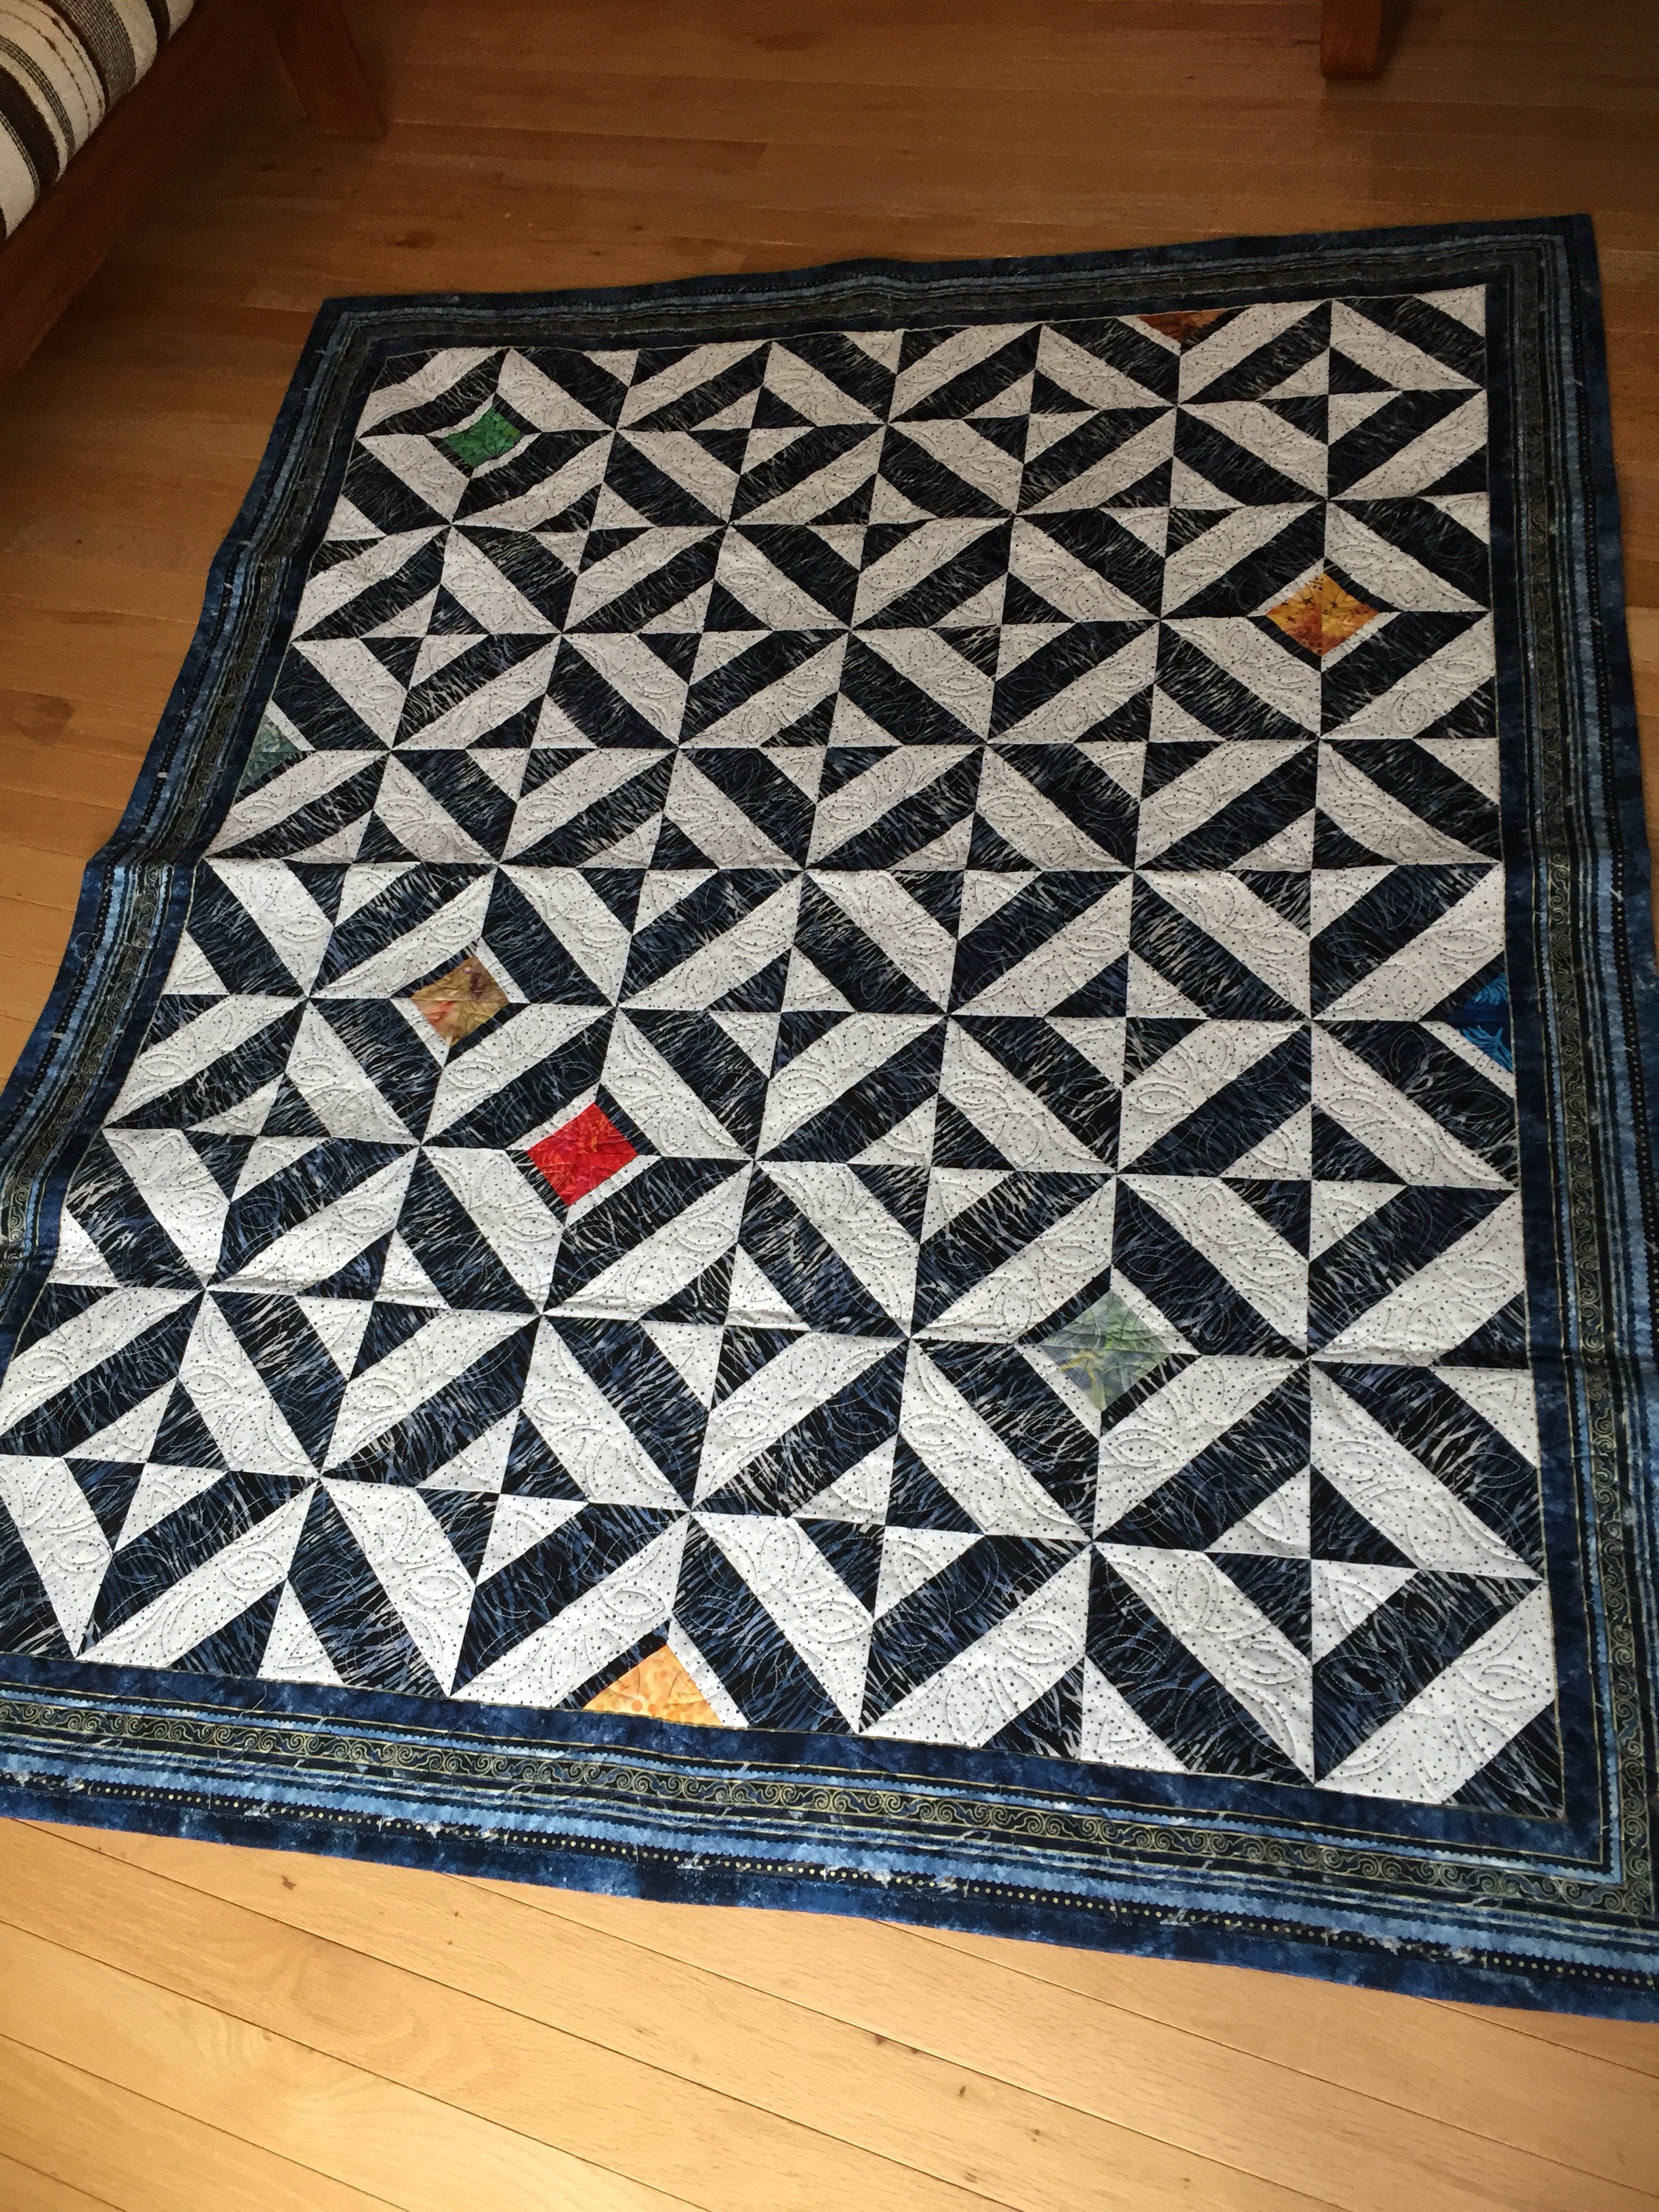
I think I will bind the quilt with the darker grey. I still have to think about the quilting motif and whether to include the block borders in the embroidery or not.

Jellyroll Quilt – Finished

I actually finished the quilt before I went to Toronto to visit my sister’s kids and grand-kids 10 days ago. I was happy with the border and how the mitre worked so well; with the splashes of colour; with the quilting design and how well it filled the block…. I was pleased with the second side and how it used the leftover bits and I had enough border fabric leftover to add a stripe to the back.

The only thing I might have done differently was to use a lighter thread for the border. I chose a dark variegated thread to blend into the border but I could have used a little contrast.

The quilting shows best on the second side:

The class meets again tomorrow – our focus will be on embroidering in the hoop – how to hoop, how to center the block, how to precise position the design, how to embed thread ends within the quilt. And we’ll discuss various ways of binding a quilt.

I will try arranging another get together in a month to show off the finished quilts. 

Jellyroll Quilt Class II

I wanted to construct a quilt using the same techniques that the class participants were using but I wanted to see what the quilt would look like in just two fabrics.
image

A half a dozen blocks later I could tell I needed some added colour so I inserted coloured centres in three blocks.image

The quilt laid out looked like this – not enough colour…image

So I added more until I was satisfied with how the coloured flowed within the quilt.image

I prepared an insert strip for the backing (in the photo it’s laying on the backing fabric) and sewed the backing together.IMG_7143

When I put a quilt together I tape the backing to the floor wrong side up, place the batting on the backing (right side up – who knew there’s a right and wrong side to batting but there is!), then finally the top (right side up). Then I get down on the floor and pin the three layers together.

This time I decided to try an idea I’d seen on pinterest using pipe insulation. I didn’t have pipe insulation but I did have three pool noodles!

I rolled the backing on one (so it would unroll wrong side up), the batting on a second (so it would unroll right side up), and the top on the third. This allowed me to assemble the quilt on my dining room table! I rolled out a small amount of all three and pinned them together, folded over the pinned part, rolled out a bit more, pinned, folded over until I had the quilt pinned.
IMG_7165

So now the quilt is ready to stitch in the ditch and be quilted in the hoop – I’m ready for class which begins in about 15 minutes so I better close up and get moving!IMG_7166

Jellyroll Quilt Class I

image
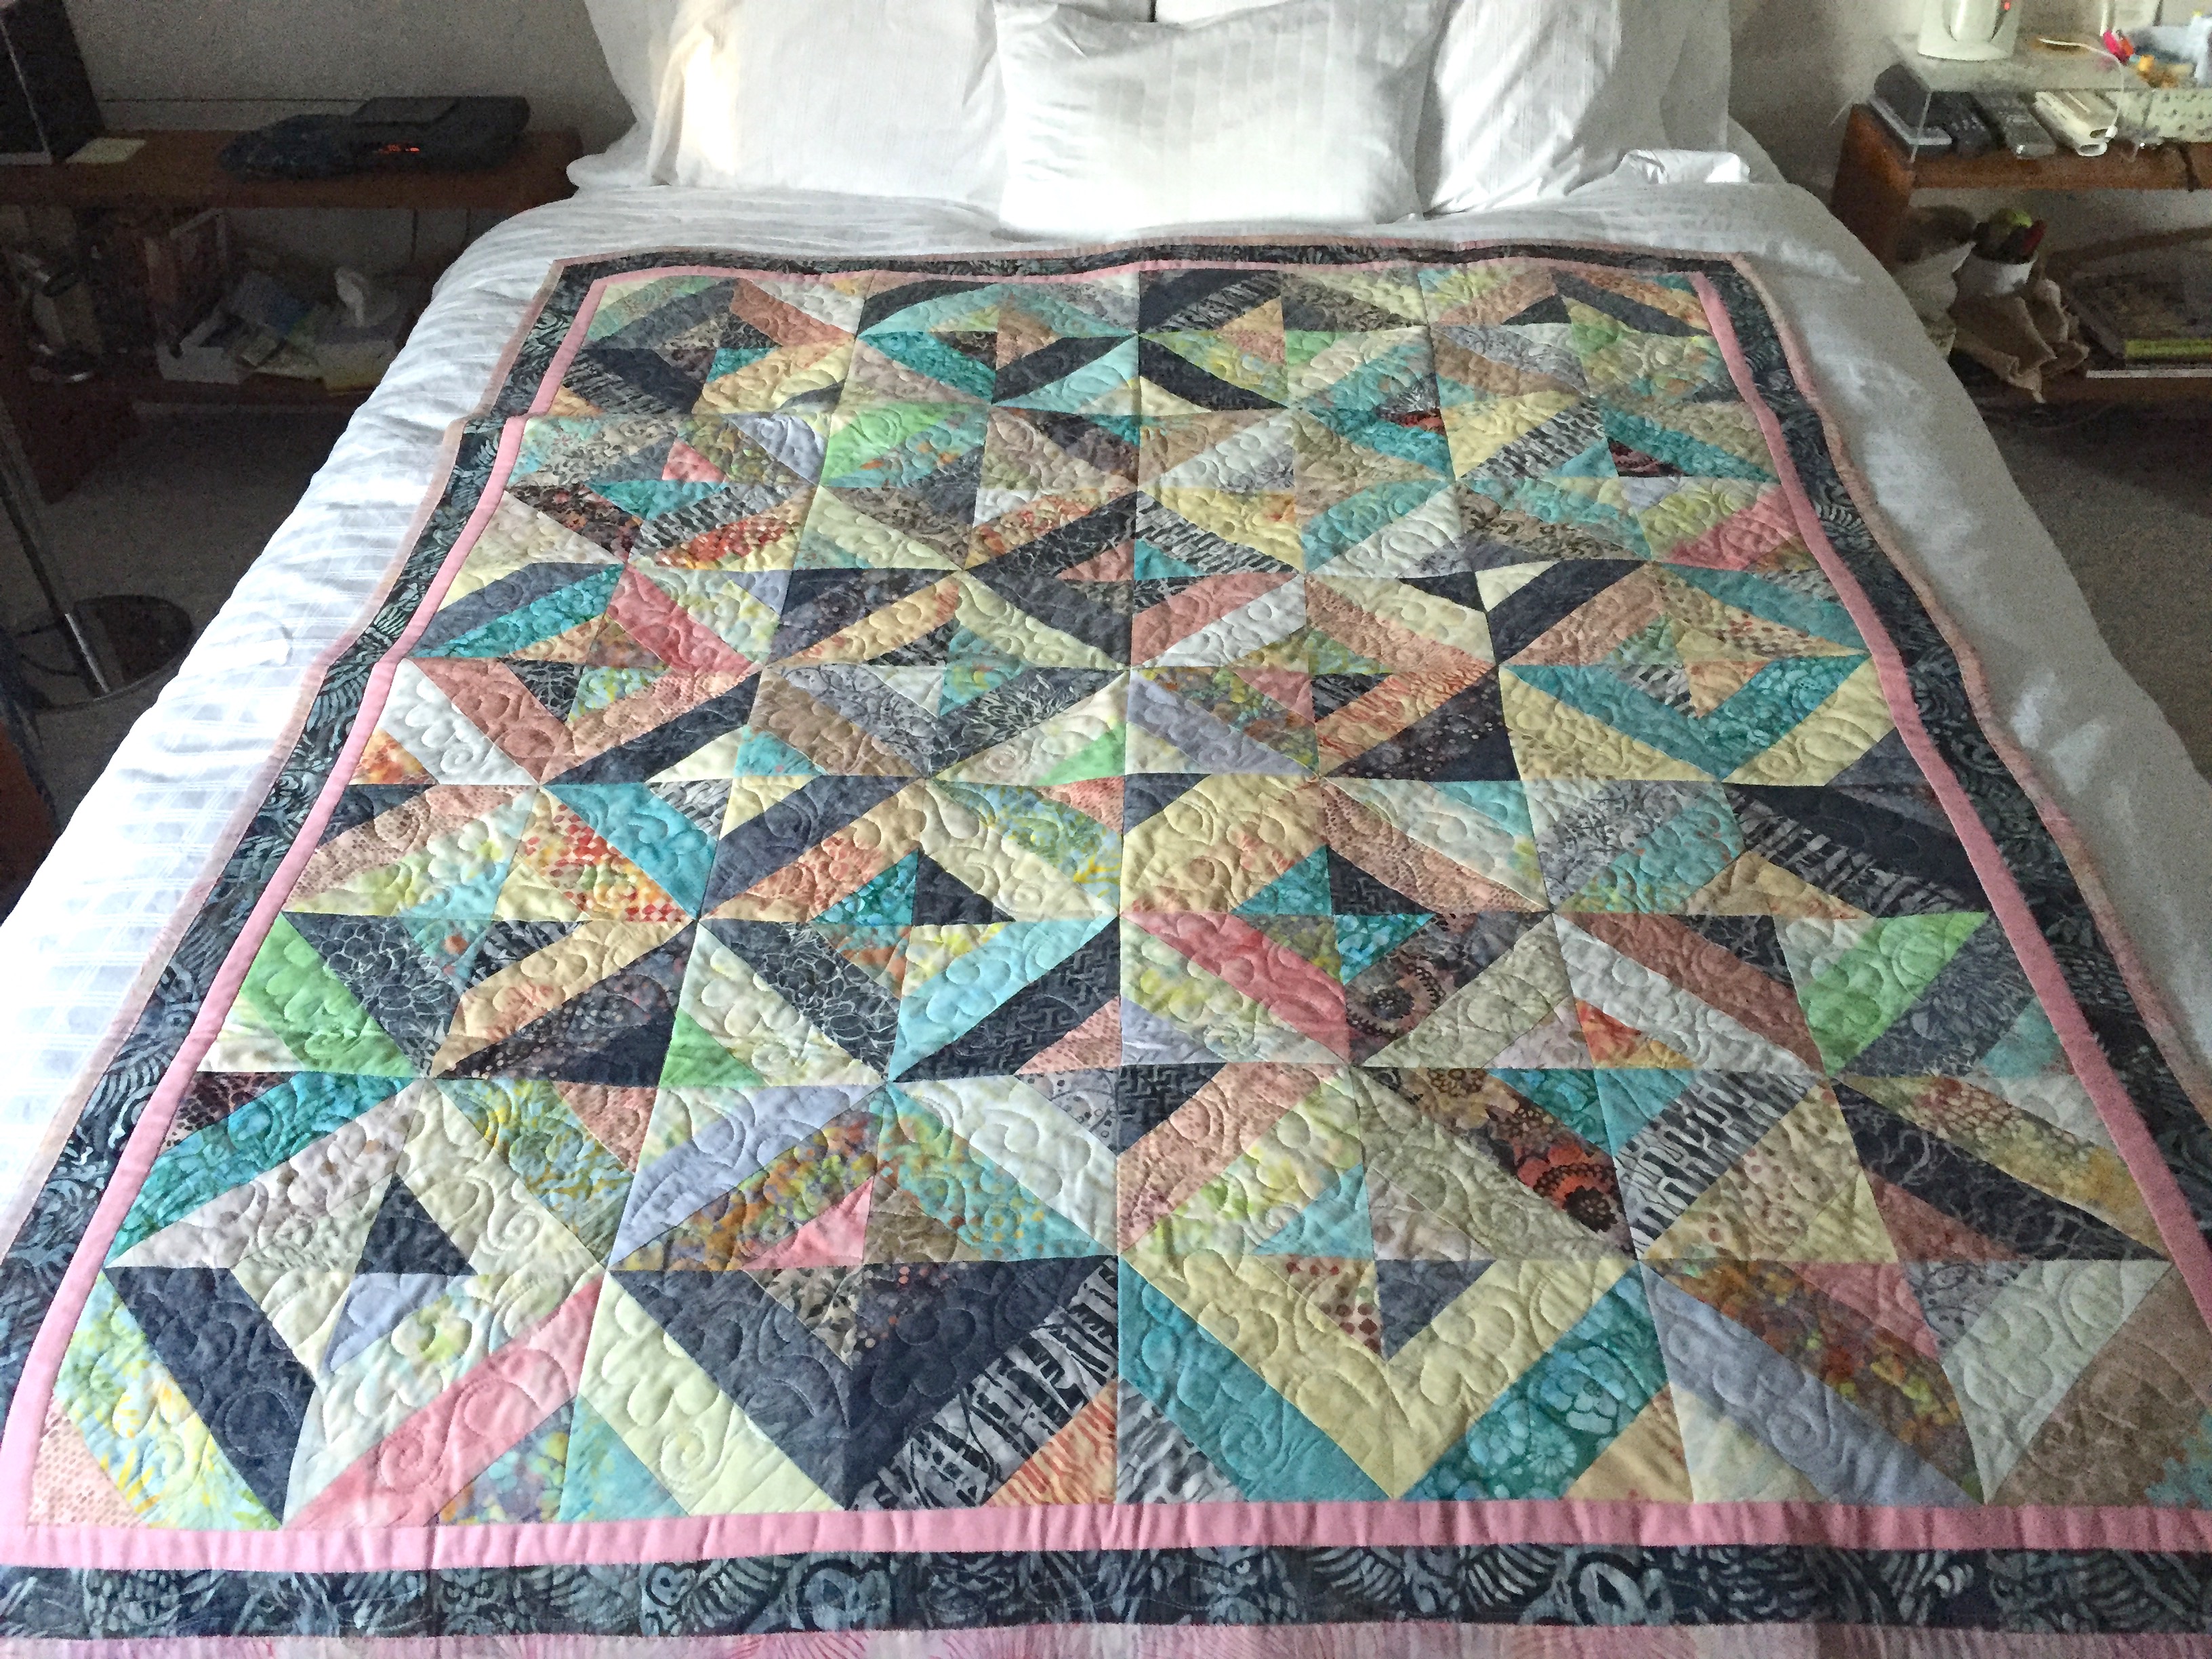
The class came about when I showed Bonnie this jellyroll quilt made from a jellyroll I’d “won” one evening at an event at her shop Sew With Vision. “Good idea for a class she said.” I agreed to do it.

However I had no interest in taking another jellyroll and repeating the quilt for the class so the challenge I set for myself was to create a strip quilt with just two fabrics. I picked out two contrasting fabrics and got to work.

image

I joined pairs of strips – one light, one dark. Cut triangles (8 from each pair of strips), joined pairs of triangles to make 6″ blocks, trimmed them, assembled large blocks from four small blocks alternating colours at the center of the big block.

I’d made five large blocks when I thought I needed a bit of colour to make the quilt work.

image

I inserted a colored center into 3 blocks and stopped there. I finished the remaining blocks today and laid them out on the floor:


image

Not enough colour. So I added a bit more

imageThat’s it. I was going to add sashing but I think any sashing will disrupt the improvisation so I think I will leave well enough alone although I will probably lay out a couple of sashing strips to see how they look.

I’m stopping for now.


Placemats

IMG_7062

Just finished the set of eight placemats for Andrea’s kitchen. I don’t have a picture of her kitchen but the tile floor is grey/white, cupboards are dark brown, countertops also white/grey granite, and there’s a dark red sofa in the family room. Hence my colour selection.

This set of placemats used eight fat quarters (a fat quarter is half of a 1/2 m of fabric rather than 1/4 m from the width of the fabric). They are stacked and cut into pieces (the pieces from each fabric are all the same size and shape), then you mix and match to create the placemat. Very efficient use of fabric – very little left over.

Finished dimensions: 17″ x 13″ – a good size for a placemat. I used a brown/brown printed fabric for the reverse.

I could have completed the placemats with a binding but used a “pillowcase” finish instead – stitched the quilt sandwich in the following way: back fabric wrong side up, pieced top fabric right side up, batting. The edge stitching starts part way along one long side, and edge side, second long side, second edge side, and finally part way on the other end of the first side leaving an opening to turn the placemat right side out. The small opening (~ 4″) is blind stitched closed. I just like the look of the placemats unbound.

The quilting: stitch in the ditch along all seams both horizontal and vertical; very quickly done.

Diagonal Diamonds Quilt

IMG_7012

Quilt Top

Finally finished. I started this quilt about ten days before heading to Peru – got 20 blocks sewn before I departed. I resumed sewing the top when I got back. The fabric is Cockatiel Bali Pops by Hoffman Fabrics which I’d got as a “gift” the night I attended an event at Sew With Vision (the local Pfaff / Husqvarna dealer) in September. Although on the surface the construction technique seems simple enough all of the blocks edges are on the bias so it takes a lot of attention to match the seams when joining blocks.

Because these are not colours I’d usually use I wasn’t sure what to do about borders and backing. In the end I chose to highlight the peach tones and the dark grey on the top, and bring out the lighter greys on the back. The inserted strip is constructed from the small pieces of leftovers – fortunately there was enough to create the strip length I needed.

IMG_7016

Quilt Back

Final dimensions: 50″ X 60″

“Whale Watching” Now Hung

Having the piece stretched on a wooden frame was a good idea. The framers were able to pull it flat – the “bubbling” disappeared. When I got the piece home I added a muslin backing with a label. Then I walked around the house looking for a place to hang it. It ended in my living room replacing “Asparagus Field” which now hangs in the spare room. 

I’m pleased with how the finished piece turned out.

Ideas – Next Art Quilt

I’ve been wanting to do a floral piece for a while now. The Cana lilies on my back deck are gorgeous again this year and against a dark foliage background would be striking.

Or a rendering of a phalanopsis also against a dark background would be eye catching.

And my Echineacia have been wonderful again this year (even if I can’t get them to return in the pot). And this one has an insect visitor!

I took this photo of the three pilots “wind waiting” many years ago and it’s an art quilt asking to be made.

And I’ve have this dark image of the cloud funnel we saw from Kirk Hill in Parrsboro with Blomidon across the bay and the glider in a heap on the ground barely visible – it would also make an interesting piece.

I have a lot of great photos that would lend themselves to textile art pieces – choising which to work on next is the challenge!

Whale Watching II

Over the weekend I managed to do a lot on this art quilt – last week I had completed the piecing of the foreground, but there remained all the stitching to be done. I worked at a bit on Saturday and again on Sunday keeping in mind that “less is more”! Then I applied the narrow inner white border topped by the dark blue wide outer border – the mitres at the corners were as close to perfect as I could get them. However, as carefully as I was attempting to keep everything flat, I ended up with a bit of a buckle in the piece itself.

Before taking both borders off and starting over, I decided to take the piece to the framing shop for their thoughts on how I might deal with the problem. They suggested I could stretch it on a frame which would definitely help smooth the piece out – so that’s what I’ve decided to do. When I get the piece back from the framers, I’ll add a backing and a label (by hand, of course). I can’t put an embroidered signature on the front of the work because the piecing is too dense for the close stitching of a machine embroidery (I broke two needles applying the borders at the corners) – so a label on the back it will have to be!
I should have the art piece back in two weeks.

Now on to something new.

Whale Watching

IMG_5683

Just finished piecing the foreground for this wall art quilt. At the top you see the photographic collage built from three photos and an insertion to widen the panorama; below is the quilt. It took a lot of trial and error to establish the “layers” in the foreground – green fabrics that look like grass, shrubs, etc. is impossible to find – I’ve had to hint at the different vegetation by using various green fabrics in my stash. Once the stitching is done, the whole foreground will blend better.

So next comes the stitching to make sure each piece of fabric is permanently attached, and to represent the horizontal flow of the vegetation. Once that is all done, I still have to figure out how to add piping (probably in white) as mat; and finally a wide binding (I’m thinking 2″) to frame the picture. I picked up some dark fabric a couple of weeks ago which may work well. But I think I still want to audition something else — so a trip to Atlantic Fabrics early this coming week to see if there I can’t find something better for the job.