Celtic Knots Quilt

IMG_2938

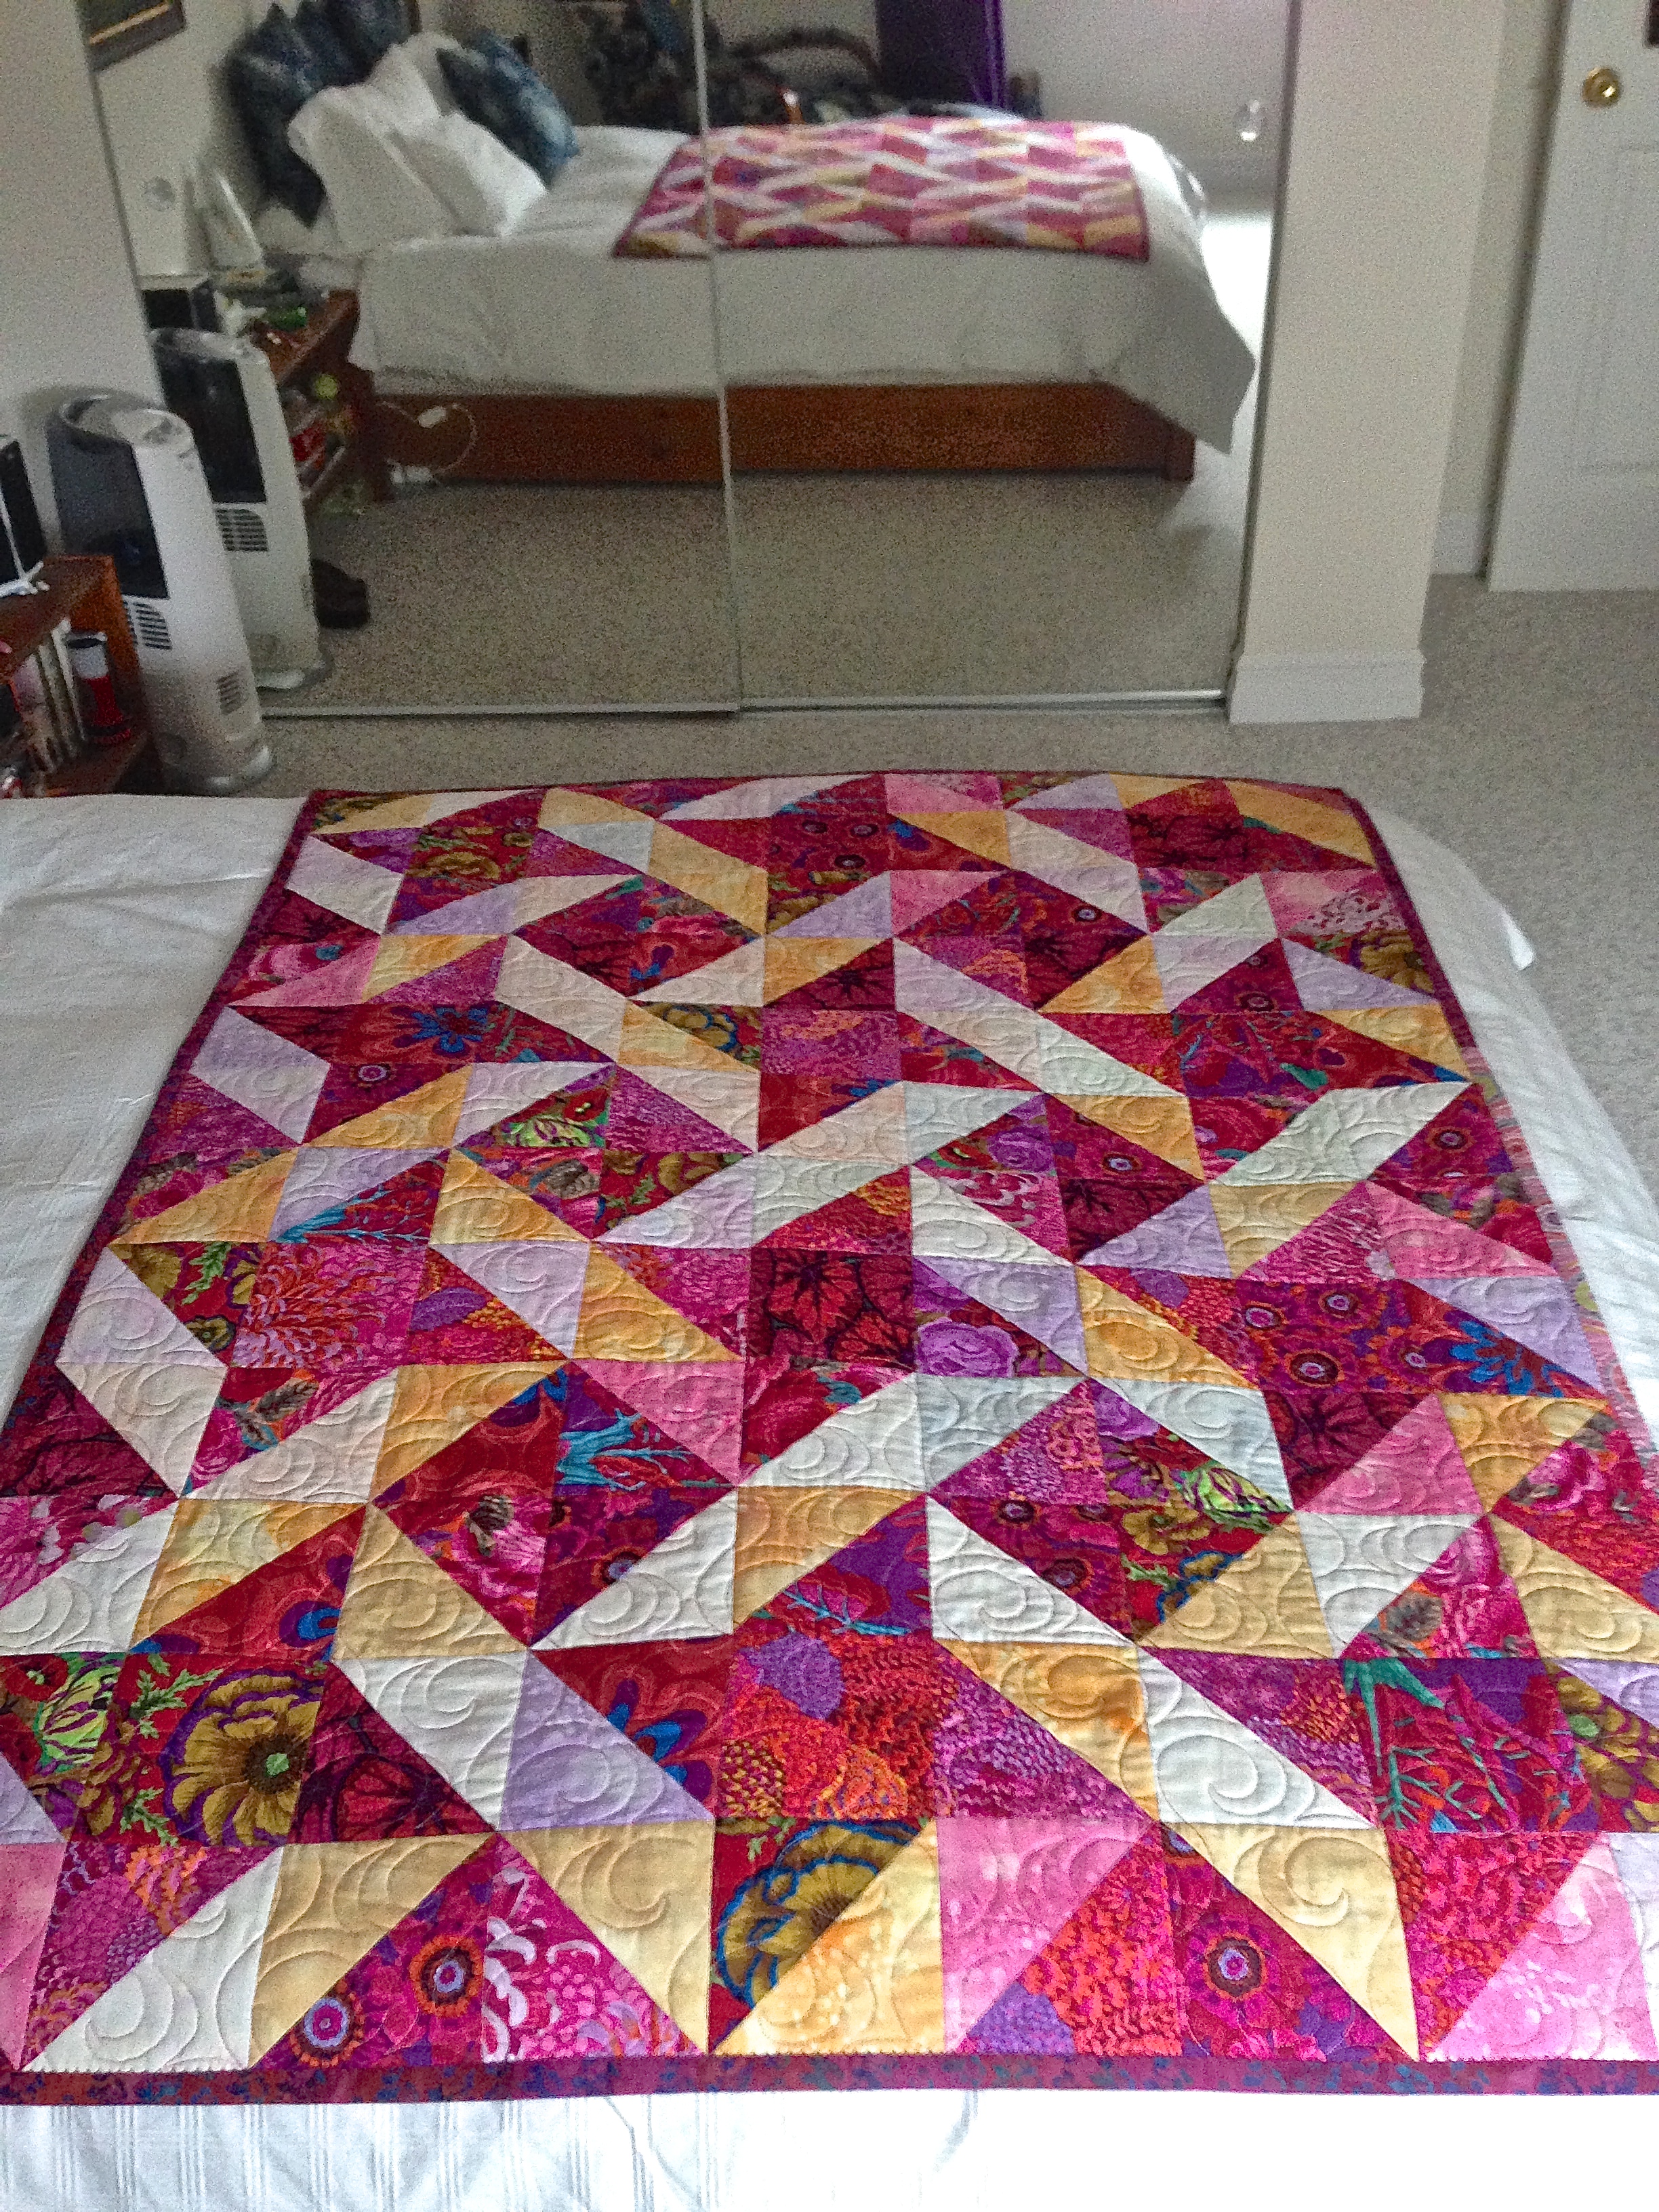
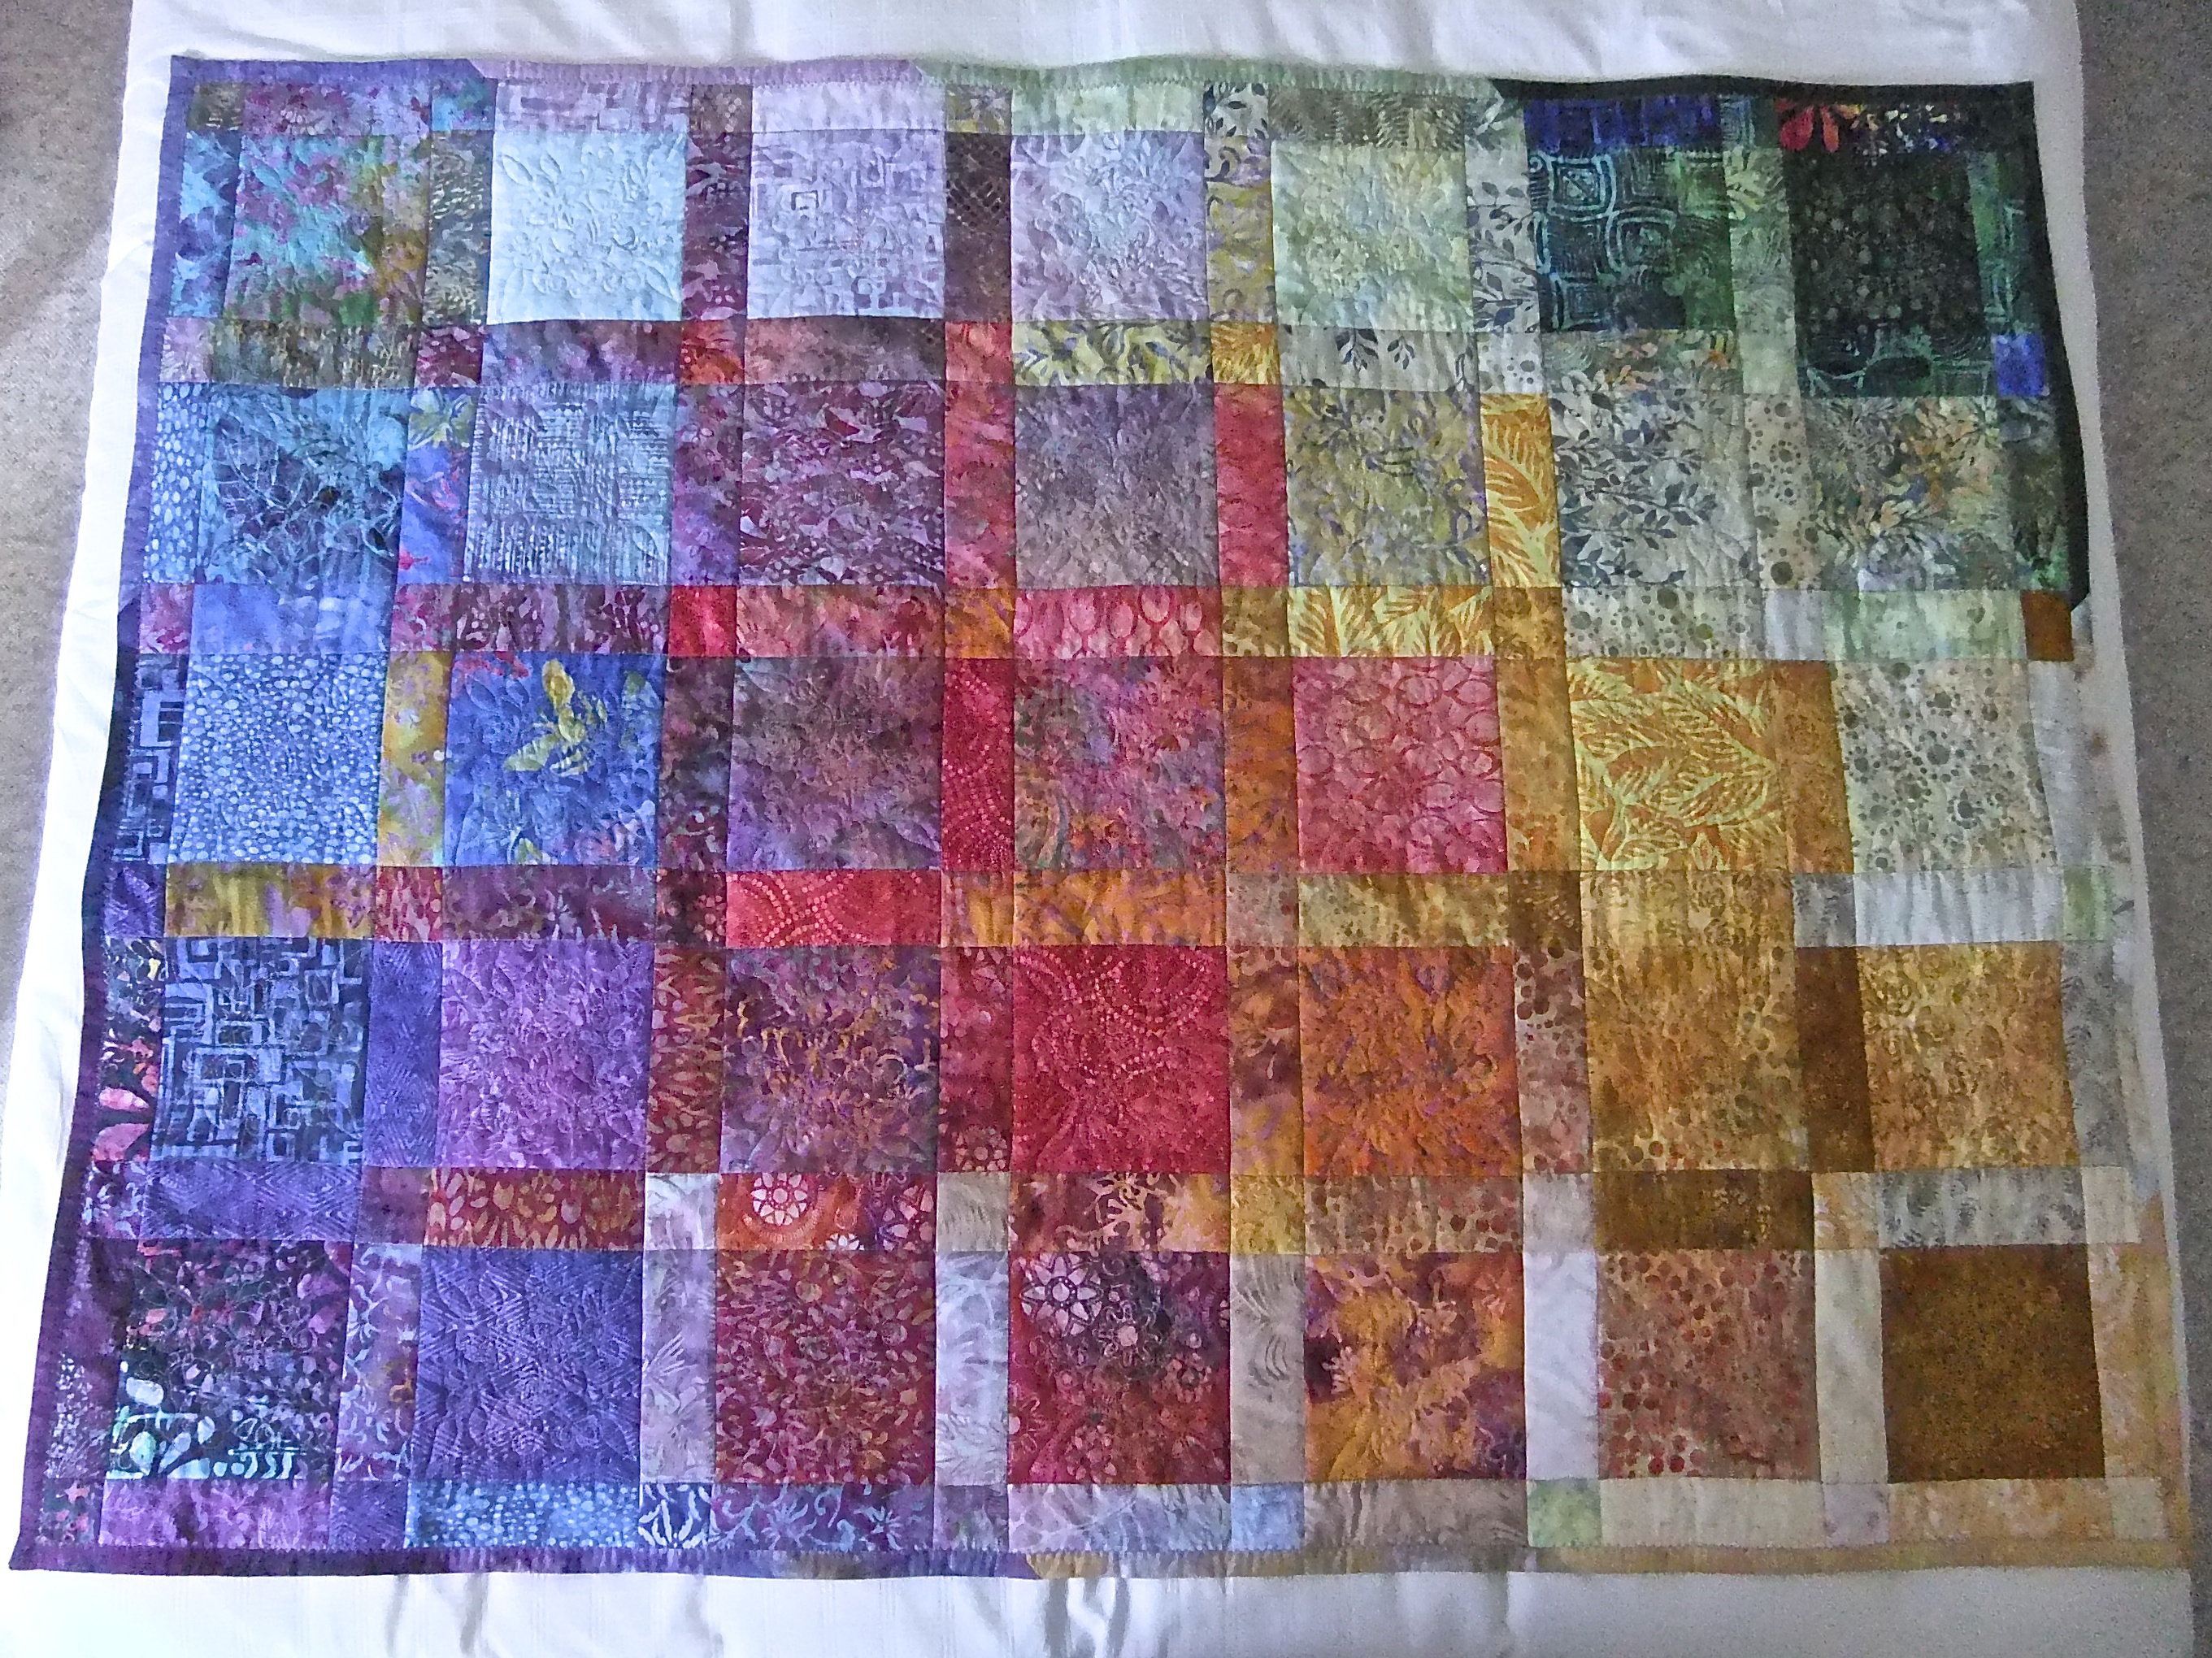
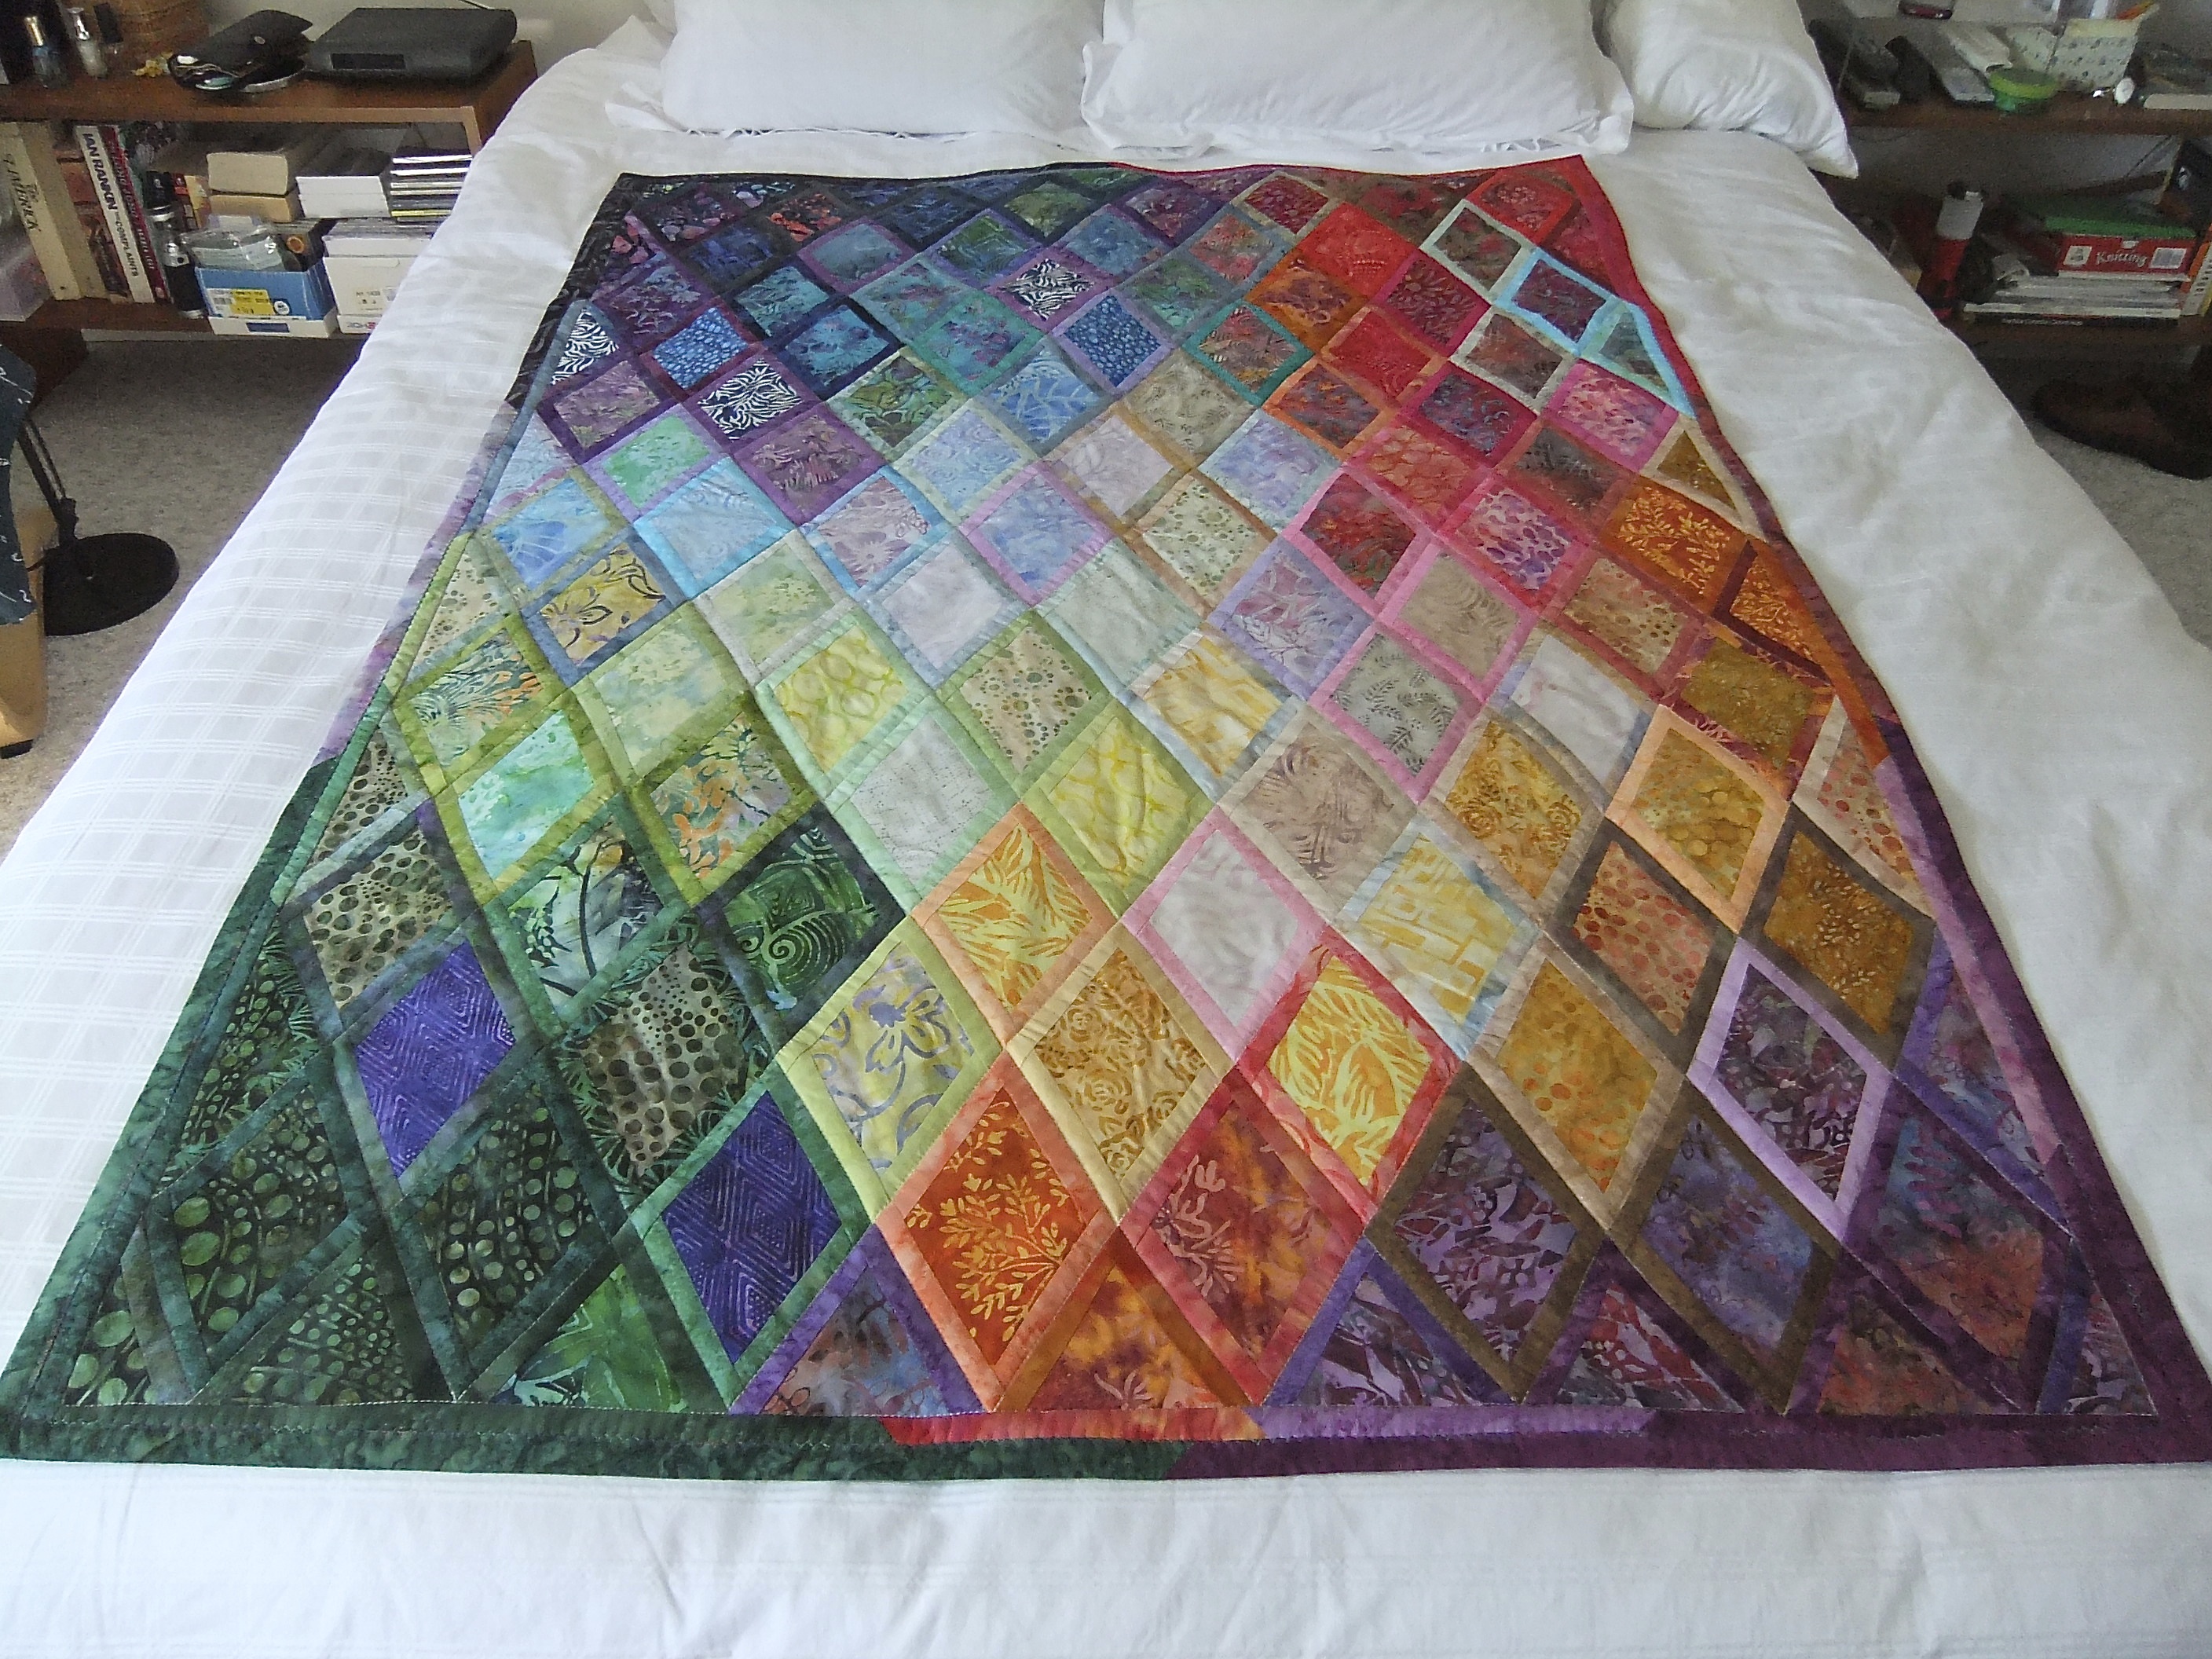
Finished this quilt yesterday. I had a jellyroll of a set of batik strips (Moda) which I’ve had in my stash for a while – when I came across a photo of a quilt like this I thought it a good way to use up that roll. Easy to construct, essentially, the small blocks are a variant of a log cabin, the joining sashing includes blocks of the print fabric and then the outer sashing is solid (although I could have added in small blocks to join up the big squares. In any case, the real challenge was what to do about quilting this quilt because the large blocks were 14″ x 14″ and the largest design I can create in my Grand Dream Hoop is 13.5″ x 13.5″. I set up a design that consisted of 4 smaller elements (there are two difficulties using the large turnable hoop – 1. the design shouldn’t cross over the middle, it won’t likely align when the hoop is turned, and 2. because of the size and weight of the quilt there is drag on this large hoop and so the two sides are never perfectly aligned).

Celtic Knots

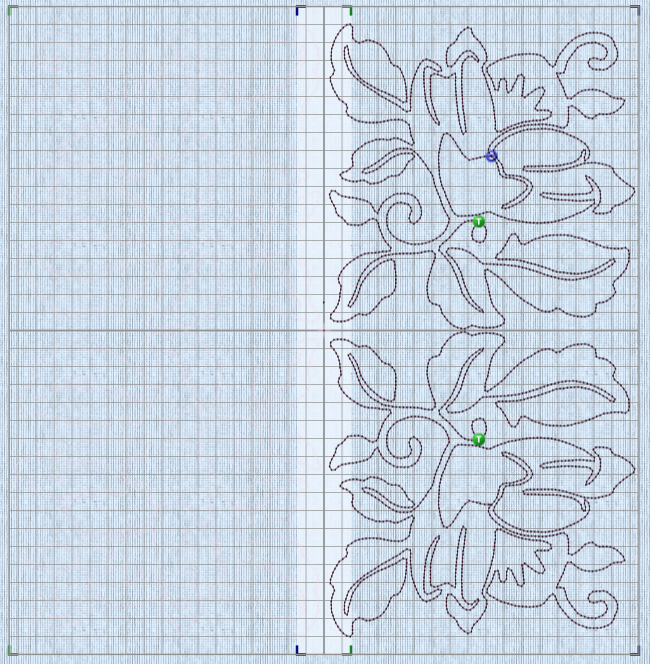
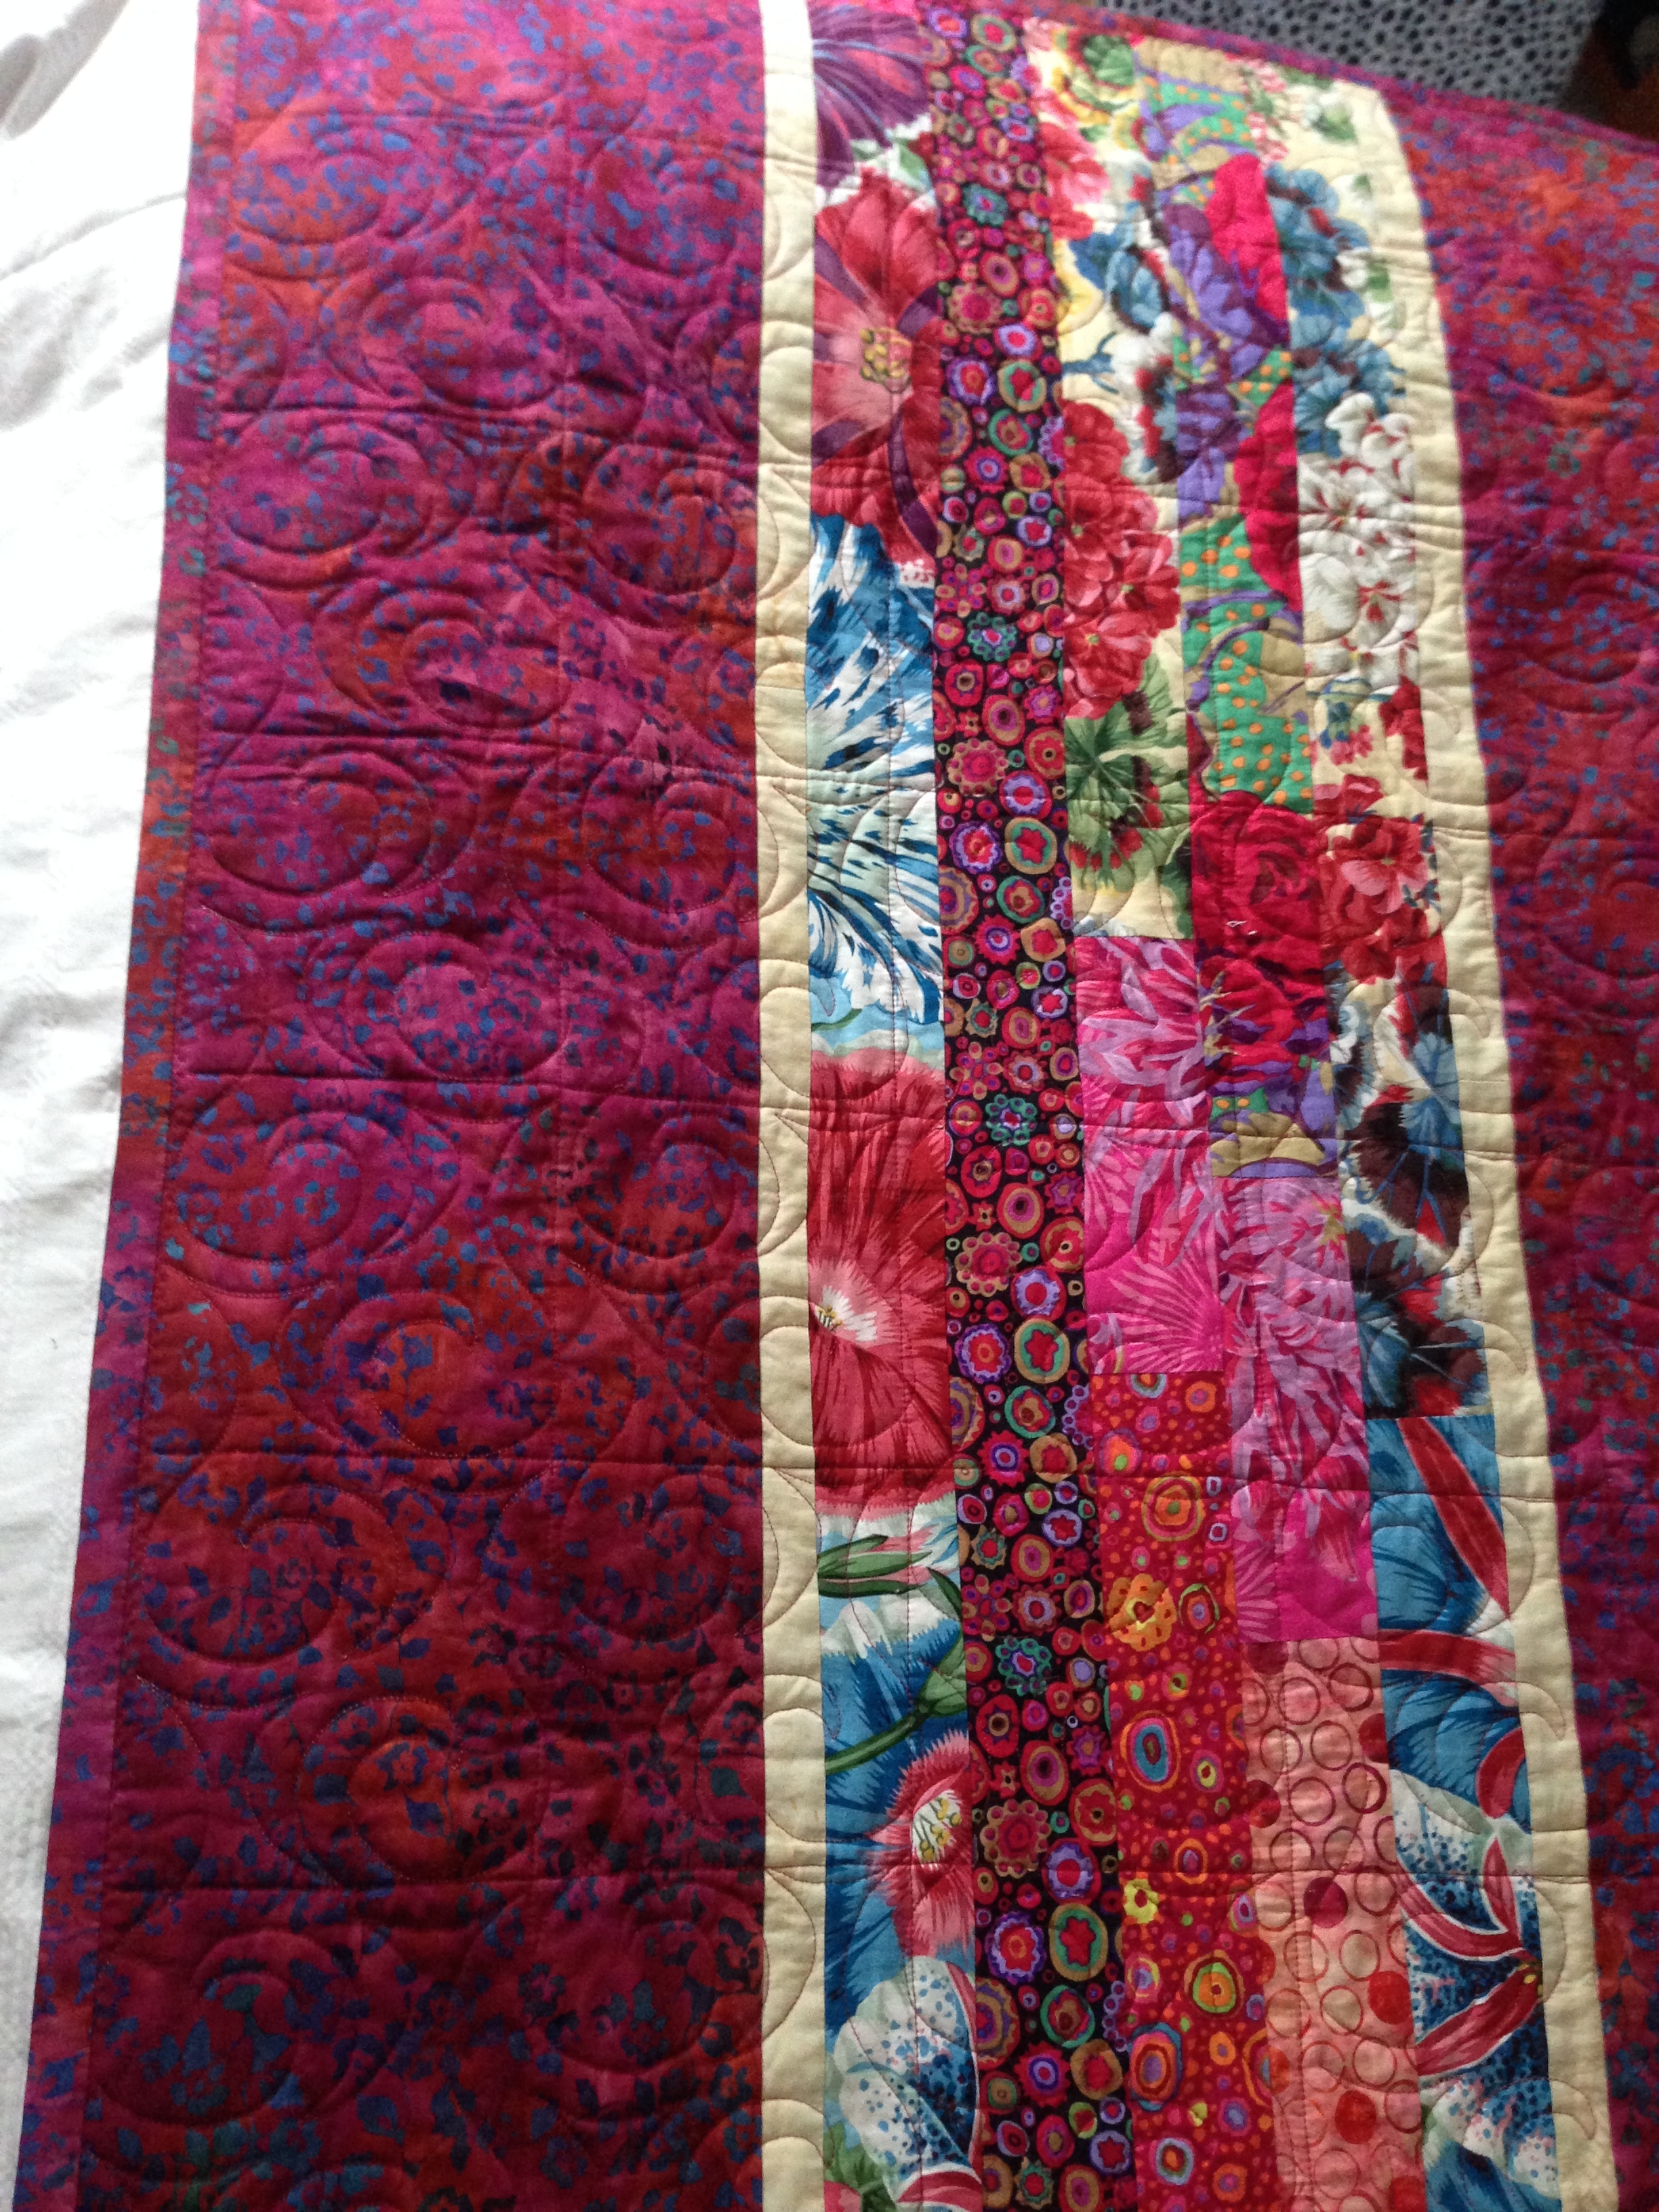
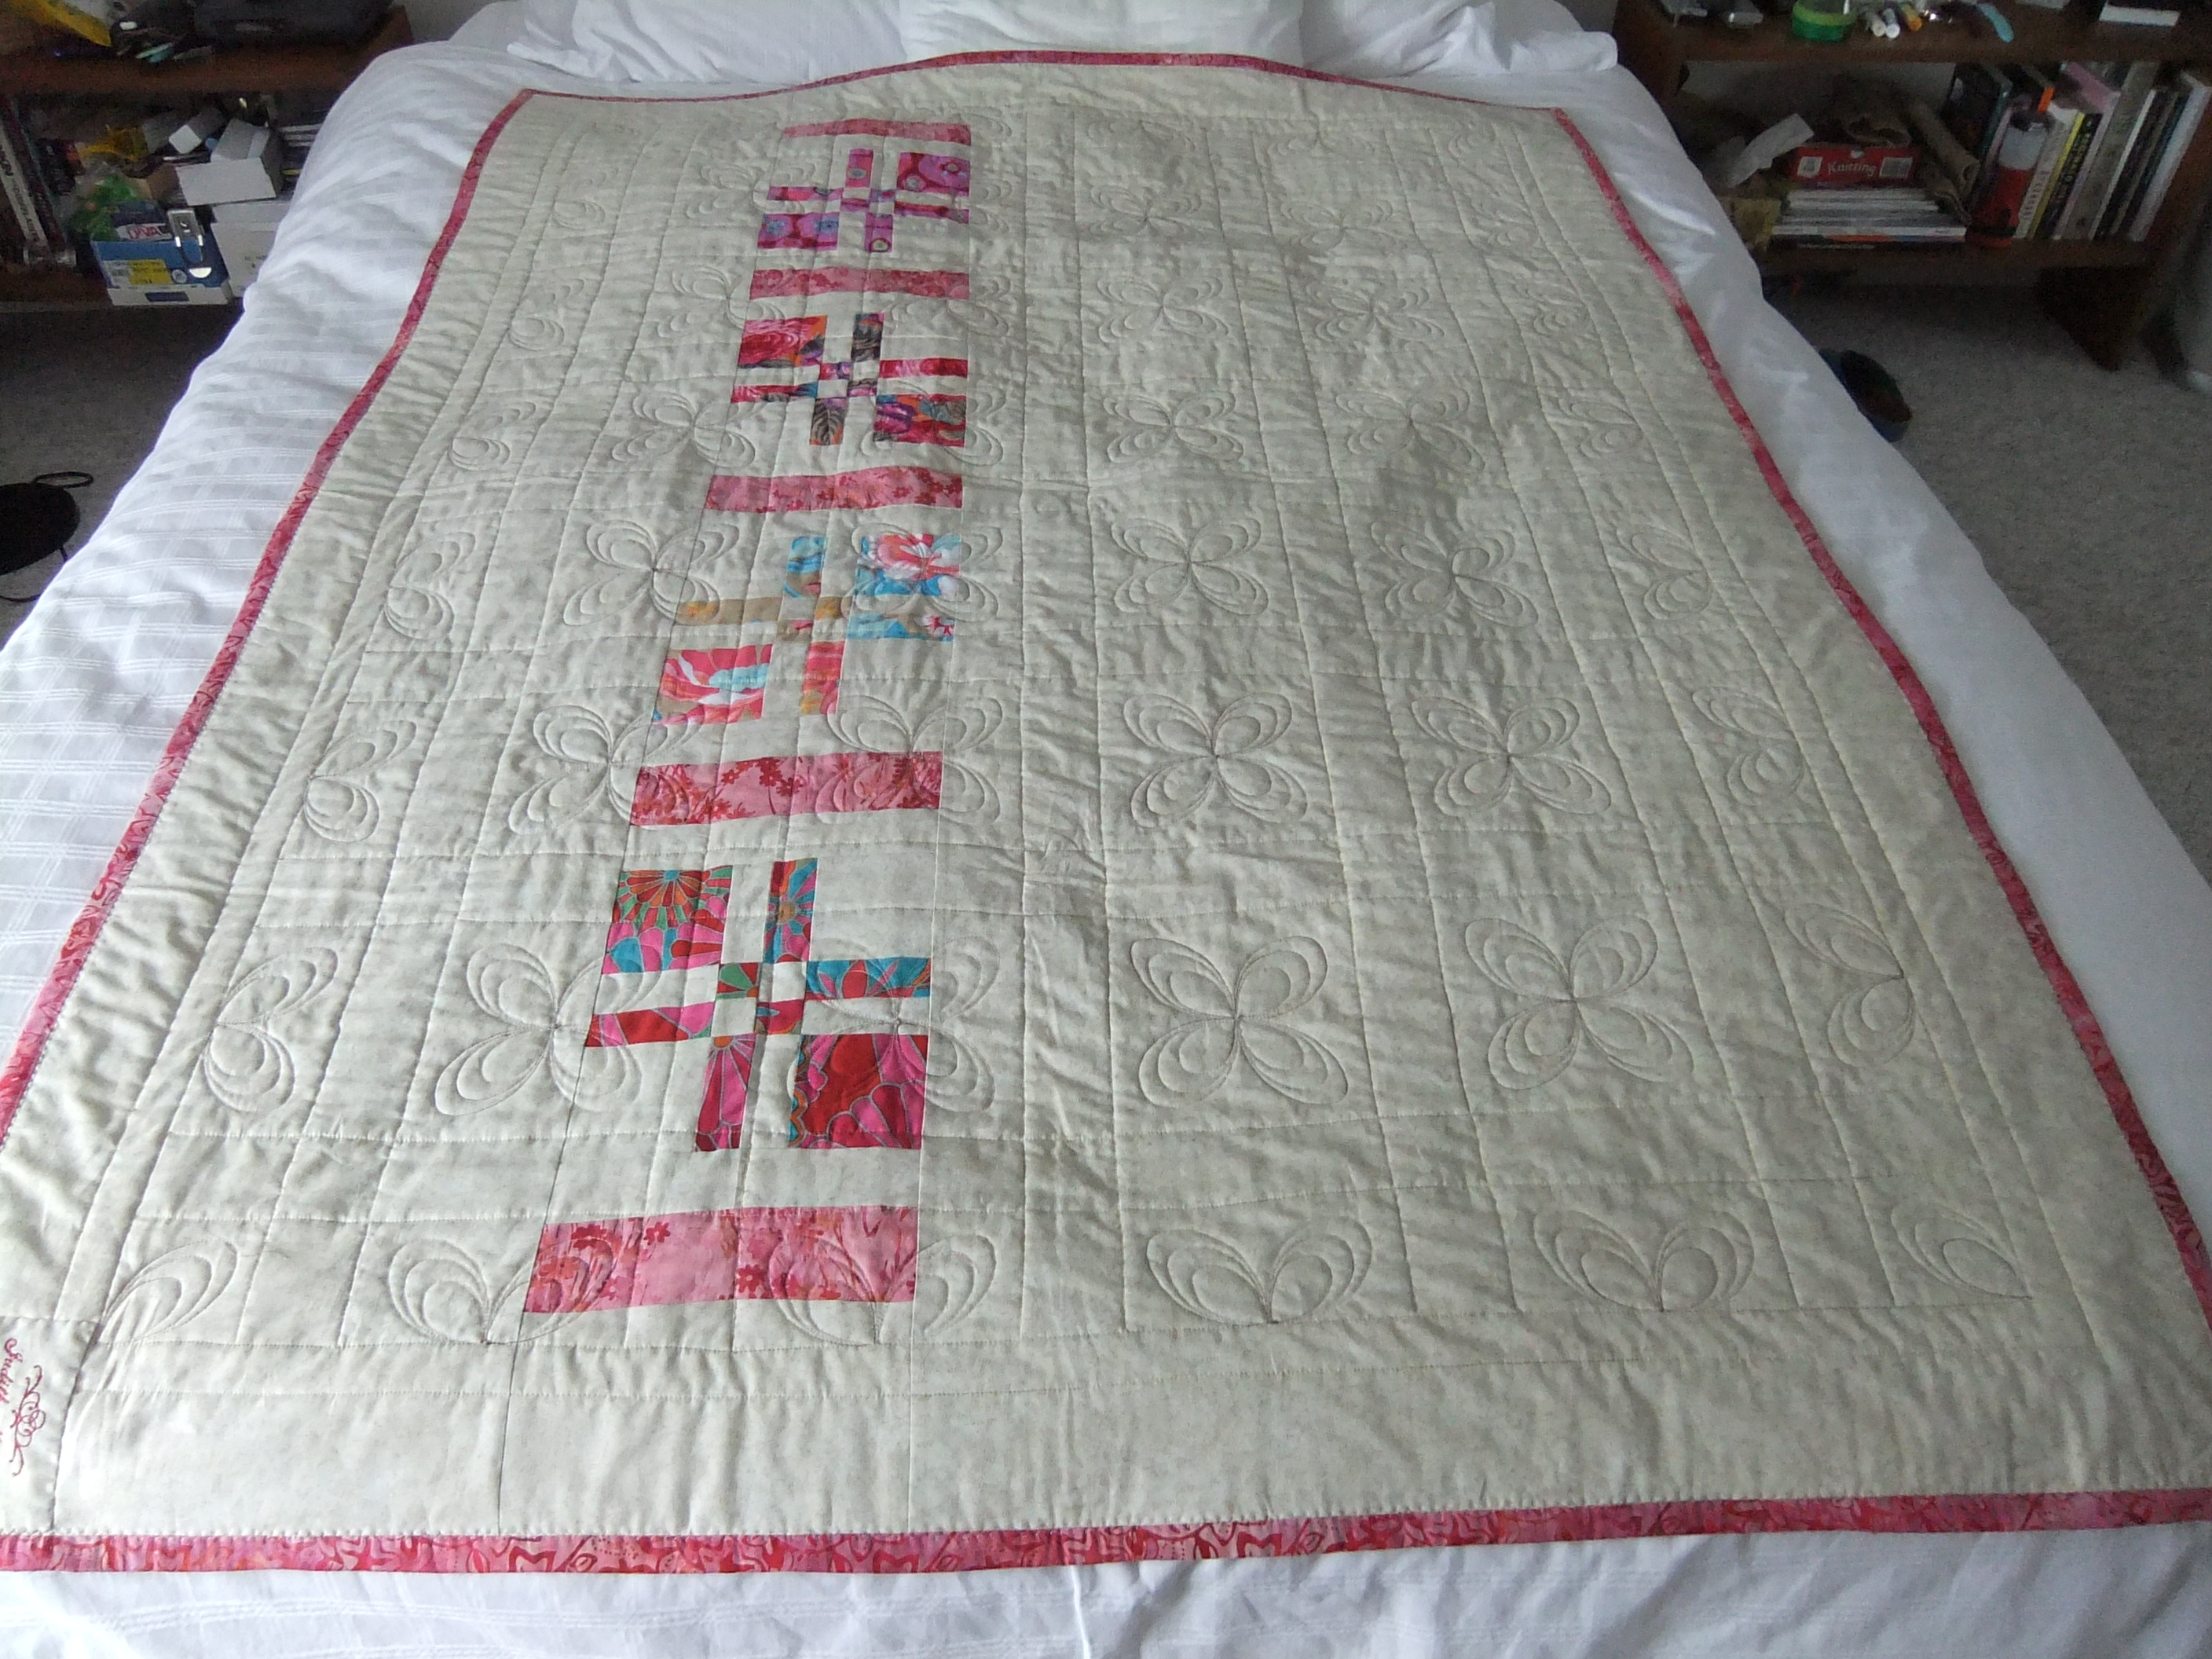
The left side of the design replicates the right side. I wanted the design to embroider the background center block, not leave it empty. For the sashing I created a design using one of the machine quilting stitches and fit it within the 360 x 200 hoop so that it would fill the length of the sashing pieces, and then a small single-run flower for the corners of the sashing.

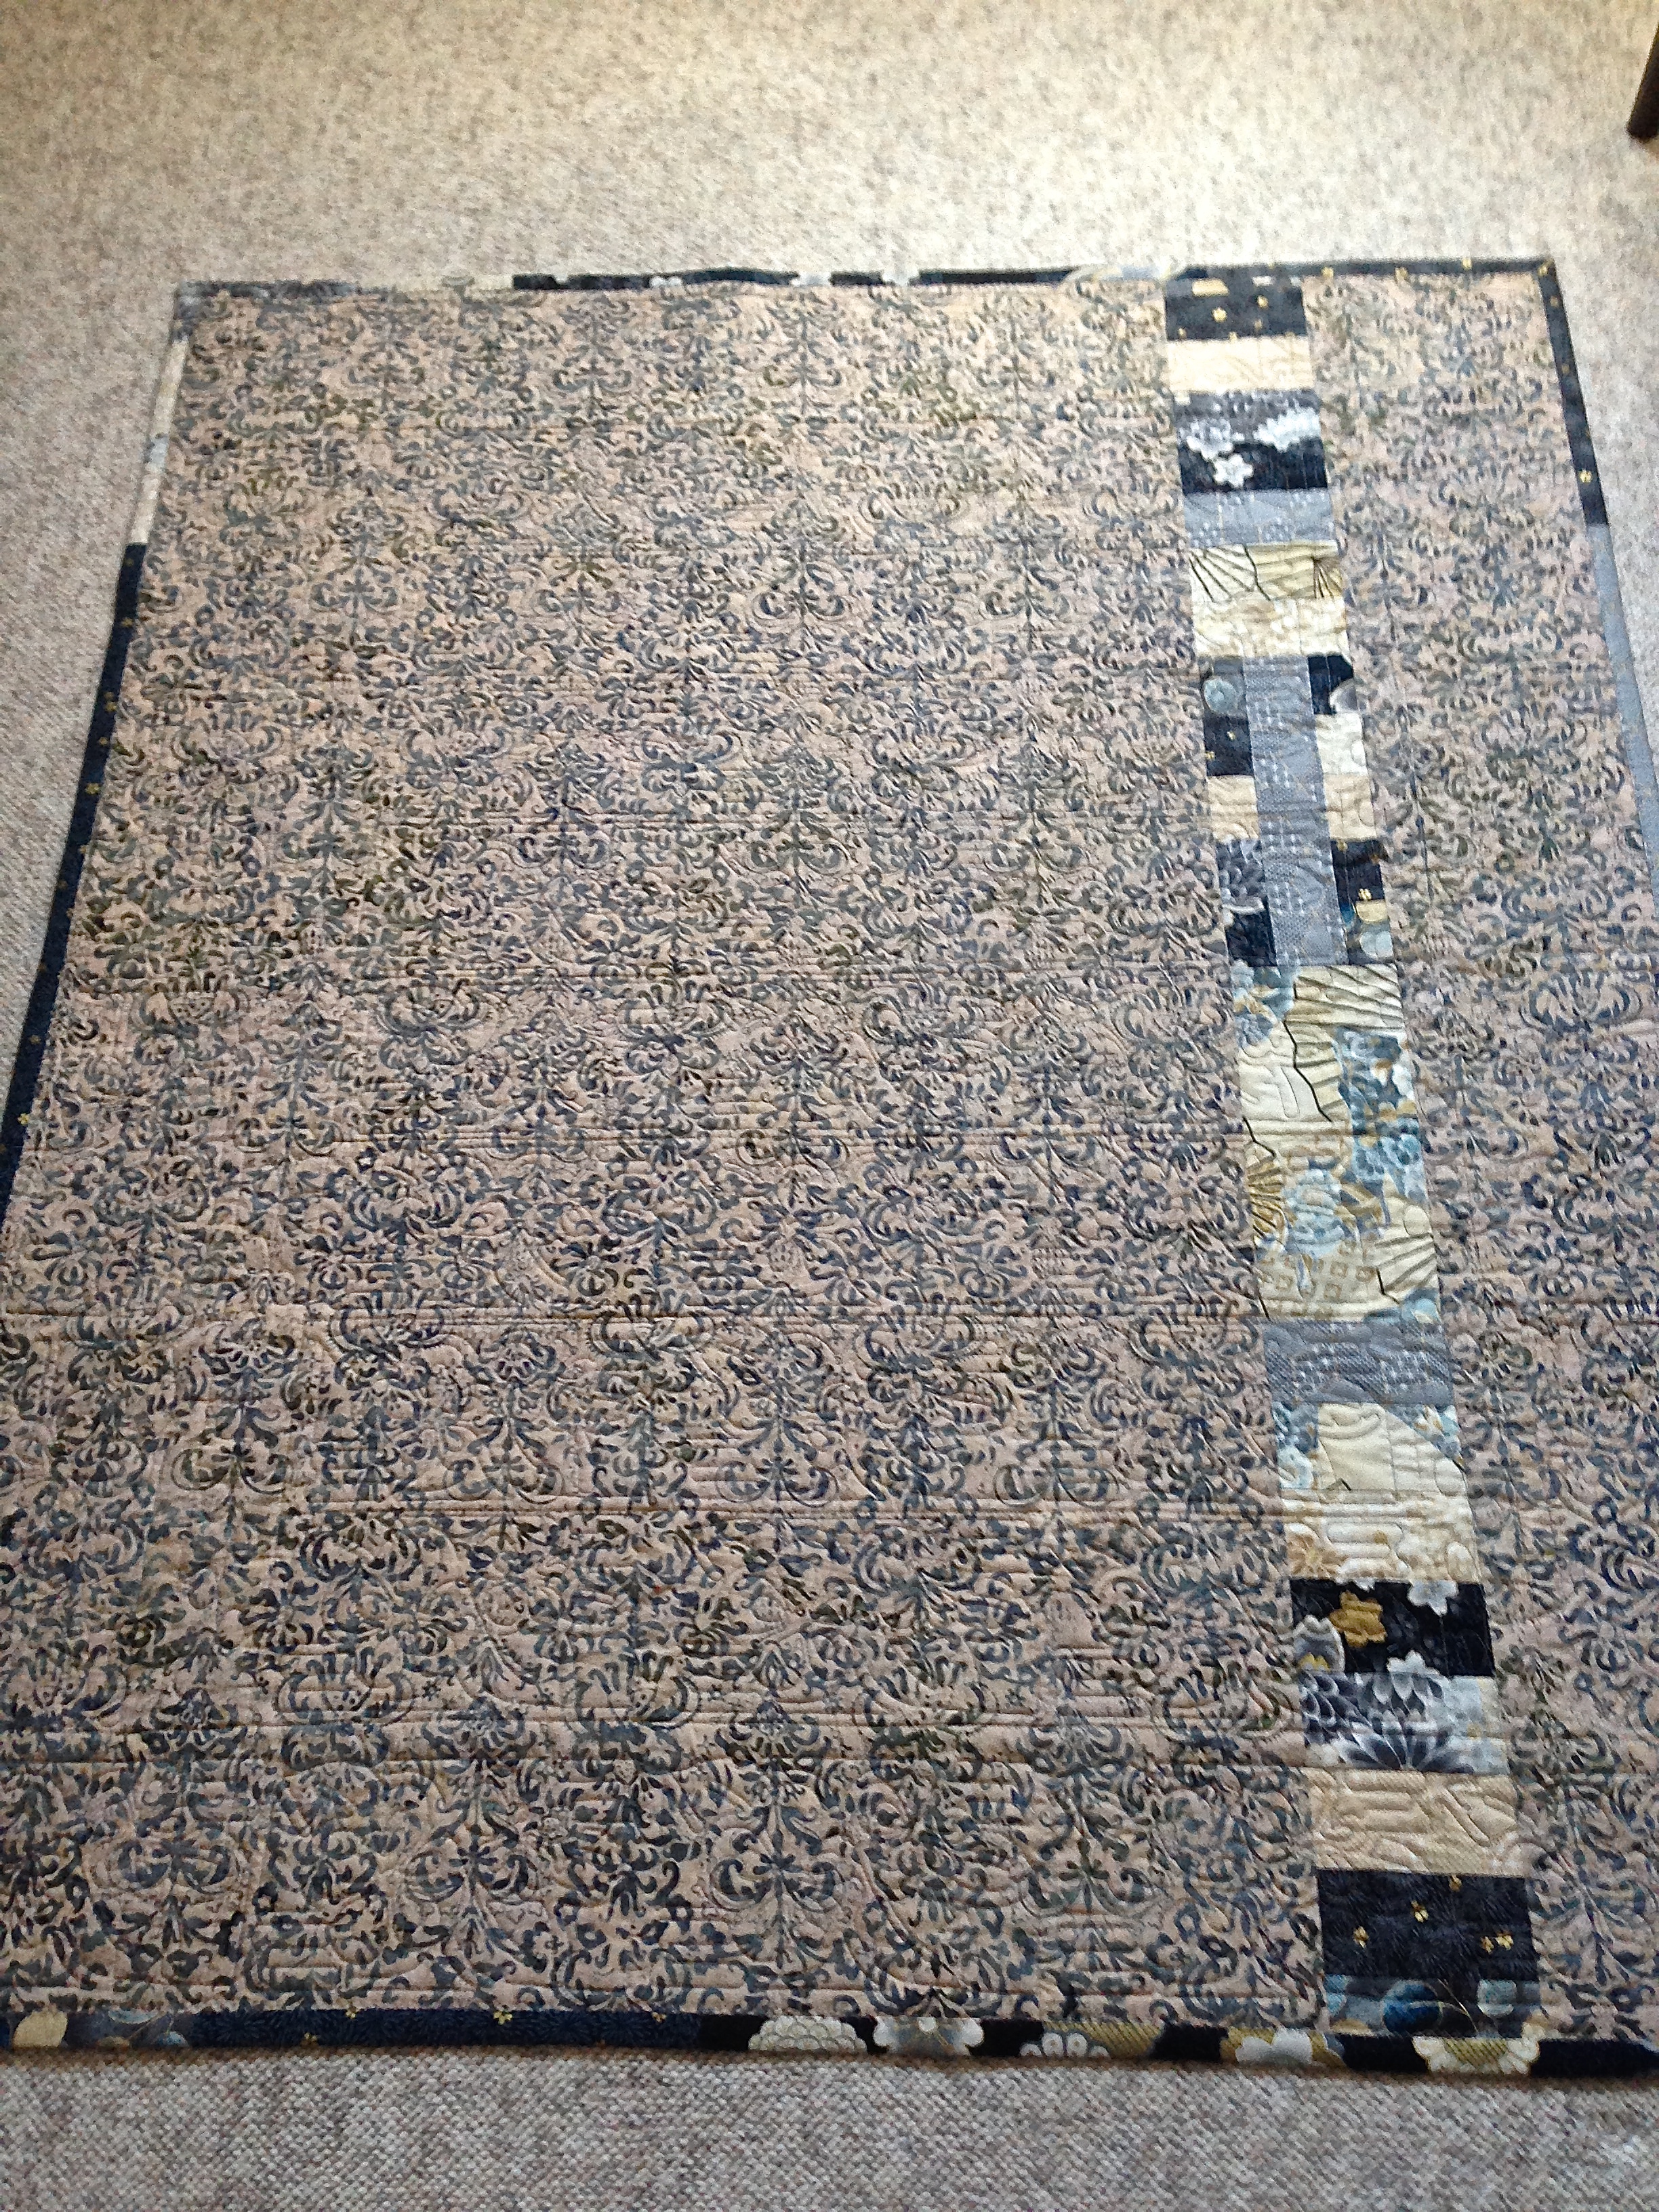
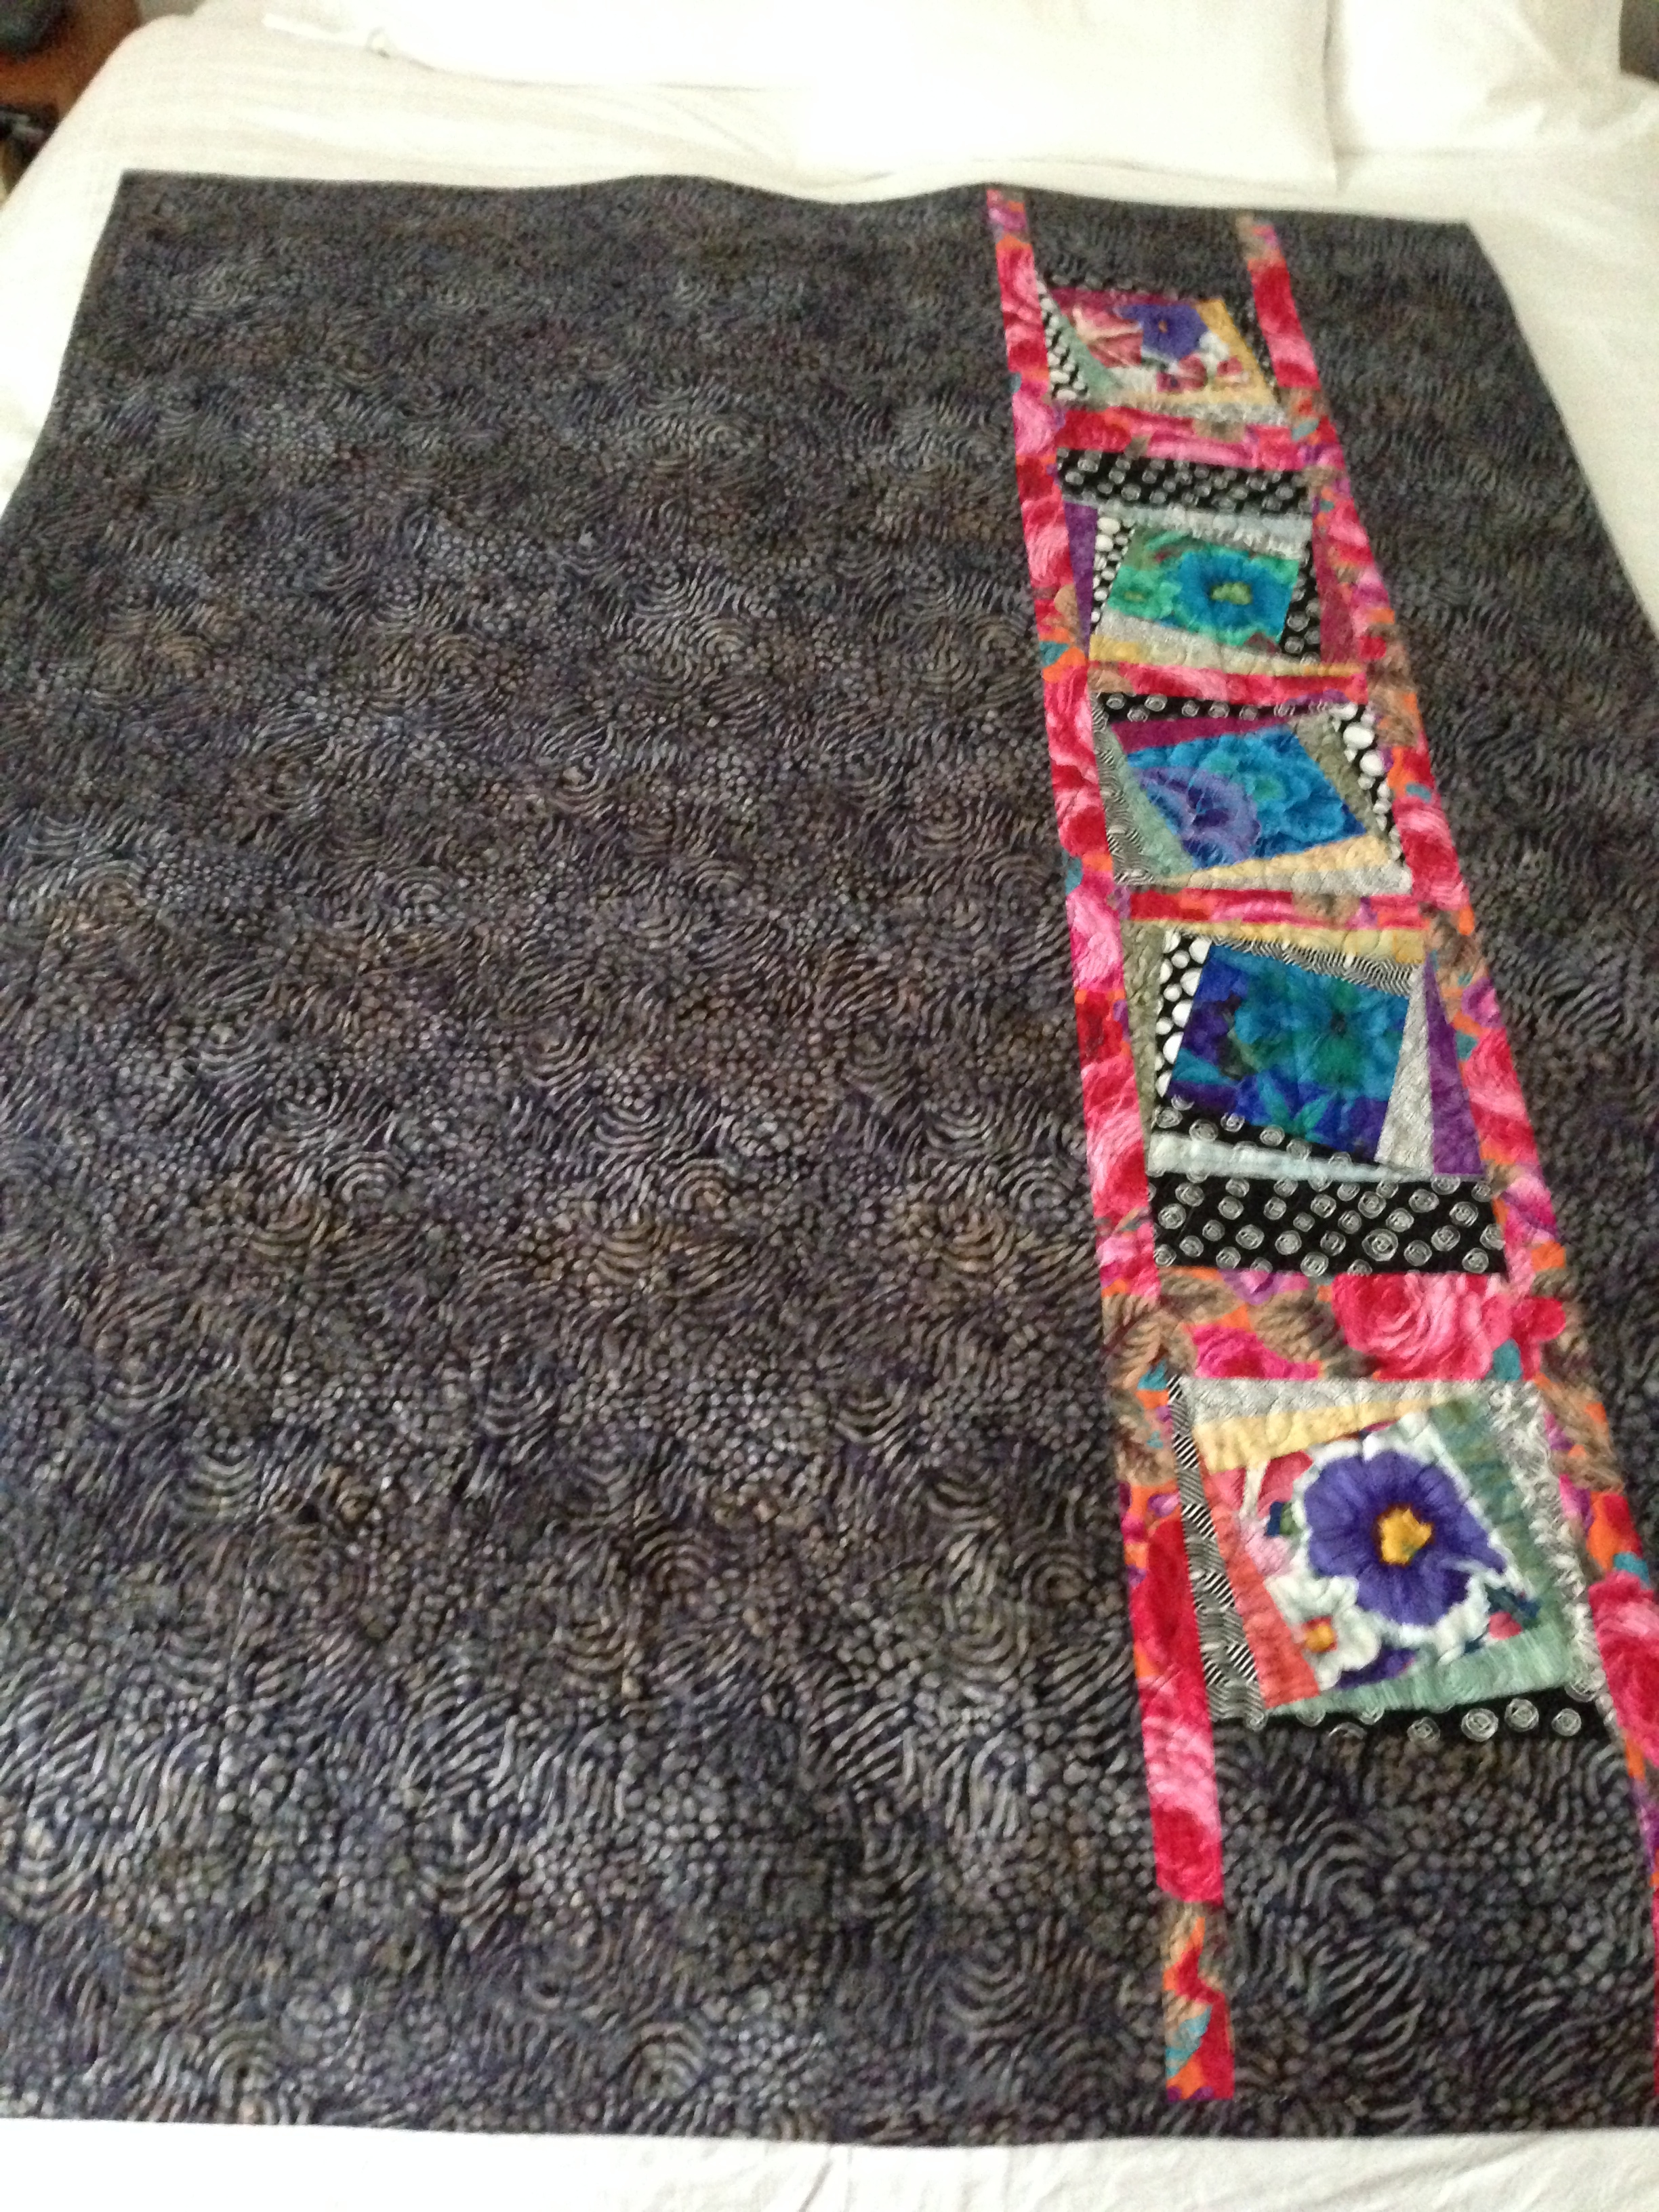
Here’s the quilt back:

IMG_2940

A pieced strip using the small amount of leftovers from the strips plus a 2 1/2″ strip of some fabrics that I thought blended with the original fabrics.

The binding used six strips from the original roll.


Midnight Sun

IMG_2894

There’s a story behind this wall hanging. I first saw a photo for a wall hanging kit by Lonni Rossi: Sunrise in the Garden in the Keepsake Quilting Catalogue:
sunrise in the garden

I was going to buy it except the kit would have cost me over $100 by the time I paid exchange, duty and shipping! I thought that was a bit expensive for the amount of fabric I would be getting. I could see the hanging would be simple to do – wide strips of 7 fabrics with a circle appliqué. I cut out the picture and stuck it in my collection of interesting possibilities but never expected to actually make it.

Until Monday, when I was in my local fabric shop and came across a collection of black/white/red fabrics (Black and White and Current 5) and immediately saw some possibilities. I bought small quantities of each of five of the collection (there are 14 fabrics in the whole collection), came home and quickly created the piece. I pieced the top, added quilt batting and did a bit of free motion quilting to attach the batting to the top, not a lot, though. I did a “grass” stitch around the circle to finish it off.

I wanted to know a bit more about the designer Lonni Rossi, so I googled her. I found instructions for Enchantment at Midnight on her website.

Enchantment at MidnightSo if you happen across some fabrics that would work you can download instructions for making the wall hanging using the link above. I didn’t need instructions for the hanging, but I found Rossi’s instructions for doing a “blind binding” useful. That’s how I chose to finish my hanging:

IMG_2899

Rossi suggested 3 1/2″ strips for the binding – I had already cut 2 1/2″ strips for a conventional binding, so that’s what I used. Worked out fine. I added a label this morning to the back of the hanging – it’s not my design, although it’s my interpretation of it so I didn’t put my name on the front.

One other thing – I slipped a 4″ piece of foam core board into the bottom of the quilt before completing the backing to keep the corners from curling and to add a bit of weight. It made hand stitching the binding a bit difficult but not impossible.

All in all, I though the hanging turned out surprisingly well.


Satsuki Quilt

IMG_2891 I bought a Kauffman “Japanese” fat quarter bundle called “Atmosphere from Craftsy – I don’t usually buy quilt kits – I prefer to improvise but the colours in this fabric collection looked as if they would blend with my new bedroom chair (which they did). The quilt is simple, long wide strips for the centre panel with short strips to finish the “row” – the rows are alternated. The point was to showcase the colour gradation from one end of the centre portion of the quilt to the other. The border was pieced from strips of the remaining fabric in the collection. IMG_2892 The back of the quilt uses a batik fabric I happened to have in my stash – the right shades to work with the patterns on the front. I needed to widen the back so I added in a strip using scraps from the Kauffman fabrics. There was barely any of the Satsuki fabric left over (just small pieces of two of the lighter fabrics)! in the hoop I quilted “in the hoop” using a design I created from an image I had. I sized it to fit within the width of the central panel strips, using three repeats for each of the eight panels. Then I adjusted the size of the embroidery to accommodate the border width and length. I used a Sulky blendable thread which worked with both the light and dark fabrics.

Quilting Without a Pattern I

IMG_2883

Here is the first of the Joe Cunningham quilts – he calls the idea “The Three Crazy Sisters“. The quilt is based on a three-strip block – in his example, the three strips were all cut 2 1/2″ wide. I adjusted that: two strips were 2 1/2″ wide, the third was 2”. What he did was improvise the middle strip – used a second colour (only) of whatever length to which he added a piece of background to make the strip the same length as the other two in the block. I did the same, most of the time, but sometimes I used the pieced strip on one side.

I made 35 blocks, then laid them on the floor and played with the layout. I alternated direction of the blocks – horizontal, vertical, horizontal…  When I was done, I pulled three blocks and added in solid blocks – it’s the red one that draws the focus for the quilt.

I used leftovers from the Japanese Quilt along with more of the Japanese indigo wax katagami fabric I bought at my local fabric store (meant for garment sewing, but lovely for quilting).

IMG_2872

I used a second of the indigo wax katagami fabrics for the back, along with leftover blocks from the front. I used a third katagami fabric for the binding with a strip of red batik as an accent.

Kaffe Fassett Quilt 8

IMG_2836

This quilt uses a combination of Kaffe Fassett large print fabrics with contrasting pieces of Fossil Fern (Benartex). The quilt turned out quite a bit larger than my other quilts – not quite a twin bed size. So the back had to have an embellishment to extend the single length of backing fabric I had.

[Someone asked whether I had a pattern – I didn’t – I’d seen a photo and could immediately see the whole was constructed as a 9-patch with a “solid” square at the centre (I used a KF fabric centre) and surrounded it with 8 HST squares which I constructed from the KF fabric and a light fabric (I used a number of different Benartex light Fossil Fern fabrics I had in my stash). I’d suggest using the same pale fabric throughout if you’re new to quilting – easier to see how to arrange the blocks.

The HST are arranged to form a 4-point star around the centre square. The outer corners are triangles from the KF fabrics. All my KF fabrics were in shades of red or deep pink so they all blended and could be placed against one another. My quilt top was a 3 x 4 array of the 9-patch blocks. Where they join you have a square, on point, made from four different KF triangles.]

Close-up of 9-Patch Block
IMG_2845

The quilt was embroidered in my 360 X 350 hoop using a large design I created – that allowed me to quilt 4 squares at a time!

Quilting Without A Pattern II

IMG_2864

I finished this quilt this morning. It’s based on an idea of Joe Cunningham – Pattern-free quilt making (a Craftsy class) – Fantasy Four Patch. The idea is simple – take two fabrics (one dark, one light), cut 1 strip from each: 5 1/2″, 4 1/2″, 3 1/2″, 2 1/2″, 1 1/2″. Sew them in pairs to make 6 1/2″ strips, then cut the strips: 5 1/2″, 4 1/2″, 3 1/2″, 2 1/2″, 1 1/2″. Again, sew together in pairs to make 6 1/2″ blocks! Now start laying them out to make a design pleasing to you – there are no rules here. I wanted a 5 X 7 array so I needed 35 blocks. I could have done a 6 X 8 array which would have needed 48 blocks – you get the idea.

This was my idea – to draw the colour concentration from the dark fabric toward the light fabric to get a colour flow. I tossed in three small bits of contrasting fabric to catch the eye.

The binding carries on the colour flow extending the dark into the light.

Because this is a small quilt (~42″ X 54″) I was able to back it with a single (unpieced) WOF (width of fabric) panel so there’s nothing to show on the back.

I enjoyed making this quilt. It went very quickly.

Projects

IMG_2855

This is the state of my sewing room: at the top is the enlarged photo for the next art/landscape quilt of the two boys, below that is the pattern and fabric for a jeans jacket I want to make in the next couple of weeks, on the seat of the sofa are two quilts that are stitched in the ditch but need to be quilted, and fabric and ideas for one quilt from a stack of fat quarters and another from a jellyroll. Lots to do and not enough hours in the day! First to finish the two nearly done quilts, then the jacket, I think, before I tackle the two new quilts. Endless ideas for projects.

Japanese Quilt

IMG_2646Finished this afternoon, the lap quilt made using half-square triangles using the Japanese sample fabrics that I bought at the yard sale in Portland Oregon last spring. I didn’t arrange the blocks in any of the usual half-square triangle patterns – Instead I set up two blocks near the “top” and worked in a “frame” around them, then filled in the remaining space creating diagonal rows – at the same time I was also trying to create a bit of colour flow – difficult because the colourful floral blocks were so different in hue. The border took a bit of care, I wanted the diagonal joins to flow from the diagonal  lines in the pieced top – I found the way to do that was to make sure the seams aligned first, basted them in place to make sure the line worked, then stitched the rest of the border piece. The overall effect I wanted was to have an indigo quilt with colourful triangles embedded in it. I used the indigo fabric with the circles on the back – A WOF (width of fabric) piece was wide enough for the backing so there is no embellishment on the back. Notice the embroidered dragonflies on the top. I quilted in the hoop using a sashiko single run overall design in each block and a modification of the design in the border. I intentionally used a dark navy variegated thread front and back so the embroidery doesn’t stand out but creates a quilted look. The striped binding was a third indigo fabric from the collection that had the other two.


My Kaffe Fassett Quilts

Just got the Pinterest Weekly and found a quilt I’d made (photographed on my bed) attributed to someone else! I thought I ought to set the record straight: I have done seven quilts, either using Kaffe Fassett fabrics, or based on photos of his quilts I’ve found online.

#1: At the time I didn’t have any Kaffe Fassett fabrics so I took his idea (which I’d seen online) and made it using batiks I had in my stash. The backing is a single fabric.

DSCF2007

#2: I had no sooner started #1 when I realized I could do something more with the way the colours were assembled and started #2 – setting it up to tell a colour story. The back of this quilt is also a single fabric.DSCF2072


#3: The idea of a colour story grew when I came across the Kaffe Fassett diamonds quilt – this quilt has 650+ pieces including diamonds and borders and partial diamonds on the outer edges. Back of quilt is still a single fabric.DSCF2124


#4: This quilt uses Kaffe Fassett fabrics but is built on a vanishing 4-patch. This was one of the first quilts where I did something interesting on the second side – I had to because the quilt was wider than WOF (width of fabric) and I needed more width than my backing fabric provided.

DSCF2385

DSCF2389


#5: A Kaffe Fassett idea (from one of his books – although I worked entirely from an image on Pinterest) using batik fabric from my stash. The back of this quilt is a single run of fabric.IMG_1579


#6: This is the quilt I found on Pinterest attributed to someone else! It’s both Kaffe Fassett fabrics for the squares as well as based on a Kaffe Fassett quilt (again from an image of a quilt he did which I found online). This quilt has a pieced second side using left over bits of fabric from the top using a “jellyroll race” technique to make the inserted strip.
IMG_2098

IMG_2099


#7: This quilt uses Kaffe Fassett fabrics for the central squares of each block – it isn’t a Kaffe Fassett design, I don’t believe. Again the inspiration came from a photo I found online. The back is also pieces using leftover blocks from the front of the quilt.DSCF2615

IMG_2478


So these are my Kaffe Fassett quilts to date – either made with Kaffe Fassett fabrics or from images of quilts he’s done which I’ve found online. I still have quite a bit of Kaffe Fassett fabric in my stash so there will be more quilts…

Art Quilt 3

So, this morning I went through photos to see what I might attempt next as an art quilt… Here’s an idea ben-zach-3The image is a composite – the sidewalk beside the Public Gardens in Halifax and Ben and Zach at the Toronto Zoo. The original Zoo image background was just too dull to bother using – so I cut the boys out and added them to an enlargement of the background scene. I have to do it all again making careful adjustments to the enlargements, and the boys need to be played with quite a bit in Photoshop because I need to sharpen the detail and add a bit more sunlight/highlights so they aren’t so dark.

I have a few other ideas as well:

hfx hrbr cropped Halifax in the fog from across the harbour

photo7143Paragliding from Second Beach, Parrsboro NS

DSCF0419Sailboats in Halifax Harbour