On Fitting Pants

Donna DeCourcy wrote me today

“I look forward to your progress on pant fitting. Currently, I make all my own clothes and am frustrated by pants. I enjoy your blog immensely and finally changed my password and made the roundabout route to get back to finally making and leaving a comment!”

I answered her:

  • jmn Donna, pants fitting and making is difficult and frustrating because you’re working from a flat piece of paper and you’re trying to create a garment that is curvy in a number of different locations that are different on every body, and your body changes constantly!
  • You can’t count on a pattern you got to work once to work with a different fabric that has a different weight or a different amount of give (stretch). You can’t know for sure a pattern you made six months ago will fit you today! Unlike a top or a dress or a skirt which fits more loosely, pants (particularly today’s styles) fit closely, so there’s not much forgiveness in fitting – they fit and are comfortable, or they’re not and you start over again. 
  • I’ve been chasing patterns and ideas for fitting pants for at least 30 years! At the moment, the closest I’ve come to getting a pattern to work is “Top Down, Centre Out” which fits the waistband first, then drapes the pants pieces from that, making the adjustments in the toile/musin as you’re making the pants.
  • That’s why I just make “wearable muslins” (prepared to discard the project) because as far as I’m concerned each new pair of pants (from the same pattern) is still a work in progress, never a sure thing.

I added another comment later:

Monpei #2

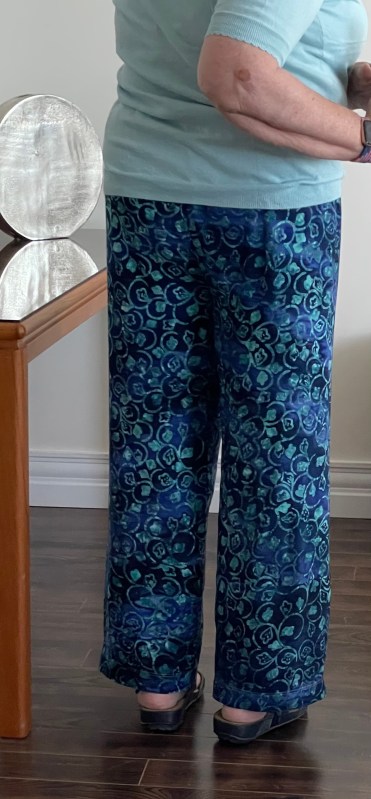
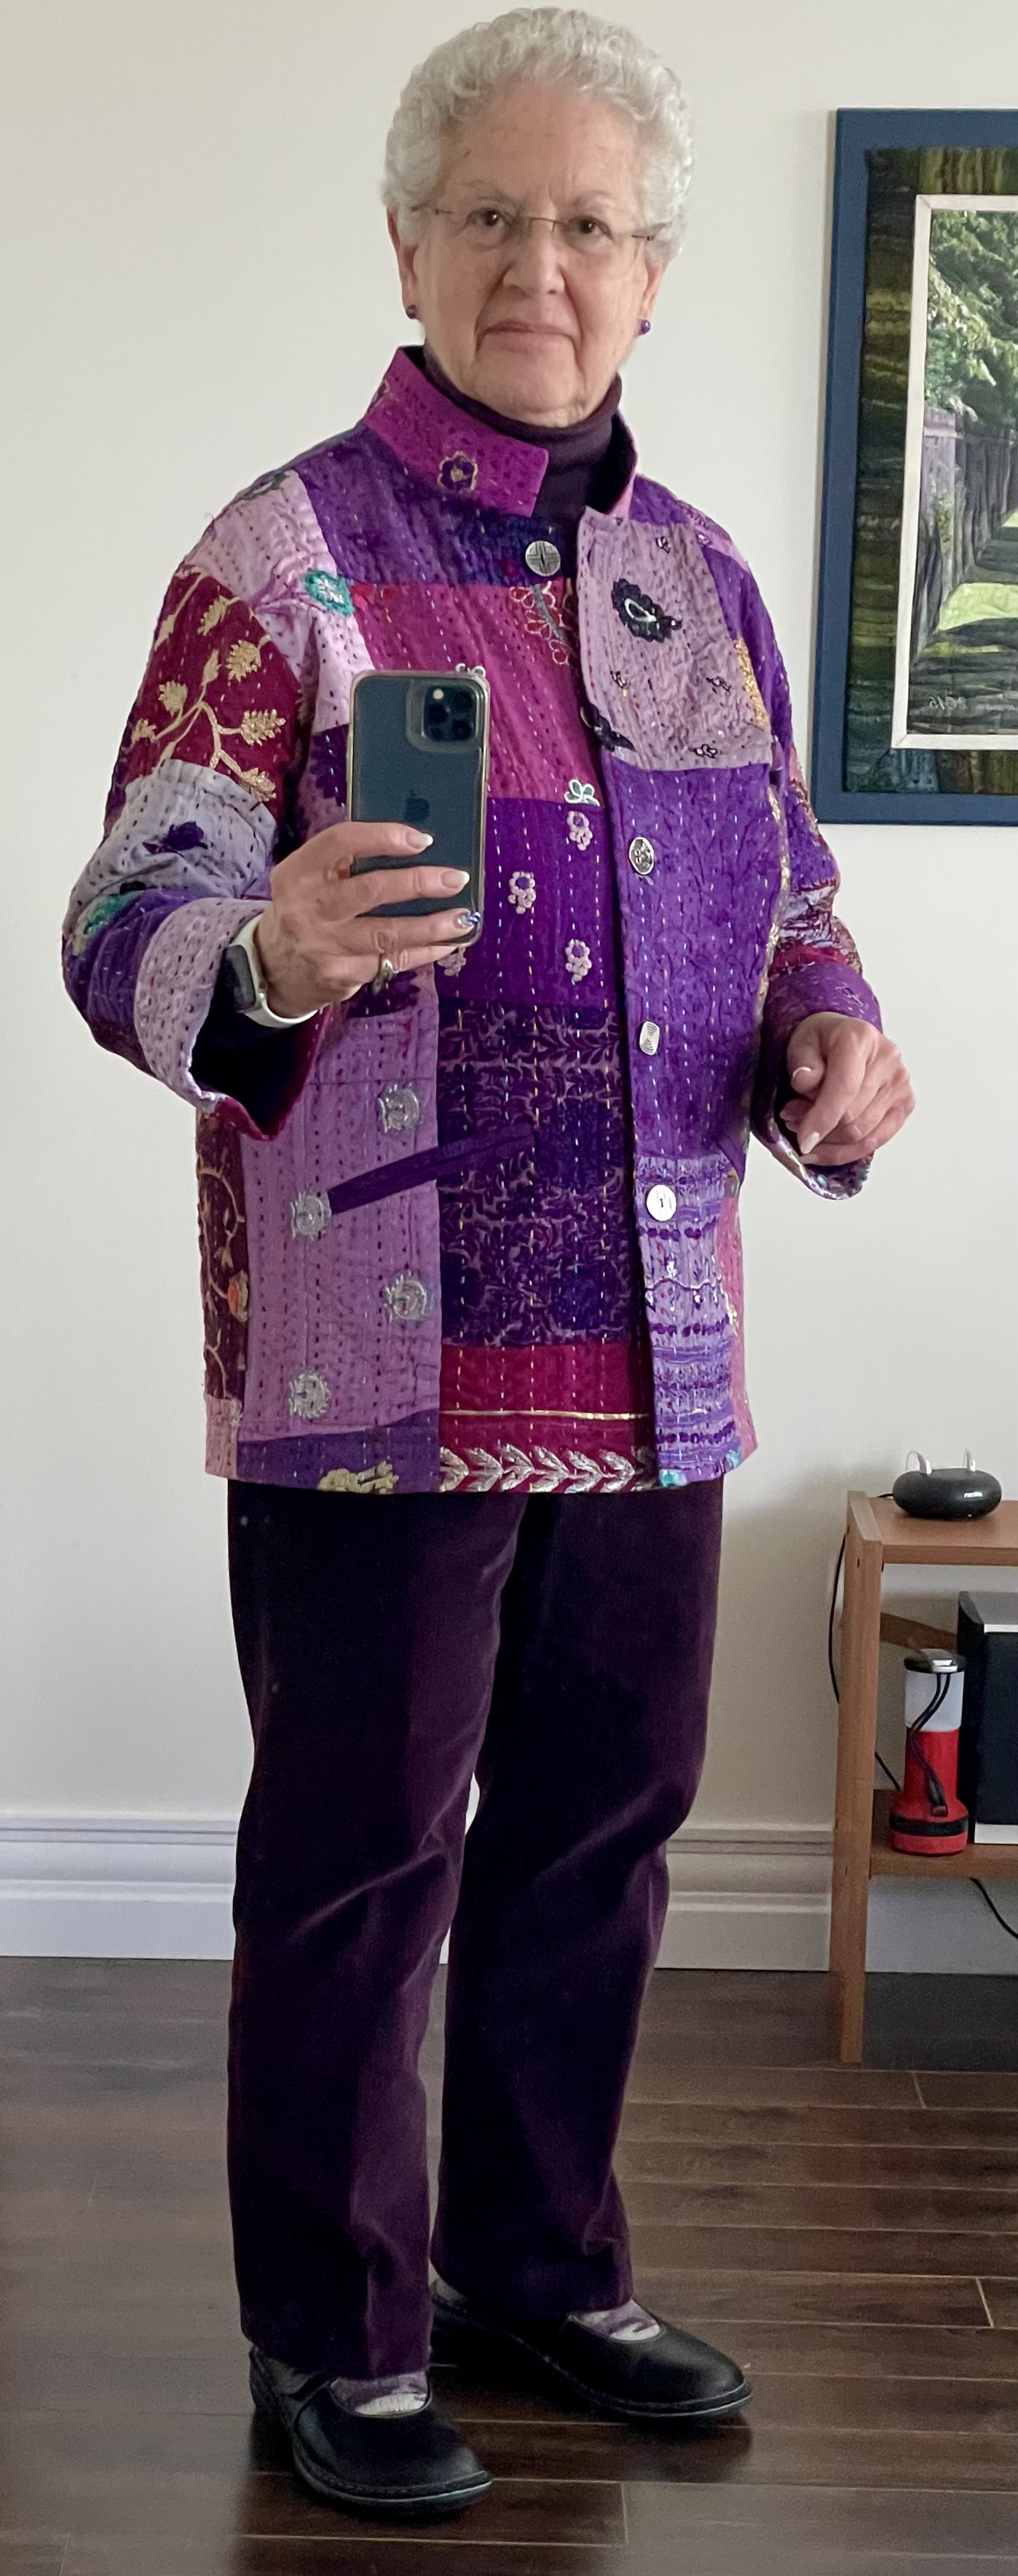
This pair of pants is a Monpei: Here’s how I made them: https://jmncreativeendeavours.ca/2021/07/25/the-japanese-monpei/

You might want to give this idea a try. It’s surprising how well they hang on me! I’m about to make another pair from some Japanese katagami fabric I’ve had for a couple of years.

Ahead Of The Curve

I’ve been making clothes for myself for decades. I stopped being able to buy pants that fit without alteration since my early 40s; hence my long-term quest for pants patterns and techniques for fitting pants that would yield me something that fit me. My top measurements are closer to a single size although for the past decade I’ve avoided fitted shirts, t-Shirts, etc. because my waist has slowly, but surely, increased and that affects how any top I might make will fit.

I was laughing a couple of weeks ago with MaryAnn (a sewing pal) about a FBA (Full Bust Adjustment), saying what I need more is a FTA (Full Tummy Adjustment). She got up, went into her sewing room and returned with a book:

Book Cover

Everything you want to know about fitting patterns is here and if your question isn’t answered in the book, it will be found in Jenny’s blog: Cashmerette Sewalongs + Tutorials. Her foray into garment making for largish women is very informative. Her learning to make garments for herself led her into pattern making for curvy women. She’s recently introduced pattern sizes from 0-16 (the original sizing was 12-32). These simple, generally unadorned garments are suitable as a place to start for anybody. She wants women to look good in their clothes and to feel somewhat stylish.

While the book explains the complete range of adjustments in great depth, Jenny starts by describing “grading” – how you use today’s multi-size patterns to fit the different parts of your body. My challenge is I’m right between her smaller sizes and the larger sizes. With a size 12 bust, a size 20 waist, a size 8 bum, I can’t actually work within a single size range. I’m about to write Jenny to ask her advice concerning which size range I should be working in. I’m guessing because I’m a smallish person she’ll recommend working in the 0-16 range and grading my waist beyond the pattern rather than working in the 12-32 range and grading beyond the pattern to fit my bum. I’m going to take the basic pants pattern from the back of the book and size it to fit me (it’s a 12-32 pattern) to see where I get with it. If I’m able to get a fitting muslin using a graded sloper based on this pattern, I’ll be able easily to design whatever features on want on my pants from there.

Let you know how I get on!

Denim Pants

Trying to take photos of the pants I’m modelling is so difficult. Not great photos but adequate to show how the pants fit.

I finished the denim pants (made from the same pattern drafting I used for the white linen ones this morning. This was a test run to see whether I could use the pattern sloper without making any further adjustments. I could. The nips in the waist I’d taken worked out fine. The length was good. The front fits in the crotch without pulling, the side seam is perpendicular to the floor, the back falls straights without being baggy. I can sit in them confortably. The back crease is really a seam incorporating a dart under the bum (which is now in the right place).

I did add elastic to the back yoke because when I sat down the back pulled down. With the elastic the pants seem to be staying in place.

I’ve ended with a cross between Jeans and Trousers – I’ve used a jeans pocket (not a slant or inseam pocket used for trousers), incorporated the back yoke used to fit jeans at the waist, a fly front for easy access; but I’ve added the back dart down the centre of the pants, a straight leg, with limited top stitching that’s de rigueur for jeans, finishing the hem with a single top stitching, giving me a simple look more like trousers.

With my fingers crossed, in a couple of months, I will use this sloper to make some corduroy pants for the fall. That will let me purge some of the winter pants in my closet; some of which have been fitted and refitted many times as the years pass and my shape changes. This fit should last into the fall.

Let you know how I get on!

The Thing About Pants

The thing about making pants is the fit changes over a six month period – my weight distributes just a bit differently so the pattern that worked last year won’t quite fit now even though my weight hasn’t changed much.

I bought some white linen and a medium weight denim several weeks ago. I decided I had to get those white pants done because it’s almost August and I have nowhere to store the fabric till next spring!

Finished pants draped over a chair

I didn’t want to make another pair of pull-on pants. I wanted a fly front which is actually a lot easier to get into. I pulled out my Sandra Betzina jeans pattern Vogue 7608 which I’ve been using since 2015.

My challenge is I have a very flat bum, skinny thighs but a full belly which makes my waist measurement close to my hip measurement. I last used the pattern in May 2019 (the date I noted on the draft) so I wasn’t prepared to trust the sizing of my draft – I figured I should at least lay it against my pull-on pants pattern (most recently used in Feb 2022) and was surprised how close the two actually were. Then I did what I needed to do – I took my body measurements yet again: waist, high belly, hip (at fullest), thigh, and checked them against the pattern. On this pattern I’m a size A through the bum in the back but I need a C from hip to waist. In the front I’m a C from crotch to waist. I checked the grading on my draft against the original pattern to make sure I was close to a working size.

I intended making the dart adjustment in the pants back but I needed to make sure I was getting it centered so I balanced the pattern, front and back, then added the dart to the centre back. This pattern has a back yoke (no waistband), with a waistband in the front. The smart thing was to start by working “Top Down/Centre Out“. I cut out the 2 yoke pieces, the two front waistband pieces, sewed them together, then tried it on. The fit wasn’t bad, a reasonable amount of overlap in the front, so I decided to go ahead and cut the fabric.

I was using my white linen fabric to make a muslin – if the finished garment fit I’m ahead of the game, but as usual, I was prepared to throw out the whole effort if it didn’t work.

I did all the prep work – fused interfacing where it was needed: back pocket facing, front pocket facing, waistband, yoke, both sides of the fly. I serged edges where I wanted to prevent fraying. I made up the pockets, added them to the front (I simplify the pockets by adding them to the top, rather than inserting them from behind the fronts). Now here’s where I deviated from Top Down/Centre Out construction. If this was going to be a wearable garment, I needed to set up the fly front. So I went ahead and put in the zipper, added the fly facing and top stitched the fly in place (Here are instructions for this simple fly front) (Here’s a link to a video.) With the fly completed I added each front waistband piece.

With the front done, I worked on the backs. I sewed the yoke to each back side, then sewed the back dart in each back piece, serged it (1/4″ seam allowance). Added the back pockets to each side. Now I returned to the Top Down/Centre Out technique – I sewed inner leg seams (no serging), sewed the outer leg seams (no serging), stitched the crotch seam( no serging), then tried on the pants. I could see I wanted to take in the side seams 1/2″, I wanted to remove about 1/2″ from the back crotch inner leg to flatten the bum a bit more, I also wanted to bring the back dart higher so it would finish under the pocket, finally take in the centre back 3/8″ at the waist.

I made those adjustments (marked them on my pattern draft), then I serged the seams. Tried on the pants again. I was satisfied with the fit, so I added the waistband and yoke facings (having matched them to the waistband and yoke on the pants), top stitched around those elements on the right side of the garment. I marked the inseam (27″), folded and pressed the hem, then finished the hems with a cover stitch. Last I added a button hole on the front waist tab, and a button and tried the pants on again. Overall the fit was good – but the pants were too long.

I took out the hem, shortened the legs by 1/2″. Cover stitched again – still a smidge too long. I shortened them another 1/2″.

The front fit is close but the added length interferes with how the legs fall – this was before I shortened, and reshortened the pants. The back is close – I just need to raise the dart to remove the slight bit of fullness under my bum. I’m not going to do that with these pants, by the time I’ve sat in the linen for a few minutes the back will be stretched out – I marked that adjustment on the pattern for the denim which I will make next.

All in all, after shortening the legs, I have a pair of wearable pants. A good couple of days effort.

Purple Placemats

Completed Placemats

I completed the purple placemats yesterday. I’d set them up with batting and backing when I finished the bright ones, but I didn’t get around to sewing them together, turning them right side out, and stitching in the ditch along the seam lines. It’s not like I have use for them – I do so little entertaining these days where I might use new placements on my glass table. These have gone in the drawer along with the other two sets of “Stack ‘n Whack” placemats I now have on hand. I’ve made them to display in Sew With Vision to advertise a class in the fall. Once that’s done, they will likely be given as gifts.

Fuchsia Silk Shirt

This project started when I was looking for a light natural silk tussah to use as background fabric for the wall art pieces back in March/April. I came across this beautiful fuchsia silk tussah at Britex in San Francisco. It’s a wonderful store, BTW. When in San Francisco I spent a lot of time there.

Fuchsia Silk Tussah

I tried resisting it, but in the end I ordered two yards, knowing when it arrived I was going to make a shirt/jacket from it. Turns out I had some dupioni silk in precisely the same shade which I planned to use for facing the yoke, collar, under collar and cuffs! Meant to be.

The fabric arrived beginning of May. I cut out the shirt June 12, then went off to Toronto on the 16th for five days for a family visit. I began working on the shirt when I returned. I wasn’t able to sit down and work on it straight for the 5-6 hours it takes to sew a shirt – I distributed the work over several days. Just added the last four buttonholes and the buttons this afternoon.

Finished Shirt

This is the basic “Easy Shirt” from Janet Pray – the one I’ve made a gazillion times. It’s a man’s shirt so I have to remember to reverse the fronts. The medium size shirts in my closet are starting to be “snug” so I opted to make the shirt in large. When I was in San Francisco in 2017 at Sandra Betzina’s last sewing workshop she recommended a small adjustment to the pattern – she advised adding 3/8″ to the bottom of the yoke, 3/8″ to the top of the back, to give me a bit of ease over my rounded back. It worked beautifully – the back of the shirt falls perfectly straight.

Since I plan to wear the garment as a light jacket (rather than a shirt) I was able to fudge the buttons – instead of 6-7 of the on the front, I used 5 (there were just 9 of these small, metal, “flower” buttons at Fabricville when I went shopping); I needed two each for the sleeves leaving 5 for the front – I eliminated the top two buttons.

Fuchsia Pink Shirt

The shirt is the tiniest bit on the large size – what I really ought to do is make a size half way between medium and large. For a jacket the loose fit will be fine. I have to say, I love the colour! Maybe now is the time to bring out the two gorgeous Liberty cotton prints I bought at Britex (one in 2015, the other in 2017) and make those shirts!

Fat Quarter Placemats #2

“Bright” Fat Quarter Placemats, Assembled

I wasn’t sure, yesterday, whether the purple fat quarter placemats counted as “Bright”. Today I decided to try wild – I selected an orange batik from one drawer of my stash, paired it with the leaf print, chose a green “fossil fern” piece, ended with a medium yellow “grunge”. They go together – definitely colourful. Probably not “dining room” but certainly “kitchen”, wouldn’t you say?

I’ll show the two sets to Sally next week and see what she thinks. This set would definitely catch someone’s eye hanging on the wall in Sew With Vision!

For cutting and sewing instructions: Stack ‘n Whack Fat Quarter Placemats

Fidget Quilt

Fidget Quilt 20″ x 16″

The wife of a friend of mine has recently moved to a full care facility. Her Alzheimer’s and other chronic ailments finally made it impossible to look after her at home. Looking for ways to stimulate her, her husband came across an article in a local newspaper about “fidget” quilts and sent it along to me. Easy to make.

Yesterday, I gathered some leftover charms (5″ fabric squares), laid them out in a 4×3 array, then dug around in my stash of “stuff” to see what I could find. Lots of zipper tape scraps – I selected the long pulls (for arthritic hands which have difficulty grasping) – big buttons, shoelaces, toggles, small buttons, hair elastics, key rings, ribbon, lace, an empty thread spool (I keep them, they’re useful for something now and again), some leftover cutouts from the back of the latest Drunkard’s Path quilt.

I began constructing blocks by adding stuff, one block at a time. I threaded four wooden buttons on some bright blue elastic (leftover from making face masks) and attached them with one of the quarter circles. I threaded one shoelace through the empty thread spool and attached that with another quarter circle (using a decorative edge stitch). A piece of lace which I left loose in the middle, adding a stemmed button in the centre to hold it in place. I mixed and matched pieces of zipper tape with contrasting slides (a single slide on one zipper, two slides meeting in the middle on the second).

Some elements I arranged across the background square, some on the diagonal. I found a woven, embroidered, woolen belt with small pompoms from my Peru trip, cut off one end and attached that. I used a buttonhole stitch to attach a pink shoelace to another charm slipped a toggle on, tied the ends with a reef knot (didn’t I manage to cut off one of the plastic ends while trimming the whole thing – grrrr – I stitched it, wrapped it in thread, and dipped it in glue to stiffen it, Not as good as the original shrunk plastic, but I’d gone too far to replace the square and do it over again).

I set up an embroidery with Sally’s name and stitched it out. The hair elastics I attached beside one another on another background square. I added ties to the zipper pulls (and a dab of glue to keep the ties from slipping off). I looped three key rings onto some thin ribbon. I used contrasting polyester embroidery thread to attach the elements – another textural element.

I stitched the squares to a piece of quilt batting, added grosgrain ribbon to cover the joins, then cut a very heavy weight craft interfacing to stiffen the project. Finally I added backing fabric and binding.

There you have it – a fidget quilt. The whole project took 5-6 hours. Now to find out which aspects Sally is drawn to and which she ignores.

I suggested to the family a couple of other possibilities – playlists of her favorite music on some device which she can operate herself or one of the staff could turn on for her regularly. Photo books made from family photos, favorite places she’s lived/visited, etc. Children’s picture books with good illustration, simple story, interesting ending. Children’s audio books.

There are lots of possibilities for stimulating her and keeping her in touch with her life.

Kantha to Jacket – Finished

I started with a Kantha bedspread which I’d purchased six or more months ago in preparation for doing a workshop on making garments from these textiles.

I did the workshop at the end of February. I started by cutting out a jacket for myself – two fronts, a back, two sleeves, two cuffs, a collar, two pocket backing pieces. Then I cut out front facings, a collar facing, a hem facing, and narrow bias strips for binding the seams.

Prior to the workshop, I sewed the bound/double welt openings for the slash pockets – so I could show the gals attending the workshop how I did that. I bound each pocket back piece, and attached one to each front behind the pocket opening. Then I attached the front facings, sewed and bound the shoulder seams before adding the mandarin collar. I bound the collar seam. That was as far as I got with the jacket – I didn’t want to finish it, I wanted to be able to use my garment to show how I stitched and bound the seams, how I faced the jacket hem and so on.

Since the workshop, the jacket has sat on one side of my cutting table waiting for me to complete it. First I finished the Moons/Planets quilt, then I constructed the baby quilt. This week I got back to work on the Kantha jacket.

I set up and sewed the buttonholes on the right front “placket”. That’s easier to do when the fronts are relatively unattached to the rest of the garment. (In fact I should have added buttonholes before sewing the shoulder seams and adding the collar!) Then I sewed in the sleeves, bound and top stitched them. I sewed the sleeve underarm/side seams, bound and top stitched those seams as well. I sewed the side seam of each cuff (to which I’d already added an edge facing), then serged the cuffs to the sleeve ends. I didn’t bother binding that seam since it’s concealed under the cuff which folds back over the sleeve.

I finished the bottom with a facing and then I added five buttons – all 23mm metal buttons, each one different. (You can see that if you click on the jacket front to get to an enlargement of the photo.)

The thing I had to be careful of were the beads that were either glued or sewn to the heavily embroidered Kantha. I removed any which were in the way of the seam allowances – I didn’t want to hit one with a sewing machine needle! I left beading in the centre of the pieces alone.

The jacket is now finished. All I need is an opportunity to wear it. I will likely just put it on one day with a pair of jeans.

PS – With the jacket on:

From Shirt To Heritage Nightgown

Embroidery Salvaged From White Shirt

Is it a week ago? Two weeks? I can’t remember, exactly. I took a drive on a sunny Sunday toward “the valley” with a friend. We moseyed our way along until we reached Wolfville. We browsed in some shops, Marie bought some summer tops in one. I came across a Talbot’s embroidered white shirt (size M) in a second hand shop that shouted “heritage nightgown” so I bought it (hoping size M would actually fit across my chest – holding it against my body it looked as if it would).

Without trying the shirt on first, (how silly was that) I cut off the ruffled neck and replaced it with a binding, cut the sleeves shorter and hemmed them, then trimmed away the bottom of the shirt intending to add a long “skirt” to complete the nightgown.

Finished Heritage Gown

I finished the nightgown yesterday. My reconstruction was focused on salvaging the entire embroidery. A mistake. The shirt had bust darts which pointed toward the flower in the middle of the embroidery. In my attempt to keep the embroidery intact I cut below the darts. I should have bitten the bullet, cut above the darts and across the embroidery – the finished garment would have fit better.

As it is, I wore the nightgown last night and it’s reasonably comfortable even though the embroidered “yoke” comes too low and hits the fullness of my bosom rather than sitting at underarm depth. Given the density of the embroidery I’m not sure how I would actually have cut it – no easy way to fussy cut across it and have it make any sense.

The gown is not a write-off. I’ve added it to my collection and will wear it in rotation with the others in the drawer. And it cost me $28 rather than the $120 at one of the clothing stores we visited which had some April Cornell nightgowns for sale.