This project started when I was looking for a light natural silk tussah to use as background fabric for the wall art pieces back in March/April. I came across this beautiful fuchsia silk tussah at Britex in San Francisco. It’s a wonderful store, BTW. When in San Francisco I spent a lot of time there.

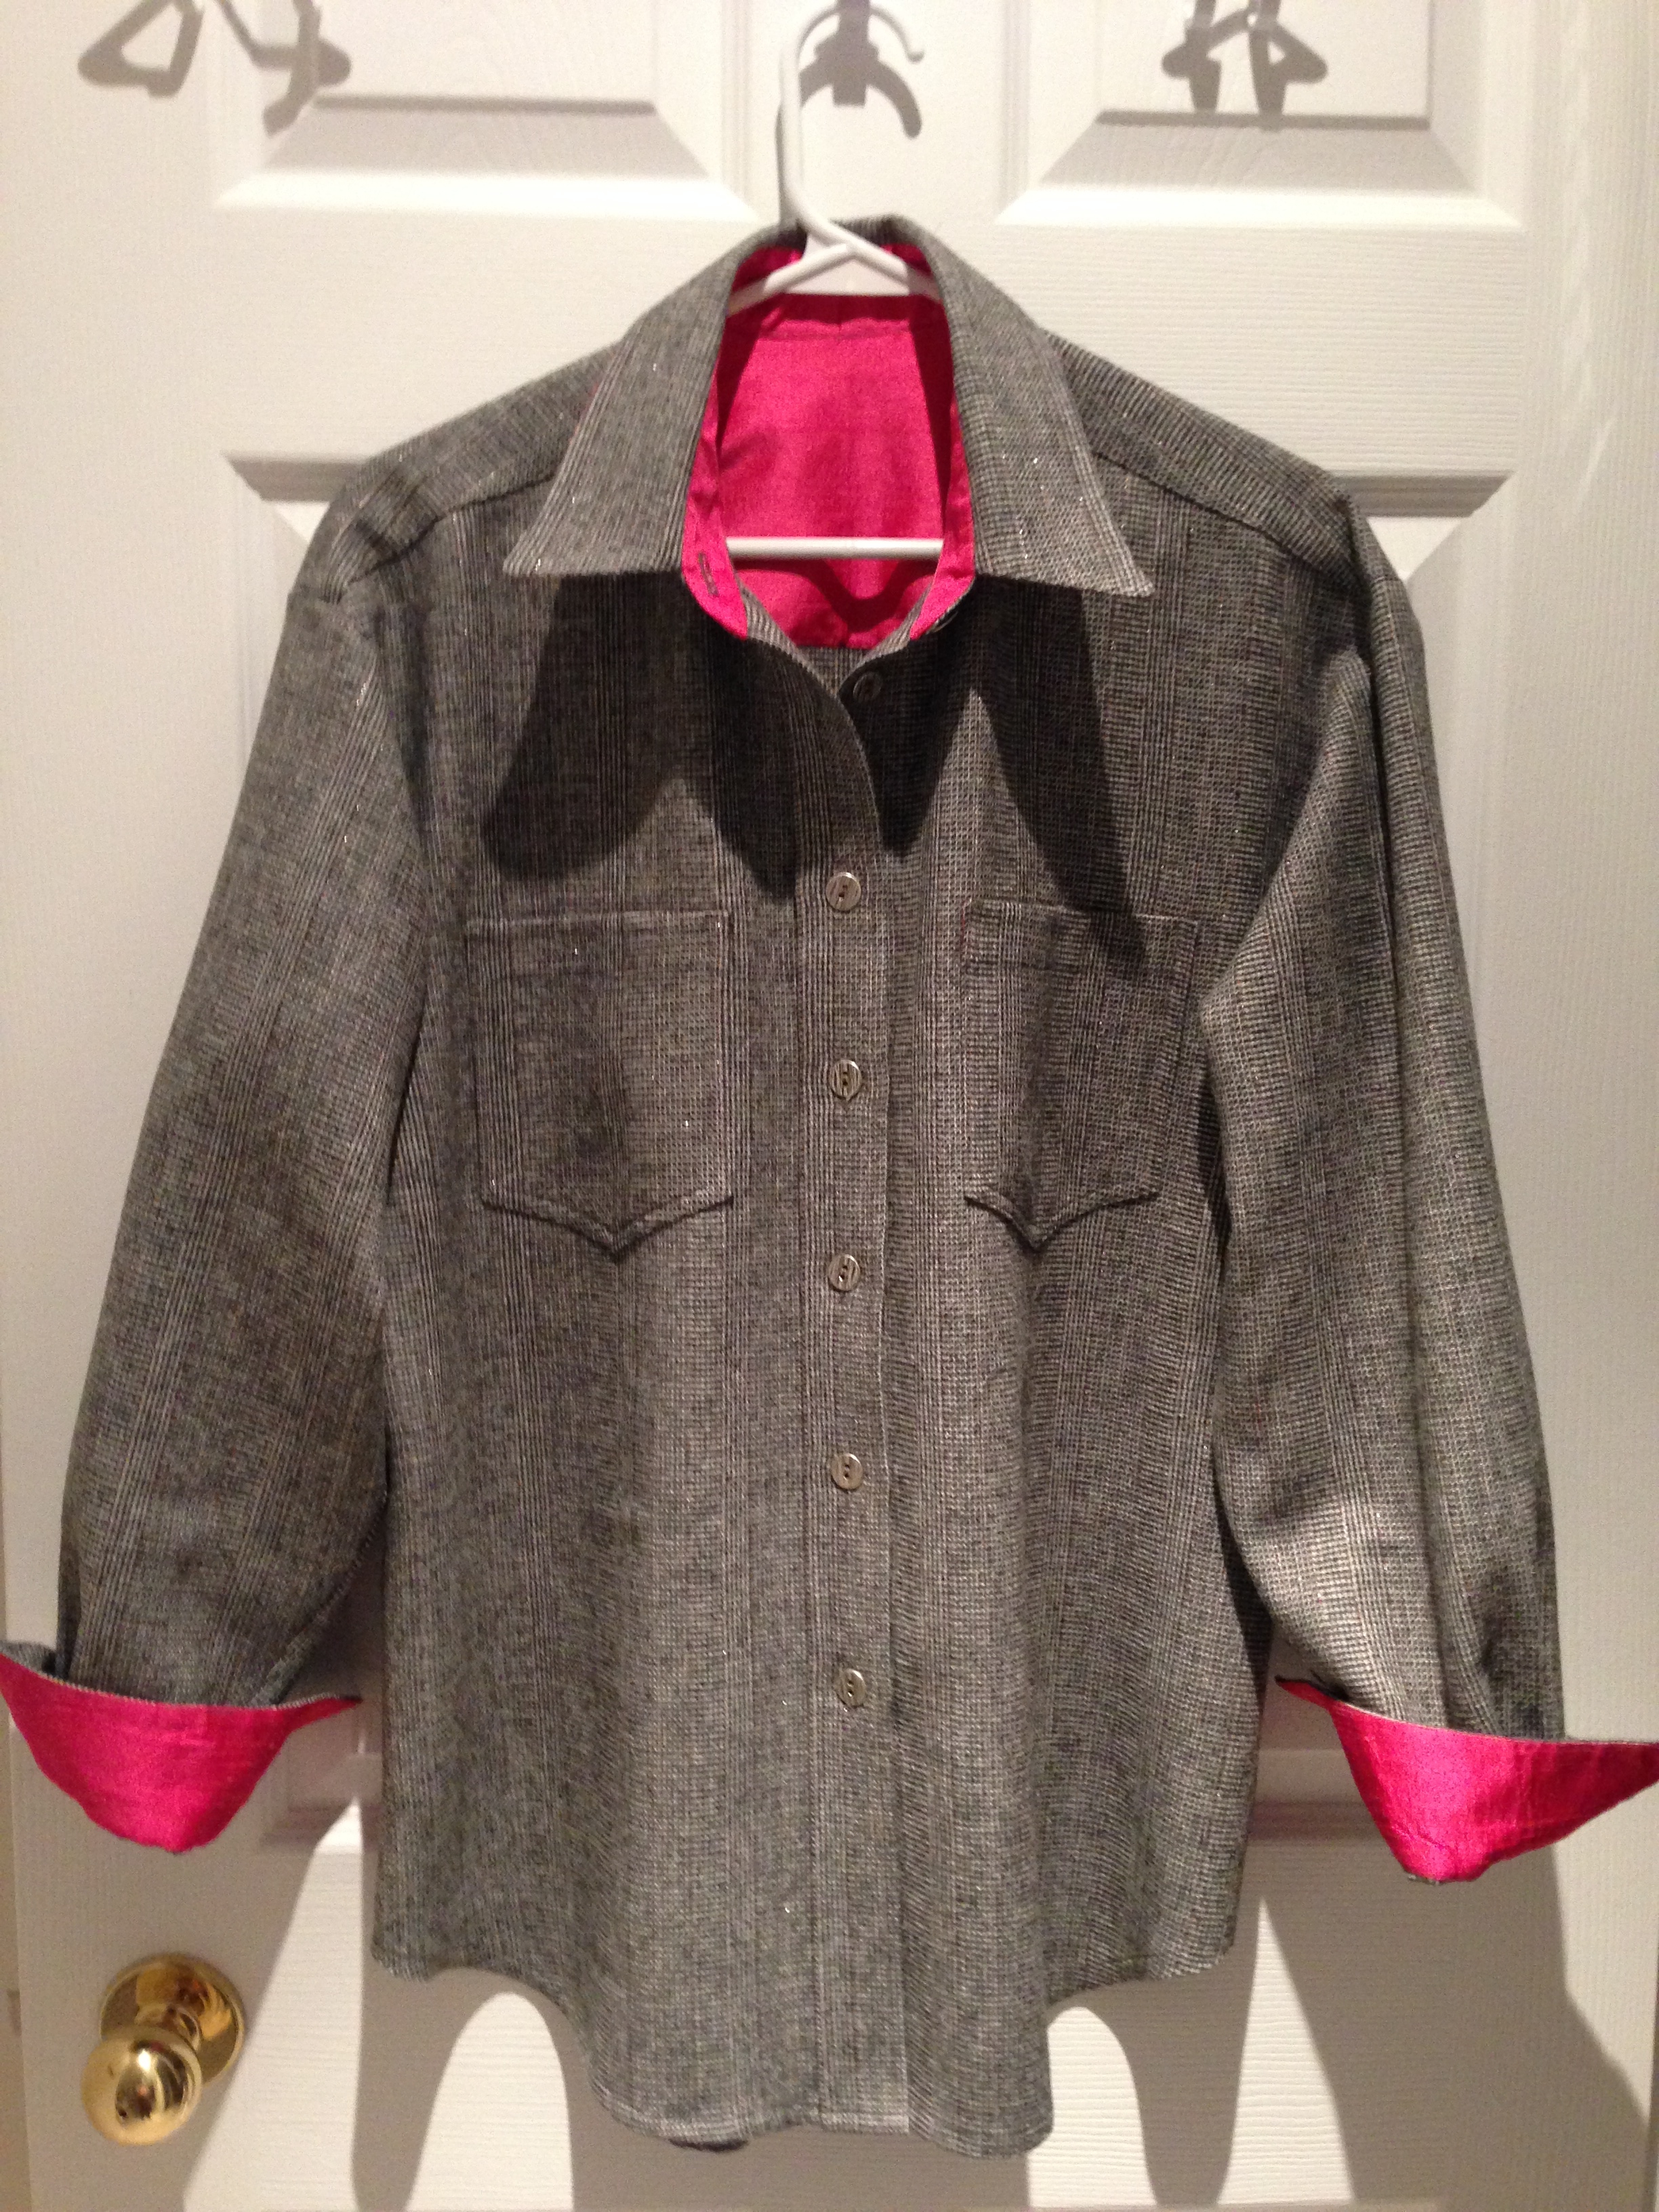
I tried resisting it, but in the end I ordered two yards, knowing when it arrived I was going to make a shirt/jacket from it. Turns out I had some dupioni silk in precisely the same shade which I planned to use for facing the yoke, collar, under collar and cuffs! Meant to be.
The fabric arrived beginning of May. I cut out the shirt June 12, then went off to Toronto on the 16th for five days for a family visit. I began working on the shirt when I returned. I wasn’t able to sit down and work on it straight for the 5-6 hours it takes to sew a shirt – I distributed the work over several days. Just added the last four buttonholes and the buttons this afternoon.

This is the basic “Easy Shirt” from Janet Pray – the one I’ve made a gazillion times. It’s a man’s shirt so I have to remember to reverse the fronts. The medium size shirts in my closet are starting to be “snug” so I opted to make the shirt in large. When I was in San Francisco in 2017 at Sandra Betzina’s last sewing workshop she recommended a small adjustment to the pattern – she advised adding 3/8″ to the bottom of the yoke, 3/8″ to the top of the back, to give me a bit of ease over my rounded back. It worked beautifully – the back of the shirt falls perfectly straight.
Since I plan to wear the garment as a light jacket (rather than a shirt) I was able to fudge the buttons – instead of 6-7 of the on the front, I used 5 (there were just 9 of these small, metal, “flower” buttons at Fabricville when I went shopping); I needed two each for the sleeves leaving 5 for the front – I eliminated the top two buttons.

The shirt is the tiniest bit on the large size – what I really ought to do is make a size half way between medium and large. For a jacket the loose fit will be fine. I have to say, I love the colour! Maybe now is the time to bring out the two gorgeous Liberty cotton prints I bought at Britex (one in 2015, the other in 2017) and make those shirts!