Quilt Math…

16 Blocks With 1/2″ Sashing

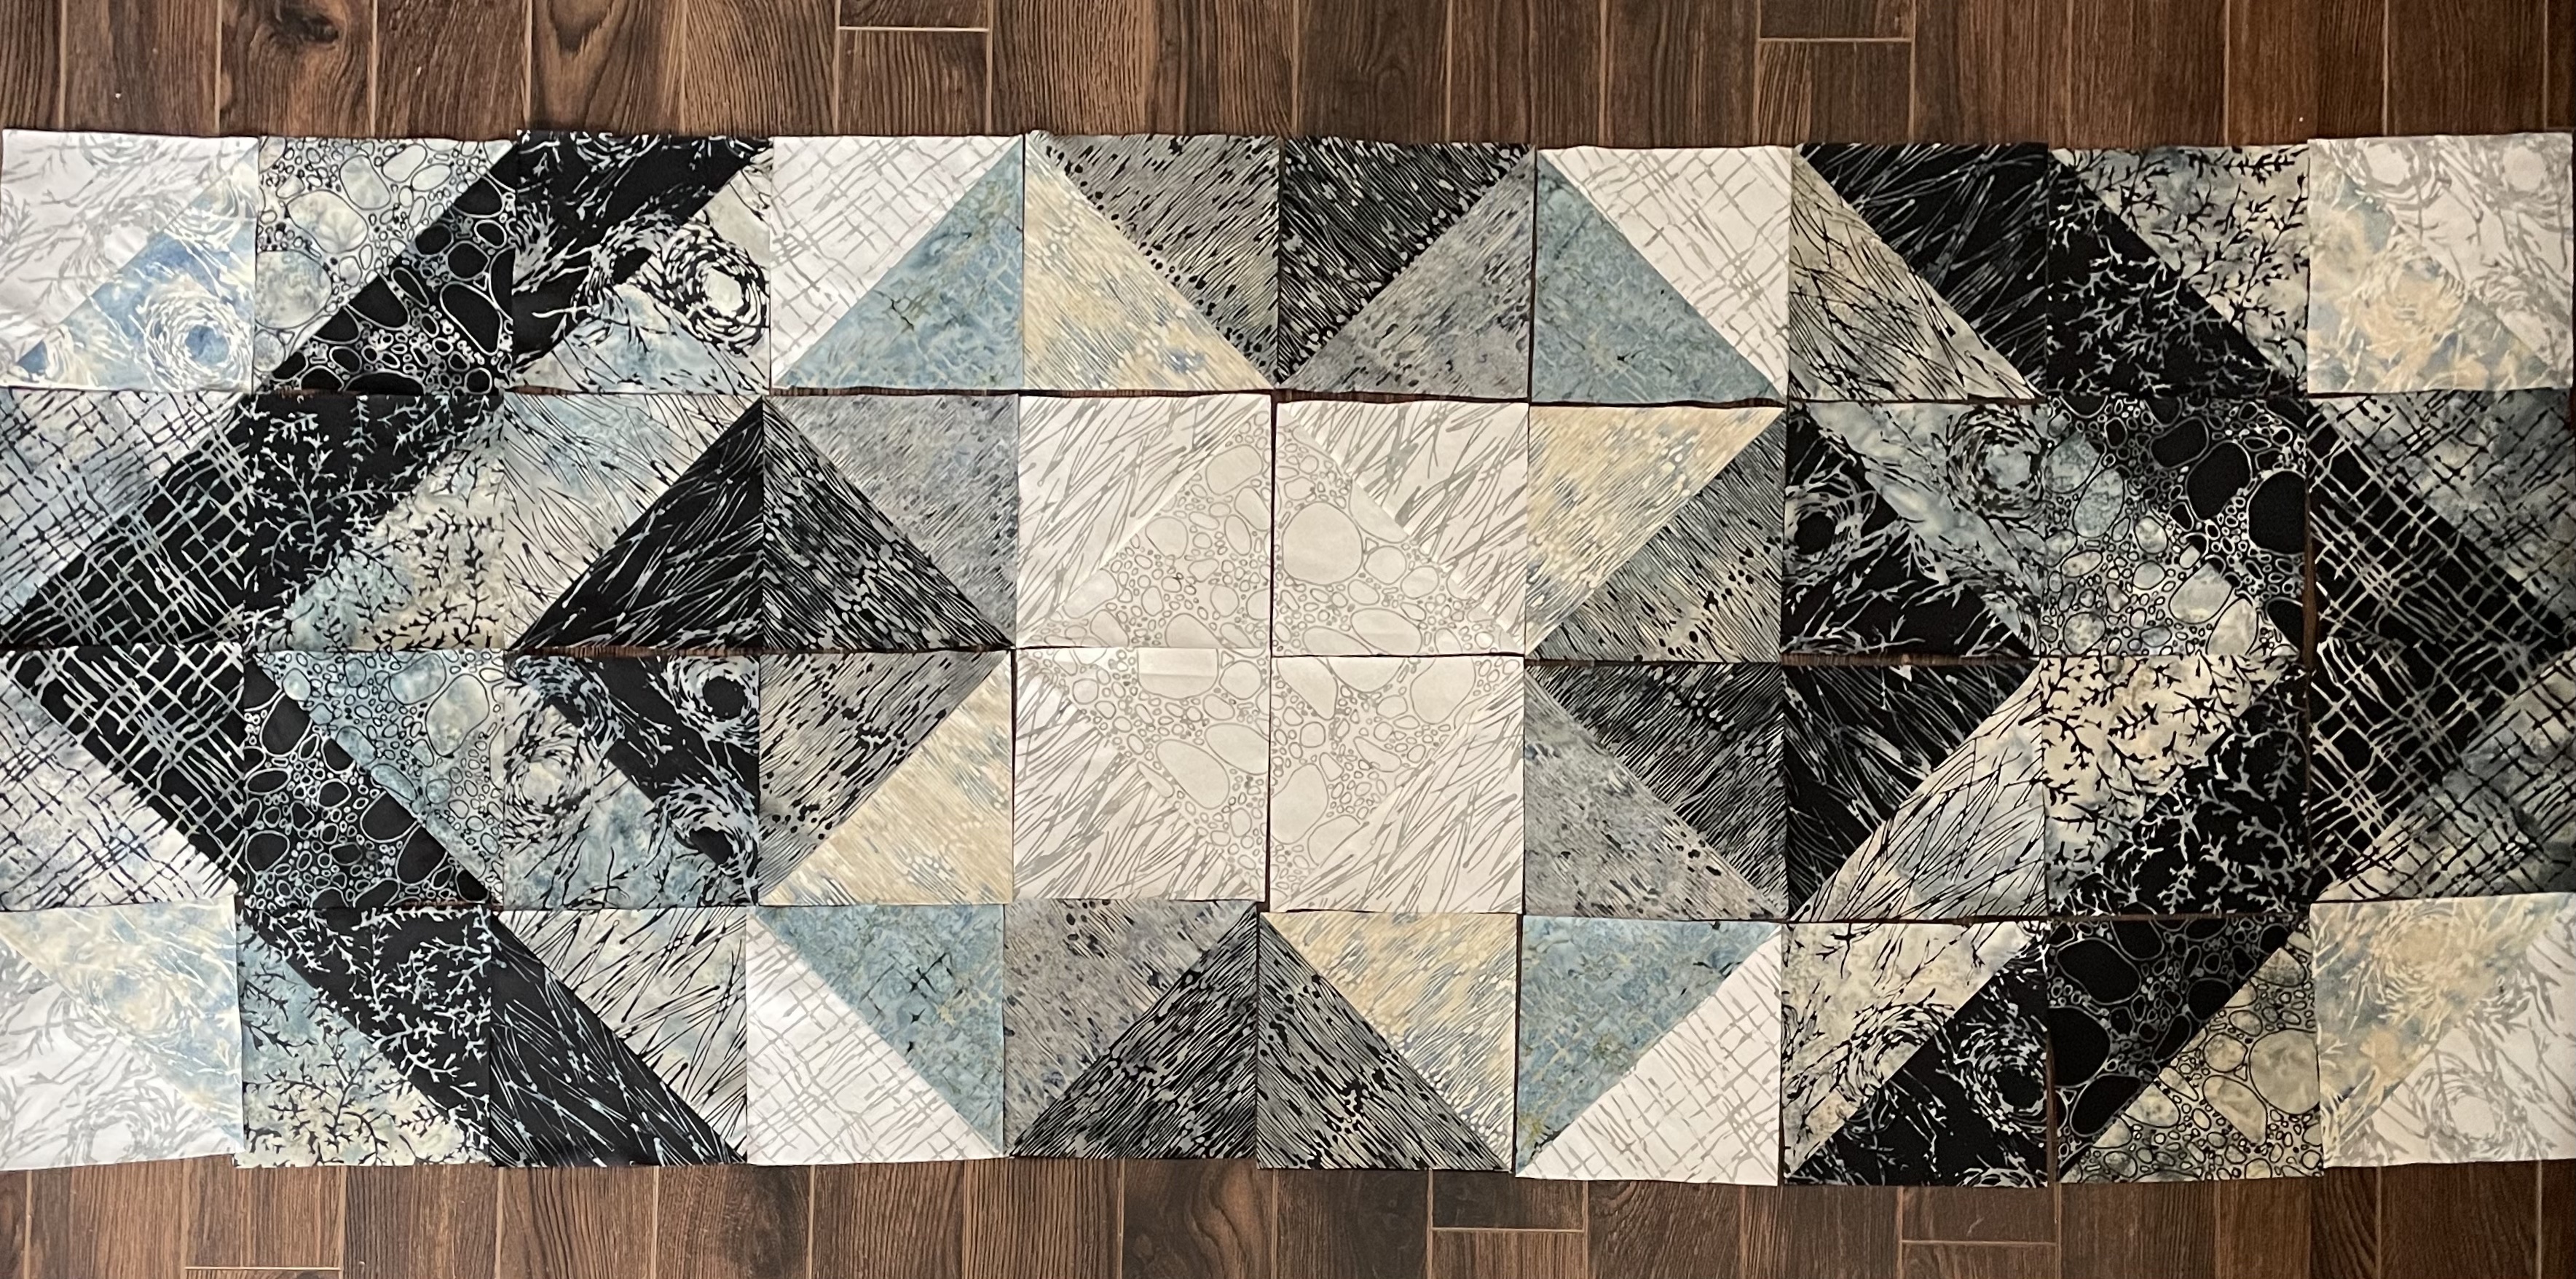
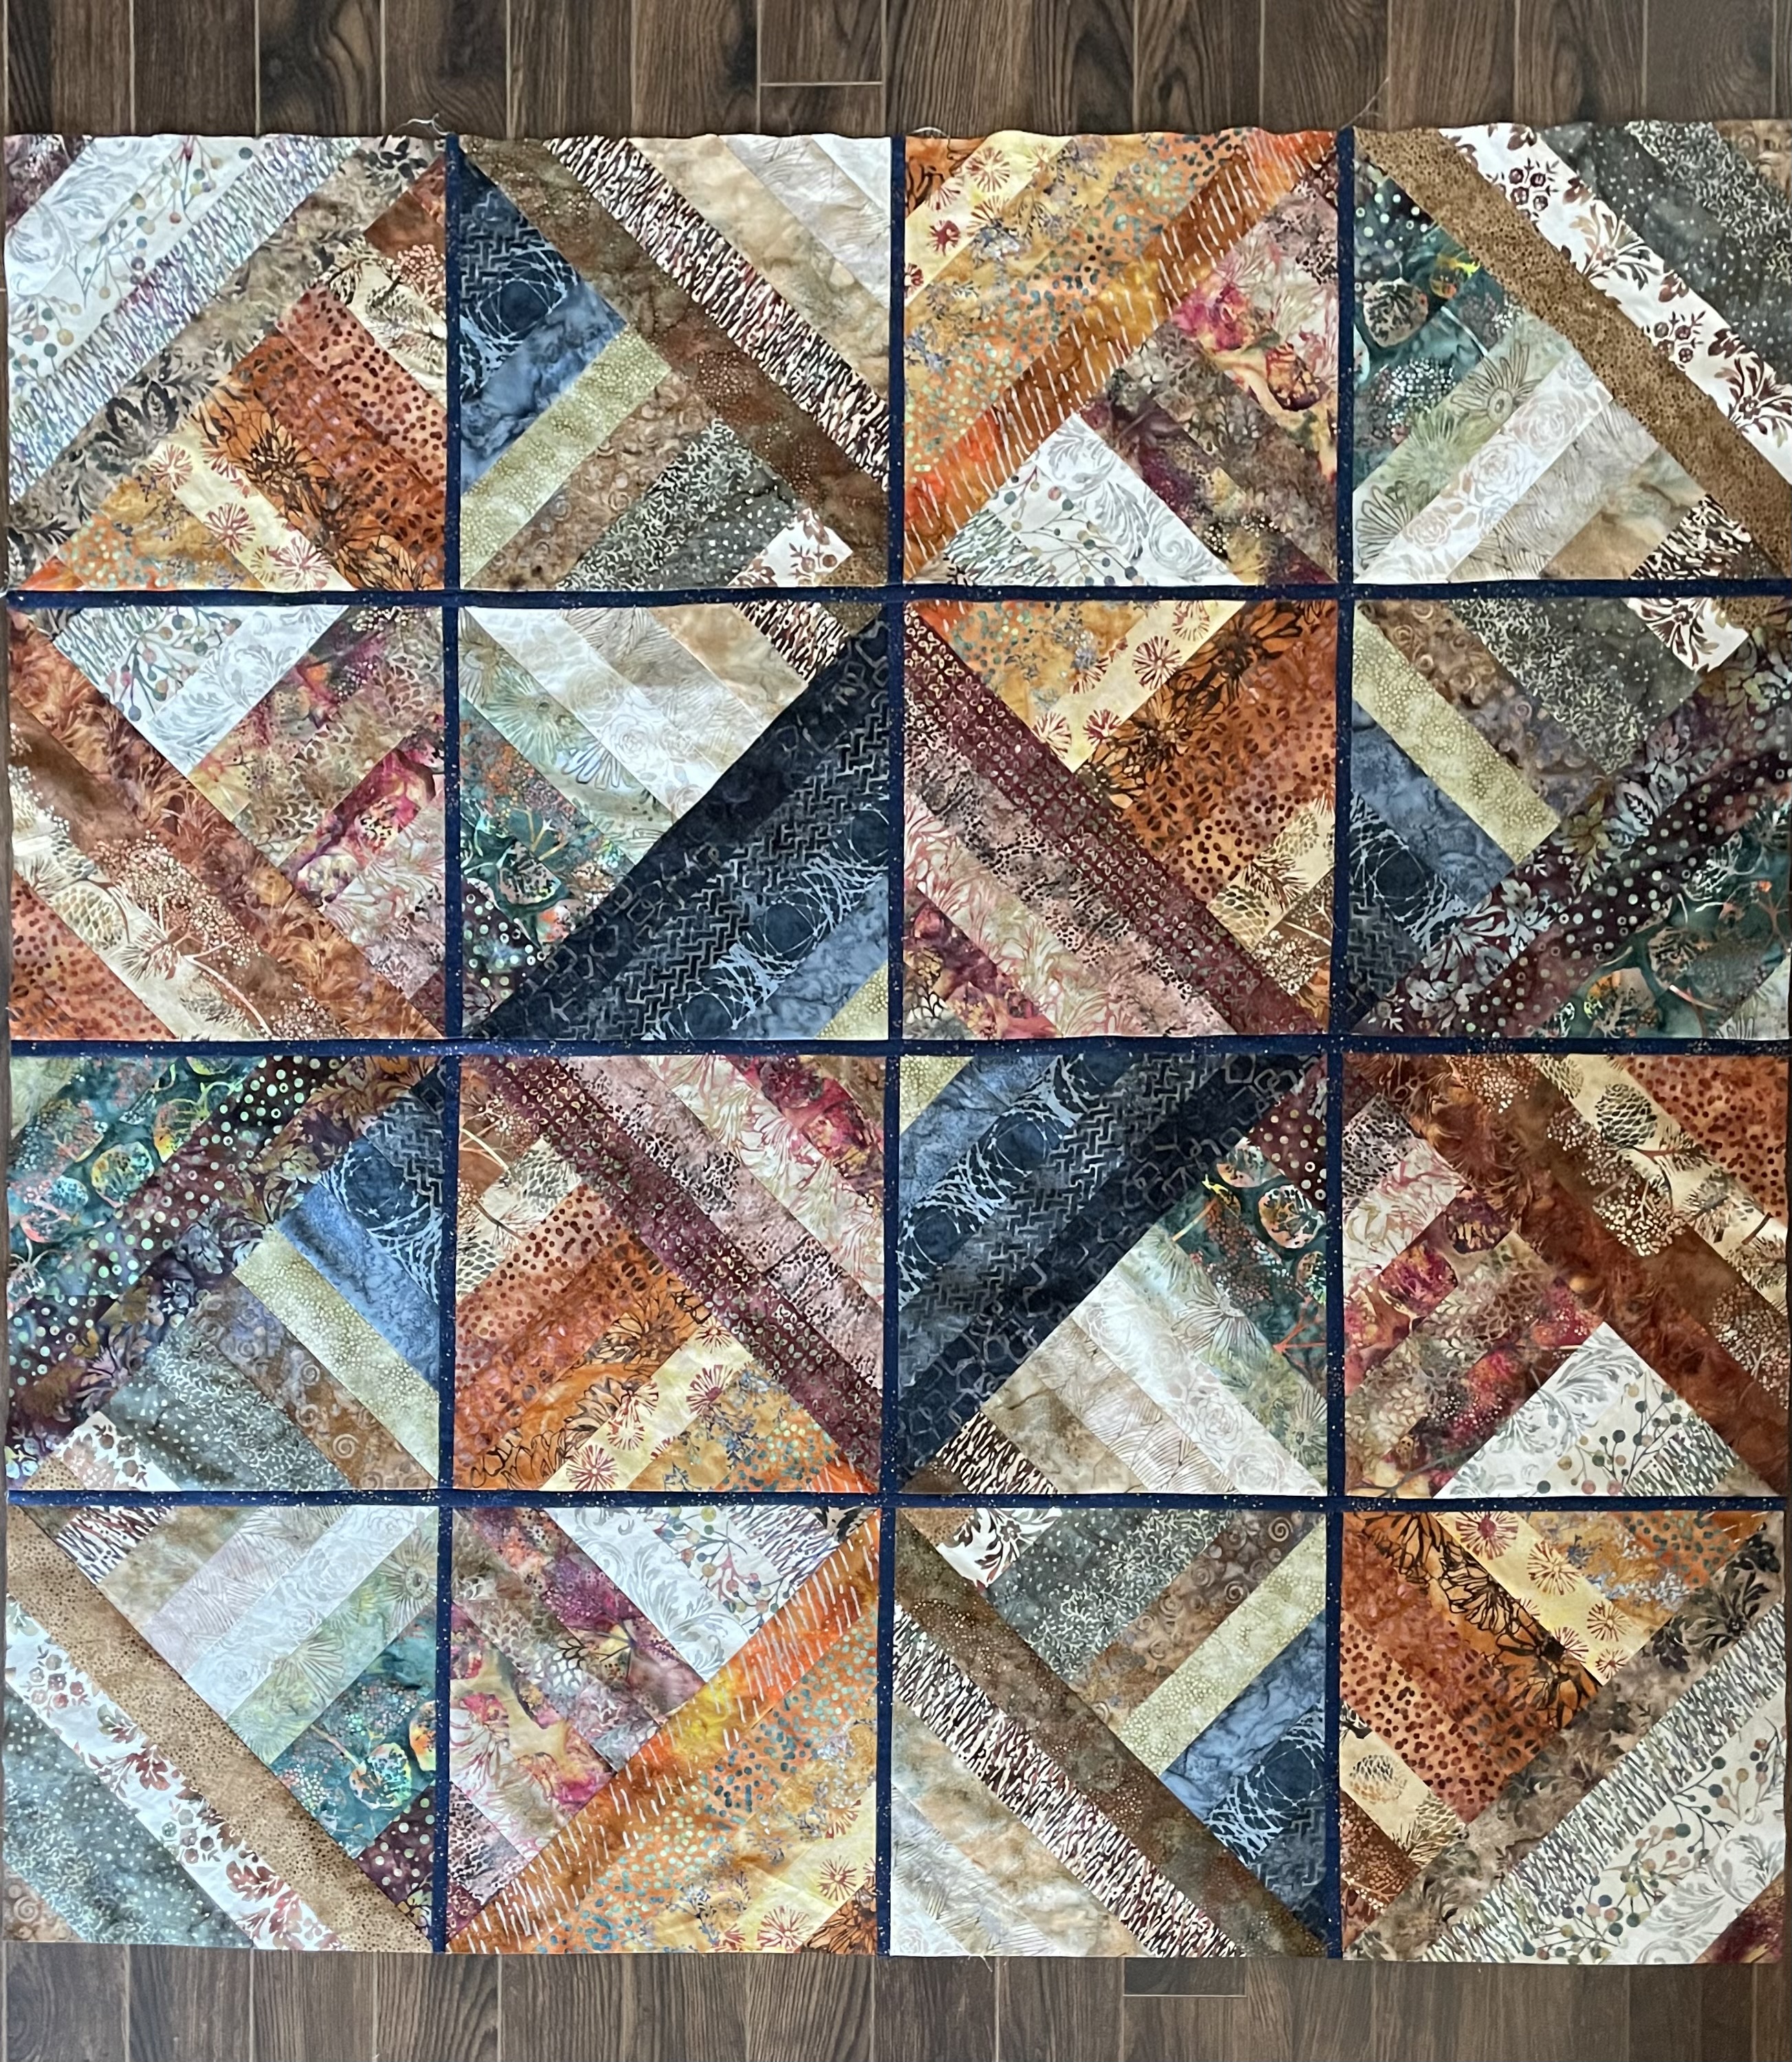
I have just finished assembling the 16 blocks with 1/2″ sashing. I decided to use a narrow sashing to tame the bias edges of the blocks – it has done that. The half inches and the intersections are pretty good – the imperfections won’t be noticeable when I’ve added the outer border and quilted the whole thing.

So here’s my dilemma – I have exactly 20″ of the sashing fabric to use for the outer border. I’d like to use 3″ cuts but here is the math:

  • Side length = 56″
  • Fabric (minus selvage) = 42″ + 14″ = 56″
  • Overlap needed to join fabric = 6″
  • Overlap for corner mitre = 3″ x 2 = 6″
  • Total fabric needed for one side = 56″ + 12″ = 68″
  • Fabric needed for 4 sides = 272″
  • 20″ of fabric cut into 3″ strips yields 6 x 42″ = 252″!

If I cut six 3″ strips I’m going to be 20″ short of fabric – and I don’t have a scrap of this navy Speckled (Ruby Star Society) anywhere in my boxes of scraps. (If I hadn’t done the sashing, I’d have had enough fabric!)

Back to the beginning – what if I don’t mitre the border corners – I still need 56″ of border length for two sides, plus 6″ to create a mitre join, the two short lengths each need to be 62″. The two longer pieces each need to be 62″ + 6″ (double the width of the border) – 68″. Total border length: (62 x 2) + (68 x 2) = 260″! I’ve managed to save 12″ but I’m still short 8″. Butting the border pieces won’t work either.

OK, so I create 2 3/4″ strips (2 3/4″ x 7 = 19 1/4″) – that means I have enough fabric to make 7 cuts from the 20″ of fabric. 7 x 42″ = 294″. That gives me enough length for four border sides with mitred corners (leaving me 22″ to play with). Attached, (using a 1/4″ seam) gives me a 2 1/2″ border. I then lose at least another 1/4″ if I do a hidden binding, 1/2″ – 5/8″ if I decide to finish with a traditional quilt binding. In the end I will have just about a 2″ border. Not quite wide enough to tame the busyness of the 40 coloured strips in the panel.

I managed to find more navy Speckled fabric online – it’s on the way; but I have no guarantee that the colour will match what I used for the sashing. It looks like I better wait for the fabric I ordered to arrive. Just put this project aside and start another quilt. If the fabric I ordered is close I’m in business. If not, I will have to make a narrower navy border and then improvise with another fabric to make a wide second border.

The World In Stones

Jon Foreman, a Welshman, does these amazing creations on a beach using stones or shells, or just a rake and some string.

It’s about the time it must take to collect the RIGHT stones – construct the array, take photos, then walk away. The next day the array is likely gone, washed away by the waves. He sets to work again.

Do take a look: https://www.thisiscolossal.com/2022/04/jon-foreman-new-land-art/ – each piece is spectacular!

New Quilt – In Progress

Four days ago I shared my work on a new quilt – I had sewn together 3 panels of four strips each – I had 7 panels left to create.

4 Panels Sewn

I’ve worked away at the panels – finished sewing them yesterday.

40 Strips Sewn in 10 Groups of Four

Here’s where it got interesting. I made the decision to revamp the panels into 4 sets of 10 strips – I accomplished that by sewing two sets of 4 then splitting the next adjacent panel in half and joining the resulting 2 strip sets to the first 8 and the second 8. Repeated that with the remaining strips giving me 4 sets of 10.

What I did next was create two 20.5″ squares from each 10 strip panel, matched up two non-identical panels, stitched around the outside, then cut along the diagonals. From my first two panels I got the following:

The first eight blocks laid out

Not a bad start – you get two large blocks with an encircled square. But my other eight blocks are very different in colour so how do I use them?

The first layout was a more or less random placing of the 16 blocks. The second layout set up a dark square in the centre and build more or less randomly on that centre. The third layout took the initial 8 blocks and added the second eight to the sides. At the moment I have no idea which to use. Each time I look at the photos I see new conflicts I want to resolve.

In addition, I’m planning on putting a navy speckled 1/2″ sashing between all the blocks which should actually bring the hodgepodge of colour together – fingers crossed on that. Furthermore, I really don’t want a square quilt! I want a rectangular one. I could get that, if after sewing the square together, I cut each of the two sides in half and place the cut pieces at the top and bottom! I have a hunch I may actually do that.

I worked on another half-square triangle project yesterday as well – the quilt is really a half-square triangle block (just built from 10 strips rather than a smaller number, usually 4).

Table Runner

I’m on the calendar to teach a quilting class Thursday on experimenting with HST. I had a layer cake – I matched up the fabrics – same batik pattern in two different colours, and made the blocks. This is the layout I will probably use. I can’t really sew the blocks together since I want to use them to show the many different ways these blocks can be assembled. In fact, it’s Sunday, tomorrow is a holiday, I won’t find out whether anybody actually signed up for the class till Tuesday – at which point I’ll have to scramble to contact the participants to notify them about what to bring to class on Thursday. Crazy! If nobody has signed up I’ll be able to work on the quilt!

Continuing To Explore With Icon 2

4 Panels Sewn

Last week I pulled a jellyroll package from my stash (Hoffman Bali Poppy: Poppy Field #2: Hard Cider #662) – it held 20 strips – maybe enough for a lap quilt but there weren’t enough light contrasts so I dug through the drawers of batik and came up with another 20 fabrics that blended – I cut 20 more strips. I colour sorted them into groups of 4 to give me 10 groupings. I’ve begun sewing the 4-strip groups together. I have 6 groupings to go.

4-Strip Groupings

I have no idea yet what I’m going to do next. The obvious move is to cut the strips into 8 1/2″ blocks, overlap blocks (right sides together), stitch around the outside, then cut on the diagonals to create 4 HST blocks. But there may be other things I can do with these 8 1/2″ panels. I’m still thinking about it.

The thing is, I used the projection guidelines on the machine to set up a scant 1/4″ seam – I still used my 1/4″ quilting foot with right guide, but the laser guide was a scant bit to the left of the guide on the foot. It was actually quite easy to follow the laser guide and I did end up with a pretty accurate 8 1/2″ panel.

Laser Guides on Creative Icon 2

I’ve marked the needle position on the embroidery unit extension (and I’ll mark it on the tool box, too) in order to accurately stitch a 45° mitre when joining two 2 1/2″ strips. No other marking needed. The laser guide isn’t quite long enough to position the end point of the mitre.

I also played with more decorative stitches:

Decorative Stitches on Silk

I’m doing the “Experimenting With Your Machine’s Stitches” class a second time in couple of weeks – an opportunity to try out more off the stitches on this machine. Again, I used the laser grid system to align the stitching. I mirrored the stitches as well as the thread colour from the centre. [I did a simple grid quilted the back of the bag.]

Crazy Quilt Bag

I also pulled out a bag I made quite a while ago using scraps of fabric, where I used the “stitch/flip” technique to construct the fabric on which I then used decorative stitches to mark the seams. I want folks to see this other possible use for other machine stitches.

Sky / Sand / Sea – Finished

Sky / Sand / Sea

Finished, except for hand stitching the hidden binding to the back. It’s hard to tell from the image how much quilting I did. I decided to leave the narrow strip unquilted to act as a separation between the two pieced strips. That meant I had to free motion quilt the light elements stopping precisely at the separator and make sure I did a tie off at the back. The darker elements required a different technique – I created embroideries to fit the size of each of the dark elements and stitched them in the hoop as I would any embroidery. You can see the detail below:

Quilting Detail

I wanted a “wave” like flow to the “sea” elements so I set up a couple of different embroideries for each section. I used a “stippling” stitching in the embroidery on the hibiscus fabric. I created “grass” for the green/blue fabric, etc. I made sure each embroidery fit the dimensions of the bit of fabric I was quilting. In the end I was pleased with the outcome.

I added the gulls once I’d stitched the “sky” portion of the hanging – they are cut from black raw silk, fussy cut, fused, then edge stitched in place. My initial idea had been to print images of gulls on fabric but when I did that with the paper cutouts they didn’t show up well. In the end I thought silhouettes of the gulls worked better against the “Sky” background.

This evening I’ll do the hand stitching to finish off the piece.

Sky / Sand / Sea

Sky / Sand / Sea

I have the panel assembled – two pieces joined off-centre with a narrow strip. It was obvious the resulting panel needed something more – gulls! So I searched for silhouettes of gulls online. There are lots of them. I downloaded a bunch in various sizes and flight positions. I need both right-flying and left-flying birds.

What I have in place at the moment are paper cutouts so I could judge position and size. I need to make two of the birds smaller – the one in the centre needs to be a bit bigger. Otherwise, I think three is all I want or need. My plan is to print them on fabric, fussy cut them, then fuse them in place.

In the end I chose to join the fabric pieces with straight lines – I’m intending to do quite a bit of thread painting particularly through the “sand” and “sea” elements with gently curved lines (using doubled rayon thread for emphasis) which I’ll stitch over the seams to obscure them a bit.

Next I need batting, then I can start stitching.

From Sample Stitches to Drawstring Bag

Drawstring Bag

I did another stitch sampler – this time horizontal rows of embroidery stitches (of which this machine has MANY – particularly when you consider you can modify both length and width of each of the 500+ stitches). No ribbon or lace – just the stitches themselves in rayon embroidery thread.

Then I turned the panel into a drawstring bag large enough to carry a pair of shoes, or my knitting, or whatever I need a bag for. Finished size: 10″ x 13″.

What’s different about this drawstring bag is the way the channels are formed. Many years ago I was given a Japanese drawstring bag made with such channels. It’s a more refined way of finishing a drawstring bag. So I’ve been making mine this way for a long time.

Here’s a link to instructions for this Japanese Drawstring Bag.

It Finally Arrived!

A year and a half late – my Pfaff Creative Icon 2 sewing machine arrived two days ago! Development delays, computer chips unavailable, pushed the delivery of these machines way back. Some were sent out to preorder customers in later December – I opted to wait for the second batch (hoping that any glitches remaining in the software and mechanics would be worked out).

Got the call that my machine had arrived on Monday while working at the test kit assembly facility – I picked it up late in the afternoon, took it home, unpacked it, plugged it in, and played with it after supper until close to midnight.

The icons are different, and they’re located in different places from my original Creative Icon and it took me some time to find things I was used to using. Yesterday I was at it again and had a better time making the work flow. Today, I did what I always do when I get a new high-end embroidery/sewing machine – I made a bag for my foot pedal and power cord so I can slip them within the machine opening when transporting it.

Bag For Foot Pedal and Power Cord

I used the same embroidery I’ve used before, in part, because I wanted to see how accurately it stitched out – the irregularities were my fault (not the machine’s) – I used batting and not stabilizer behind the fabric, I used the universal needle that came with the machine (instead of changing it for an embroidery needle) – and both of those decisions resulted in some pulling of the fabric and loose stitches when they caught on the embroidery foot. Otherwise, the embroidery worked out well, with all the bits matching up as they should. I quickly turned the embroidery into a zippered bag.

The second task today: I’m teaching a class in early April on “Using Your Machine’s Stitches” – intended for folks who have relatively simple machines and rarely explore all the possibilities of their mostly utility stitches (but it also could be of interest to folks who have a “cadillac” like I do and also don’t explore all their stitches, either).

To set up for the class I sat down with a piece of Kona cotton fabric (with tear-away stabilizer) underneath and a new 75 embroidery needle. I started embellishing the fabric using doubled embroidery thread (to make it stand out more strongly) and only the utility stitches (which I edited for length and width) on my machine:

Utility Stitches Sampler

Now here’s where I’m trying to become acquainted with my fancy new machine. Notice the grid projected onto the sewing area in the upper right of the photo! That’s the new feature of this machine – it has both a camera and a laser projector which allows me to line up my stitching precisely – I began with a chalk diagonal from corner to corner. After I stitched that line, keeping the pink guide line centred on my chalk line, I was able to add subsequent rows using the grid, without having to draw any further lines. I stitched over a piece of narrow blue satin ribbon; I also stitched a narrow piece of lace in place (not yet done when I took the photo). I filled the entire piece of fabric, then trimmed it. My plan is to use it to make a zippered bag. I could use undecorated fabric for the second side, but I think I’ll do a second piece using embroidery stitches probably in horizontal lines as an example of what that can look like.

I’ll be busy learning this new machine for the next couple of weeks. I have a physical printed users manual alongside the digital one I can access on the machine! I’m trying to figure this all out by invoking my knowledge of how my previous Creative Icon works and predict from there. I’ve made quite a bit of headway since Monday night!

Carryin’ On

Fabric Squares For Another Wall Piece

Yesterday, I cut 7 1/2″ squares from the fabrics I’d collected from my stash to do a second wall art piece. What I see in my mind’s eye is something to suggest sky/sea/sand in two unequal panels: a wider light one, and a darker narrower one, joined by a dark strip graduated from lighter at the top to darker at the bottom. At the moment, the blocks are the same width – that’s because I don’t yet know where I want to place them – some of the dark pieces on the left will get cut into narrow strips and integrated into the fabrics on the right. When I’ve worked out colour placement, I’ll sew my two strips (I want a finished length of around 42″) then trim the one that will be on the right to 5 1/2″ – 6″. I still need some kind of lighter sand colour fabric for the top of the narrow insertion strip dividing the two panels – have to look for that today.

Latest Socks


Finished these socks two days ago – definitely bright! Into the “give-away” stash. I have a number of pairs of yellow socks in my sock drawer; no need (no room) to add another!

Blue Flowers

Blue Flowers

Just finished (well, I’ve still have to hand stitch the hidden binding in place). It took several days to do the thread painting – using decorative stitching around each fabric circle, embellishing the flower centres with embroideries, adding leaves, and stitching the detail in the foreground at the bottom of the piece.

Detail

Here you can see more of the stitching detail – many decisions: what thread colour, which stitches, stitch dimensions. Most of the centre embroideries I’d already set up from a previous floral hanging but they had to be adapted to fit these smaller centres.

This was the image that inspired the piece:

By Marieka Diepenveen

The piece by Marieka Diepenveen is a watercolour. I particularly liked the irregular concentric blue flower shapes and the tiny leaves growing out of the variable green vegetation. I added more colour and adjusted the dimensions and my circles are regular. My vegetation was dictated by the batik I chose to use which had greenery shapes. I might try another where the flower shapes are irregular….