Finished quilting and binding the table runner last evening. Hand stitched the binding on the back (definitely not my most favourite thing to do!).
I’m happy with how the dark narrow binding pulls attention away from the outer border which doesn’t completely match up. I just didn’t have enough sunflower fabric (with its very large flowers) to find precise repeats for the border strips. I realize nobody but me will even notice. I was making this table runner as an example for a class I was planning on offering – not going to happen in the near future so I’ve hung it in the closet with the rest of my finished projects until such time as I might need it.
Sunflower Kaleidoscope – Top
I dug through my stash to find something for the back – found a 9″ golden/orange WOF piece which worked as a starting point, added a scrap of the sunflower fabric and a piece from the previous runner at the ends (the two ends are intentionally different – it wasn’t a mistake!). I had enough of the orange dotted fabric for narrow inner borders and then hunted until I found the dark outer border fabric given me by a friend.
Sunflower Kaleidoscope – Back
This project is now done. Today, it’s back to face masks. I have to think about how to streamline the process so I can turn them out in batches quickly. It’s gotta be like the zippered bags at Christmas – a production line.
Just finished assembling the sunflower kaleidoscope table runner top.
Kaleidoscope #3
This time I managed to get sets of eight triangles for the octagons so the full kaleidoscope effect is present. Because of how the repeats in the fabric were set up I was able to get away with less fabric but that also meant I had fewer stacks to choose from. The variation turned out reasonably well and I was able to get some colour flow with the octagons.
I had to buy another 1/3 metre of fabric for the outer border but because the flowers are very large it wasn’t possible to match up the border pieces. I think a dark, narrow binding in some shade of brown should tie the piece together. Now I just have to find something in my stash that will work – not a lot of brown fabric there; it’s not a colour I’ve used much.
It’s noon. Time to get out into the sunshine even though it’s a cold day – temperature -4°.
After finishing the first kaleidoscope table runner I went shopping for fabric to try a second to learn more about what makes a good print design for constructing the octagons.
The pattern repeat in the butterfly fabric I bought was ~ 23in in length and although I bought 1.4m I decided to use just half of the fabric for the kaleidoscope since I didn’t want to end up with many more triangles than the 40 (5 x 8) I needed.
I was hampered by the fact that the printing of the fabric wasn’t precise and even though I aligned the 5.5″ fabric strips precisely, I wasn’t able to get 8 exact repeats of from any spot – just sets of 4. So I built my octagons from two sets of 4. That still gave me the kaleidoscope effect I was after.
Kaleidoscope Table Runner II
I cornered and bordered the octagons with a dark blue print and then used strips of the butterfly fabric for the outer border. The back used the leftover from both border fabrics as a simple bordered panel.
Again, I quilted the octagon blocks in the hoop, and stitched the borders in the ditch to stabilize the runner.
Finished the table runner last evening – hand stitching the binding to the back. I don’t enjoy hand sewing but in this case I used a 1/4″ binding on the top with a 3/4″ binding on the back and the only way to attach it was to hand sew it in place since I didn’t want a line of machine stitching through the border on the front.
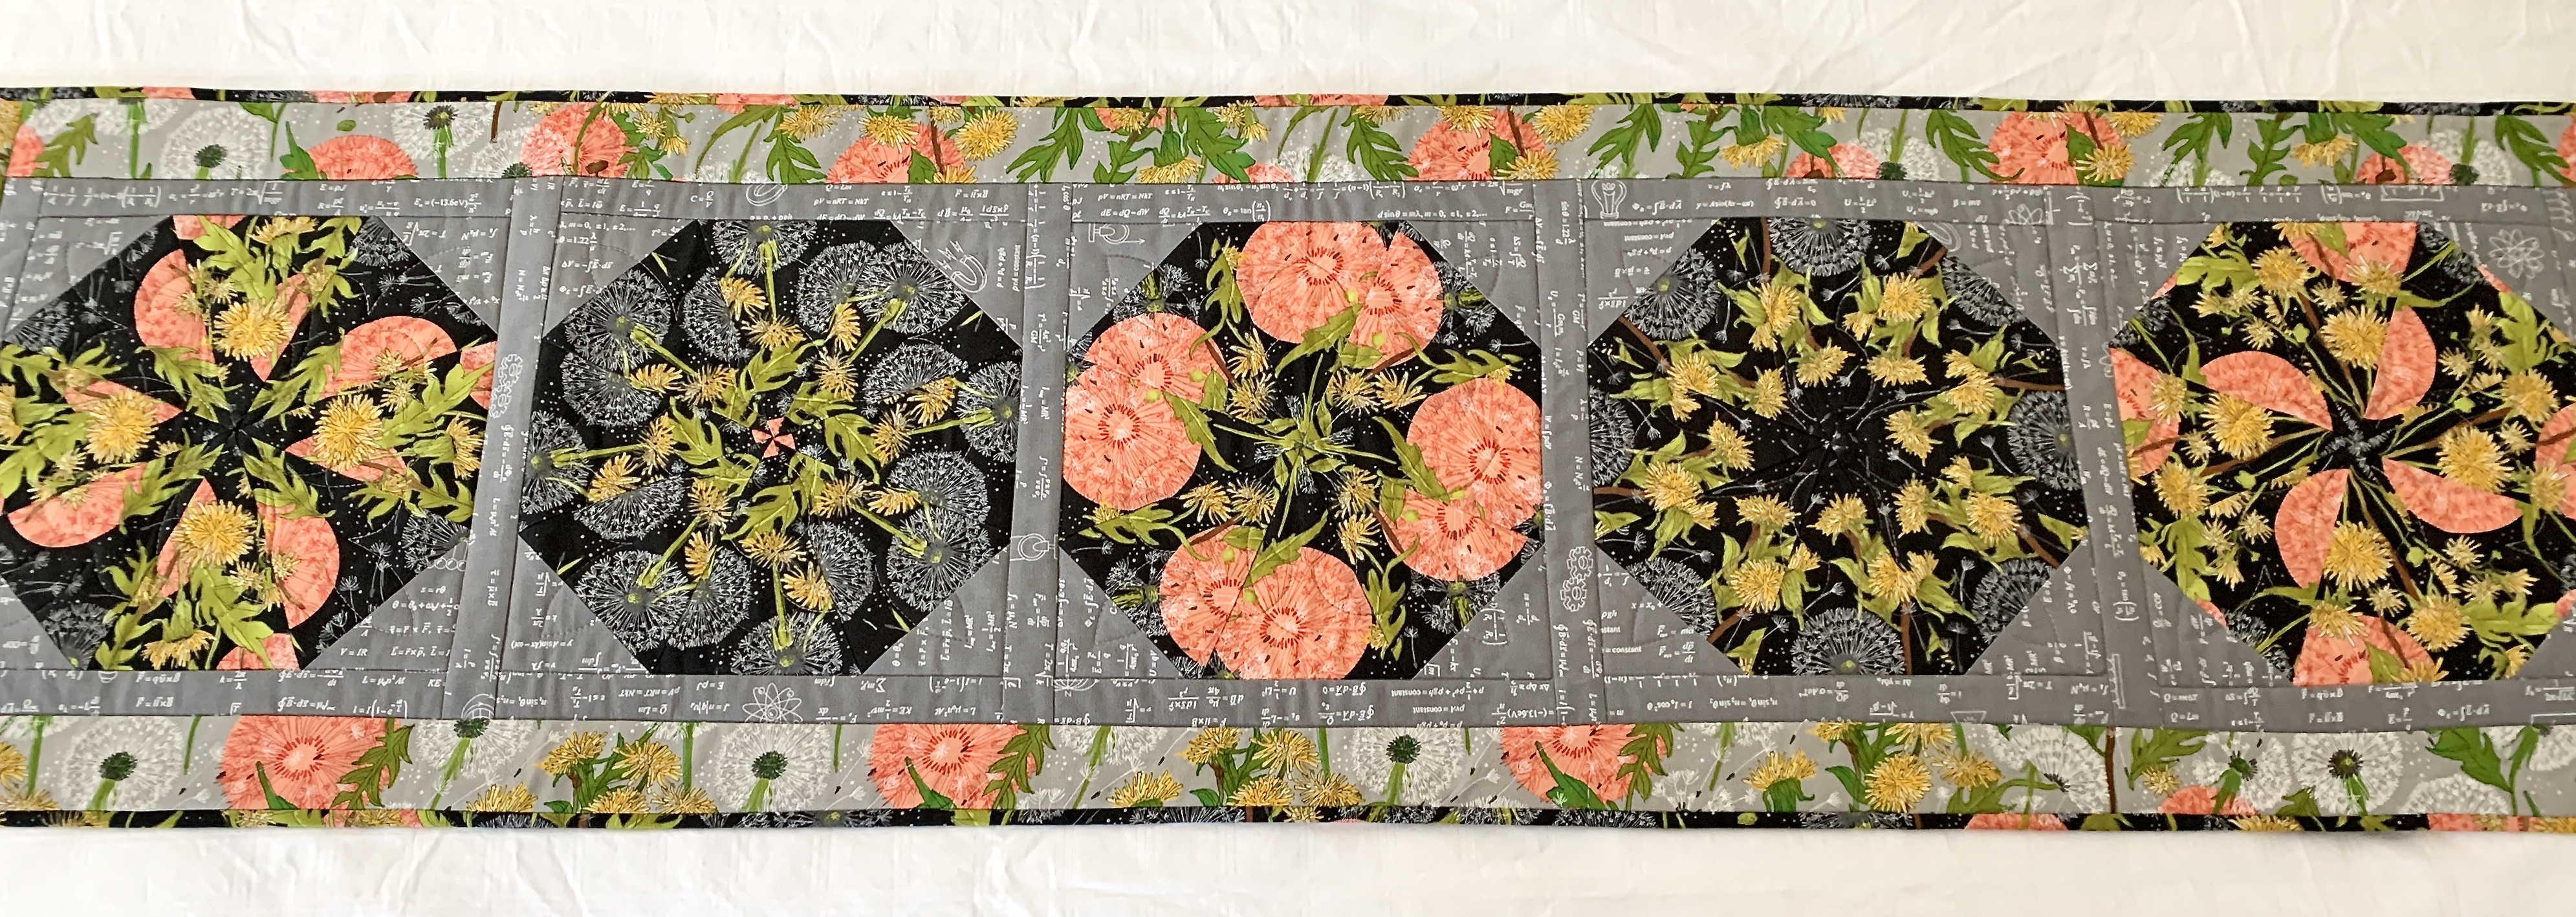
Completed Runner – Top
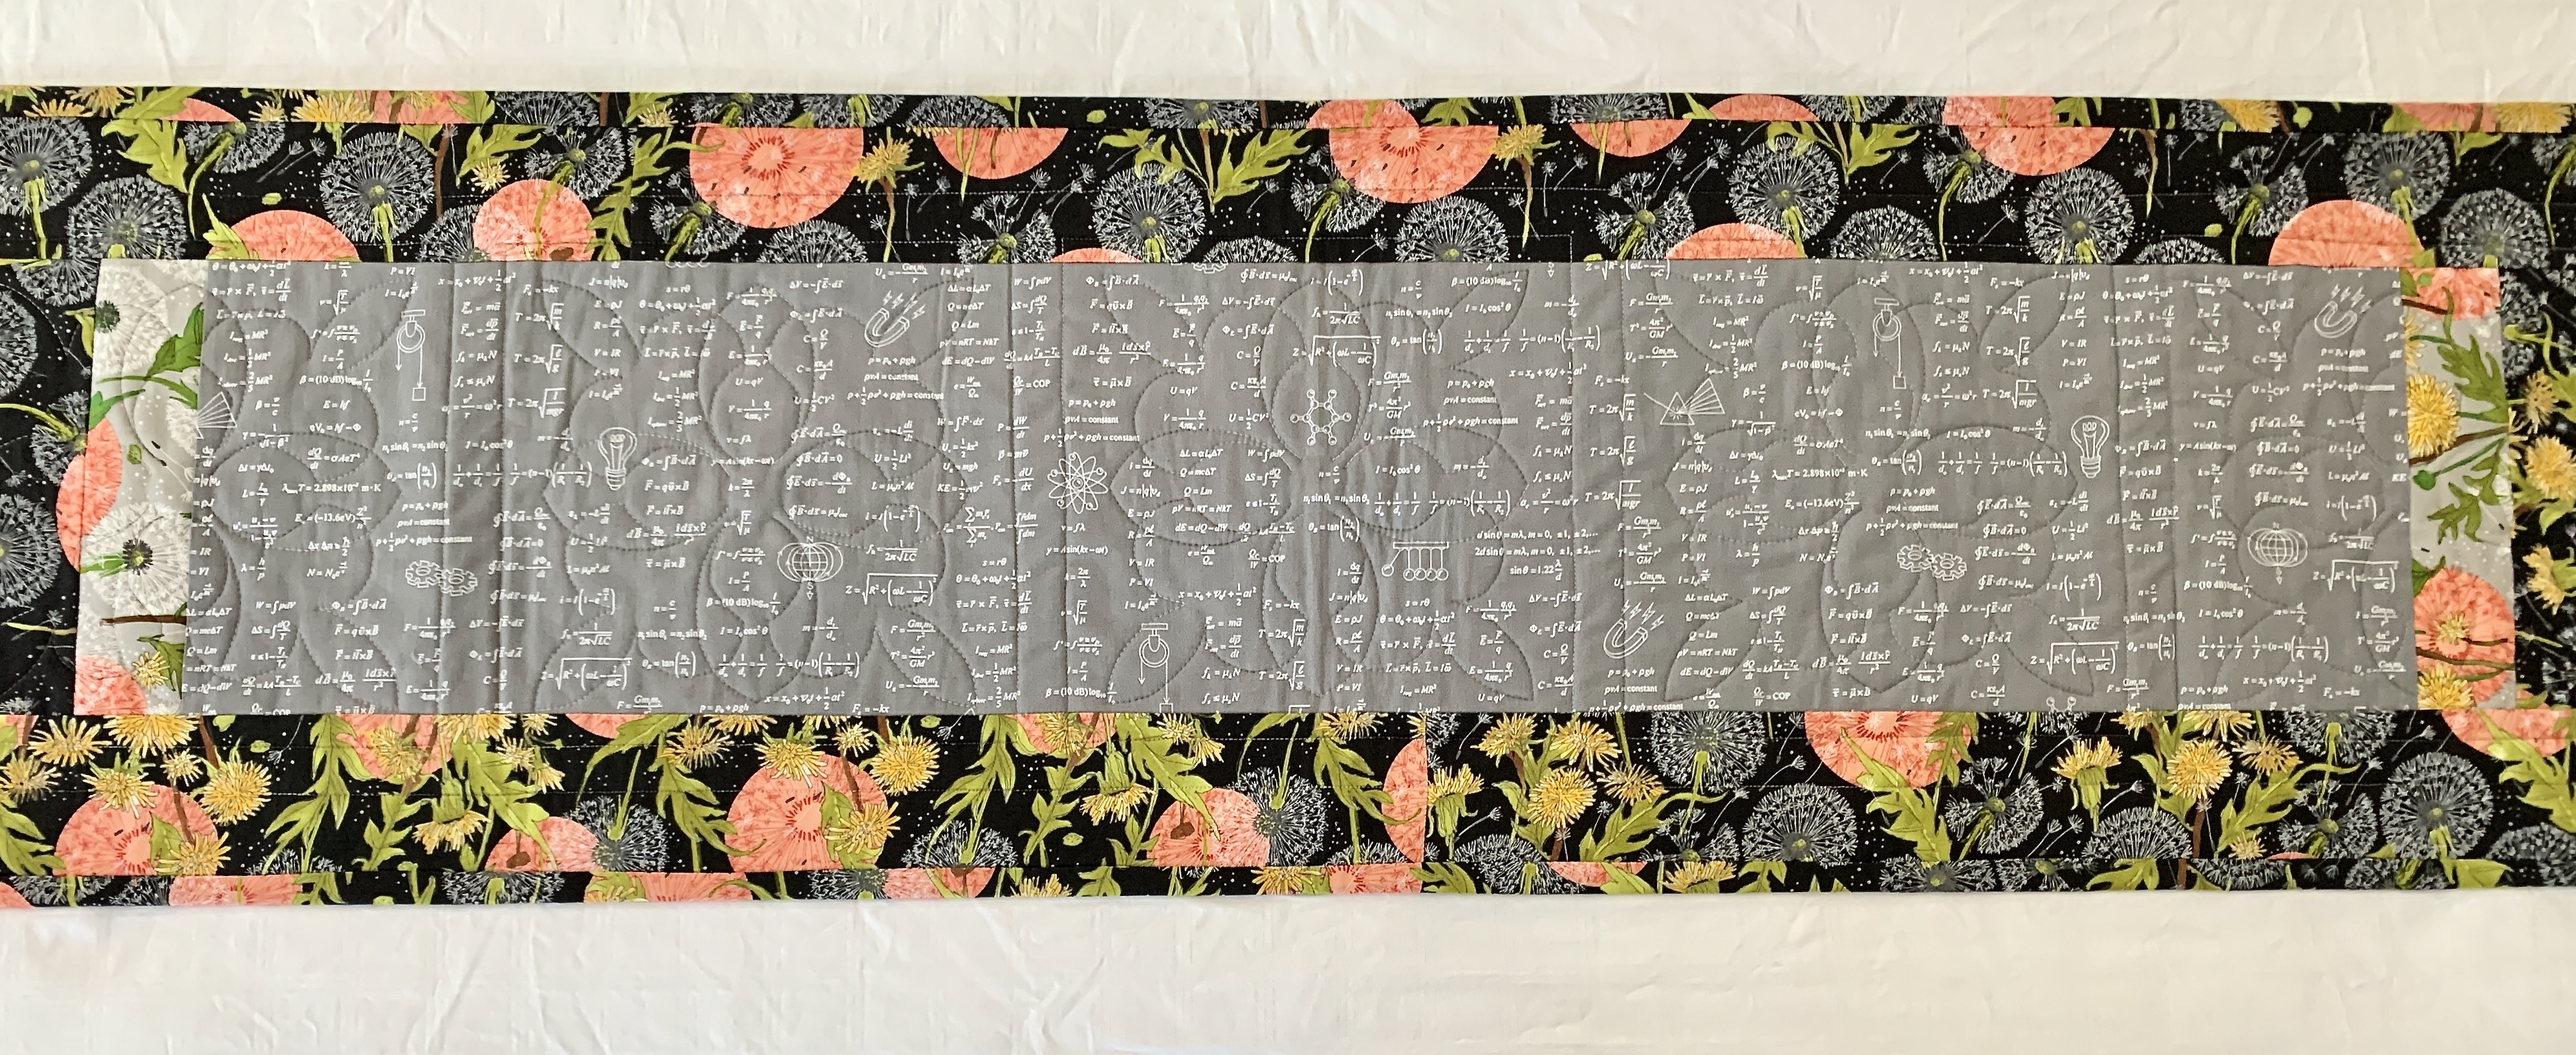
I constructed the back from leftovers – I hadn’t bought very much of either the grey for the sashing or the grey version of the printed fabric. Not much in the way of scraps left, I can tell you.
Completed Runner – Back
This idea would also make a decent bed runner probably with seven octagons to make it long enough so it drapes over the sides. Might even want to add another narrow light inner border as well. My runner is just a bit narrower than the width of my queen bed. I have no intention of using either is as a bed or a table runner; quite likely it’ll end up as a wall hanging and included in one of the showings I’m scheduled for this summer.
BTW:
“A bed runner is a small, long piece of decorated cloth used to enhance the appearance of an otherwise plain bed. While some prefer the look solely for aesthetic reasons and would choose it even if it were more expensive than traditional decorative bedding, the primary reason to use one in the hospitality industry is to reduce costs while keeping the room attractive.“
I’ve been looking for projects to try out that I can share with some of the other sewing gals. I’ve almost completed the Bargello Table Runner – it’ll get done over the weekend. The other day I came across another idea: a Kaleidoscope/Stack ‘n Whack octagon block for a quilt or table runner described on the Jordan Fabrics You Tube Channel. I decided to try it out.
Yesterday I picked up some large print fabric to see what’s involved. The tricky part of the whole project isn’t the piecing – it’s the cutting. I hadn’t bought enough fabric to end up with eight identical triangles (except in two cases) so I had to make do with 4 and 4 somewhat complementary triangles for three of the octagons; but it’s the construction of the block I was interested in trying out.
I laid out my dark fabric, found the pattern repeat, cut what I had into two repeats (I bought .7m – I should have bought 1.4m to get the eight repeats for cutting the triangles but with a bit of improvising I ended up with 4 layers instead of 8 which yielded enough triangles for the project), halved the width-of-fabric, then carefully aligned the printed pattern through the four layers as was demonstrated in Video #1 below.
Kaleidoscope Table Runner
Once I had my layers of fabric carefully aligned, I cut out 5.5″ strips, then cut out 45° angled triangles – in the blocks with the peach elements I had two sets of four triangles to sew together, in the predominantly dark blocks I was able to get eight matching triangles.
Next I stitched the octagons together. Today I added the corner triangles (cut from 3.75″ squares) and the sashing and added both to each of my five octagons. Finally, I added a 2.5″ outer border of a lighter grey version of the original fabric from which I cut the triangles.
All in all the project went together relatively easily – once I’d figured out the necessary size for the corner triangles! That took a bit of experimenting.
I’ve also figured out how I will piece the backing so I don’t have to buy any more fabric for this project. I’ll get that done tomorrow, then I’ll set up the quilt sandwich and get the table runner assembled.
It’s definitely do-able as a class project – I completed the runner in less than 6 hours.
I didn’t stop to take photos as I went along. The whole process is explained very clearly in the videos below. So if you’re interested in making a table or bed runner, or a full quilt using this kaleidoscope block watch Donna Jordan from Jordan Fabrics in Oregon as she explains the process.
The biggest hitch in the whole project is actually finding a suitable fabric for constructing the stack ‘n whack blocks – you really need a large print fabric with an open design and quite a bit of colour variation. I would say what I chose in the end wasn’t a colour combination I would normally choose but the selection was very limited at my local shop. I will look at a couple of other shops nearby to see what else I might find.