Failed Attempt

Failed Attempt

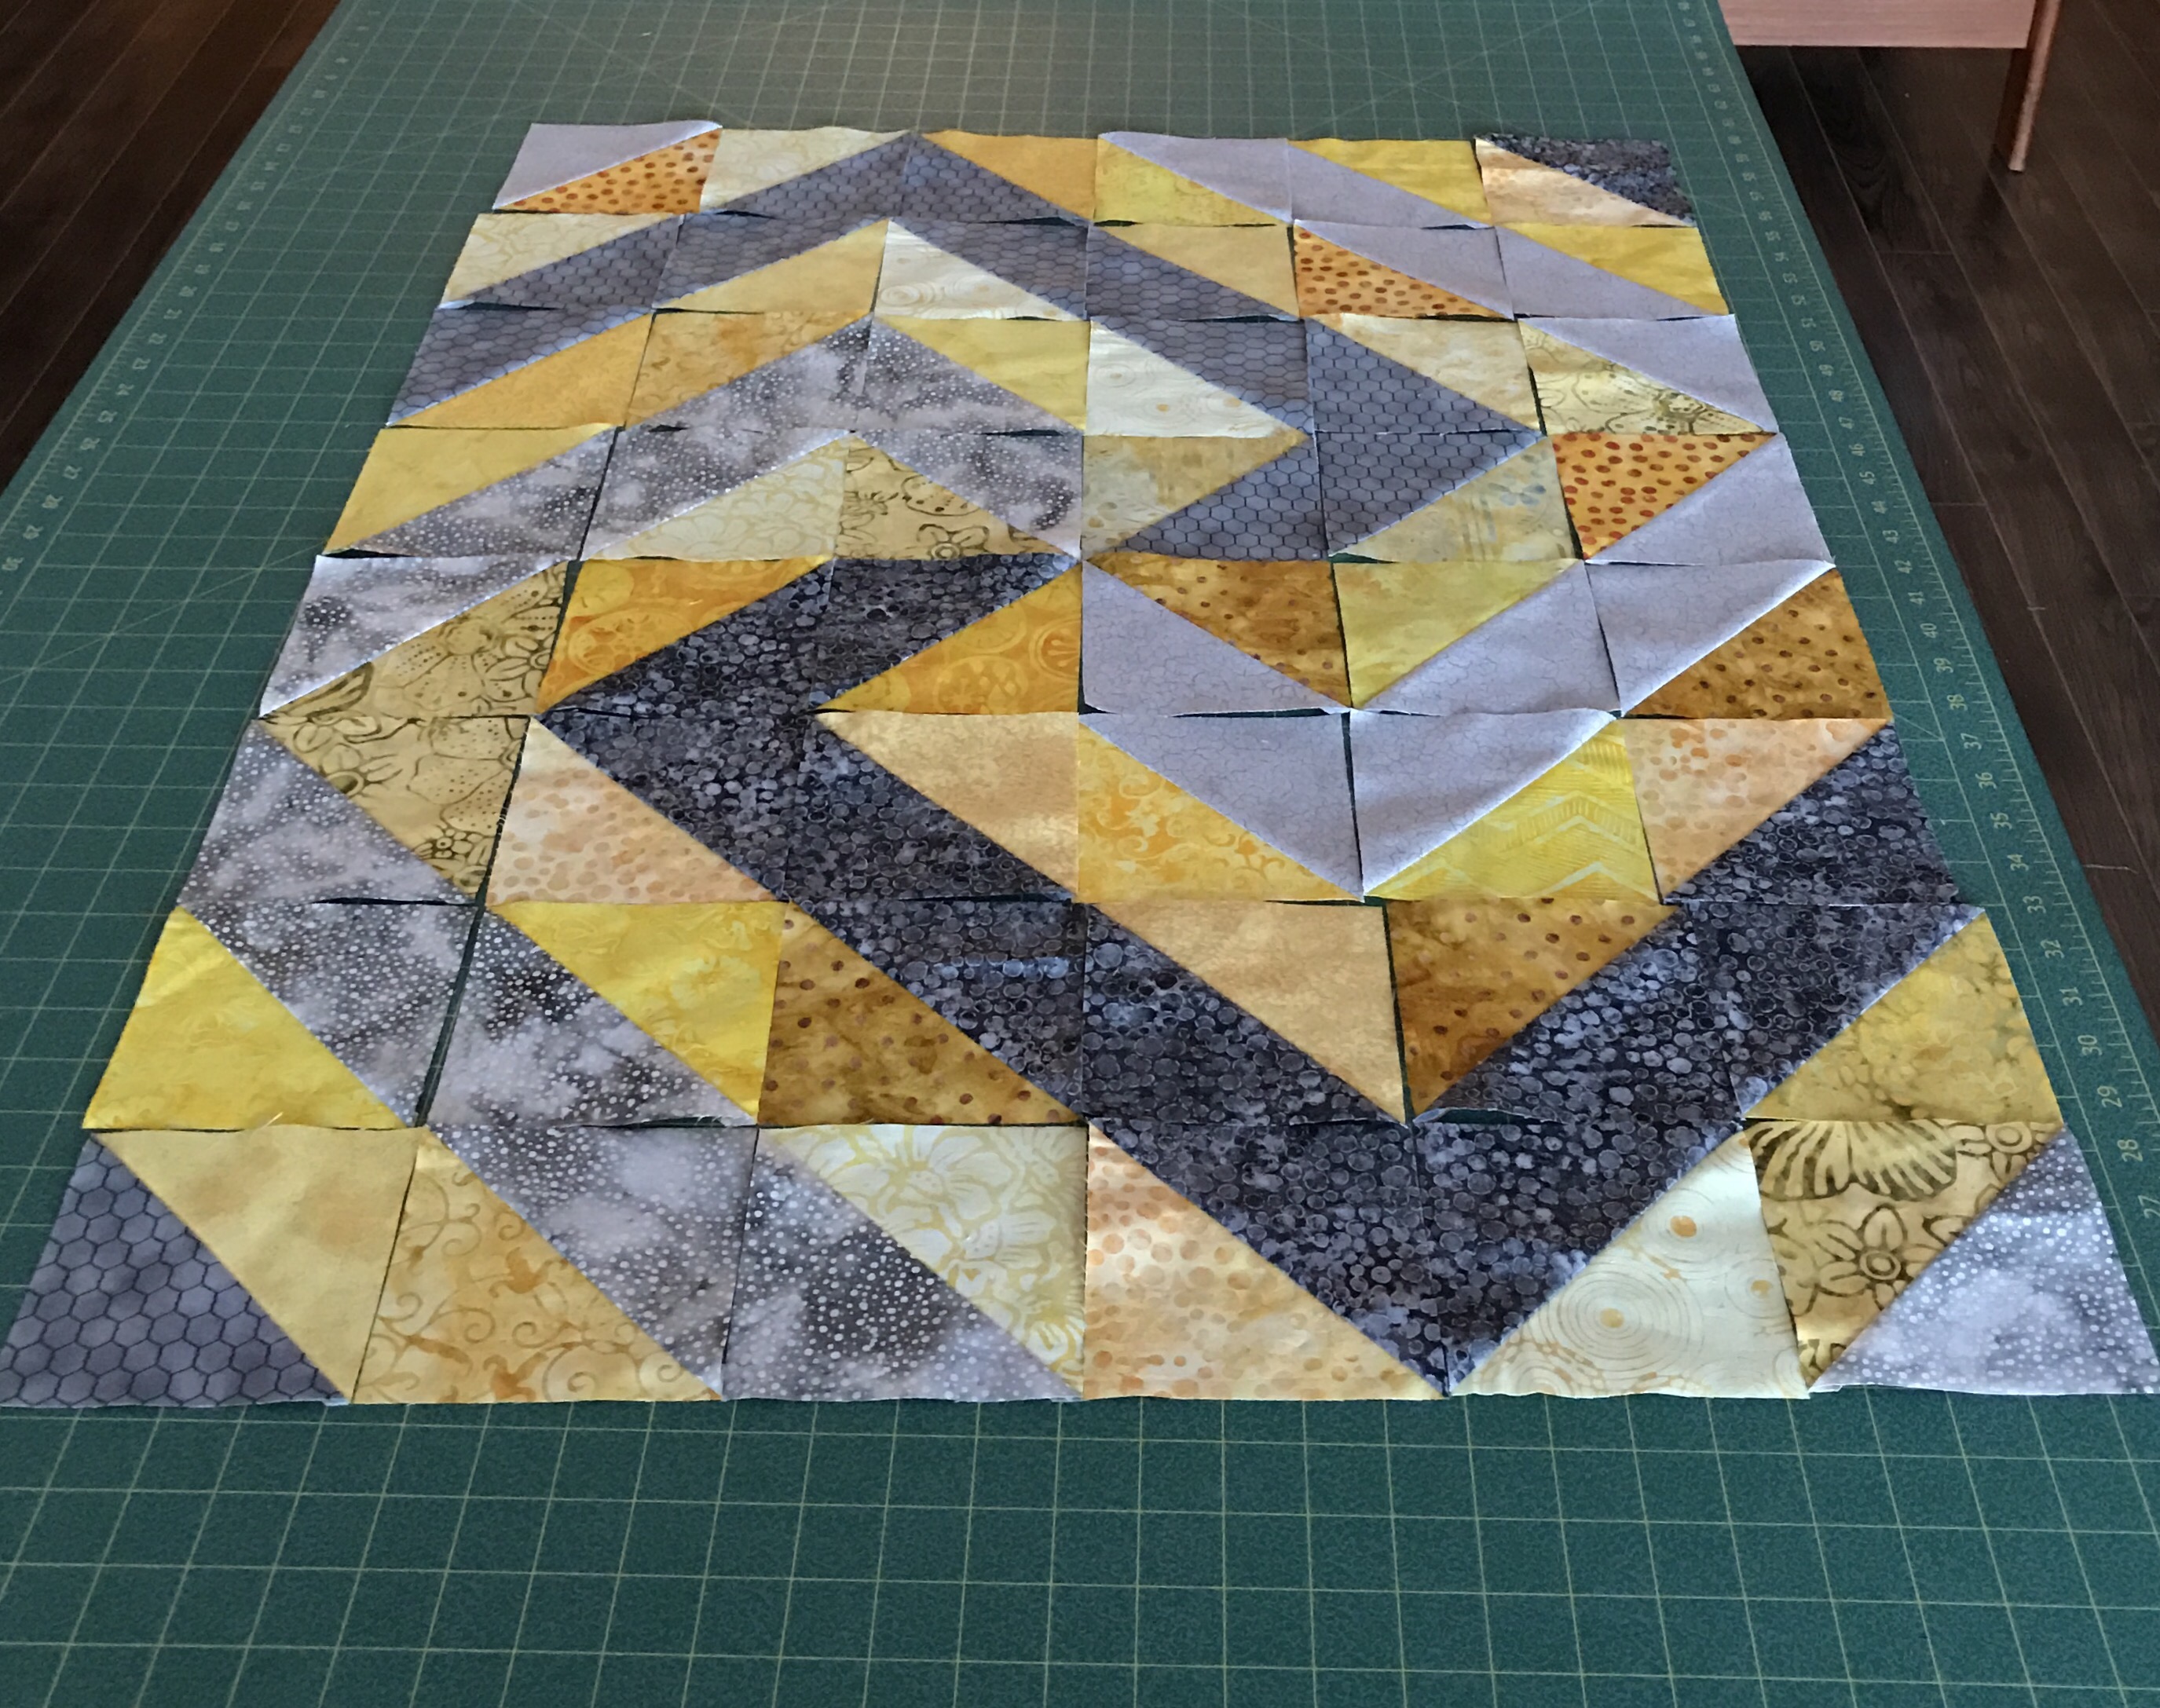
I needed to piece an eleven inch strip to insert into the single width of backing fabric I had (that’s the primary reason I piece the back of my quilts – to get the width I need for the quilts). I had lots of small amounts of the Asian print fabrics I’d used for the top so I cut single 2 1/2″ strips, sewed them together in pairs on both edges, cut triangles which resulted in 2 1/2″ squares. I assembled the squares into a central row then filled in the sides with another row of the small squares and edged with a set of light coloured triangles to set off my pieced strip against the dark backing fabric.

I decided to construct the insert panel along the diagonal so incorporating the triangles would be straight forward. Nice idea. However, in spite of the fact that I trimmed the triangles, the further I got into the panel, the more it bent away from the straight! I took tucks in strategic seams only to find my next diagonal row was even further off. With the panel half assembled, I gave up.

Unused Small Half-Square Triangles

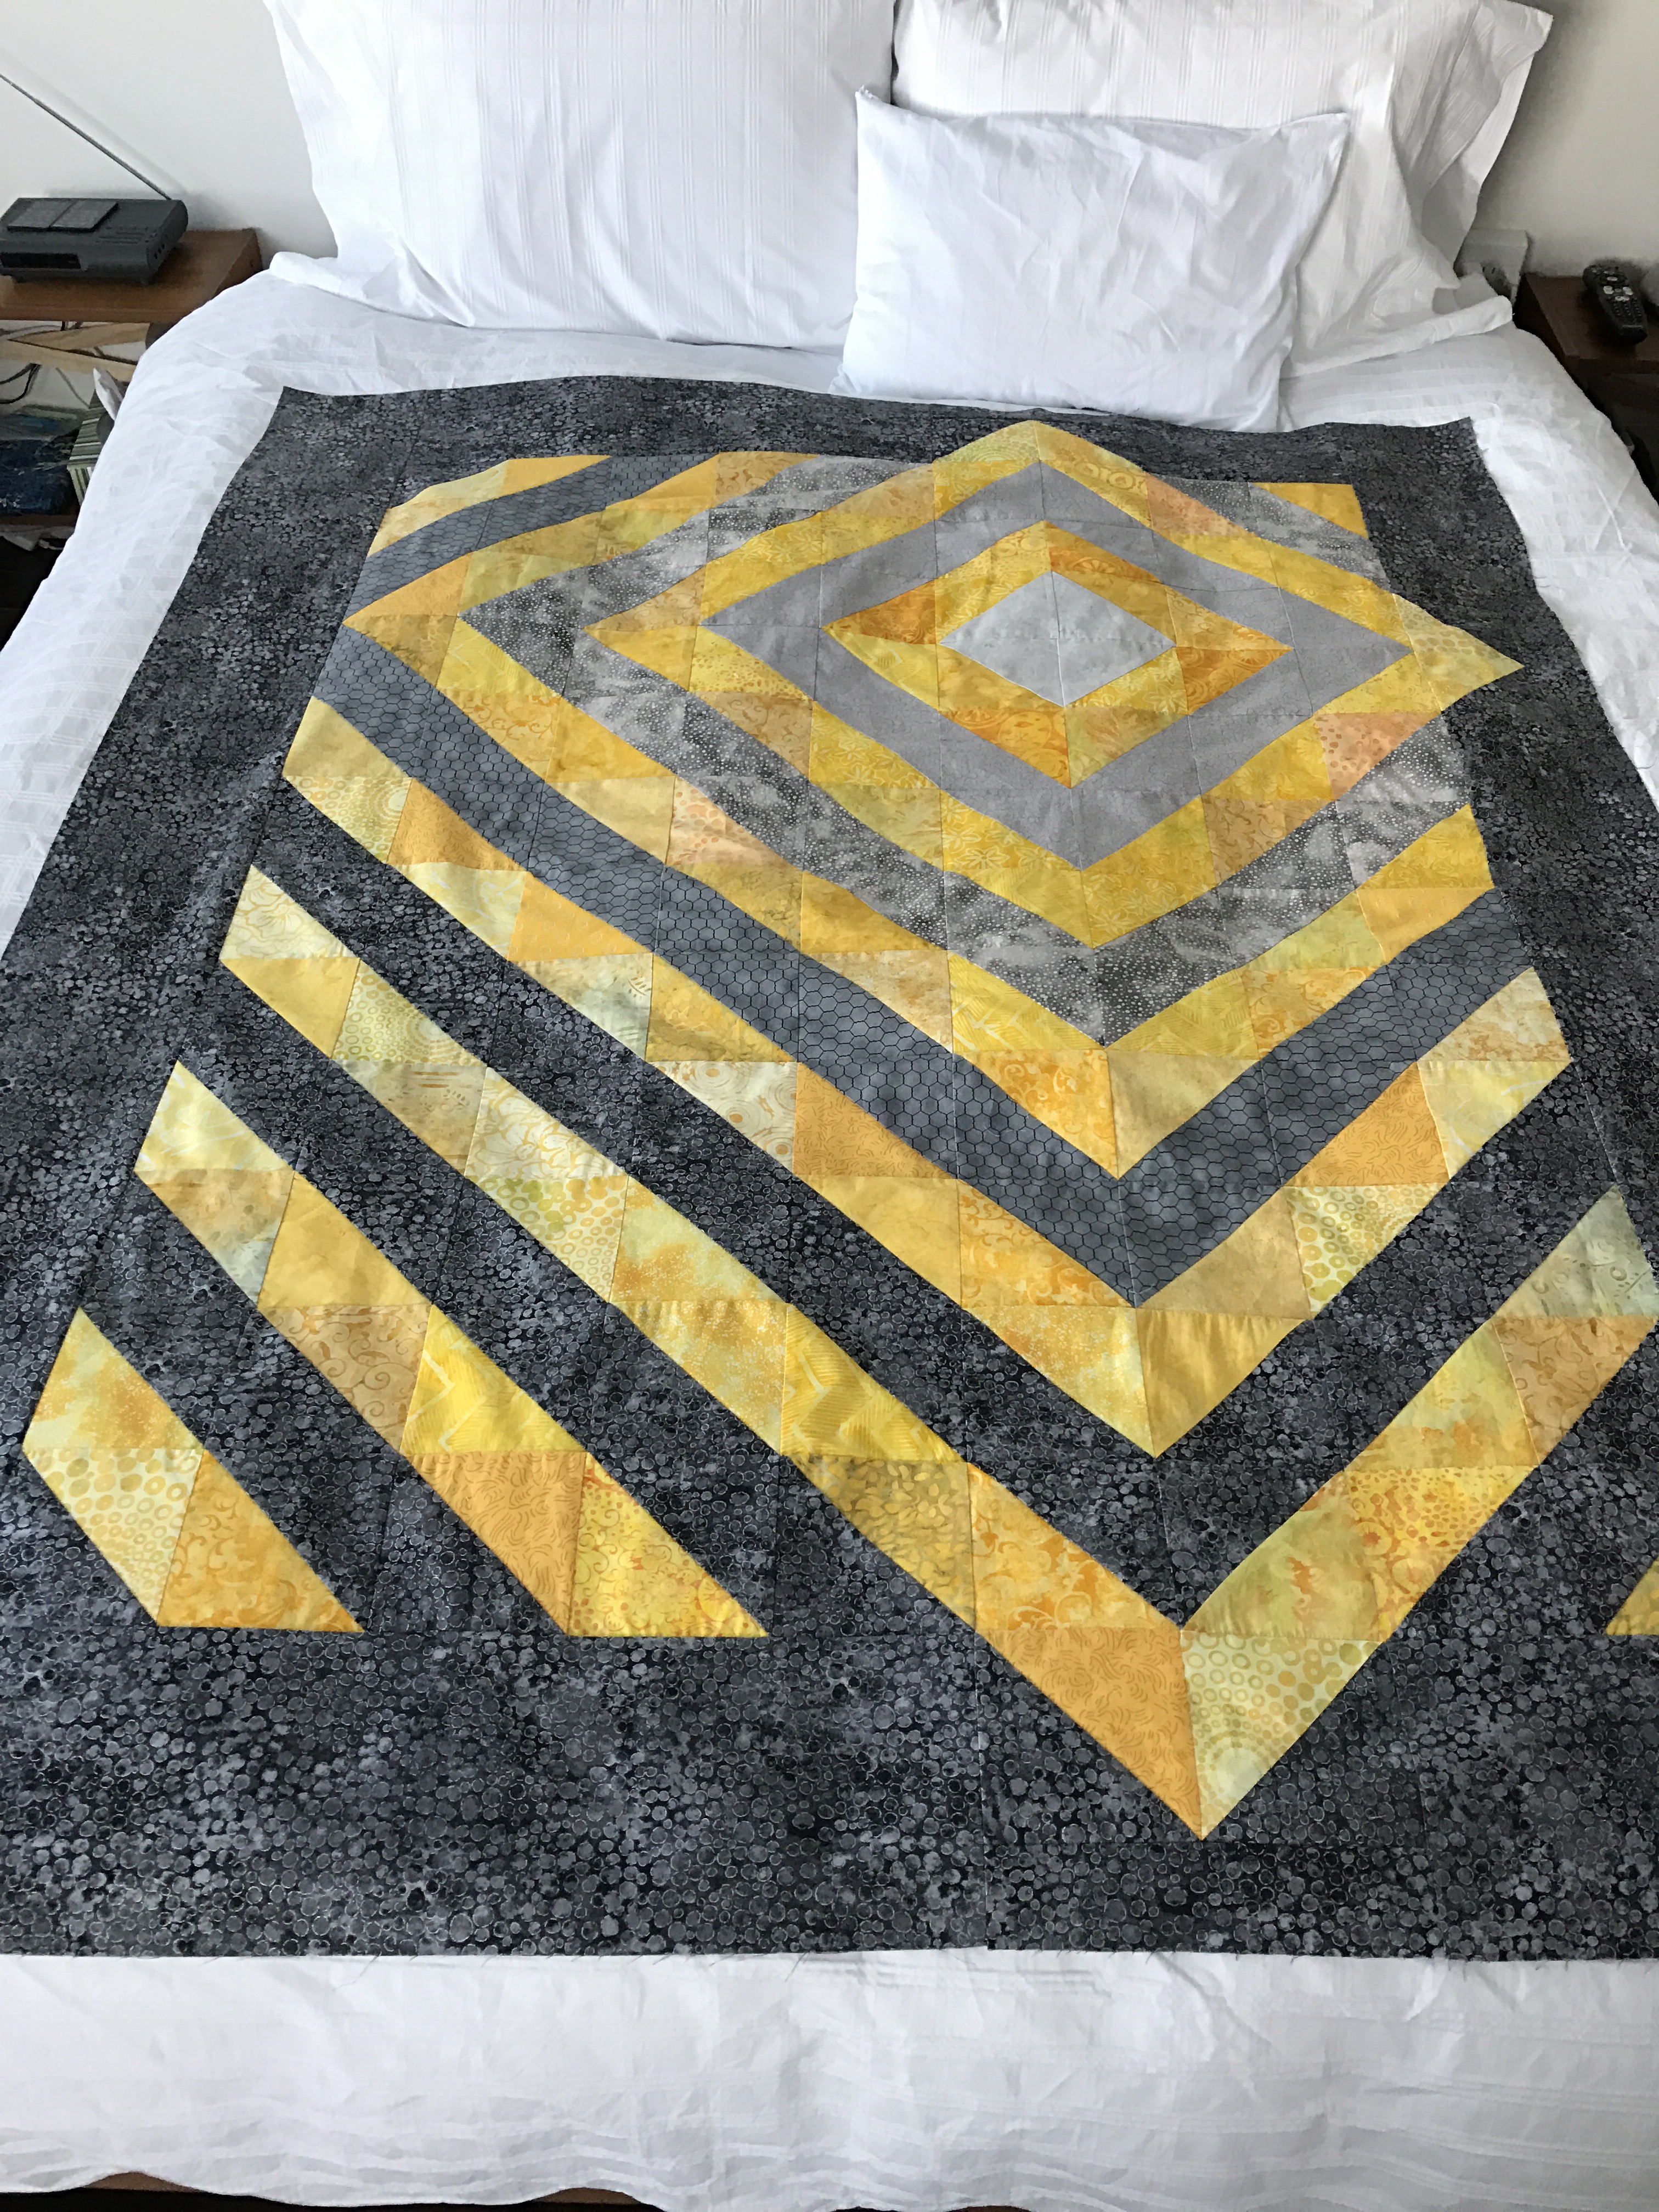
I gathered up the unused small squares and triangles, looked at them for a while, paired the small squares, then joined two pairs to create five inch squares – I ended up with nine which I aligned on point down the middle of my cutting table (in the end I needed only eight). I had lots of the Kona solid “pepper” fabric I’d used on the quilt top – I cut 6 1/2″ squares (which I cut along the diagonal) and inserted the triangles in the spaces between the pieced squares. Finally I added two narrow strips of one of the black/white fabrics to offset the panel against the backing fabric.

Pieced Back Using Small Half-Square Triangles

So my efforts weren’t entirely in vain. I have tucked away my failed attempt. I inserted my new panel into the backing fabric (offset twelve inches from one side along the length). I pin basted the quilt sandwich and you can see I’ve begun quilting the quilt. My finished quilt will end up 49″ x 62″. My quilt design (in a 360 X 200 hoop) has worked out to 7″ x 13.7″. I’m quilting along the length of the strips rather than from side to side (to complement the strips rather than stitching across them) – I will end up quilting seven rows, each row requires 4 complete and 1 half repeat to cover the quilt from edge to edge.

So far, I’ve stitched two rows and started the third. It’ll take me another two days to finish the quilting. I plan on binding the quilt with some of the backing fabric I was able to find yesterday in the sister shop across the harbour from where I bought the original backing fabric.

I’m already planning my next project – a spring raincoat using PUL fabric (Polyurethane Laminate used to make diaper covers among other things) in black with bright umbrellas which I came across a month or so ago. Now to find a pattern….

Japanese Strip Quilt

Pieced Strip Top Completed

I finally finished piecing this strip quilt – much more difficult than I expected it to be. Assembling long strips, particularly strips that have themselves been pieced, and consisting of different fabrics, tends to produce a “bow” – so you have to alternate the direction in which each new strip is attached. This means you sew one strip placed on the top, the next the strip is beneath because you want to start at opposite ends of the growing top for alternate strips.

Assembling The Strips

The piecing of the strips themselves was also a challenge. I joined lengths of complementary fabric pieces being careful to alternate the direction of the joins from one strip to the next. Then to assemble the top each strip had to be carefully laid out, the background fabric attached at one end, that end trimmed and aligned, then the opposite background end had to be attached and trimmed.

No chain piecing here – each and every strip is unique with the joins needing to be staggered and in alternating directions. So, of course, the creating and assembling of this quilt top took much longer than piecing say a collection of half-square triangles were it’s possible to mass produce the blocks.

Now I have to come up with an idea for the back. I have 66″ of a single width of backing fabric – I will need to insert close to 10″ in order for the back to be wide enough for the top. Still thinking about what kind of piecing will complement the strips on the top.

Second Pieced Demo Pillow Cover

Finished Pillow Cover Top (Starburst arrangement)

Finished Pillow Cover Top (Starburst arrangement)

Here is the second pieced pillow cover as a demo for the gals interested in having a go at some sewing in ten days time. I had finished the 16 half-square-triangle blocks yesterday, I assembled them into a 4 x 4 array this afternoon. Added batting, stitched in the ditch around the “star” elements to quilt the cover top. Found a fabric for the back, cut batting – my original cut was 16″ – I needed 16 1/2″! so I had to cut a second piece of both batting and fabric. Quilted the cushion back along diagonal lines in both directions.

This time I applied an invisible zipper (I’m actually thinking about taking the first pillow apart and inserting an invisible zipper into that one – I bought a second one for that purpose this afternoon).

Back of Finished Pillow Cover

Back of Finished Pillow Cover

I’m about to sit down and write instructions for making a 16″ pillow cover from 10″ fabric blocks (layer cake size).

  • Step 1: Mark both diagonals
  • Step 2: Stitch 1/4″ on each side of both diagonal lines
  • Step 3: Cut along diagonal lines, then again on both the center vertical and horizontal lines which yields eight 4 1/2″ half-square triangles – perfect for this size pillow cover.
Mark Diagonals, sew 1/4" from line on each side

Mark Diagonals, sew 1/4″ from line on each side

Here’s a tip for making a pillow cover – don’t sew the corners square. I happen to own this Dritz Pillow Cover Template (I’ve had it for years!). As you can see, it rounds off the corners removing about 1/4″ – 3/8″ from the corner. This rounded corner looks square when the cover is stuffed with a pillow. You don’t get those pointy “ears” on the corners. I trimmed my corners on both the yellow pillow cover yesterday and the one I just finished.

Corner Shaping Template

Corner Shaping Template

I applied my zipper along the curved edge just fine, when finished the zipper edge looks square as do the other three sides.

Grey-Yellow III

Damn!

Just finished the top borders only to see in the photo that I’ve switched out two blocks and have then in the wrong place. So gotta carefully unstitch that area, and reposition those two blocks – not today. Maybe tomorrow.

Top Finished

Top Finished

Other than that, I’m pleased with the finished top. The grey-black gradation has worked; the yellow doesn’t shift the way I was visualizing it but it’s still effective, more or less. I certainly can live with that. I’m pleased with the points integrated into the border – that worked out nicely.

So now to come up with something for the back. I have a lot of yellow/grey blocks left over – I’m going to have to play with them on the floor to see what I can come up with.

Here’s where the blocks are reversed so the greys are in the wrong place:

OK, I couldn’t stay away from the sewing – I fixed the blocks:


Then I went on to the back – remaining blocks – a spiral:

I’ll fill in around it with the backing fabric – this large 8 x 6 block will get positioned offset toward one of the quadrants.

Grey & Yellow


I’m playing with three ideas in this new quilt I began during the week. First, I felt like I wanted to work with yellow and grey. I went through my stash pulling out everything I had in those two shades (quite a lot, actually). Then went shopping for more yellow and one more grey.

Next, I decided to work with half-square triangles. I’d seen a picture of a quilt with the point elements offset into the border. An otherwise simple quilt suddenly became more interesting.
hst-1

Then, I’d seen another quilt where the colour of the blocks was graduated giving an ombre effect – in this quilt only the greys shift from light to dark, the yellows are of constant value.

ombre-quilt

I wanted to shift both colours from light to dark:

img_8326

First Layout

The border here will be the dark grey embedding the yellow solidly against a dark background. I can also see from the photo I have to reposition (perhaps even swap out) some of the darker blocks with dots because they pull the eye from the overall movement in the quilt. Another thing I’m wondering is whether I shouldn’t pop a tiny bit of another colour (say a very strong orange) into some location or other – but perhaps if I’m careful repositioning the dots I might get the effect I’m after. I’ll have to play with the layout some more.

img_8328

Layout #2

Repositioning the darkest blocks with the dots has done it I think… although maybe I should gather the paler oranges together into the second or third ring – that will probably require I make new blocks – anyway, it’s time to get on with other things today. I’ll keep looking at this before stitching the blocks together…

Starburst Quilt – Finished

It’s called “Starburst” (pattern from the Missouri Quilt Company)  but with this combination of fabrics in this particular layout you don’t really see the starburst, unfortunately. I’ve also mentioned earlier that the background fabric didn’t set up enough contrast, particularly with the paler batiks to highlight the starburst effect.
img_8184
However, I’m happy with the finished quilt. The dark narrow border and binding help strengthen the contrast and the quilting design used draws a bit of attention to the diagonal lines.

The back, on the other hand, I think has stronger contrasts:

img_8185

While the dark elements blend into the backing, the lighter “framing” makes the whole design come alive. So on the whole, I’d say the quilt worked out quite well. It’ll get added to the collection.

Now back to “Wind Waiting” – the pilots need quite a bit of thread painting – that’s up next.

Starburst Quilt Back

Yesterday I collected a bunch of fat quarters and large leftover pieces in the colour families used on the front of the Starburst quilt. I bought two dark navy fabrics planning to use one on one half of the back, the second on the other side. I found an image of a simple quilt, planned it out so it would fit the dimensions of the Starburst top. Today, I cut out the pieces, sewed them together and stitched up the back.

Starburst Quilt Back

Starburst Quilt Back

I also managed to assemble the quilt sandwich – top, batting, back – and now I’m ready to create some kind of simple single run design for quilting the whole thing. The blocks on the top are 6″ square – I’d like something that fills each block and brings out the diagonal of each half-square triangle. Don’t know what that is, yet. But I’ll come up with something tomorrow, I’m sure.

Starburst Quilt

Friday, I attended a day-long quilting/sewing session with 19 other women to raise money for an ailing quilter in Newfoundland. The quilt kit was for a HST (half-square triangles) quilt – Starburst. I just finished piecing the top with borders.

The quilt uses 16 batik/print fabric 10″ squares and 16 “background” 10″ squares as contrast. My problem was the background fabric in my kit didn’t offer enough contrast – a very pale blue, I think would have worked better than the mid-turquoise batik I had.
img_8178

I did one quadrant on Friday then stopped. On Saturday I took apart what I’d sewn and rearranged the squares trying to get a better flow of colour because I didn’t like the colour distribution I’d started with. I also trimmed all 64 squares to 6 1/2″ hoping that would make my points all work without a lot of fuss. However, I finished piecing the squares only to discover the bias edges produced a “wobble” at the outer edge – I needed to remove about 1″ from the length of each edge. Today I began by taking 1/8″ off quite a few of the joins at the outer edge in order to make the top lay flat. Then I measured all the outer edges to make sure I ended at 48 1/2″. Finally I cut the binding fabric in the kit to 61″ length (to be sure I had enough to mitre the corners).

Just finished adding the binding – a fight to get the mitred corners to press flat but in the end I won that battle. I warned the top it was going straight into the garbage if it didn’t cooperate! It finally acquiesced.

So now I need to come up with an idea for the back and I will need backing fabric to complement the pallet used in the top. Off to the fabric shop to see what I can find.

Wickedly Difficult…

I’ve begun edge stitching around the circles. Today I managed to get 15 or so done (plus some semi-circles at the edges).

Stitching Around The Circles


What’s making the process so difficult is the amount of bulk I’m having to contend with and the fact that the fused circles are lifting from the quilt surface as I bunch and twist the pinned top and batting in order to get all the way around each circle.

Stitching Detail

If I go slowly enough I can keep on the edge more or less but it’s a tedious task (and it’s tricky stitching where a circle has lifted since the fabric has a tendency to slip). I stopped after 15 circles this afternoon because of the tension building in my shoulders.

Actually it will get easier as more and more circles are stitched because once they’re in place I won’t be having to contend with as much fabric lifting. But oh, there are a lot of circles still to do! 

It is going to take days and then I have to figure out a back and actually quilting all three layers together. What I’m doing right now is just stabilizing the circles.

Who’d Have Thought…

Yesterday I pieced and attached the border for the circles panel. I had originally intended bordering the top using an almost black and an off white printed fabric. But when I opened out the border fabrics and laid out the panel on them, it looked all wrong. So I decided to try a border of graduated colours.

I auditioned the fabrics and thought it could work. Next I cut 3 1/2″ strips and placed them adjacent the panel. I cut pieces, mitred them together (including the corners) and attached the border to the quilt panel. But something didn’t feel quite right. I took some photographs. And when I looked at them I could see my problem: the bottom border had the mitres going in the wrong direction – your eye is pulled immediately to the yellow bottom left corner:

img_8096

First Bottom Border

I was going to live with it, but this morning when I got up I decided to fix that border. I knew I couldn’t just realign the joins – my border would be too short. So I started from scratch, cut new strips (or used what I had leftover from the first border), sewed them together and attached the border to the quilt,

img_8099

Second Bottom Border

It’s really quite interesting how that mitre direction makes such a difference. Now the colour story flows from top left to bottom right and the eye moves around, sees the shades of pale greys fading into the medium greys, into the darker greys/black at the same time the yellow blends with the oranges and reds rather than standing out.

Wouldn’t have thought it would make such a difference.

I have my embroidery machine set up with rayon thread (I have selected several shades of red), a new embroidery needle (an embroidery 75), my sewing star foot (which has an open toe), and a narrow blanket stitch. The quilt top has been pinned to batting and I’m now ready to stitch around all the raw appliqué edges. I won’t get to that until Thursday – tomorrow I have to return to Parrsboro to pick up the two quilts I left behind for the art exhibit featuring all the artists who had shown during the season.