So, This Was My Idea

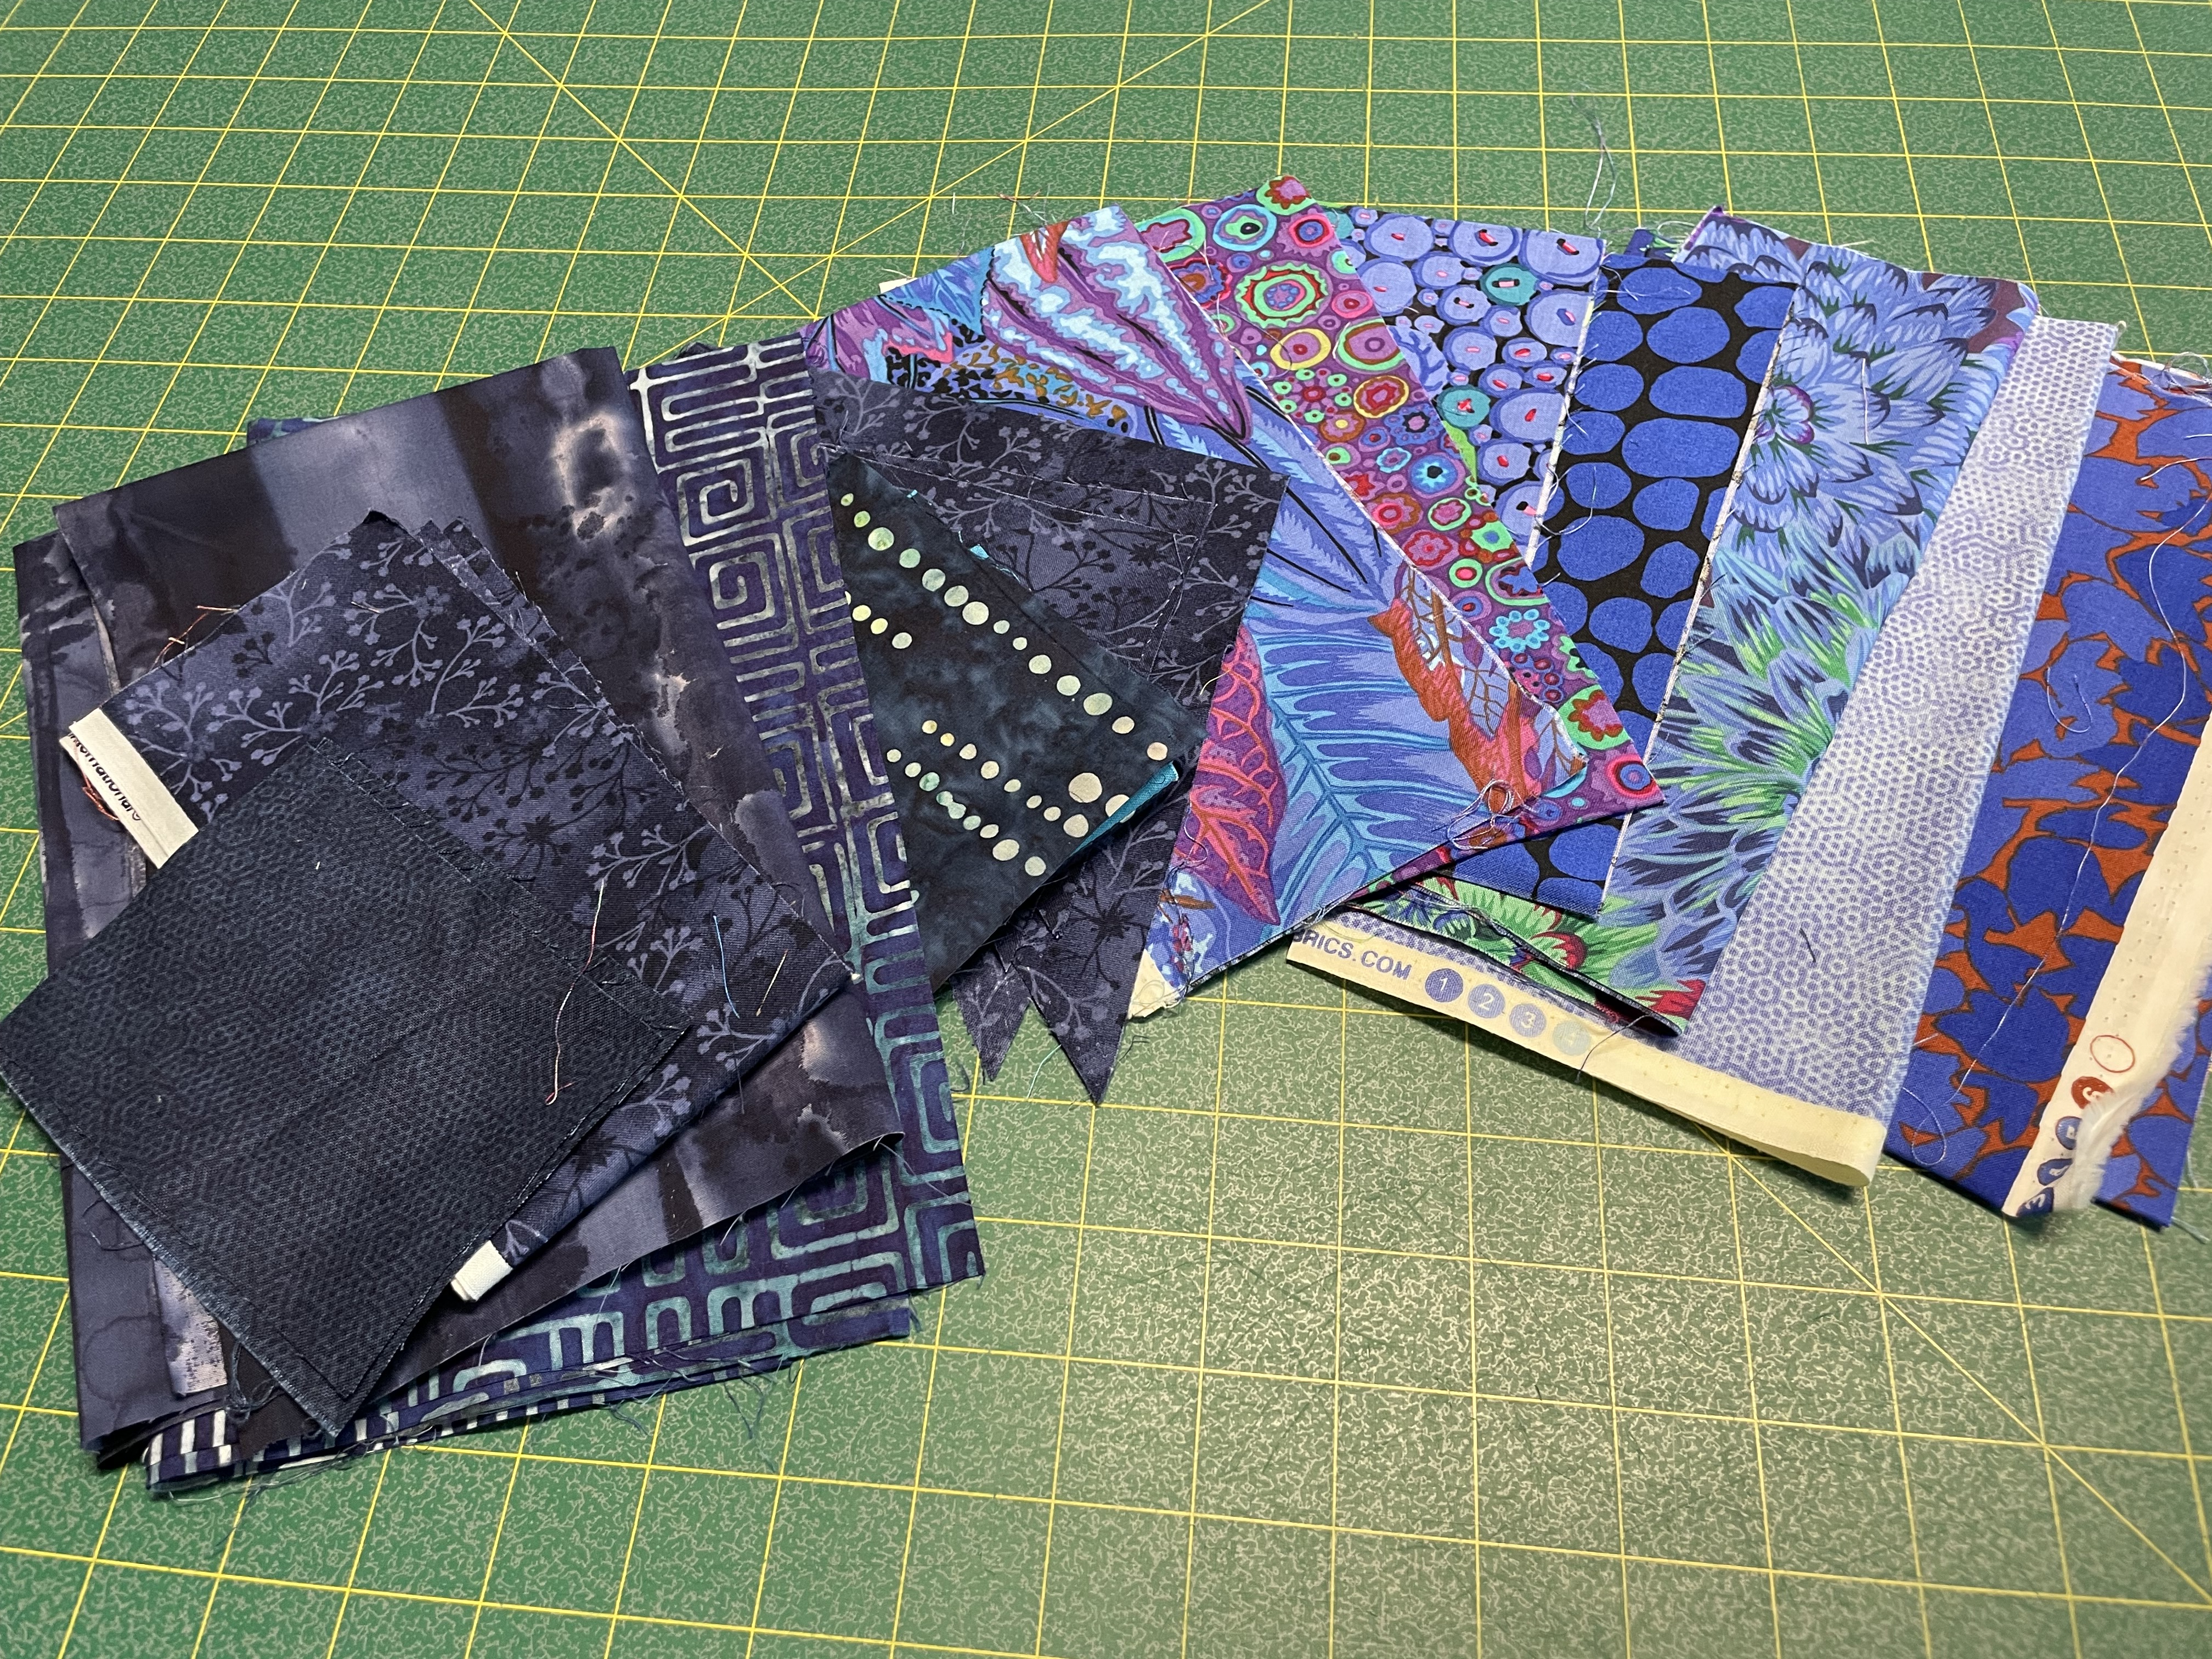
Remember when I started this quilt I had a wonderful bright fabric with yellows/oranges/ turqoises/blues. Because the solids weren’t quite light/bright enough, I added a couple more to liven the array.

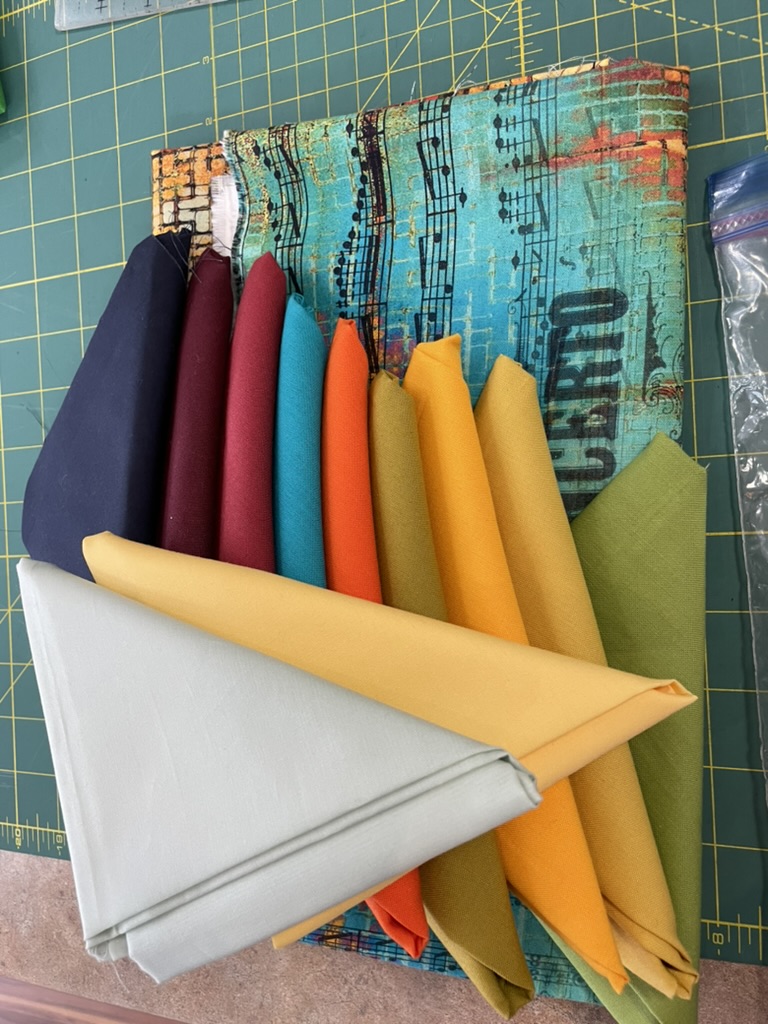
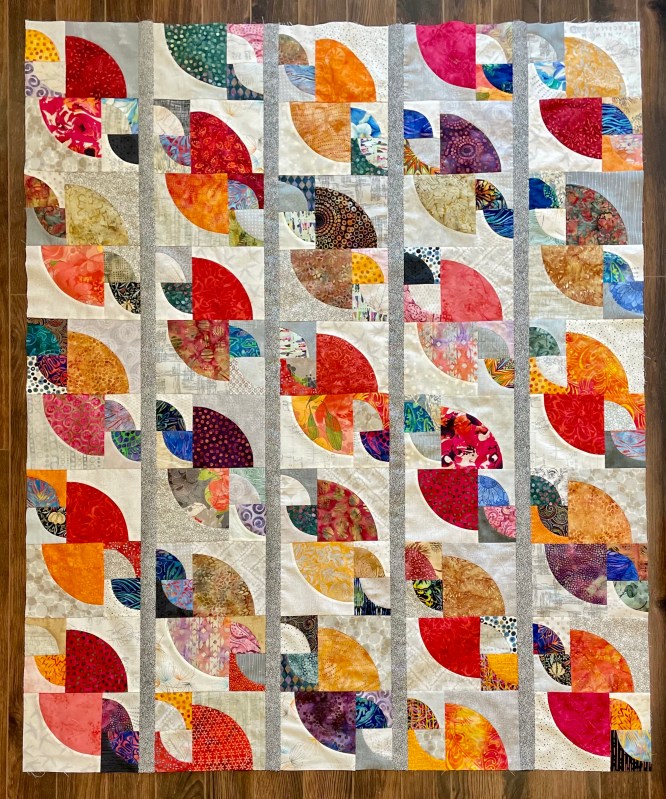
I had an idea in my head based on a quilt I’d seen on Pinterest

Another HST Idea

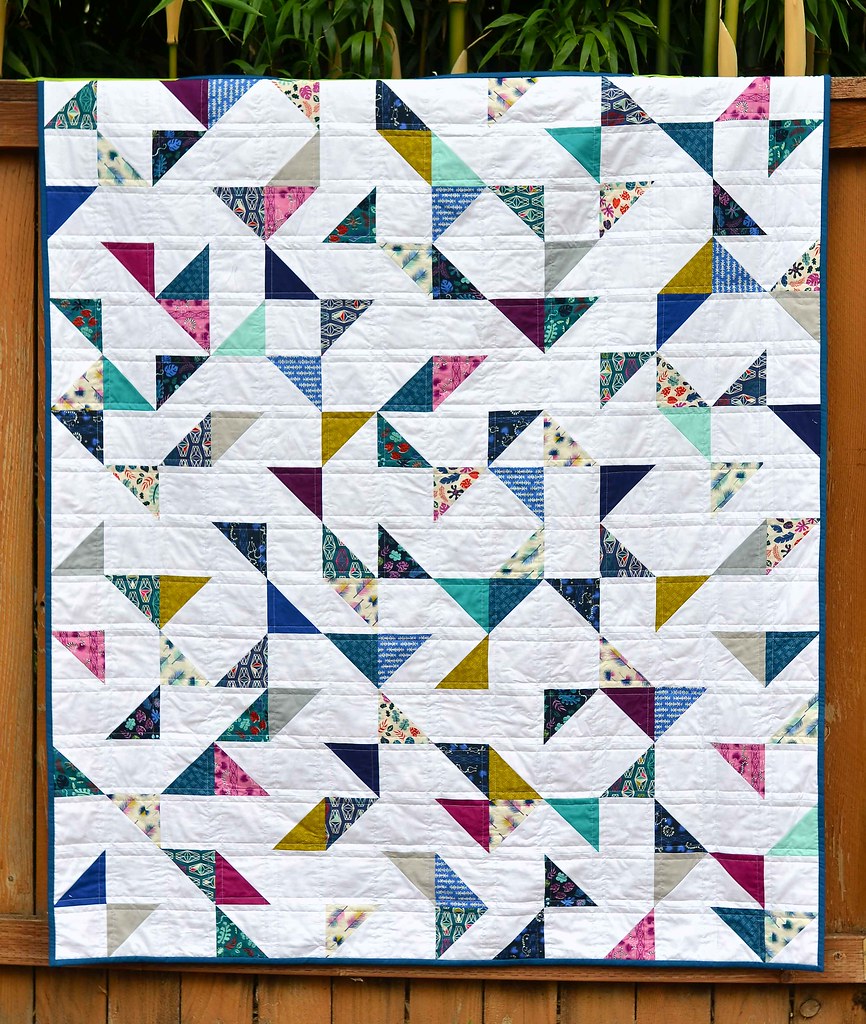
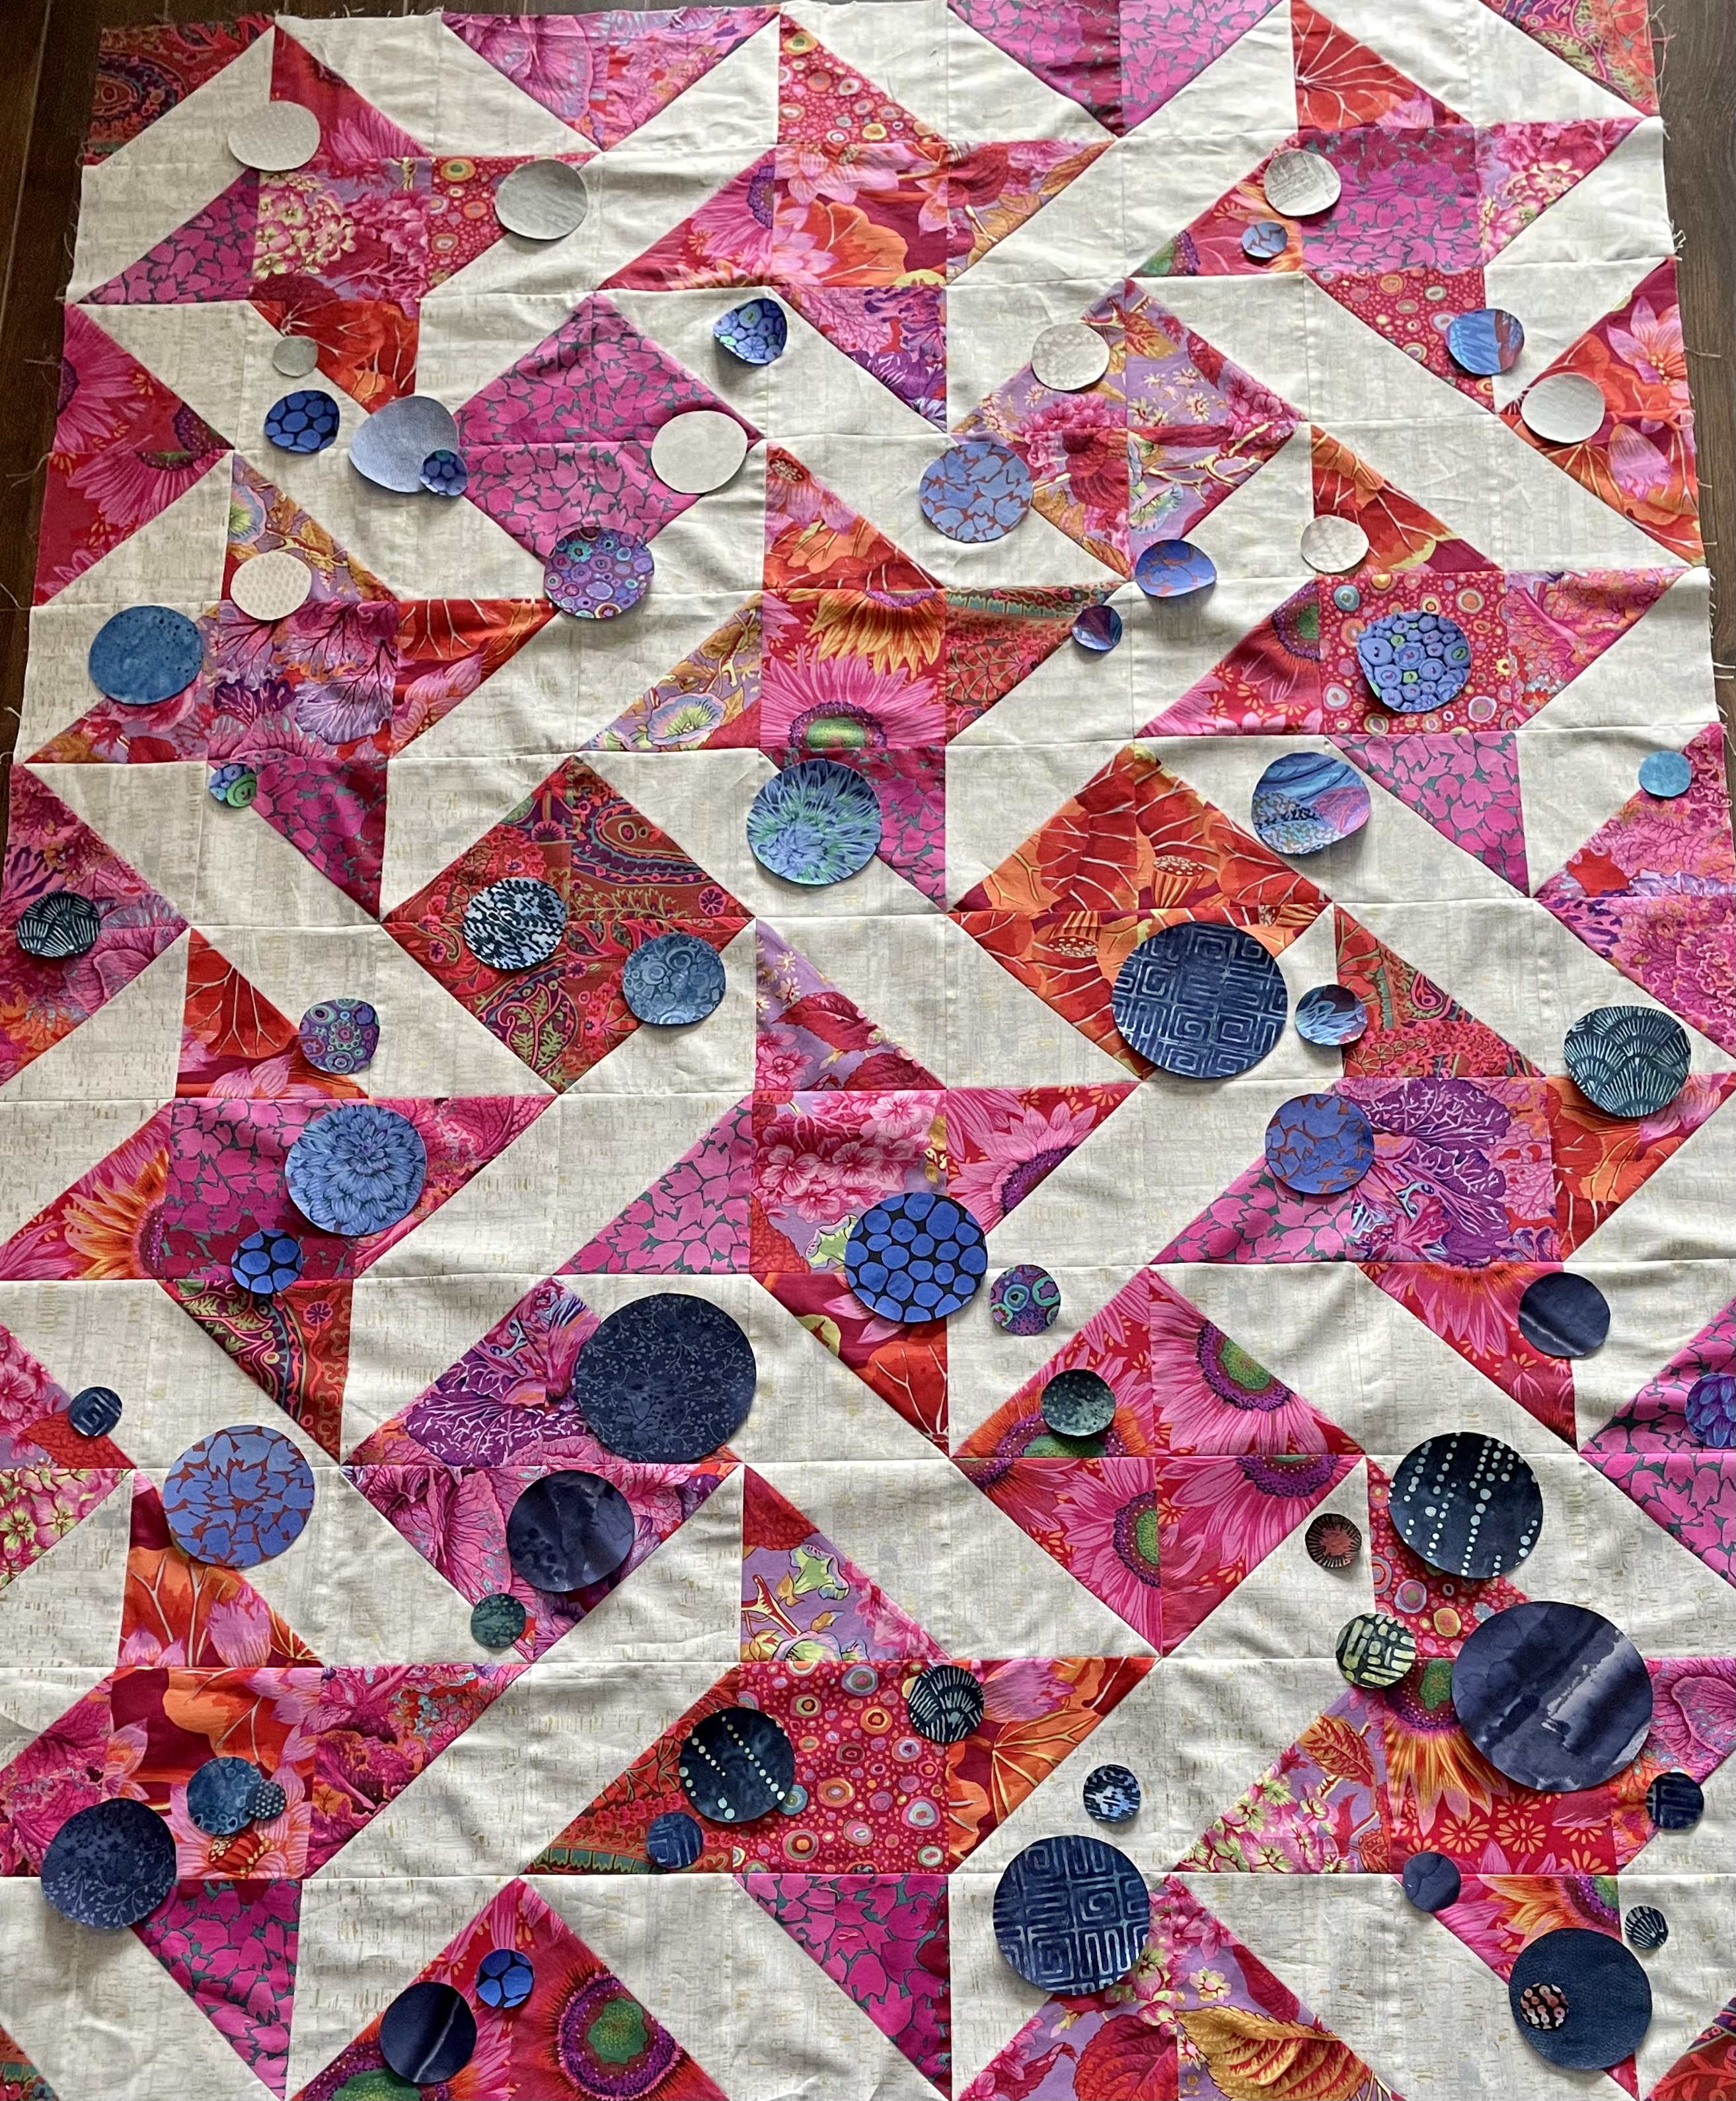
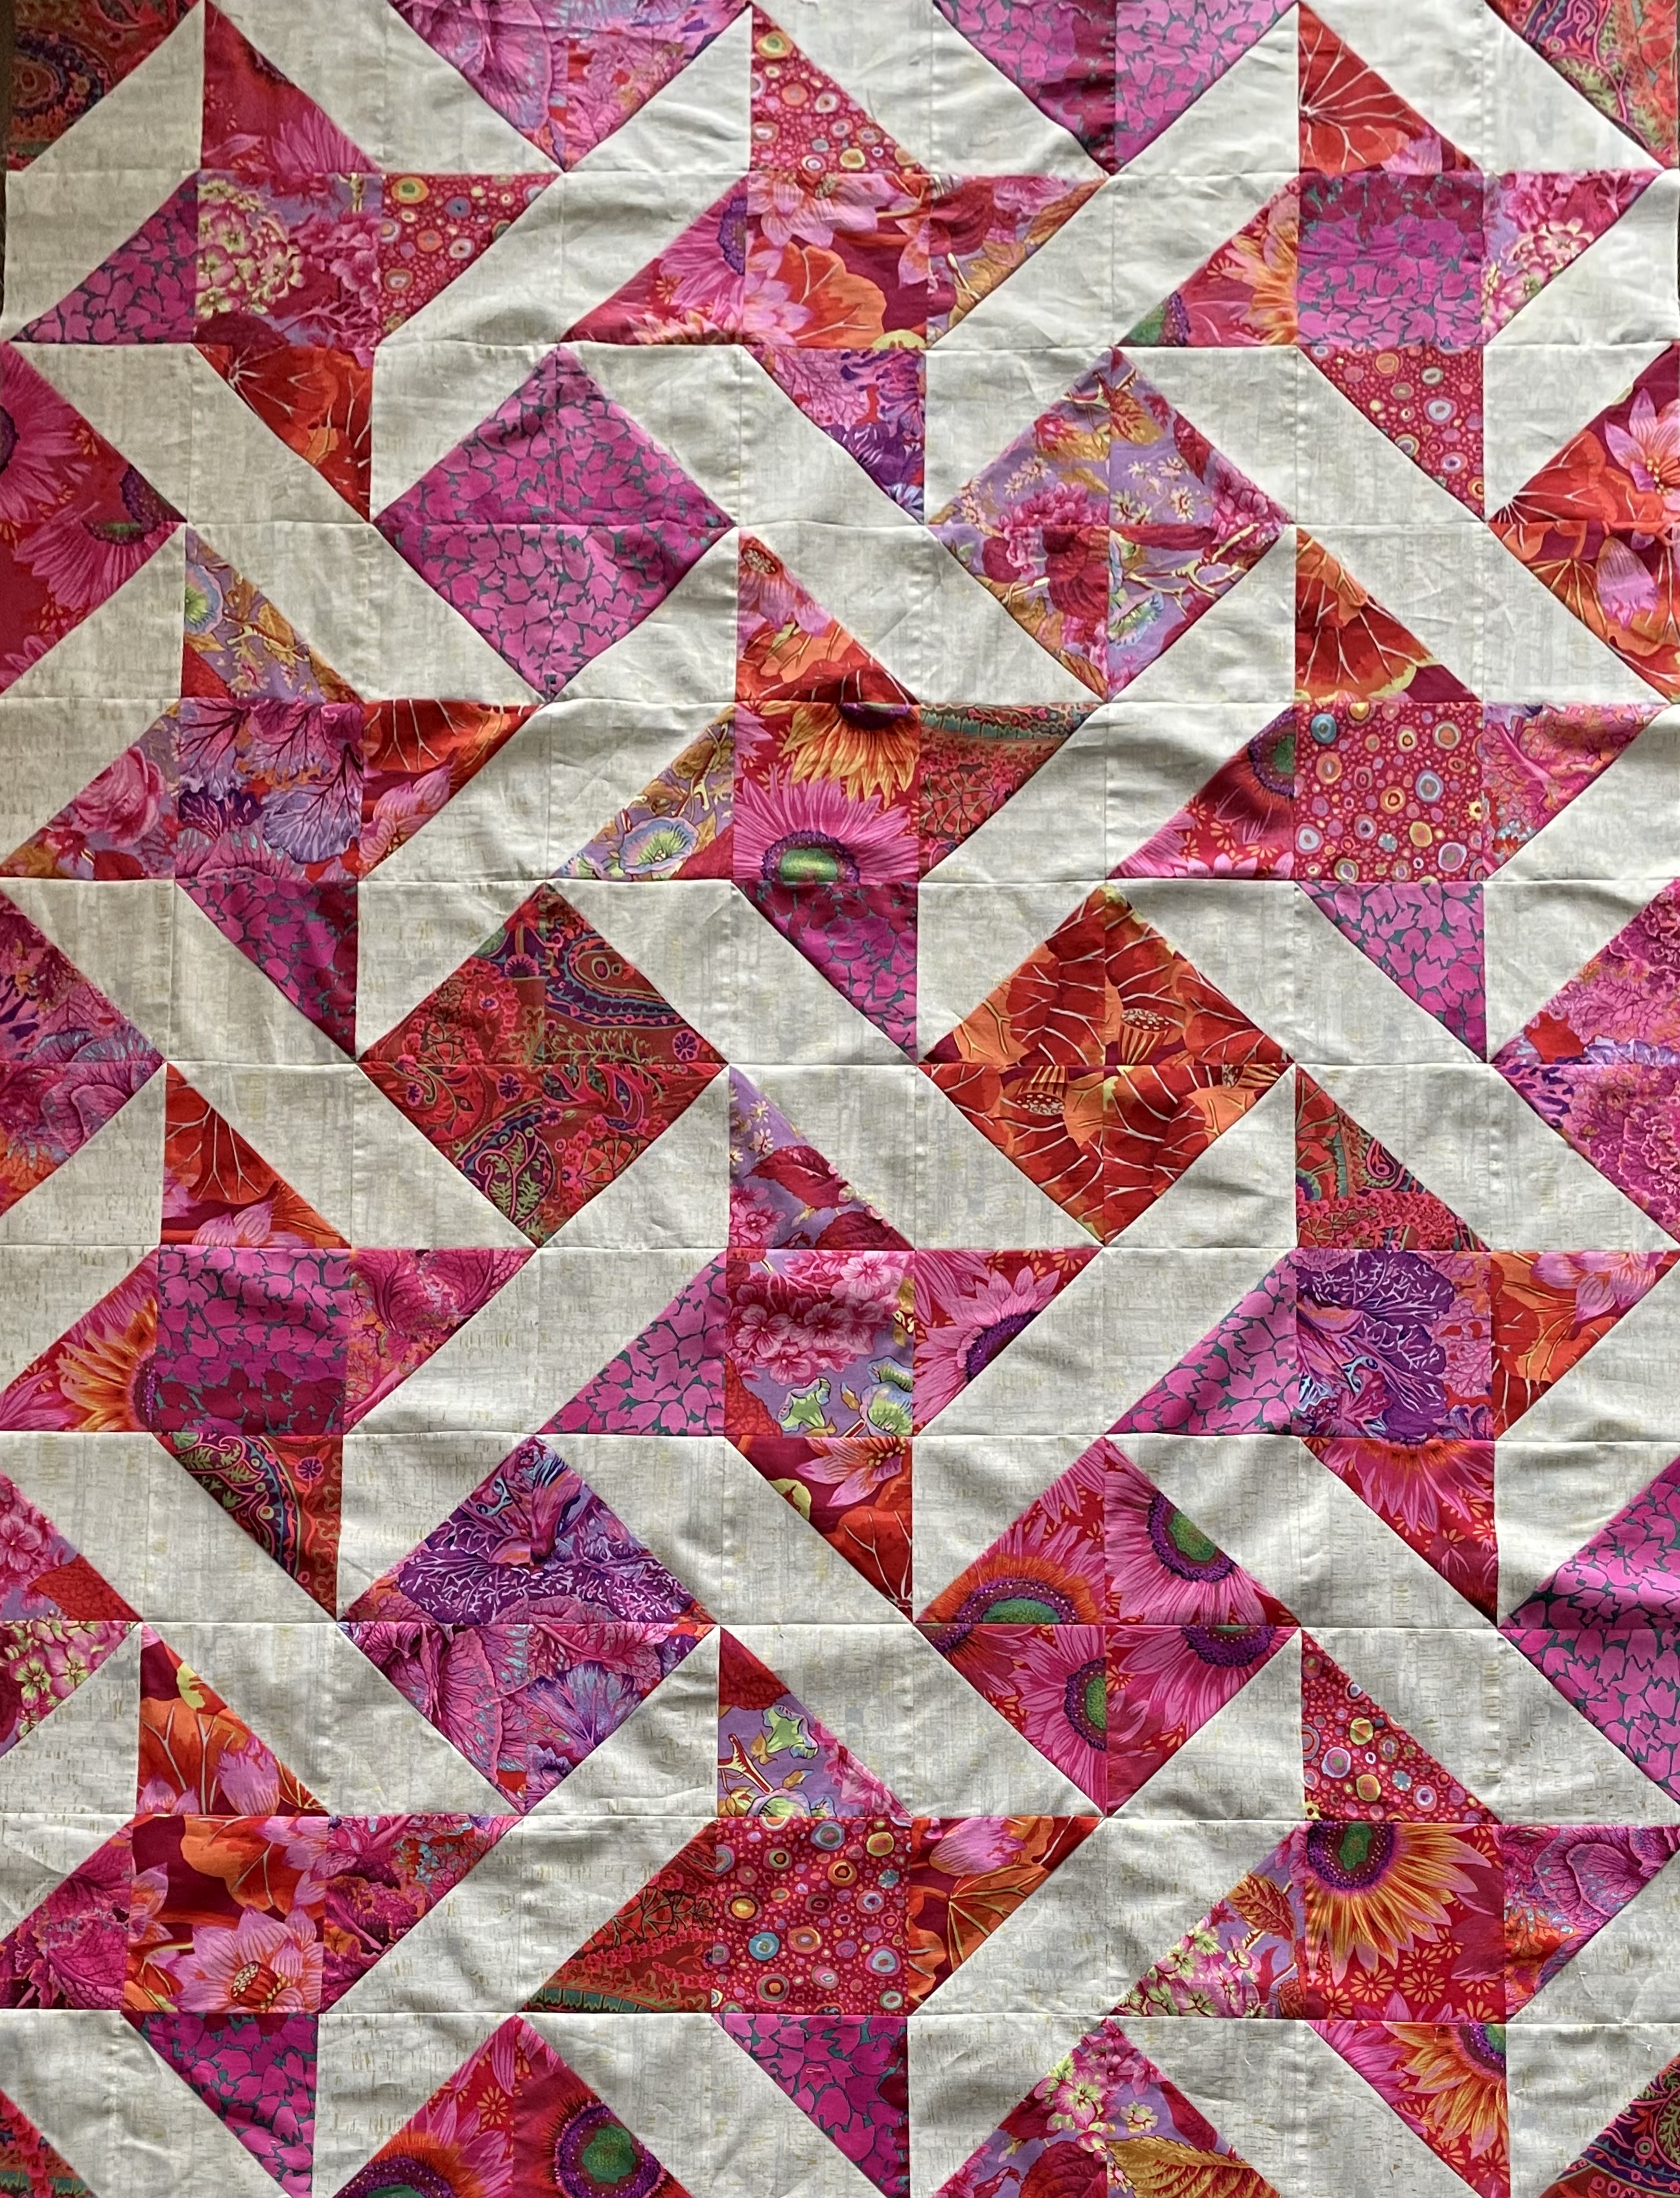
to use the print as my background, the solids as accents, with the solid triangles formed from three strips.

This afternoon I finally got back to sewing on this quilt (I’ve been avoiding it for over a month). It didn’t take long to sew the strips for the “solid” triangles, pair each strip with a strip of background print fabric, cut the HST.

56 HST with Solids

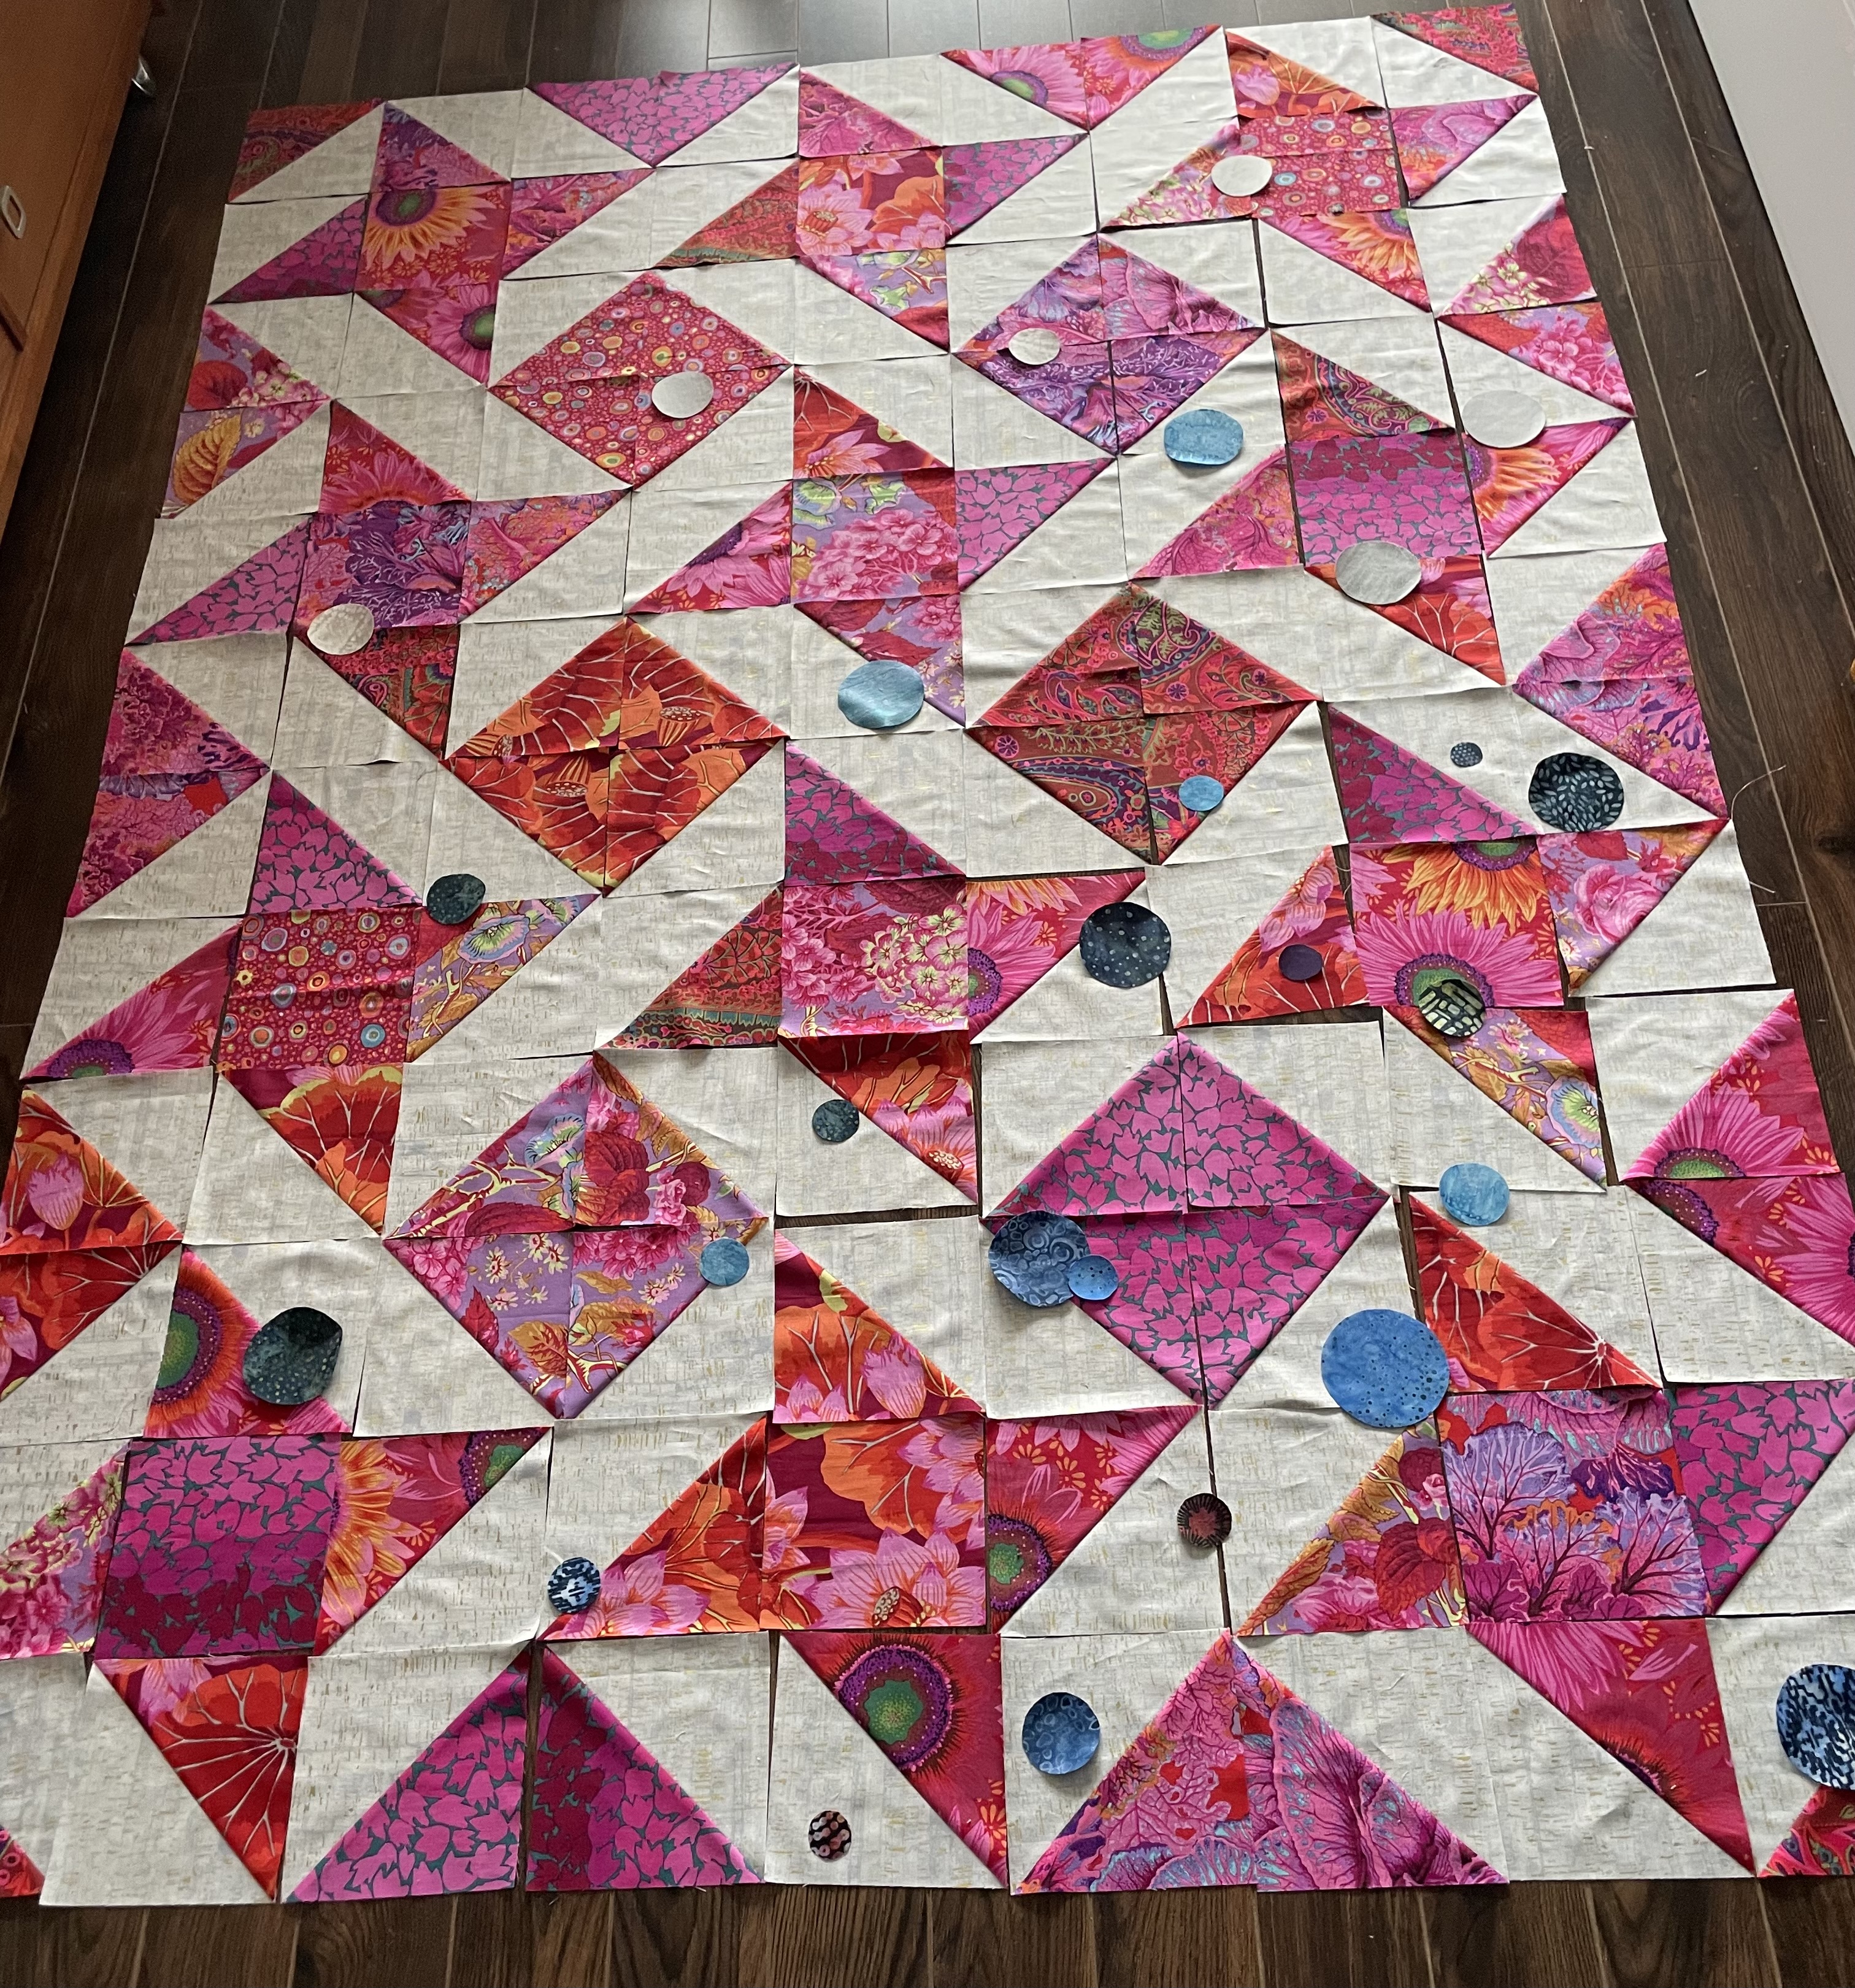
Each strip pair gave me four blocks – I just needed to lay them out interspersing them with background blocks.

Tentative Layout 9×12 Layout

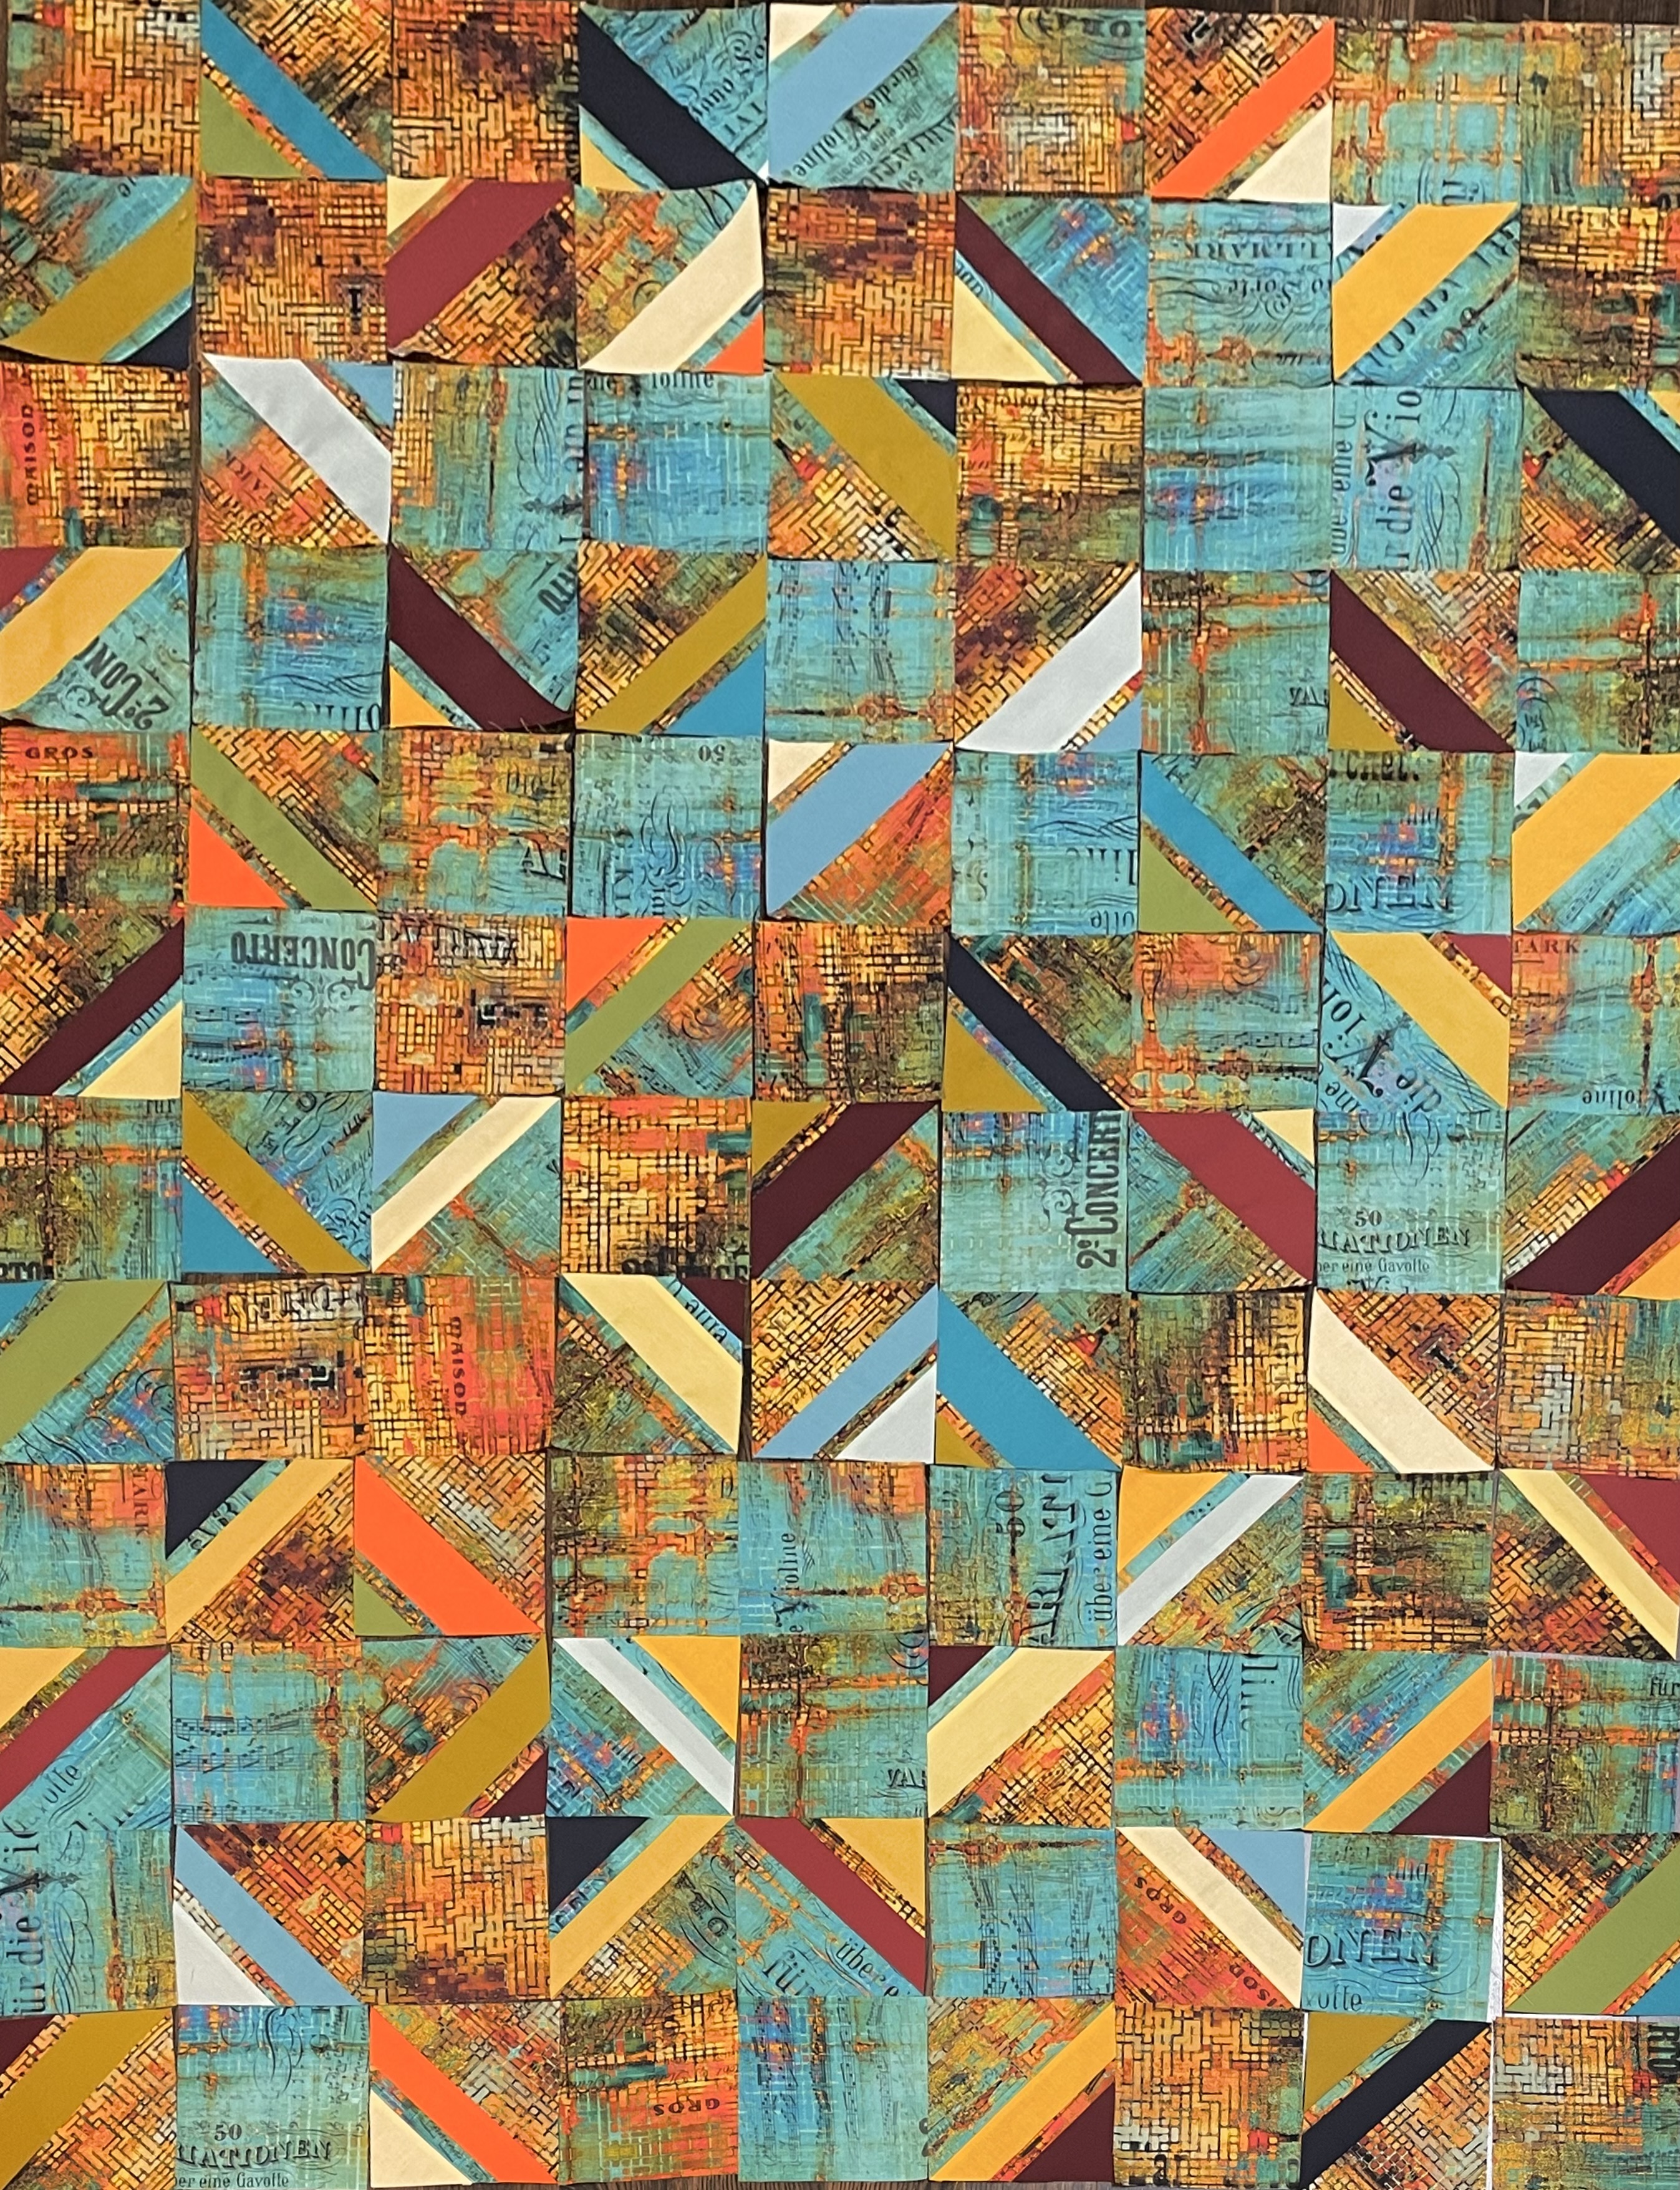
I find it very interesting that when I look at the pieces on my floor the yellows/oranges stand out, but the photo brings out the turquoises/blues! The pale yellow solid elements brighten the ensemble. The pale blues are lost among the music elements of the background. The orange solids, the burgundy stripes connect with the background print (on the floor – not so much in the photo), and the navy doesn’t do much of anything. I’m not sure I see much point in playing around with the layout – I don’t think it will make much difference to this rather drab quilt top.

My challenge now is to come up with some way to make this layout interesting. Would a solid sashing in one of the lighter yellows accomplish that? Use the background fabric for a border? What about circle appliqués (of different sizes) cut from the solids placed in some kind of cascade?

Whatever I do, it will have to involve the solids because that background fabric, which I thought would be striking is so busy when cut up, that it overpowers everything else!

Got any suggestions? I sure don’t know where to go from here.

Since I began working on the project, I’ve had a hunch I wasn’t going to be happy with the outcome. My fallback position was to assemble the array, make it into a quilt (with batting and a backing), then use it to make a jacket! Looking at the potential panel, however, I don’t think the jacket would be outstanding, either.

I hate it when the work goes sideways as it has here.

An Idea…

I was looking at the print fabric and the solid fat quarters and thinking I didn’t have “light” in my collection. So I eliminated the colour to see what my tonal contrasts looked like – not too bad, but I could use a bit more light in my colour assortment.

Also, I want to showcase the print even though, in a sense, it’s the background. I found an idea on Pinterest I thought might accomplish that for me:

You have to stretch your imagination to visualize the white above as my print fabric, and the print triangles as my solids. Even further, I’m thinking I will break up the triangle with strips from at least two different solids and include a narrow strip of the background fabric as well.

Just playing around with scrap fabric I start to get a sense of what this idea might yield:

Playing Around

Now imagine that bullrush print as my bright yellow/orange/turquoise/green fabric, those triangle elements as the bright solids above and you get a glimmer of where I think I’m heading. I have more bullrush fabric and a couple of different brown/taupe solids to add to the above – tomorrow I’ll do those and include them to the array.

There is actually a pattern for this quilt online: Lagoon Quilt Tutorial but I’m not planning on following it. The block size in the pattern is 4 1/2″ – I want to end up with 5″ or 6″ blocks (not sure which yet). My final quilt size will be more rectangular then the Baby or Lap quilts for which Erika @ KitchenTableQuilting gives dimensions. Her triangles are “solid”, mine will be striped. Lots of differences. What I’m taking from the quilt photo is the inclusion of squares from the background fabric – in my case, the foreground fabric! What I didn’t want was to bury that very interesting print amidst the solids – this way I can showcase it.

One thing stopping me from proceeding at the moment is that I don’t have enough of the print fabric. I’ve ordered some (because my local shop has none left), and I’m waiting for it to arrive! (I’m also in hold mode because my right wrist has decided to be painful – arthritis that will take a bit of time to settle down – cutting with a rotary cutter is almost impossible and I tried but can’t cut with my left hand). As soon as the fabric arrives (and my wrist settles down), I’ll get to work on this quilt.

Circles – A Tentative Layout

Lots Of Circles

I spent much of the morning cutting out circles – 5″, 4″, 3.5″, 3″, 2.5″, 2″ & 1.5″. They still have the fusible web paper on the back, nothing here is permanent yet.

I’ve tried creating a gradient from dark on the bottom right to light on the top left – that seems to be working quite well. I’ve also made the layout denser toward the bottom, less dense toward the top. I’m more or less happy with how this has laid out – next step will be to pin each circle in position.

This is only part of the design – my intention is to do 3-5 largish circular embroideries in strategic spots. I also spent time this morning going through my large collection of embroidery designs selecting circular/floral embroideries that might enhance the quilt further.

These are but a few of the embroideries I have in the folder – I think I’m actually leaning toward the “Freeform Flower” – I have five different versions of that one which may make the final project feel more “modern”. If I go that route, I will have to edit the embroideries for size and likely add a third outline stitching in another colour.

I’m giving myself a day to walk around the circle placement before I fuse them in place and then I will tackle the embroidery challenge.

Quilt Top – Assembled

108 Blocks Assembled

I just finished sewing all 108 blocks together – they need a bit more pressing but I’m now ready to move on to the next step – adding contrasting circles and embroidery to make this a double layer quilt. Later this afternoon, I’ll add fusible web to the back of my pile of blue fabric scraps and begin cutting out circles in many different sizes to fuse to the top.

I’ve already spend a couple of hours looking through my embroidery design collection for circular shaped embroideries – I’ve put several in a folder so I can locate them later. They’ll all need modifying for size and included elements. It takes a lot of time!

The assembly of the quilt top went reasonably quickly – I didn’t pin each row to the growing top – I find my nestings aren’t as accurate if I do; I start at one end, match up the first nesting, hold it firmly against my machine bed with my right index finger as I stitch toward my finger/the join. I take a stitch or two past the join then align the next nesting, holding it firmly with my index finger as I stitch my 1/4″ seam toward that nesting point. I do that with each segment. When I flip and press that row open my joins/nestings are almost all dead on.

There are some small inaccuracies – the original cutting of the blocks may be a smidgeon inaccurate, the HST diagonals may be a very tiny bit off the corner, my seams may be a thread width from exactly 1/4″ in spots, etc. All those very small variations add up – that’s quilting for you! But if you look closely, my joins are pretty close and when when I’ve added the circles/embroidery and quilt the whole project, nobody but me is going to notice the “background” seam joins.

Thursday, I taught a “bargello” class – about using strips sewn together, the panel then cut in strips of different widths, these new strips are sewn together to create a “wave” – this involves lots of nesting of seams.

2 Bargello Blocks

The two blocks came from one of the two sets of WOF strips I created for a demonstration piece. I’m not going to make the second two blocks – I don’t need another table runner I’m not going to use. I could give it away, but this two block piece will go into my “demonstration” projects box along with the remaining set of strips which I can use on another occasion when I’m teaching “bargello” again.

Both women in the class were nervous about sewing nested seams – there’s lots of practice in this project and in fact they’re easy to do – also without pinning. The joins are actually more accurate, I find, if I just align each new nesting as I go along, one at a time. The whole block assembles surprisingly quickly.

I could have joined the two blocks end-to-end, with the yellow centre blocks pointing in the same direction; I could have aligned them side by side with the yellow centres both pointing toward the opposite side. I chose to alternate them – to make my join I added two narrow strips to each block to bring the yellow back to the edge on each side. I probably should have made the join using the widest strip on each block but one of my wide strips wasn’t cut accurately – I only had one I could use – so I cut it in half!

This is, after all, a demonstration piece.

Appliqué Circles?

I dug out my stash of circles with fusible web and selected the blue and grey in whatever size I had and dropped them over the blocks. This tells me several things

  • I want a few circles larger than the largest I have here
  • I want to graduate my distribution from bottom right (darkest) to upper left (less dense and lightest)
  • I want greater density and more sizes of circles in the lower right
  • I will edge stitch the circles – what I don’t know yet is whether I also want to include some embroidery along with the appliqué – I think it may be a good idea – not much, but circles of some sort embroidered with blue threads
  • I’m trying to focus on something happening in the foreground rather than on the background quilt design

It’s time to start assembling the quilt top!

Makin’ Progress

I spent the weekend working on the latest quilt top – 108 6″ blocks (9 x 12) – 12 unpieced squares, 96 half-square triangles. Earlier in the week I cut the fabric into strips, then into squares, matching 48 squares with 48 background pieces, marked the diagonal. That’s where I stopped on Tuesday. Yesterday and today I sewed 1/4″ each side of the diagonal line, cut along the diagonal, pressed and trimmed the HST blocks.

The 8th Iteration of this Layout!

I’ve opted for maximum symmetry in this layout – at the same time doing my best to distribute the star centres as well as making sure all six fabrics are represented in the assembled on-point blocks with a decent distribution of fabrics on the periphery! That’s meant a lot of moving individual and sets of HST multiple times. (I just noticed in the photo that the direction of the background print isn’t consistent! You won’t see it but I can. I’ll have to try swapping blocks within each set to correct that!)

This is the layout at the moment. I realize nobody but me is going to notice the “clashes/repititions” that stand out for me. Besides, once I have the top stitched together, I’m thinking about appliqué of some sort in various dark purple/blue small prints (that will draw attention away from the overall fabric distribution beneath). I have no idea whether that should be circles of various sizes, or small diamonds (some of which might overlap), triangles? I’ve pulled several scraps

from various boxes and laid them out together. Until I assemble the top I won’t know what might work and what won’t. I have still more boxes to rummage through – I’ll do that tomorrow.

I’m finally moving on a quilt again. I’ll have time tomorrow and Wednesday afternoon to chain piece blocks together but before I do that I do want to check the layout at least one more time!

———-

I just took a careful look at the background triangles. I knew the background fabric had a directionality to it but I wasn’t aware of how it was going to play out.

The right leaning diagonals have the subtle background stripe horizontal; the left leaning diagonals have the background strip vertical. I looked carefully – they’re all like that. The background pattern is so subtle nobody’s going to notice it but me! Can’t change any of them! Interesting outcome. Completely unanticipated.

Stack ‘n Whack Fat Quarter Placemats

I don’t need another set of placemats, but yesterday I took several quilts and other projects to Sew With Vision to show the new owner, Sally, so we could talk about classes for the summer and fall. The set of placemats I took with me I made several years ago and they wouldn’t catch anybody’s attention. They’re pretty dull.

Original Placemat Tops

These stack ‘n whack fat quarter placemats are a novice quilter project. I decided to make a new set to display in the shop to entice some novice quilters to take a class to learn some basic quilting technique – precise cutting (with rotary cutter), sewing precise 1/4″ seams, chain piecing, pressing seams to nest joins and sewing the nested seams.

I picked four batik fat quarters from my stash (who knows, maybe these are also dull!). I started by pressing each fat quarter then I stacked all four, cut the pieces all at the same time, last evening. It probably took me an hour to press, stack and cut the fat quarters.

Fat Quarter Placemats

This afternoon, I laid out the pieces for each placemat, making sure my layout was the same for each one. Next, I laid adjacent pieces together and pinned them, then I piled the pinned pieces on top of one another. To sew, I used a “production” technique. I chain pieced as much as I could in the first pass – I stitched the adjacent pairs of pieces in the “rows”, pressed the seams to one side, then sewed the two parts for each row.

When I finished sewing and pressing all the rows, I laid out the placemats. I picked up the rows for one placemat, making sure the seams in adjacent rows were pressed in opposite directions so I could nest seams as I joined the rows. As I stitched, I made sure the joins did nest as I sewed them.

I pressed each placemat when the sewing was finished.

Now I need batting and backing to complete the placemats. I’m still deciding whether to quilt them just by stitching-in-the-ditch along the seam lines, or whether to quilt them in the hoop with a simple design.

These placemats could be sewn together to make a table runner. Or you could use the idea to make a quilt top. The placemats are simply an excuse to hone technique. As I explained to Sally, I don’t teach a project, I teach technique – I use projects as a vehicle for becoming a more experienced sewer or quilter.

For cutting and sewing instructions: Stack ‘n Whack Fat Quarter Placemats

Whew – I Made It!

I finished Drunkard’s Path #5 last night. I got the facing/hidden binding hand stitched down, the label added. It just needs a sleeve for hanging which I will do sometime today.

Quilt Top

Because the quilt was so wide (60″ x 71″) I had to add a wide insert into the backing fabric. I used corners I cut from the borders when assembling the front, adding in two of the leftover drunkard’s path blocks along with large cuts of scraps in the colour family I used for the top. I finished the quilt with a facing/hidden binding. It was a close thing – I had to fudge the fabric for the top binding with another scrap that kind of blended with the fabric there, and managed to salvage just enough from one of the side cut-offs to finish the top facing.

Quilt Back

I didn’t have enough backing fabric left over to make a label! I had to scrounge through my box of grey scraps to find something in the same colour tone to use. So, unfortunately, the label stands out, rather than seem part of the backing.

I just have a couple of small preparations to finish up (labels to print, dowels to cut to size for hanging, packing everything up for travelling) and I’ll be set for Friday morning’s departure to Parrsboro.

Quilt Top

Panel With Borders Added

I’m working away on this quilt. The top is now complete. I had to buy a 1/2m of fabric for the dark narrow inner border – there was nothing bright enough or strong enough in my stash to complement the panel. A quick trip yesterday afternoon to my local fabric shop and I was able to set up and attach the borders.

I cut all three border strips at one time, sewed them together, then added them to the panel, finally mitring the corners – much easier than trying to mitre each border strip individually and then struggling to get the mitres to align. Took less time, as well.

I’ve pulled out fabrics for the backing – I’m going to do a wide strip (24″) using large blocks of fabrics comparable to the scraps I used for the blocks. I have a couple of nice soft grey prints that will blend with the bright colours to finish the backing.

Quilt Panel

Finished Quilt Panel

Interesting and several surprises. The overall “redness” of the panel is coming through – I intended that. I wasn’t anticipating the diagonal lines – the top left/bottom right “rope” like lines popped out when I laid out the blocks – I could have eliminated them by rotating the position of the blocks in columns 2 and 4 to replicate the orientation in columns 1, 3, 5 but that layout was uninteresting ( didn’t take a photo). I knew I was going to use sashing to join the columns – I thought it might interrupt the diagonals – it hasn’t.

The colour distribution is pretty good – no block jumps out saying “I shouldn’t be here!”. However, I laid the panel on the floor, took a photo, and the placement of four small drunkard’s path blocks smacks me in the face – you’ll have to look hard to find them all in the same column adjacent one another! Didn’t see it before sewing the panel together. I was focused on the large pie pieces, not paying attention to the small ones. Not taking the panel apart. I bet if I say nothing, nobody will notice.

Now the borders. This quilt is growing larger by the minute – with the planned borders added the top will finish at 62 1/2″ x 73″ – close to a double bed size! I will have to carry through, though, because were I to simply add an outer border using the sashing fabric, the panel will be diminished. I have to end with a lighter fabric on the outside, with a coloured element between.

I’m feeling the pressure to get this quilt done before the end of May – I want to include it in the Parrsboro show – so my goal is to finish the top today, construct the backing on Saturday, set up the quilt sandwich Sunday, then spend next week quilting. I lose Wednesday – I’m doing a workshop on making a Fidget Quilt – but maybe by a week Sunday I will have the quilting done – that leaves me a day or two to bind it.

BTW, I just googled “Drunkard’s Path images” and could find no picture of a quilt top that uses this array for the block. I guess it’s an original improvisation!