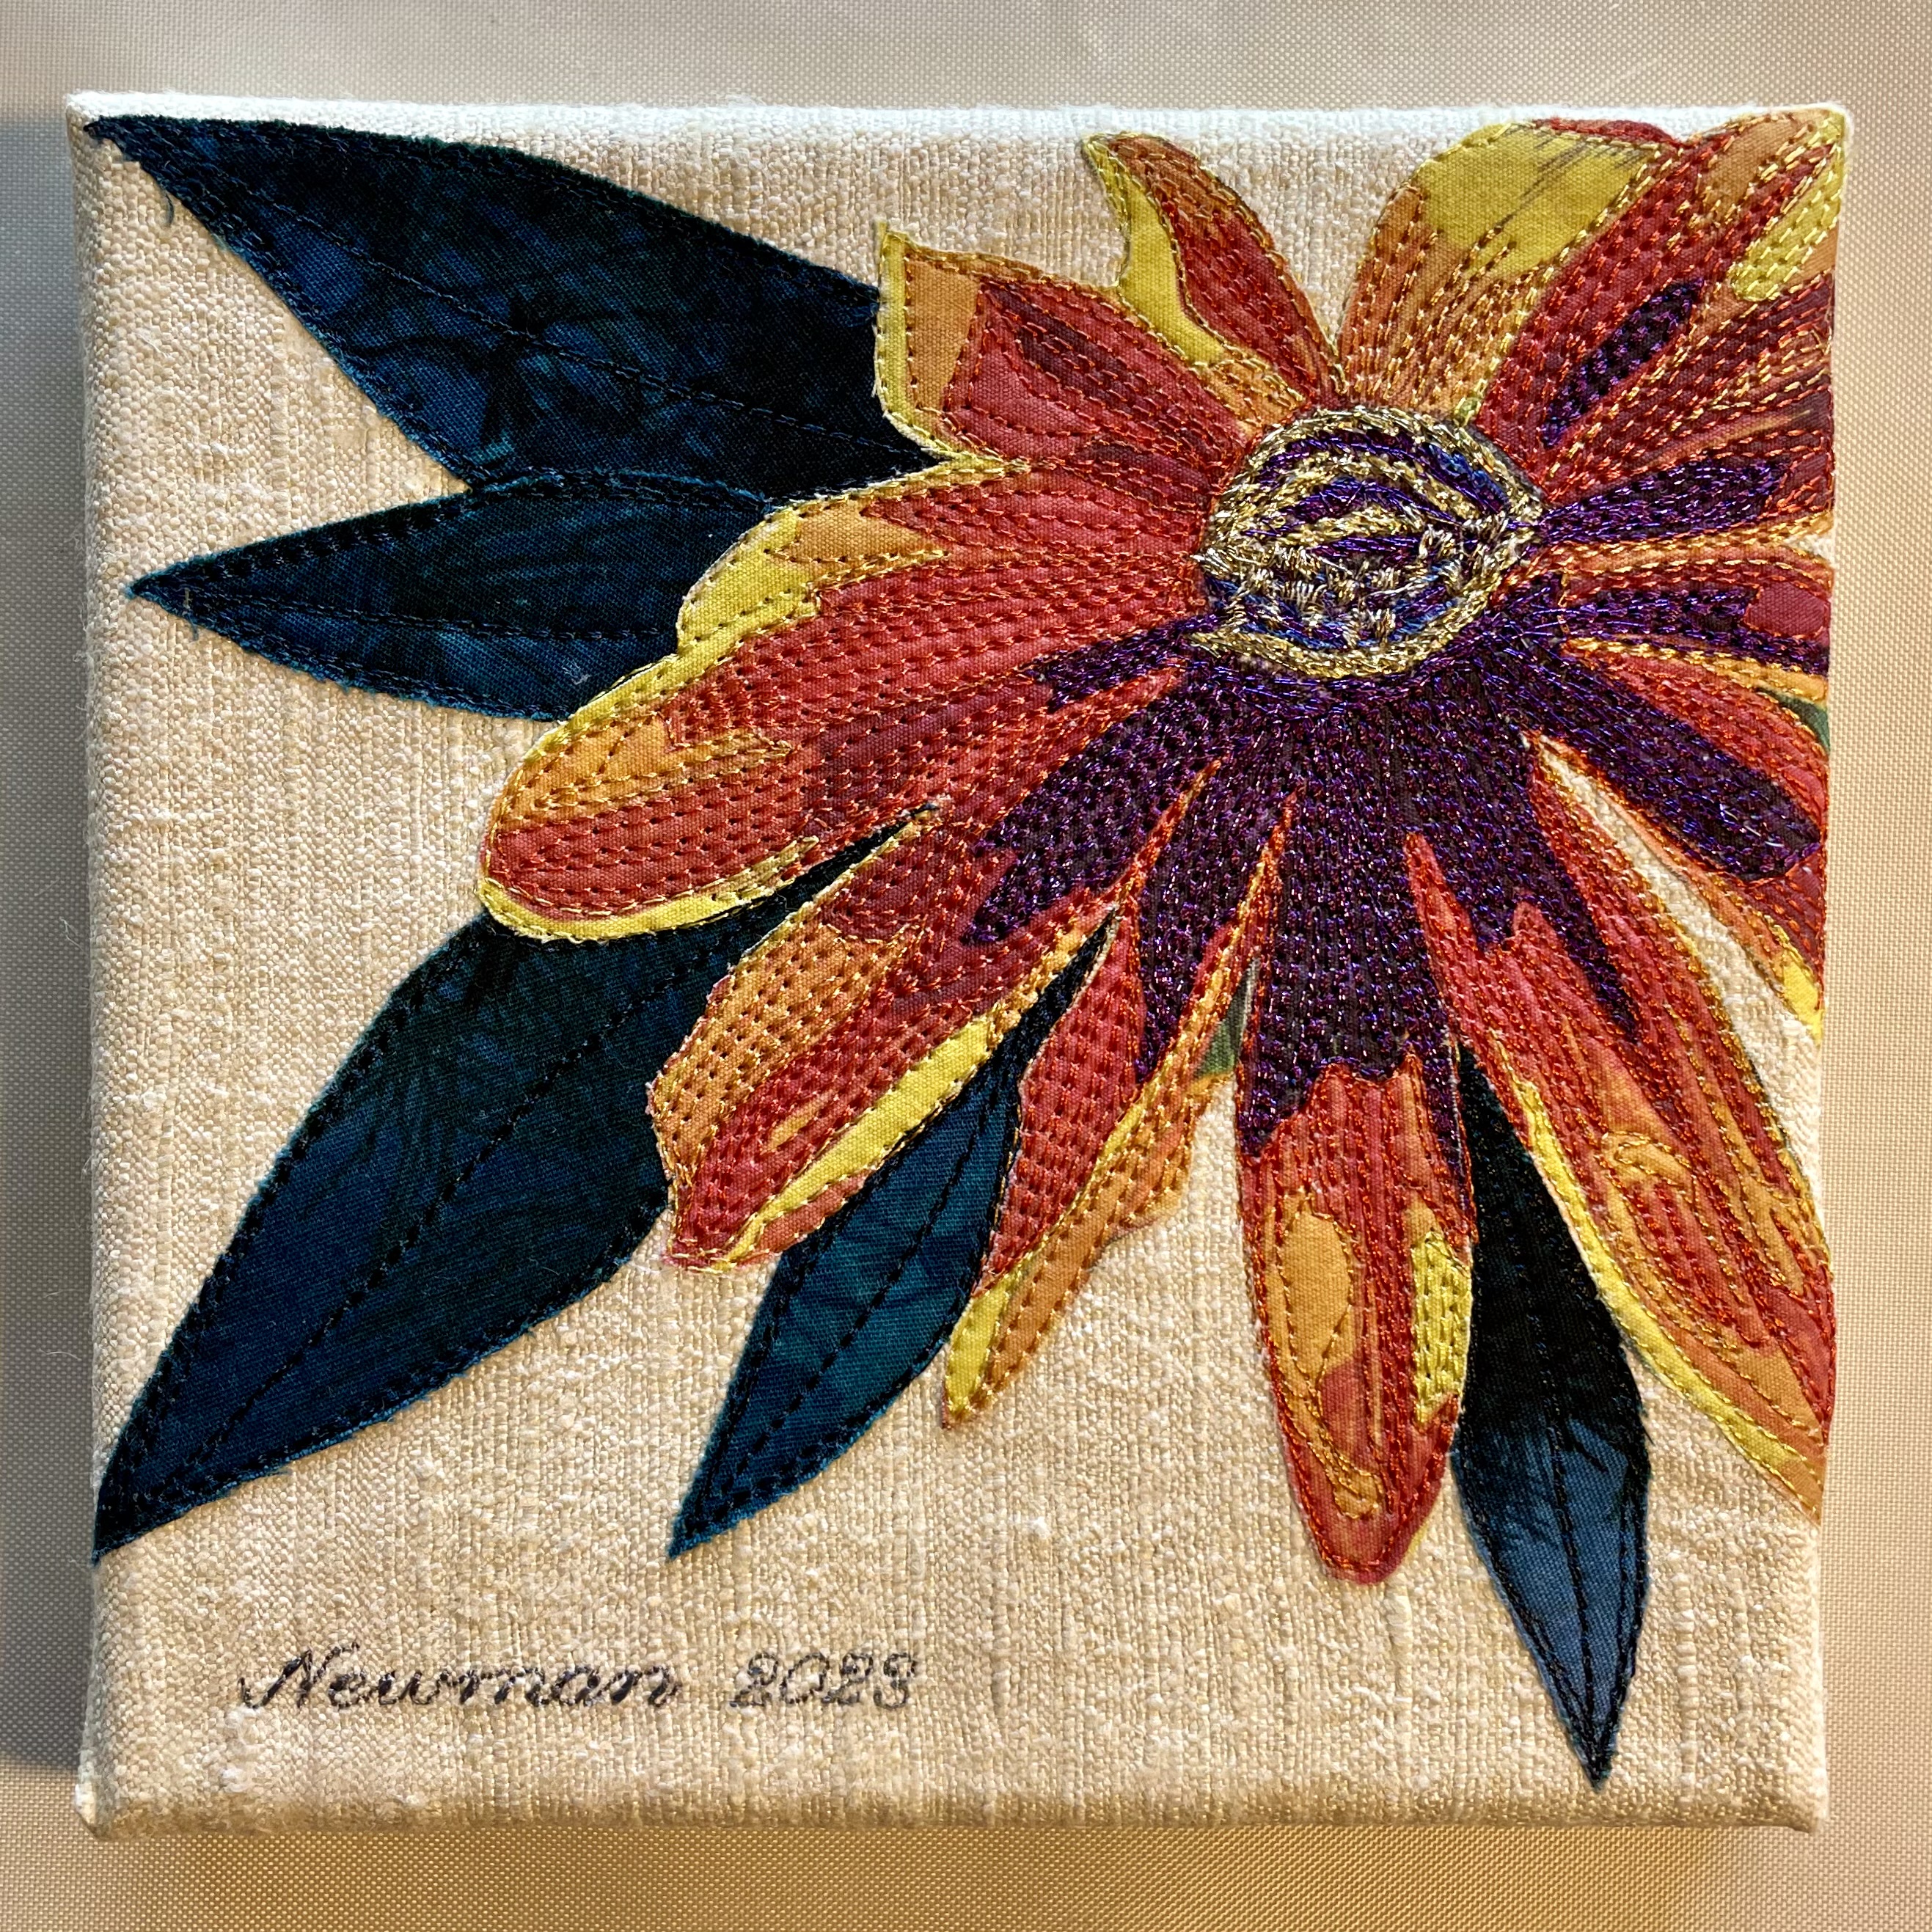
This one is #3. I finished it yesterday. A surprising number of thread changes involved in this one. I’m pleased with how the flower centre turned out – I didn’t feel it needed a metallic thread; the dark brown/black set up enough contrast with the golden yellow to make the flower lively. The challenge is deciding how much stitching and where. The flowers look better when there is some unstitched space but there still needs to be enough thread painting to give the flower texture.
More To Come
This is what’s on my cutting table (anti-clockwise starting at the bottom left) – a purple poppy (needing to be fussy cut), a Blue Flag iris, Bradford Pear, a clematis, a peony, a day lily, and a hibiscus I cut from some Hawaiian bark cloth which I’m not going to use. Instead, I added a few more printed photos to the collection – a yellow/pink phalaenopsis, a more vibrant purple iris, and a golden/red hibiscus. That gives me the ten flowers I’m hoping to complete for this set.
I’m waiting now for my latest order of 6×6 mounted canvases to arrive so I can mount these pieces when I’ve finished thread painting. This project will take me another ten days or so to complete.
Osterspermum are African daisies. I first noticed them at garden centres maybe 20+ years ago. They come in a range of colours from off white to a lovely purple, red, orange. I started planting them in the container gardens on my back deck. Over the years I took lots of photos of them.
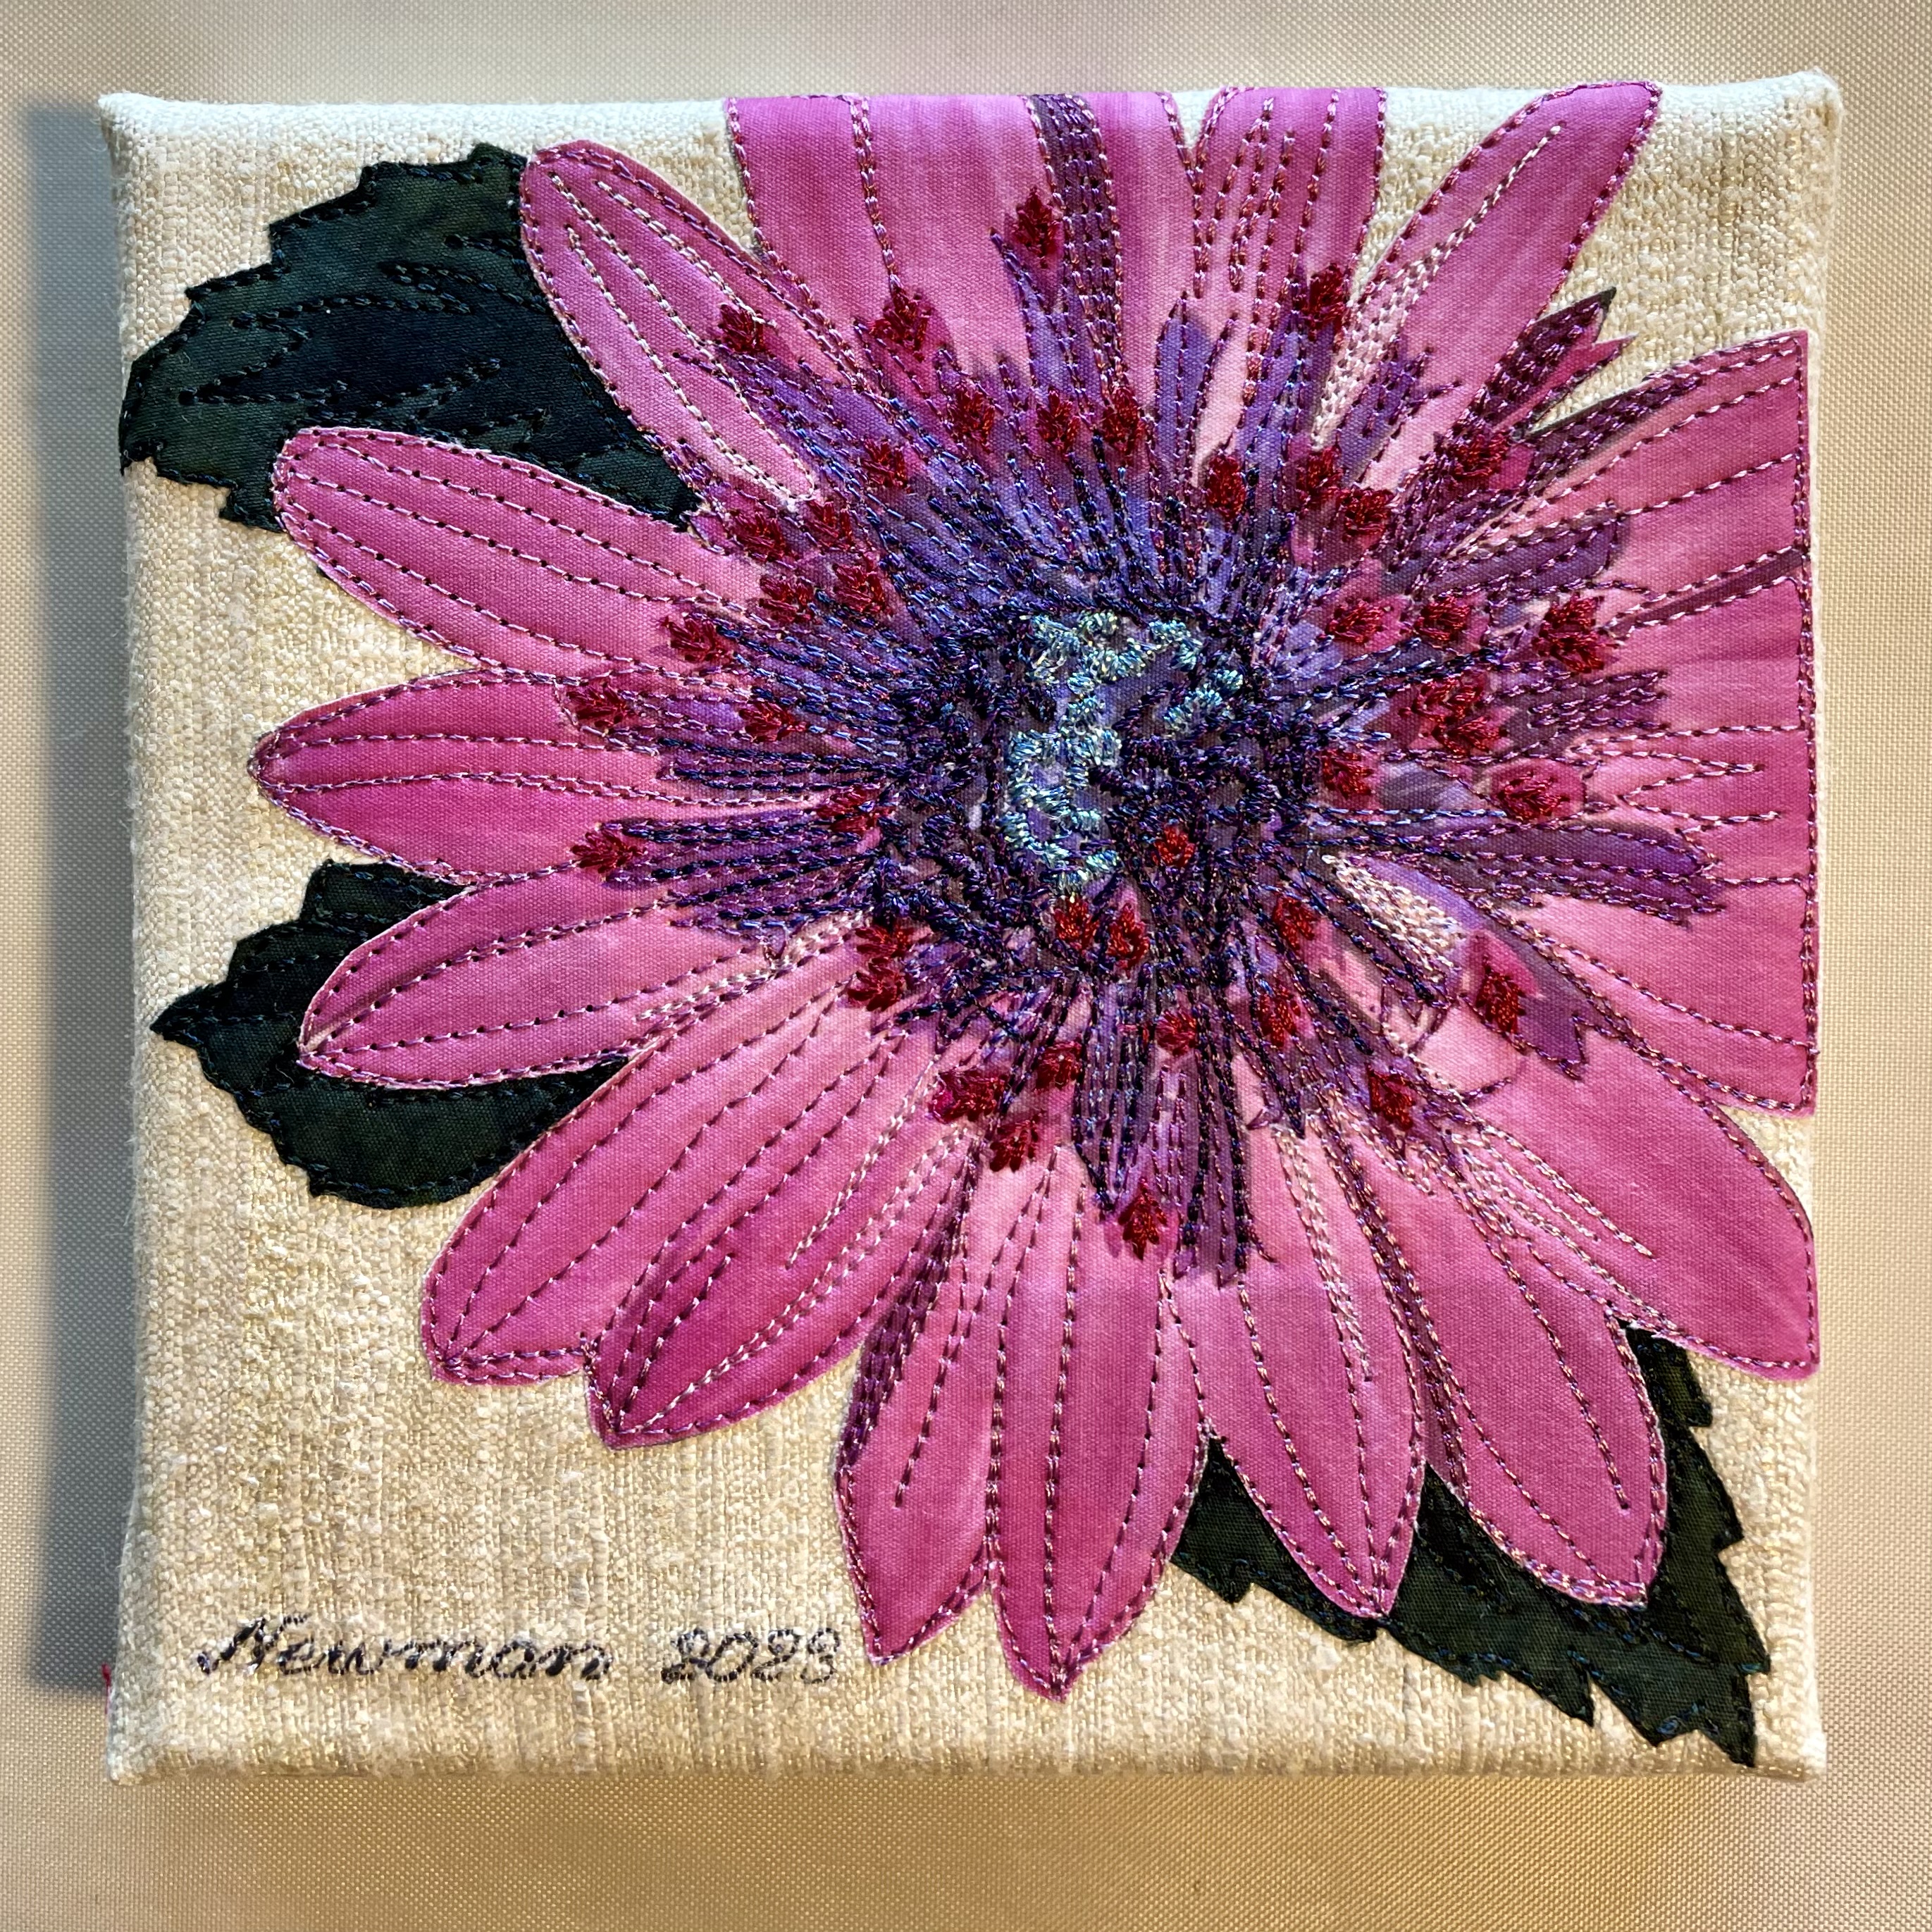
Osteospermum
I decided to include an Osteospermum in the set of ten pieces I’m working on.
Again, on a raw silk background, I fused the fussy cut flower printed on cotton. I selected a variety of rayon and polyester embroidery thread to use for the thread painting. Then I started stitching – first the flower edges with a dusty pink thread, then I spent about an hour designing a stitch to use for the small central florets – I stitched each one separately. Then I worked my way into the centre. wanted to catch the viewer’s eye at the centre – I used a metallic thread paired with a rayon to stitch the unopened florets at the very centre. Last came the leaves.
A second 6×6 piece finished.
Then I went back to Rudbeckia II – I wasn’t happy with the flower centre. I removed the piece from the canvas backing, pressed it lightly and reworked the centre and dark purple areas thread painting with metallic thread.
Rudbeckia II – Reworked
You can just see the glint of the metallic thread at the centre and in the deep purple areas. The thread painting with metallic thread gives more depth and texture at the flower centre. The slight glint of purple metallic thread livens the whole flower.
This is my second go at the Rudbeckia. This time I printed the flower on fabric, pulled off the plastic backing, added fusible web, then fussy cut out the flower. I dug through dark green scraps, added fusible web, then cut leaf shapes. I fused leaves and flowers to a 9″ x 9″ raw silk square of fabric which I’d backed with Sewer’s Dream interfacing to stabilize it.
Then I began stitching! It took several hours to thread paint the flower – constantly changing thread and bobbin colour – using the “hover” function on my machine to simulate free motion sewing.
This time, I left myself enough space on the background to apply a signature. Having used fusible web, my raw edges are relatively smooth, not fraying as was the case with the first Rudbeckia.
I think I’m rather happier with this version than I was with the first prototype.
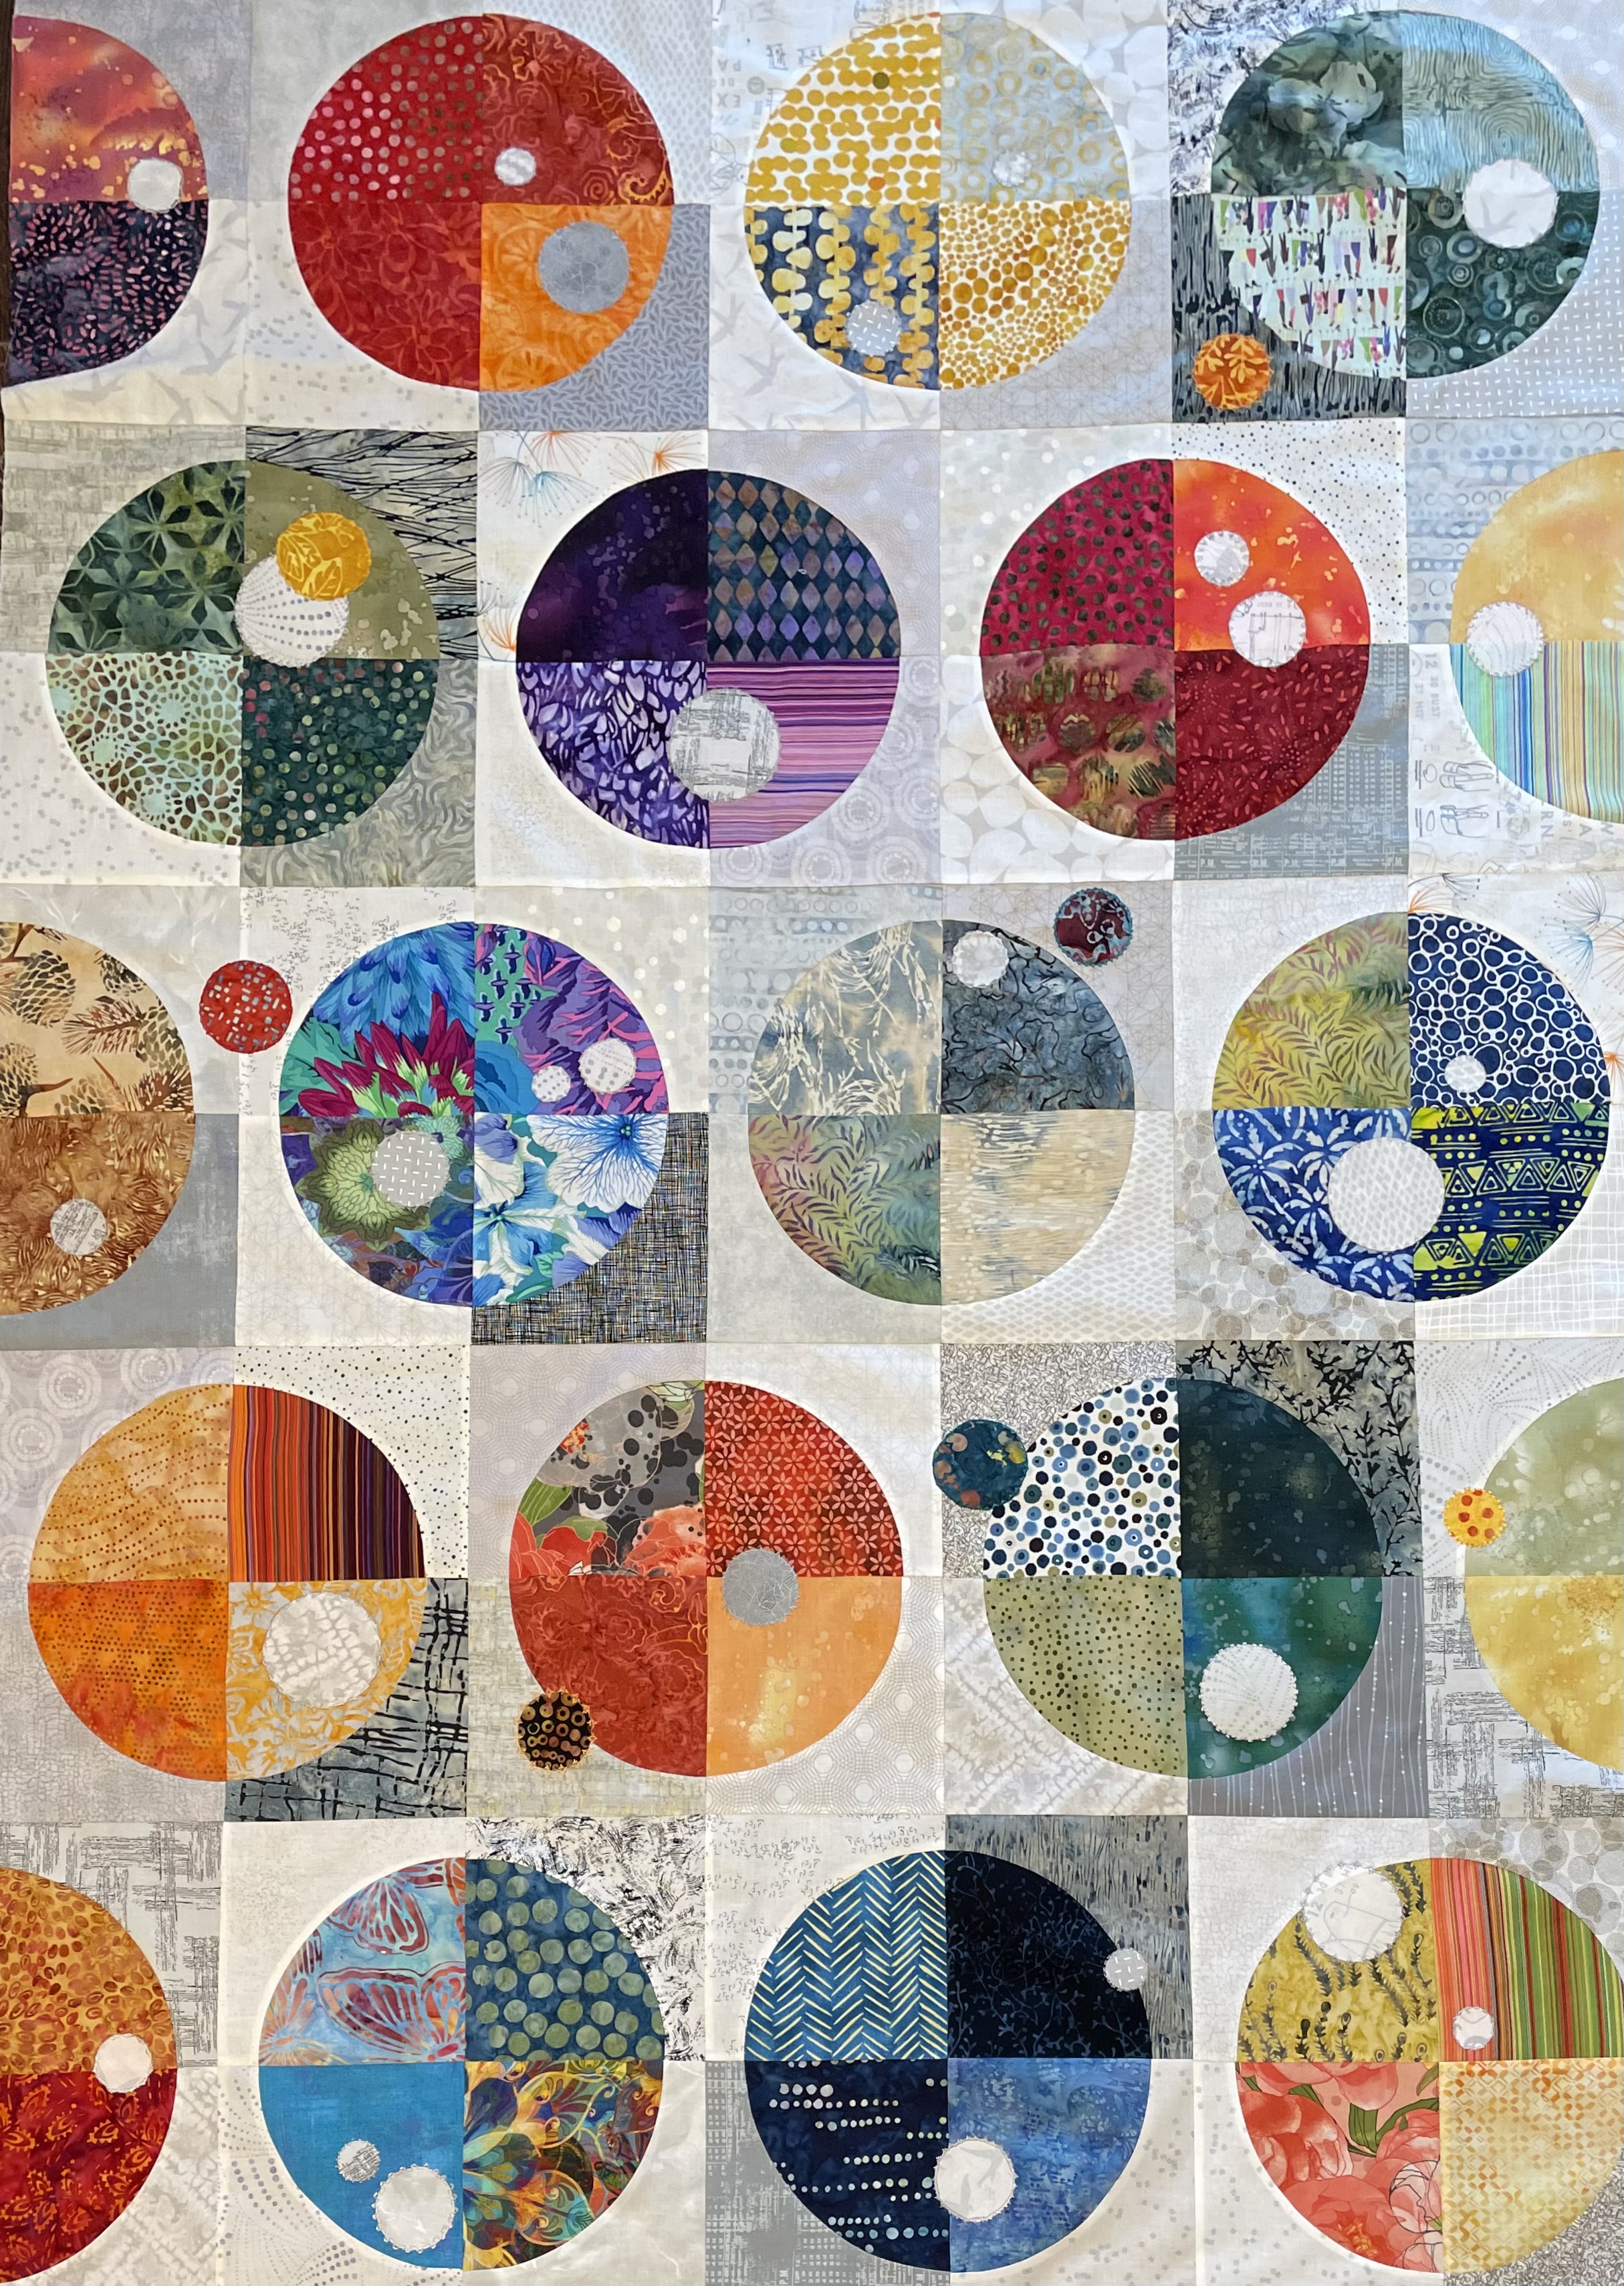
I just finished the decorative edge stitching on all the small circle appliqués. Slowly and carefully – using 50wt rayon embroidery thread (top and bottom).
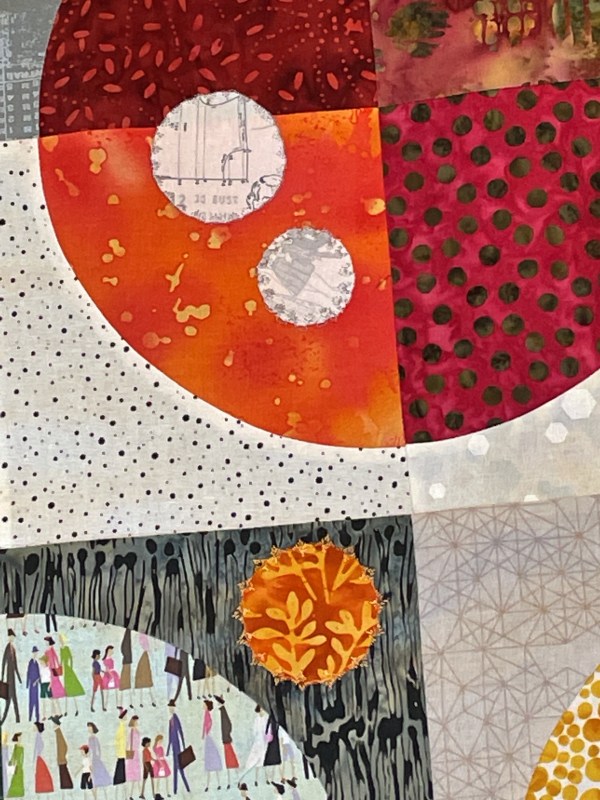
Detailed Views
In these detail photos you get a sense of the decorative stitching done along the circumference of each small circle. I used a silver grey thread for all the grey circles, and blended in a complementary thread for each coloured block.
Yesterday, I added the gold and turquoise borders to the panel. Today, I spent a lot of time avoiding the next step because if I wanted the dots fabric to go in the right direction I was going to have to waste a lot of it and I didn’t have a whole lot to work with. I really wanted to border the whole panel with the dots – but I barely had enough to complete two sides and even then I had to do a lot of piecing to get enough length! That fabric is now attached with the mitred corner in the bottom left.
I’ve cut two strips of the hexagon fabric for the other two sides – I need one more to finish the corner. I have plenty of that fabric – not a problem.
I still have to decide at what point to edge stitch (and embellish) the appliqué – I could do it as soon as the borders are complete; I could do it after assembling the quilt sandwich – when I do it depends on how I think about quilting the whole project. The previous convergence quilts I’ve done were quilted overall in the hoop on the embroidery machine. I’m not sure how that will look with the appliqué, however. Stitching-in-the-ditch won’t do it, though because that leaves the larger blocks unquilted space. So I will probably choose to quilt in the hoop which means I should edge stitch the appliqué before assembling the back with what leftover bits of fabric I have.
I haven’t done much textile art for the past month or so – not since the 6×6 pieces. Nothing in particular has called out to me.
This morning I decided I had to start something. I keep a folder on my desktop “Wall Art” where I stick ideas. I looked at Charlie’s first swim photo – I’ve never been happy with my original piece created using raw-edge appliqué. I’ve wanted to print the photo on fabric and embellish it.
Charlie’s First Swim
The problem is his dad sent me a small version of the photo on his phone and when I attempt to enlarge it I get a very pixilated image. This morning, I printed an enlargement on paper – I’m going to try stitching that to see whether I can sharpen the image with some thread painting. If it works, I’ll print Charlie on fabric and carry on from there.
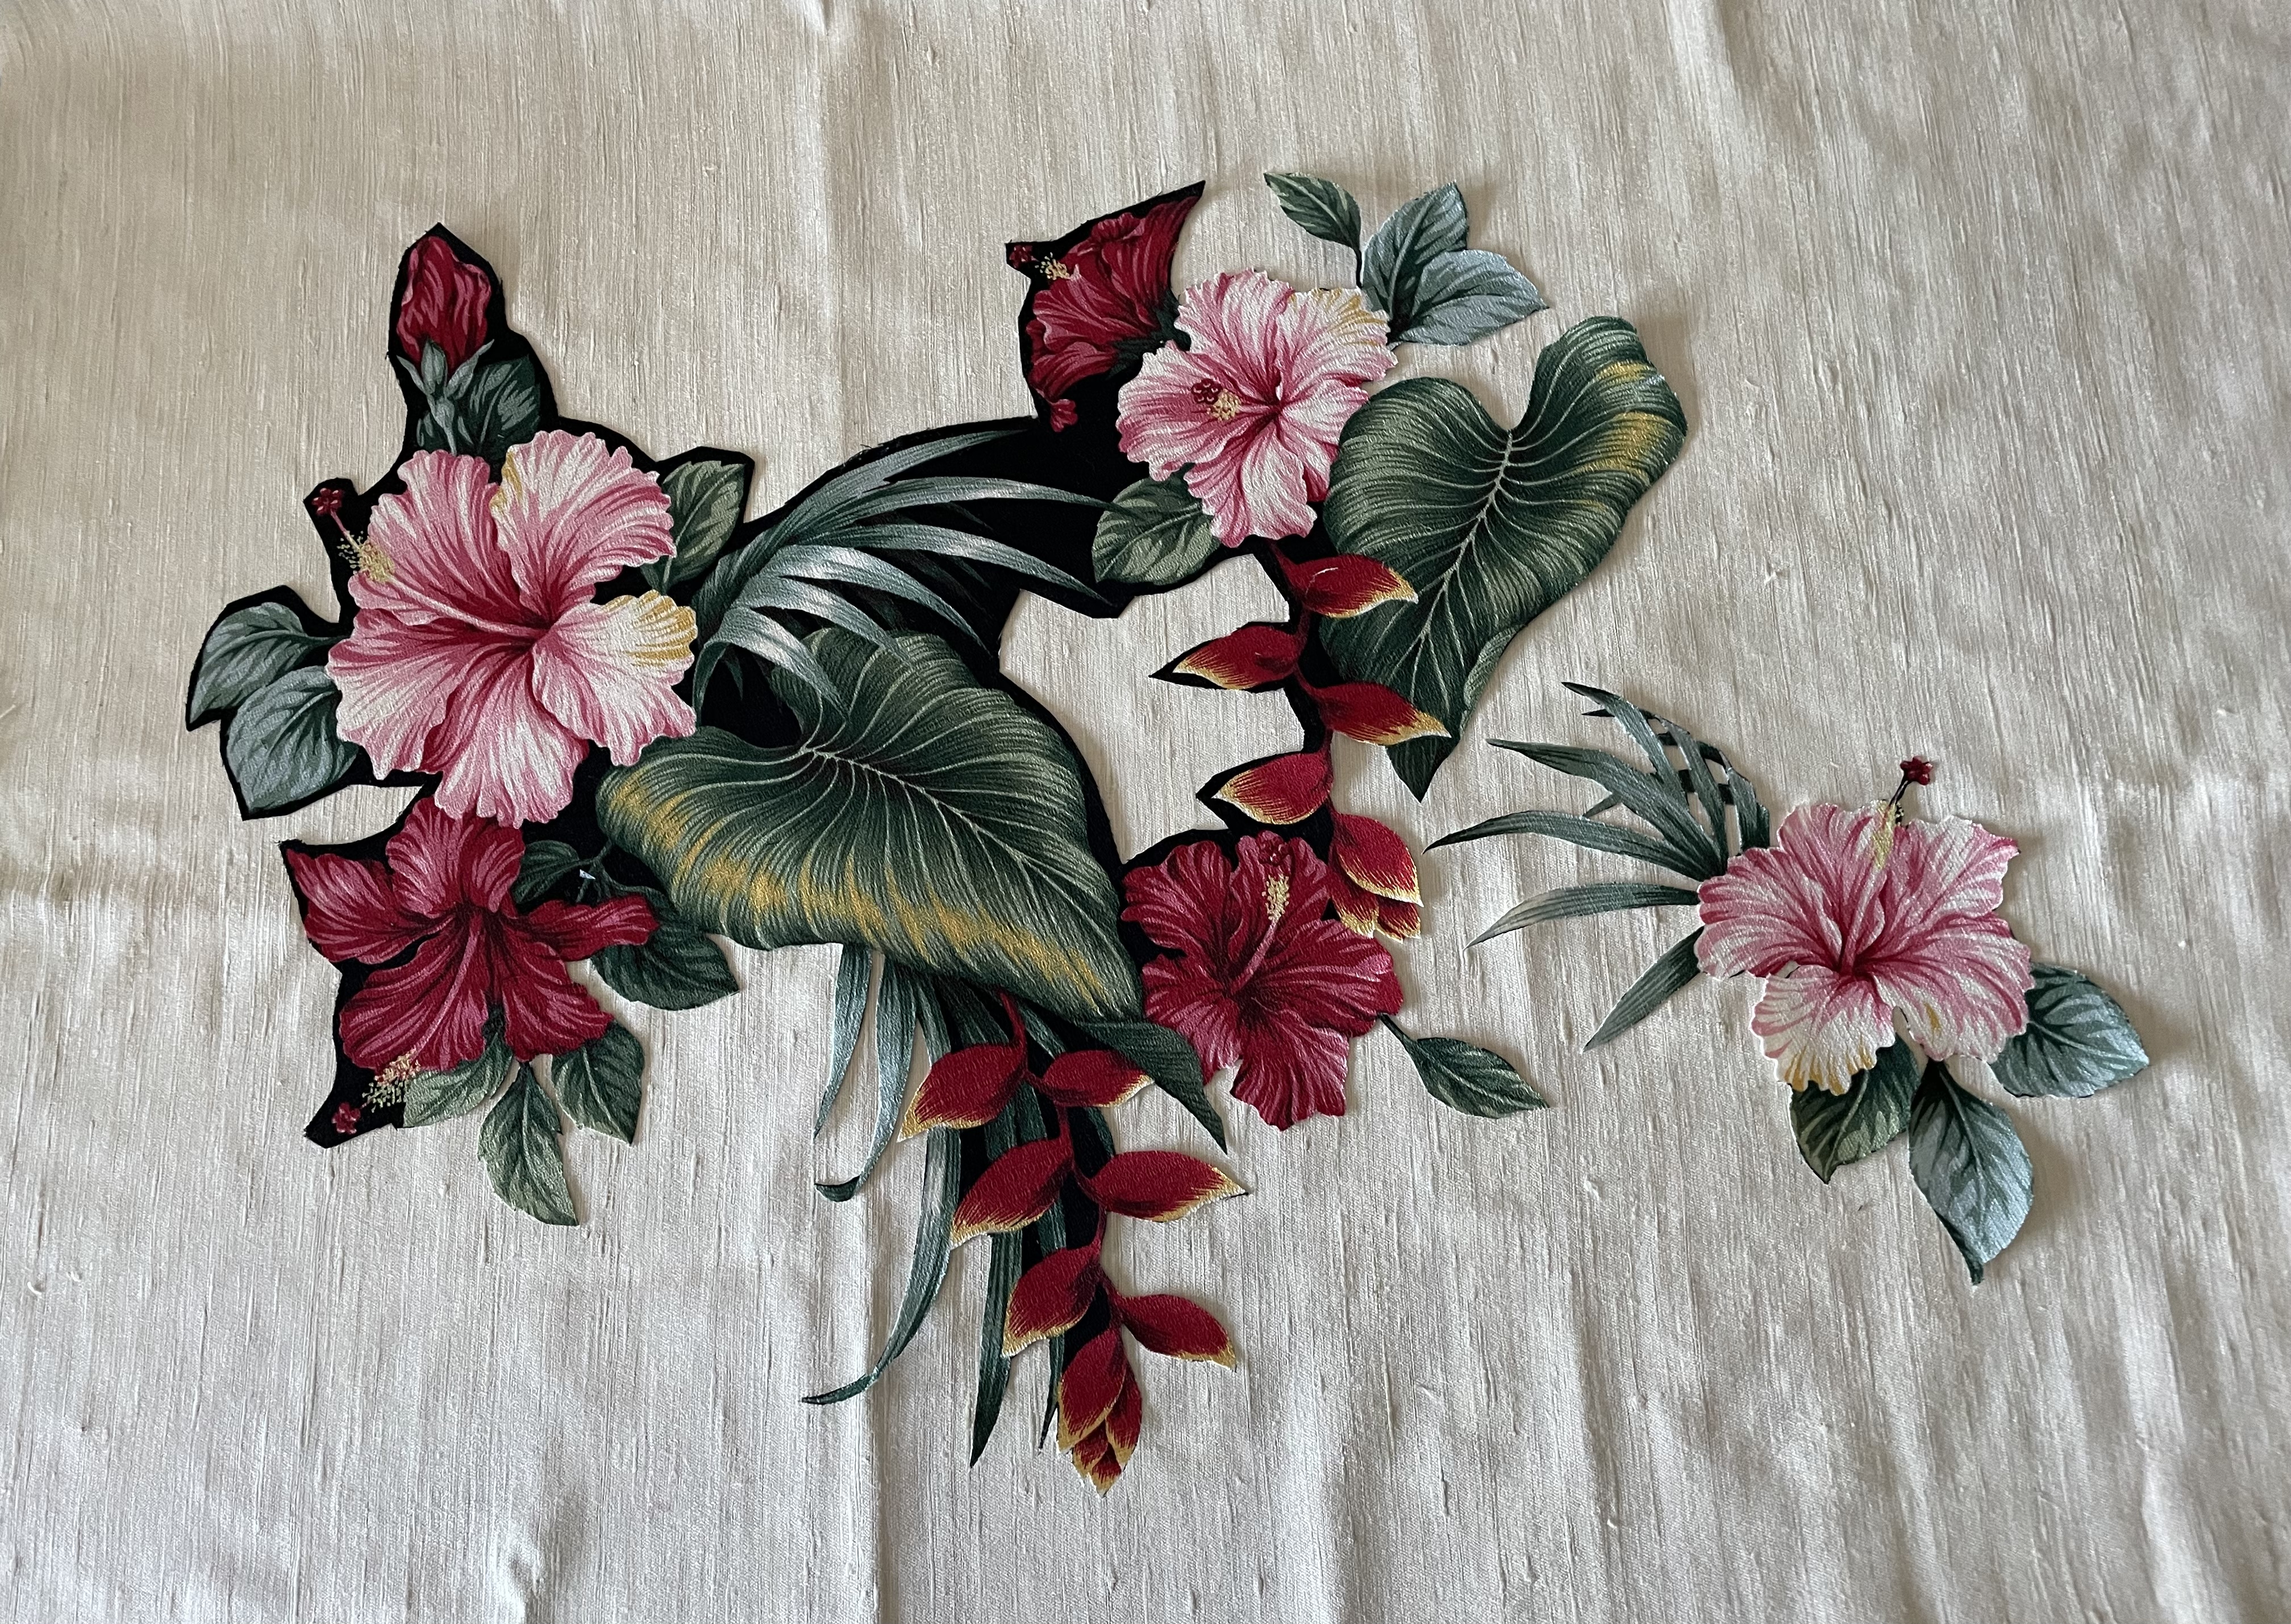
Another thought was to revisit the bark cloth in my stash. I selected an array of hibiscus and heliconia from the black fabric, pressed a sheet of Pellon 805 fusible web to the back, and started fussy-cutting the flowers.
Hawaiian Flowers
I’ll carry on trimming off the black. I plan to use a panel of natural raw silk as background. This may be a project I’ll work on while working on other things.
However, this doesn’t feel like a start – I definitely want to do some quilting – just not sure where to begin.
This morning’s project was to complete Block #4. I’m getting more efficient at embellishing the raw edge appliqué, applying stems and leaves, and signature. A bit less than three hours. I’ve built up a library of “edge” stitches, and “leaf” shapes so I’m not spending time browsing and modifying my machine’s stitches to find something to use.
Block #5 tomorrow.
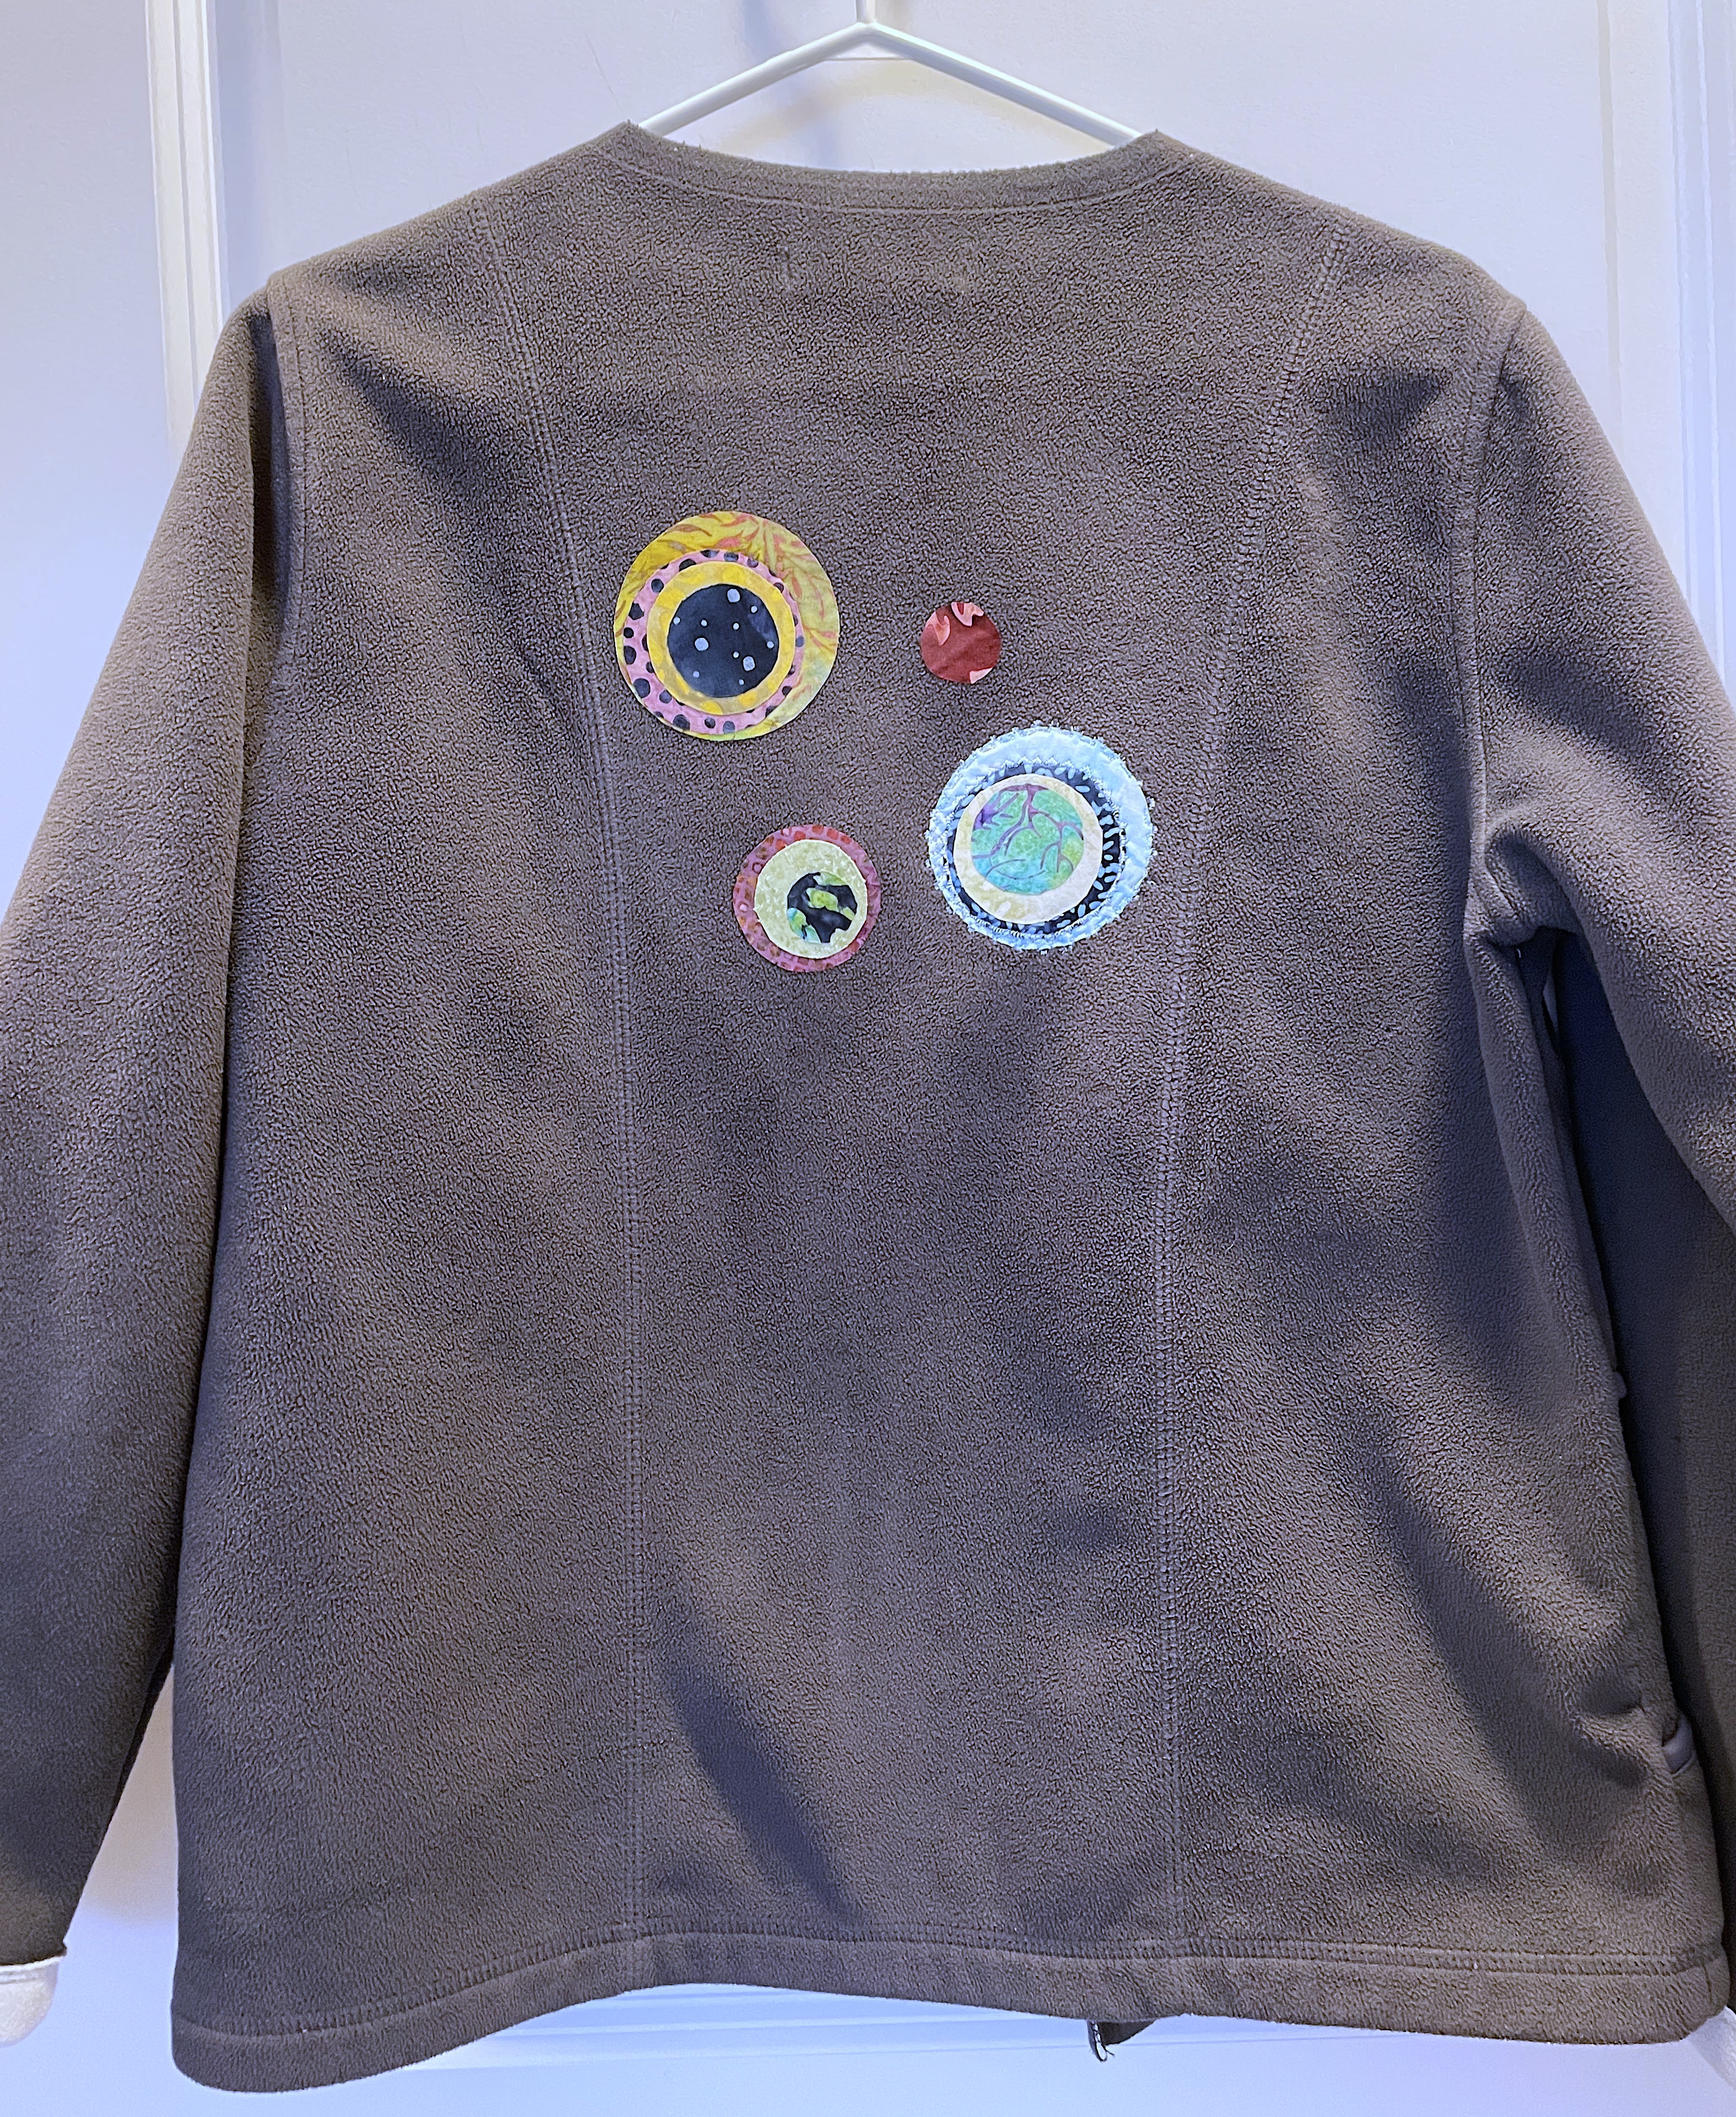
Sweatshirt Makeover
Jacket FrontJacket BackSweatshirt Makeover – In Progress
In just under two weeks I’m teaching a class “Sweatshirt Makeover” – intended to explore remaking and/or embellishing an old sweater, plain jacket, or sweatshirt to give it new life.
I did a couple many years ago:
Iris Appliqué on Sweatshirt BackFramed Mola on Sweatshirt FrontSweatshirt Makeovers
The “Iris Appliqué” was my very first attempt at raw edge appliqué! I added irises to both front and back of the shirt. Several years later my sister brought me two molas from Costa Rica – I fused this bird mola to the front of a black sweatshirt and framed the edges; I still have the fish packed away in a drawer.
There are two aspects to a sweatshirt makeover – you can embellish it (taking particular care to fuse fabric over old stains or holes you want to hide); or you can remodel it – turn a pullover sweatshirt into a jacket with buttons or zipper or snaps. You can remove cuffs from sleeves or hem. Change the neckline. Lots of possibilities.
I didn’t have another old sweatshirt on hand so I went to Mission Mart (a local used clothing depot) to see what I could find. I came across a grey zippered fleece jacket (which was on the small side). So I decided to take out the zipper, remove the collar, shorten the sleeves, reshape the front edges so they’d hang better when I added two centre panels which I intend closing with buttons.
The next decision was how to embellish it. I decided simply to use the “modern flowers” theme I’ve been working on for the 6×6 wall art. I selected a bunch of batik circles, fused them onto the back and fronts of the jacket. Today I started edge stitching the circles and I added stems and leaves to finish the left front.
At the moment, I don’t know what to use to widen the front of the jacket (I need about 5″ in total for the jacket to fall loosely). I have a couple half-yards of wool fabric which might work with the fleece – I have to make a trip to Fabricville to see if I can find a double sided grey fleece (or some other colour) that might work with the jacket.
Or I may never do any more on this project – I’ve done enough to illustrate how you might think about doing a makeover and take this project as is to the shop to put on display to advertise the class.
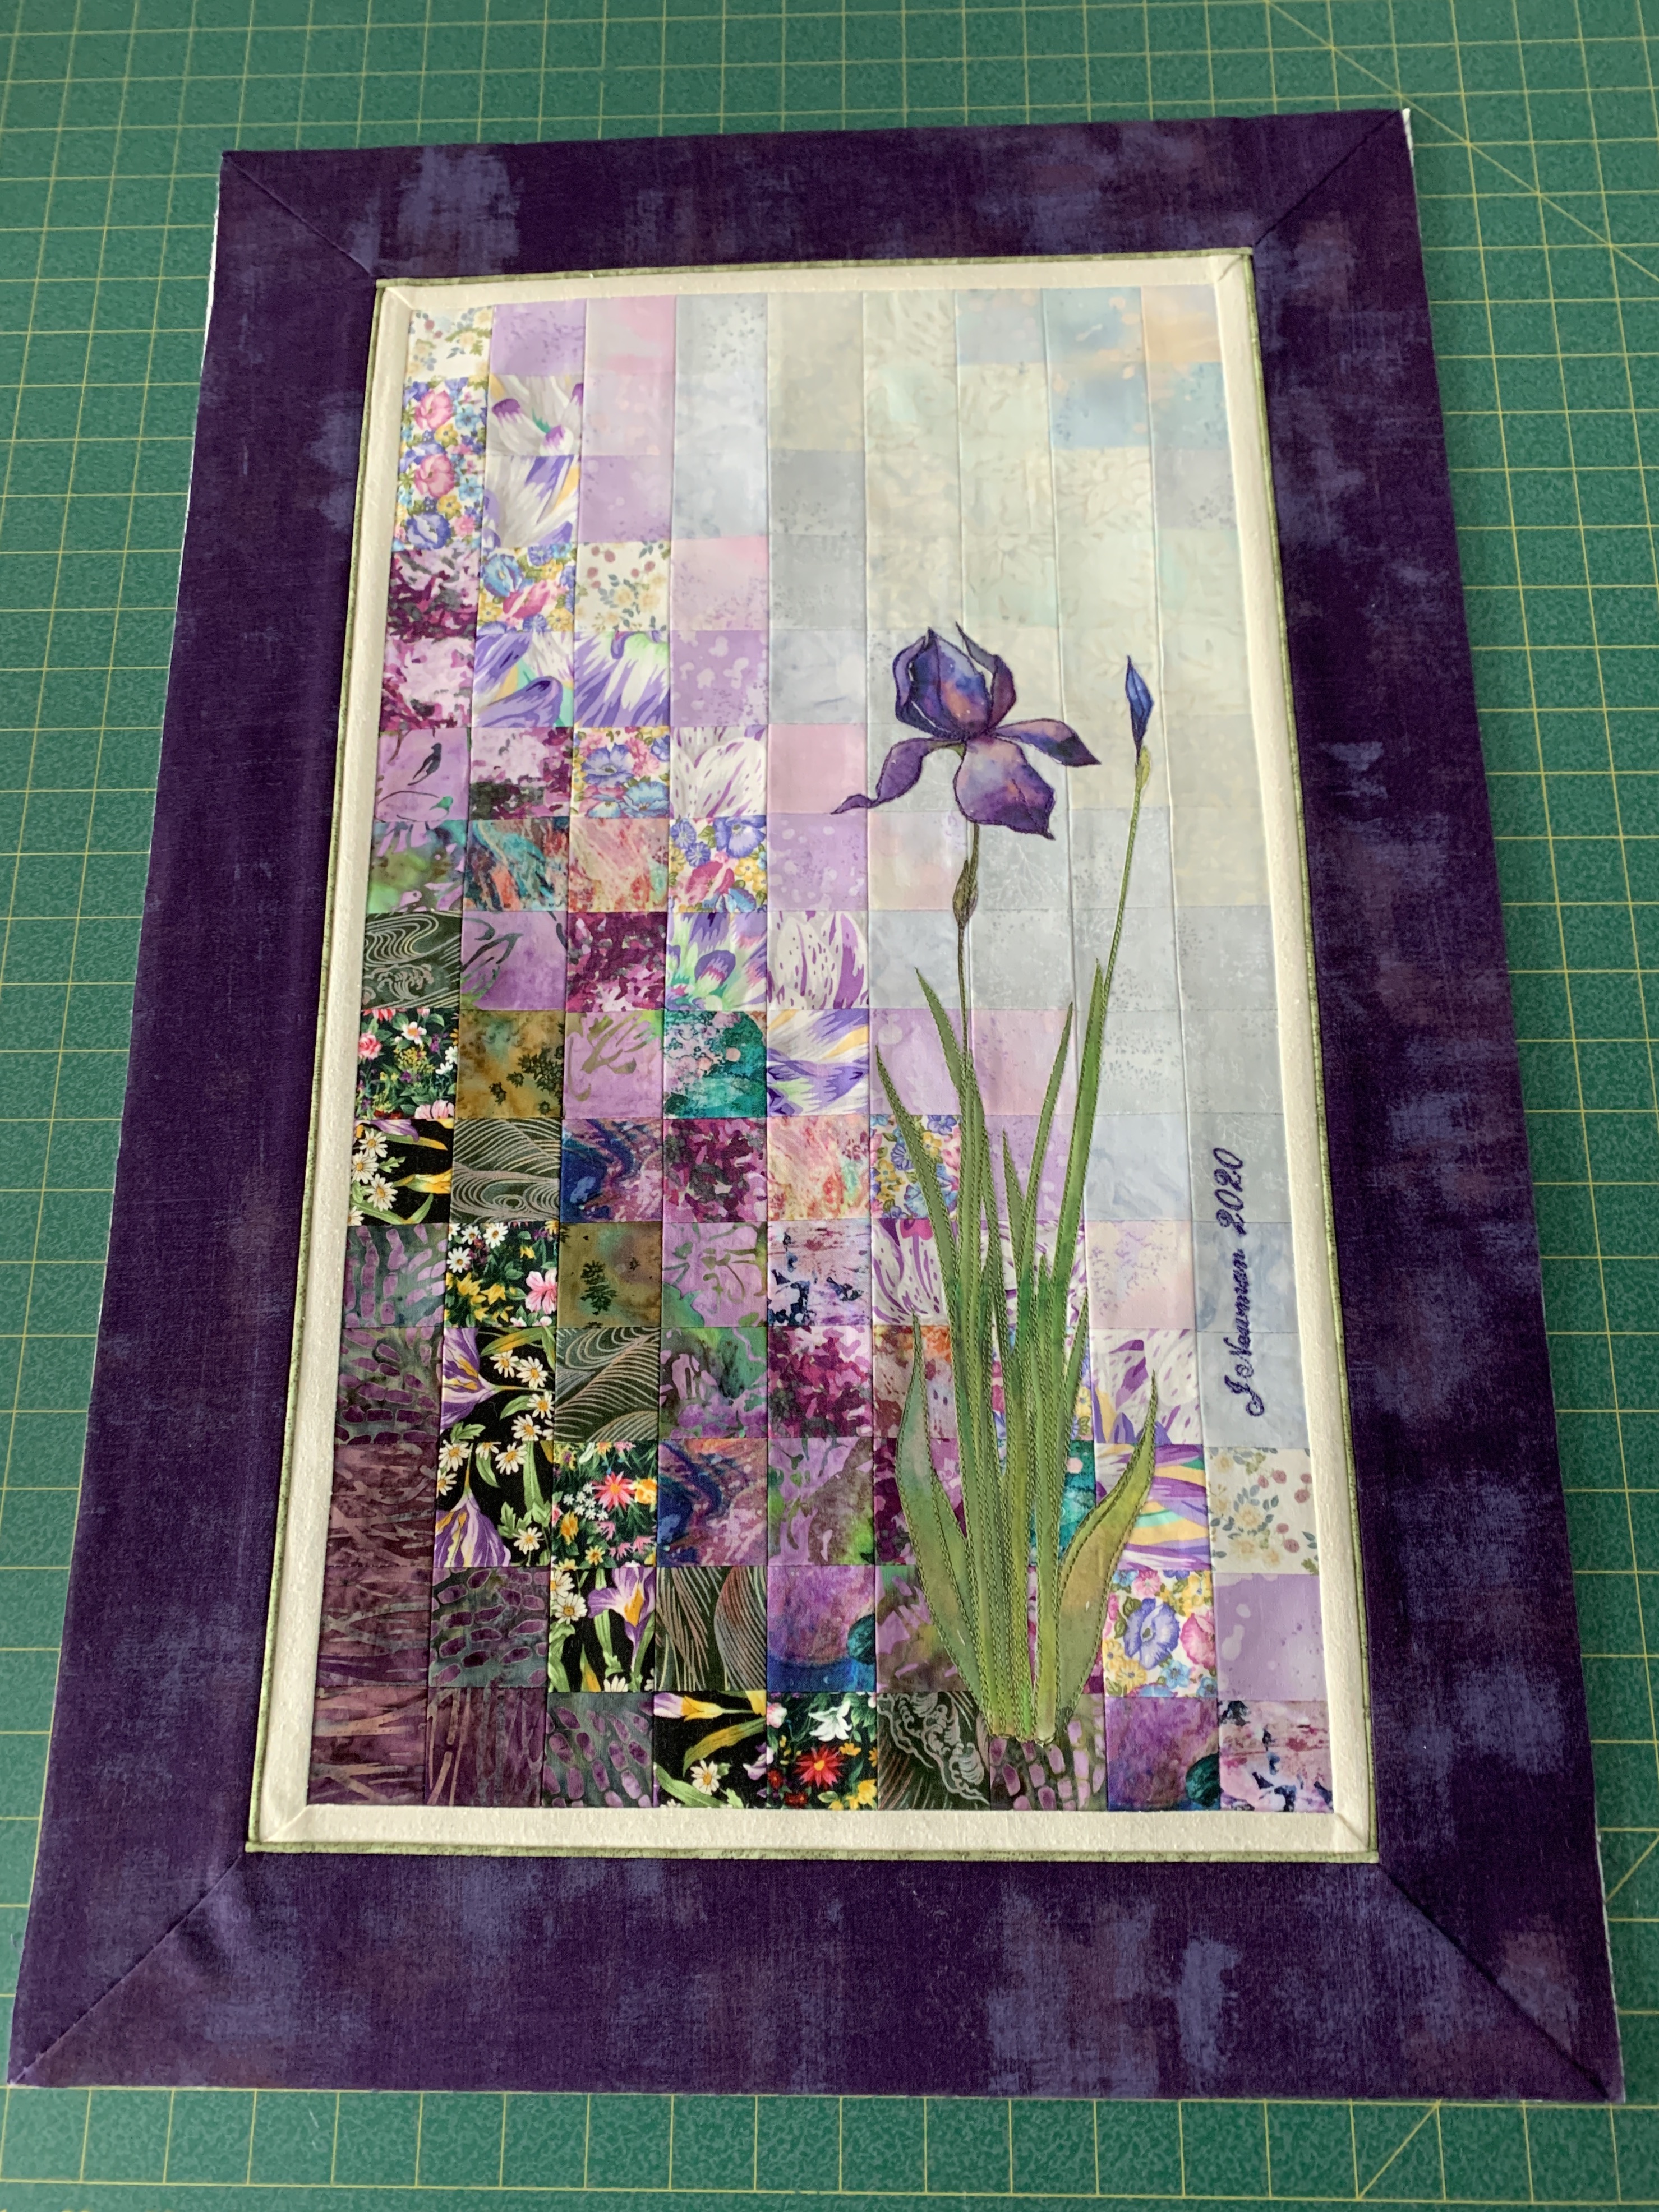
Yesterday, I enlarged and printed both the iris and its leaves on fabric then applied some Steam-a-Seam2 Lite (fusible web) to the back so the iris could be fused to the watercolour panel background. Last evening I fussy cut the iris, the bud, and the leaves.
Complete except for hidden binding
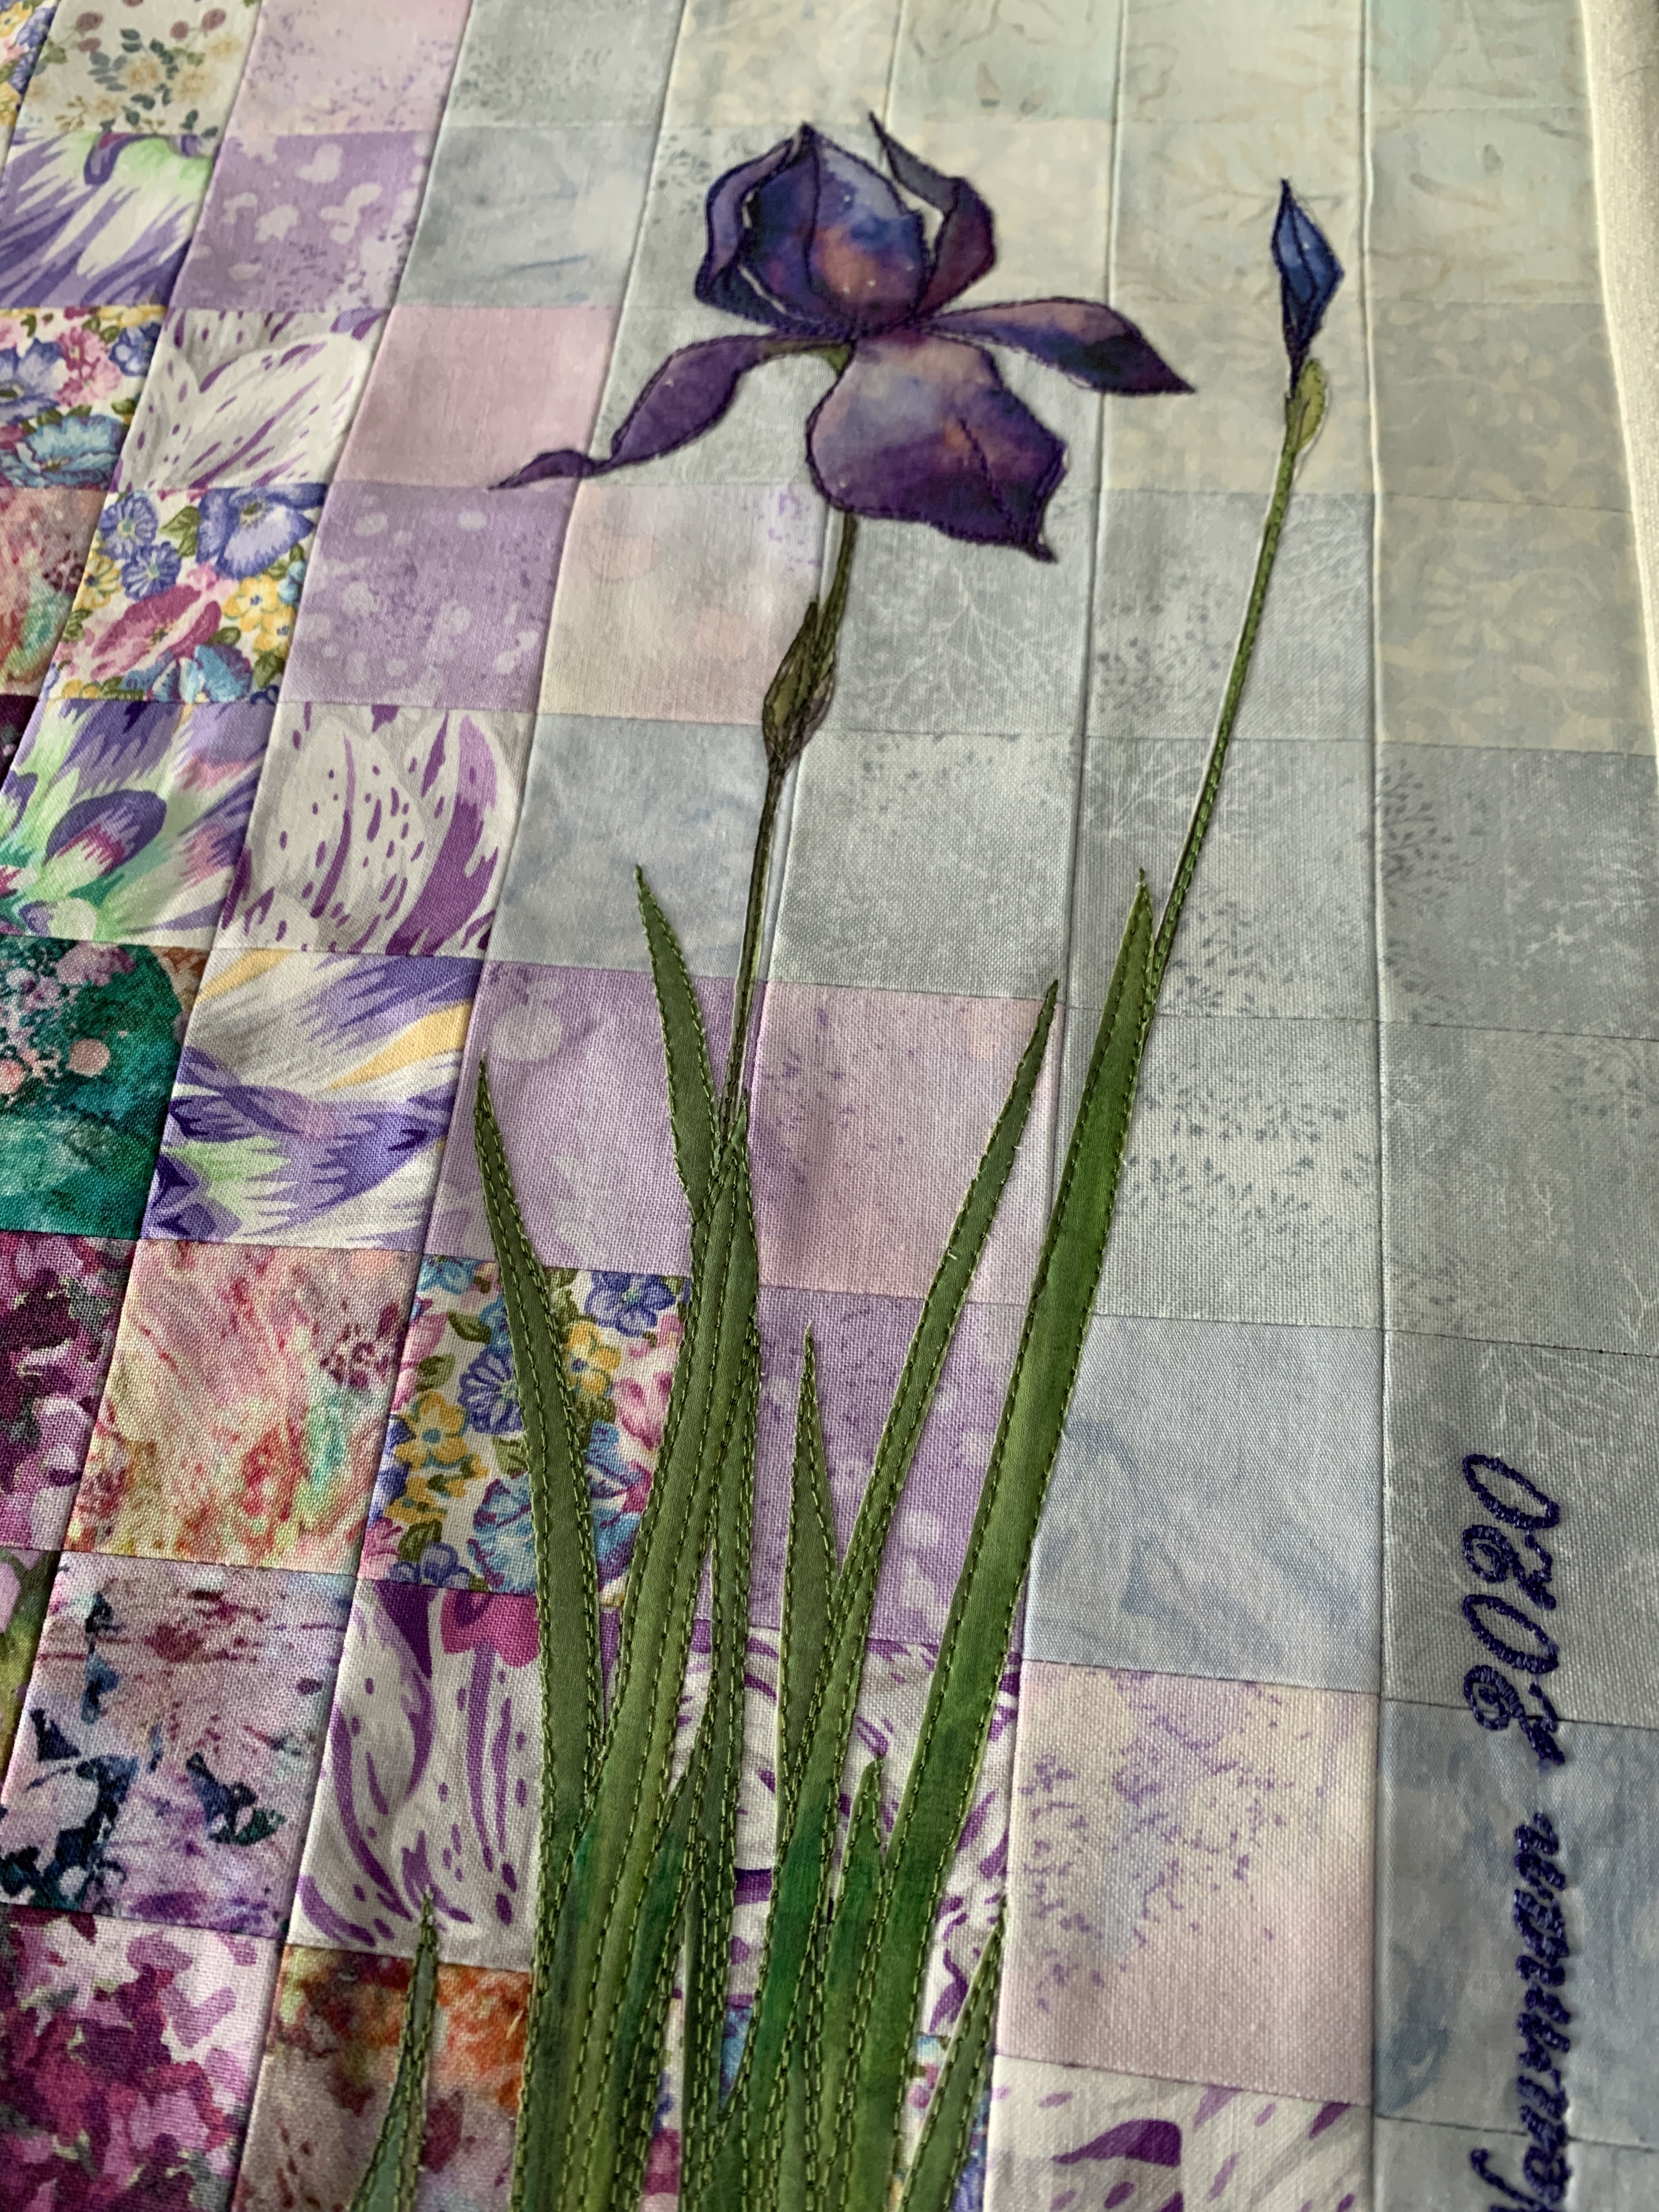
This morning I fused the appliqué elements to the panel, then thread painted them, taking care to edge stitch everything so the appliqué won’t lift over time.
Iris – Thread Painting
Because the appliqué elements are rather small they didn’t want a great deal of stitching but I did want to work in a bit of shading on the leaves and on the flower – not so much that I obscured the shading within the appliqué.
I added a signature along the right side, then applied three border sections – first a narrow inner binding of natural raw silk, then small dotted green piping, last a 3″ purple grunge outer border.
All that’s left to do is add the hidden binding (I do have a small amount of purple grunge left but I’ll see if I can pick up 1/2m more because it’s a very useful colour to have on hand). Once the bindings are attached, I’ll insert a muslin backing and hand stitch the bindings in place on the back.
I will leave the piece as it is – while I can still lift the border to reveal the inner border construction. That will allow me to show the gals how I align the narrow border, and piping as I explain how I do it.
So I can demonstrate on Wednesday how I finish a hanging, I had to produce another panel for class. I had a clear idea of what I wanted to construct – a colour shading from dark purple in one bottom corner to very light in the opposite one. That was easier said than done – I had no suitable precut light colour squares; instead, I had to go back to my stash and pull out both large and small cuts of fabric in very pale colours that would blend with the purple range I was building. After considerable hunting and cutting, I was finally able to assemble a complete panel.
Once laid out, I stitched the rows (first sewing the 8″ panels together, then cutting apart each row, starting at one end, sewing and pressing each seam open).
Rows Sewn Together (Back)
Next I stitched the columns, again by cutting apart and sewing each column one at a time beginning on one side.
Columns Stitched, Seams Pressed Open
I pressed the seams open as I went along – first finger pressing, then pressing with the iron.
Completed Panel
I’m now ready to add a fused appliqué to the pale side of the panel – that’s for tomorrow. Once the appliqué is fused and thread painted, I will be ready to demonstrate how to add the three finishing layers on Wednesday.
Finished with a hidden binding and backing fabric. I like this one even more than the original. I think the ombre fabrics create a feeling of water and notice the single fish swimming against the school…. But that’s it for fish – I have no more in my bag of fusible scraps.
Skinny Quilt #4 – An Update
Skinny Quilt IV – Straightened
I wasn’t happy with this banner – it wasn’t quite square and it showed when the piece was hanging. Yesterday, I took it apart so I could straighten the sides and while I had the backing and binding off, I decided to remove the smallest blue circle – first, because it was the wrong colour – it didn’t really show up – and second, it was the eighth circle and an odd number is more pleasing. Now the yellow in the top large circle is now echoed in the small one and your eye moves between the two and is then drawn into the complexity of the fabric design of the other circles. A better balance.
Best of all, the banner is now square so it hangs straight and I can include it I the banner/skinny quilt collection.