Latest Socks

 
Another pair from leftovers. I see now the cuff should have been in the purple rather in light blue – had I done that the color would have flowed from dark to light. I could change the cuff by unraveling this one and knitting a new one from sock to edge – but really that’s more work than it’s worth! They’ve been put in my sock drawer as they are. That’s it without taking a couple of pair out!

Whale Watching

IMG_5683

Just finished piecing the foreground for this wall art quilt. At the top you see the photographic collage built from three photos and an insertion to widen the panorama; below is the quilt. It took a lot of trial and error to establish the “layers” in the foreground – green fabrics that look like grass, shrubs, etc. is impossible to find – I’ve had to hint at the different vegetation by using various green fabrics in my stash. Once the stitching is done, the whole foreground will blend better.

So next comes the stitching to make sure each piece of fabric is permanently attached, and to represent the horizontal flow of the vegetation. Once that is all done, I still have to figure out how to add piping (probably in white) as mat; and finally a wide binding (I’m thinking 2″) to frame the picture. I picked up some dark fabric a couple of weeks ago which may work well. But I think I still want to audition something else — so a trip to Atlantic Fabrics early this coming week to see if there I can’t find something better for the job.

First Art Show – 2015

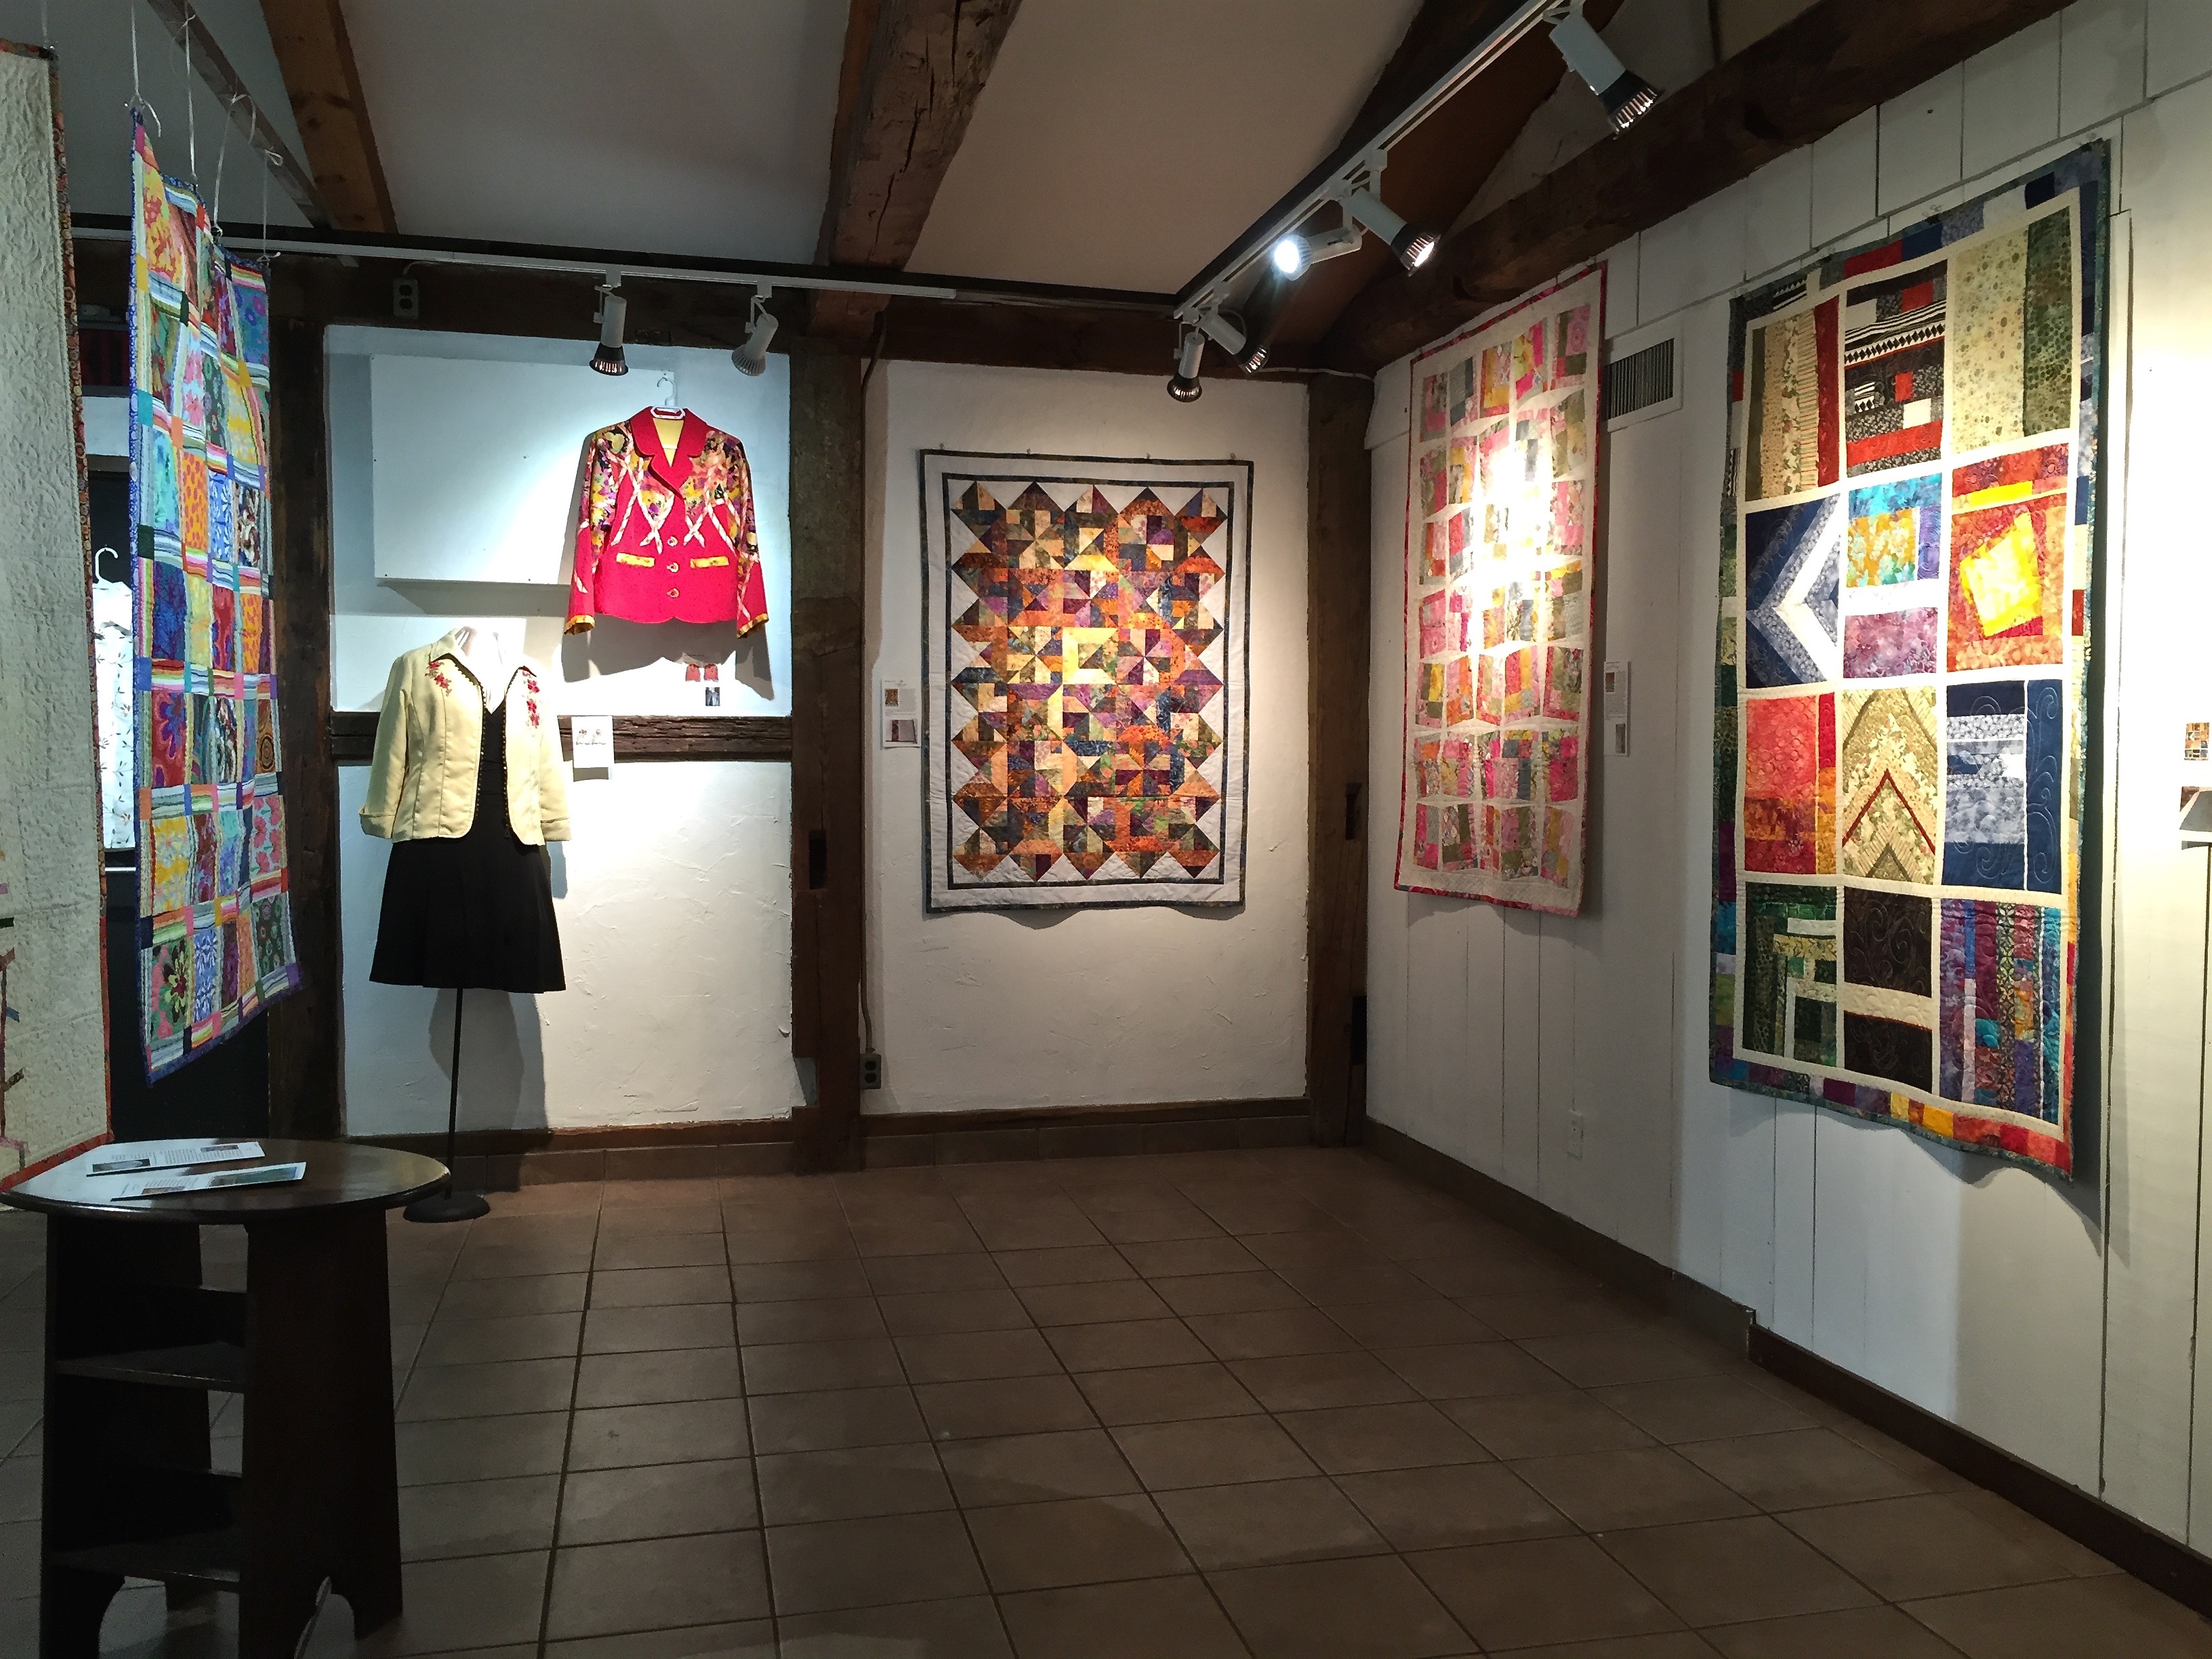
I’m having my first art show — Functional Art: Quilts & Garments.
At the Art Lab Studios & Gallery in Parrsboro NS (2 hours from Halifax).

I had a difficult time deciding which quilts to put into the exhibition – in the end I chose 10 showing a range of work over three years. I also included three jackets and two shirts illustrating wearable art.
IMG_5664

Although the gallery is small there was plenty of space to showcase the quilts and garments and the room was popping with colour when we finished hanging the works, yesterday.
IMG_5647

There’s a story behind each of the pieces. I will get to talk about that tonight when I go back for the opening. I’m looking forward to seeing reactions and hearing comments.IMG_0624

Attaching Elastic…

I’ve been making my own swimsuits forever – because I can’t buy one that fits exactly the way I want it to (you know, that flat bottom with skinny legs!). Many years ago I found this Kwik Sew pattern that produced a great swimsuit – 2 hours from start to finish. The only challenge was adding the elastic to the arm/neck and leg openings. I’ve always done it using a zigzag stitch on my embroidery machine but it’s a fiddle getting the slight amount of fullness distributed evenly. Takes quite a bit of pinning and an awkward hand position as I’m sewing the elastic in small segments. Once the elastic is in, the top stitching is no problem.

I got a new serger a couple of weeks ago (a Baby Lock Evolution) and I went for my new owner lesson. I explained to Heather, the teacher, I’ve been using sergers for more than 40 years, I didn’t need help threading the machine — what I wanted to learn was how to use the serger to apply elastic to swimsuits. I had come prepared with swimsuit fabric scraps and some elastic for us to try this out. So she found the appropriate elastic foot for my machine and we got to work.

IMG_5667
Here’s the challenge – the arm/neck opening on my swimsuit is 120″. For a comfortable suit I need 106″ of elastic so the amount of gathering is minimal, but I still need a bit of fullness to be accommodated in the elastic. There are two ways of achieving that gathering – with the differential feed and with the knob on the elastic foot itself. The instructions suggest the maximum amount of gathering with the differential foot – we tried that – way too much gathering; we adjusted the differential feed back to normal and just used the knob on the foot to adjust the tension on the elastic – it didn’t need much.

When I got home I started experimenting – the ratio of fabric to elastic: 1.13 so I cut a strip of fabric 15″ long, a strip of elastic 13 3/8″ (plus 2″ for the initial feed – marking the 2″ mark with a permanent marker and positioning the elastic with that mark at the needles leaving me 13 3/8″ of elastic to be sewn to the fabric edge). My goal was to attach the elastic to the fabric edge (using the 4 thread overlock stitch) and have fabric and elastic come out about even. It turned out that I actually needed a negative differential feed setting – 0.8 seemed to work well and very little tension on the foot knob. It took several tries to find the amount of gathering I was after but I thought I was close enough so I decided to try a swimsuit I had cut out and partially assembled.

My usual way of sewing up a swimsuit is to sew the side seams, the center back seam, the should seams and the crotch. To apply elastic with the serger I needed to leave the back center seam and the crotch seams open so I could work with the openings as flat fabric. The first swimsuit I worked on required a LOT of patience — I stitched the elastic into the neckline but the fabric gathered too much; I removed it, all 106″ of it, and tried again. Second try I didn’t have enough tension on the elastic itself and so I ran out before I got to the end of the fabric; again, I removed the elastic, readjusted the tension on the elastic foot and tried a third time. It actually took a fourth try to get the tension more or less right but in the end it worked.

The leg openings required a wee bit more tension — the first leg opening turned out nicely on the first try but the second was way too gathered. I ripped the stitching out and tried a second time — it was better (good enough to live with).

I serged the center back seam and the crotch, then turned the elastic and top stitched it in place — voilà I had a wearable swimsuit (I wore my new suit to aquafit class yesterday and a couple of gals commented favourably on it).

Having finished one swimsuit successfully I cut out a second and sewed it up. This time the elastic in the arm/neck opening went well on the first try, as did the leg openings. Serging the center back seam presented a bit of difficulty because I had to start the stitching on a double thickness of elastic (on my next swimsuit I will use a starter strip of double thickness of fabric to get the seam going) but a second try was successful. Again, I sewed up the center back seam, the crotch, turned and topstitched the elastic and swimsuit #2 was done!
IMG_5666

What a difference this foot has made to the process of swimsuit construction – the elastic is easily applied and the whole production from cutting out the fabric to finishing the sewing took about two hours. The elastic foot was definitely a good investment!

Jean Jacket III (3)

Yesterday was the third class for the Jean Jacket. During the week I’d worked on my jacket getting the outside and lining set up, attached the collar, sewn the front seams (top stitched one front seam – I left the other so I could show some constructiton elements to the gals), installled sleeve headers and shoulder pads. Once I was finished I wrote the gals:

Homework:
Here’s what I’d like us to have accomplished before Thursday:

  • The outside constructed (with sleeves completed and basted in – sewn in if you think they work)
  • The lining constructed (with hidden pockets) and sleeves inserted (basted or sewing – depends on whether you’re happy with the fit)
  • Collar constructed
  • Lower band constructed – sides seams on both outer band and band facing (don’t sew the bands together – this will all happen when we use the band to finish the bottom of the jacket!)

It seems like a lot but all of it will go quite quickly. With that prep work done, in Class #3 we’ll work on:

  • whatever of the above construction work you weren’t able to get to
  • put body of jacket and lining together at the collar
  • practice a Hong Kong Seam Finish for the sleeve cuff

That will leave us:

  • stitching front edges (front panel with front facing)
  • adding bottom band
  • attaching sleeve cuffs (on inside of sleeves)
  • making button holes and attaching buttons (or putting on snaps if that’s what you’re planning on using)

Yesterday, we pretty much accomplished what I’d hoped we would. The gals will carry on – they may even come to our next class (in two weeks) with the jacket done. It’ll be fun to see how their jackets turn out – I know they’re all going to fit quite nicely because we’ve been adjusting the fit as we’ve gone along.

While we were working, a woman visiting the shop watched while we worked – she culdn’t take the class this year, she said, but she plans on doing it next fall! Who knows, we might do this again if there’s enouogh interest.

I finished my jacket this morning:

  What you can’t see are the inner zippered pockets which turned out well.

I’m happy with the final product. It’s comfortable (although a slightly different fit than the other two jackets – go know how that happens since I carefully cut and stitched the elements in exactly the same way!)
This jacket has gone into my closet – my old denim jacket has come out and now resides in the goodwill pile.

Something New From Leftovers


Been working away at this pair of socks for the past couple of weeks – slowly, in part, because the weather has been so humid the yarn was sticky and difficult to knit with, and because there was tennis on TV! Can’t knit and watch tennis, too.

The weather cooled and became a bit drier just before the weekend so I could knit again (and the US Open 2015 didn’t start till today). Finished this pair last evening.

I’m determined to use up the leg-length leftovers I have in the stash before I buy any more yarn. I’ve gone through the basket and matched up the yarns with one another and with solids – put the balls in plastic bags – enough in each bag for one pair of socks. It looks like I might have leftover yarn for a half a dozen pairs.

This is the first of the “leftover” socks. You can barely tell there are two different patterned yarns – they are interesting enough that I’ve put them in my sock drawer.

Now on to the next pair in blues, mauves & purples.

Jean Jacket III (2)

A friend asked me today how my sewing class was going – because I hadn’t written about it afterward. In part, it’s because I didn’t take photos during the session, and also because I haven’t yet got to working on the denim jacket I’m making for myself. I do have to get to it, because Thursday will be here before I know it and I, too, need to have my “homework” completed.

Thursday was our second class – I wanted us to have the fronts and back assembled so we could try the body on and make any adjustments that were needed. We took in princess seams (both front and back), lifted shoulders a smidgeon, took in side seams a bit, particularly under the arms… We adjusted sleeve patterns just a tiny bit so the cut out sleeves will fit the armscye where we’ve changed the side/shoulder seams. So homework this week: to cut out the sleeves, assemble the bottom pieces, attach to the upper sleeve, sew sleeve underarm and insert sleeves into the body of the jacket.

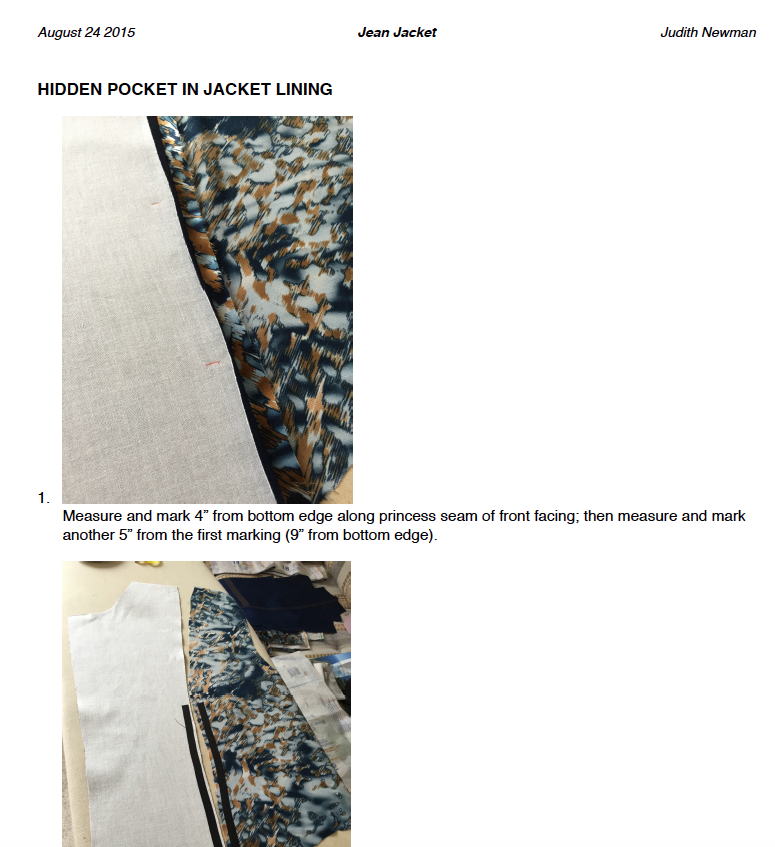
We worked on two things in class: creating and inserting the hidden pocket in the lining. I had prepared a set of instructions for making this hidden pocket so we had something to work from.

hidden pocket instructions

I had made the first pocket in my jacket lining before class; I finished the second one during the session.

We also worked on shoulder pads. I had done some research on shoulder pads (the jean jacket is shaped to accommodate them). I had decided the instructions I found in an old Reader’s Digest (1979) “Complete Guide To Sewing” would work well. So I showed them the pads I had made, and shared with them the “pattern” pieces I’d prepared to construct them.

Everybody went home pleased at having made considerable headway on their jackets.

When I tried on the body of my jacket I thought the front at the sleeve gaped a bit so I created a small dart in front (from bust point to armscye), then basted in the sleeve top to see how it would fit – no go! I’d put in a temporary dart in the front of the sleeve so it would fit the opening and adjusted the underarm seam. The whole assembly pulled and the sleeve twisted! So I took out the dart in both sleeve and jacket front and basted the sleeve back in. Definitely a better fit. Now I have to removed the sleeve, press the front and sleeve top (to remove the needle holes left from the basting) – assemble the sleeve and sew it all back together again.
IMG_5573
The back lining is ready to go, as are the two front lining panels – all I need to do is join them at the shoulders and side seams; won’t take long.
IMG_5574

Then I’ll put sleeves in the body and in the lining and stop there.

Next class (#3) we’ll make the last adjustments to the fit, then join lining to body with the collar. Once that’s done, we’ll be able to add the bottom band and sleeve inner cuffs which join lining to body at those two locations finishing the jacket construction.

The last step will be buttonholes and buttons and the jackets will be complete.

Fall’s On The Way…

Yesterday I could feel it in the air. “The closing down of summer…” as Alastair MacLeod describes it in his wonderful short story of that name – the first in his collection “As Birds Bring Forth The Sun.” Yesterday there was a hint of the chill to come, although the temperature was in the 20s; a smell unmistakable and yet indescribable. It was there.

Today I look around and see harbingers everywhere:
The hosta flowers have been finished for more than a week – I’ve been meaning to cut the stalks off for a month, the pruners have been sitting on the bench in my front hall waiting for me to get to the task – just haven’t done it yet.

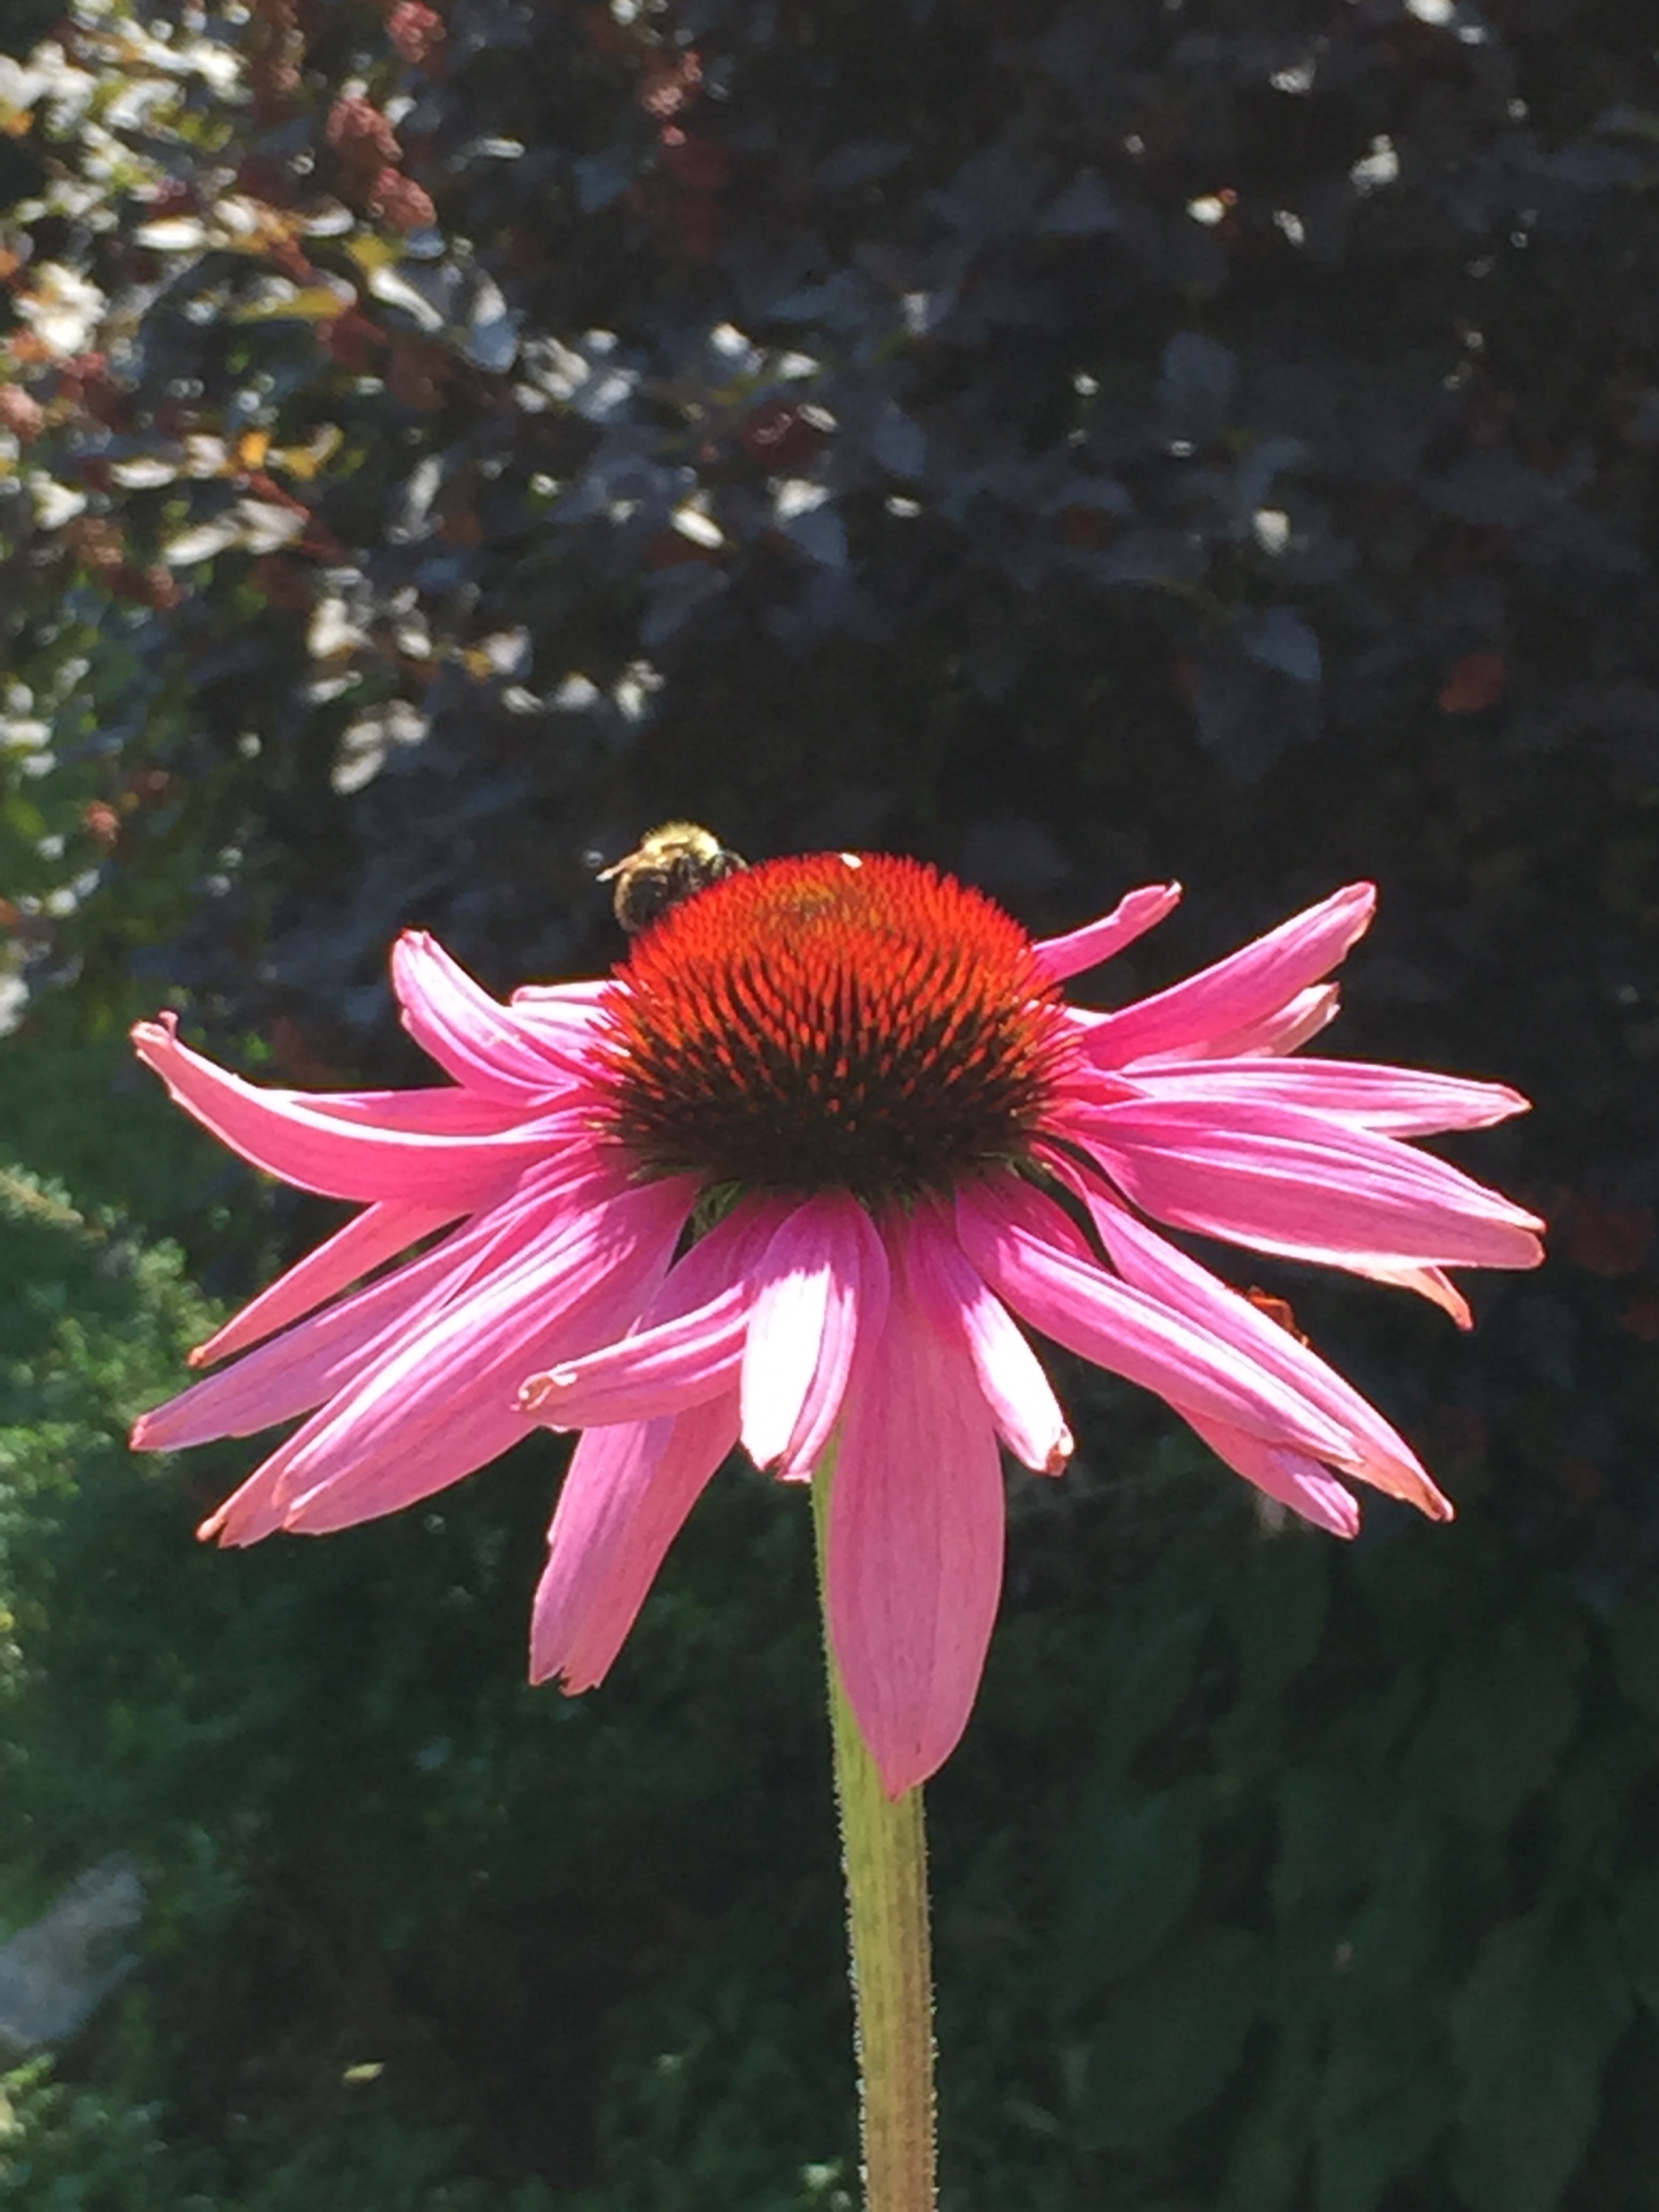
The bees are busy harvesting pollen from the echineacea – more bees than I’ve seen all summer long – they know the season has begun changing.

I haven’t spotted any blue chicory along the roadside but there’s lots of goldenrod around. It all reminds me of a seventh-grade science project – the seed chart – a sheet of bristolboard filled with samples of local wildflower seeds in small bags and carefully labelled – that’s why I recognize our fall wildflowers and remember their names.

For the next six weeks or so Nova Scotia’s weather will be our best of the year – warm, often sunny days with comfortable, cool evenings. Nobody travels far in September/October – we don’t want to miss a moment of it! For soon the cold and snow and short days will be upon us… And we’ll be yearning for our wonderful early fall weather which seems oh so brief.

Jean Jacket III

Last week I began teaching a class at Sew With Vision on the Jean Jacket (V1036 – Sandra Betzina, Today’s Fit).

In our first class we spent time tracing the pattern pieces [HINT: rough cut each complete piece in all sizes, with a highlighter mark the size corresponding to your largest measurement, tape the rough cut piece to your cutting surface, place tracing paper (I find the paper used in the doctor’s office for examining tables excellent – crisp and sturdy) over pattern and tape corners (to prevent paper moving while you’re tracing), then trace the size you’ve marked, including all markings. In another highlighter colour, trace those areas of the pattern which correspond to your smaller measurements. With a pencil use a French curve to link the different sizes as smoothly as you can]. Then cut out the traced pattern pieces (return the original pieces to the envelope uncut!).

Next we joined the traced paper pieces together – pinning on seam allowances – and checked the fit. We made adjustments wherever they were needed (shoulder, princess seams, side seams). We marked the pinned adjustments on the paper pieces, and retraced the pattern pieces if the adjustments were substantial.

We spent the afternoon practicing sewing technique – sewing curves (I’d precut the lower sleeve elements of the jacket which has sharply rounded curves to sew), edge stitching (using a narrow-edge foot), and top stitching – in preparation for constructing the jacket itself. (The photo below shows a finished sleeve bottom and collar for my jean jacket.)

IMG_5568

Homework for the second class: cut out fronts, backs, collar, front pocket, front facing, front side lining, back lining, back side lining, and back yoke. My instructions were to leave the sleeves uncut until we had a chance to fit the jacket body. If we need to make substantial adjustments to the shoulders the sleeve pattern will need to be modified…

Sew the fronts, the backs (without edge/top stitching so that size adjustments can be made easily). Because I know my jacket fits (having already made two), I did the edge and top stitching as I went along.

IMG_5564

IMG_5566

Then I made shoulder pads using a technique I found in The Reader’s Digest Complete Guide to Sewing, 1979, pp: 376-377.

IMG_5567

Because the two outside front pockets are decorative (not useful) I want the gals to learn how to construct a hidden zippered front pocket which gets inserted between the front facing/front side lining panels. I did one side, and set up the second. I prepared instructions for the gals to follow since this pocket is not included in the original pattern.

IMG_5558

I also shared a great article from Threads MagazineArmani Jackets: The Inside Story which shows in detail the internal construction of an Armani jacket.  (Click here for the original link to the article online.)

Here are some useful links for sewing techniques used in constructing this jacket:

Sewing Curves

http://www.shecanquilt.ca/2011/12/sewing-curves-is-not-hard-seriously.html

http://www.craftsy.com/blog/2015/02/sewing-curved-seams/

Top Stitching

****     http://www.taunton.com/threads/pages/t00023.asp

http://www.threadsmagazine.com/item/26461/tips-for-better-topstitching/page/all

https://yesilikethat.wordpress.com/2013/10/24/twenty-top-tips-for-topstitching/

http://www.craftsy.com/article/decorative-topstitching

Richard The Thread (this is the only source I could find for ice wool/woven lambswool for sleeve headers – by far the best material for this job – expensive, but it shapes wonderfully well and a yard will last 30 years!)

I’ll share more as we continue building our jean jackets over the next three weeks.