Bargello Table Runner #2

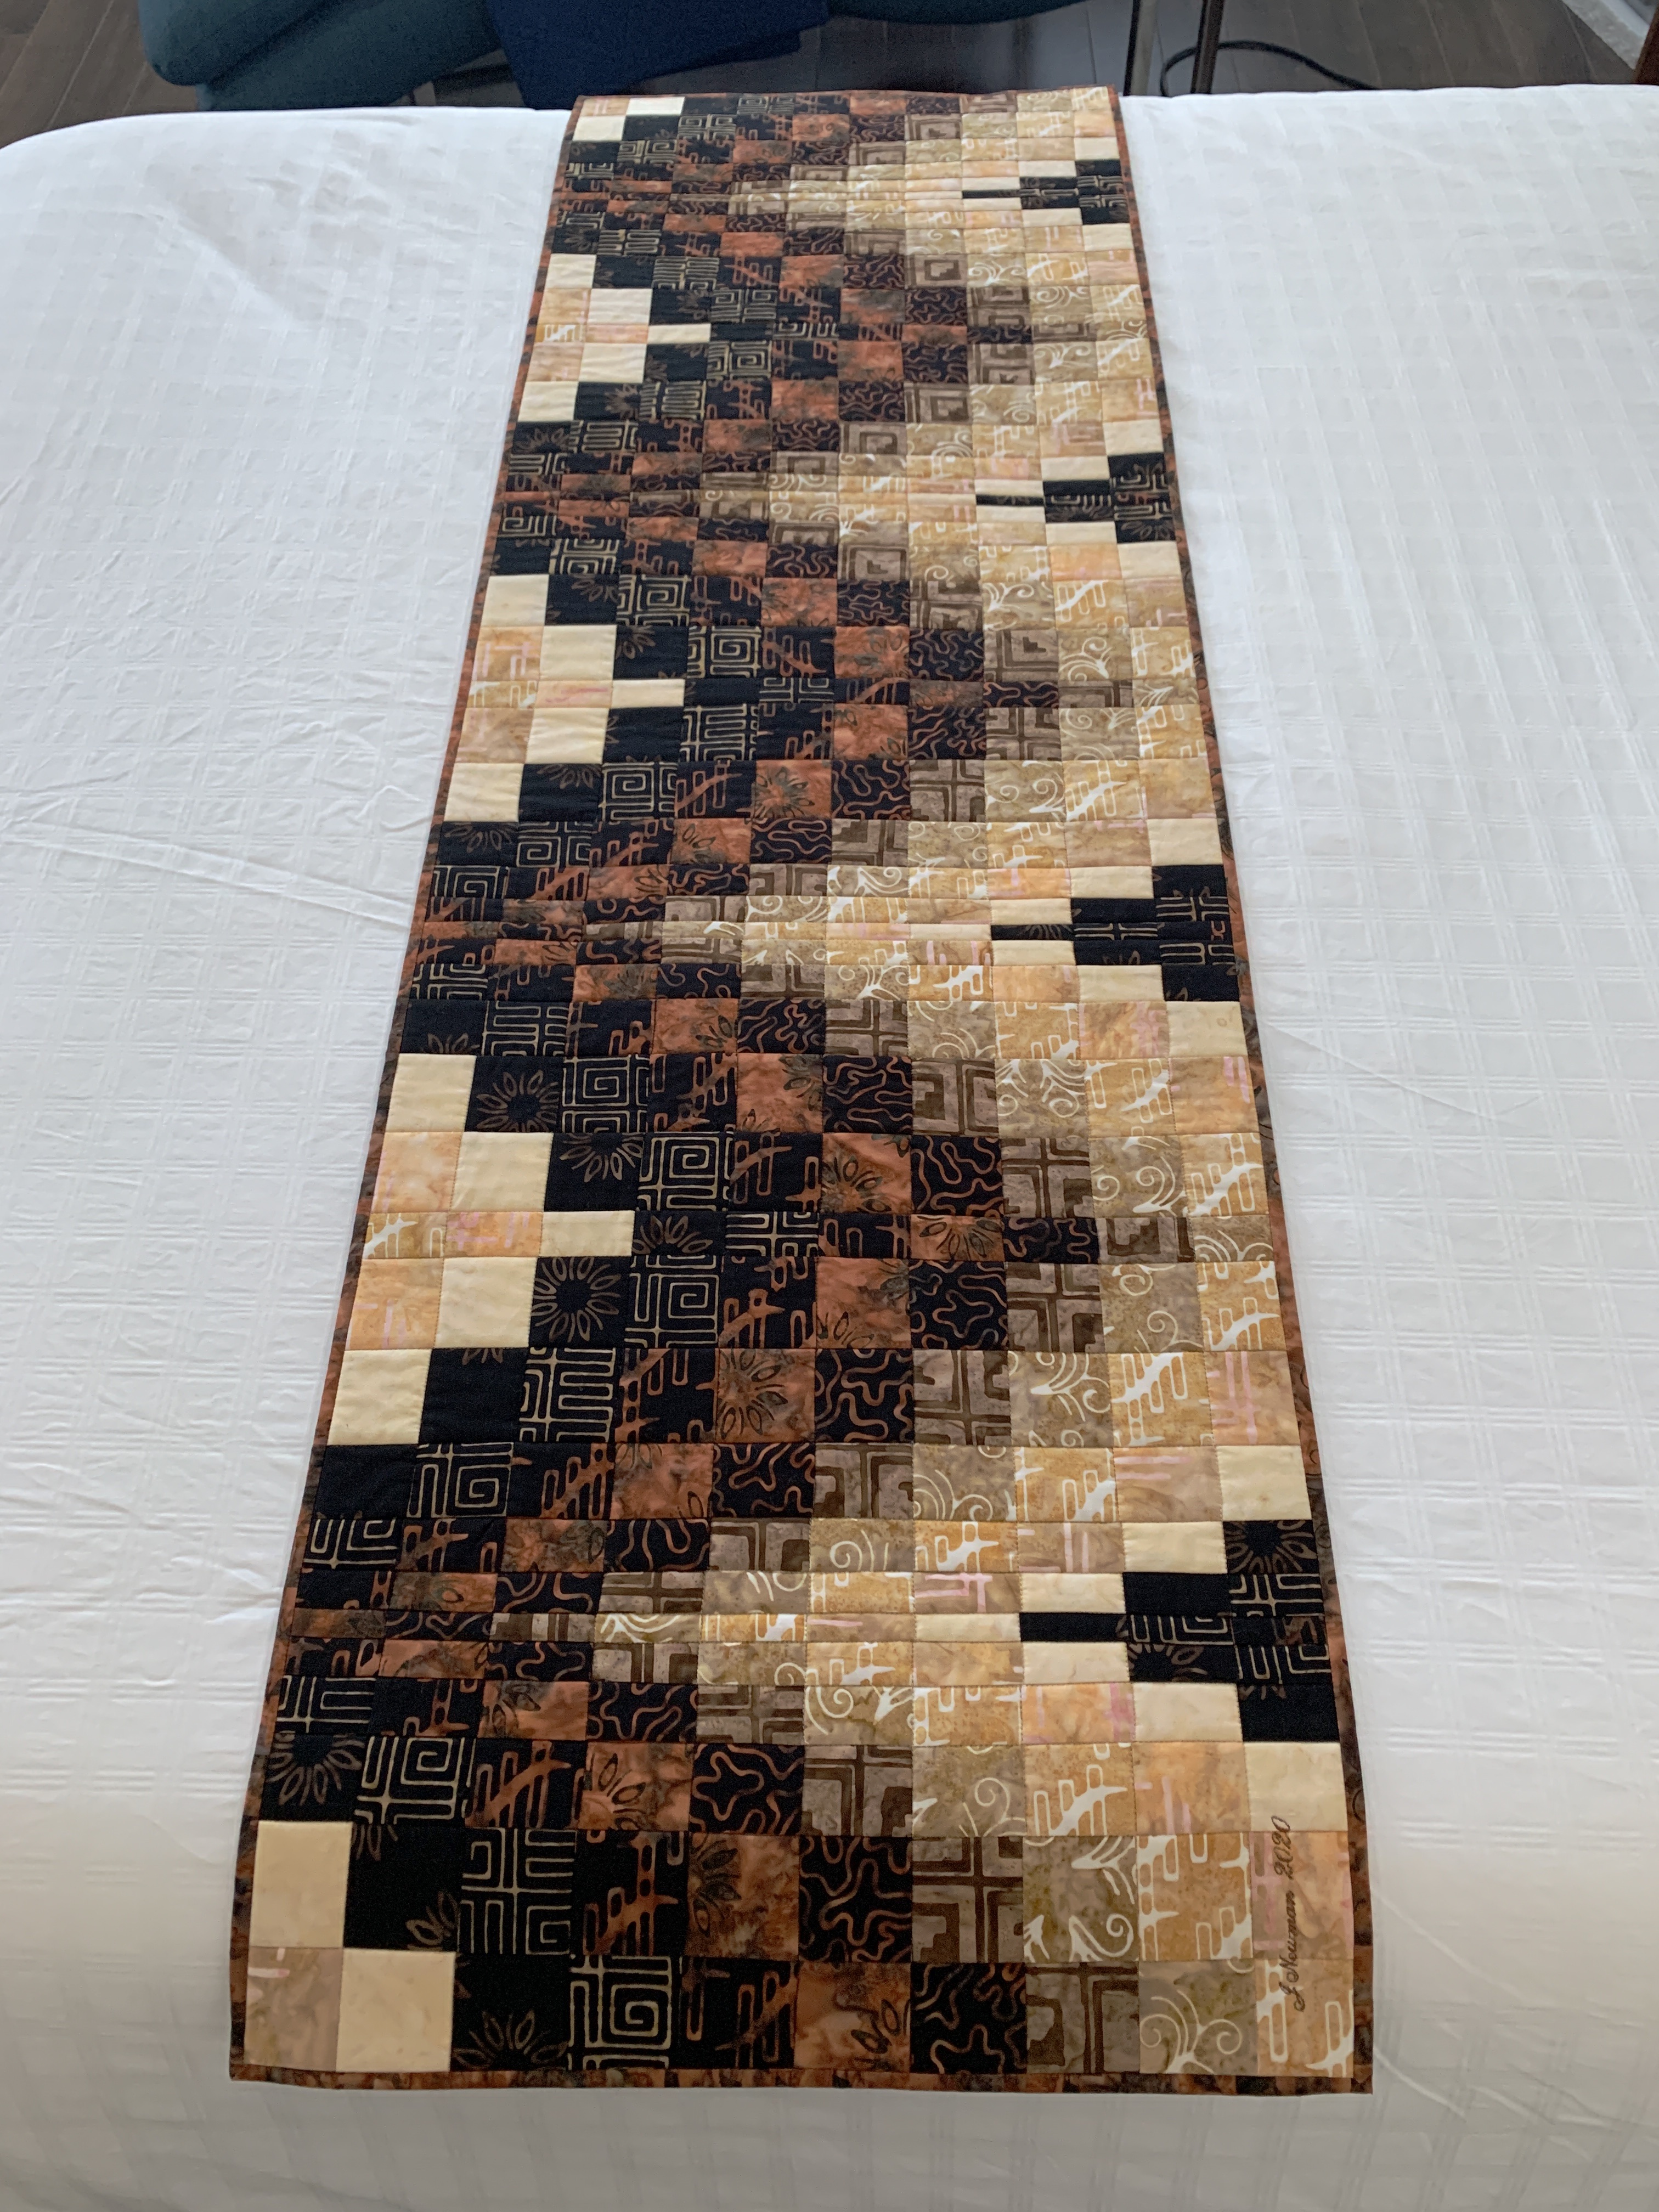
I’ve been working on a second bargello table runner for a class I held last week (we’re supposed to meet again in a week and a half – not sure if the gals will come or not – not sure if the shop will even be open!) The government directives to “stay at home” may prevail and even this small group may not take place. If that should happen I may try a Google “Hang-Out” with the gals – (that’s if I can get it to work and write them some instructions for connecting) so we might talk about assembling their table runners. [PS: Everything has closed down here in NS – shop closed; classes cancelled… (Mar 19 2020)]

My fabric for this runner came from a 5″ wide 20 strip jelly roll with a lovely range of contrasting colours. I selected 10, deciding to use the bronze as the contrast fabric and situated it between two of the black/bronze strips. 5″ allowed me to cut 2 x 2 1/2″ set – precisely what I needed for 4 bargello blocks.

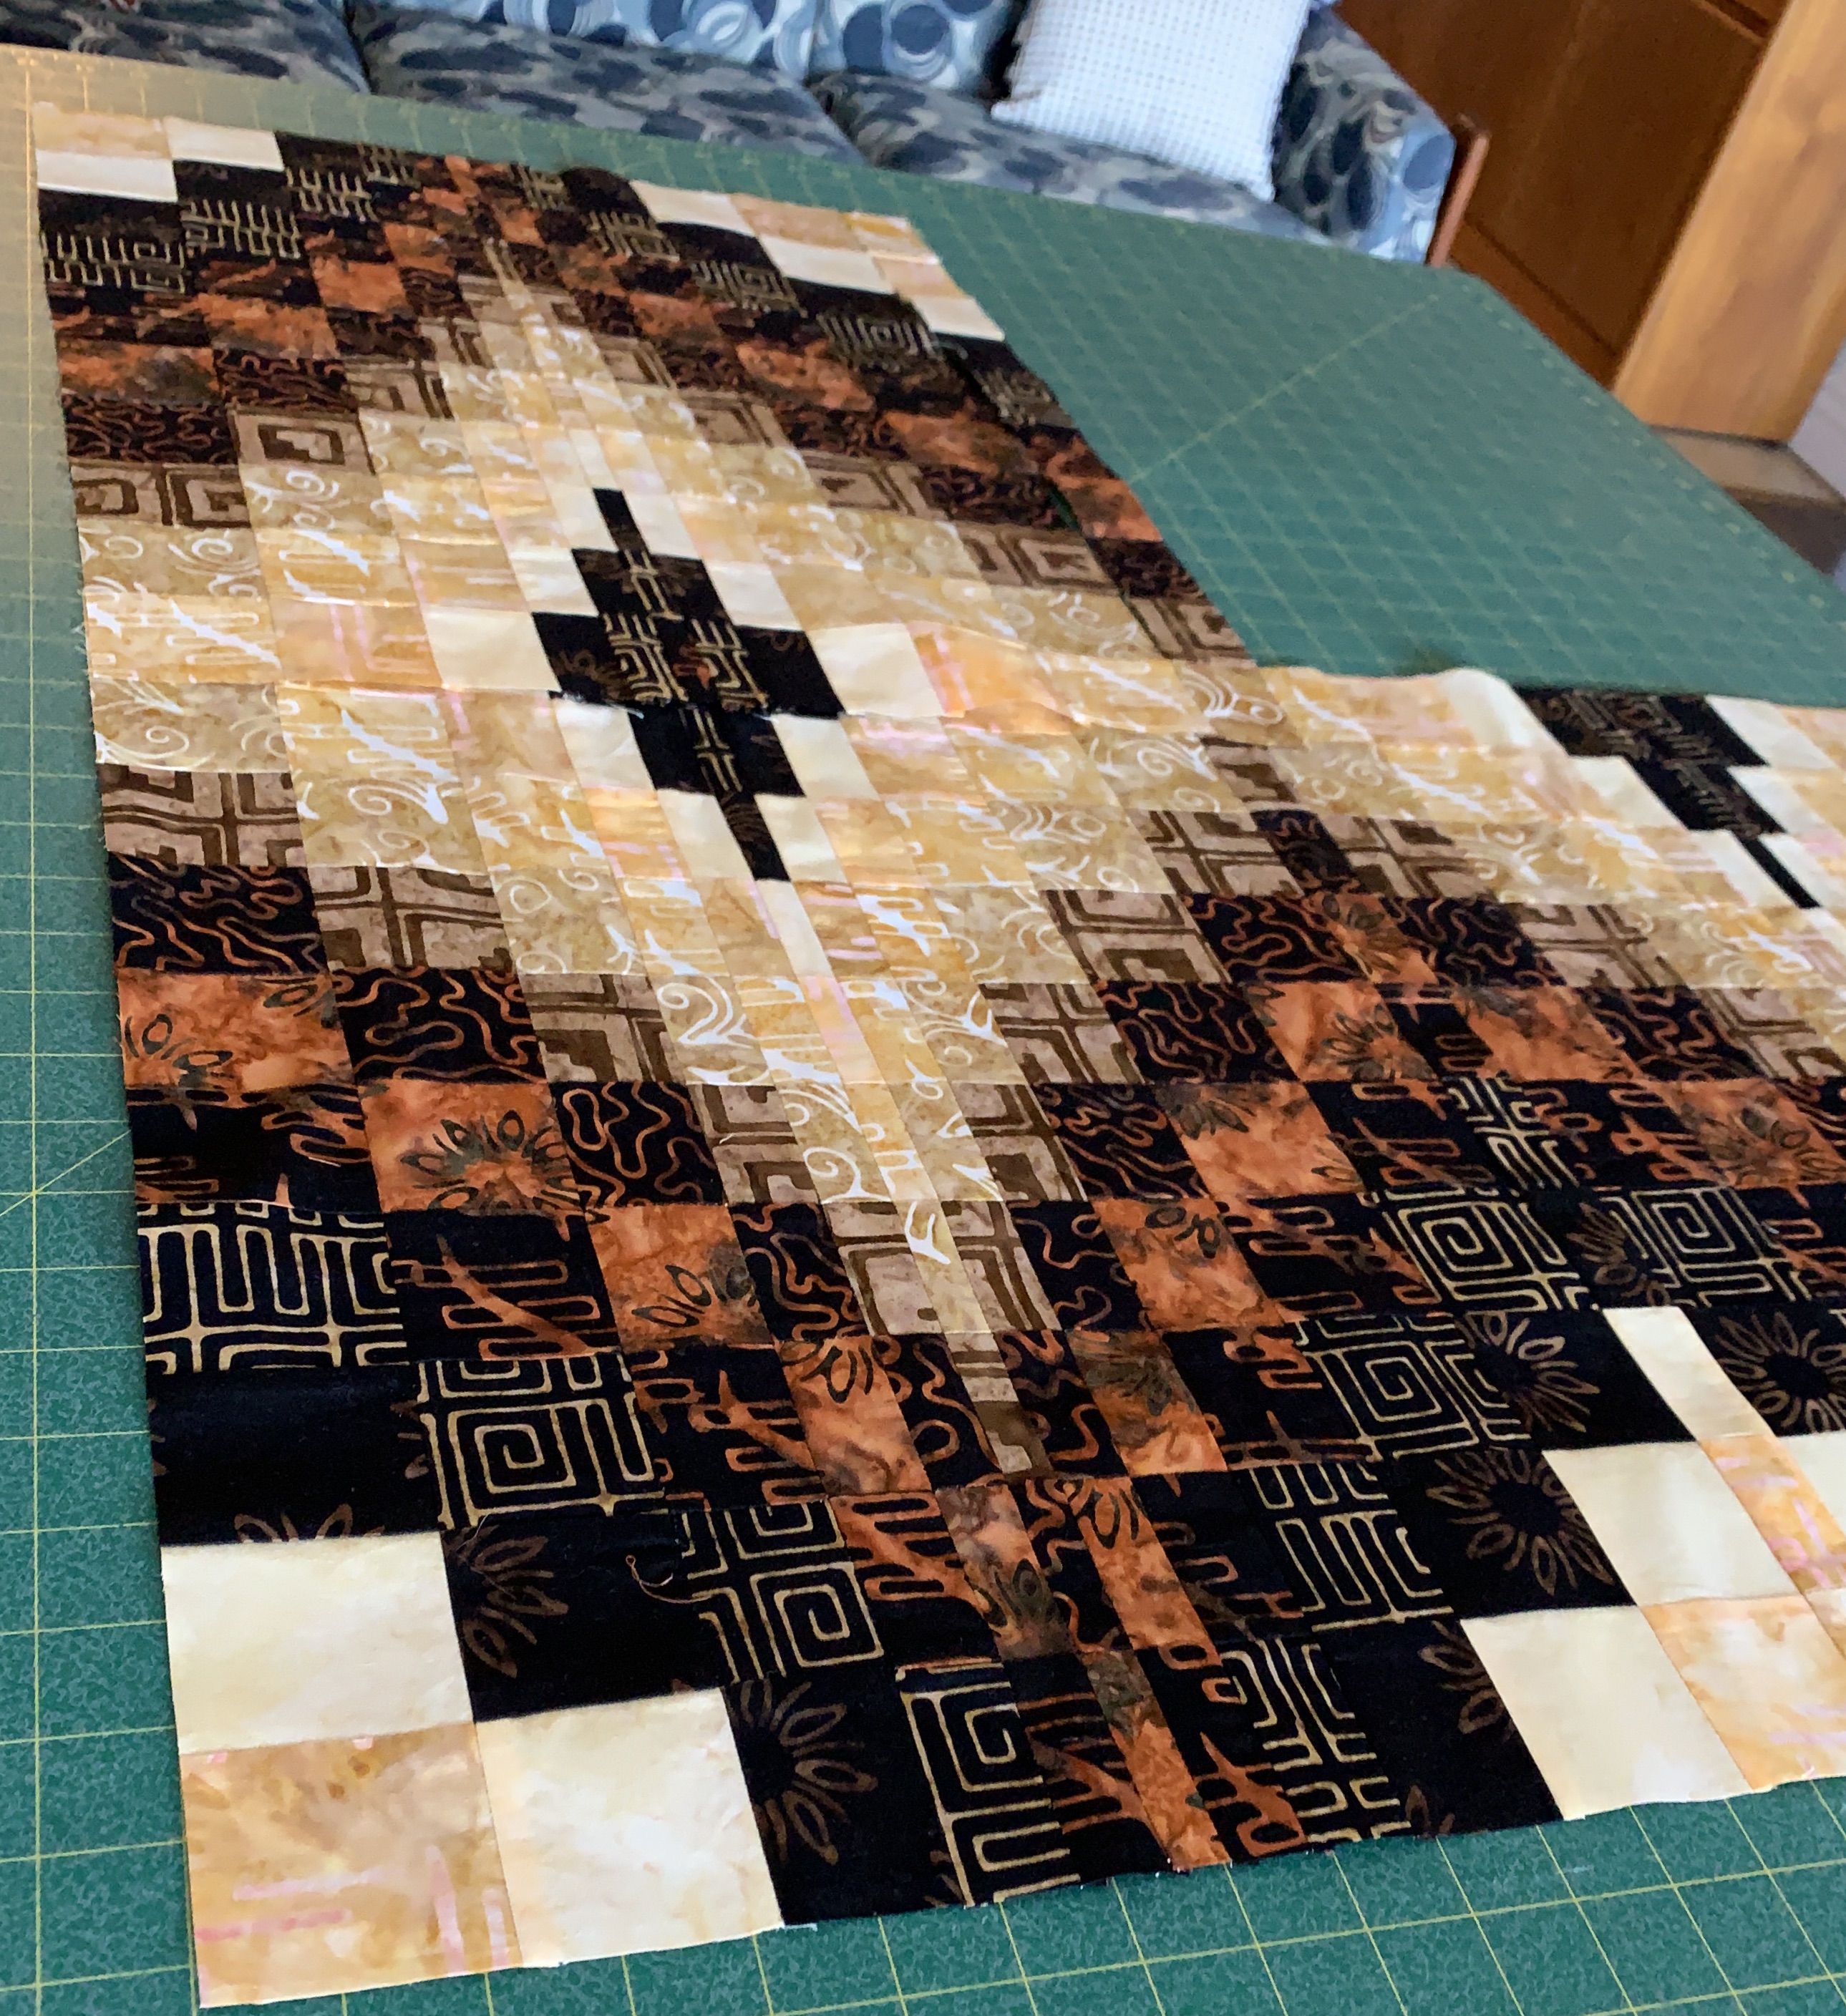
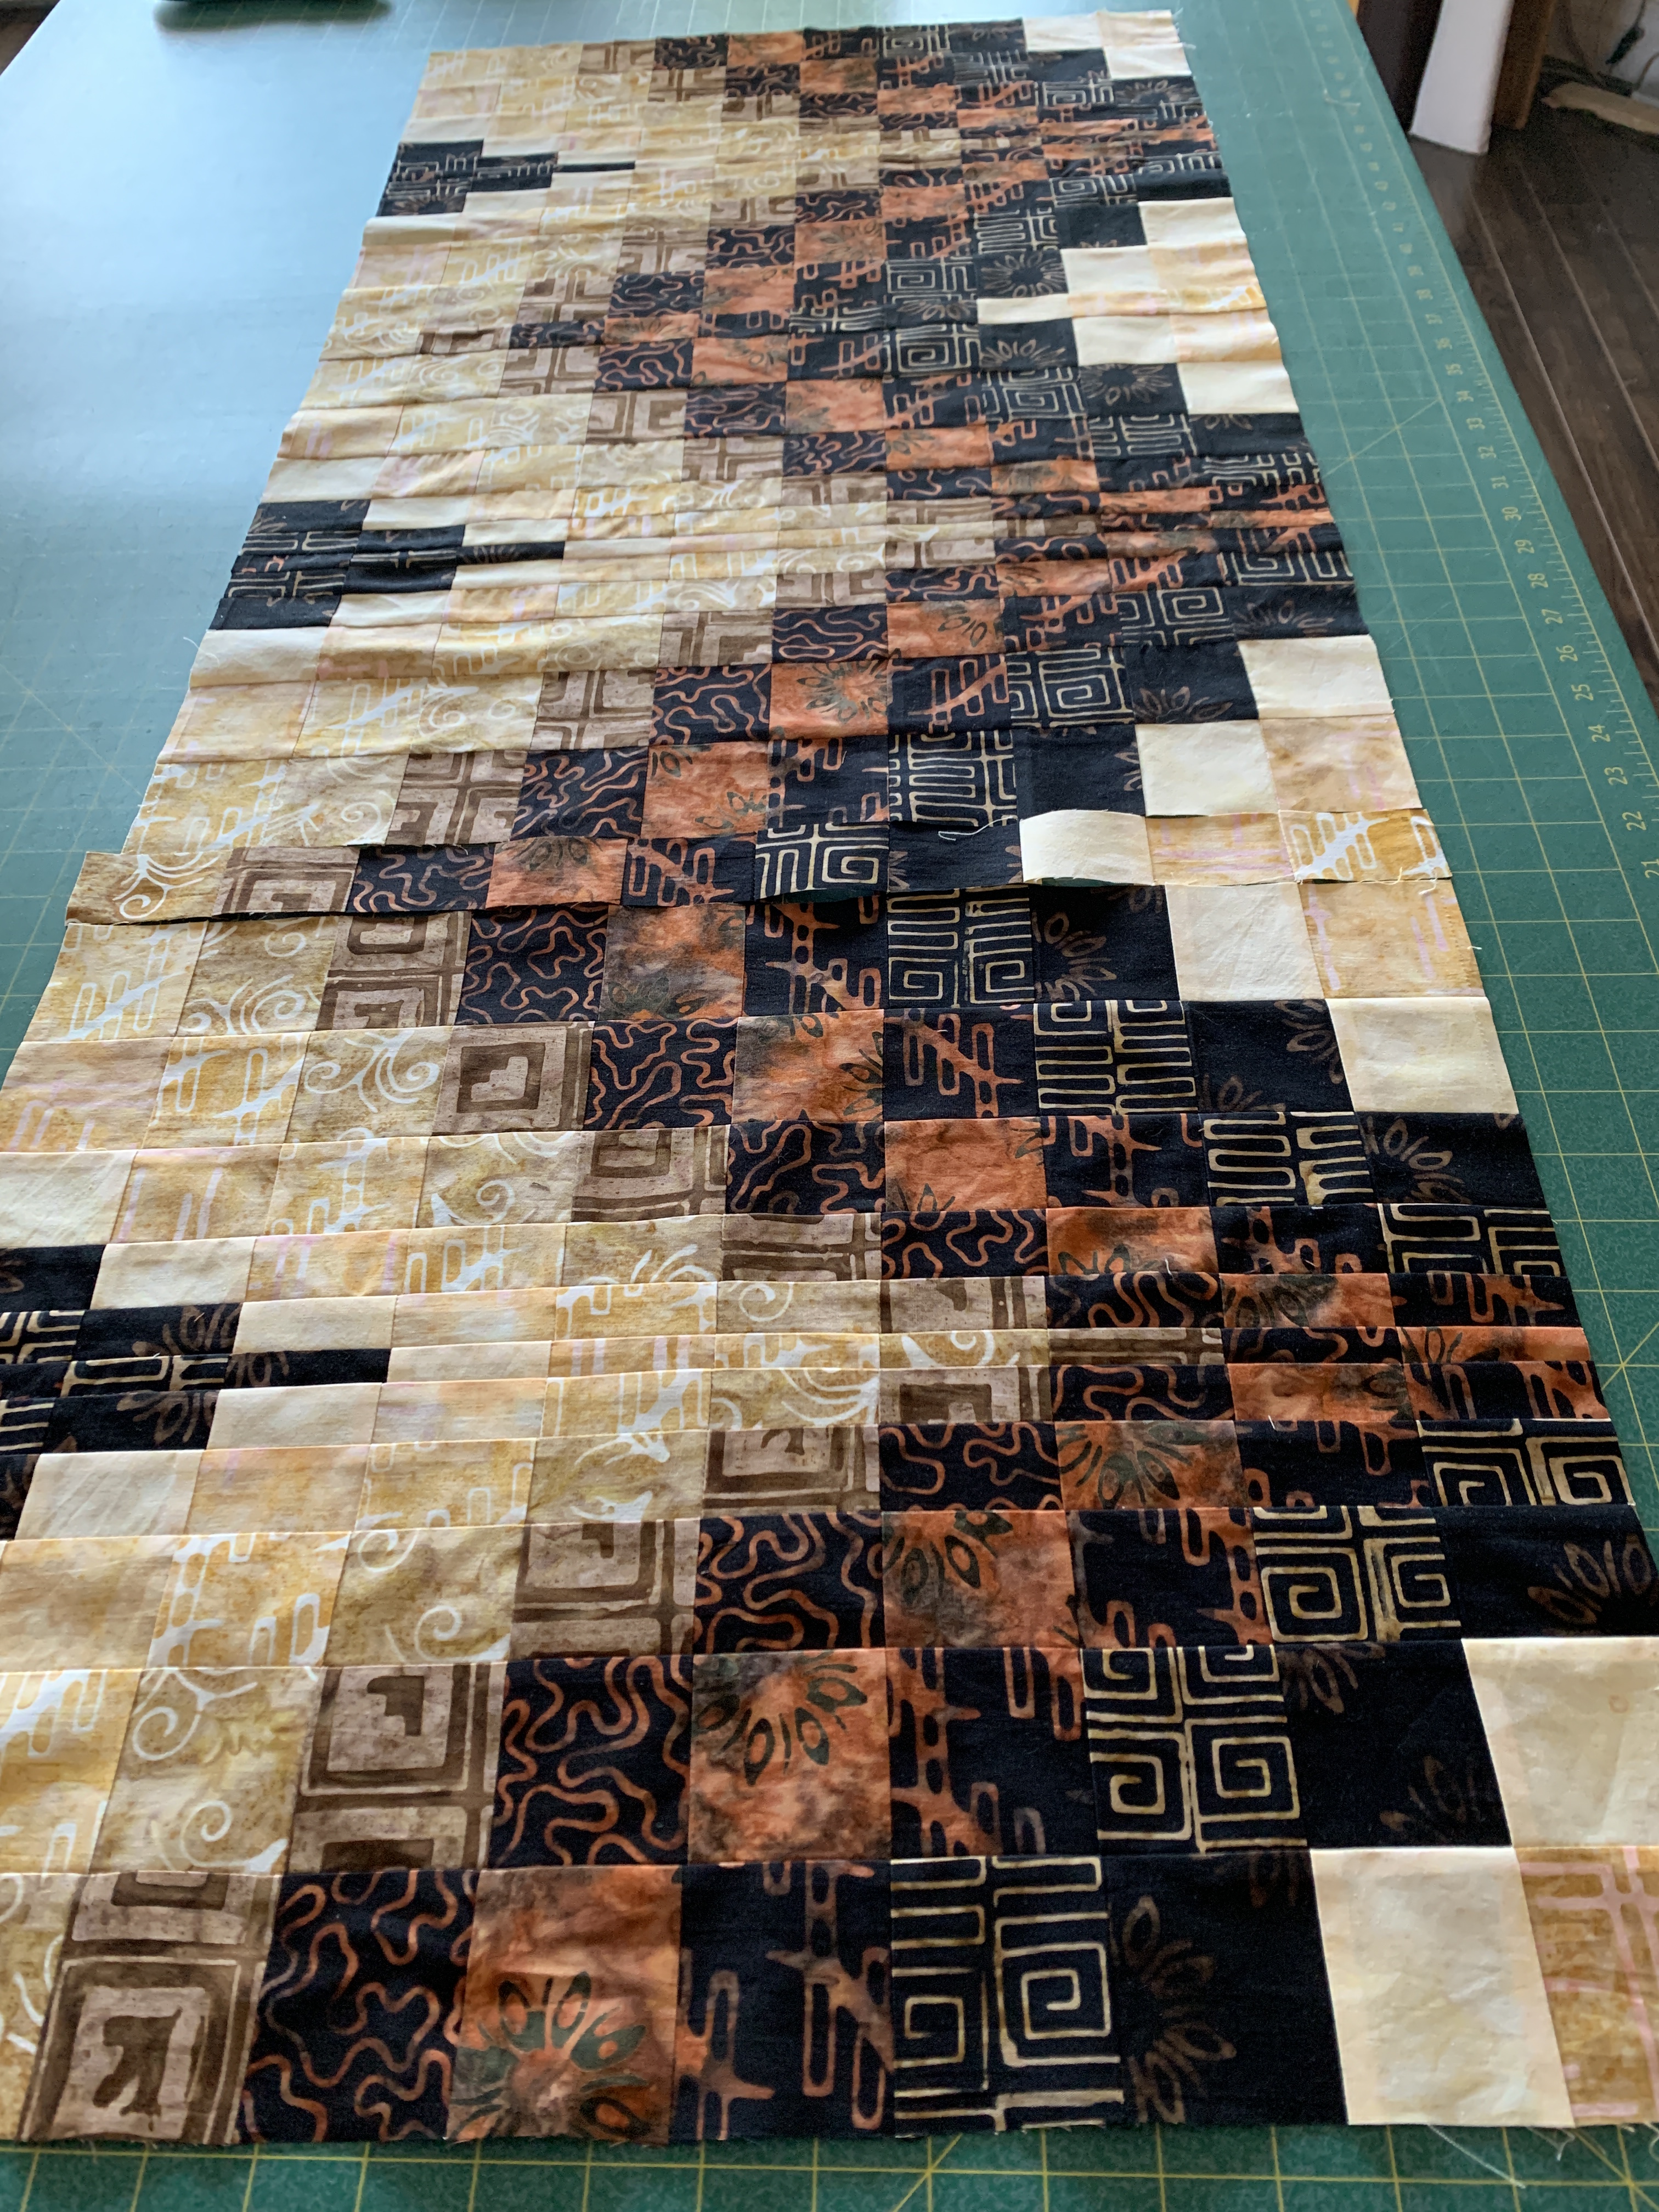
Bargello Table Runner II – Under Construction

Notice I said 2 1/2″ strips. The previous bargello table runner used 2″ strips. Using 2 1/2″ strips makes each block quite a bit taller – so much so that placed together end to end (as above) my table runner would turn out to be somewhere around 75″ long; too long for my table; too long to hang on my front door.

So, I’ve decided to join the blocks on the sides using a 1 1/2″ strip which allows me to generate a flowing wave pattern. The other thing I did was to use several narrower strips at the centre of the block which produced a more bargello-like curve to the layout (more obvious in the top image).

Three blocks laid out as a “wave”

I haven’t sewn all three blocks together yet – I want to be able to show the gals different ways of thinking about layout. So tomorrow I’ll assemble the 4th block (which is cut and laid out) and ready to go.

I should end by saying to anyone reading this “Stay safe.” Stay well!” I am staying at home for the most part – I went to pick up a prescription this afternoon. I tried to see my dentist (I just lost a small filling while eating lunch) but the office is only taking emergencies. My small filling doesn’t count – so heaven knows when I might be able to get it repaired. Months maybe?

I’m so grateful to have the sewing and knitting to keep my mind and hands busy. I’ve a lot of projects, including a spring jacket, I want to work on during the next while.

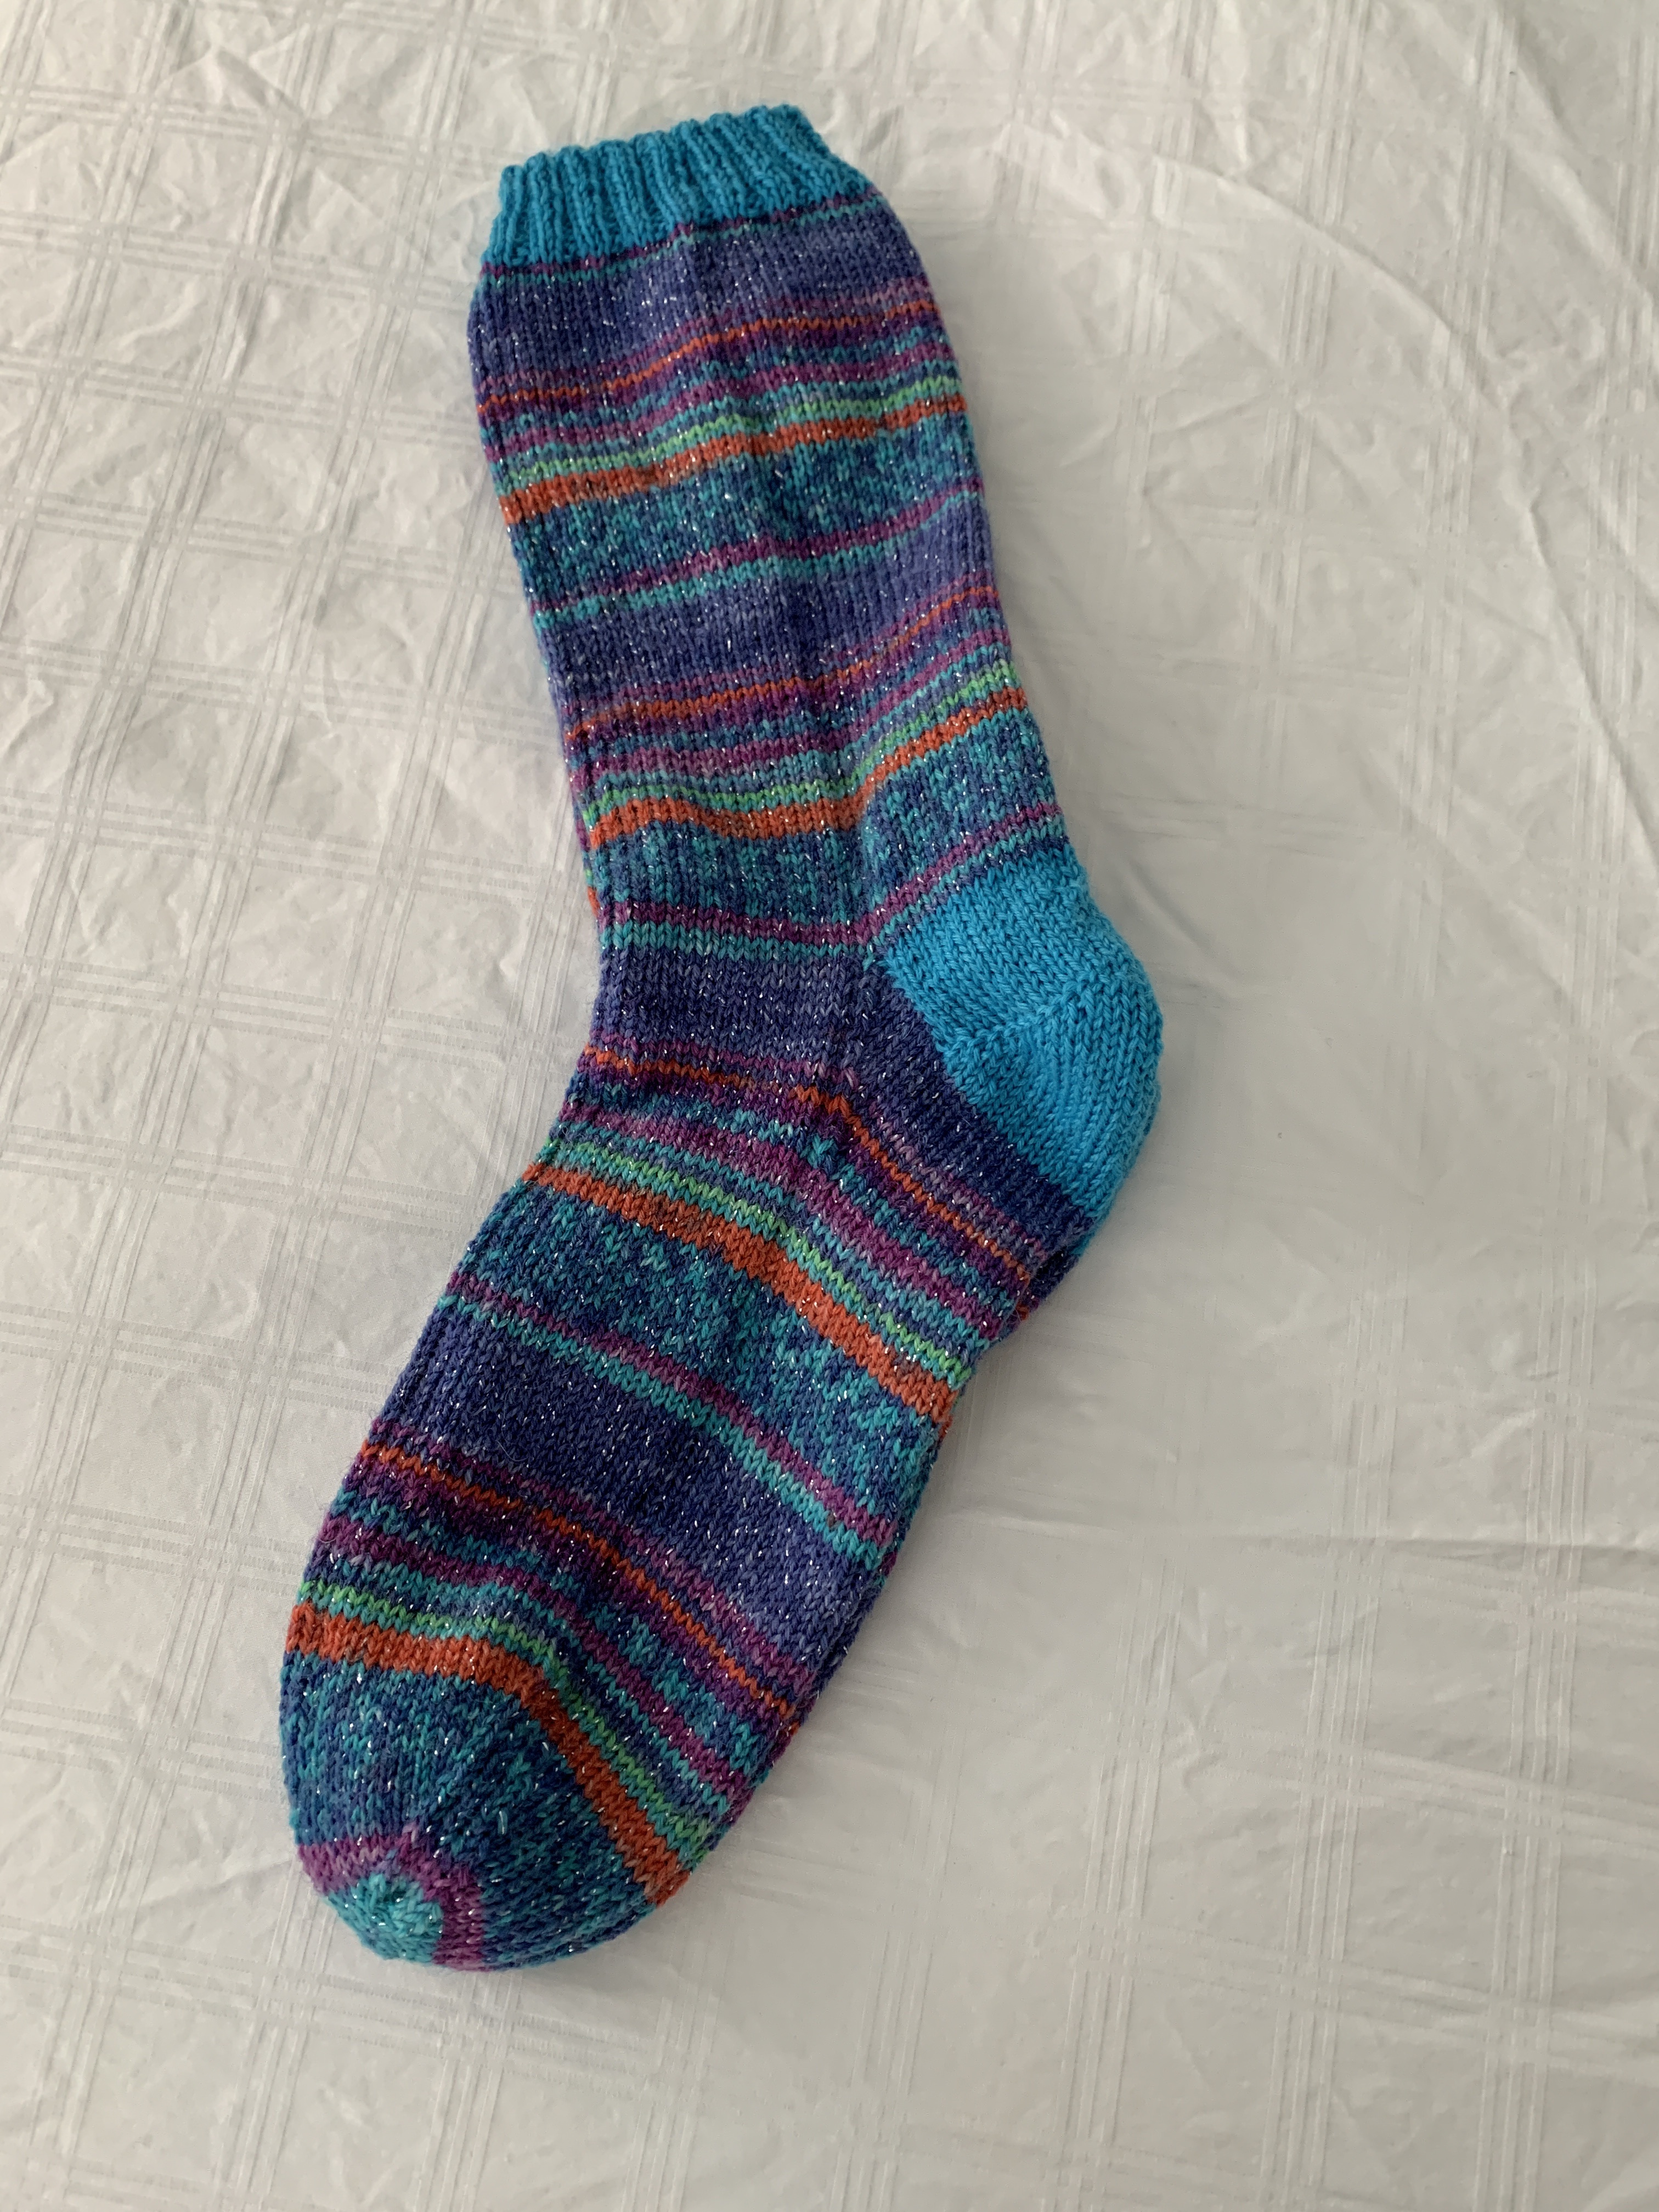
Sparkle Socks

The photograph is misleading because it doesn’t show the sparkle! However, the sock yarn has a fine mylar thread included in the 4 ply which produces a lovely sparkle in the socks!

Sparkle Socks

Some lucky friend will be gifted these socks. I don’t need any more right now in my sock drawer so these are in the give-away pile.

I’ve moved on to socks for my chiropractor who enjoys receiving them. He’s been a great help to me not only maintaining my back mobility but in advising on a wide range of other health related issues. A pair of socks is a small token of my appreciation. They’ll be done by my next appointment.

Kaleidoscope Table Runner II

After finishing the first kaleidoscope table runner I went shopping for fabric to try a second to learn more about what makes a good print design for constructing the octagons.

The pattern repeat in the butterfly fabric I bought was ~ 23in in length and although I bought 1.4m I decided to use just half of the fabric for the kaleidoscope since I didn’t want to end up with many more triangles than the 40 (5 x 8) I needed.

I was hampered by the fact that the printing of the fabric wasn’t precise and even though I aligned the 5.5″ fabric strips precisely, I wasn’t able to get 8 exact repeats of from any spot – just sets of 4. So I built my octagons from two sets of 4. That still gave me the kaleidoscope effect I was after.

Kaleidoscope Table Runner II

I cornered and bordered the octagons with a dark blue print and then used strips of the butterfly fabric for the outer border. The back used the leftover from both border fabrics as a simple bordered panel.

Again, I quilted the octagon blocks in the hoop, and stitched the borders in the ditch to stabilize the runner.

This piece might just be hung on my front door!

Bargello Table Runner IV

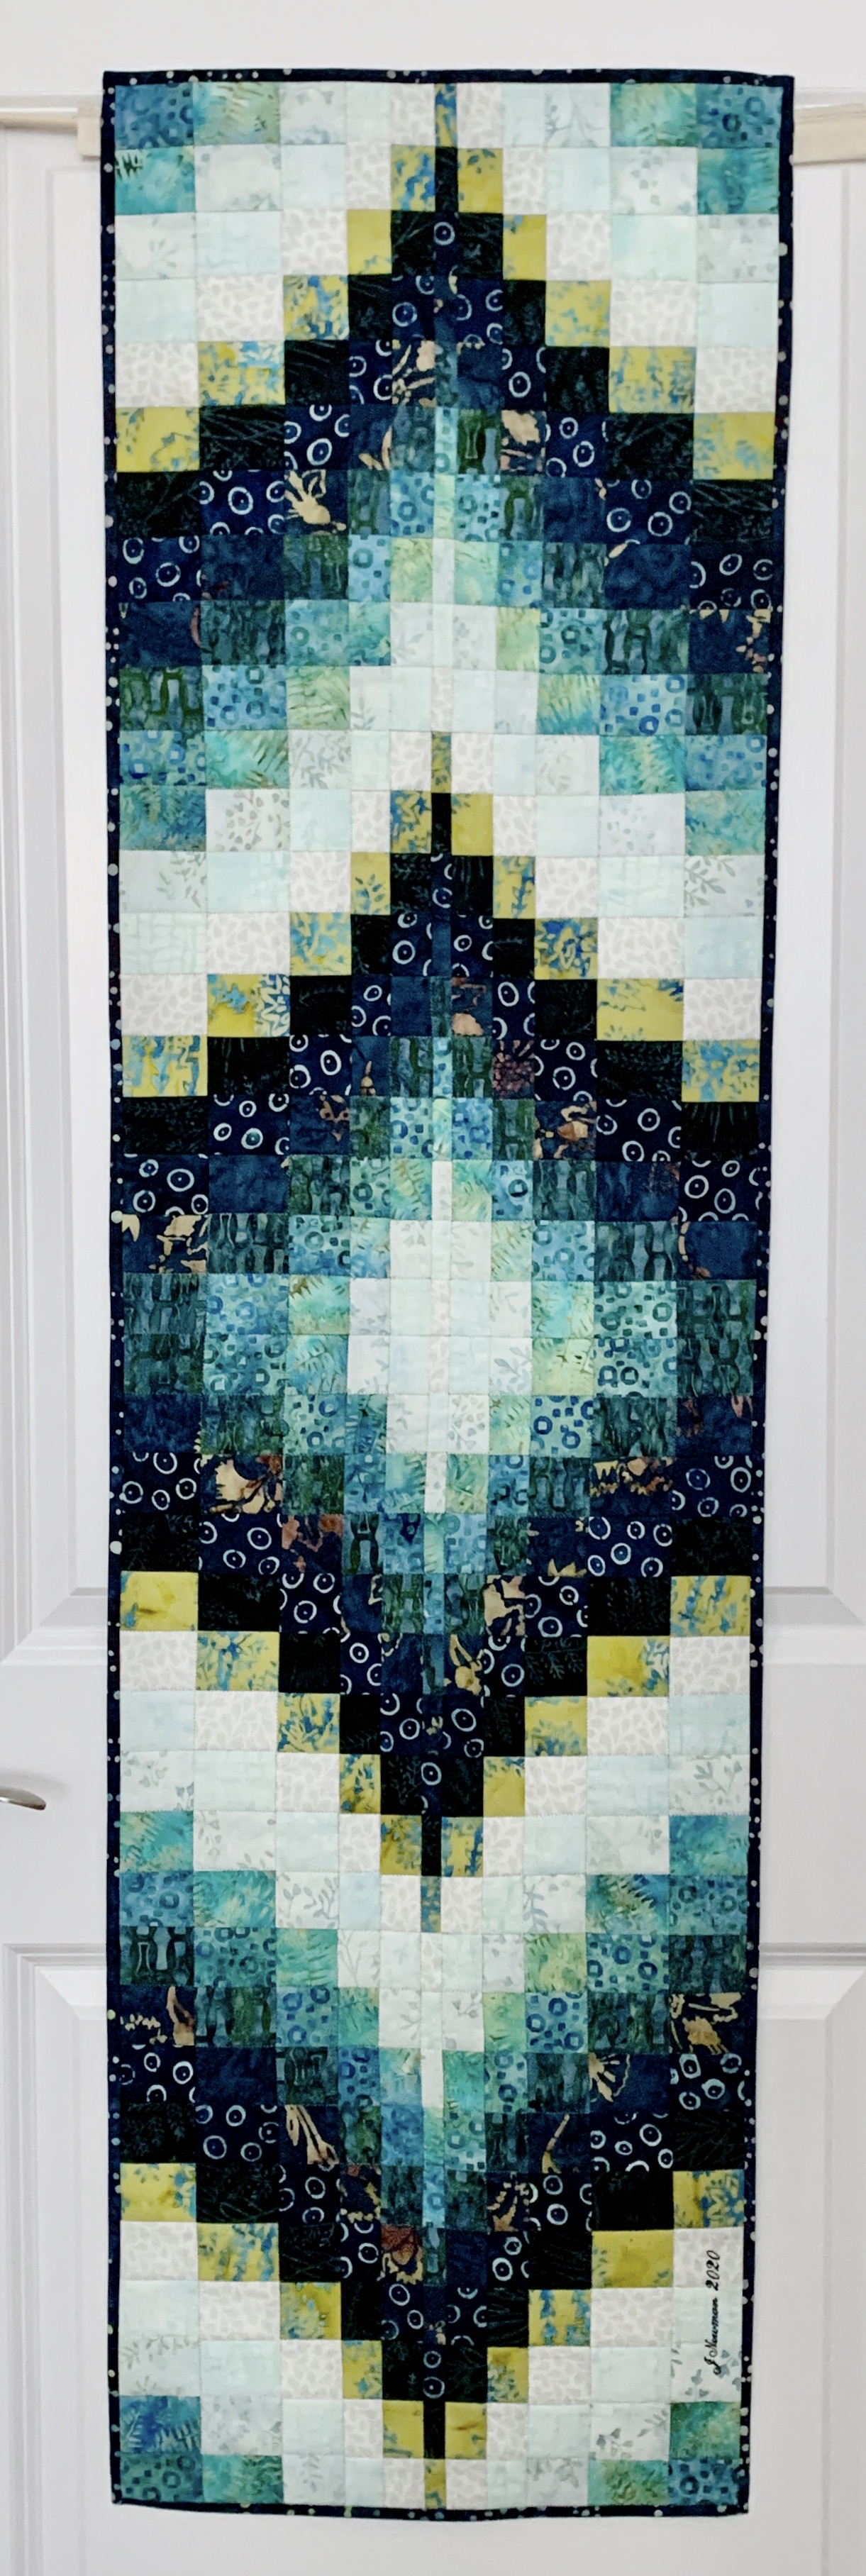
I finally finished the 57″ x 16″ Bargello table runner last evening. It took me several hours over two days to stitch the whole thing in the ditch – that was because I was changing thread colour and having to stitch on the zig-zag.

Bargello Table Runner – Finished

I thought about quilting the piece in the hoop for quite a while – doing an edge-to-edge style of design along the length – but I decided it would detract from the bargello detail. In this case, I also stitched through the backing, which meant I needed to add a binding. I chose a 1/4″ binding on the front but 3/4″ hand stitched down on the back.

The original Bargello piece is also finished – it’s the inverse of the longer table runner with a dark, rather than the light, centre.

Bargello Table Runner I

I’m teaching a class in two weeks on how to improvise a Bargello block and how to think about layout for a table or bed runner, a cushion, a wall hanging, or a quilt. The point will be to understand how the quilting version is derived from wool on canvas work and uses the same math principles.

For the class, I will need to set up another Bargello piece so I can demonstrate forming the tube stitched from 10 strips, cutting, and laying out the Bargello array. Better think about that in the next day or two.

Here are instructions for this table runner –  Download the PDF

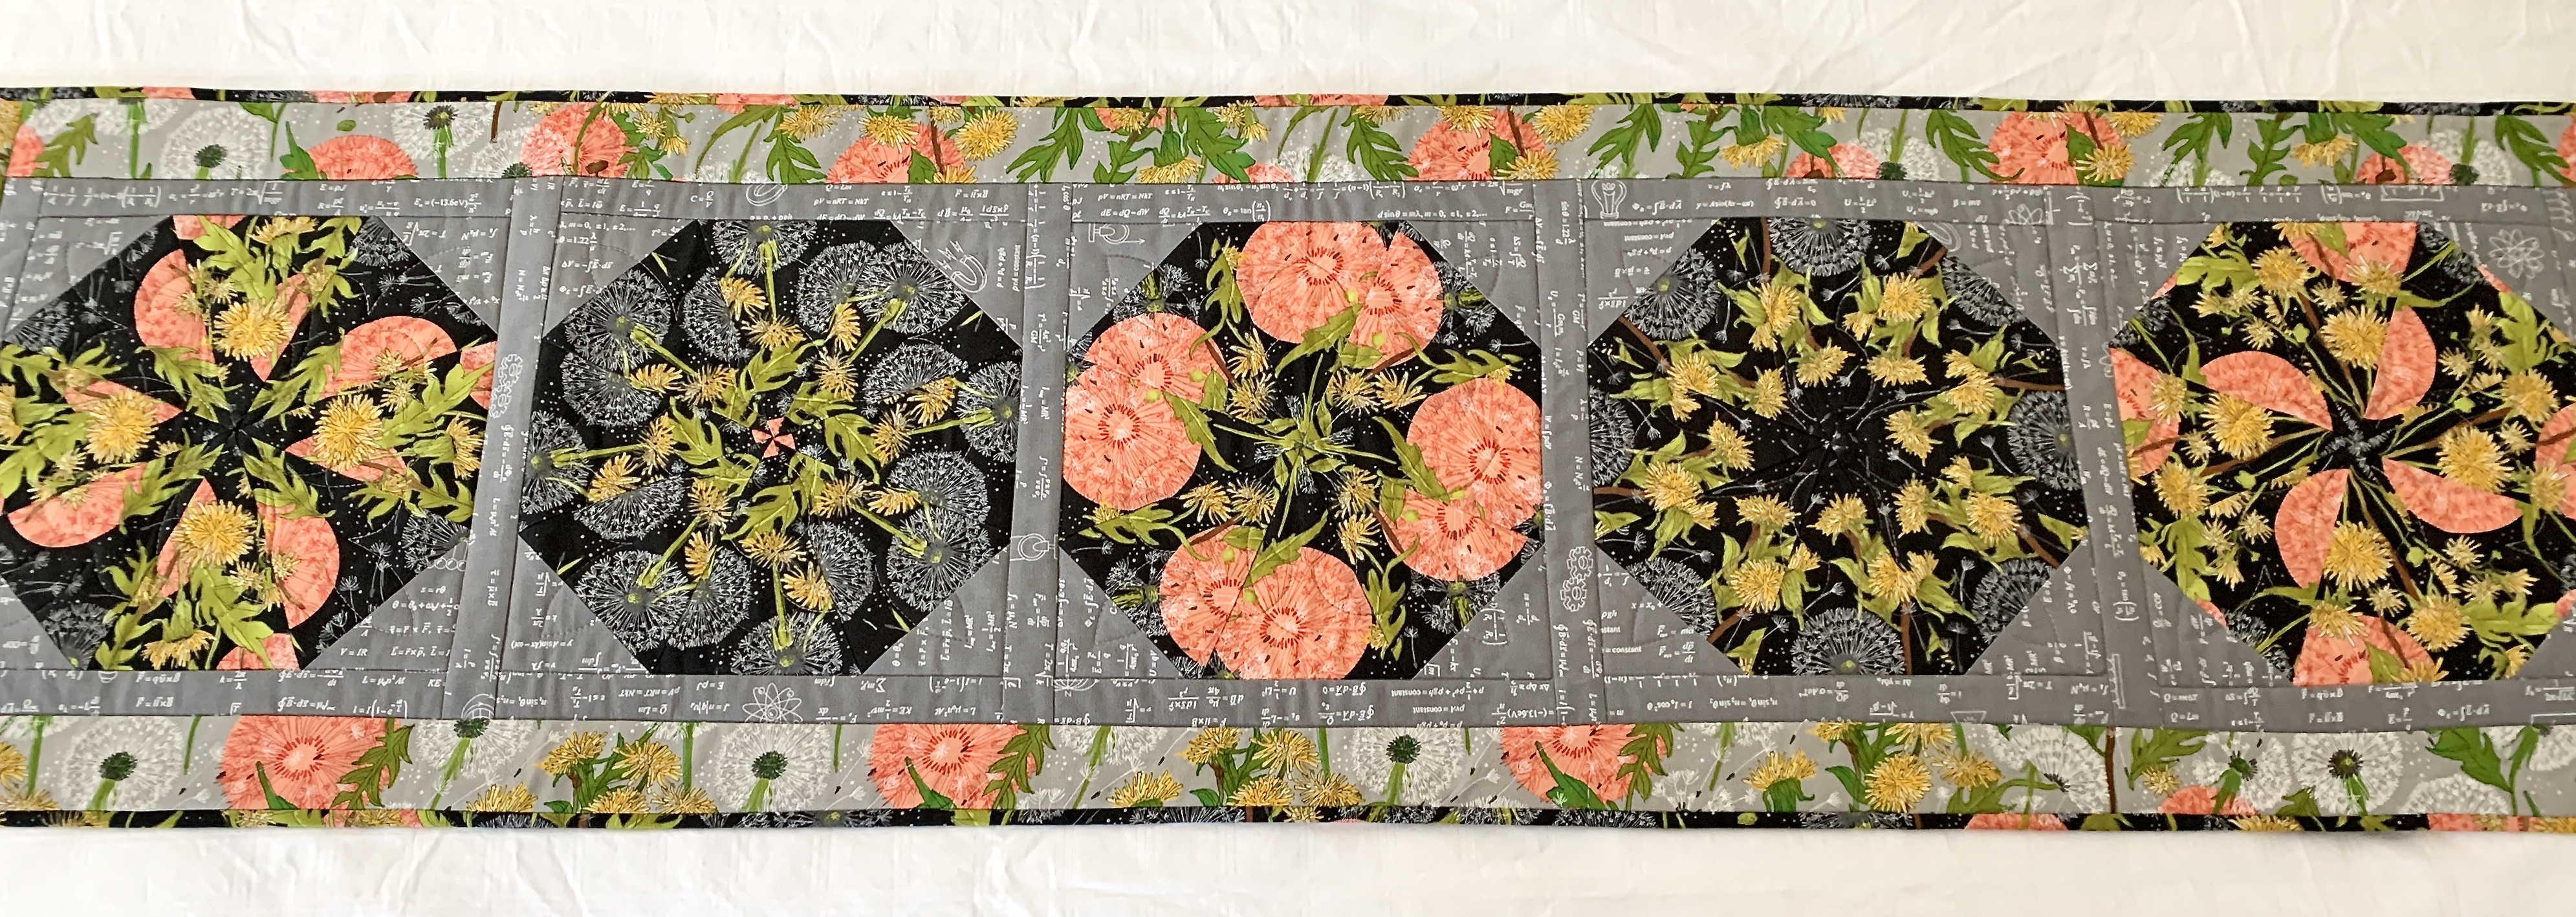
Kaleidoscope Table Runner – Finished

Finished the table runner last evening – hand stitching the binding to the back.  I don’t enjoy hand sewing but in this case I used a 1/4″ binding on the top with a 3/4″ binding on the back and the only way to attach it was to hand sew it in place since I didn’t want a line of machine stitching through the border on the front.

Completed Runner – Top

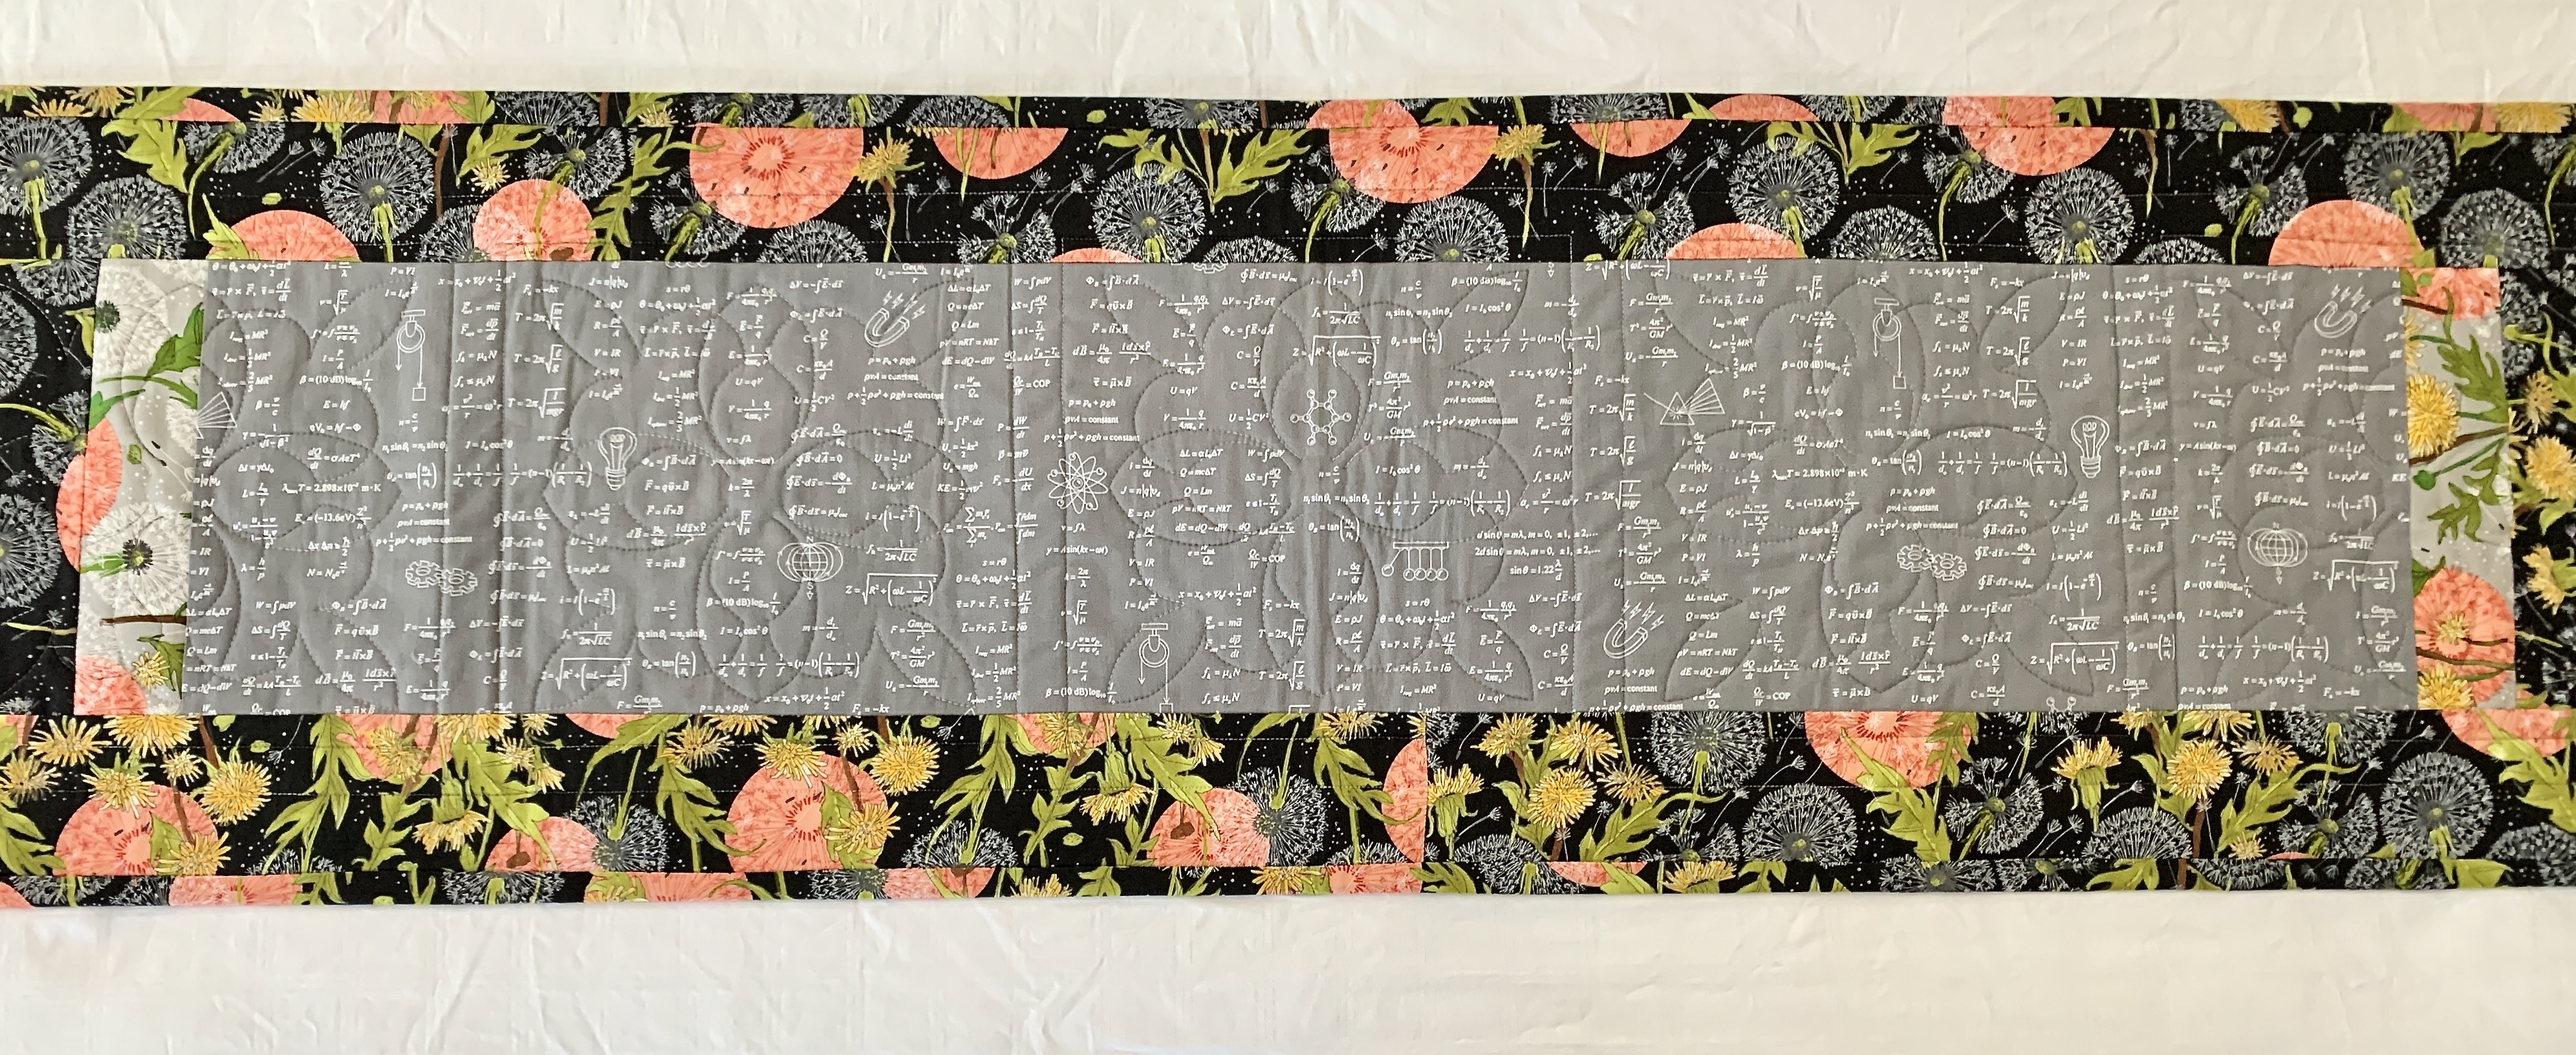
I constructed the back from leftovers – I hadn’t bought very much of either the grey for the sashing or the grey version of the printed fabric. Not much in the way of scraps left, I can tell you.

Completed Runner – Back

This idea would also make a decent bed runner probably with seven octagons to make it long enough so it drapes over the sides. Might even want to add another narrow light inner border as well. My runner is just a bit narrower than the width of my queen bed. I have no intention of using either is as a bed or a table runner; quite likely it’ll end up as a wall hanging and included in one of the showings I’m scheduled for this summer.

BTW:

 “A bed runner is a small, long piece of decorated cloth used to enhance the appearance of an otherwise plain bed. While some prefer the look solely for aesthetic reasons and would choose it even if it were more expensive than traditional decorative bedding, the primary reason to use one in the hospitality industry is to reduce costs while keeping the room attractive.

Kaleidoscope Table Runner

I’ve been looking for projects to try out that I can share with some of the other sewing gals. I’ve almost completed the Bargello Table Runner – it’ll get done over the weekend. The other day I came across another idea: a Kaleidoscope/Stack ‘n Whack octagon block for a quilt or table runner described on the Jordan Fabrics You Tube Channel. I decided to try it out.

Yesterday I picked up some large print fabric to see what’s involved. The tricky part of the whole project isn’t the piecing – it’s the cutting. I hadn’t bought enough fabric to end up with eight identical triangles (except in two cases) so I had to make do with 4 and 4 somewhat complementary triangles for three of the octagons; but it’s the construction of the block I was interested in trying out.

I laid out my dark fabric, found the pattern repeat, cut what I had into two repeats (I bought .7m – I should have bought 1.4m to get the eight repeats for cutting the triangles but with a bit of improvising I ended up with 4 layers instead of 8 which yielded enough triangles for the project), halved the width-of-fabric, then carefully aligned the printed pattern through the four layers as was demonstrated in Video #1 below.

Kaleidoscope Table Runner

Once I had my layers of fabric carefully aligned, I cut out 5.5″ strips, then cut out 45° angled triangles – in the blocks with the peach elements I had two sets of four triangles to sew together, in the predominantly dark blocks I was able to get eight matching triangles.

Next I stitched the octagons together. Today I added the corner triangles (cut from 3.75″ squares) and the sashing and added both to each of my five octagons. Finally, I added a 2.5″ outer border of a lighter grey version of the original fabric from which I cut the triangles.

All in all the project went together relatively easily – once I’d figured out the necessary size for the corner triangles! That took a bit of experimenting.

I’ve also figured out how I will piece the backing so I don’t have to buy any more fabric for this project. I’ll get that done tomorrow, then I’ll set up the quilt sandwich and get the table runner assembled.

It’s definitely do-able as a class project – I completed the runner in less than 6 hours.

I didn’t stop to take photos as I went along. The whole process is explained very clearly in the videos below. So if you’re interested in making a table or bed runner, or a full quilt using this kaleidoscope block watch Donna Jordan from Jordan Fabrics in Oregon as she explains the process.

The biggest hitch in the whole project is actually finding a suitable fabric for constructing the stack ‘n whack blocks – you really need a large print fabric with an open design and quite a bit of colour variation. I would say what I chose in the end wasn’t a colour combination I would normally choose but the selection was very limited at my local shop. I will look at a couple of other shops nearby to see what else I might find.

So here are the videos:


Charm Quilt – Finished

Finished the quilt last evening. When all the quilting in the hoop was done (it went reasonably quickly), I added the binding. I didn’t want much of a binding but in the end I finished with a 1/4″ binding on the front (3/4″ binding on the back) which had to be hand-sewn. I never do hand sewing if I can help it – but in this case the binding on the back was wider than on the top and I didn’t want a machine stitched seam next to the binding; so hand sewing it was.

Charm Quilt – Finished

I’m pleased with how the back turned out, as well. I was able to use the column of HST I’d taken from the panel on the front, added a few sashing pieces that evoked the colour pallet of the front with a slightly darker grey fabric.

Finished Charm Quilt Back

This could be a quilt top on its own!

Now, I’d intended working on this quilt as a demonstration for the “quilt in the hoop” class – it was cancelled a week ago, the gals couldn’t make it yesterday, so far only three are able to come next week. I just kept working on the quilt and I finished it. So for the class (whenever it happens) I’ll work on my sample muslin piece. For now, I’ll be back to working on the bargello table runner.

Bargello Table Runner III

I’ve just finished piecing the bargello table runner top. The second pair of blocks went quite a bit faster than the original two because I was careful about pressing seams in the right directions so I would have no nesting problems as I assembled the blocks.

Bargello Table Runner Top – Finished

The unanticipated thing was pressing seams as I constructed the blocks – I discovered I had to press the seams in the opposite direction from the original two blocks so seams would nest when I went to attach the new ones.

Next I have to find a backing fabric. I’m going to do a pillow case finish without bindings to preserve the clean edge I have here.

Bargello Table Runner II

Years ago I did some wool on canvas bargello embroidery creating seat covers for several chairs.

Bargello done with wool and canvas

Bargello is done by stitching across a set humber of canvas threads – in this case I’d guess 4 threads – with adjacent stitches stepping down two threads. Also there are different numbers of stitches at different points – three consecutive stitches over the same threads, two, two, one, one, one, one… It’s the changing number of repeat stitches at any level that creates the interesting curved lines characteristic of bargello work.

It’s similar with creating bargello using fabric. Set up a panel from coloured strips, cut new strips of different widths from the panel, sew these strips together systematically staggering the colours to set up a bargello pattern.

Beginning to Lay Out The Pattern

Here is my completed bargello block:

Bargello “block”

Here are two blocks sewn together to make a curved diamond.

Bargello Double Block

Yesterday when I created a test block I wasn’t quite careful enough with my cutting, and my 1/4″ seam allowances weren’t perfect, so the finished panel was just a bit slanted. Instead of doing the same block using my second set of strips, I started a new layout and this time I made sure my ruler didn’t slip while cutting the initial strips, that I matched up my edges precisely when sewing them together, was particularly careful when cutting the panel into different width strips and nested the seam joins when sewing those strips together. My two blocks turned out pretty much the same dimensions (and although the photo doesn’t demonstrate it, this panel is straight).

The other thing I did this time was to add a 10th very dark strip next to my contrast colour. I ran into difficulty nesting the joins yesterday and that was because I had used just 9 strips initially – taking care to press my seams in alternate directions – but when I added in the contrast strip and joined it to the first (creating a tube) I ended up with a pressed seam not paired to another and as a result I was changing nesting direction for just about each join/point while assembling the block. With 10 initial strips I had the right number of seams that when pressed in opposite directions matched up.

Seams pressed in opposite directions

Sewing the different width staggered strips together was nearly effortless – the nestings were all just about exact. So in spite of some directions I’d found online calling for an odd number of strips to form the bargello layout, it turns out an even number of initial differently coloured strips makes the later sewing much easier.

Bargello Table Runner

The women in the last class I taught asked for another project. I thought they might be interested in bargello piecing. It looks complicated, but it’s another of those techniques where you sew strips together to set up a colour palette, then recut and re-sew to create some kind of a pieced pattern.

Bargello is a type of needlepoint embroidery consisting of upright flat stitches laid in a mathematical pattern to create motifs. The name originates from a series of chairs found in the Bargello palace in Florence, which have a “flame stitch” pattern. Traditionally, Bargello was stitched in wool on canvas; but bargello can also be created from fabric piecing.

A number of years ago I made a bargello quilted jacket:

Bargello Quilted Jacket – Back

The jacket was cut from 6 panels constructed from pieced strips – 2 fronts, 2 sleeves, 2 backs (joined in the centre). In this case the second cut was done so that there were two sets of strips on opposite diagonals creating the zigzag effect.

There are simpler ways to piece bargello. Today, I took nine 2″ strips cut from the width of fabric graduated in colour from pale to dark blue with a contrasting yellow/green. I sewed the nine strips together from light to dark, then added the contrast strip and sewed the first and last strips together to form a tube.

Bargello Table Runner – In Progress

Next, I cut the tube into 11 strips of different width (1″ – 2 1/2″) and sewed them together to create the parabolic curve. I had enough fabric in the first sewn panel to make two blocks which I then stitched together in opposite directions to get the “diamond” in the panel above.

I started out by cutting two sets of 2″ strips – I will use the second set of strips to make two more bargello blocks to add to either end of the current piece to construct a table runner – the project I’m suggesting for a class.

I will need to take pictures as I construct the second two bargello blocks to record the steps in the process.

So far we’ve heard back from one person who is interested in doing the class. Hope there will be a few more.