Fabric Face Masks – Production Begins

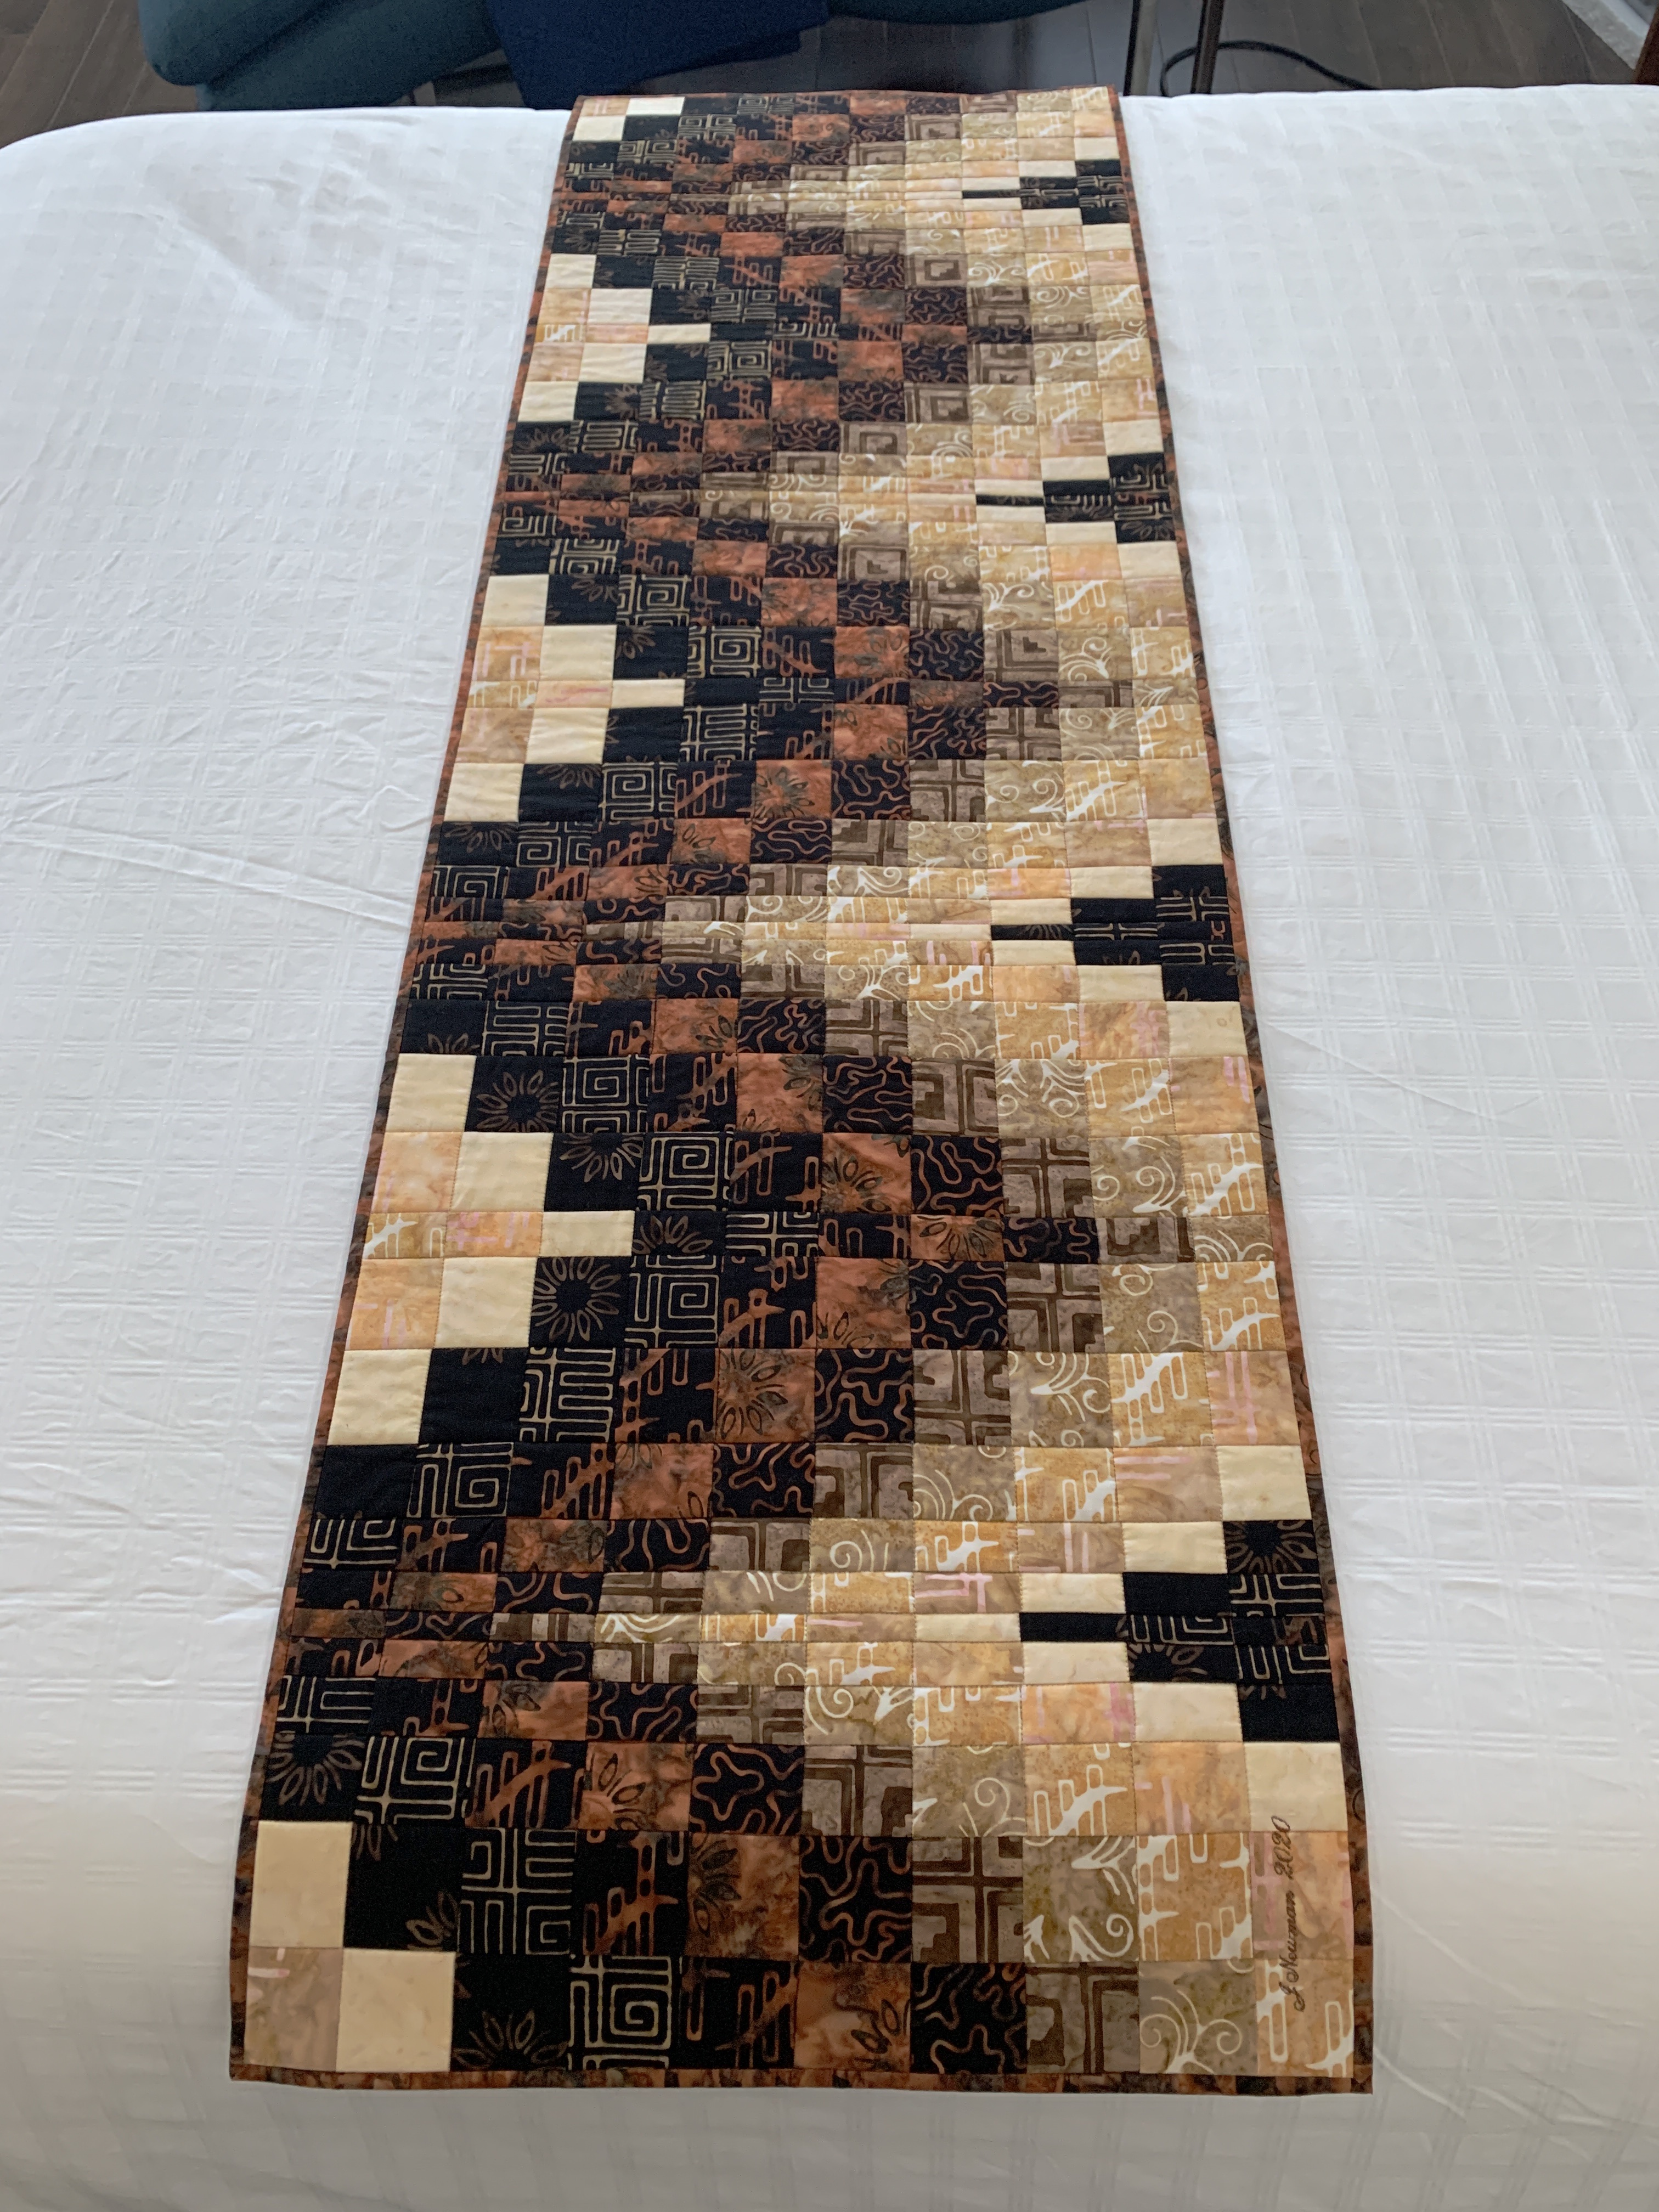
With table runners and other stuff completed, time to turn to fabric face mask production.

I started by pulling fabric from my stash. I have quite a number of “scrap bags” from Keepsake Quilting which just happen to contain 9″ (1/4 yd) coordinated fabric strips – fancy that – I need rectangles that are 9″ x 6″. I cut several strips into 6″ rectangles.

Next, I cut what non-woven fusible interfacing I had on hand into 8.5″ x 5.5″ rectangles and fused them to the back of the fabric. The 1/4″ seam allowances will be less bulky without the interfacing included and because the interfacing is fused to the fabric, it’s going nowhere. I was able to prep 56 pieces of cut fabric. Now I have to go looking for more non-woven fusible interfacing.

Fabric with non-woven fusible interfacing (as a third layer for added filtering)

A friend brought me a metre of unbleached flannel the other evening. I washed it, dried it, and cut it into 9″ x 6″ rectangles. Today I briefly stopped by her place to pick up 4 more metres (the rest of her supply). It’s been washed and is now drying. I also picked up a bunch of twist ties from her.

Flannel rectangles for inside of mask

I have been collecting twist ties from all my friends in the building and have ended up with, would you believe it, almost 140 to use at the top edge so the mask can be pinched to fit the nose.

All that’s left to do is cut the 1/8″ elastic. I need 13″ for each mask, I have nowhere enough at the moment. I ordered a roll via Amazon the other day but it’s not going to arrive quickly enough for this assembly line. I’m going to have to scrounge around the building and touch up some other sewing friends to see if I can come up with more. If all else fails I have the better part of a 100m roll of 3/8″ elastic I can use.

Elastic (as yet uncut), twist ties for fitting over nose, more cut fabric

I’m now ready to start production tomorrow and get as far as my materials will let me. I am aiming for 100 masks. That’s not going to be enough – I have requests for 20+ for family in Toronto; I have 25 friends in the building to outfit; other friends in the city. I haven’t yet contacted the hospital community to find out whether they have a shortage of face masks and could use some. If that turns out to be the case, then I will have to enlist a bunch of other sewing people to pitch in. However, I’m hoping I won’t have to turn this project into a large enterprise.

Tomorrow, I will have to set up a batch of 10 and see how I can organize production so I can arrive at a finished product with the fewest steps. I’ll report on my process.

Sunflower Table Runner – Finished

Finished quilting and binding the table runner last evening. Hand stitched the binding on the back (definitely not my most favourite thing to do!).

I’m happy with how the dark narrow binding pulls attention away from the outer border which doesn’t completely match up. I just didn’t have enough sunflower fabric (with its very large flowers) to find precise repeats for the border strips. I realize nobody but me will even notice. I was making this table runner as an example for a class I was planning on offering – not going to happen in the near future so I’ve hung it in the closet with the rest of my finished projects until such time as I might need it.

Sunflower Kaleidoscope – Top

I dug through my stash to find something for the back – found a 9″ golden/orange WOF piece which worked as a starting point, added a scrap of the sunflower fabric and a piece from the previous runner at the ends (the two ends are intentionally different – it wasn’t a mistake!). I had enough of the orange dotted fabric for narrow inner borders and then hunted until I found the dark outer border fabric given me by a friend.

Sunflower Kaleidoscope – Back

This project is now done. Today, it’s back to face masks. I have to think about how to streamline the process so I can turn them out in batches quickly. It’s gotta be like the zippered bags at Christmas – a production line.

Kaleidoscope #3

Just finished assembling the sunflower kaleidoscope table runner top.

Kaleidoscope #3

This time I managed to get sets of eight triangles for the octagons so the full kaleidoscope effect is present. Because of how the repeats in the fabric were set up I was able to get away with less fabric but that also meant I had fewer stacks to choose from. The variation turned out reasonably well and I was able to get some colour flow with the octagons.

I had to buy another 1/3 metre of fabric for the outer border but because the flowers are very large it wasn’t possible to match up the border pieces. I think a dark, narrow binding in some shade of brown should tie the piece together. Now I just have to find something in my stash that will work – not a lot of brown fabric there; it’s not a colour I’ve used much.

It’s noon. Time to get out into the sunshine even though it’s a cold day – temperature -4°.

Bargello Table Runner #2 – Finished

After yesterday’s experiments with fabric face masks, today I went back to completing the bargello table runner. I had more than half to stitch in the ditch and because I was matching thread colour to the blocks it wasn’t straightforward sewing – lots of stitching a short distance, changing direction, a bit more stitching, then another turn…. Nevertheless, I was able to finish the quilting reasonably quickly (I looked at the clock – it was close to 1pm).

Then binding. I was planning to use a black “crackle” from my stash but I wasn’t totally happy with it. All fabric stores in the region are now closed so I was limited to what I had in the apartment. I was putting away the leftover fabrics from the bundle of strips I used to create the bargello to find two perfect bronze strips left. Each 5″ wide – I decided to cut one strip into three 1 5/8″, I cut one 1 5/8″ strip from the second. Joined the binding strips and attached them to the front of the runner.

Finished Table Runner

Again, I wanted a very narrow binding (a smidge more than 1/4″) which left me with a 3/4″ binding on the back side – it had to be sewn by hand.

I realized once I’d put the binding on that I didn’t have a signature/date on the piece – on the previous table runners I was smart enough to embroider my name and year BEFORE I added the backing and quilted them. This time I forgot and had to embroider my name and year through all layers. (I hope having made this mistake here, I won’t make it again.)

Table Runner On My Glass Table

I auditioned the runner on my glass table – it’s either a bit long or a bit too short depending on how you look at it. It isn’t “just right”. Also (I can’t believe I’m actually saying this) it is too bright and strong for the room decor. Perhaps I’ve just become used to the more toned down runner I’ve been using on the table.

This piece is now stored away in my quilt closet along with the other wall art, table runners, quilts living there. I’m anticipating all the showing I was lined up to do this spring and summer will now not happen. If I’m lucky, some of those venues will come available when this period of quarantine comes to an end (whenever that might be).

Fabric Face Masks

Last evening, Rachael Maddow had an item on the surgical face mask crisis in the US and talked about Deaconess Health Centre’s call for crafters in the community to help build a supply of masks.

I’ve been looking for a way I could do more than self-isolate as a way of pitching in during this pandemic. I can’t do much because I’m “over 65”, with a preexisting cough that makes it difficult for me to be out in public at this particular time, but this was something I could do.

I found the link: https://www.deaconess.com/How-to-make-a-Face-Mask and this morning I printed out the instructions from the Turban Project Face Mask and gave it a try.

First, the instructions recommend using flannel for the inside layer. I have a relatively large fabric stash but no flannel – I did, however, have some densely woven muslin which I thought would work reasonably well. I also wanted to improve the impermeability so I added a layer of thin fusible batting to one sample, and a non-woven fusible interfacing to the second. The instructions also called for either “rope” elastic or 1/8″ elastic – neither of which I had on hand – remember I can’t go shopping and local fabric stores are closed anyway – so I improvised using some metallic-wrapped Christmas elastic I had in a drawer which was fine for a sample.


Then I sat down to sew. I quickly sewed the two layers together (elastic included in the side seams), turned the mask right side out. The rest should have been easy but trying to position the pleats and stitch them in place was a bit awkward. In my first attempt I made the pleats too narrow so the side of the mask was too long and the whole thing wouldn’t sit well over my face. I need to make a template marking the pleat position if I’m going to make a batch.

I then decided I needed a small bit of wire over the nose (like one of the commercial masks I found in a drawer in my bathroom – heaven knows where I got it). I dug around the apartment and came up with a set of twist ties in a box of garbage bags – I took two and stitched them to the top edge of the mask. This allowed me to pinch the mask to my nose! But the mask still gaped on the sides so I took the pleats apart and made them a bit bigger – turns out a good fit needs to reduce the side measurement by about a half. To finish off,  I added two small pleats to the bottom edge which made the mask fit snugly beneath my chin.

Inside of mask showing wire at top edge

I still don’t have the elastic length right – the pattern calls for 7″. Because they recommended tying a knot in the end (to prevent pulling it out from the seam) I cut the elastic a bit longer – turns out on the first (mauve) mask the ties are a bit too long.

With the second mask I cut the elastic to 6″ – too short!  6 3/4″ would be about right to allow me to tie knots and stitch the pieces into the side seam.

So my masks are actually three layers, not two – a firmly woven print (a batik would be even better), a fusible non-woven interfacing, and a closely woven muslin with a slightly brushed side for softness. The point of the mask isn’t to stop virus particles from coming in to me but to stop my coughing and sneezing droplets from getting out – in other words to protect other people.

I plan on making one for each of the gals in the Friday afternoon knitting group here in the building – the recommendation from health professionals is not to wear a mask if you’re not coughing/sneezing but it can’t hurt to have one one hand, in case. And for the ears I will cut lengths from my roll of 1/4″ elastic (of which I have quite a lot!).

The caveat, of course, is this face mask is not meant to replace a surgical face mask; it is a contingency plan for those who haven’t been able to find any surgical masks in the stores. And it’s washable – it can be cleaned repeatedly after every use.

Bargello Table Runner

The women in the last class I taught asked for another project. I thought they might be interested in bargello piecing. It looks complicated, but it’s another of those techniques where you sew strips together to set up a colour palette, then recut and re-sew to create some kind of a pieced pattern.

Bargello is a type of needlepoint embroidery consisting of upright flat stitches laid in a mathematical pattern to create motifs. The name originates from a series of chairs found in the Bargello palace in Florence, which have a “flame stitch” pattern. Traditionally, Bargello was stitched in wool on canvas; but bargello can also be created from fabric piecing.

A number of years ago I made a bargello quilted jacket:

Bargello Quilted Jacket – Back

The jacket was cut from 6 panels constructed from pieced strips – 2 fronts, 2 sleeves, 2 backs (joined in the centre). In this case the second cut was done so that there were two sets of strips on opposite diagonals creating the zigzag effect.

There are simpler ways to piece bargello. Today, I took nine 2″ strips cut from the width of fabric graduated in colour from pale to dark blue with a contrasting yellow/green. I sewed the nine strips together from light to dark, then added the contrast strip and sewed the first and last strips together to form a tube.

Bargello Table Runner – In Progress

Next, I cut the tube into 11 strips of different width (1″ – 2 1/2″) and sewed them together to create the parabolic curve. I had enough fabric in the first sewn panel to make two blocks which I then stitched together in opposite directions to get the “diamond” in the panel above.

I started out by cutting two sets of 2″ strips – I will use the second set of strips to make two more bargello blocks to add to either end of the current piece to construct a table runner – the project I’m suggesting for a class.

I will need to take pictures as I construct the second two bargello blocks to record the steps in the process.

So far we’ve heard back from one person who is interested in doing the class. Hope there will be a few more.

No More Bags – Right?

I thought I was finished with the Christmas bag making – wrong! Yesterday afternoon I distributed the zippered bags to the women in the knitting group (they all loved them) – however instead of the dozen I’d planned for, by last evening I had given away 20!

I reconstructed a list of other people I’d already given bags to – that was another 15, and I still have a further 16 on my list. In spite of the ten small bags I made the other day I was going to be a few bags short and I still want to have some around for ready gifts through the year.

So this morning I got up and started prepping for another twelve bags (finished size 6″ x 8″).

Even More Bags

I cut the outside fabric, lining fabric, batting, zipper tape, grosgrain ribbon – that took about an hour. I sat down to production sew the bags which took just over 90 minutes (that’s less than 10 minutes/bag). By 11:30 I had another dozen bags.

And that wasn’t the end. I visited my friend Joan during the afternoon. She’s 88 and not as active as she used to be. I didn’t think she’d find a use for a bag so I didn’t take one. However we discussed them and turns out she could use a small bag to carry a credit card, a bit of cash and a key. When I came home I made her one. I’ll take it over to her tomorrow!

20 to the knitting group
15 given to other friends
14 more to give away
10 sent to my niece (for her to use as gifts)
24 in my stash

That makes 83 bags I’ve done in the last month and a bit. No more!

Last 10 Bags For 2019 – Really!

Not much to say about these – I can practically make them with my eye’s closed. The size of these bags was determined by the fabric pieces I had – a sample collection of colour ways in graduated sizes I was given at the sewing retreat last month. I was limited by the size of the smallest sample piece. That was when I decided to add a top strip using leftovers from the larger pieces.

Last 10 Bags For 2019!

I have now sewn close to 50 this season – that’s it, no more. Ten went to my niece for her to use as gifts.

Maxelle’s Gift Bags “Hand-made by Aunt Judith”

The Gifts

Twelve are for the women in my knitting group – they get their’s tomorrow.  The others have been disappearing quickly from the stash – which is why I decided to make ten final ones.

I should now have enough zippered bags for this season with a few left over to give away during the year.  The bags don’t need to be wrapped – they are the wrapping and useful besides.

That’s it! No more till next year.

The Elastic Wallet

The other day Barbara Emodi shared in her newsletter “The Elastic Wallet” (from Threads Designs Inc. Theory). Sounded interesting so I bought and downloaded the pattern and tried one.

The Elastic Wallet

The wallet is made from 2″ elastic with a non-fraying fabric piece on one side (although there’s no reason not to add it to both sides if you wanted to). The elastic is just the size of a credit card – Barbara suggests giving it as a gift with a gift card included – a nice idea.

The wallet is simple to make – but I have one suggestion – in the instructions is tells you to cut 15″ of a 2″ elastic (I just used the black elastic I had on hand), fold the two ends into the centre point, then fold in two again enclosing the two ends.

After constructing the one above, I’d do it the opposite way, I’d fold the ends into the centre but fold the elastic in two again leaving the open ends on the outside – my reason for doing it that way is because my 1/8″ seam allowance missed the open ends of the elastic in a couple of spots and they’re not secured. Leave them on the outside, use a decorative stitch to sew the two side and bottom edges together, and those ends would be sewn securely. I plan on making another one that way tomorrow.

Let you know how it turns out.


Instructions For Making Zippered Bags

I’m posting instructions for making zippered bags since I’ve received requests about how I make my bags.

I make zippered bags two ways – one using zipper tape which gives a very nice finish to the bag:

Zippered Bag Constructed Using Zipper Tape

I also make bags using zippers:

Zippered Bag Constructed Using A Zipper

The bags look similar, however, I prefer using zipper tape because it simplifies the process.

I purchase my zipper tape from The Zipper Lady who sells the tape by the yard in a gazillion colours – she also sells zipper pulls.

She has video demonstrating how to put the slides onto the tape.

Hope this helps you out.